Left 4 Dead 2

Left 4 Dead 2

375 ratings
Realism Expert Guide
By 「A」 and 2 collaborators
This is a much-needed guide on how to play Realism Expert without dying in the first 5 minutes of joining a game on this difficulty. This covers everything from what weapons best complement each other to the best strategies against the infected.
2
   
Award
Favorite
Favorited
Unfavorite
Introduction
L4D2 is a game about cooperative play. It is best enjoyed with friends so try to make a few friends along the way! Searching for friends on the L4D2 forums is also a good way to find like-minded people to play Campaign, Realism, or other modes in the game with.

This guide aims to cover the Expert and Realism Expert difficulties as they are far more challenging than the other difficulties. Easy to Advanced difficulties require some level of teamwork, but Expert requires a high level of teamwork and care.

Newcomers should proceed to the Newcomers section and complete the Normal and Advanced difficulties before trying out the much more difficult Expert and Realism Expert difficulties whereas the more experienced players should skip the Newcomer section.

If you are looking for a Versus guide, refer to this:
https://steamhost.cn/steamcommunity_com/sharedfiles/filedetails/?id=113762019#3852

If you want to know some information about Survival's Mall Atrium, read up here:
https://steamhost.cn/steamcommunity_com/sharedfiles/filedetails/?id=599848639

For basic L4D2 terminology, this was made:
https://steamhost.cn/steamcommunity_com/sharedfiles/filedetails/?id=130902328

And for advanced information on Realism Expert, check this out:
https://steamhost.cn/steamcommunity_com/sharedfiles/filedetails/?id=372959237

Either way, have fun killing zombies! :)
Newcomers
Welcome to L4D2! Unlike conventional shooters like Counter-Strike, L4D2 is a game where strong teamwork is more important than individual skill. You will be constantly relying on your teammates to cover you and rescue you so be sure to take care of them! Share health and information with your teammates and keep the infected off of them.

While you will be facing common infected most of the time, there are also more evolved infected called "Special Infected" that not only have more health but also superior abilities that can render you helpless, requiring another survivor to assist you before they incapacitate or kill you. Refer to the Special Infected section for more information on them.

Gameplay Guidelines

Stay Together & Cover Each Other
Teamwork is key to success. There are just too many zombies for one person to kill. Also, your allies are needed in case you get caught/pinned, like by a smoker with its tongue. Once caught/pinned by a smoker, hunter, jockey, or charger, you will have no way of freeing yourself unless you have a teammate to save you.

Clear the Horde!
While Special Infected are much more dangerous than common infected, the threat that they pose is severely diminished if there are no common infected around. Clear the commons fast and quickly and prevent them from surrounding you. Stick to the walls and cover all places that zombies can attack from to reduce the chance of a zombie hitting you. If zombies are chasing you, try to lure them to a narrow alley or room where they will be bunched up and easier to kill.

Move & Shoot!
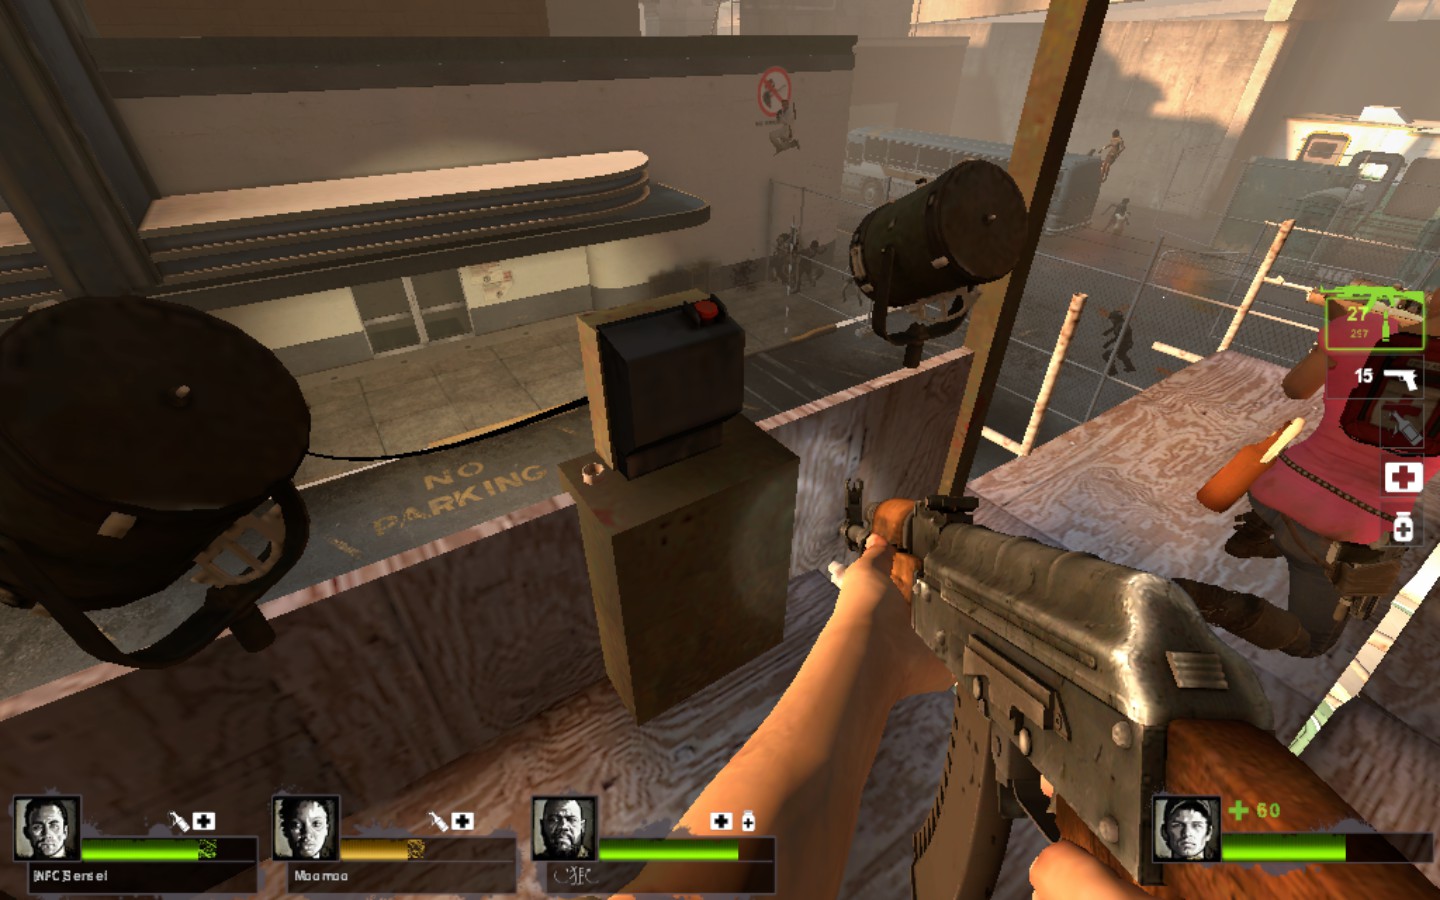
This is an important concept in this game, especially during crescendos and open areas. Some crescendos, like Parish chapter 2 (The Park), will have endless hordes of zombies that do not stop coming unless an alarm is turned off, as shown in the pic on the right. If you stay still in one position, you will eventually be killed by the endless horde. Move and kill zombies along the way until you turn off the alarm. In other places such as Dark Carnival Chapter 4 (The Barns), the horde never stops coming at all, which is why in events such as that one it is best that you understand sacrifices may need to be made to make progress.

Try to get through open areas as quickly as possible as zombies can attack from all directions and it will be extremely difficult to handle any natural horde that spawns. Move quickly and shoot common infected along the way to reach the next safe position.

Crouch
Remember to crouch as it significantly increases your accuracy and allows your teammates to shoot over you. In close quarters, you can also use crouch to slow down your movement as you inch slowly into your teammates' field of view, giving them ample time to stop shooting and let you pass.

Shove
The shove is your magic button--it deadstops hunters and jockeys, pushes away boomers and groups of common infected, and it can save your allies from being caught by a smoker and releases them from jockeys and hunters. It also pushes aside common infected much more reliably than your melee weapons so mix up your shove with your melee attacks for the best effect. If you are ever surrounded by common infected...shove! Don't just fire, shove off the commons before you shoot. Note that the shove doesn't work on witches*, tanks, and chargers. If you shove too often in a short time span you will experience fatigue, limiting your ability to shove continuously (you can shove 7 times in a row). However, it is still a very strong and potent ability for survivors. The beauty of shoves is that it is incapable of doing friendly fire damage to your allies.

Save your Allies
If your allies are pinned you need to save them quickly. Always keep an eye out for your allies, especially if they are surrounded by a horde. Good survivors will typically know when an ally is pinned almost immediately. If multiple allies are down, you will need to make choices based on who needs saving first. Consider which special infected is doing the most damage to your teammates and which special infected you can kill the fastest. Also consider your teammates' health, will anyone die if you don't save them first? Weigh the pros and cons quickly to decide who to save first. Also, always remember to cover your allies. It doesn't matter if you only have pistols, at least make the effort.

Saferooms
The starting saferoom is guaranteed to stop any infected 100% of the time except the tank so know that assuming the saferoom door will hold up against him is a gamble. However, every saferoom door at the end of a chapter will always hold up. Sometimes special infected will spawn inside the saferoom at the end of the chapter so be very careful as you enter it.

Difficulties
In increasing difficulty
  • Easy [CI do 1 damage]
  • Normal [CI do 2 damage, 1 from behind]
  • Advanced [CI do 5 damage, 2/3 from behind]
  • Normal Realism
  • Advanced Realism
  • Expert [CI do 20 damage, 10 from behind]
  • Expert Realism [body shot damage is decreased, snipers are no longer one-shots]

Start from Normal difficulty and work your way to the more difficult levels. Expert is when it becomes really difficult as you can only take a few hits before being incapped, so try to practice not getting hit before you venture into Expert modes. Do not get used to relying on the snipers in Campaign as there is a drastic drop in power when going into Realism.

Realism Mode
In Realism there are no more helpful survivor outlines and rescue closets are gone. You need to know where all your allies are so communicate and stick together. Items are outlined only when you get close enough to interact with them. Bodyshot damage is severely cut down (particularly for Advanced and Expert) and the witch can no longer be crowned.

Consistent headshots are the best way to reliably kill infected. The Magnum and the M60 are the only firearms that can kill commons in one hit regardless of where you shoot. Melee weapons also shine as they can kill many common infected in one hit.


Preparing for Versus
Playing campaigns will prepare you for versus but only by a small extent. By playing the campaigns you can learn the map layouts, how to kill zombies quickly, and it also gives you some idea of how to handle special infected and tanks in versus (human players will use special infected and tanks with greater skill and coordination than the AI). Thus, to prepare for versus you should focus on learning the alternate paths, possible areas for infected to spawn, areas where items can spawn, and also practice killing zombies as efficiently and quickly as possible while rushing through the map (preferably in lower difficulties like Normal/Advanced and only if the other players are able to rush). You should also practice shoving Hunters/Jockeys out of their jumps (known as deadstopping) as this will be a valuable skill in both campaign and in versus mode.

Versus mode is equivalent to a normal difficulty campaign, but with smarter special infected and a 6,000 HP tank. Versus mode has a very different playstyle from Campaign and Realism. Being good at those will not guarantee you success in versus, and vice versa as rushing is more popular in versus as opposed to taking it slow in either mode on Expert.

L4D2 is a game best enjoyed with friends, but If you don't have a group of friends to play versus with, then you should read a versus guide and/or watch some youtube videos before entering a game because the expectations of veteran players are high and they will be quick to kick any inexperienced players.
Weapons: Shotguns
Tier 1

Chrome: The chrome shotgun is the more accurate of the 2 tier 1 shotguns as the spread is tighter and focused down the crosshair. Although this does not make it effective at long range it can still hit for decent damage at mid-range and may cause knockback. Because of its accuracy and damage it is the best tier 1 gun in close spaces and can easily deal with large numbers of commons in hallways, doorways, etc.

Pump: The pump shotgun is less accurate than its tier 1 brother having a wider and messier spread making it ineffective even at mid-range. The spread does have an advantage in being able to push back several common that aren't too close together, making it slightly more effective in open spaces than the chrome. With it being a shotgun and all one would still require a very close range burst to do optimal damage to infected.

Tier 2

Combat: Also recognized as the Spas-12, the combat shotgun shares the accuracy trait of the chrome shotgun. Basically, it's an upgraded chrome shotgun in that its spread is also tighter and generally goes down the crosshair as opposed to its brethren. As one would expect the same advantage and disadvantages come with it with the exception that it can be more effective in open areas due to the rate of fire, capacity, and highly increased damage per second.

Tactical: Popularly called the "Autoshotty", the tactical shotgun functions like an upgraded pump shotgun. The spread is much wider than that of the combat's but it is slightly more powerful when comparing full burst hits making it the best weapon at point blank range and the optimal tank buster. Like the pump, it's good for pushing back commons that aren't too bundled together for further engagement.

Alternative Info

- All 4 shotguns are capable of crowning a witch in Campaign modes but nothing can crown in Realism.
- Learning to cut a smoker tongue may make melee favorable as shotguns struggle to deal with them otherwise one may need to use a magnum for long range damage. It is possible to break the tongue when it connects to oneself with a shotgun burst if timed correctly but this is incredibly risky and difficult on Expert.
- Every shotgun is capable of incapping a player at full health in 1 shot on Expert and can do heavy damage in general so be wary of friendly fire.
- With perhaps the exception of the charger because his head is small, a headshot at close range from any shotgun will take out every SI.
- Keep an eye on ammo and reload wisely as it's 1 shell at a time.
- If cornered, alternating between firing bursts and shoves makes it possible to deal with large amounts of commons outside of choke points. Shotgun bursts that don't kill can push back commons giving time for a reload if needed.
- The tank's size makes it easy for shotguns to hit for high or max damage, consider using them on several survivors to kill a tank faster. *Note that the tier 2 shotguns have a damage penalty against the tank but still do high damage to him.
Weapons: Automatics
Tier 1

SMG: Also known as the Uzi, this little weapon has the lowest damage per bullet of all the automatic weapons but the highest rate of fire tied with its silenced cousin and is somewhat more accurate. If one has decent aim and good trigger control the SMG is capable of killing several commons grouped up with headshots but because it is weak and expels ammo so quickly it can't deal with too high of a volume of commons. Its aim is okay at long range with controlled bursts and good at mid-range with full auto but it is not recommended to go for the body and try to hit as many headshots as possible to conserve ammo which this weapon tends to burn through

Silenced SMG: A MAC-10 with a suppressor, as aforementioned it shares the highest rate of fire in the game but comes with a tiny bit more extra punch at the cost of less accuracy. Even with controlled bursts, it is not recommended to try and engage infected at long range. Keep it mid-range and as with every other automatic, make the most of headshots and get infected together to compensate for the low damage per bullet.

*I am unsure if the suppressor makes a difference in commons' ability to detect a player.

Tier 2

Assault Rifle: Widely accepted as the M16, this rifle has the 3rd highest rate of fire and is arguably the most balanced weapon in the game by not being exceptionally bad or good. Unfortunately, in realism this weapon is objectively more bad than good. While it does have the highest rate of fire of the rifles it also has the lowest damage per bullet, the lowest damage per clip, and barely beats the combat rifle in damage per second. Do not think that that means this isn't a viable weapon in RE, do understand that it does require the most compensation from the player in headshots. Its accuracy is very high which helps with this, being good at long range and can challenge a scoped sniper's accuracy when it's equipped with laser sights.

Combat Rifle: Shortened to the SCAR by most, this is the middle child of the rifle trio. It has the best accuracy of all automatic weapons, has the 2nd highest damage per bullet, has the highest damage per clip (though this is due to having the largest clip at 60 rounds), and has the lowest damage per second. It is a 3-round burst weapon meaning that while it does shoot 3 bullets per click, it only has 20 clicks before needing to reload so make sure each bullet from the burst lands on target. This rifle has one odd advantage over the other automatic weapons in that it retains good accuracy while on the move. Why it was made like this is unknown but it does make it versatile and effective if needing to run to save someone or when doing a running crescendo event. The distinct disadvantage on the other hand is that its reload is very long. Be careful about when and where you do it or you may be left without a primary in a bad situation.

AK-47: One of the only weapons with a proper name, the AK is likely the best overall weapon in RE and obviously the best of all the automatics. It has the worst accuracy of the rifles but it does have the highest damage per bullet and highest damage per second by a substantial amount and that's with a much lower rate of fire. With controlled taps and bursts the AK can be used at long range and it especially excels when used at mid or close range. With laser sights equipped it is, in my opinion, hands down the best weapon in the game. Despite its comparatively small clip, low rate of fire, and low accuracy, it's an all-around great weapon for RE in any situation.

Alternative Info

- It is crucial that one learns ammo management and aim control with all of these weapons in Realism.
- Melee are recommended over the magnum as secondaries to automatics as none of them are particularly good at dealing with large hordes and go through clips fast.
- The AK is the only non-scope rifle that can stun a witch with a headshot.
- Aside from general ammo management, all automatics need to use up quite a lot of ammo to deal with a tank with maybe the exception of the AK (depending on one's defintion of "a lot"). Pick up another weapon if possible or make sure shots count otherwise one may be left with a low-ammo primary.
- Laser sights greatly improve the effectiveness of all automatics more than any of the other weapons so be on the lookout.
- I can't stress enough how important headshotting is with these weapons.
- Using special ammo rounds is favorable because of how many rounds each weapon holds per clip.
- Do not panic and pray and spray. Most automatics spray widely on the move and stray bullets can easily cause friendly fire damage.
Weapons: Sniper Rifles
Tier 2

Snipers can spawn where tier 2 weapons spawn but also tend to have exclusive and unique spawns outside.

Hunting Rifle: The smaller and more user friendly of the 2 snipers, the hunting rifle is almost literally the same as its seemingly technologically superior older brother with a few differences. The biggest and most standout difference is that it has the highest accuracy of any weapon in the game while moving though it also has the best accuracy overall. The only other differences are that it has is lower ammo in reserve and half the rounds per clip but damage per bullet, damage per second, and rate of fire are all the same. As one would expect of a sniper rifle it is best for picking off infected at long range but isn't all that bad at close range.

Military Sniper: The heftier and more futuristic-looking of the 2, the military sniper is only an upgrade to the hunting rifle in terms of ammo capacity. Although it does have less accuracy on the move and overall, it's still fairly accurate if one knows how to pace their stops and shots. Having 30 rounds per clip and high damage backing each shot makes this weapon ideal for annihilating SI and tanks at long range, where it's safe to click away and watch their futile efforts in attempting to engage.

Alternative Info

- Sniper rifles are extremely broken in Campaign modes due to their 1-shot ability but are severely handicapped in comparison in Realism because of heavy bodyshot damage reduction.
- Both snipers have infinite penetration with their shots being able to go through several common if they're lined up. They can penetrate different surfaces too but not all and will not penetrate through SI or the tank.
- Even with damage reduction, snipers retain their ability to destroy SI better than any other weapons.
- Similar to the tier 2 shotguns, they are able to mow down tanks with relative ease but with the added advantage that they can do it more safely at long range.
- Special ammo may hinder snipers more than it helps in Campaign modes but is usually good to use in Realism.
- Melee are a better option as secondaries since the scope makes it easy to headshot idle commons and melee can easily deal with hordes which snipers cannot do.
- Sniper shots are extremely accurate at long range when standing still or crouching but they do not have the ability to 'spray' so relax and take your shots carefully.
- Both snipers have long reloads so do it sparingly or when there is no immediate danger around.
- Despite having the highest damage per bullet in the game, both snipers have low damage per second because of their low rate of fire highlighting their need for accurate shots.
Weapons: Secondaries
Tier 1

Pistol(s): The starter weapon(s) of the game, the pistol is what one is going to get used to using before anything else. Sadly, by the time one gets to RE they are pretty bad compared to any other secondary even in the hands of someone with a good shot. They do more damage than an M16 per bullet but the rate of fire is much, much slower and they're not too effective at mid-range, let alone long range. Dual-wielding boosts their usefulness but that doesn't pull them out of the realm of mediocrity. They should be used like the SMGs where headshots must be the main focus of the player.

Tier 2
Magnum: The most controversial weapon in RE due to its power, the magnum is the most popular and broken weapon in Realism because of it's exclusive ability to one-shot kill commons among non-special weapons on bodyshots. The magnum is very versatile, being effective against commons, SI (not so much the charger if he's too close), and even against tanks. It excels in enclosed areas and is also good in open areas. With steady aim, the magnum can be effective at long range and is great at mid range. One does need to keep an eye on the rounds left in the magazine as it only holds 8 at a time though it does have infinite ammo in reserve.

Melee: All the common melee are: the fire axe, the cricket bat, the baseball bat, the katana, the machete, the frying pan, the tonfa, the crowbar, the pitchfork, the shovel, the combat knife, and the guitar. They differ in the speed of the swing and how wide their arc is. They all have the ability to kill commons on contact anywhere on the body but this does not go for SI as they can survive if the player hits their legs and the charger takes 2 hits on the body from all melee. Melee can be dangerous to use in RE because the player needs to be in point blank range of infected to cause damage and any mistiming or whiffs can easily lead to taking damage. They are a sort of medium risk, high reward type secondary. While they may not be great at taking out several idle commons, they are more than capable of dealing with high amounts of aggressive commons if one has their back to a corner and can time swings.

Alternative Info

- Both the pistol(s) and the magnum have longer reloads if every round in the clips are used. try and reload with at least 1 round left when using a single pistol or magnum or 2 when dual-wielding pistols.
- Pistols lose rate of fire and accuracy when incapped, the magnum does not.
- Dual-wielded pistols have higher damage per second and per magazine over the magnum but the magnum's one-shot advantage on commons renders this irrelevant except against SI.
- Although the magnum only holds 8 rounds at a time, do not count it out against regular-sized hordes. It is capable of holding its own by combining its firepower and penetration with shoves. *Note the penetration is limited to 2-3 commons.
- The magnum is very commonly abused in RE because it is so overpowered compared to even all tier 2 primaries, being able to make most chapters a point-and-shoot adventure.
- Certain melee are able to cut smoker tongues if the player times their swing right when it connects. The ones that can do this are the: fire axe, crowbar, katana, pitchfork, knife, and machete.
- The katana is considered the best melee because it can cut smoker tongues, has a wide arc, and its swing comes out fast.
- Melee hit registration is unreliable in this game so it's safer to shove and go for the kill after a swing than it is to spam swing after swing.
Weapons: Special
Tier S

With the exception of set spawns in Cold Stream, these weapons can randomly spawn in different locations of certain maps or not spawn at all.

M60: A big ass machine gun in layman's terms, the M60's rate of fire and damage per bullet is similar to the SCAR's but it's accuracy and damage per second is very similar to the AK's. This weapon functions like the other automatic weapons with the exceptions that every round can shred apart commons on any difficulty with 1 shot anywhere on the body as with the explosive ammo upgrade and that it only has 150 rounds in its magazine with none in reserve and no way to legitimately refill it. It can easily annihilate large hordes and any SI at mid to close range, It isn't too good at long range but can still manage just like the AK.

Grenade Launcher: A gift and a curse, the GL is one of the most fun and best weapons to use but can be a bane and a huge anchor to have on the team. As one would expect, the GL is very dangerous to use because it carries explosives as ammo instead of bullets and if not careful it's going to lead to a lot of friendly fire damage and possibly some deaths. It's a weapon that requires a lot of practice and understanding of the game to be effective with so it's always expected of a player to know how to use it if they pick it up in RE. It's not ideal against commons unless taking out a group but it is particularly good against SI because it can stumble them (except the charger) when it doesn't kill them allowing for players to shoot at an easy target. It is definitely a weapon that gives one a great return if time is put into it.

Chainsaw: *Revs* The only special weapon that is neither a primary nor a firearm, the chainsaw is the close combat equivalent of the M60. It tears through commons like butter and is very good against every SI except the charger (and boomer, I suppose) and is even capable of "crowning" the witch in Campaign modes. It counts as a melee weapon but it's more of a melee weapon on steroids as it has several hits register per second as opposed to 1 hit every 3/4 of a second with standard melee. There are downsides in that it has to be revved up to be used and it runs on fuel which sadly cannot be refilled despite all the gas cans around. This can be remedied by learning approximately how long it takes to rev it up and by tapping fire when making contact instead of having it on full automatic. It's easier and safer to learn than the grenade launcher but can do a lot of damage to other players so be cautious.

Alternative Info

- The M60 can only be found in 5 campaigns which are: No Mercy (ch. 2, 3, and 4), Death Toll (ch. 3 & 4), The Sacrifice (ch. 1 & 2), The Passing (all chapters, dropped by L4D1 Survivors with laser sights attached in Finale), and Cold Stream (ch. 2 & 3).
- Special ammo boxes will not refill the M60 and will instead replace every round it has left with the special ammo pickup.
- It is possible to refill an M60 through respawn bugs.
- A lone M60 is not ideal for killing tanks and in fact cannot kill a tank in RE with all 150 rounds.
- The magnum and melee are both good as secondaries to the M60 and should be used often to conserve ammo on it.
- The Grenade Launcher can be found in the following campaigns: Dead Center (ch. 2), Dark Carnival (ch. 2), Swamp Fever (ch. 1 & 2), Hard Rain (ch. 1 & 2, found in return chapters if found in 1 or 2), The Parish (ch. 3 & 4), Cold Stream (ch. 3), No Mercy (all chapters except 1st), Crash Course (both chapters), Death Toll (ch. 3), Dead Air (ch. 2), and The Sacrifice (ch. 1 & 2). *I might be forgetting some locations.
- Laser sights have no effect on the accuracy of the grenade launcher.
- An explosive ammo round on the grenade launcher will make it go more directly down the crosshair with less of an arc and an incendiary round on it can light a tank on fire permanently.
- The more distance a round needs to cover the more the arc comes into play, learning to compensate for that is important.
- A personal recommendation to help in learning is to go to No Mercy's finale and pick up a grenade launcher to test it out.
- Another personal recommendation is to simply not pick up special weapons (and most of the emphasis of this goes to the grenade launcher) to not weigh one's team down and to lessen the risk of votekicks due to misuse, friendly fire, etc. since I know a lot of people love to pick them up.
- In the intro video a grenade launcher is shown being able to stun a tank but it cannot do this in actual gameplay. A direct hit will only slow his movement down for a split second before he can continue at full speed. It is capable of stunning everything except tanks and chargers.
- While the default damage of the grenade launcher is 400 per nade, it does up to 1000 damage per nade to tanks and also does increased damage to witches.
- The chainsaw can be found in most campaigns but is uncommon.
- The chainsaw deals the most damage per second and total damage possible with weapons that have ammo/fuel reserve by far.
- Unlike with standard melee, it is very easy to cut smoker tongues with the chainsaw. All one needs to do is have it on and be aiming at where the tongue is coming from and it'll cut it.
- Although noise from guns and such will get the attention of commons, the noise from the chainsaw seems to do it better and more often.
- It is the only melee weapon capable of killing the riot police infected from the front.
- The chainsaw and M60 are both automatically dropped after their ammo or fuel are depleted, leaving the player without a primary or with only a single pistol as a secondary.
Weapons: CS:S
Tier 1

MP5: The long awaited cousin of the SMGs those of us outside of GER haven't been able to access for over a decade on official multiplayer servers, the MP5 comes to us not as a clone but as a slightly different SMG to round off the trio. While its rate of fire is the lowest of the 3 SMGs, its accuracy and damage per bullet are superior to the other 2 meaning that it is more viable at mid and long-range where the other 2 fail quite miserably. The general use remains the same as every other automatic weapon where it will be unable to handle a large volume of infected and headshots are a necessity should a player using any automatic not want to torch their ammo reserves.

Tier 2

SG 552: Unlike the MP5, this rifle could perhaps be called a clone of the M16 Assault Rifle with 2 differences in that it has a microscopic advantage in rate of fire and the scope allows for easier semi-auto use and more reliable accuracy at long range. In some respect, this rifle makes the M16 obsolete and the objectively worst automatic rifle of the 4 as it either matches the M16's attributes or improves upon them. With the scope serving as a perk to support its already high accuracy while not sacrificing rate of fire like with sniper rifles, sharpshooters will likely favor this hybrid rifle as their weapon of choice.

Scout: As with the hunting rifle being the 'lesser' version of the semi-automatic sniper duo, the scout is the 'lesser' version of the bolt-action sniper duo. Although it does have the 2nd highest damage per bullet (not to be mistaken with per round or per shell), the rate of fire horribly cripples the damage output of this weapon and that's before we take into consideration the bodyshot reduction from Realism mode. It may retain advantages that a sniper rifle has such as near-perfect accuracy and long range reliability but with the rate of fire being so low and directly causing the damage output to also suffer, it is impossible to say that it isn't a direct downgrade to either of the semi-automatic sniper rifles.

AWSM: Accepted by just about everyone as the AWP, this is the heavier hitter of the the bolt-action sniper duo and if we're going by damage per bullet, the heaviest hitter of not only the 4 sniper rifles but of every weapon in the game. Do not be mistaken, that damage comes at the great cost of having the 2nd lowest rate of fire in the game which severely hinders its damage output. With that to take into consideration, like the scout, it is fair to say this is a direct downgrade to the semi-automatic sniper rifles and will only ever serve as a glass cannon to pick off SI and wandering commons.

Alternative Info
- The MP5 not being a copy+pasta clone of the other 2 SMGs makes next to no difference in how it's used, however, it might have slightly more use against SI at farther ranges with good trigger control.
- The SG 552's single disadvantage is that it has a slower reload than the M16.
- For those that like to snipe but find snipers too big a liability and rifles lacking at long range, the SG 552 is a perfect fit that can do both.
- The rate of fire does decrease noticeably when the SG 552 is scoped in but in return the high accuracy becomes even more precise.
- It's unfortunate to say that the scout is likely the objectively worst weapon in RE, possibly worse than even pistols, because of how low its rate of fire is and its advantages as a sniper being stripped in the transition from Campaign mode to Realism mode.
- Cancelling the full bolt animation by shoving does increase the rate of fire but it comes at the cost of wasting shoves. This goes for both the scout and the AWP.
- It's recommended that a player use melee if they choose to use any of the CS:S weapons as none are ideal for dealing with large amounts of infected.
Special Infected (SI) Part 1
*Note that all of the damage numbers used below are for Expert difficulty only. All SI will make a specific noise when they get view of the survivors.

Boomer
[50 HP]
If you see a bunch of special infected ahead, shoot the boomer first. A fresh horde spawned by the boomer and blinded teammates are usually the biggest threat to your survival, particularly in Expert where the horde does so much damage. In addition the boomer is big, has the lowest HP of all the SI and the explosion when it's killed will stun any infected nearby giving you an opportunity to kill them. If a player is puked on and there's a tank around, the tank will continue to attack the player even after incapping them. This applies to all the SI except smokers which don't seem to care. Boomers themselves love to use their scratch which does 20 damage to bait players into shooting them (shove away then shoot if they do get close, of course). Biling infected will also be pointless as the boomer's puke has more priority than bile bombs, however, pipe bombs do have a higher priority so tossing one can at least get commons off whoever is boomed. Sometimes boomers will kamikaze from high places onto players as to stun and blind them so infected can take advantage. Remember that if a player is glitching a boomer by climbing something to shove the boomer away and then kill it as the explosion can knock a player off of whatever they're on and cause them to be incapacitated or killed by the horde.

TLS AI Changes: If anything, they have become more aggressive with around the corner plays and don't sit around doing nothing as much as before.

Charger
[600 HP]
Chargers are large and have the most HP out of all the SI. They do 20 damage with their punch and are very capable of incapacitating an entire team given the chance. If they successfully charge a survivor and other survivors are in the way while he is still charging, they'll be sent flying so be extremely careful around rooftops and other high areas as it can mean auto-incapacitation or death depending on the height of the fall. The best way to handle them is to get in an open area, let them charge but move out of the way and then shoot while he's stunned. It is possible to use melee weapons against him when he's stunned but know that he can buffer punches to do damage if you get close enough. Be wary as he won't experience a full stun every time, it's possible for him to have much shorter stuns and get a punch or 2 if not anticipated. Another important thing to know is that survivors do not have invulnerability like they do when they get pinned by one of the other 3 SI that can pin hence why a lot of players incapacitate people they're attempting to save from a charger. An interesting thing to note is that jumping on things that are high enough (usually those that can put you over the charger such as railings) will cause him to run away.

TLS AI Changes: Chargers have become far more aggressive with spawning and charging right away. Their pathing retaining flaws makes it so it's 50/50 on whether this will be dangerous or not as they can spawn and charge into a wall right in front of them. It is still possible to mess with the AI by jumping on things.

Hunter
[250 HP]
Hunters are very, very dangerous when you're alone. Their scratch does 40 damage, the highest out of all the SI's attacks, and their pounce can kill a player in less than 10 seconds even if they were pounced at 100 HP and weren't black & white. If you hear a hunter approaching, move forward slowly while crouching and as soon as you see his shadow, be ready to fire as their jump can cut corners. They can also jump extremely high so never think that they can't reach you. If they retreat by jumping back when you fire at them, give chase and take them down as it takes them a few seconds to get back into pouncing position. If he pounces a player and you're close but for whatever reason can't fire, shove him off and keep shoving him until you can fire. If out in an open space, you can bait him into jumping and then move to the side as he initiates his jump then proceed to shoving and killing him as he has slight landing lag. It is possible to shove him out of a leap (which is called deadstopping, a common technique used by experienced players) but be careful as sometimes he'll stumble forward and buffer scratches. It is possible to 'headshot' a hunter with melee weapons when he's in midair but the timing is very difficult to pull off and you do risk being pounced if you fail.

TLS AI Changes: Hunters remain largely unchanged.
Special Infected (SI) Part 2
Jockey
[325 HP]
The general consensus among Expert players is that the jockey is the hardest SI to deal with. His scratch does 20 damage and he can jump deceptively high, though not as high as the hunter. The reason he's considered such a big threat is because of his scratch's range, his unusual movement, his ability to steer players elsewhere, and his size makes it hard to get headshots--and he has the 2nd highest amount of HP of the SI. To deal with jockeys, you either have to unleash hell and hope he dies or try and shove them then shoot at them. If a jockey gets on a player and other players are close by, shove him to get him off the player and keep shoving him until he's dead. An important detail to know is that if you manage to time a shove well enough when he jumps so that you hit his ribs, it's an auto-kill. This technique is simplified by crouching but is still difficult to get down. Like with the hunter, it is also possible to melee 'headshot' the jockey but instead of doing it when he's in midair, you need to crouch and melee right as he jumps. To deadstop a jockey anticipate his jump and track it with a shove, if done correctly it'll push him away without him being able to scratch you. One of the most important things players don't seem to remember (funnily enough it's an in-game tip) is that moving around one's mouse can hinder the jockey's ability to steer players when they're latched on. Moving it around erratically seems to be the most effective and can even keep a player in place if done correctly to help one's teammates shoot or shove him off.

TLS AI Changes: Jockeys have changed enormously from pre-TLS behavior. They are now far more passive and will take long routes around to try and flank survivors. It looks as though when there is a notable amount of space between them and survivors they struggle to decide whether to aggress or try and find a way around to flank, though if the distance is relatively short they will most likely be aggressive.

Smoker
[250 HP]
Smokers are opportunists. They will rarely attempt to drag a player away on equal ground and prefer to get players who are either alone or falling behind and do so from higher (or lower) ground depending on what would be most effective for doing damage or killing. Be especially wary of this when crossing points of no return. Strangely, they hardly ever use their scratch which inflicts 20 damage even when players are at point blank range. Rifles and snipers are the best weapons to deal with them but if they're out of sight then shove the survivor that's being dragged to free them or shoot the tongue to break it. When their tongue is connected to a survivor, the game has script where a single shot to the smoker's head will kill it. Cutting the tongue with melee is another option players have but it is much harder to do in Expert as opposed to other difficulties because the smoker automatically tries to capture players instead of giving them a second to react. The melee weapons that can cut his tongue are: the machete, katana, crowbar, fire axe, pitchfork, knife and chainsaw.

TLS AI Changes: Similar to before, smoker behavior is a coin flip. They like to favor spawning into attempting instant pins more the same as chargers and when they can't, they mimic jockeys and try to play the long game.

Spitter
[100 HP]
Spitters are probably the least dangerous of all the SI but even so they shouldn't be taken too lightly. They can do 20 damage with their scratch which they like to use and the longer you stand in their spit, the more damage you take and it does build up quickly. In most cases, jumping on things like railings and tables will prevent you from taking damage though there are times when the spit will somehow climb from the floor onto higher places. Spitters, like boomers, can easily be melted by most weapons. Because of an update around mid-2013 (June/July), if a spitter spits from directly above you on you it is an auto-death, regardless of what your HP is or if you were B&W. Her projectile spit has also become a solid entity that is capable of pushing/blocking survivors. In some cases, and hopefully someone can correct me if I'm wrong, it's possible to do a type of super jump by landing on the spitter or her spit.

*I don't know if the auto-death bug remains true as I haven't seen it in awhile and up to the time of this edit (March 2021).

TLS AI Changes: Spitters were the 1 SI that behave like they have been improved. They try to aggress survivors more and try to serve as blockades in narrow sections of maps.

NOTE: For both jockeys and smokers, their new AI pathing sometimes make it so that them trying to flank puts them out of range of relevance and it's not uncommon for them to despawn so progressing when they're behind or even regressing can often force them to disappear.

Uncommon Infected
  • CEDA workers are immune to fire and have the potential to give you a free bile bomb.
  • Construction workers are not attracted to pipe bombs or biles and those will instead aggravate them into attacking the survivors.
  • Clowns have a sort of bile effect where they get surrounding commons to chase them because of the squeaking that comes from them, usually leaving a small horde-sized group when killed.
  • Mudmen crawl and are hard to hit. They also obstruct your vision with mud if they hit you.
  • Fallen survivors have 1000 HP and tend to carry a pipe bomb, a molotov, pain pills, and a first aid kit though what they carry varies. They are vulnerable to one-hit kills from melee weapons, however, the magnum requires two shots to kill.
  • Jimmy Gibbs, Jr. has 1000 HP too and like the CEDA workers, is immune to fire, and can also lower visibility the same way mudmen do except with oil (or what is assumed to be oil). Like the fallen survivors, he is vulnerable to one-hit kills from melee weapons. He only has a 5% chance of appearing in Dead Center's finale, which is the only place he'll ever spawn.
  • Security guards cannot be killed by being shot from the front, they have to be shoved then shot in the back. It isn't possible to get a headshot on them either. *They can be killed from the front if shot with special ammo rounds.

All of the uncommon infected have a higher amount of health than the common infected.
Witch
Basic Info
[1000~ HP]
Ignore the witch if possible. If she's in a tight space where you need to pass her to progress, try passing her one by one with your flashlights off while holding a health item such as a first aid kit or pain pills and while looking away. Firearms, shining your flashlight in her face, and looking at her will make her angry.

Set fire to the witch if you need to and do it from as far as possible. Once set on fire start running as witches run slower when they are on fire. The witch will automatically die after a short while. If the witch sets fire to herself using a natural fire while chasing (e.g. Parish's 3rd chapter), she won't chase anyone anymore.

Witches can be confused with ladders same as tanks. Shoot the witch and climb a ladder but not too high where she'll start climbing, push you up, and proceed to kill you. If done correctly, the witch will be unable to reach you and she'll be at the bottom of the ladder making it easy for your teammates to deal with her. This trick also works in other high areas where they aren't easily accessible by climbing ladders and such.

Incapacitating yourself after you have angered the witch counts as an incapacitation and the witch will ignore you. *Not confirmed 100%. Hanging on a ledge also counts as an incapacitation and will not cause you to lose any health if rescued quick enough. *Confirmed 100%.

Sniper, Magnum, and AK-47 rounds to the head will stun the witch before she is agitated. After the witch is stunned, you can keep her stunned by shoving her quickly, thereafter she will remain stunned as long as you keep shoving. It is good idea to stun the witch then rush forward with a melee weapon and alternate between shoving and hitting her with the melee weapon. Any melee weapon will kill the witch in 4 hits. It's possible to kill her by shooting her while doing this but it's much safer to use melee.

Differences between Realism and Campaign
Some players don't know that dealing with a witch differs between Campaign and Realism. In Campaign modes, it is possible to crown a witch using shotguns or a chainsaw but in Realism it is not. The most common technique in Realism is to shoot her and run behind a door then let the other players kill her which doesn't work in Campaign because she can break down doors. Your other options are to use the ladder/high place trick or to light her. *Note that If you're going to use the door option, have players shoot at her from the side, parallel to the door, as many novice players have a tendency of shooting at her from the front, incapping the player hiding.

Crowning Witches
Witches can be crowned in Campaign on all difficulties but not Realism in any difficulty. On Expert you have to shoot her in the head but in Advanced or Normal you just need to make sure all your bullets go into the witch. Watch this video by ZebraJCH to see how to Crown witches.


*Note that witches that are walking around will still be faster when set on fire as opposed to the witches that are sitting down.
Tank
General Need-to-Know Info
[8000~ HP]
Try to save a molotov for the tank. AI Tanks are either not smart enough to walk around fires or prefer to go through them if it'll save them time, so just put it in-between you and the tank and let the AI work it out. Gas cans also work, or even natural fires like at the finale of Dead Air.

Once the tank is lit, run away. If you have limited room, run around places where the tank will be forced to climb and such to get to you so you can widen the gap between yourself and the tank. Do know that if you're below 40 HP you won't be able to outrun the tank. If you don't have pills or an adrenaline shot try and get to a location where it will be inconvenient for the tank to come get you or climb a ladder high enough so the tank glitches and just stays under if it decides to go after you same as with the witch. If possible, try to lure the tank to follow teammates that are in green HP (40 or higher) as tanks cannot outrun them. If trying to draw his attention, hitting him with a melee weapon will usually do the trick but it is dangerous as it involves being at point blank range to him. This might be necessary if the tank is attacking an incapacitated teammate.

Don't ever, ever, ever, ever, ever, ever, ever, EVER, EVERRRRRR use a bile on a tank when there are no common infected around. The worst case scenario is dealing with a tank with several common infected around and especially with both commons and SI around. Remember, the tank is a SI and just like the other SI dealing with him is easier to do in an area with a lot of room to kite him around in. Any clutter or anything that limits your movement can greatly complicate dealing with a tank. Hard Rain's finale is a solid example of that.

Shooting rocks out of the air is an option but on Expert I highly advise against trying this unless highly experienced as it is an instant incapacitation if they hit. If a rock breaks when you're hiding behind something like a tree or a pillar the debris can still cause damage, though it does next to nothing.

This should be common knowledge as this also applies in lower difficulties but try to avoid fighting tanks in any areas that have small vehicles, trash cans, or other things such as fallen trees as they are instant incapacitation if they are yeeted at survivors and can easily take out an entire team of survivors if not careful.

*Note that if a survivor is puked on by a boomer, the tank will continue to attack him/her/them even after incapacitation.

How to dodge a tank rock.
Strafe preferably to either the left or right, just as the tank is about to release the rock, start strafing in the opposite direction. The tank will throw the rock to where you would be had you continuing strafing in that same direction. Be extremely careful when trying to dodge rocks on higher difficulties though as they have been known to have heat-seeking capabilities and defy the laws of physics, going through things such as walls and vehicles.
Expert Strategy
Guidelines
  • Clear the horde! You need to kill them fast and efficiently.
  • Hug the walls.
  • Wait out natural hordes.
  • Move fast in open areas.
  • Cover each other.

Line of Fire
Do not walk into another person's line of fire. If you must, do it slowly so that the person has time to react to you. Take note of where everyone is aiming at even if they haven't fired as they may shoot soon especially if their crosshairs are aimed at the infected. This is important as some players start firing like mad at tanks and witches whenever they see them, sometimes blocking the only way to escape so they end up incapping the player(s) running or causing too much damage for them to run.


Do No Harm
While it's good to shoot at infected that are surrounding your allies, do it very, very carefully in Expert mode as your bullets do far more friendly fire damage.

Communication
Communication and teamwork is key in this game, more so in Realism where there aren't any survivor outlines. A mic is a very useful tool in this game. It's a lot faster than typing and doesn't leave you defenseless in the middle of a bad situation. If you don't have a mic, try your to get into a position where you'll have a few seconds to ask for help when you need it. Tell other players which items and weapons are where so they don't waste their time looking through the same place. If you don't have a mic, bind some of the more common messages.

  • Enable developer console.
  • Type in console:
    • Bind i “say_team Save me!”
    • Bind o “say_team Items here”
    • Bind p “say_team Go!”

Slow & Steady Method
  • Clear infected from a distance.
  • Rush quickly in open areas.
  • Lure the natural horde.
  • Stay together and always be wary of a natural

    *Remember that while a mic is a helpful tool spamming the crap out of it, especially when it has low quality, may do more bad than good.

    Fighting the Horde
    Fighting hordes is a recurring threat so of course players have devised ways to deal with them. The most effective and easiest way is a choke point, forcing infected into a narrow pathway or somewhere where they're forced to come through 1-by-1 or in lower numbers to make them easier to deal with. Rooms are commonly used to do this. Sometimes, however, the AI director decides to to target a player that's alone with all of the infected and using a choke point/room may not be enough. If/when this happens other precautions have to be taken. A safe bet most of the time is climbing something like a shelf or a stack of boxes, hell even a refrigerator can work (and to be quite honest they're one of the safest places to be on top of). Still, stay alert for SI that may be able to get to you.

    Open Areas
    Being out in the open works great for dealing with SI but when dealing with a horde it is extremely dangerous. You can quickly become surrounded and unable to move/run anywhere. If this happens to you stay calm, don't panic, don't toss a bile into oblivion or set yourself on fire--trust your teammates. If commons are coming from all directions--and they most likely will be--try and clear any single direction and make an attempt to get into a corner or run toward a teammate but don't run into their line of fire and make sure to shove any infected that may be behind you as to not risk having them hit your teammate(s). If you decide to run to a corner or can't go with a teammate, crouch to lessen the probability of someone doing FF. If you're the one trying to help out a teammate in trouble, get a side angle if possible when shooting at infected or aim low or high but DO NOT aim at their torso as it increases the chance of FF by a significant amount.

Speedrunning / Rushing
  • Don't kill all the infected, just kill the ones you need to, they have feelings too! There is a limit to the number of infected that can be in the game at once thus leaving infected alive at the start means that you have less to deal with at later parts of the map.
  • Stick close together killing any infected that get close to your group.
  • In tight areas it may be good to switch to melee weapons as they do significantly lower friendly fire damage in comparison to firearms. Use shoves to further limit friendly fire damage while rushing in tight areas.
  • Tier 2 shotguns are the best weapons for rushing, just be careful with friendly fire. It's safer to rush with magnums otherwise.
  • Close doors along the way if it's convenient.
  • It may be good to leave players behind as incapped players help to attract infected away from you and prevent more infected from spawning at the end of the map. Don't do this for the finale if you want everyone to get a completion achievement.

Watch this amazing Speed Run by Isdmyth with bots.

Watch this awesome team speed run by Cryst, Art_uP, Frey and Toretto. They complete Dead Center Realism Expert in just 15 mins with zero deaths.

*Players that insist on constantly rushing are very, very likely to be inexperienced and it's a reliable tell if that's all they want to do. A lot of players that prefer to rush will go down in a matter of seconds if they run into the slightest bit of resistance from the infected. Not that it isn't a viable tactic but experienced players can get through maps fairly fast without having to resort to rushing which players that are more focused on their own survival seem to heavily favor. (They'll usually be the first to start running and of course this means that they can be saved as many times as needed by players behind them.)
Final Message
Good luck, have fun, and if you're achievement hunting, No Mercy is the easiest map overall so try your luck there before trying any other map. :D

https://steamhost.cn/steamcommunity_com/sharedfiles/filedetails/?id=122504362
57 Comments
Legoshi's Lover 1 Nov, 2023 @ 1:20pm 
Useful guide, just wanted to clear some wrong information about the sitting witch and give some of mine that I've gathered while testing.

1. Looking at her doesn't do anything, but if you have your flashlight turned on while looking at her, she will get up much faster. The flashlight does not affect the wandering witch. Looking at her without the light can be useful to tell if she's noticed you. When her hands are getting at the same level as her head, that is when she is about to run.

2. Moving slowly (crouching, walking) next to the sitting witch will reduce the chances of her noticing you, but it's discouraged with bots because they will walk slowly while aiming at her and probably startle her. If she notices you and starts getting angry, get away, don't shoot her yet.

Being too close to the sitting witch angers her as fast as the flashlight.

Note: You can only stun a wandering witch with explosive ammo, pipe bombs and the grenade launcher.
Alastor 25 Mar, 2022 @ 6:44am 
Welp i'm gonna need this
Joe Kerr  [author] 19 Sep, 2021 @ 10:33am 
I knew that but I accidentally put "all". WHOOPS :awkward: Thanks for catching that mistake.
blueyandicy 19 Sep, 2021 @ 9:08am 
Quick note* All shotguns DON'T have the nerf to damage against tanks. Only the Auto/Tier 2 ones do, the Tier 1 Shotguns do FULL damage against tanks.
Hououin Kyouma 22 Jul, 2018 @ 6:14pm 
?? I found it very useful! Greatly explained how to play l4d2 even in normal mode without going down. Great guide.
「A」  [author] 21 Jul, 2018 @ 11:29pm 
This guide was a waste.
Joe Kerr  [author] 14 Dec, 2017 @ 3:06am 
Hate having to post this again since my last comment on this guide from over 3 years ago is still on the first page of comments and isn't difficult to see.

DO NOT post misleading or false information. Realism Expert was a big enough cesspool of players back then that thought they were masters at the mode when realistically they had no idea what they were doing or what they were talking about. I didn't tolerate that crap back then and I'm not ever going to.

Either post something relevant and or useful or I'm going to delete it.
Mahjones 24 Sep, 2017 @ 8:16pm 
So good to see people still help each others
Jimbo Duelly 1 Jun, 2017 @ 4:11pm 
Keep in mind you can also destroy tank rocks with your guns or melee weapons (if you're skilled enough) this has saved me numerous times.
PdG 11 Apr, 2017 @ 6:54am 
thx