The Age of Decadence

The Age of Decadence

90 ratings
Advanced Assassin/Preator Hybrid Walkthrough
By rock
This guide will teach you how to create the most potent SP-farming machine and accumulate a high Body Count. It is centered around the Assassin background and includes stealing, looting, killing, and collecting just about everything. Outdated!
2
6
   
Award
Favorite
Favorited
Unfavorite
0) Introduction and Character Building
IMPORTANT: THE GUIDE IS OUTDATED AND MAY NOT BE ACCURATE!
I'm still getting comments on the guide from time to time, so if you have just started playing, use this a loose reference and not a hard walkthrough.

Update log:

1.1f) Nov 12, 2024: Darius Tomb note.
1.1e) Dec 12, 2021: Added disclaimer.
1.1d) Jan 8, 2018: Minor warning added about Neros.
1.1c) Jan 2, 2018: Minor addition of a loot container in Darius' Tomb.
1.1b) Dec 30, 2017: Minor correction in stats.
1.1a) Dec 8, 2017: Minor correction to Hamza's training after the first Maadoran Assassin mission, changelog alteration.
1.1) Dec 2, 2017: Updated with minor corrections, screenshots, and formatting.
1.0) Nov 25, 2017: Skill totals are accurate as of publishing.

Conventions:

FSP - Combat (Fight) Skill Points: Can only be spent of combat skills.
GSP - General Skill Points: Can be spent on combat or civic skils.
CSP - Civic (Civil) Skill Points: Can only be spent on civic skills.

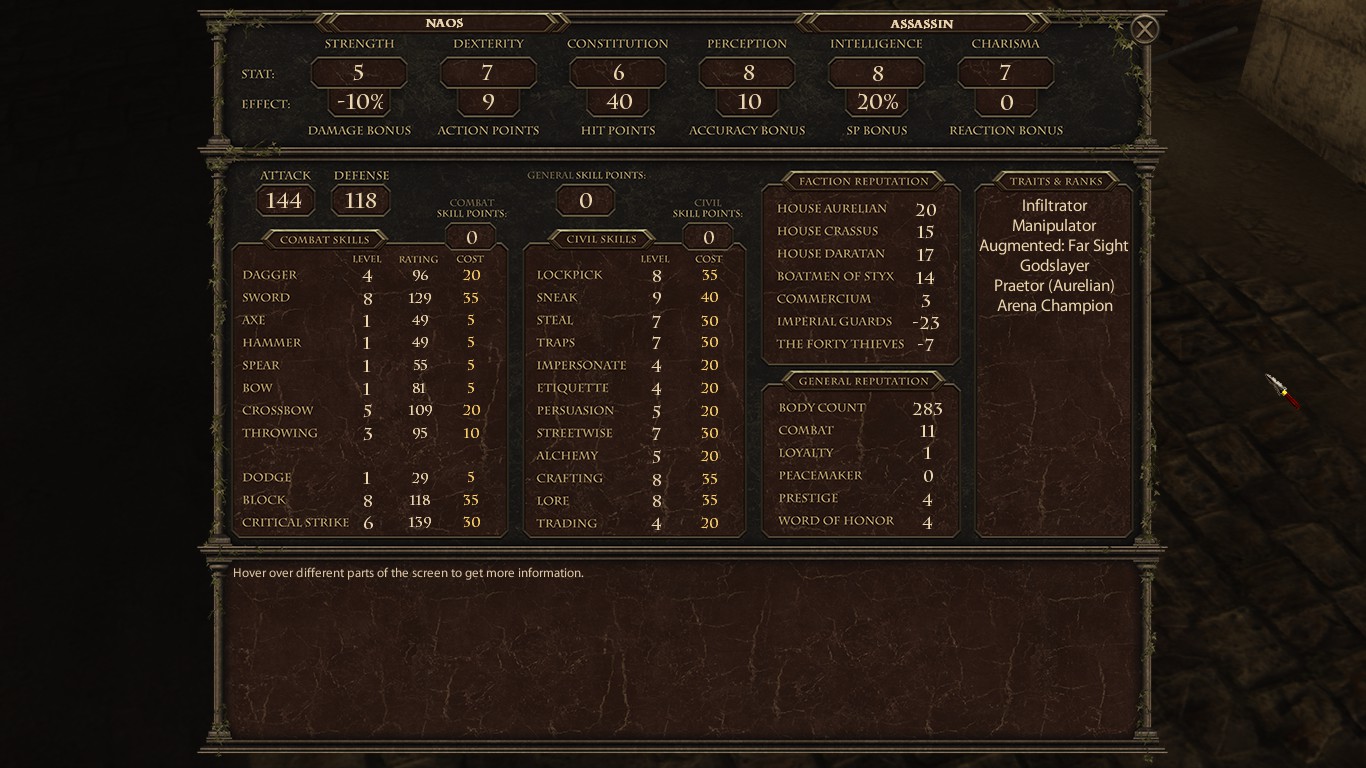
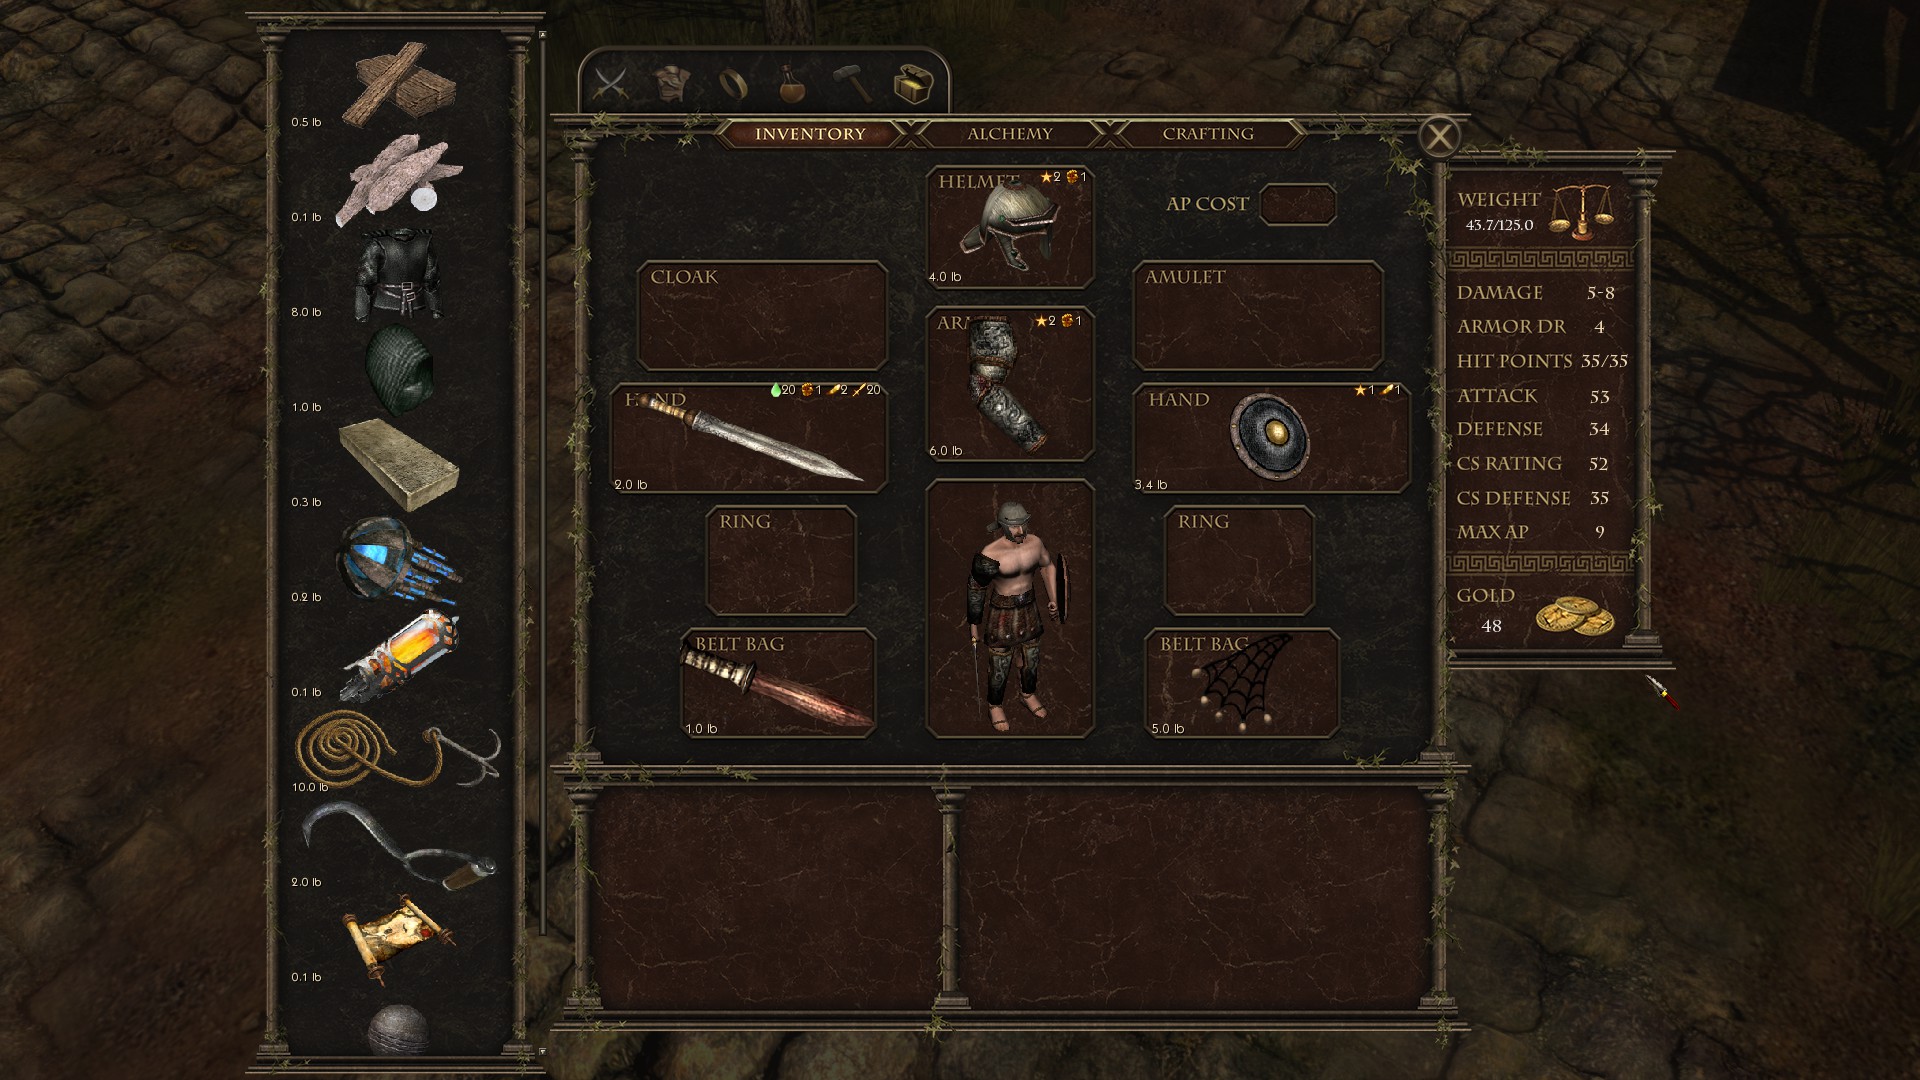
This guide is for an Assassin to Aurelian Preator character maximizing SP rewards through a combination of high Intelligence and Charisma and a lot of metagaming. This hybrid is able to do everything worth doing while getting maximum amount of lore and gameplay choices; some alternative options are given, but they are for reference only. This character ends up getting the power armor, so Swords and Block are used, but using the power armor is optional and you may substitute Daggers + Dodge instead if you wish to do your own thing in combat. Playing through the game at least once is recommended as there will be some slight spoilers on items and their location/function along with general game spoilers. This guide does not follow through to the God ending, though you may still achieve this ending if you deviate from the guide. This won't be a guide for the morally righteous, as SP is prioritized in most situations, and you will make some morally dubious and downright sociopathic decisions. You will also kill a lot of people.

Here is what you can end up doing:


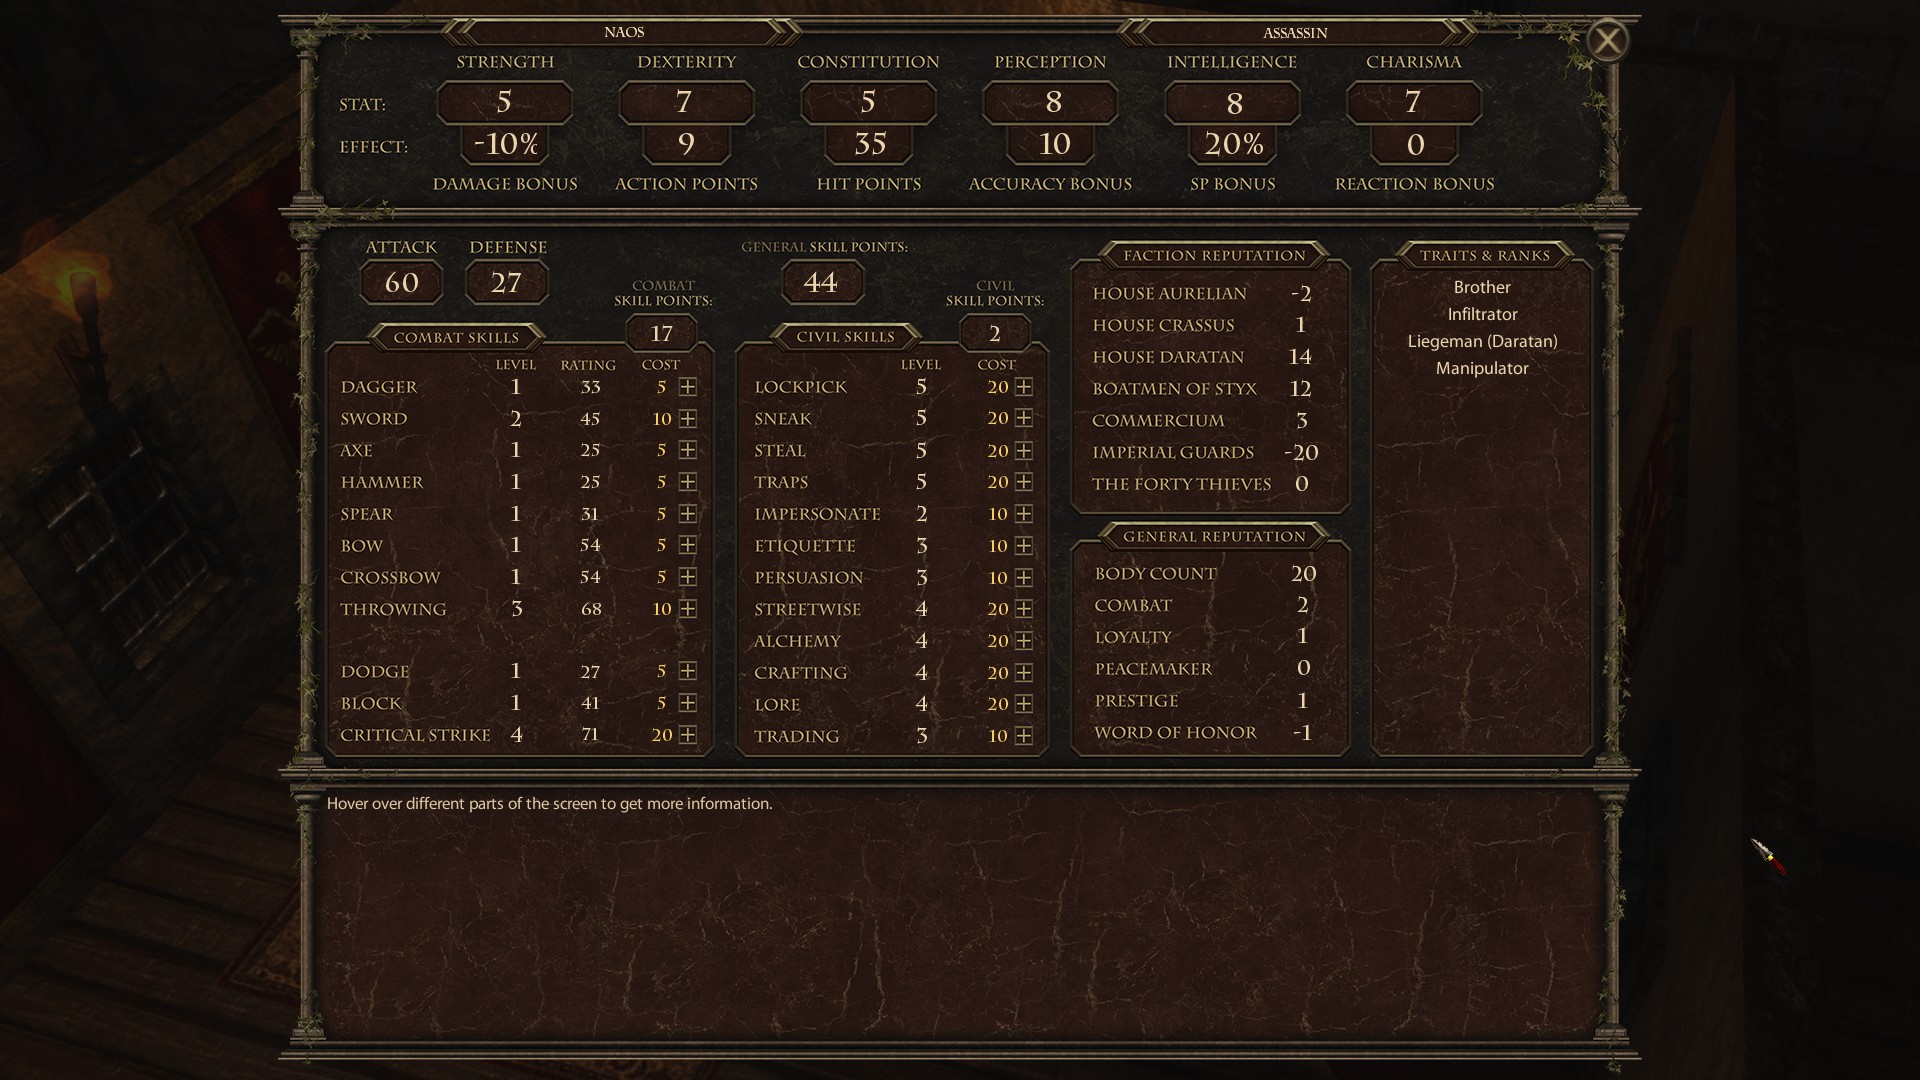
Explanation of Stats:

5 Strength : Necessary to use the climbing tools. Primarily a combat Statistic, but it is used when climbing, pushing, and you get the idea. Not terribly important outside of combat though.
7 Dexterity : To not completely suck at combat and a few important checks. Not terribly important outside of combat, but more important than Strength.
5 Constitution : Can be increased to 7 during the game, but this guide will only increase it to 6. You may start with 4 and increase Agility instead for an extra 2 CSP by climbing Feng's house. I don't recommend doing this as it locks you out of completing the Maadoran sewers (but you may come back and do them later), the Abyss, and possibly getting the God ending. Also makes combat really frustrating. You cannot survive the God ending with less than 7 in Constitution, nor can you survive the Star Room in Ganezzar, or the various end-game conditions with less than 7. Least important physical Statistic outside of combat.
8 Perception : For a few important situations, mainly getting the surgery tools for God ending. You also need 8 Perception to explore the Abyss without Feng's help, but you will be fine with 7 and Lore. I also believe you need 8 to finish one Assassin mission in Maadoran with the best result.
8 Intelligence : For a minor quest, some bonus information, and bonus SP. You can get away with 7 Intelligence, but doing so would mean fighting very tough enemies earlier in the game. 8 Intelligence allows you to convince Carrinas to proclaim Antidas emperor, and it has a lot of benefits for talker-only characters.
7 Charisma : To receive training in Teron and do better in mixed social tests; also used in getting more information out of people. 9 in Charisma allows you to tell the priest in Teron that you are the Chosen One. This opens up unique options in Ganezzar, the final city, when interacting with some zealots, and even a unique ending (sort of). Great for a talker-only character, can be left at 4 when developing for combat.

Explanation of Civil Skills:

Lockpick: You need 4 in this to get Modules and a Respirator in order to complete the Abyss. It is also used to get a green jar to increase a stat, along with Lore, also at 4. Aside from that, there are a lot of locked things in the game, but none of them are essential.
Sneak: Useful in infiltrating the Palace in Teron, but can be skipped everywhere else. You primarily use this to sneak into Inn rooms and rob the patrons.
Steal: Useless outside of stealing from Inn patrons and merchant stalls. If you are doing your own playthrough, you can skip this entirely. You do need Steal of 2 to join the Thieves Guild.
Traps: Not worth it and be skipped completely for your own playthrough. There are other ways to avoid the traps that you need to get rid of, and those that protect useful equipment are never worth it. You do need this to disarm a trap in the Old Hanger, but you can also get some Aurelians to help you instead, or blow up the door with 5 in Crafting and Alchemy.
Impersonate: Useful in a few places but very seldom. Can be skipped entirely, in my opinion, as fighting generally gets you better rewards. This can be used to get through some encounters with no violence.
Etiquette: Only useful when dealing with nobles, and only seldom. Impersonate 3 is useful when sneaking into the Palace in Teron and not getting executed. Far more useful to a Daratan Praetor or Merchant.
Persuasion: One of the two core Charisma skills, but the weaker of the two. You do need this at 5 to get the guardian in Inferiae to help you (along with Streetwise). Far more useful to a Daratan Praetor or Merchant.
Streetwise: The King of Charisma skills. You use this to trick, lie, and cheat people, and there are a lot of opportunities to use it. With Charisma of 7, you ever only need 7 Streetwise to do everything worth doing in the game. Far more useful to a Daratan Praetor or Merchant.
Alchemy: The second most important combat support skill and is checked a few more times in social situations; increasing it to 5 is probably the highest you will need to go outside of combat. Alchemy of 6 is enough to reap maximum benefit without overspending points. Alchemy of 10 is very powerful though, limited only by your alchemy supply, and can completely dominate pretty much any fight outside of the final boss (unless you also have combat stats).
Crafting: The most important combat support skill and is checked with Lore quite a bit. You won't need more than 8 during a playthrough, but 10 in Crafting allows you to craft from Sky Metal and sharpen your weapons to do +5 in damage. Incredibly useful.
Lore: The most important Civil Skill. Lore gives you a lot of background information, provides bonus SP, and something I wouldn't do a full playthrough without. 8 is enough to do just about everything, including using the Healing Machine in order to increase a stat. That said, you can complete the game just fine without it.
Trading: Lowers buy price and increases sale price. Also allows you to haggle for lower prices on special items. 4 Trading is generally enough to get the most benefit from this, but you can skip this entirely unless you are a Merchant since the best gear is either found or crafted. Far more useful to a Merchant, as you can influence some people with this in conversation.

Create your Assassin like so:
5 Str, 7 Dex, 5 Con, 8 Per, 8 Int, 7 Cha

2 Throw
3 Critical Strike
= 5 FSP
4 Lockpick
4 Sneak
2 Streetwise
= 0 CSP

Reputation:
2 for all houses
5 for boatman
3 commercium
-5 legion
0 thieves
1) Guidelines and Teron Start
Guidelines:

If you're new to the game, do the combat tutorial.
Don't spend SP unless the guide states that you should do so.
Don't talk to people unless the guide specifically mentions this, mainly in Teron. If you're not sure who you should be talking to, look ahead. It's generally safe to talk to most characters in the game, but if the guide specifically mentions them, that means they might have a special interaction so you shouldn't talk to them until the guide states to do so.
Loot everything and everyone, stash the goods. Don't sell your loot unless you have to. You will get better sale prices with higher Trade (maximum of 4 in the guide).
Keep quest items or important trinkets on you at all times unless you know you won't need them. Which just means you can dump them at the Inn and pick up when necessary. Power Modules are one example of an item that is useful in a bunch of places but serves no purpose being carried around. Thieving tools/climbing kit is also helpful in a few places but isn't used frequently.
Always keep a dagger on hand because it allows you to pick Critical Strike options. Doesn't matter what quality it is, but you cannot Critical Strike in dialog without one.
You can't carry a lot, so store excess at the Inn when you come to visit.
You will get +1 Combat Skills training periodically for certain Body Count numbers/general combat; the bonuses in this guide may be off, as they were based off my playthrough, and Body Count can vary.

Talk to Coltan for an Alchemy increase + 1 = 2 Alchemy, worth 5 CSP.

Equip the Hood. Poison the sword by dragging the poison on to it.
Talk to Neleos, accept the first mission. Go shopping if you need to, but there shouldn't be anything you need. Use Dexterity + Critical Strike on the mercenary.

Equip the sword. Throw the net if you're having trouble. This encounter is especially tough because you don't really have the skills for combat. That will change much later in the game, so deal with this for now. Easiest way to win the fight is to target the head with the sword, reload if you fail. Maybe throw in a power attack after you net the enemy. + 1 = 6 FSP.

Loot everything, leave the room + 18 = 18 GSP. Don't leave for Feng's yet.

Exit the building, talk to Fulvio for some useful training + 15 to Ranged training.
2) Meeting Feng and Looting
>>HARD SAVE HERE<<

Go to the Inn. Talk to the Alchemist, get his starter kit for 50 gold. Talk to the Storyteller and use the Intelligence option.

Talk to the Innkeeper, get a room for 100 gold. You can ask him about some of the other topics if you like. Lockpick and Sneak everywhere you can at the Inn +17 = 17 CSP. Don't try to disarm the trap on the second floor as it will probably kill you (you can survive only with full health). Store everything you've stolen so far in your room on the second floor.

Go to the Blacksmith, talk to him. Climb into the window at the back of his house. Examine everything for some training and some materials + 1 = 2 Crafting, worth 5 CSP. You also get some SP + 8 = 25 CSP.

Increase Streetwise from 2 to 3 - 10 = 15 CSP.

Go to Feng's. Use Streetwise to see through his deception + 2 = 17 CSP. Take his quest, pick the Assassin option + 12 = 30 GSP.

Now go to the Tavern and talk to Lucius. Pick Streetwise and Perception + 2 = 19 CSP.

Go south of the Tavern. You will run into two con artists. Use the green options, then let them go + 2 = 32 GSP.

Note: Thieves have the option of making Livia work in Cado's Tavern and get some training to boot. You can meet Livia later on working for Levir, so it's fine if you let her go. Keep in mind that characters with portraits are generally more important than others. You can also kill Livia and her cohorts, so that's a thing you can do with little consequences.

Go to Barracks/Boatmen, then a little north to a small graveyard. Grab the tools off a nearby Dead Body. Talk to the Undertaker if you want to. You can leave talking to him for before you leave town.

Go to the Palace, talk to Dellar to get his quests then talk to him again to get training after a Charisma check +5 to Sword, Dodge, and Critical training. Very nice indeed.

On the way there you will see a town square with a bunch of people. Walk into the scene. Keep the preacher talking for some reputation and background information + 1 = 3 House Crassus reputation. Dissuading the preacher does nothing. Trying to trick him won't work without 9 Charisma.

Near the Palace is a place house you can interact with the front door. Increase Throwing from 2 to 3 - 6 = 0 FSP, - 4 = 28 GSP. Wait until dark, throw the hook, loot everything + 2 = 21 CSP, + 2 = 30 GSP.

Adjacent house has an open window to climb into + 1 = 22 CSP. We'll come back here much later.

Go to the Outpost (mine) on the world map, then immediately go to the Bandit Camp + 10 = 40 GSP.

Return and head to the city gate (you should spawn next to it). You will see some refugees trying to enter. Talk to the refugees and ask for ten times your investment. You will find one of the refugees, Aemolas, in the Merchant Plaza, but don't talk to him yet.
3) Sneaking into the Teron Palace
Increase Etiquette from 1 to 3, Crafting from 2 to 4, and Sneak from 4 to 5 - 22 = 0 CSP, - 33 = 7 GSP. Go back to the Palace and try to find an alternative way in.

Important Note: When you Critical Strike foes in dialogue, you get +1 Critical Strike training in most situations.

For maximum gain, do the following:

Talk to the guard. Streetwise.
Lockpick + 1 = 1 CSP.
Sneak around back.
Check out the tower.
Critical Strike +1 Critical Strike training.
Go back and sneak into the guard house.
Look around, then Lockpick + 1 = 2 CSP. Take it and go back.
Go out of the guard house, then back to the original entry point.
Throw the hook, then climb up.
Critical Strike +1 Critical Strike training.
Jump down the bedroom. Examine the room + 5 = 7 CSP.
Sneak past the guard.
Go right + 1 = 8 CSP.
Go to the gallery.
Do not roll under the gate, stay there. You will figure out some stuff and get a scroll +10 = 18 CSP. You can't read the scroll yet, so don't worry.

Meet Antidas + 18 = 25 GSP. Show Antidas the map. Choose Etiquette, get the reward + 18 = 43 GSP.
Use Charisma to ask Antidas more about himself for training +1 = 2 Lore, worth 5 CSP, + 5 = 23 CSP.

It's possible to get enough reputation to get some training later without pledging to Antidas, but it requires wasting a power core early in the game. You don't want to do that, so whatever.

Pledge yourself to Antidas, Etiquette Reputation Aurelian = 0, Crassus = 1, Daratan = 9.

You should now have 43 GSP, 23 CSP, and 0 FSP. There's far more to come though.

Note: You have a major decision to make here. You can either continue to work for Daratan or work for the Aurelians. Doing the latter skips Teron content and changes how things play out AND you also get less SP. I advise to continue with Teron, which requires doing the following sections and then killing some spies. If you want to go Aurelian early, you will want to do the Assassin mission first and then join with the third spy instead of killing him. You will still have the option of siding with the Aurelians and getting all of their content without leaving Teron early, so there's no real reason to do this.

Dump your loot at the Inn.
4) The Outpost and the Bandits
Increase Persuasion from 1 to 3, Streetwise from 3 to 4, Lore from 2 to 3, Swords from 1 to 2 - 23 = 0 CSP, - 17 = 26 GSP.

Optional: Go to the mine, you can approach the gates and tell them you're a loremaster. You will get a bit of lore about the power core, but with only 3 in Lore you will fail to do anything with it. This is fine. Fixing the mine immediately sends you to the next city and ends Teron early.

Note: You will get more SP by killng both the bandits and the Aurelians, but you will miss out on reputation, Word of Honor, and a few other benefits. I suggest killing both groups if you are going for a primarily combat-oriented character.

Talk to Esbenus at the Bandit Campt, suggest negotiating, then exhaust his dialog choices for a bit of lore. Return to Dellar via dialog option.

Now you can do some asking around for an extra FSP. You can ask the Innkeeper and the various merchants about who supplies the wine to the Aurelians at the Outpost. The merchants in the Merchant Plaza will tell you it's a guy in the Shanty Town if you pay 50 gold.

Heal (via healing salve) and go talk to Rhaskos in Shanty Town. When prompted, ask why you even need him to initiate combat. Kill him with a combination of fast strikes, running back to let the poison do him in, and netting him + 1 = 1 FSP. This battle can be challenging for a total combat newbie, but persist and you will win.

Go to Dellar, Intelligence success to suggest using the bandits against the Aurelians. Go back to Esbenus, tell him to attack the outpost, use Streetwise. When prompted, give Esbenus the money + 1 = 1 Word of Honor, + 1 = 1 Module. You will lose that gain pretty soon though. Loot the place. You will return here much later to gain even more SP and better rewards. Report back to Dellar to collect his final reward + 24 = 50 GSP, House Daratan reputation = 15.

Note: There is another way to get Word of Honor for an Assassin but it requires letting a spy go free, which later leads to an assassination plot against Antidas. So I wouldn't recommend doing that, and you'll get some bonus FSP for killing the spy.
5) Loremasters and Other Business
Go to the Merchants Plaza, talk to Aemolas. Get your money back and don't press him to pay you back. Ask more about his village, then get his quest. Word of Honor of 1+ is required to get that quest from him. Agree to do it + 3 = 53 GSP. You won't do this until Maadoran as it's pretty challenging. Doable though with bare minimum stats if you know how to do it.

Talk to Cassius at the Inn. Lead him to an abandoned house, then Streetwise. Do not kill him. Go back to Feng and tell him Cassius is no longer a problem +2 GSP, 55 total. Then use the Alchemy option. Ask Feng about himself for some training + 2 = 3 Trading, worth 15 CSP. Feng will also tell you how to get to the center of the Abyss; otherwise you need Perception of 8, which you have.

Go back to the Palace and talk to Antidas. Then talk to him again and keep picking Streetwise + 3 = 58 GSP, +2 = 2 CSP Daratan reputation = 13, - 1 = 0 Word of Honor reputation.

Talk to Cassius next. Ask him questions, then ask him to teach you + 1 = 4 Lore, worth 10 CSP, + 5 = 7 CSP. Make sure to ask him about the painting in the Aurelian palace to initiate a quest. Now we need to go around and collect as much left-over SP as possible.

Go to the squatter's tower north of the Boatmen of Styx. It's inside the outer wall of the city. Go inside, investigate the wall, proceed, come out, then Streetwise/Trade + 2 = 60 GSP.

Go back to Feng's house and his back room door should be open. Examine everything for some training + 20 = 27 CSP.

Time to gear up for combat. Increase Alchemy from 2 to 4 - 20 = 7 CSP. Go talk to the Blacksmith. Get his schematics for swords, light metal armor, helmets, and shields. Also get 2 pounds of wood. Buy a Sharpening Stone.

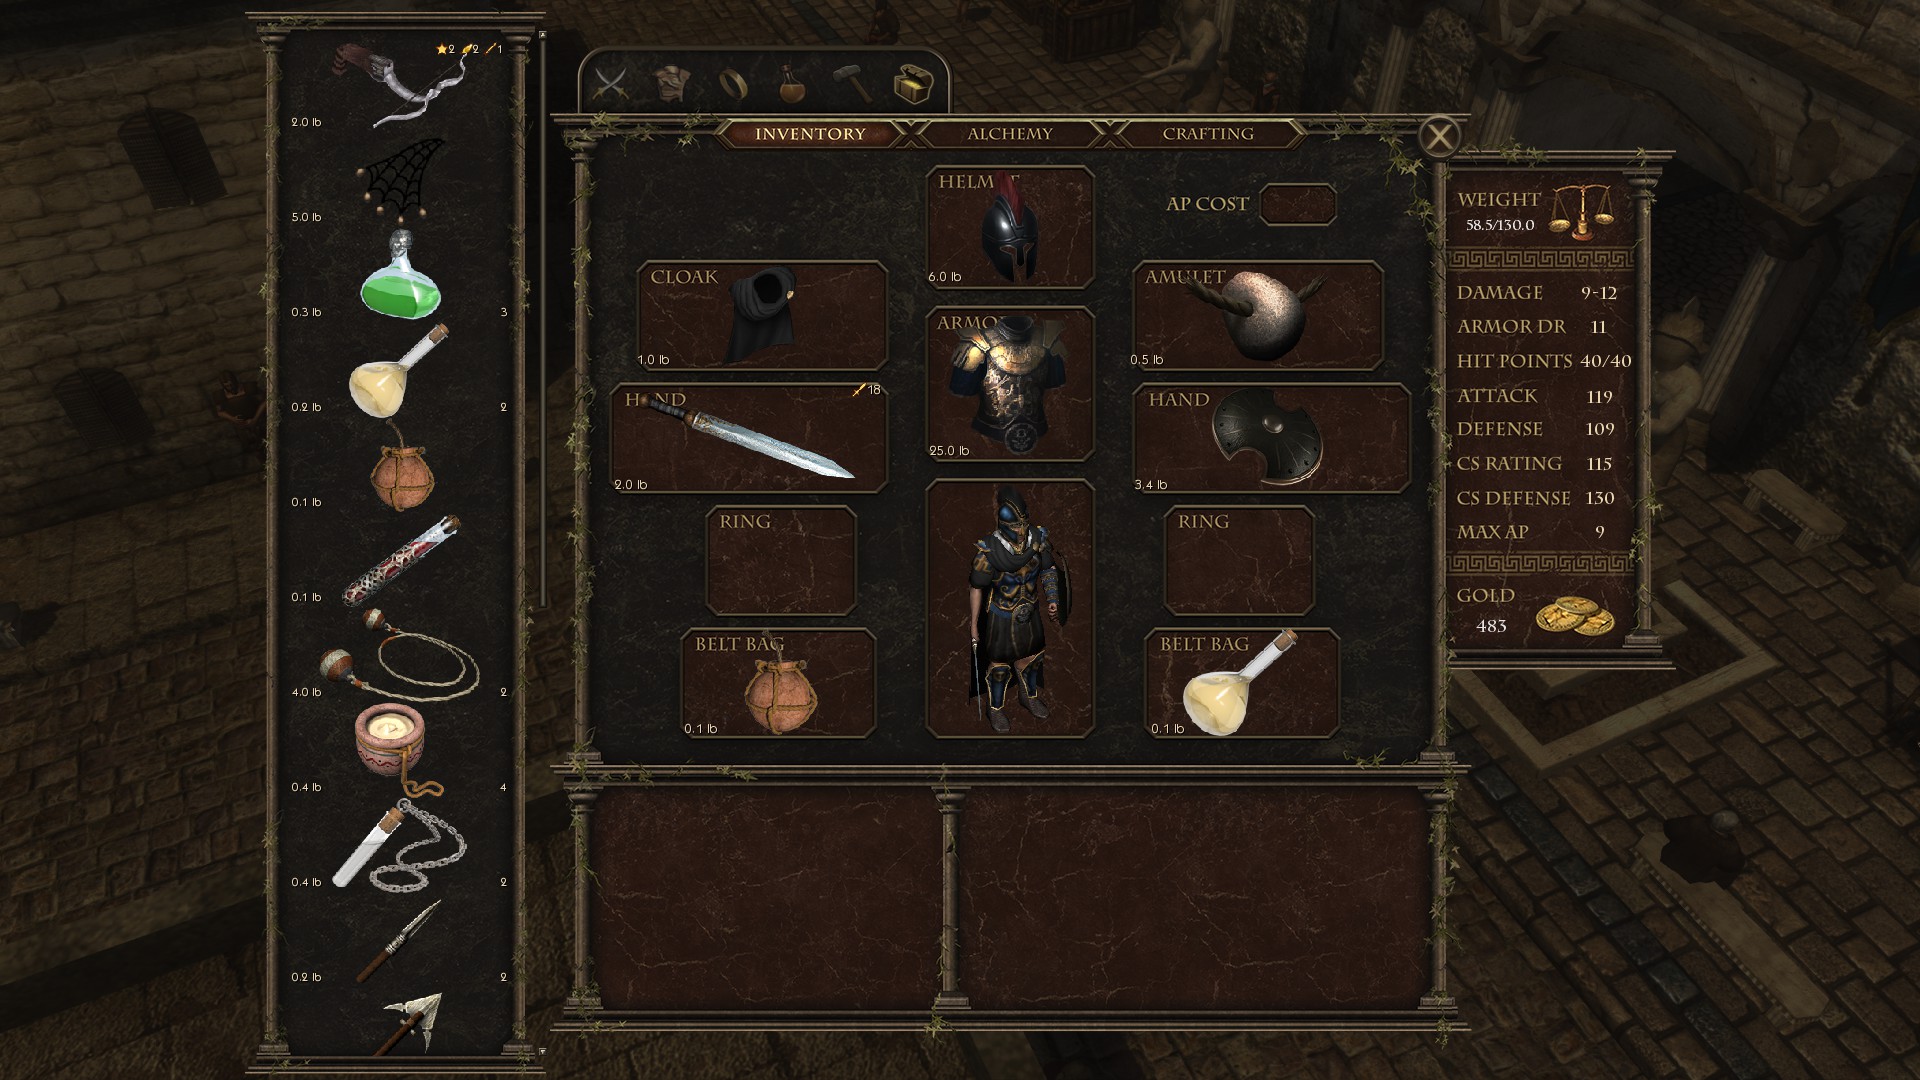
Go to the Inn and get all your iron stuff. The Praetorian armor you have, keep that, it costs more than the other pieces. Deconstruct the rest and also deconstruct the buckler you started with.
    Make an iron set of:
  • Legionnaire Helmet with masterwork and hardened
  • Buckler with masterwork and lightened
  • Gladius with balanced and hardened.

Make poison with a Kadura Leaf, then poison the Gladius you made. Use the Sharpening Stone on the Gladius. Then heal up. Put on the Praetorian Armor and bring a Net. You can make Healing Salves with Cassava Root if you need to.


Note: Ignore the Manica in the screenshot, but you can make one if you like. It's a decent item, though the AP bonus of it is wasted, and you will want better protection. If you're using a shield, you generally want to wear heavier armor, as Shield defense rating includes a flat bonus to account for wearing armor, unlike Dodge.
6) Other Teron Business Cont.
Go back to the Boatmen, then initiate the next Assassin mission. You will have to kill three spies, at first two, then another one.

Go in the house, talk to the spies to get closer to them. Kill the woman with the hand crossbow first by using fast strikes. When the third shows up, Persuasion+Charisma to get his documents, then kill him anyway for bonus SP + 7 = 11 CSP, + 3 = 3 FSP. The third spy is tougher than the first two, so throw a net at him. You will take a hit with Word of Honor - 1 = - 1 Word of Honor reputation, but you will fix that eventually. Never trust an assassin. Leave to get your reward + 18 = 78 GSP, + 5 = 8 FSP, + 1 = 4 Critical Strike, worth 10 FSP. As a sidenote, how would anyone know you didn't keep your word when all the people there, except the main character, are dead? Questions.

Go to Shanty Town and approach the kebab salesguy, but make sure you have at least 200 gold on you. Get a kebab, then run after the thief. Use Assassin[/b] to pass the check + 2 = 80 GSP, + 1 Critical Strike training[/u]. You don't get to enjoy your kebab. Soon you will run into some armed guards. Pay them. If you fight them, you'll be in for the toughest fight of Teron. Winning will just get you kicked out anyway. Congratulations, you just got away with actual murder.

Go the Tavern and go west. There is an alley with some thugs, approach. Critical Strike their leader, then focus on the hammer guy, head or artergy strike him, as he can damage your armor. The other two guys won't be doing much to your armor after that, and kill the dagger wielder next + 1 = 10 FSP, + 1 Critical Strike training. Heal, as we're about to fight again soon (brew a Healing Salve and dump any luggage you don't need).

Get a bomb, you should have found one at the Outpost, and craft some poison. Go to the Blacksmith and purchase 6 lbs of wood, then craft 3 hand crossbows. Purchase 30 barbed arrows, poison then, then load all the crossbows with the barbed poison arrows. Equip all three crossbows, you won't need a shield or sword, and put the bomb in your pocket. Quicksave. Go to Merchant Plaza and talk to Miltiades at the east entrance. Go along with his scheme, then pick the option to fight. The two opponents are quite challenging for you right now, but that's why you brought a bomb. Equip a bomb before the fight and throw it. When the guy with no shield drops to the floor, hit him in the artery once with barbed poison arrows, then shoot the other guy until he's dead. Reload if you don't get to go first on the first turn and enter the scene again. If the fighter on the left does not drop after the bomb, reload the fight. Lockpick the nearby door + 2 = 10 FSP, + 1 = 10 CSP.

When you're ready interact with the door and talk to Miltiades. Accept his deal, then use the Persuasion option on the next batch. These guys are harder than the previous duo, and you get more SP talking your way out + 4 = 84 GSP, + 5 = 15 CSP.

Now go find Miltiades near Feng's house for some money. Do not kill him to see him again later.

I won't list the specific SP requirements here as they should be pretty self explanatory. Your goal is to increase Sneak, Lockpick, Traps, and Steal to 5. Start by increasing Steal from 1 to 5 and go from there. You will loot all of the merchant stalls in the Merchant Plaza, steal from the Merchant by the Inn (Steal 4), steal and loot everything left in the Inn (Traps 4), and finally loot everything in the expensive house by the Palace (Traps 5). The same one from section 2. You want to be left with exactly 5 CSP. Increase Impersonate from 1 to 2 - 5 = 0 CSP.

You should now have 12 FSP, 2 GSP, and 0 CSP. Moving on.
7) Assassin Finale / Teron End
Go back and grab all your quest-related stuff and other important items. Talk to Cassius or whoever you like at this point, in case you haven't, to get all the possible lore and background information. This is it, time for the two last Assassin missions in Teron. Once you start these, there's no going back and you will be kicked out from the city. Make your final preparations, including any last minute purchases.

Note: There are some interesting-looking hats and capes being sold, in case you want to get a good outfit going for later and deviate from the guide. Neleos has a nice-looking ensemble if you want to imitate that (Reinforced Leather Armor, which is only available in the second town and on, and a Loremaster's Turban).


Now go around gathering alchemy reagents. Press tab to see item interaction signs. You can find 6(!!) on the bandit camp map and 8 or 9 in Teron. Now buy up all alchemy ingredients (don't buy the salves as you can make those yourself), all schematics, all bolas, all nets, all bombs, all fire vials, and the rest of the sharpening stones. Antidoes are useful in Maadoran, but you can also buy them there. If you have enough, buy 1 or 2.

Dump absolutely everything you don't need at this point at the Inn chest and proceed on to the Boatmen guildhouse. Make sure you have a fire vial, a bomb, and 20 poisoned piercing bolts. Don't bother with armor and shield, you won't need them. If you have those armor piercing steel bolts from earlier, bring those. MAKE ABSOLUTELY SURE YOU HAVE 200 (170 or so should do) GOLD! You will need it for a room in the next town.

>>HARD SAVE HERE<<

The bad news is that the next two missions will have you fighting in merchant robes. The good news is that you'll have friendly assassins to back you up. They're no push overs, in case you haven't faced Dias in the previous assassin mission. You also have a choice to make here to either side with the Boatmen of Styx or side with the Imperial Garrison. This guide follows the former, and the rewards are awesome, but you can experiment with whatever you like. If you side with the Garrison, you can get Carrinas to declare Antidas Emperor. Anyway, make sure to keep the fellow assassins alive. You will want to pick up the following equipment for the next town: Gladius (Steel), Imperial Armor (Steel), and Buckler (upgraded DR 6).

Take the mission, shoot Carrinas. Use the Impersonate option + 2 = 2 CSP, then Critical Strike to loot the body + 1 Critical Strike training. Fight the next group of guards, run to the side of Coltan so Fulvio tanks them, then finish them off with poisoned arrows + 2 = 14 FSP. Should be easy + 18 = 20 GSP, + 1 = 2 Combat Reputation. Agree to the next mission + 2 = 15 House Daratan Reputation, + 1 = 1 Loyalty Reputation.

Kill the two guards like normal by backing away and letting Fulvio tank them, should be easy + 1 = 15 FSP. Reload your crossbows and heal if you have the mixtures, but you won't be getting attacked. The next fight will be a bit tricky, but still pretty easy IF you have the right tools. Try to get piercing steel bolts reloaded as you will need them for the next guy. Throw the bomb followed by a fire vial, then just kill the lighter armored soldier. The Centurion is really well armored and strong, so you may need to spend that bomb to ground him and go for arterial strikes + 24 = 44 GSP, +2 = 17 FSP, +1 Prestige and Combat Reputations, + Boatmen and - Legion Reputation, + 1 Combat Skills training. Loot the two soldiers if you can. Grab that Centurion Helmet. Body armor is worth more than other stuff, so try to grab it as well.

Poor Dias, that guy was very skilled. Agatai was probably too, and he did train you that one time. Final stats: 17 FSP, 44 GSP, 2 CSP. Just for fun, my body count was 20 by the end. Loot the dead. It's time for the next hub.


>>HARD SAVE HERE<<
8) Maadoran Start
Note: Now that you're here, make sure to harvest any plants you come across for bonus Alchemy reagents.

Enter the city and get some SP [+15 = 59 GSP]. Talk to Clericus nearby for some background information. Same with A local guide. Enter the Inn adjacent to where you started and listen to the story. Do not provoke Kadmos yet, you will fight him later. Loot everything in the Inn after paying the Innkeeper. Do not try to disarm the trap, it will kill you [ + 6 = 8 CSP]. Maadoran's fights are way tougher than those in Teron, so don't think you'll get off easy here. Unfortunately, there's a really hard fight coming right up.

Increase Swords from 2 to 4 and Block from 1 to 5 [- 17 = 0 FSP, - 48 = 11 GSP].

Grab a bomb and a fire vial. You should have exactly one of each left, put each in a pocket. Reload your crossbows but keep them in inventory. Put on the Imperial Armor and the Centurion Helmet, wield the steel sword you picked up, and also equip the upgraded buckler you picked up. Make sure the sword is poisoned (use the poison you got from Coltan if you like, but it's the best poison you have access to until end game), but don't use a sharpening stone on it. There are better uses for it. Go north from the Inn to encounter a merchant, follow him. Use the bottom option to ask why the thugs are doing this, then make them pay you with Body Count then decide to kill them anyway. In case Body Count fails, reload and don't bother using it.

This next fight is brutal and may require saving and reloading a bunch. Do not underestimate it and always take the safest bet. If you're having trouble, fast travel to the arena/fort, then get the equipment mentioned later. This will allow you to skip the encounter until you are ready.

First, when it starts, make sure the thugs are in front of you and don't move. If they stay still, throw a grenade at them. If they move, wait until they're adjacent to you and use the neurostimulant. Run back, throw a grenade. Then a fire vial when they're close together. Start spreading the poison around with fast strikes—that's your main means of winning. You can take pot shots with the hand crossbows, aiming for artery, when the thugs are down. When you get to one/two thugs left, try to go for their arms if you can. This mainly applies to the one with the shield. You should survive by the skin of your teeth + 3 = 3 FSP, + 4 = 15 GSP, + 1 Combat Skills training. Fighting them head-on is really difficult, even if you have the skills for it. You get a really awesome unique dagger, The Arbiter, for doing this (+25% to hit, wow!), the best you can find short of crafting your own for a while.

Heal up. Go north of the arena and you will run into a mob. Fight and kill the peasants: Let them surround you and use whirlwind to hit them all, then shield bash the Burly Man. He is the only one that can really damage you, and he can also decrease your DR. This shouldn't be too hard as the peasants have poor weapons and cannot really damage you otherwise + 1 = 4 FSP, + 2 = 17 GSP, + 1 = 2 House` Crassus reputation. Sell off their stuff in the next area, and anything else of similar quality in your chest, as it's trash and you won't need it.

Important Note: Make sure you heal at the Healer at least three times. She will offer you a quest and unlock a new location. Accept the quest but do not go to the Monastery.

Go to the Arena. Talk to the guy and then fight the next two opponents. They should be fairly easy for you—hit them until they die + 2 = 6 FSP.

Go east to the Commercial District. Here you can steal from the merchant stalls + 9 = 17 CSP, and make sure to get all 9 of them as it can be confusing. Take note that there is one stall outside, off to the side by itself, and one stall inside that you cannot steal from yet.

Go to the Boatmen House, talk to the guy out front, get in. Talk to Darista, accept the mission. Talk to Hamza. Then talk to Cyrus for some training + 2 = 4 Impersonate, worth 20 CSP.

Go to Abukar on the third level of his tower and get him to reveal where the Library of Saross is.

Increase Trading from 3 to 4 and Critical Strike from 4 to 5 - 6 = 0 FSP, - 13 = 4 GSP, - 10 = 7 CSP.
9) Palace District and Gear
Find Nasir's shop just a little west of the Blacksmith. Accept his request and go to the palace district. Ignore the hustler trying to sell you a pass, it's a fake. You can buy it and see for yourself if you like. Talk to the guard in front of the palace if you like, he won't let you in, and he will tell you about the fake pass.

The target house is just right of where you spawn in. Killing or talking are not preferred as both get you less loot or lock you out of other areas.

Do note, you can get into the fight, then get into an ambush fight in the slums. The latter is pretty challenging, and you won't be able to access the temple area after. However, if you do this after temple, you will get more SP. The guide does not follow this path.

Choose to sneak in, then Critical Strike +1 Critical Strike training, then get your rewards and return to Nasir + 1 = 8 CSP, + 6 = 9 GSP.

There is a large house with a pool in the palace district. In the back there is an area you can sneak into and some chests you can loot for alchemy ingredients + 3 = 11 CSP.

Right next to the Palace gates you will find Caius. Make sure to ask him for a reward in exchange for helping him. Go into his house and talk to Marcus. Agree to get the armor, but no matter what you say, if you decide to keep the armor without paying him, you will lose Word of Honor. Leave and tell Caius you're still working on it.

Talk to the various merchants in the commercial district if you like as they sell some interesting stuff. The Exotic Emporium Trader has some schematics you can buy, which I recommend doing. The Fletcher does as well and make sure to buy the crossbow schematics. The Farmer standing around has some nice bits of background info, and you can talk Alchemy and Trading with him to help him out.

Go ahead and sell off all the junk you've accumulated, though you may want to keep any steel things you found. Now you want to gear up. Do not spend more than you need by overselling, selling items is more profitable when you have higher Trading. I am going to stop giving advice on how to handle every combat encounter at this point. It's entirely up to you, as you can formulate your own strategies. I will still provide advice on how to tackle some of the harder fights. Recommended equipment starting out is: Dreamweaver sword (purchased from the Imperial Trader, make sure to sharpen and poison it), Mongudai Ordu Armor (purchased from the Ordu Trader), any helmet (I wore a Loremaster's headgear, but the helmet you grabbed from a Centurion a while back is the best), and a Cavalry shield that you craft (Lightened, Masterwork).


These are your current SP totals:
0 FSP, 9 GSP, 11 CSP
10) Arena I and Slums
Return to the Arena and fight the Crossbow Kid (Isatis). Run up to him and fast strike a bunch. Heal and do the next fight with Papa Yochan. Hit him a bunch. Finally you will fight the Desert Raider, the hardest of the bunch (so far). Bring a net and equip it in a pocket. Also go buy a poison antidote from the Alchemy Trader. The Desert Raider will try to hit you with axes at range, then approach. When he approaches throw then net and then finish him off. If he hits you, use the antidote. Finish him whatever way works for you, though I recommend hitting arms + 5 = 5 FSP.

Speak to Basil in the adjacent building. Kill the thugs +2 = 7 FSP, + 1 Combat Skills training and loot them. Agree to help, and don't forget the Trading check. Go north-west and find Quintus on a second floor of a building. He's being assaulted by two thugs, and these guys are harder than the previous duo. If you go first, try to take them one at a time and go for the arms. If not, try re-entering the fight. You can also bring a net or two for added sanity. Kill the thugs assaulting him + 2 = 9 FSP. Go back to Basil and get your next lead + 6 = 15 GSP.

Heal, repair, and go talk to Kamnebi near the gate. Go with him and stay for the fight. It's pretty easy if you don't rush into the middle of it + 1 = 10 FSP. Loot, talk to Red Gracchus for a crossbow, leave, then talk to Kamnebi for some training + 15 = 26 CSP, + 5 Block rating.

Increase Lore from 4 to 5 and Block from 5 to 6 -10 = 0 FSP, - 10 = 5 GSP, - 20 = 6 CSP.

Go to the entrance to the slums, west of the Arena. Talk to the Beggar then talk to the Youth standing nearby. Get his quest, use Trading. Seems a little odd, eh? Make sure you're healed, have 100 gold, and ready for a fight. Go with Leon and his thugs, then follow them again and kill them + 2 = 2 FSP.

Immediately fast travel back to the Entrance and re-enter the slums. You want to go south, to a well, immediately upon entering. West has a fight you're not ready for. Talk to the Beggar, get his quest. Examine the well, go right, left. Explore and get the loot + 2 = 3 Modules. Interact with the Respirator via right clicking it, insert a Module - 1 = 2 Modules. Leave, talk to the Beggar and pay him 100 gold + 1 = 0 Word of Honor reputation.

Now go south again to face Mehrab and his Blades. They're actually not that hard if you're prepared, so fight them, and upon entering combat, run back next to a pillar and let them surround you. Whirlwind them and then mop up + 3 = 5 FSP. The guy with the diagonal reach is probably the most dangerous foe here as he can actually damage you, so reload if you need to.
11) Abyss and Library of Saross
Past the area where you fought the Blades you'll see an entrance to the Abyss.

Talk to the Old Man if you like for a bit of lore. You can buy the amulet he sells; it's useless, but it's a cool neck decoration.

Enter the Abyss. You can't really fail here, but do use the breathing apparatus when it asks you to. Eventually you will arrive in a chamber, and after a bit of cryptic exposition you will be able to leave + 30 = 35 GSP. You cannot really do anything else in the chamber for the moment anyway.

Time to explore a bit. Go to the Alchemy merchant in the commercial district and buy an antidote. Make sure you don't have poison in your inventory. Head to Saross + 5 = 40 GSP.

Talk to the Prospector. He will try to poison you. Kill him—the funner way is to poison him back, but you don't get anything for it really. I recommend doing it at least once for some interesting conversation (bring poison with you). Killing him gives you some SP + 1 = 6 FSP, + 1 Combat Skills training. Examine everything, you will get three new locations added to the map. Interact with the generator, you won't be able to repair it. On the way back to the stairs you will notice a hidden switch. Interact with it to learn that it needs power. You received 3 Rock Oils from the Prospector. Do not use them for anything, you will need them to finish restoring power to the generator when you come back here much later with 8 in Craftng.

Now go back to the world map and enter the three new locations: Zamedi, The Arch, Inferiae + 15 = 55 GSP.
12) Becoming an Aurelian Praetor
>>HARD SAVE HERE<<

The time has come to move on with the story quests to get some better equipment and skills. Increase Block from 6 to 7 and Swords from 4 to 5 - 6 = 0 FSP, - 44 = 11 GSP.

Go north in the arena district and into a house. You will find Domitius. Talk to him + 18 = 29 GSP. Go with the guards and talk to Gaelius. Pledge yourself to him and sever your ties with the Boatmen.

Travel to Darius' Tomb + 5 = 34 GSP. Explore the Tomb, on the way back ask the raiders to help you push. Go in, don't tell the raiders to touch anything. Just fight and kill them by backing into a corner and fighting them 1-2 at a time. Note: You may want to wear the Imperial Armor (Steel) for this, submitted by Anomandaris Dragnipurake + 3 = 3 FSP, + 1 = 3 Combat reputation.

Darius' Armor is really good. Put it on. There is a container you can loot after dealing with the bandits that has a lot of gems that you may find valuable. It's in the area they initially won't let you go in, at the far end of the tomb.

When you return to Maadoran, grab a few nets and provoke Kadmos at the Inn. He has a really, really good stuff that you will want. Go for fast strikes against him—throw the net first, then lay it on him. He will recover any poison you put on him, but it may still damage him for a turn. Just chip away with fast strikes and you should survive. He's no slouch and may take a reload or two + 3 = 6 FSP. Use his shield and helmet from now on, they're excellent. You are now equipped with the best armor you can get at the moment; only the powered armor remains.

Buy an antidote (just in case) and craft 2 more healing salves. Go to the Boatmen, talk to Hamza, and begin the next quest. Look for a guide, Critical Strike + 1 Critical Strike training. Then fight the two enforcers. They are tough because you are wearing rags, but doable. Fast-attack DPS the one without a shield. Use the antidote if you get poisoned. Target the other guy's arms and kill him + 2 = 8 FSP. If you have issues with this fight, bring a bomb (make it) and use it, but it's very doable without if you get a little lucky. Heal, put on your armor again, and move on.

Examine the brickwork and wait. Critical Strike the thieves and you will fail, but that's okay + 1 Critical Strike training. If you kill both with higher Agility, you will get another CS training point. The three left aren't particular challenging with your full armor. Just fast strike them when you can and they should go down + 2 = 10 FSP, + 1 Combat Skills training. Talk to Levir if you like, but don't accept his proposal. Owning Levir means he will ask you to kill Gaelius later--if you are an Assassin.

In the western room you'll find a small examination point (tab to see it). You have to hover your mouse around it to get an interaction.


Use Intelligence+Crafting to finish the mission + 18 = 52 GSP, Boatmen of Styx reputation = 14. Go back and talk to Hamza twice; exhaust his dialog for some training in Critical Strike, which you already have at 5 + 15 = 25 FSP, + 1 Combat Skills training. If you talk to Hamza and get training with Critical Strike of 6, you will instead get + 10 Critical Strike training. It's arguable which is better, but I think it's best to get the FSP if you do not want to increase Critical Strike beyond 6; you can spend the points on something other than Critical Strike, or not. For a dedicated Assassin character I went with +10 CS, but I recommend taking the FSP to follow this guide.

Now go back to the Palace and speak with Gaelius. Do not give him the helmet + 24 = 76 GSP,
+ 3 = 1 House Aurelian reputation
. Accept his next task and speak with Senna.
13) Arena II
Note: While fighting in the Arena you may want to go in as light as possible to get all the possible loot from fallen enemies. Some of them have named items, so don't sell stuff off carelessly.

When you're ready go and fight the Barbari. Try to quickly kill off one, then the others + 3 = 28 FSP.

Nicander is a lot like a weaker version of Kadmos, but he will try and net you. Just strike his hands/fast strike him until he dies + 3 = 31 FSP, + 1 Combat Skills training. Increase Block/Dodge from 7 to 8 - 30 = 1 FSP.

Bendidoros is next, and he's pretty easy. No real gimmicks, easy win + 3 = 4 FSP. Sarpedon follows. With your new weapon skills he should go down easily to arm/torso strikes + 3 = 7 FSP.

You should be good enough to take out the two Ordu without much trouble. Rush the swordsman, go for arms, then legs, then finish him off. Then the archer + 4 = 11 FSP, + 1 Combat Skills training, + 1 = 4 Combat reputation.

The Butcher is the next one, and he's not a walk in the park. I would bring a net or two and try to fast strike him to death, hitting arms when possible. Aside from that, he's not particularly special + 4 = 15 FSP.

Grab a bolas and a hand crossbow (load with a poisoned barbed arrow) for Mack The Knife, who is next. Don't underestimate him, as his knife skills are really something. Throw the bolas to keep him from dodging, then shoot his artery with the crossbow. Finish him off with your melee + 4 = 19 FSP.

The Triarri are your last Arena fight before the champ, Al Sahir (Yazid). The champ is on a whole other level from everything else in the game so far, so you will come back to him later. There are three Triarii, and they are all easy to hit. Problem is they are wearing heavy armor and can easily overwhelm you with their weapon skill. Go in as light as possible for when you have to loot them. When the fight starts, run all the way back to a corner of the arena. Focus on whirlwinds and body strikes. If you're having trouble, bring fire vials to give you some space and damage them. Nets also help, but are not really required. Their armor is worth the most, so make sure you grab that if you can + 5 = 24 FSP, + 1 Combat Skills training.

Increase Swords from 5 to 6 - 20 = 4 FSP.
14) Slums Revisited and Aemolas' Gold
Heal up and go to the slums. Head west to run into three Thugs and Miltiades. Fight—you should be good enough to win. I wouldn't sharpen my weapons or use poison if you're out. Fast attack the enemy with a poisoned sword and the other with the crossbow, leave the shield for last. Talk to Miltiades and accept his next con + 2 = 6 FSP. Agree to kill the men and do so for a very easy fight + 2 = 8 FSP, + 6 = 82 GSP.

Time to deal with Hermon and his droogs. This battle is really tough, primarily because Hermon can damage your armor and make it easier for the other thieves to damage you. If you do not take armor damage before killing Hermon, which is possible but hard, you should have no problem mopping up the rest. When they net you is when you're going to have an issue, as that can throw off your entire battle plan. I would bring a bomb and a fire vial or two to make your life easier (craft them), run back, throw them at the incoming thieves, and then just mop up whoever is left with a combination of whirlwind and fast/arm strikes. An extended neurostimulant will also help, so craft one of those. The thief with the hand crossbow also has a hammer, so take him out quickly. Phew..
I reached 100 Body Count here, for reference + 5 = 13 FSP, + 1 Combat Skills training.

Time to help an old friend. Travel to Aemolas' village. Parlay with the raiders then just fight and kill them. This battle would have been hard back in Teron, but now it's pretty doable. Use whirlwinds/body blows/fast strikes, and watch out for the spearmen. They will do the most damage and will try to kite you. You don't really have a choice in the matter, so take them out last + 3 = 16 FSP, + 1 = 6 Combat reputation. If you're having issues, parlay with the bandits, then run to the one tile barn entrance nearby to take them one at a time. They have some equipment, which I would just turn into crafting material at this point. It's garbage. Interact with the well and return to Aemolas to give his cut + 6 = 88, + 2 = 2 Word of Honor reputation.

Heal. If you're running out of sharpening stones, don't worry, you're about to get five more. But you won't really need them that much for the next few fights, so you can do without sharpening for now. Now make your preparations, then return to the slums until you encounter Neros' Drinking Hole.

Note: If you have not talked to the Youth from earlier, near the entrance to the slums, he will disappear forever and you will not get his quest upon talking to Neros. So go back and talk to him now if you have skipped him. Thanks to DJ Raptor for submitting this one.

Use the first Traps option while talking to Neros, then Trading, then kill him and his two bodyguards. It's a very easy fight compared to what came before + 2 = 18 FSP.

Go to the temple district, and after a short conversation explore it. The traders here have lower quality merchandise compared to others, but the items are still pretty good. Buy them or not, up to you. One Trader will sell a mechanical eye—buy the eye and take it to Abukar for a bit of lore. Go back to the temple district and talk to Clemens to have him install the eye for you. Ouch.

Go to the noble district and examine a door for a Calvus Home. That's your next stop, but be ready for an easy fight. Flee before the guards show up. You can talk your way out of this, or pay, but it isn't particularly worth it + 1 = 19 FSP, + 6 = 94 GSP.

Increase Lore from 5 to 8 - 74 = 20 GSP, - 6 = 0 CSP. Head back to the Abyss, read the background information in the bookshelves. Power up the machines twice for some more background information and then shut down all of them + 30 = 50 GSP. Powering up all of the machines leads to Maadoran getting destroyed and you dying (you need Constitution 7 to survive and gain an ability, but I don't think this is worth it unless you plan to exterminate everyone in a playthrough). Talk to the Old Man near the Abyss. Return here later to see the Old Man peddling a demon.

You should have a large pile of gold at this point, so go to the mercantile quarter, talk to The Curio trader, use Trading, and buy both of his items [+ 1 = 3 Modules]. You can also buy out Zeb in the temple district. Leave the rest of your gold (1300+) for Haran's Pass, which you will visit soon, as you will want to buy a few things there.
15) Inferiae and Lost Magic
Increase Persuasion from 3 to 5 and Streetwise from 4 to 5 - 50 = 0 GSP. For now run back to Abukar and ask him why he sealed Saross to get an item from him; you won't be using it though for bonus SP—but it's nice to have alternatives.

Heal. Make sure you have 2 healing salves. If you have a sharpening stone left over, use it if you need to. Once you are in Inferiae, proceed ahead, talk to Azra. You'll see an Intelligence option, don't pick it. Keep asking her questions. Don't tell her to have hope, tell her that everyone needs something (the bottom response), and you'll see a Persuasion or Intelligence prompts. Use either, then ask her how she got across, then you will get a Charisma success. Azra will tell you about Al-Akia (or maybe the Ziggurat, I am not sure), where you'll go later. You can now ask A local guide in Maadoran about her by asking about the witch. She was a cold-hearted killer, still is, so do not feel bad about what happens later on in this guide. Inferiae is a bad place. Agree to go to the pit now or later (talk to the guards). Do so.

Once in the pit talk to the host, the demon, and persuade it to help you. Exhaust all the dialog options, but DO NOT kill the villagers with the shock. The demon will teach you how to use computers.

Click the combat button/press the space bar to initiate combat. Make sure you're in a good position. Torso attack the demon until it dies; it should go down pretty quick + 3 = 22 FSP, + 1 Combat Skills training, + 1 = 7 Combat reputation. Heal up and loot the demon. Increase Critical Strike from 5 to 6 - 20 = 2 FSP.

Come back to the entrance, where you started in the tower, and climb above via the grappling hook. You can find a grappling hook on a dead body nearby. You will fail the Sneak check. Kill the two guards and leave + 12 = 12 GSP.

Make sure you have three power tubes now (Modules), and you should, as you are about to get a Ghost Hand. Heal up, get about 30 iron barbed arrows, a hand crossbow, and then return to Inferiae. Go up to the center and try to interact with it, trigger the fight. This fight is pretty easy, just don't waste your main weapons (which should be sharpened) on the villagers. Keep a line of them in front of you, and crossbow them with barbed arrows instead. When Azra gets closer she'll acid your armor—try to snipe her and her warriors with poison/barbed so that you can wittle them down. They are the only combatants that may pose a danger to you. If you manage to down Azra before she throws acid on you, you will score three bottles of really high quality acid. All in all, pretty fun fight + 2 = 4 FSP.


Jump down the hole at the center and go through the shimmering portal that you left behind the last visit + 12 = 24 GSP. Do not remove the Large Module from the thing next to the portal as you won't be able to come back here, in case you wish to. The Large Module allows you to enter the Mountain Facility through the well in the slums, but there is another easy way to get there. And there's also another Large Module you will get in a little bit. Grab the Ghost Hand and power it up with three Modules - 3 = 0 Modules, then read the message next to the dead body. Leave via the elevator to see a very interesting big of information, courtesy of your mechanical eye.
16) Haran's Pass and Ordu
Once you depart for Haran's Pass, you won't be able to come back until your task is finished. Make sure you have at least 1300 gold on you, though I'd bring more (~1800) since you can buy other useful stuff there (sharpening stones, nets). If you've been following this guide, bring 2-3 fire bottles, two bolas, and some healing salves. For maximum safety also bring a bomb. Go when you're ready + 5 = 29 GSP. You can basically say whatever you like as it won't change the outcome. If you pretend to be a Loremaster, you will need to sneak out at night, or not. If you use Body Count, you can just go right on through. My favorite way is thus: Pretend to be a Loremaster, wait until dark and approach the guards, fail to bribe them by having insufficient money, then fast-talk Bass in the morning.

Talk to Ramirus and buy all of his items. Buy all you need from the Quartermaster. When ready push the travel button and move to the Ordu encampment. There are several alchemy reagents scattered around that you can pick up. Do so, there should at least 5, as you won't be able to come back again.

Speak to Thorgul in the big tent. Calm him down. Exhaust his dialog, then talk to him again to find out about the Keeper of Tales. She is in the tent on the other side of Belgutai; talk to her and ask about everything for some very interesting insights about the past + 2 = 2 CSP.

Fight Bogutai. He has excellent Dodge and Sword skills, and you won't survive a direct confrontation with him. Throw a bola (his neck for maximum entrapment), arterial strike him with a crossbow. If you get a lucky critical, you should be able to win this easily. Step back. Let him get close. Reload crossbow, fast strike him twice. Push him back with shield, throw bola, arterial strike. Finish off with fast strikes. You may need to reload once or twice or throw a bomb at him to really keep him down + 2 = 6 FSP, + 1 = 8 Combat Reputation.

Note: You can go the non-violent way and still succeed, but fighting gives more experience. If you decide to sit out the battle and come back, you will find with a Grooved Sphere exactly like the one you have on the body of Bass. Just a neat little thing.


Heal to full and talk to Thorgul. Agree to blow up the powder kegs and you will get into a confrontation with Bass and some other soldiers. This fight is fairly challenging. Strike Bass in the head with your sword then run to his left (his left, your right). Whirlwind next round, then throw a fire vial. Body strike the guy adjcent to you. Repeat once more. The archer is the most dangerous enemy here and he will ruin your day. Hopefully you can kill the three men and make your way to the archer before bleeding out. Use nets if you need to + 2 = 8 FSP, but you won't really have the AP.

Finally return to Gaelius in Maadoran for your reward + 30 = 59 GSP, + 10 = 11 House Aurelian reputation. After you are able to move again, go and pay a visit to the third floor of the Palace. You will find Erebus, the Loremaster. You can speak to him about a variety of topics, and ask him about a few items, and you will finish the The Grain of Truth quest here + 6 = 65 GSP. Before you leave make sure to ask about training + 10 CSP = 12 CSP, + 1 = 4 Etiquette, worth 10 CSP.
17) Zamedi and the Arch
Increase Streetwise from 5 to 7 - 12 = 0 CSP, - 38 = 27 GSP.

Go to where The Curio trader is in the commercial district. Adjacent to him is a two-story house with a door you can enter. It's hard to spot, and for your trouble you will find Tiresias. Use Streetwise to get a Large Module. Pay him 250 gold to get training + 15 = 15 CSP.

Head to the well in the slums, make your way back to the underground chamber. Use the Large Module to open the portal to the Mountain Facility and go through. Examine the shelves, then examine the nearby vats for an expired Medical Canister. Go to the opposite end, lockpick the lockbox, and then use the machine, increase Constitution Constitution = 6. Alternatively you can increase Dexterity or Strength with no real downside, but you will soon lose 5 hp, so this is preferred. Read up on all the background information. In the well go left at the initial fork, then examine the body, to get a gem.

Heal up, fix your armor, etc, make sure you have the item you received from Gaelius. Travel to Zamedi and enter through the portal. Talk to the guardian and agree to do what it asks. When you arrive, examine everything there for the Mysterious artefact and a whole bunch of alchemical reagents. On the second floor you will find a terminal with a lot of information on it—don't bother trying to hack the Ziggurat portal. Even with the right stats you need information from Meru's library in order to access it, and doing so locks you in to the end game. You have already been to the Mountain Facility.

Return to the first floor. Asking questions and then killing the guardian gives you a lesser reward, in my opinion (- 1 WoH, + 5 FSP, + 1 Combat Skills training). Do this instead: Give the guardian the ring back immediately. Ask him why he has to kill you. Then pick Streetwise to make a new friend and get a lot of background information + 12 = 39 GSP, + 10 = 25 CSP, + 1 = 3 Word of Honor reputation. There is more to do on the bottom floor, but you will need to come back here another time. Looks like the men outside weren't as fortunate, so don't forget to loot them for some gems and gold.

Travel to the Arch. You'll run into your old buddy Esbenus and his merry band of slavers. There's nothing else to do with Esbenus after this, so go ahead and kill him either in the first conversation or by paying and then initiating combat. They are really easy + 3 = 11 FSP, + 1 Combat Skills training. I do think his version of the upcoming interaction is more interesting. If you leave Esbenus alive, he will appear in the ending slides.

Have a chat with the Oracle, but don't show him your mechanical eye if you want to have a lot more conversation. Pay 100 gold for even more conversation. Either way, approach the Arch. Make sure you have the powered up Ghosthand, turn on the Arch, and start sacrificing believers for information. Do NOT enter it. Use Streetwise when it calls for it. Shut it down when finished and leave + 12 = 51 GSP. You will come back here later.

Return to Gaelius for your reward + 30 = 81 GSP, + 5 = 16 House Aurelian reputation.
18) Arena III and Monastery / Maadoran End
Time to take care of some final business. Increase Sneak, Steal, Traps, and Lockpick from 5 to 6 - 25 = 0 CSP, - 55 = 26 GSP. Now go rob everything left at the Inn and the merchant stands + 8 = 8 CSP. You will also get to rob stuff back in Teron pretty soon along with Ganezzar.

If you've been following this guide, you should have no problem with the next section. Heal up. Go to the Monastery + 5 = 31 GSP. Talk to the raiders, then try to push the leader off a cliff to initiate combat. They shouldn't be too tough as the archers can't penetrate your armor unless they get a lucky crit. Mop them up one at a time from a nearby one tile tree-cliff area. Or whirlwind them all, up to you + 5 = 16 FSP. Killing all the villagers and the bandits gives you only + 4 FSP; saving the village gives more SP and you get to trade with the villagers for some sweet alchemy supplies. Make sure you buy everything you need from the Elder (all of it, really) and loot the raiders before proceeding to the next part. You can also just sell the raider stuff to the Elder.

You have a couple of choices here: You can go and grab the extract from the forbidden area (being kicked out of the Monastery and unable to return), you can simply go back and tell the Healer that you didn't find anything (which leads to no reward), or you could slaughter the village (press space/initiate combat) for 2 FSP and then get the extract for 6 GSP. You can choose now or come back here later, but for the sake of the guide, I'll leave this one up to you for the moment.

Let's take out the Arena Champ. You won't be fighting him directly, since he uses Alchemy really well. Here's a way to cheat. Go back to Maadoran and if you've been following this guide get the following: 2 bombs, 2 bolas, 1 neuro stim, 1 antidote. If you have the 3 acid vials from Azra, get those, otherwise craft three acid vials.


When the fight begins click the wait button next to end turn. Use the neuro stim, throw three acid vials at Al Sahir, then throw the bomb. If he is decently low on health, just fast strike him. If not, when he approaches to attack you, use your shield to push him back (or step back, if you can still tank him). Throw a bolas, shoot him with a crossbow in the artery. Stand your ground. When he approaches push him back again, or step back, throw a bolas, then step back in and hit him with a regular strike. Finish him off with fast strikes + 5 = 21 FSP, + 1 Combat Skills training, + 1 = 2 Prestige reputation, + 1 = 9 Combat reputation.

In case you forgot to collect them, grab all the alchemy reagents available in Maadoran and elsewhere. Saross has 5 (one is hiding under a tree), for example.

Grab all of the relics you collected so far and see if Abukar or Erebus have anything to say about them. You can read that mantra you collected from the display room in Teron, though it won't be useful until later.

That's it for Maadoran, for now.
19) Ganezzar Start
Talk to the woman to your left. Pretend to be faithful. When the Old Man joins the conversation, use Persuasion and then Streetwise a few times to convince him [+ 3 = 5 House Crassus reputation]. You can also have a chat with the Mercenary standing nearby.

In a nearby hovel you will find Pancratius. Tell him that you believe the world is not just and fair to get his approval.

Along the main street there is a tavern on the left side. Enter, chat with the Loremaster.

Along the main street you'll see a Guard standing around near a house, saying “Plague.” Speak to him, offer remedy via Streetwise or Alchemy. Go in, treat the man + 3 = 11 CSP.

Street Hustler nearby has some interesting things to say about the city if you ask him and pay 10 gold.

Near the north wall of the city you'll see a Zealot. Talk to him and tell him you're a believer + 2 = 7 House Crassus reputation.

Going up the stairs you'll get stopped by Zealots. Keep going. You'll see a Guard. Talk to him, tell him you're faithful, then pick the bottom option for something about justice and evil + 2 = 9 House Crassus reputation. Then talk to the Nobleman nearby for some lore.

Go to the Inn nearby. Lockpick, sneak, and steal everything. One container is trapped with Traps 7 (the one on the left on the first floor), so you will not be able to open it yet. You also won't be able to sneak behind the Innkeeper yet without 9 in Sneak + 14 = 25 CSP. Go on the balcony on the second floor and speak to Laevinus + 18 = 69 GSP.

Steal from the nearby merchant stalls now + 4 = 29 CSP. Keep in mind that you won't be able to steal from one stall located in the fenced area. Talk to the Trader nearby with some Zealots around him. You can Streetwise him into 3 pounds of blue steel, but you can buy 5 pounds from him instead. I suggest the latter. You can also talk to the Clerk standing nearby.

In the Temple Square there is a large podium-like structure. Keep listening to the sermon + 1 = 10 House Crassus reputation. There is a Blind Man nearby. Speak to him for some background information. Brontia also has some things to say about the nature of men and beast. Philospher, standing west, has some other background lore.

You will also see the local Commercium headquarters nearby. It has a door locked with Lockpick 8, the chests are trapped with Traps 8, and one is Traps 9. There is a module is one of the Traps 8 chests, but you shouldn't need it at this point.

Go to the skyport and you'll run into Brother Marcus. He gives some background information.

Head to the Castle and speak to the various characters there. Don't speak to Meru just yet.
20) Teron Revisited and Old Facility
Travel to the market and talk to Esdras. Go to the bandits and kill them. They're not particularly challenging + 3 = 24 FSP. You can put the Imperial Power Armor on if you like, and insert some Modules, as it can give you extra strength to carry stuff. The Power Armor doesn't have exceptional damage resistance, but it does give you bonus stats and a unique ability, which makes it completely worth it if you're going for a Block playthrough. It's still useful for dodge characters, but they cannot use a two-handed weapon while wearing it. Their centurion cape goes well with the armor.

Heal. I ran into an ambush by the Imperial Guard here while returning to Maadoran. This fight isn't particularly hard if you're wearing the armor with two modules. Just kill the guards and you're good + 5 = 29 FSP. A good tip for combat in the power armor is to use Apis with 1 AP left over then switch over to Anubis to heal on the beginning of your next turn or Horus in order to get extra AP.

Time to get some more supplies and CSP. Return to Teron and you will see that the place has changed somewhat. You'll notice that the alchemy ingredients have respawned, so has all the merchant inventories. All of the containers and stuff to lockpick/sneak have also changed.

Points of interest include Brandir, a mercenary near the Tavern, who mentions your lost eye. You can also speak to Cassius about Al-Akia and chat with Antidas.

Go to looting the various containers, people, and merchant stalls now. You should get it all, and some stuff is really good + 33 CSP. Putting all those points into thievery really paid off. But that's not everything, there's still more to loot elsewhere.

Increase Crafting from 4 to 8 - 38 = 31 GSP, - 62 = 0 CSP. Craft a blue steel Khopesh with masterwork, balanced, and serrated edge. This will be your weapon for the upcoming combat.

Travel to the Old Facility + 5 = 36 GSP. Go to the entrance and tell the soldiers that you are an Aurelian Praetor. Descend, interact with everything, then go down and examine a valve near the gate + 1 = 1 Module. Use the Module you just got on the Imperial Power Armor - 1 = 0 Modules. Unlock Ra. This isn't required, and you may skip this, but it's a nice touch that gives you the benefits of the other three modes at output 2. You can, however, mostly achieve the same effect just by switching modes in combat. Use this as your default mode if you do unlock it, as it looks pretty awesome. Switch to the other modes when you need extra Strength or healing or AP. Keep in mind that Agility gives you extra hit % in combat and Strength gives you extra damage, both of which are very nice.

Interact with the door. Examine the keyhole and try to open the door, you will disarm a trap + 1 = 1 CSP. Leave it alone and go back to the entrance. Use your station on the engineers that show up and get them to open the door. Go and interact with everything in the ship. You won't be able to take off, but you will come back here later.

When you return the engineers will tell you they will seal the place. Try to convince them otherwise, then choose to fight and kill them + 2 = 31 FSP.

Increase Swords from 6 to 7 - 30 = 1 FSP.

Go back to the entrance and just fight the three soldiers there + 3 = 4 FSP. They were in the wrong place at the wrong time.
21) Saross Revisited and Hellgate
Pick up 3 rock oils and the Bronze Sphere, then travel to Saross. You can interact with some rocks up north to reveal a grate, but that's only useful if you haven't found the presence of the chamber in the basement. There's also a second floor if you missed it. Interact with Ancient Machinery and fix it without the oil injector and with less oil + 10 = 11 CSP. Go back to the switch and press it, explore ahead + 6 = 42 GSP. You will use the Bronze Sphere to get a Surgical Kit.

Make sure you have the Mysterious artefact. Travel to Hellgate + 5 = 47 GSP. Explore the side room to learn a bit of lore. Take the elevator and examine the body. You will get an ancient grenade out of it.

Continue on and you will run into a Construct. Throw down the Nullifier. It doesn't count for Body Count, but you still get SP for it + 1 = 5 FSP. Talk to Bennie, give your Word of Honor, then use Streetwise. He'll give you an amulet, but go ahead and drop it on the construct you just killed. You'll come back for it.

Note: All the constructs have sky metal on them, and you can collect quite a bit by killing them. There should be 12 in all in the game (9 in Hellgate, 3 in Ziggurat) for 12 pounds of Sky Metal.

Lockpick the door you just came from +1 = 12 CSP.

Explore the central passage and kill the two Constructs. These guys can critical, though they're aren't terribly special otherwise. Your armor will also heal you during downtime, so heal up before engaging the next set + 2 = 7 FSP. Lockpick the doors on each side and disable each generator + 22 = 34 CSP.

Kill the Construct outside + 1 = 8 FSP. You'll see a door to lockpick to the east. Leave it alone as it leads to a Construct and the entrance to the Ziggurat, the final area of the game. Going there locks you out of everything else.

Check out the computer room nearby. Read the neat lore and leave the gate key alone. It's in the nearby chest. Kill the Construct blocking your way to the final room + 1 = 9 FSP.

Proceed on and kill three more Constructs + 3 = 12 FSP. There are a bunch of chests here and two are trapped (Traps 7). Don't worry about them for now. Make sure to the grab the Divine Spear from the central chest and a Module + 1 = 1 Module. One of the trapped chests has another Module, an extra one, that you may or may not come back for later. It won't be needed for anything.

Leave Bennie and leave Hellgate.
22) Outpost Revisited and Side Quests
Go back to the Outpost and go inside the mine. Make sure you have the Module from Hellgate and examine the console. Use the Module to power up the mine + 12 = 59 GSP, - 1 = 0 Modules. Doing this has some reputation outcomes, but that doesn't matter much now + 1 = 3 Prestige reputation, + 2 = 17 House Daratan reputation, - 2 = 14 House Aurelian reputation.

Return to Ganezzar and go up the ladder right of the Main Gate. Choose the bottom option to rescue Elias. Kill the thugs + 2 = 14 FSP. Go to Temple Square. The house on the left has two guards. Talk to them to speak with Darganus. Accept his task.

Go find Berengarius in a nearby shop, it has a sign up front. He has two guards, so talk to him to continue. You can either kill or spare the woman—sparing leads to working for the zealots and killing Beregarius. You don't want to do this as it locks you out of helping an old friend later. Less SP also. Kill Claudia and return to Darganus + 6 = GSP. Now make that stunning recommendation for Lord Miltiades, the first of his name.

Now go back to the Main Gate and to the house on the left. You've already met Pancratius. Speak to him, then speak to Hector, then walk away from the latter. Return to kill Pancratius. Or just kill him from the very beginning + 1 = 15 FSP. If you kill Hector instead, Milteades will ruin his own reputation later on—killing Hector does grant 1 more FSP and a cool weapon. Return to Darganus for your reward + 12 = 77 GSP, - 2 = 8 House Crassus reputation.

Go visit your pal Basil at the 'Grab a Bite' Tavern. He's getting hounded by some of Levir's thugs. Dispose of them +2 = 17 FSP. You can press Basil for gold, but at this point, I just told him to pay whenever. Gold wasn't that important anymore.

Go check on Quintus to find him arguing with some collectors. Kill the collectors + 2 = 19 FSP, and you can ask Quintus for more money or not. Whatever you feel like doing.

Go back to the well in the slums. Switch to Ra. Go right, right and you will grab a bag of blue steel and gold.

Go back to the Abyss. It's closed, oh well.
23) Ending Decision
>>HARD SAVE HERE<<


You have several choices to make here, and I will briefly describe what you can do:

If you don't want to fight, you can raise your Lockpick, Traps, and Steal to 7 or higher in order to grab all of the remaining chests/loot. Don't forget you can also go back to complete the Elixer and Power Armor quests and return to the Divine Spear to Bennie (don't forget the amulet at the dead Construct, if you want it). You can then simply take the elevator in Hellgate to reach the Ziggurat.

If you increase Impersonate to 5, you can speak with Meru's Prophet after speaking to Meru and realize that the Prophet is a fraud. Then you can get an alchemical mix from him to survive communing with Balzaar directly.

You can also speak with Meru without realizing the Prophet is a fake and get him to take you into the room anyway (via Charisma). You won't survive just sitting in the chair by Constitution (without cheating), but you can survive by wearing the Helm of Destiny.

If you kept the Divine Spear, you can go with Meru to Al-Akia, complete the ritual, then go and side with Agathoth at the Ziggurat. You will be unable to survive the Constitution check (without cheating) when confronting Balzaar, but you can use the Divine Spear in that scene in order to get an ending.

If you gave back the Divine Spear, you can go with Meru to Al-Akia and sabotage the ritual. Then you can return to Bennie and ask him to perform the ritual on you. You won't survive the Constitution check (without cheating), so I don't recommend doing this.

If you return to Gaelius after speaking with Meru without going to Al-Akia, he will send you to parlay with the Imperial Legion. You can convince Gaelius to use the Ordu instead. Else you can go to Caer Tor and convince Paullus to take Ganezzar in exchange for Gaelius' offer. With Word of Honor of 3, if you did this BEFORE finishing the power armor quest, you can convince Paullus to do it without sacrificing the Ordu.

If you take the flying fortress back to Ganezzar, you can convince the Aurelian army to back off with some Streetwise and by increasing your Lore or Persuasion. Then you can visit Meru's library for even more lore but little practical application at that point. This keeps Meru alive without going to Al-Akia and ressurecting Balzaar. You can also visit Marcus if Meru is dead regardless of your decision and still see the library.

If you don't side with Balzaar, you may go to the Ziggurat and either kill or parlay with Agathoth. You can also overload the reactor and destroy the temple completely, or just leave it dead and buried. If you serve Agathoth, he will ask you to bring him someone to control. Pick whoever you want. Antidas has the hardest path and gives the most experience. You may want to do this after helping out Milteades for the last time, making him a lord. Simply go with Meru and Miltiades will be there to tag along—this is probably my favorite ending.

Note: If you take Meru to Agathoth, you may also run into another old friend: Neleos. If you don't make Miltiades into a lord of Ganezzar, Varro will come along instead and change the outcome, though you can choose from either. You have to be an Assassin, not a Praetor, to trigger this encounter.

As usual, I will post the preferred path, though at this point it doesn't really matter. Do know that this path does not grab all of the experience, but it maxes out combat skills so that you may fight Agathoth head on. But pick whichever appeals to you, or try them all. My opinion is that the "best" ending to the game is if you serve Gaelius and convince Paullus to take Ganezzar without sacrificing the Ordu.
23) Dead River and Unfinished Business
Get antitode, some rope, and the Charged Respirator. Head on to Dead River + 5 = 82 GSP. Go forward, speak with the man, then descend into the darkness. You can also trigger combat on the surface, but it doesn't give any FSP.

Go toward the light underground and speak to the Elder. Interact with the machines. Pass the subsequent checks, but you don't have the part necessary to fix the bridge. You may come back though.

Return to the surface and proceed to the side of the ravine. Descend down. The regeneration of Ra mode will protect you from the deadly mist along with the Respirator. Kill all of the giant scorpions + 17 = 36 FSP, + 1 Combat Skills training and collect all the loot + 1 = 1 Module. Increase Swords from 7 to 8, increase Crafting from 8 to 10 - 30 = 6 FSP, - 41 = 41 GSP, - 34 = 0 CSP.

Return to Maadoran. Get your Sky Metal (you should have 11 pounds of it) ready and craft a sky metal Khopesh. That will be your main weapon, but you may additionally craft anything else you like. You can also use any other sword if you want, the Khopesh just has a higher chance to bleed which is really good.

When you're done Basil should require your help again. Go speak with him, then meet your next foe in a suspicious house. It's a giant centipede, but nothing you can't handle + 1 = 7 FSP. Go back and speak with Basil. The next set of enemies will give you some trouble—they choke you with a bola, then net you immediately after. Bring some AP boosters, antidoes, bombs, etc because you're probably going to need them, and at this point you have enough materials for them. Just use those you already have, don't craft extra. If the bola fails to connect, then you've basically won. Otherwise, try to get in some healing while simultaneously fighting them off, probably in Ra and with AP boosters + 3 = 10 FSP, + 1 Combat Skills training. It's a pretty tricky battle, so get ready. Return to Basil when you're done + 6 = 47 GSP and tell him whatever you feel like. Money is no longer an issue, so it's up to you.

Go inquire about the challengers at the Arena. You will fight against three people, and I won't really provide strategy on how to overcome them. Just know that you likely won't win a straight-up fight with Hamul. But at this point in the game they're more fun distractions than a real challenge + 7 = 17 FSP, + 1 = 10 Combat reputation, + 1 = 3 Prestige reputation.

Note: Widowmaker has a fully upgraded, two handed Sky Metal axe and an important amulet. Widowmaker also has a set of really amazing blue steel armor that is better than the Warrior's Crown and Darius' Armor. Really cool. If you return the power armor, I would recommend wearing Widowmaker's gear.

Go to Ganezzar and go to the Fort. Talk to the Legionary and then make sure the Centurion bets his weapon by asking how much and then using Streetwise + Charisma. The first fight can be a little challenging because the Caveman hits like a truck. The next is nothing special, but the third has you against four trained and well armed men. Don't underestimate this one and don't take any chances. Murad will absolutely ruin your day with poison and critical damage. Go for the kill; use items if you need to. I would suggest using a bola on Murad, he's the most dangerous opponent there due to high critical strike, and mopping up the rest + 4 = 21 FSP, + 1 Combat Skills training, + 1 = 11 Combat reputation.

Make sure you have a Demon's Heart and Module, then travel to Zamedi and go downstairs. There are some boxes to examine, and each box allows you to craft something. You will receive The Chopper and Bolter - 1 = 0 Modules. The latter is a good crossbow weapon, but you won't be using it.

Go back to Maadoran to return your armor, except you won't be returning it. You can get an extra 6 GSP from trading the armor for a house, but that's not really a good trade. Kill Marcus Valla instead and tell Caius that the house is his now + 3 = 24 FSP, + 6 = 53 GSP. You lose out on 3 GSP though. Make sure you ask Caius for your reward for a Module [+ 1 = 1 Module].

Make sure you have the Ancient mantra and “Jellyfish” artifact. Go back to the Old Hanger and use the Module to open the hanger hatch. This is the final use for a power module. Fly to Ganezzar + 12 = 65 GSP, + 7 = 15 House Crassus reputation. Don't bother talking to the Aurelian commander, you are not trying to end the siege.

Return to the Mountain Monastery. After having talked to everyone, move past the Defender in front of the big stone entrance. Sneak in. There is a locked safe on the second floor. Lockpick it, examine everything, then leave + 1 = 1 CSP. Keep the thing you came for and return to the Healer for your reward + 6 = 71 GSP. Do NOT use the Regeneration Potion. It's useless at this point and will hinder you at the final boss.
24) Al-Akia and Conversing with Gods
Go speak to Meru in Ganezzar. Then use Charisma to get him to show you the Star Room. Sit in the throne and use The Helm of Destiny to survive the process. Decline going to Al-Akia for now. Return to Gaelius, agree to speak with Paullus. Go to Car-Tor but don't speak with Paullus. Go back and speak with Meru and go to Al-Akia.

Note: You have now unlocked every location in the game. Only the final area, the Zigurrat, remains.

Fight and kill the Aurelian soldiers + 2 = 26 FSP. Enter the facility via a sunken tower nearby. Proceed north, then farther north. Lockpick the door + 1 = 2 CSP. Explore and read the diary entries and make sure to grab the Aegis of the Magi stored nearby. Proceed down the stairs nearby and Critical Strike then kill the Scolopendra + 1 = 27 FSP.

Go back to the main chamber and proceed East. You will come upon the ritual room. Agree to the ritual, let it proceed normally, then kill Fake Meru.

Optional: If you go exploring past the stairs, you'll find a half buried passage that leads to a jammed door. You can probably also open it with with Strength and the power armor. If not, come back when your Alchemy is a little higher.

Leave the Al-Akia + 36 = 112 GSP, + 6 = 20 House Aurelian reputation.

Travel to Ganezzar and go to the Castle. Speak to Brother Marcus and be allowed inside the private library. Examine the texts for some lore and little else, then leave.

Go to Temple Square and meet Darganus. You will run into your old friend Miltiades. Agree to all of his schemes, talk to Hector near the giant staircase, convince him with Streetwise or your House Crassus reputation, then return, agree again with Miltiades, and kill Darganus + 2 = 29 FSP, + 6 = 118 GSP. Your pal Milteades is now a hugely influential man in Ganezzar, for better or worse. Also don't forget to pick up the Vindicator, a unique spear, from Darganus.

Bring your Ghost Hand and travel to the Arch again. Put on the Aegis of Magi after activating it and converse with the entity inside + 12 = 120 GSP. This might be a bug, as the entity mentions Balzaar's vessel, who is now dead, but it may be that it simply isn't aware of it yet. Strange.

Increase Alchemy from 4 to 6 - 38 = 92 GSP, - 2 = 0 CSP.

Time to do some hardcore alchemy, so create as many of these as possible/reasonable:

  • Black Powder + Iron Balls = Black Powder Bomb (Frag)
  • Sulfur + Fool's Gold = Splash Acid Vial
  • Rock Oil + Sulfur = Liquid Fire Vial (Strong)
  • Quicksilver Roots + Dragon's Blood Extract = Neurostimulant (Eagle's Eye)
  • Blood Mushroom + Emoryl Roots = Berserk Potion (Extended)
  • Quicksilver Roots + Emoryl Roots = Neurostimulant (Extended)

Take all of that with you. Get some poison antidotes, the Mysterious contraption, the Divine Spear, and the Medical Canister. Make sure you have the Sky Metal Khopesh, so go ahead and coat it with poison, sharpen it if you need to, but you probably won't be using it.
25) The Ziggurat
Travel to Hellgate and give Bennie the Divine Spear + 6 = 98 GSP. You can talk to him about the Surgical Kit as well, but don't agree to do the ritual.

Note: You can still go with Bennie to the Medical Facility and back out while there. You'll leave Bennie there to study stuff. If you take the portal out of there, you'll appear back at Hellgate.

Proceed to the main computer room, grab the key from a nearby chest, open the only door left locked, and forge ahead. Kill the Construct + 1 = 30 FSP.

Enter the Ziggurat via the elevator + 25 = 123 FSP. Increase Swords from 8 to 10 and Block from 8 to 10 - 30 = 0 FSP, - 120 = 3 GSP.

Explore everything once you descend some stairs, then go down the elevator. Proceed to the adjacent elevator. Sabotage the Constructs with Black Powder/Bomb if you like, but you can kill them regardless (one less Body Count if you rig them). Hack away at the platform and kill the Constructs + 3 = 3 FSP.

I suggest increasing Dagger from 1 to 2 - 3 = 0 FSP, - 2 = 1 GSP


There's nothing you can do on this level except talk to the Awakened, so do that, check the console nearby, and then descend again. Examine the various tablets here and interact with the console in front of you. Put the Medical Canister in to weaken Agathoth, or don't, it's up to you.

To put this into perspective: Agathoth is at his weakest as he only now woke up and does not have access to all of his powers. He is the weakest of the demigods, and he was specifically left behind the front line because he is not a fighter. All of the other demigods were far more physically powerful and they were prime fighting units. One of them was able to stand against repeated missile strikes. Agathoth is not that demigod.

That said, Agathoth is still insanely powerful. He is the most powerful enemy in the game by far and will absolutely wreck you if you do not kill him as quickly as possible. I would say he is about as tough as fighting Al-Sahir and the Zamedi Guardian at the same time. Probably more powerful than that. His only weakness, if you can call it that, is that he is only one unit and cannot attack above his AP total.

There's only one sure way to win this fight for certain. A direct confrontation with Agathoth is near-suicide. Take a neurostim. Throw some acid on him, then throw several fire vials to put distance between you. Then throw bombs. When those are out, or he tries approaching, throw more fire. His ranged attacks can be safely deflected from a decent range, but his melee is almost impossible to avoid and will often crit for huge damage. If you have trouble, insert the Medical Canister into the console before the fight.

For added challenge, I was able to win against Agatoth without resorting to fire spam or bombs, with pure melee but cheesy zoning. You need as many bolas as you can carry (5 or more), some Antidotes, and the Khopesh. It basically goes like this: Put the bola in your pocket slot. When the fight begins, drink an extended neurostim, and hopefully you are going first, step back two squares. End turn.

Next turn drink the berserk potion, take antidote, step in two squares. Throw the bola at Agathoth's neck. Twice if you need to, but the second must hit. End turn. Bolas to the neck last two turns instead of one, even though Agathoth will be able to act just fine.

Step in and hit Agathoth in the head with your Khopesh. These hits will generally crit and lower his Perception. Step back two squares.

Repeat this process (drink berserk and neuro when you need to, on the turn before you step in) until you can reliably finish Agathoth in four hits. Step in, hit him in the head, tank his fists (this is purely RNG), and then finish him off with head strikes.

I can't guarantee that will work, since it's heavily RNG reliant, but you can also toss bombs in between head strikes, if you like. That will increase your chances quite a bit.


That's it, you've killed all three gods and won. Congratulations!
98 Comments
rock  [author] 12 Nov, 2024 @ 8:38am 
I added a note about it :steamthumbsup:
Anomandaris Dragnipurake 11 Nov, 2024 @ 7:16am 
I understand you probably do not want to update this guide, since that would mean tons of work for little to no reward, but you should really include the information that for the fight in Darius' Tomb (in part 12 of your guide), instead of using the Mangudai Ordo Armor it should be the Imperial Armor (Steel) that is still in the stash at that time. It changed the fight from impossible to very easy first try for me.
rock  [author] 2 Mar, 2022 @ 8:09pm 
That quest is no longer possible to do in newer versions of the game. It is stated in all caps at the very top that this guide is outdated.
Dhenkozaur 2 Mar, 2022 @ 8:02pm 
can't finish the boatmen quest after dueling kadmos?, the door just shut on me?, is the guide made on older version of the game?,or am i doing something wrong? please help
NOIRE- 15 Jan, 2022 @ 10:19am 
@Gallofa Dev changed the climb check. You can do with 4/8/5/8/8/7, or you can dump Con for other stat.
rock  [author] 15 Jan, 2022 @ 12:10am 
I think you can get away with 7 perception. I don't think 8 is essential but lower will make combat harder.

You could also just add another point of dexterity with cheats.
El Kurgan 14 Jan, 2022 @ 4:57am 
The guide is fine, but currently in the palace you dexterity 8, if you don't have it, it is impossible to sneak in without raising a critical hit to 5.

But if the critical hit is raised to 5, you can't pick up the scroll and I don't know what attribute I should lower, constitution of course not.

Sorry about my English, I used a translator.
NOIRE- 17 Dec, 2021 @ 4:30pm 
you still keep whining about one alternative way to do a side-quest, 1 out of 5 alternative ways to finish a side-quest, and thats for non-combat approach alone. And yet, you are here, in a detailed walkthrough hybrid build. You just need to connect ONE DOT to actually do it. I can give you all the detail on every possible alternative, but it still won't help your utter laziness. Don't you realize how small your blabber is? The moment you think this game sucks, meh it's your loss
Steelchill 17 Dec, 2021 @ 12:52pm 
theres a difference between a game like Underrail with no pointers giving the player actual clues and incentives to explore around without idly bumbling through the entire game versus either bumbling around everywhere and fiddling with the craptastic camera to bumble around
NOIRE- 16 Dec, 2021 @ 6:01pm 
@Steelchill sure, lets blame the game rather than your utter laziness. If you need a big shining arrow pointer in every quest, yea go play something else