PAYDAY 2

PAYDAY 2

56 ratings
PayDay 2 / In-depth Sociopath // LMG Build [Death Sentence Viable]
By craig "weatherman" huckabee
Hey there!

This build is explicitly focused on Close Range combat but also packing a punch with other weapons at a further away proximity. The skills focus on the survivability with Melee damage being high up but also including inspire and doctor bags / first aid kits to assist your teammates if needs are. This build makes use of; (But can easily be modified if you do not have the DLC.)
  • The Gage Weapon Pack #2
  • The Gage Mod Courier Pack
  • Hotline Miami 2 Digital Deluxe Edition
  • Yakuza Character Pack (Not required but handy)
  • The Wolf Pack
  • The BBQ Weapon Pack (For High Difficulties)
  • The Gage Spec Ops Pack
It also assumes you have Infamy Level V (5) or higher due to the extra skill points that are available at Infamy 5 (Reach Infamy II To start receiving skill tree reductions)

I love to receive constructive criticism as I probably can understand some altercations can make this build a more viable outcome. But I have used it consistently throughout my time on PayDay 2 and would say it's a great way in shaping up the game in a close range combat setup but also ready for a gunfight at long range if needs be. If you need any help feel free to make a comment down below!
   
Award
Favorite
Favorited
Unfavorite
Introduction
So, you want to get into close range combat right? Well, one of the best builds for this along with making the use of melee weapons is sociopath. For this build, we will be heavily focusing on the Brawler section of the skill trees in Fugitive. The build is heavily reliant on armour as well, So we'll be picking up ICTV (Improved Combined Tactical Vest) along the way, combined with the fact that it is an LMG build, so Technician is going to be handy along the way.

  • First we will be looking at the perk deck (Sociopath) and the reasons why it can be profoundly useful to you as a player during your fights.
  • Then we will move on to the skill tree where you can have a look at what different skills we can use to make Sociopath an even more viable option
  • Thirdly, I am going to show you the different possible options for primary, secondary and melee weapons we can use. Including throwables and deployables not to mention.
  • And after all of that, we will reach a conclusion where the summary of the build can be found and how I use this build on different difficulties including Death Sentence.

Let's get straight in,
Sociopath (Perk Deck)
Sociopath is a perk deck that heavily relies on you being in close proximity to your enemies for combat. It favours in the use of melee weapons that have fast swing times and draw times to make it viable due to the fact that it gives you both armour and health regeneration for killing enemies. We can use this to our advantage by picking up melee weapons such as the katana as it has an incredibly quick draw time as well as a considerable amount of base damage to knock off enemies in the first place. And with the skills that will be shown later on, we can receive upwards of 900 damage! But not just that but including the fact that for a brief few seconds your damage will increase by ten times (Overdog).

――――――――――

Let's have a look at each different section of the perk deck and how it will help us later on in the build; I will purposefully be ignoring the perks that are included in every build since they aren't a necessity for the build.

Overdog
"When you are surrounded by three enemies or more, you receive 12% less damage from enemies." What this means is we get a quick and simple version of Underdog on the skill tree making us less vulnerable to enemies that could be attacking us making it easier to get kills without the possibility of losing a considerable amount of health. But it's good to note that this is not something you should heavily rely on since let's say you are playing on Death Wish where you are taking around 200 Damage per hit for example with three enemies in a close range you will only gain 24 less damage from the base 200. (176) It's not anything, but as I said you should Not rely on it completely when charging in to combat.
"Your second and each consecutive melee hit within 1 second of the last one will deal ten times its normal damage."
With fast drawing and hitting melee weapons such as the Katana or the Nova's Shank, you can deal a considerable amount of damage from the last hit you did. Let's take the katana for example, with the skills we will be looking at later on we can get up to 900 Damage without the use of Overdogs consecutive melee hits. If we were to attack two enemies (Killing the first one then moving on to the second one), We would be doing upwards of near 9000 Damage on your next hit! This is extremely useful combined with the damage reduction from 3 enemies or more that you get making you able to clear large numbers of enemies without much hassle.

Tension
"Killing an enemy regenerates 30 armor. This cannot occur more than once every 1 second. You gain an additional 10% armor."
Killing an enemy will automatically set you up with 30 extra armor, this can be handy when you are in close or even far combat helping you gain back armor that you are losing from enemies hitting or hurting you. Making it a lot easier to gain survivability if you are near death or just want to regenerate your armor really quickly! As well as this, you gain 10% extra armor which is a helpful bonus since we are making use of the Improved Combined Tactical Vest.

Clean Hit
"Killing an enemy with a melee weapon regenerates 10% health. This cannot occur more than once every 1 second."
Along with the fact that you are already receiving a considerable amount of armor generation from both long range kills using your guns and melee weapons this factor heavily allows you to gain armor regeneration. 10% does not sound like a lot at first since it does not stack up but due to the fact that you are already receiving damage reduction from enemy fire you are not going to have to worry about losing your health and armor a lot. Gaining health back every second (If you are killing enemies that is) Allows you to stay in the fight for a lot longer than other builds would allow that do not offer regeneration. Although perk decks such as grinder offer health regeneration for hitting in this case you are able to take the full survivability aspect into account because you are able to quickly take large swarms of enemies away using your melee you are now a lot less likely to die. Since grinder also heavily relies on you moving about and using your firearms to gain regeneration we don't have to worry as much about being in crowds using Clean Hit.
"When you are within medium range of an enemy you recieve 8% less damage."
Like Overdog or Underdog (From the skill tree) We now are able to use our LMGs to our advantage since we are now taking less damage from around 20 metres from them.

Overdose
"Killing an enemy at medium range recovers 30 armor. This cannot occur more than once every 1 seconds."
A bit like Bullseye we are able to gain armor regeneration at a higher point making each melee and shot gain us even more armor back from what we already are gaining. We now have an even higher amount of survivability since we are gaining both health and armor back already! Like I mentioned before, we can use this to our advantage for close ranged combat and as mentioned medium range to stay in the fight a lot longer without having to pull out due to the insane regeneration we are gaining.
"You gain an additional 10% armor."
Like I mentioned before; 10% extra armor will be a helpful bonus since we are making use of the Improved Combined Tactical Vest.

Showdown
"Killing an enemy at medium range has a 75% chance to spread panic among your enemies.
Panic will make enemies go into short bursts of uncontrollable fear.This cannot occur more than once every 1 second."

Including all of the perks listed above this is a great way to get into fights. Each kill every second has a 75% chance from a medium distance to make the enemies go into panic including dozers! What this basically means is enemies will cover their ears in terror for around a few seconds making them unable to shoot at you. Swarming an area around you to stop them from attacking you and as such you being able to clear each and every enemy without the fear of them attacking back.
Remember since your previous kill gives you a 10 times base damage you are now swarming enemies!

Overall this is one of the perfect perk decks for people who loves to get straight into the action using their melee weapons, next we will be moving on to the use of our skill points. I should note again that we are using 120 Skill Points or assuming you are Infamy 5 level 100 / Over that
Skill Trees [Part 1]
The different skills allow us to make the most out of the Sociopath perk deck, as well as increasing our survivability to make us more powerful than the Sociopath perk deck already allows us to be. This is very heavily reliant on the Brawler perks since they focus highly on Melee damage as well as Armor concentrated skills and Oppressor to make use of our LMGs

Fugitive

In Fugitive we do not need to pick up a lot of skills, but we can use them effectively to both help the survivability of our teammates on higher difficulties as well providing them with the necessary equipment to keep them alive in the long run.
We will pick up basic Combat Medic for the 30% Damage reduction that will support both ourselves and our teammates to keep us in the fight longer so your teammate has a less likely chance of being downed near instantly on higher difficulties, moving on to Quick Fix Aced to deploy our Medic Bags or First Aid Kits (Read On to find out) to implement our items quicker, as well as having the 10% damage reduction that the user gains for using our medic deployable. Next, we can either grab Combat Doctor Aced or Uppers Aced;

Combat Doctor
  • We gain the availability to last up to an extra eight times from being grey keeping you and your teammates longer in the fight
  • Along with the damage reduction that both your teammate and you gain this is great for small maps or maps that do not have a lot of movement required such as Cook Off / Rats as you can keep in one place and quickly access what you need.
  • However, on the downside you can only place two of these medic bags down and not pick them up so for big maps such as Meltdown a player who is grey would have to run far distances to regain their lives. Which can be a high risk and can lead them into custody. This is an important factor to take into account.

Uppers
  • You have a total of 14 First Aid Kits to your disposal making you great for a quick and easy way to regain back to full health for people (including yourself) who are on low health. So you can quickly provide them to your teammates who are in need of health such as Dodge players for example, or people who have reliant armour builds and have ammo to support the team etc.
  • First Aid Kits, however do not reset how many downs you have and will only regenerate your health back to full so if you are on grey, you aren't going to have your downs reset.
  • Uppers aced allows you to place down a first aid kit and once your health is considerably low it will automatically reset your health back to full, so you do not have to worry about the possibility of being downed. This can only occur every 20 seconds though so use it wisely!

Finally, we grab inspire aced to allow our teammates to get back up in the fight if they for whatever reason get downed. This can only happen every 20 seconds so as it's important to note that you can up one player every so often!

Enforcer


In Enforcer, some skills will increase our survivability in the fights against enemies.
We will start by Acing underdog; this will allow us to go into close fights with the already damage reduction we get from our perk deck to keep us alive longer. Underdog will make us less vulnerable to heavy enemy fire meaning we can now take full advantage of its damage bonus that it provides as well as being able to kill our enemies with ease without taking a considerable amount of damage. But completely obliterating enemies that stand in our way.

Next, we want to get skills from the Tank section of Enforcer; this focuses solely on our armour so it's essential to pick up the next skills. We pick up aced resilience to, first of all, get our armour back 15% quicker, meaning that once you are out of the fire (Note: This says you are Not being fired at), we will gain our armour back a lot quicker than without the skill. As well as this, once aced we earn 75% less visual effect from flashbangs. This is incredibly important on higher difficulties since losing your ability to see in close ranges can resolve in you being downed incredibly quickly.

Following that, we get "Shock and Awe" aced to make us quickly knock down shields with your melee weapon and having a 75% chance of knocking them down from each shot with your gun. This allows us to quickly turn back behind the shields and cleanly kill them. After this, we will get primary bullseye to regenerate armour with each headshot kill from our LMGs which can be used if you are setting up a position if you have a bipod. And are being shot at.

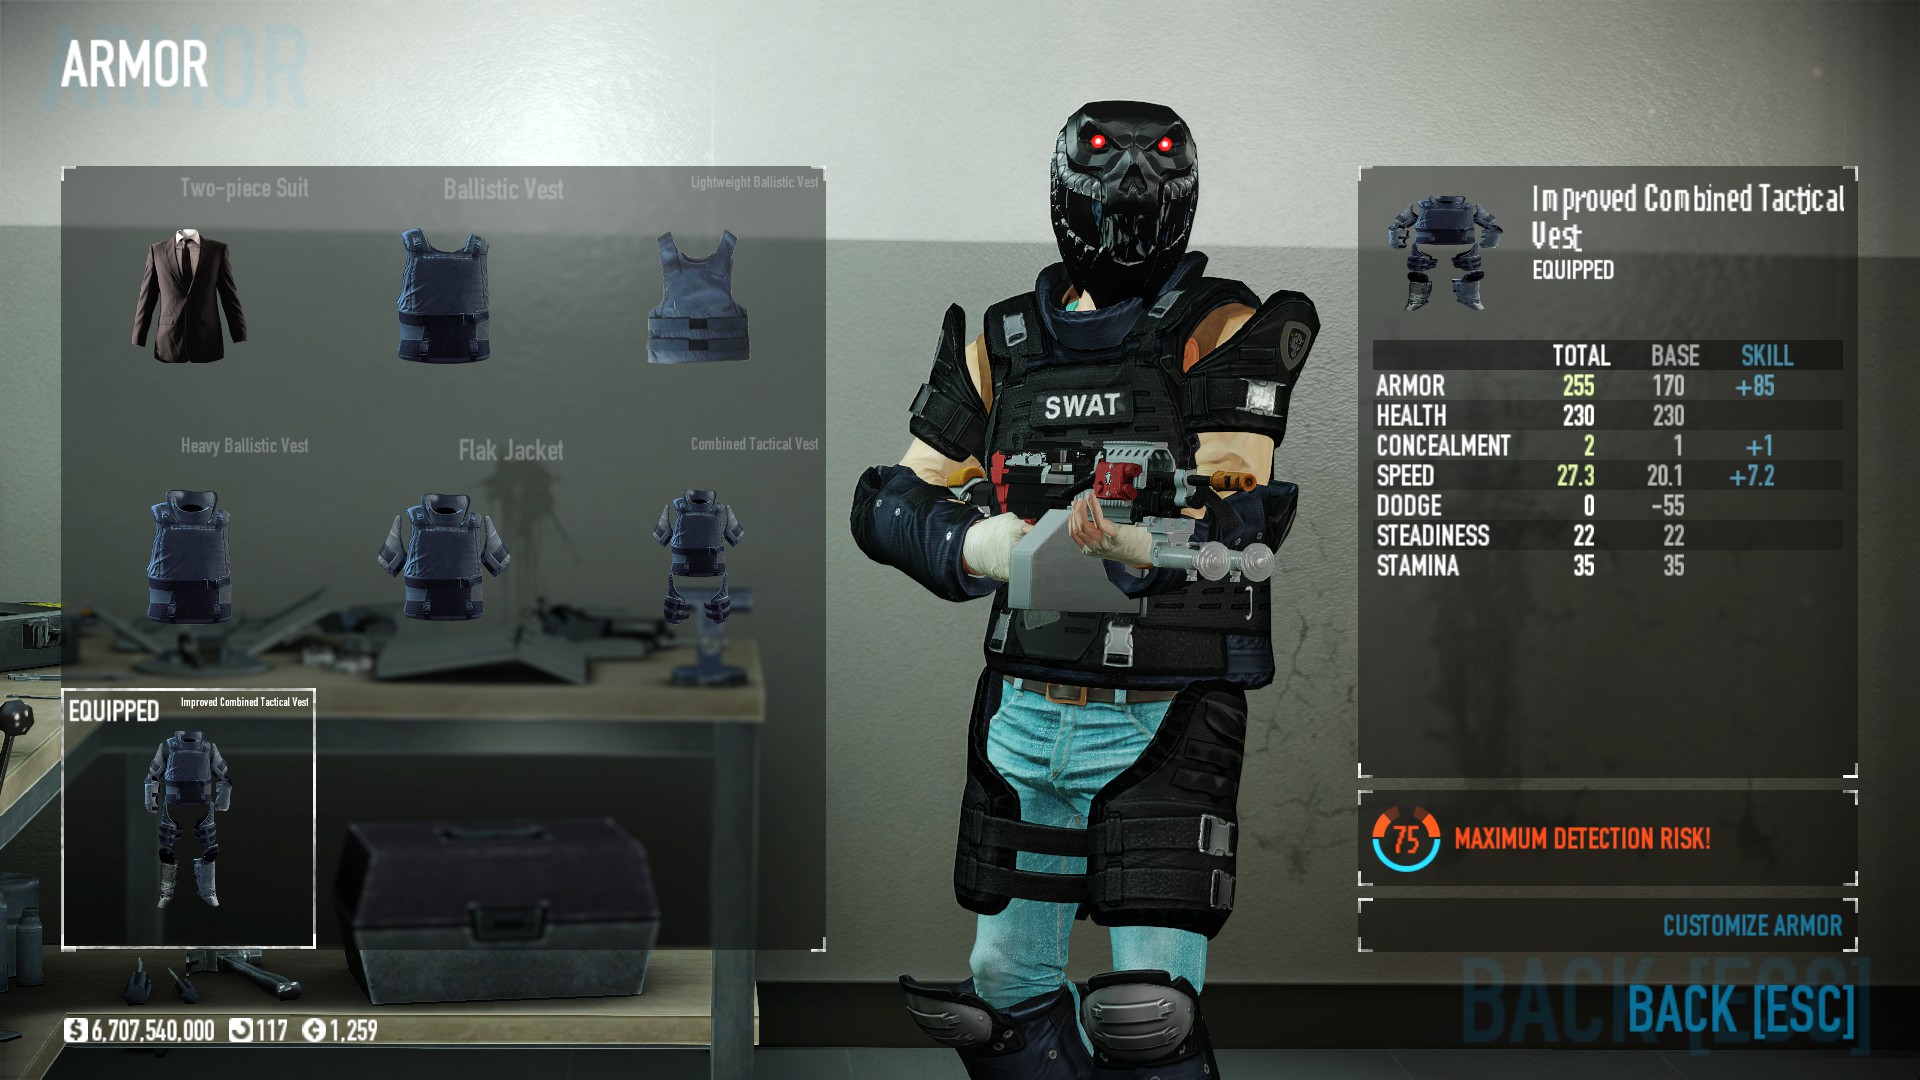
Finally, we will ace Iron Man to have an extra 30% armour! Making is even more potent against gunfire. Especially on higher difficulties where armour is a substantial factor in keeping us alive. And we ace it to unlock the Improved Combined Tactical Vest, although our speed is decreased significantly we are now more powerful to the point of where enemies are going to find it harder to penetrate throughout thick armour. Increasing our survivability even more!
Skill Trees [Part 2]
Technician

Here is where we pick up all of our LMG skills to maximise our ability to kill people from far ranges.
First of all, we will pick up Aced "Steady Grip" to gain better stability and accuracy for our LMGs since at base they do not have a considerable amount of accuracy at base.

We then move on to acing Heavy Impact, this allows us to shoot enemies making them unable to fire back, in a sociopath build we can use this to our advantage again from a long distance to increase pain and outright have a possibility to make large swarms stop shooting at us from a range. It's important to note that even when acing this our chance is only basically 1 in every five hits.

After this, Acing Surefire is excellent for being able to make use of the LMGs considerable amounts of ammunition, for starters, our magazine gains 15 more bullets (Decreases your reserve by 15 ammo in favour of our extra in our current mag.) And then acing it allows us to shoot and pierce through body armor!

Finally, we get Body Expertise essential so that 30% of the headshot damage is permanently applied to the rest of their body. Meaning that our LMGs now do additional damage from other parts excluding the head. Since this build allows us to be in range and further away, so we have a mixture of possibilities to increase sustainability and be in the fight a lot longer.

Ghost


We are not required to pick up a lot of skills only using three skill points in total in ghost since it mainly focuses around dodge and stealth matches which isn't what our build is focusing at all on. We, first of all, will pick up Duck and Cover basic with 25% faster stamina recovery and make us sprint 25% faster. These are a must have for any builds due to us losing stamina and speed exceptionally quickly otherwise. Making it a lot harder to get out of fights that we are in.
And then we will finally pick up parkour basic to have another 10% increasement in movement speed as well as a nice bonus of 20% faster climbing speed for ladders. The ICTV suit makes us a lot and these two skills are very helpful to counteract the penalties that it gives us.

Fugitive

To round off this section, we are now going to focus on the skills dedicated to increasing our melee attacks. Before we do this, its always important to pick up Nine Lives aced especially on higher difficulties. This will allow us to be downed one more time so instead of you having yourself go into custody you gain one more down helping both you and your teammates up incase of any possible chances of them being downed. The 50% slower bleedout also means we now gain a significant amount of health back after being revived so we will not be shot down instantly if we are in a dilemma such as that. (Note: This does not apply to being downed by cloakers or by being shocked by tasers for around 4 seconds and being downed by them) And then, of course, the aced skill making our life considerably longer.

After that, we move onto the brawler section. This will significantly help us in the close range combat area of the perk deck. We want to ace "martial arts" first of all to take less damage from enemies who hit us with their melees etc. such as dozers for example who once hit you will mean you don't lose as much health if you don't have the skill for example. As well as this we take the aced version to knock down near to all of our enemies making them unable to hit us. We can use this to our advantage, so we don't get shot back at if it's for example in a fight with a few enemies.

Proceeding after this we will pick up basic "BloodThirst" so that when we kill enemies with our LMG for example up to 1600% (16 times), each kill adding 100%. This resets every melee kill we do. But for our main melee weapon which we will be using which is the Katana we can do upwards of 14,400 Damage! This can be applied to dozers etc. to quickly kill them if needs are.

Next, we will ace "Pumping Iron" to do 100% extra damage to both non-specials and specials. (Dozers, Medics, Tasers, Cloakers and shields are all considered specials) Which will help us quickly deal with enemies especially on higher difficulties that have a lot more health.

Second to last we will also ace "Counterstrike" Making enemies once we have our melee drawn to hit us down and counter-attacking their hit making them down themselves. Since we will be using our melee a significant amount and having it drawn is something that won't be something we aren't doing a lot this should help us out by downing more enemies than previous skills already do. As well as this we now counteract cloakers hits when our melee is drawn making them down themselves as well so we can quickly and easily deal with them without the worry of being downed.

Finally, we pick up "Berserker" aced, when we are at low health, we will to a considerable amount more damage. In situations such as occurring a dozer who is hitting you and shooting at you we can do an extreme amount of damage towards him and in some cases managing to two shot a dozer on full health if your health is low. It is good to note that you should always watch your health and get out of the fight if you need to! Do not sacrifice yourself to be down by a dozer when you can easily stand from a distance to shoot the dozer down with your LMG. As well as this the aced version means that we will do 100% more damage from ranged weapons such as LMGs for example. Suggesting that we are now doing double damage with our LMGs when our health is low.
Weapons [Part 1]
Here we are going to be looking at the different LMGs we can use for our primaries and different secondary we will use for further combat from our build.

Primaries

The KSP Light Machine Gun

One of my favourite LMGs; The KSP Light Machine Gun is a great weapon to use for our ability to do a considerable amount of damage as well as having an awesome ammo pickup as well as great customizability.


Modifications
  • The Long Barrel
  • Tactical Compensator
  • The Lion Bipod
  • Team Boost [Not required I just like being able to give a little bit extra to my team]
  • Railed Foregrip
  • Military Laser Module
  • War Torn Stock


The KSP 58 Light Machine Gun

It has a slightly higher amount of stability than the KSP Light Machine Gun, but I would not say it is a good alternative but since it does not require any DLC to begin with it is a good alternative to the normal KSP Light Machine Gun


Modifications
  • The Tactical Compensator
  • The Lion Bipod
  • Team Boost [Not required I just like being able to give a little bit extra to my team]
  • Military Laser Module
  • War Torn Stock

The KSP 42 Light Machine Gun

The KSP 42 Light Machine Gun is a great alternative to the KSP Light Machine Gun; it has a much faster Rate of Fire than the normal KSP by about 33% more. It also has 50 more total ammo capacity making your total amount of ammo great for survivability. The only downsides I would say to this weapon are its reload speed coming in around 6 and half seconds which is shaved off by the normal KSP which is around 5.6 seconds. It also has a considerably less sized magazine to the normal KSP coming in at 165 compared to the normal KSPs 200. And has quite a bit less accurate than the normal KSP but if you have the Historical Mod Pack and not the Gage Weapon #2 Pack this is a great alternative that you can use on this build.


Modifications
  • The Tactical Compensator
  • The Lion Bipod
  • Team Boost [Not required I just like being able to give a little bit extra to my team]
  • Military Laser Module

Secondaries

There are only two different Secondaries I have used for this build, but if you have any other suggestions, please feel free to list them in the comments down below!

The China Puff 40mm Grenade Launcher

The China Puff which is still in the Meta for Payday 2 is a great way for clearing large sums of enemies with extreme ease. When dealing with the captain or large crowds of enemies that you aren't able to deal with using your melee or primary you can switch to your secondary to get out there quickly without worrying about your being killed quickly. You do a great amount of damage to enemies and the ammo pick up for the China Puff is absolutely amazing.


Modifications
  • Incendiary Rounds (I only use this for difficulties such as Mayhem and above so you can stun your enemies or deal with the captain for example since they will start trying to put themselves out to switch to your melee to regen your health etc.)
  • Team Boost [Not required I just like being able to give a little bit extra to my team]

The Arbiter Grenade Launcher

The Arbiter is another great weapon that has a considerable amount of damage, and like the china puff is awesome for clearing out large areas as well, the downside is that it does about half the damage of the china puff at base. But it heavily makes up for this with its Total Ammunition of 15 with a magazine of 6. So over double the china puff! It is a great alternative to the China Puff, and they are basically in my opinion at least up to what you desire.


Modifications
  • Incendiary Rounds (I only use this for difficulties such as Mayhem and above so you can stun your enemies or deal with the captain for example since they will start trying to put themselves out to switch to your melee to regen your health etc.)
  • Team Boost [Not required I just like being able to give a little bit extra to my team]
  • Military Red Dot Sight


Melees
Melees will be basically what we are going to be using the most, so it's important that we pick a strong and powerful weapon to counteract any enemies that get in our way.

Shinsakuto Katana

This Katana is basically the meta for nearly every melee focused build. Its great charge time, as well as a considerable amount of base damage, makes it an awesome option for anyone rocking these builds; As I've mentioned throughout this build you can get up to 14,400 damage with this weapon! And do up to 900 damage normally.

Kunai

The Kunai is surprisingly powerful for its size. Although it doesn't seem like it would do a lot on the impact, you can easily kill a dozer with its poison capabilities and nearly every other enemy in one hit. The way this works is it has knocked off damage, meaning that after every hit it will poison them in basic respects. So you can move on to your next target without worrying about your previous one since they will die from the poison. It also has an incredibly fast draw time and hit speed.

El Verdugo

Finally, this is a great alternative for people who do not currently have a lot of DLC or the Ultimate Edition for example. Its base damage is significant to the Katana as well as having a relatively fast draw time.
Weapons [Part 2]
Deployables
Depending on which skills you went for in the fugitive skill tree will depend on what medical supplies you want to bring to support your team.
But you will either be bringing the First Aid Kits if you went for Uppers or Combat Doctor Aced.

First Aid Kits


Doctor Bags

Both of these deployables will significantly help your teammates in their survival as well as assist you to sustain time alive!

Throwables

For Throwables there are really only two that I suggest. Since you are relying a lot on killing enemies with your melee an excellent option for this is to use;

Incendiary Grenades

Incendiary Grenades can create a small amount of fire around your enemies stunning them and possibly killing them. It allows you to go in to quickly deal damage with your melee or by throwing them from afar you can use your LMG again to deal with them quickly.


Concussion Grenades

Stunning your enemies is also another great option, you can quickly go in to kill all of your enemies in a much larger perimeter but sadly for a shorter length of time for which they'll be stunned for. So although it is a viable alternative you should take into account that it also shakes your screen.


Armour

In this build for this case, we brought along the skills that allow us to unlock the Improved Combined Tactical Vest. Making us have a considerable amount of protection when in close range and far range combat. Along with the speed skills and the extra armour, our perk deck provides us with we have a great amount of both armour and health regeneration that we gain.
Conclusion / How To Use This Build Effectively
Throughout this build, it's important to note that staying alive isn't always going to be easy. So before we finish this build, I thought I would explain a few ways to counteract any problems and sustain being alive as well as helping your teammates out.

Team Player

I mentioned in the skills section about the first aid kits and the doctor bags; maps have sizes that can issue from as small as something like the Jewelry Store all the way up to something like Aftershock or Meltdown/Green Bridge. If you bring doctor bags, it's so important to place your Doctor Bags in places that aren't hard to get to as well as areas where you will be for a considerable amount of time.
A great way to know when to place your doctor bag is if someone such as your teammate in chat says "Grey" For example which is telling you that if they don't get aid soon, they could go into custody. I will be putting two different maps from where I feel are right places to put your Doctor Bags.
They should be in cover and not hard to reach so that when another player or yourself need one, they can get to them quickly.

First, we will look at Aftershock. A pretty big map with a considerable amount of cover; Note this applies to other large maps as well!


In this picture we are out of gunfire from the side, it's nice to have it in a corner or somewhere that you won't receive substantial amounts of fire from. It also allows you to get patched up quickly and back to areas that enemies will swarm you. In this case, on maps such as Green Bridge, for example, you have lots of cars use this to your advantage as you can place your Doctor Bags here.
Placing it in the middle of where enemies like to can be extremely difficult later on in fights as you will find it a lot harder to access the doctor bags meaning you might even need to place down your second one.


On the other hand, maps like coof off/rats or Jewelry Store that have a lot of cover in small areas have places like rooms in the back of places with small amounts of accessibility for cops to get to you are great for allowing both you and your team to access.

First Aid Kits, on the other hand, you can quickly give to any of your teammates or use yourself when you suddenly need to gain your health back.

If a player is down remember that you have inspired to bring them back into the fight quickly. Placing a first aid kit down next to them before you up them (For example if two people are down) And your inspire isn't available or your teammate doesn't have inspire putting one down whilst your being shot at allows you to quickly get them up without using inspire and incase your health gets low your uppers ability from the skills will promptly redraw your health to full and then to follow that you can then use your inspire on the next player that is downed. This isn't so effective on higher difficulties but it as a good general tip if you are being ambushed quickly.

Using your melee
Sociopath relies as I've said before a lot of close range combat. So make sure you jump into swarms where you can do a lot of damage in a small space of time. Allow your team to stay close to you but remember you are great at clearing areas if there are enemies pushing you. If you have a heavy amount of fire being drawn your way throw down your incendiary grenade or concussion and go in full with your melee to clear the area and gain your health back.

Using your LMG
If there is fire coming from a distance, it's always great to get out your LMG to quickly deal with the fire from a distance. The ammo pools that these guns have been great. Allowing you to quickly and effectively deal with multiple enemies at once. You can shoot through shields from the skills we picked up earlier allowing us to heavily bring down enemies and running in to gain our ammunition back.

Using your secondary
Both the arbiter and the chinapuff do a considerable amount of splash damage to your enemies. And for Captain Winters as well as other swarms you can quickly deal with them by launching grenades at them clearing them quickly. Another thing they can be used for is if you are being swarmed you can quickly throw it down to get out of there as quickly as possible.


I know I overdid this a bit, but I hope that this build gives you an insight on how to be a capable sociopath user.
Thanks again and if you want to make any comments on how I could improve feel free to leave them below!

Good luck in your fight!
-BeastFox
15 Comments
yeetpolar050 30 Dec, 2024 @ 9:38am 
On lower difficulties for this build you are a GOD
GAME OVER[TR] 9 Nov, 2020 @ 10:58am 
bad build
Defensive MicroBots 7 Jun, 2018 @ 8:10pm 
Nice Job
Frank 29 Apr, 2018 @ 4:56am 
Right , thanks :)
craig "weatherman" huckabee  [author] 29 Apr, 2018 @ 4:20am 
Yakuza might just work in your favor. But i'd be very weary. You arent getting any health regeneration since Yakuza relys a lot on low health but the 50% Better bersker can help you out a little bit. Other than that something like armorer or grinder (You'll have to change the skills since you can only use the Light Ballistic Vest or Two Piece Suit) But you're going to find it slightly more difficult since it wont work like Sociopath does.
Frank 28 Apr, 2018 @ 11:05pm 
what can i use in place of sociopath? i don't have the dlc
Hugo 24 Apr, 2018 @ 4:11pm 
Interesting build, the one build I got for sociopath is meele oriented, I go the full survivavility route there, having jokers, suit, low detection, crits and keeping my main weapon as a bow, something that doesn't require skills to be effective. Also I don't bother with berzerker as the reduced survivability is something I found killing me quite a lot.
As far as meele weapons go, the Ice Pick is a direct upgrade over the El Verdugo and the alabama razor is quite something when used in a meele build.

Side note: You put Fugitive instead of Mastermind on the first tree.
Radioactive Fish Sticks 24 Apr, 2018 @ 8:14am 
You can take out Counterstrike aced and Martial Arts aced as you have no need to counter-kick cloakers (ideally) and no need to increase your melee weapon's knockdown stat since your goal anyway is to kill with melee.
Radioactive Fish Sticks 24 Apr, 2018 @ 8:11am 
@heartless That's because his skill trees total 128 points out of the 120 total you get.

And to think another comment confirmed this guide looks fine. :steamfacepalm:
ready 23 Apr, 2018 @ 2:53pm 
i'll def try out this build! for some reason I can't find the KSP Light Machine Gun in my LMG slots even when I have all the DLC. and also I don't have enough to fill the entire fugitive tree, I am Infamy V but I couldnt afford to ace counterstrike or get BloodThirst.