Left 4 Dead 2

Left 4 Dead 2

44 ratings
CI Coloring System Guide
By мяFunreal
Ever wanted to make a CI mod but you have no idea how the coloring system works? I'll teach you.
   
Award
Favorite
Favorited
Unfavorite
Introduction
The first time you open up a Common Infected texture you will be greeted by an incomprehensible mess of colors. You can make out the basic texture of the CI in the alpha channel but the rest of the whole thing seems like a mess. Everything is blue, yellow, green and nothing seems to make a lick of sense.

Below, as an example, is Jimmy Gibbs body texture


So, this guide will teach you how the CI system works. You will be able to create your very own working CI with coloring, blood masking, detail masking, reflectivity masking and specularity masking.
New L4D1 Infected Shader
You might have noticed that L4D1 infected textures don't look strange.

As per "Last Stand" we have the option to make a basic texture and use that, while still being able to use the fancy things, such as damagecutout.

Just add $DISABLEVARIATION 1 to your vmt file and you can ignore everything below.
Naturally you won't have any variation of color and overlays. (Duh.)
Explanation of each channel
All channels are greyscale and serve two masking purposes, with exception of the alpha mask. Since a greyscale channel can only use the colors between RGB 0 and RGB 255 valve decided to have the lower range 0-127 be used for one thing and the higher range 127-255 for another.
The base color of all your layers are 127, which is perfectly in between 0-255. Which is acts as a "no effect" zone.
We seem to have a "buffer" zone of about 10-20 grey tones to prevent the masks to mix.
In other words; 0-117 and 137-255 is where the effect is mostly seen at all.


Red Channel - Specularity and Detail mask
The lower range 0-127 is used for specularity.

The upper range 127-255 is used for the detail. 141 is where it starts to get visible
The detail texture is whatever the vmt line $detail "..." is

This channel stores four different mask combinations, as the picture is made 50% its original size, with one variant in each corner.

Green Channel - Reflectivity and Blood mask
0-122 is used for reflectivity.
The closer to 0 the more reflective this part is.
The entire 0-122 range will glow in the maximum brightness once a flashlight hits it.
This is used for the CI eyes and the roadcrew's reflective jackets.

The reflection only works if the vmt line $EYEGLOW 1 is set.
The reflection color is determined by the vmt parameter $EYEGLOWCOLOR "[R G B]".
Despite it being called "eyeglowcolor" it actually handles all reflections.
$EYEGLOWFLASHLIGHTBOOST X can be used strengthen the reflectivity X amount.
Roadworker vest stripes for example use 10.

The upper range 127-255 (effectively 170-255) is used for blood.
The closer to 255, the more opaque blood becomes.
$BLOODCOLOR "[R G B]" determines color of blood.

The Red and Green channel both have four variants. One 50% scale version in each corner.
The game picks one corner during gameplay and shows that blood/reflectivity combo.
It will never use one corner for reflectivity and another for blood.

Blue Channel - Clothing and Skin mask
This channel determines which part belongs to clothing and which belongs to skin.
It also decides how saturated the colors will be when the gradient applies them.

Alpha Channel - Luminosity and Color-Mapping
The alpha channel is the luminosity.
The colors of the gradient will be applied to this using a gradient mapping method, like photoshop.
Preparing
Let's prepare ourselves to start from square one with every single layer.
First, make sure that the Red, Green and Blue channels are a solid 127. You do not need to worry about the alpha channel just yet. Leave that blank for now.

Example:


Each of the RGB channels has two purposes it would be the best choice for you to create a group for each channel with an empty layer for both masks. The alpa channel will requite more layers, but we will discuss that later, since it builts on top of whatever diffuse texture you currently have.

Example:


In this guide i will use the following doodle by Zach "Psychicpebbles" Hadel.
Have your texture as a layer in the layer stack for Masking the Blue and Alpha channel.


The Red and Green channel both have four variants they can use, which means that you have the texture four times tiled onto the texture. I advise to scale the texture by 50% and move them into the corners of your texture to use those as a guide for correct masking. You must not include this guide in the Red and Green channels. Just have it visible in the layer stack only to aid you in masking.

Example:

Now that you are prepped, you can finally start creating the masks!
Smart Object Tip
Photoshop users can make use of "Smart Objects"

Instead of painting the masks of the Red and Green channel at a 50% size in each corner (less detail and accuracy this way), you can make one mask at 100% size, put all layers of that variant into a group folder, turn the group into a "Smart Object", and scale this smart object to 50% for one corner.

Pros:
Allows you to paint with more accuracy.
De-clutters the layer stack as all the layers for that corner are now no longer visible.
Loads each Smart Object as a new image in photoshop*

Cons:
Having all Smart Object images open in photoshop could get confusing. Which can be avoided by only having Red or Green Smart Objects open at a time.

This video here explains how a smart object works, and what its useful for:
*Note how at 2:26 the Smart Object has been double-clicked to open a new image.
Red Channel (Spec. & Detail mask)
The red channel used as a maks for the detail texture and specularity.

Friendly reminder:
The Red and Green channel both have four variants.
But the game only picks one corner. Meaning upper left red always goes with upper left green.

Detail
Start by painting your mask with greyscale between 140 255 on an empty layer, without the 127 grey background.
140 is pretty much invisible and 255 being fully opaque.

Example with and without guide layer:


Specularity
Mask specularity on a new empty layer.
The range for specularity mask lies between 0-125
0 being full specularity, 125 being practically non existant.

This is how the photoshop document looks like at the moment:


As you can see, we now have four variants.
The upper left with the watch having specularity and a dirty shirt.
The upper right with a gradually dirty body.
The lower left with dirty shoes and a specular mask on the pamphlet.
The lower right with nothing at all.

Notice how my Specularity and Detail layer have no background.
We don't have a 127 background in this group because copypasting colors from the collective RGB layer into a specific color layer can sometimes cause color values to shift slightly, which would turn 127 into anything between 124-130.
To make matters worse, VTF compression changes those values even more, introducing even more artifacts.
This is why there's a "Buffer zone" around the 127 value to begin with.

You may now merge this group into one image.

Since we do not have the entire picture covered, add a small dot to the corners.
Make sure the dot is not covering anything that is UV-Mapped
We're doing this because without the dots, photoshop will ignore the empty space when pasting images and paste the image anywhere in the Red layer. Which causes it to be misaligned.
With those dots, photoshop is forced to use all pixels from the very top left to the bottom right and won't ignore the empty space, making pasting the image easier.

Duplicate the group and merge the duplicate group to a single layer.
This will keep the original group for further edits nicely separated.

Select the prepped "background" and then paste the merged image to the red channel.
This will paste your merged image into the red channel of only the selected layer.
Note how i moved the prepped background layer to the top of the layer stack.

The red channel is now finished.
Our entire project now looks like this:


If we were to load this texture in the game, this is what we got now:
It picked the upper right corner of our texture.
Green Channel (Reflect & Blood mask)
The green channel masks blood and reflectivity.
This channel also uses the four variants.

Blood
You can already start by drawing on blood if you would like, but I would like to show you a way to import a blood picture and using the levels tool to push it into the "blood only" range. This level tool technique will also be used for the blue and alpha channel later, so you better learn how to use this tool.

If you have a blood texture without transparency, you will have to manually remove it. You could color select the white and delete it, or manually select it with the lasso tool and remove it.

Once you got blood layers that only have blood, without any background on them, you can greyscale them and then use the levels tool on the greyscaled blood to cut away everything outside the 170-255 range

Example:


This greyscaled blood now had the darkest possible part being 170 and the brightest 255. But the range was very small. so I undid my leveling, increased the contrast and then leveled it again.


As you can see, the left blood splatter now has several shades of grey. Causing some parts to be more opaque than others.

Reflectivity
This is usually used for the eyes only.
The Roadworker and Ceda Uncommons use this for the stripes and Ceda logo. Making them more visible in darker areas, such as for rain and smoke.

Note:
The implementation of this reflectivity is not good.
Instead of properly "multiplying the brightness" relative to the flashlight texture, it fully illuminates everything if any pixel of the flashlight texture hits reflective spots.
In this image you can see how the flashlight texture stops, making the reflective part stop harshly.


Anyways, this is how the reflectivity mask should look like. With and without guide.


Duplicate this group, add the corner guides, paste to the green channel of the Background layer.
Just like the red channel, but now for green.

Now we got this:


Saving the texture and loading it ingame gives us this
Note how the blood colored the detail texture aswell
Blue Channel (Clothing mask)
The blue channel is the tint mask for clothing and skin.
You can decide saturation of all colors for a piece of clothing and skin here.
For example: worn out knees on jeans, tan lines, and greying hair.

Skin
Range is 127-255. The closer to 127, the less saturated your color is. Valve usually uses 248.


Clothing
Range is 0-127. The closer to 127, the less saturated your color is.
Valve usually uses 0.

Example:

All channels together now get me this here.
Ingame, now that we mapped some saturation, we get this here:
Oh look, there's already some color!
I replaced Jimmy Gibbs with this model and used his VMT as a base, which uses his palette.

You can see the faded knees, some detail in the hair and the pamphlet has a darker picture on it, compared to the rest of it, as I wanted.
The background still has no color because it is 127, the point where no color is applied.

Alpha Layer (Luminosity & Color-Map)
The alpha channel acts as the luminance, which maps the colors of a gradient texture onto your CI texture.


Luminance
First of all, you need to make a luminance texture to even begin with the mapping.
The luminance is pretty much just a regular texture without any colors.
I quickly made one, it doesn't look super nice but it will do for teaching purposes.


Every piece of clothing has a different fabric. The skin and hair also has some structure to it.

Let us take a look at that gradient texture now, to figure out for how we should modify this layer.
The gradient texture that will be mapped onto our CI texture is 256x16px.
Note that it is 256 pixel wide, almost 1:1 with the 0-255 spectrum.
The very left part will be used for the dark parts and the very right for the bright parts.
The top 256x8px slice is for skintones, in other words the 127-255 range of the blue channel.
The lower 256x8px slice is for clothing, which would be the 0-127 range of the blue channel.

If you want to move anything up and down, modify the Blue channel.
For example, lets say you already fully used your entire lower range but you still need to map something to a color range. You could edit the blue channel to remap it to the "skin" side and then use a smaller gradient for skintones and hair.


Mapping Gradient to Texture
Remember when we used the level tool on the blood to limit it to the range 170-255?
We basically do that again.
In other words, all we got to do is limit the pants on the CI alpha to 0-50.
This will map the colors of the pallete from pixel 0-50 to the pants.
Tip: Use effect layers with masks, don't modify the base image.

Note:
Either make up your own ranges, or adhere to pre-existing ranges from any pallette.
Using original ranges has the bonus of allowing pallete mods to be compatible with your model.


Warning:
When i wrote this guide and mapped everything, silly me forgot the range padding.
I mapped the pants to 0-50 and the shirt 50-99 and so on.
Both shirt and pants shared a pixel, so brightest part of the pants is the darkest part of the shirt. Make sure you limit your alpha channel 0-50 51-99 100-.... Do not reuse the same number. Perhaps even skip two numbers just to be sure. I will later explain in the coloring part why.

You can now map the shirt and other clothing parts on this 0-255 gradient.
I would first count how many pieces you have and decide how big of a range you want to give those things. the larger the range, the smoother the transition from dark color to bright.
I'd also write down the piece of clothing with the range into a text document so that you can later easily colorize the gradient without having to switch back and forth.

Warning:
Avoid having very small color rangers. Have at least 10 shades.
This will end up with dull colors as it doesn't have enough room for a proper dark-bright transition.

Once you've done the clothing, you can do the same with the skin.
In case you get confused:
Both clothing and skin can be mapped to the full 0-255 spectrum.
Skin will use the upper half, while clothing uses the lower part, thanks to the blue channel.

This is my alpha channel now.
Color Gradient texture
The color gradient gives the CI their color.

Note:
The texture size must be 256x16. Larger sizes such as 512x32 do not work.

In the previous section you mapped your pieces of clothing and skin to ranges on a spectrum of 0-255. If you made a list of what range your pieces are mapped to, you can open the gradient texture and start marking those ranges.

If you look at this image, you will see how the color mapping works.
  • On the very left I have blue for pants. No matter which of those 8 horizontal lines the game picks, I will always have blue pants.
  • The shirt has four colors horizontally. I can get blue pants with a purple, red, light blue and beige shirt.
  • The blue pants and purple shirt combo can have either light blue shoes or red shoes.
One horizontal line is one outfit. The game picks one per CI. You cannot mix lines.
If you want more outfits, you can make another bodygroup on your model to use another vmt file, to use another palette with different combinations.
Use a black-color gradient, black being left and your color being right.

Gradient mapping works like this:
Your alpha channel is greyscale. It has pixels ranging in brightness from 0-255.
Imagine all those colors in a black-white gradient, instead of a pants texture.
The very left will be darkest shade, the very right is brightest shade.
The game swaps that entire gradient with your colors.
Since you limited your pants to be just 0-50 you are able to have 0 be the darkest part of the pants and 50 the brightest part, then the next brightest color in that alpha channel is another piece of clothing, where its darkest shade of grey will be swapped with whatever dark color you chose...

this image shows how this one gradient using two colors can affect the greyscale alpha channel.
Only the buttom square has been limited to a 0-50 range so you can see how that is not orange, yet immediately around that square, the texture turns orange, while the top had parts darker than 50 and therefore turn blue.


As I mentioned earlier, I mapped the pants 0-50 and the shirt 50-99. Which causes the pants brightest area and the shirts darkest area to be the same pixel.
In other words, the shirt goes from bright to dark, darker, black, but then blue because the blue of the pants is there. This causes the black outline of the drawing to become blue.
Learn from my mistakes before you make your own.


Once the gradient coloring is done, save it in the BGR888 format with the following flags
  • Clamp S
  • Clamp T
  • No Mipmap
  • No Level Of detail
If you don't save it as BRG888 it will compress the gradient and you end up with this mess:

If you did it correclty, (unlike me with my overlapping limit ranges) you will have a nice-looking texture in game.

Good luck dressing up your CI in any color you could think of
10 Comments
мяFunreal  [author] 2 Jan @ 10:05am 
if you export with dxt1, tie alpha is always gone. You need to use dxt5 for the body texture and bgr888 for the gradient.

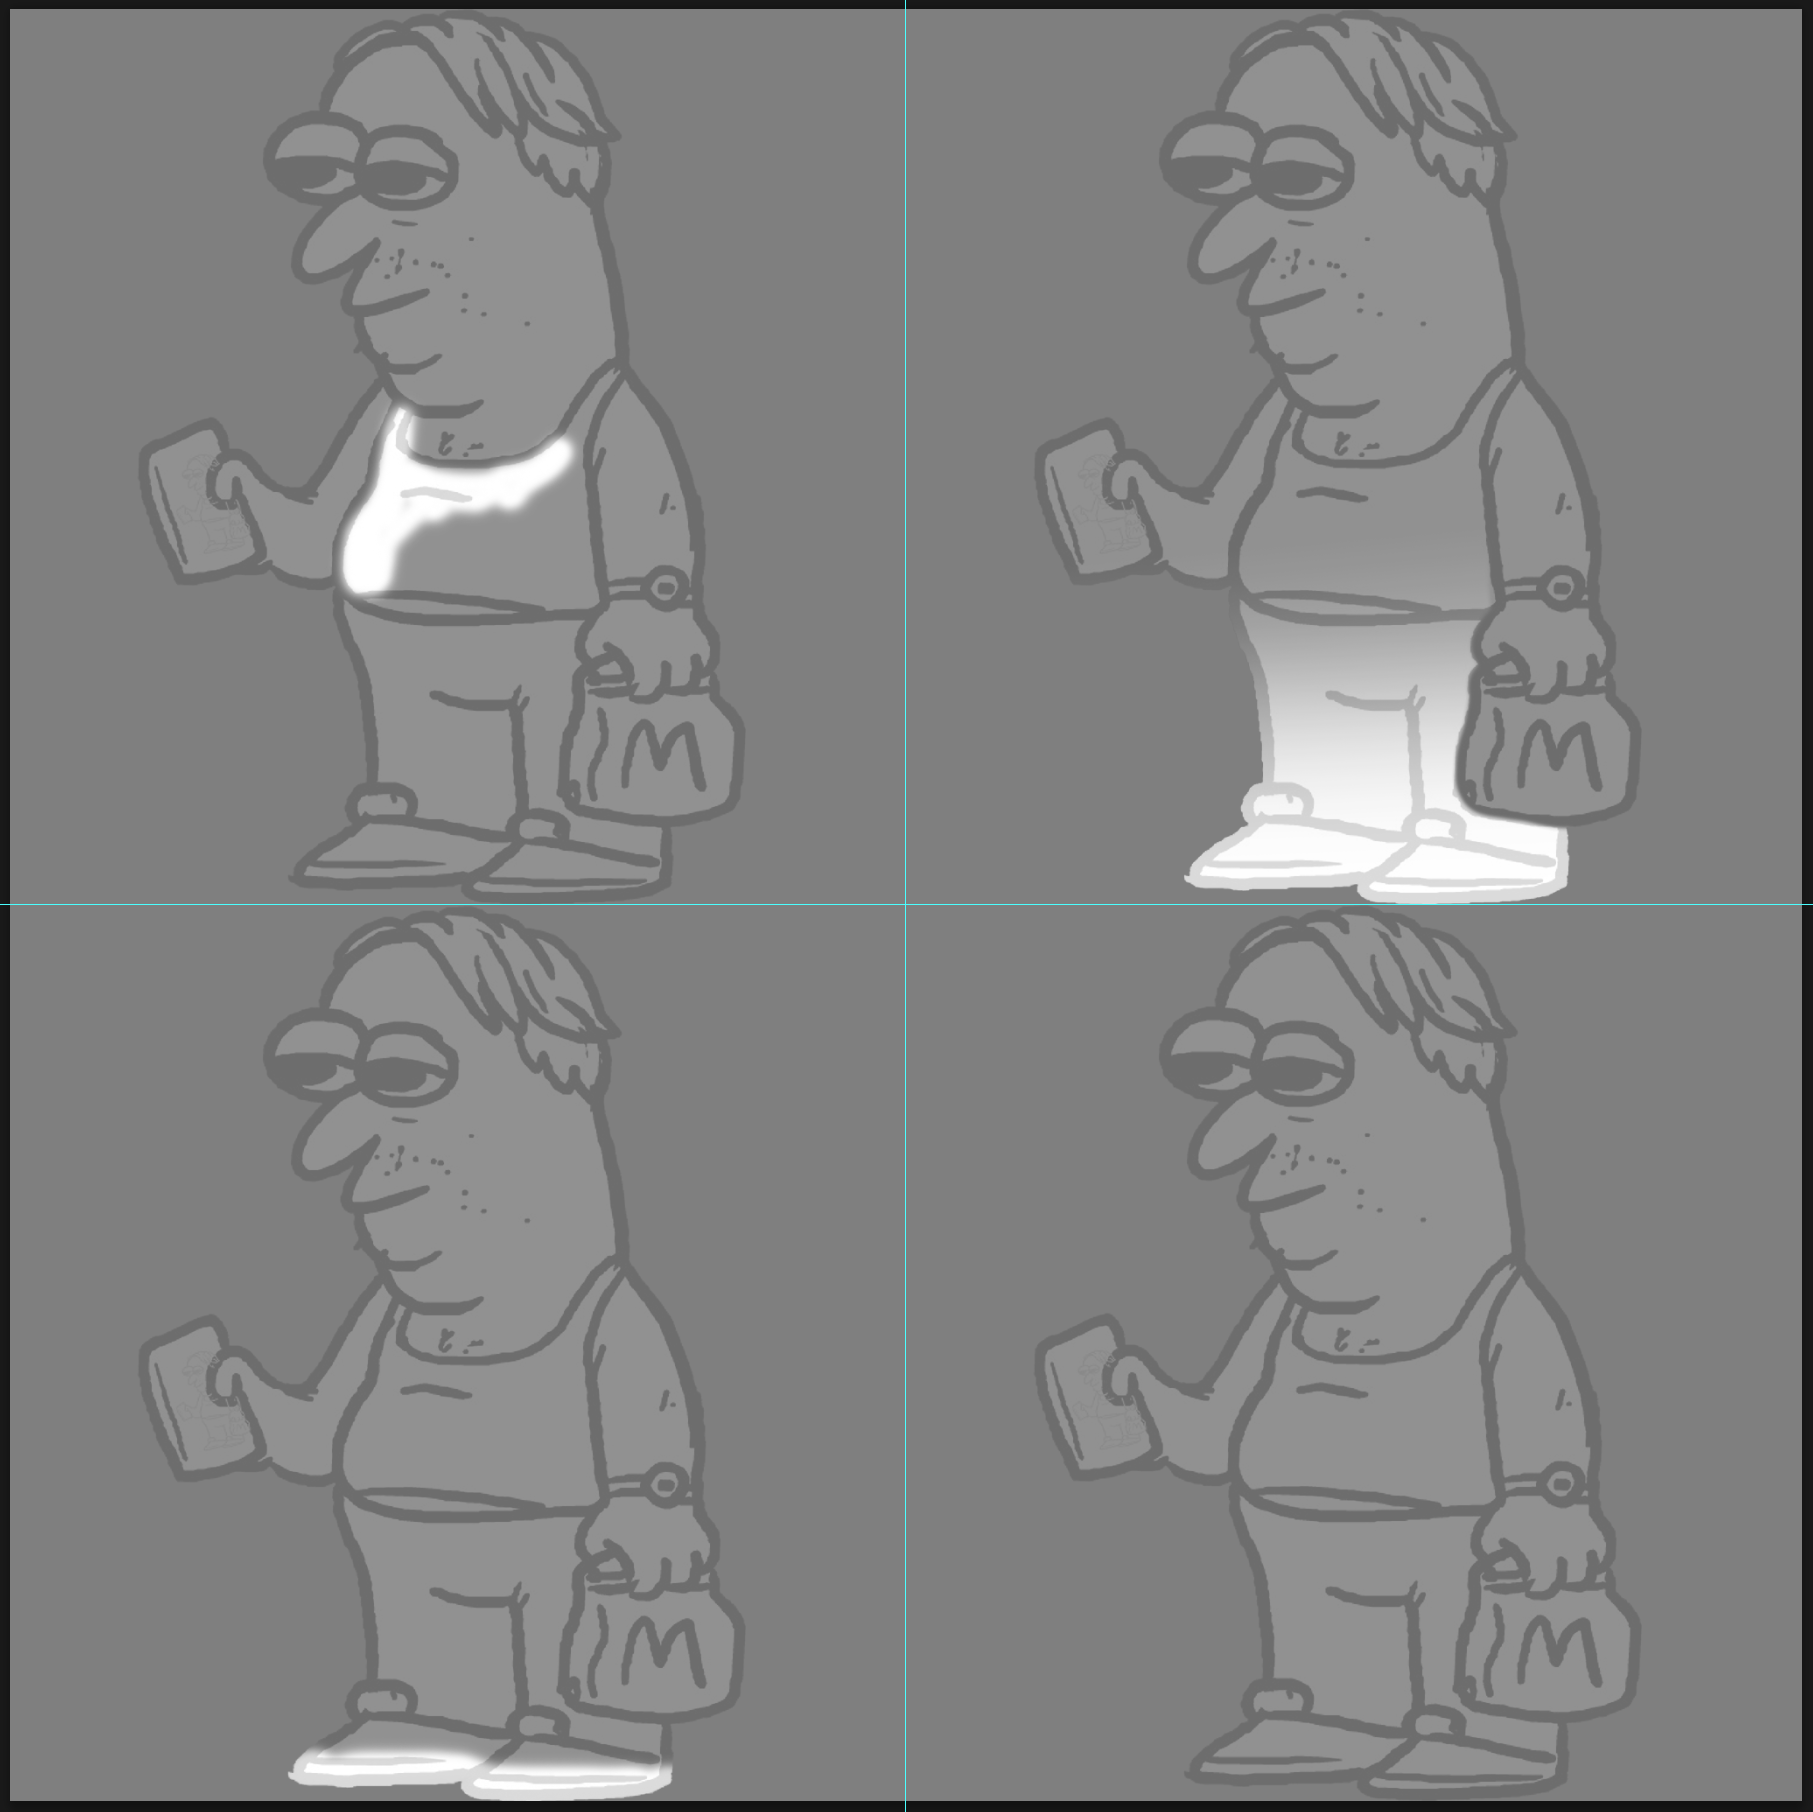
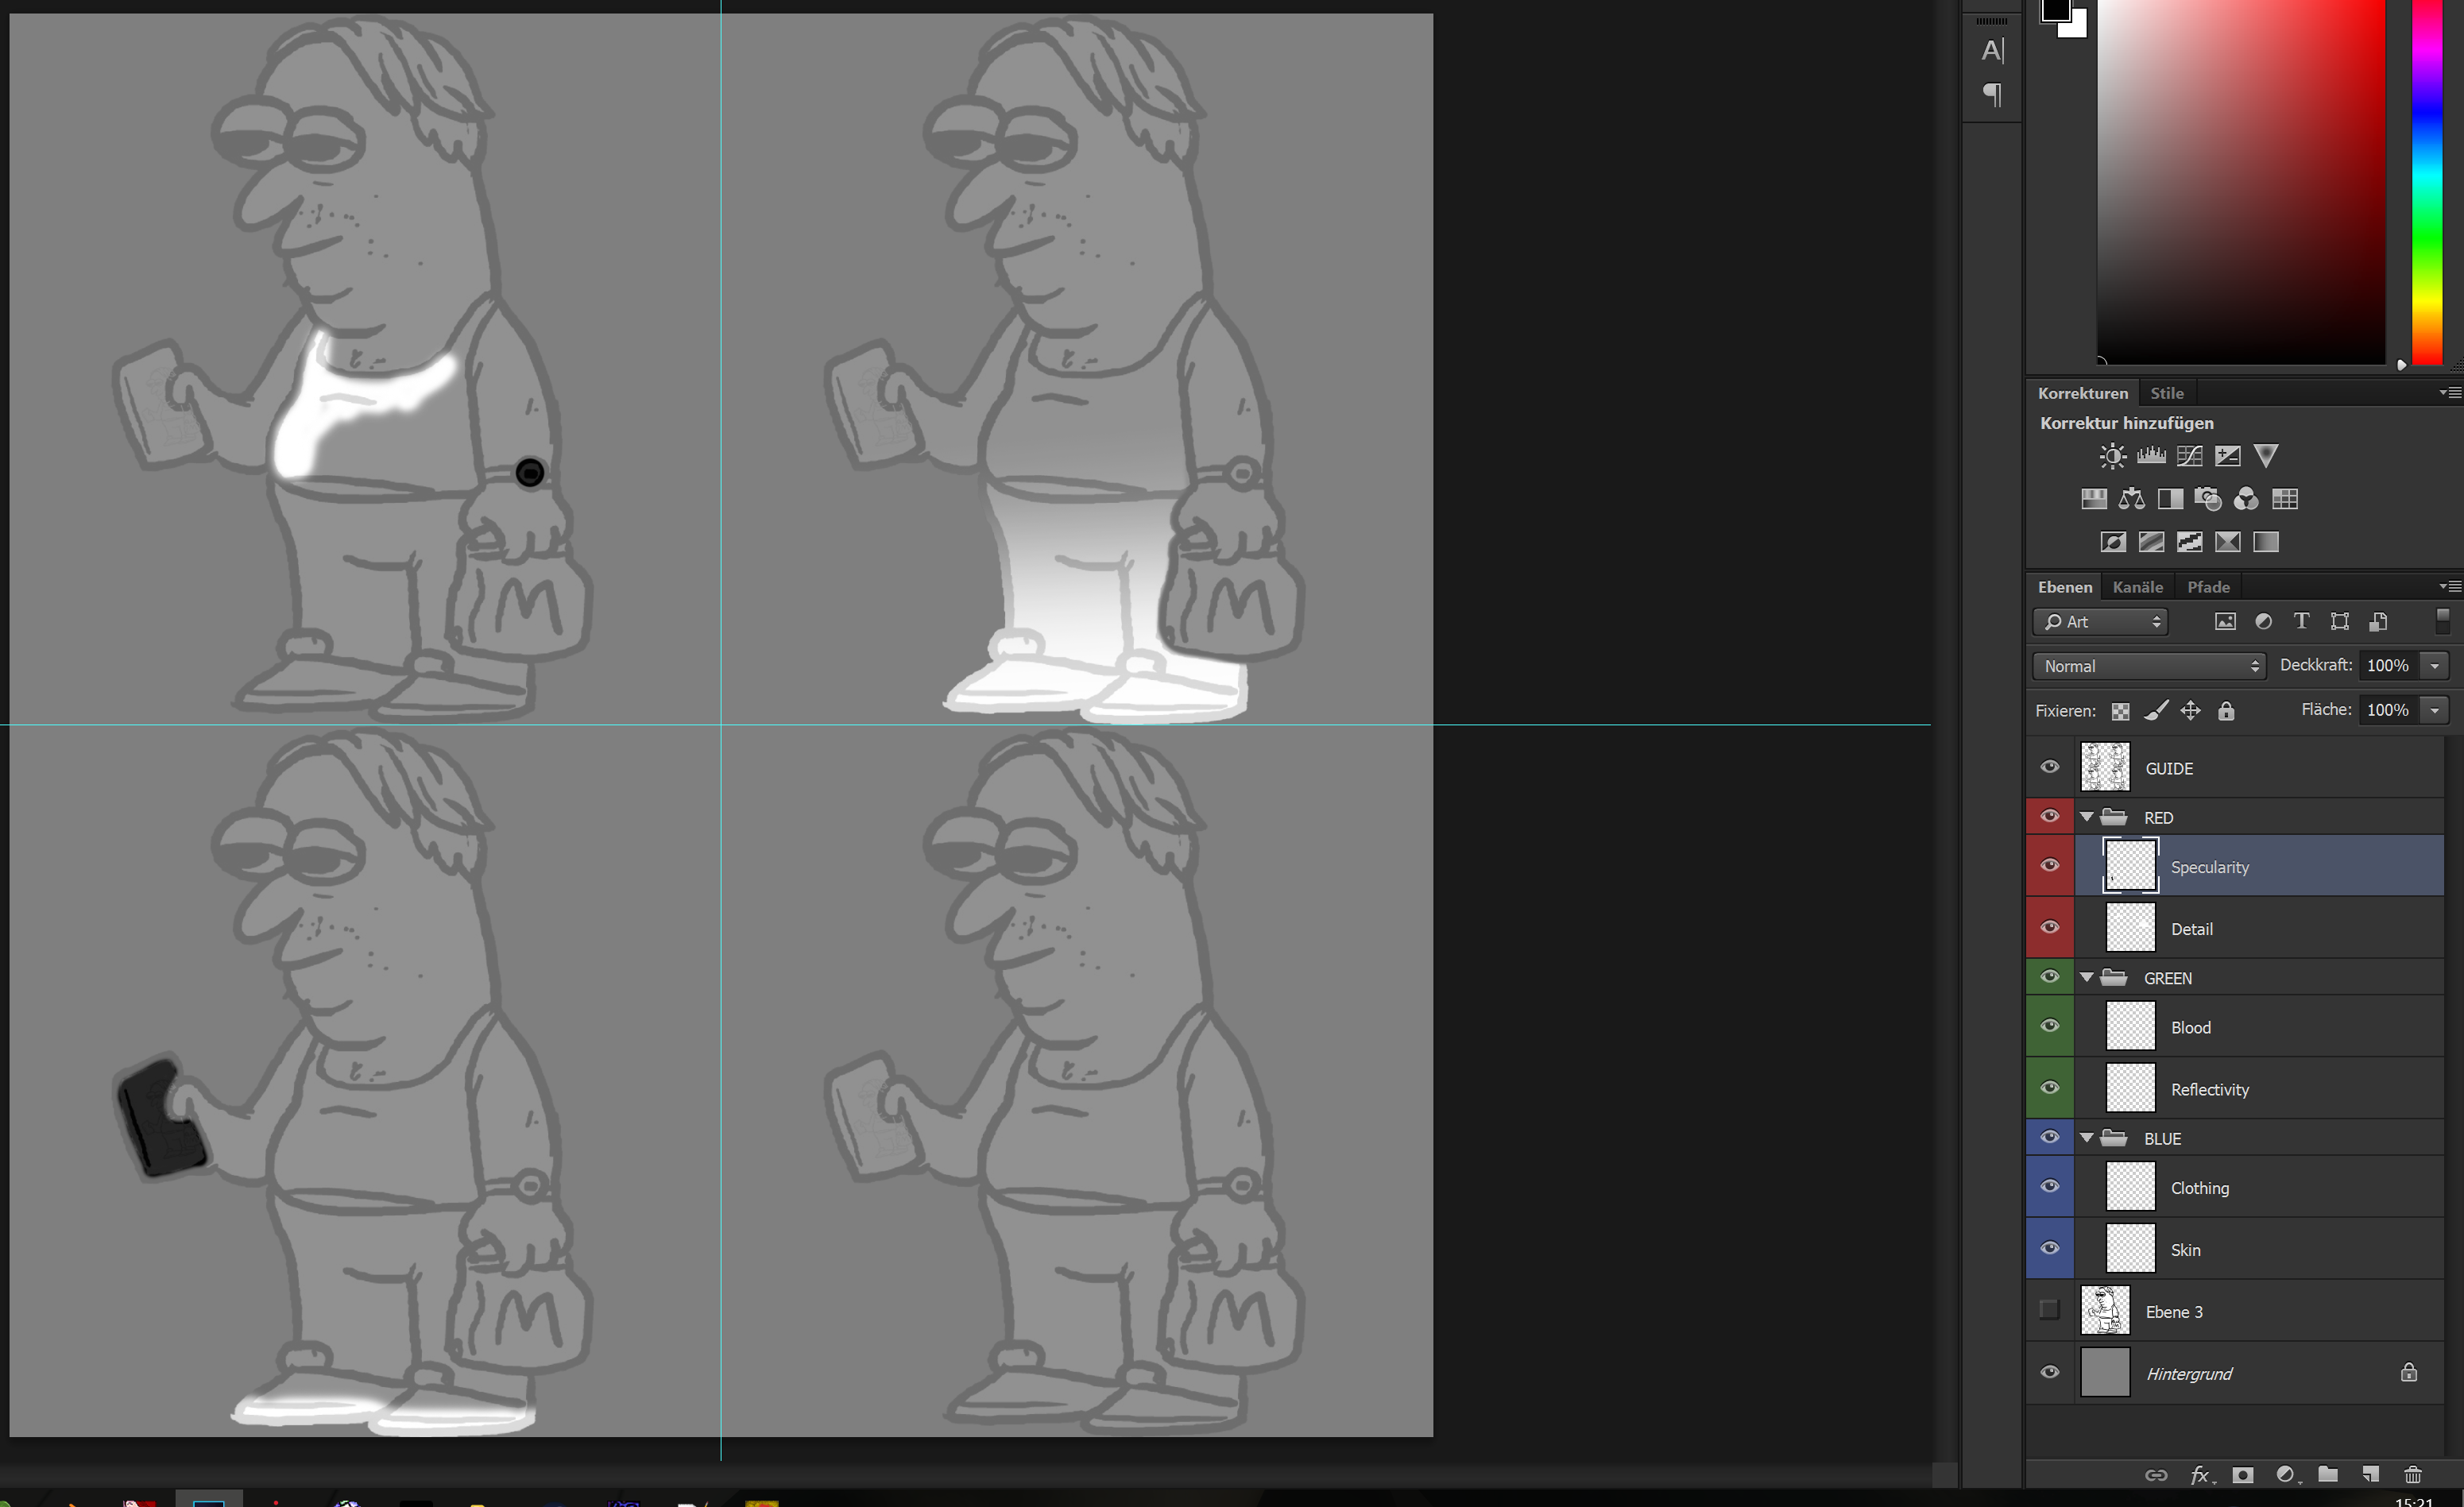
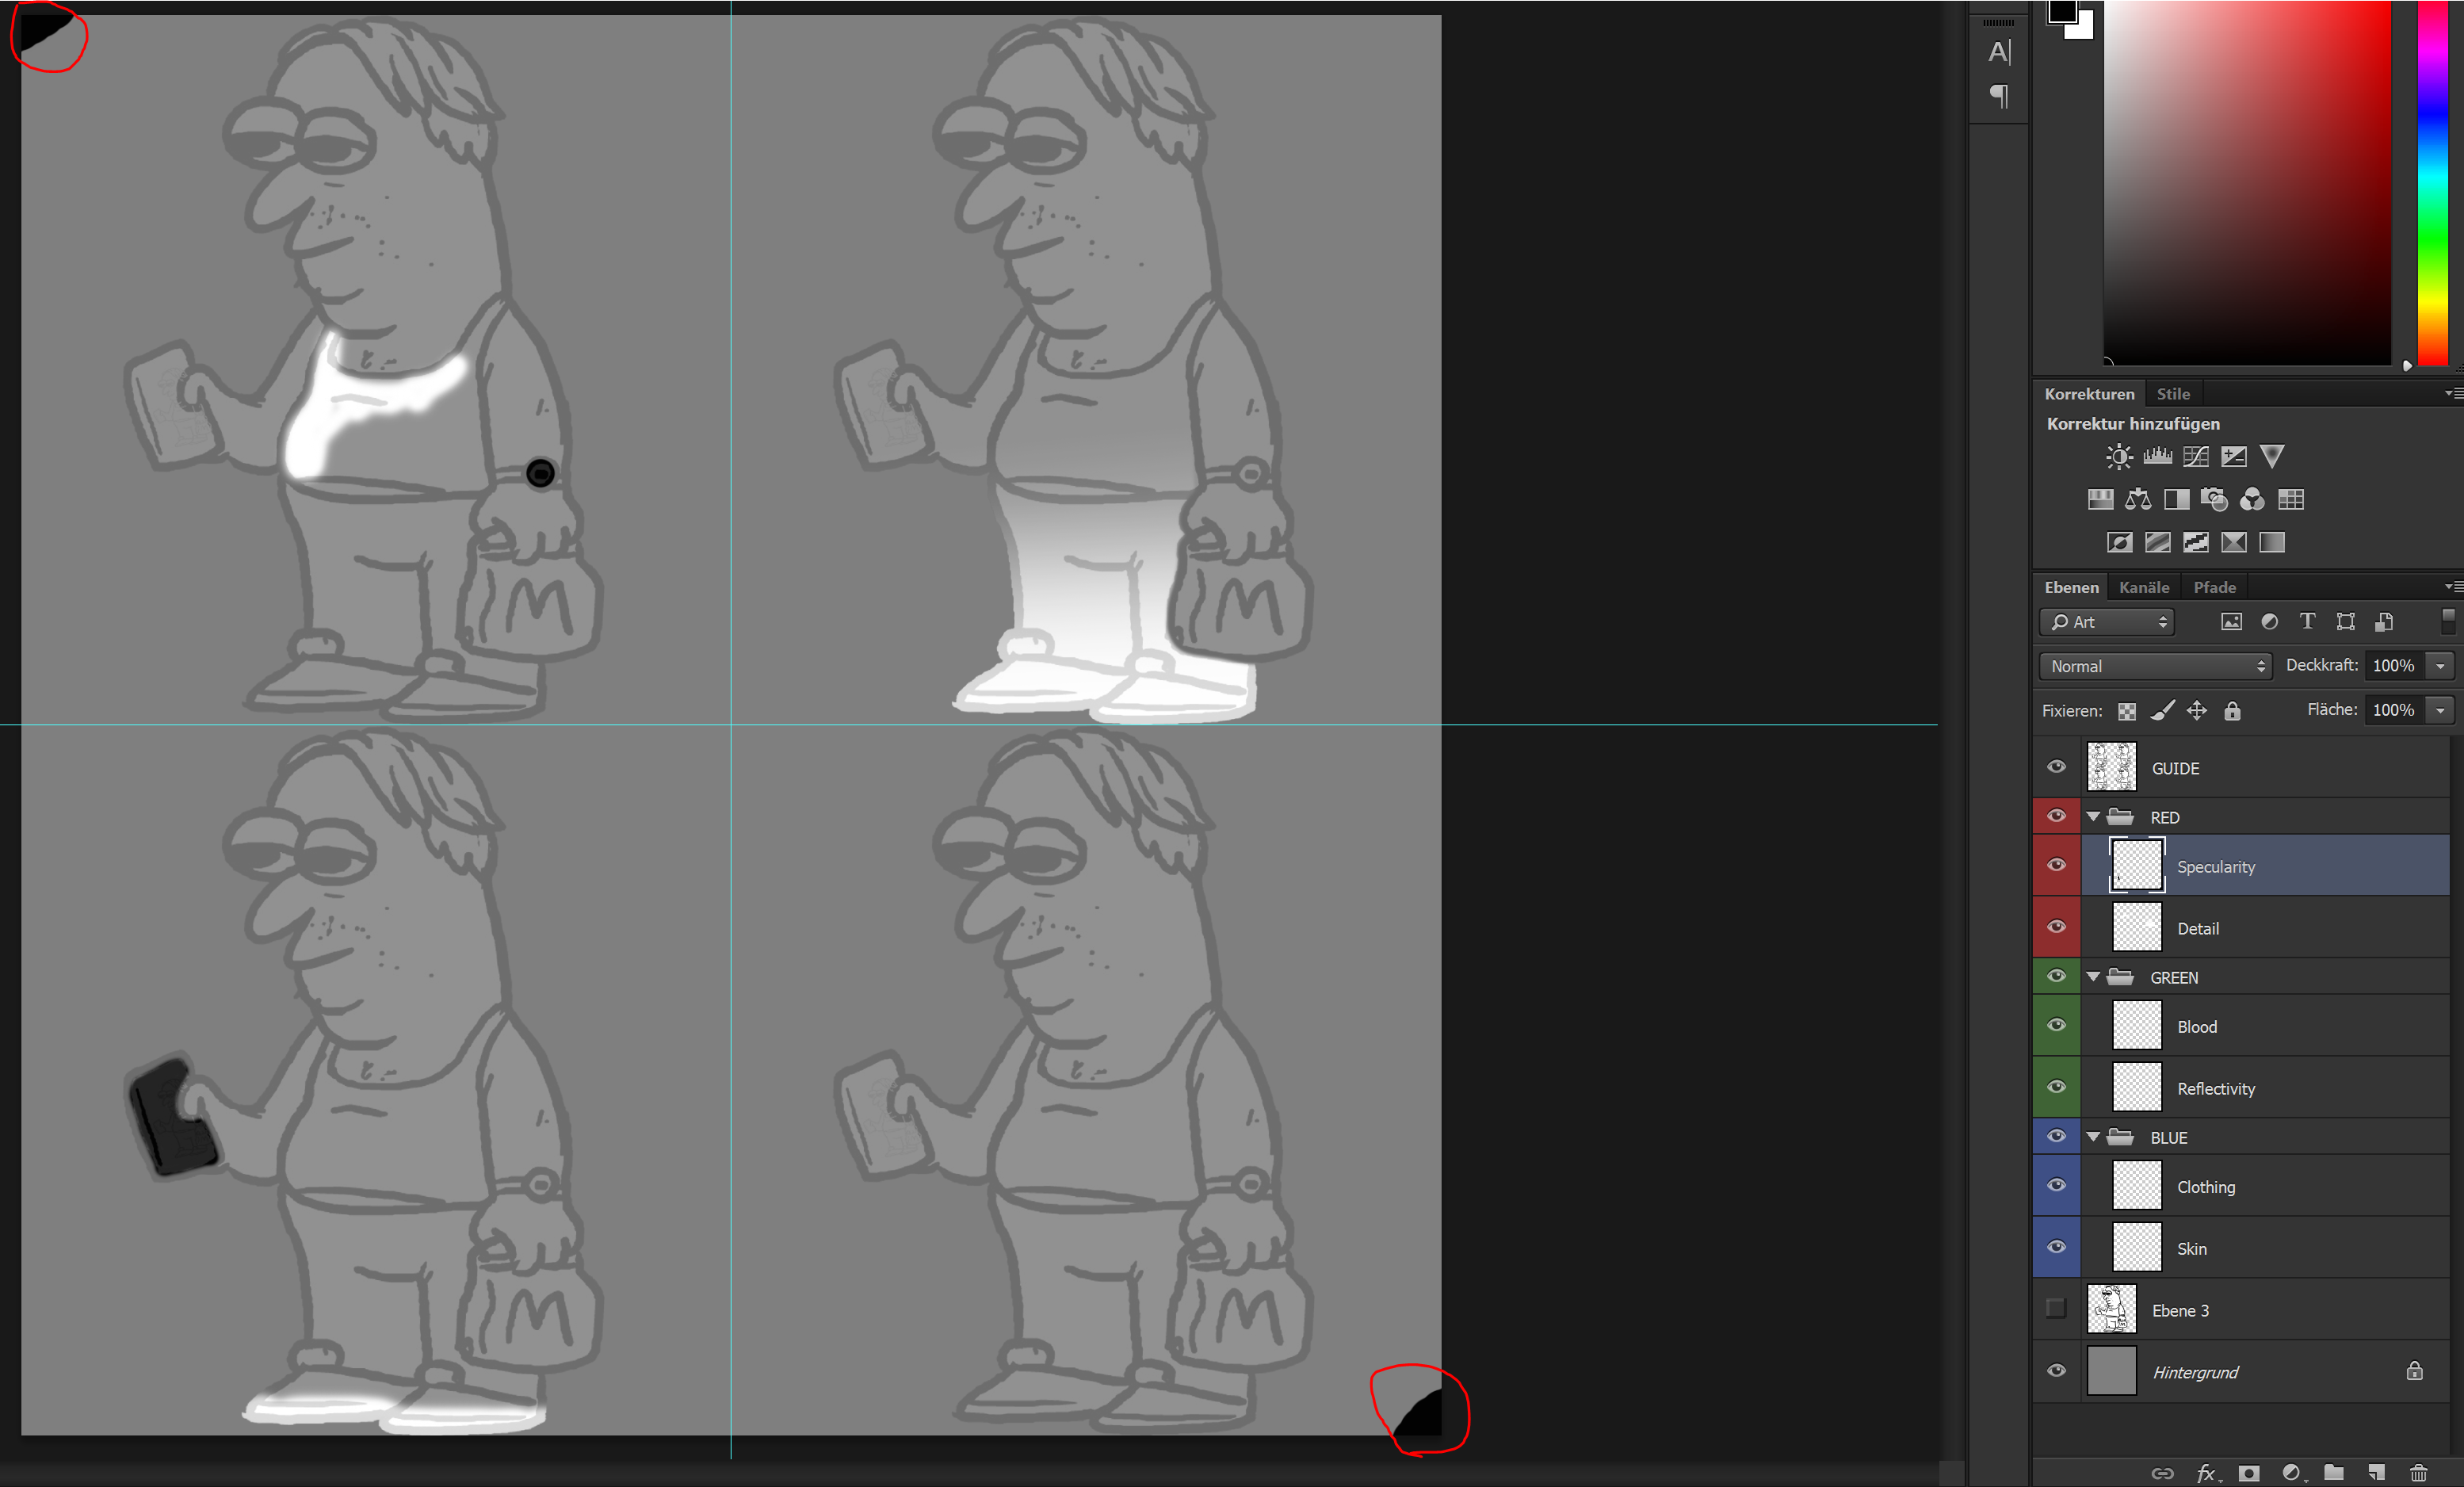
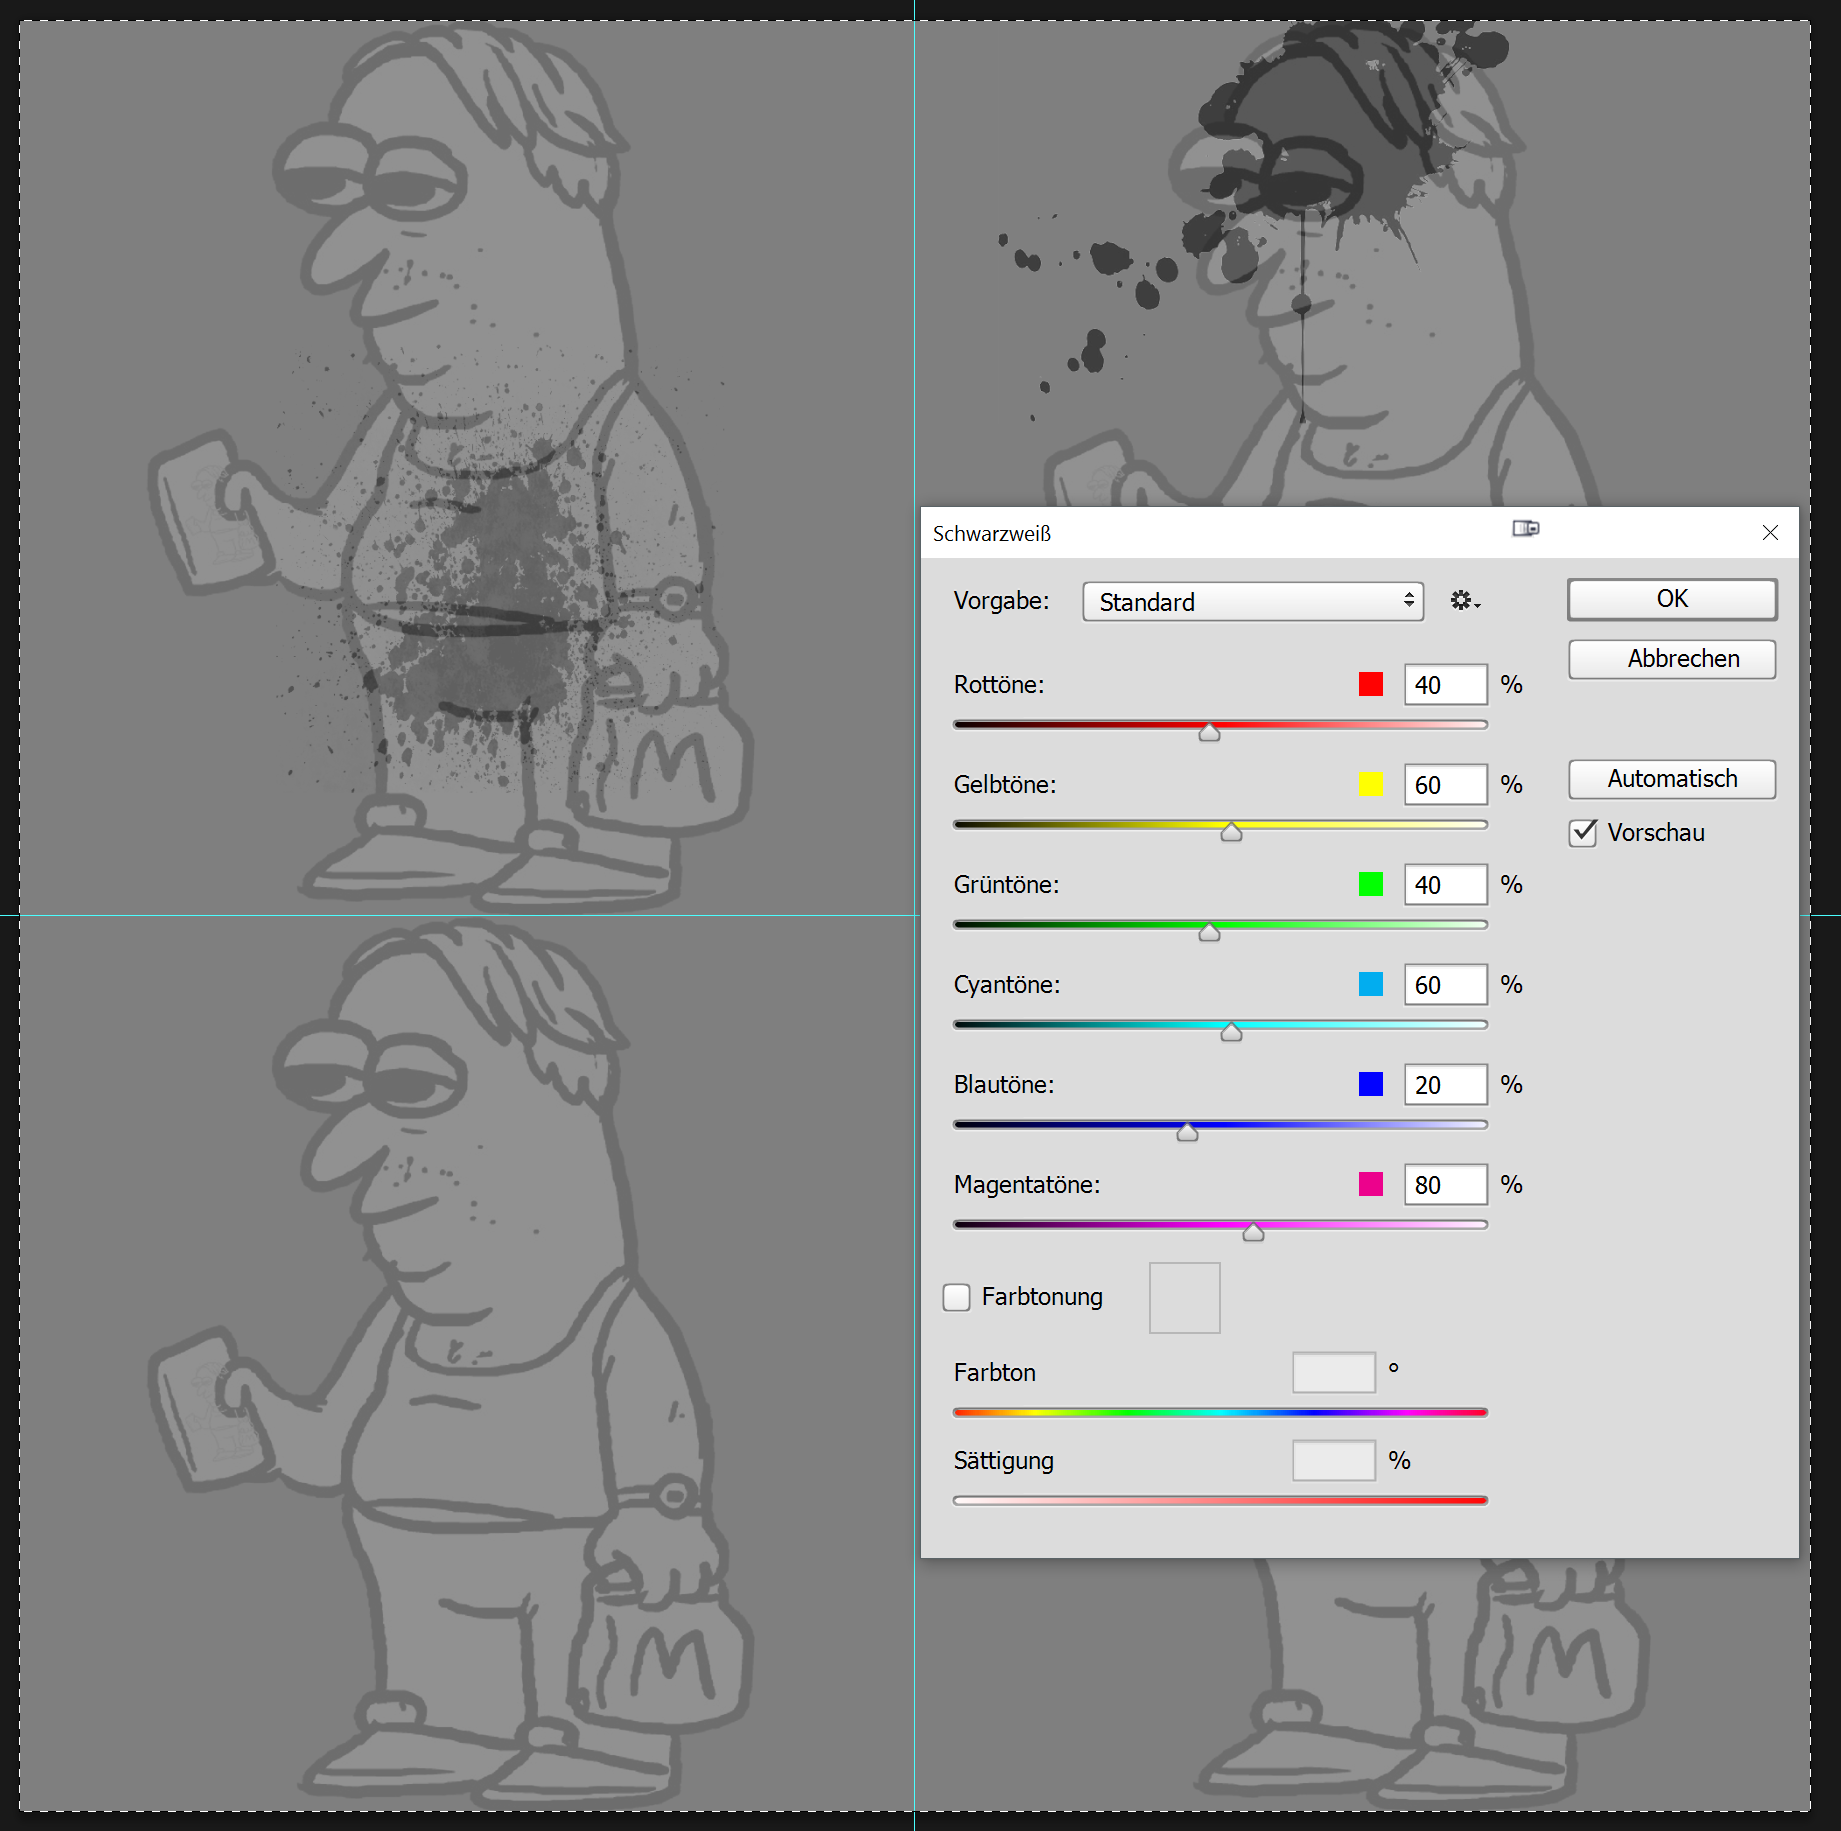
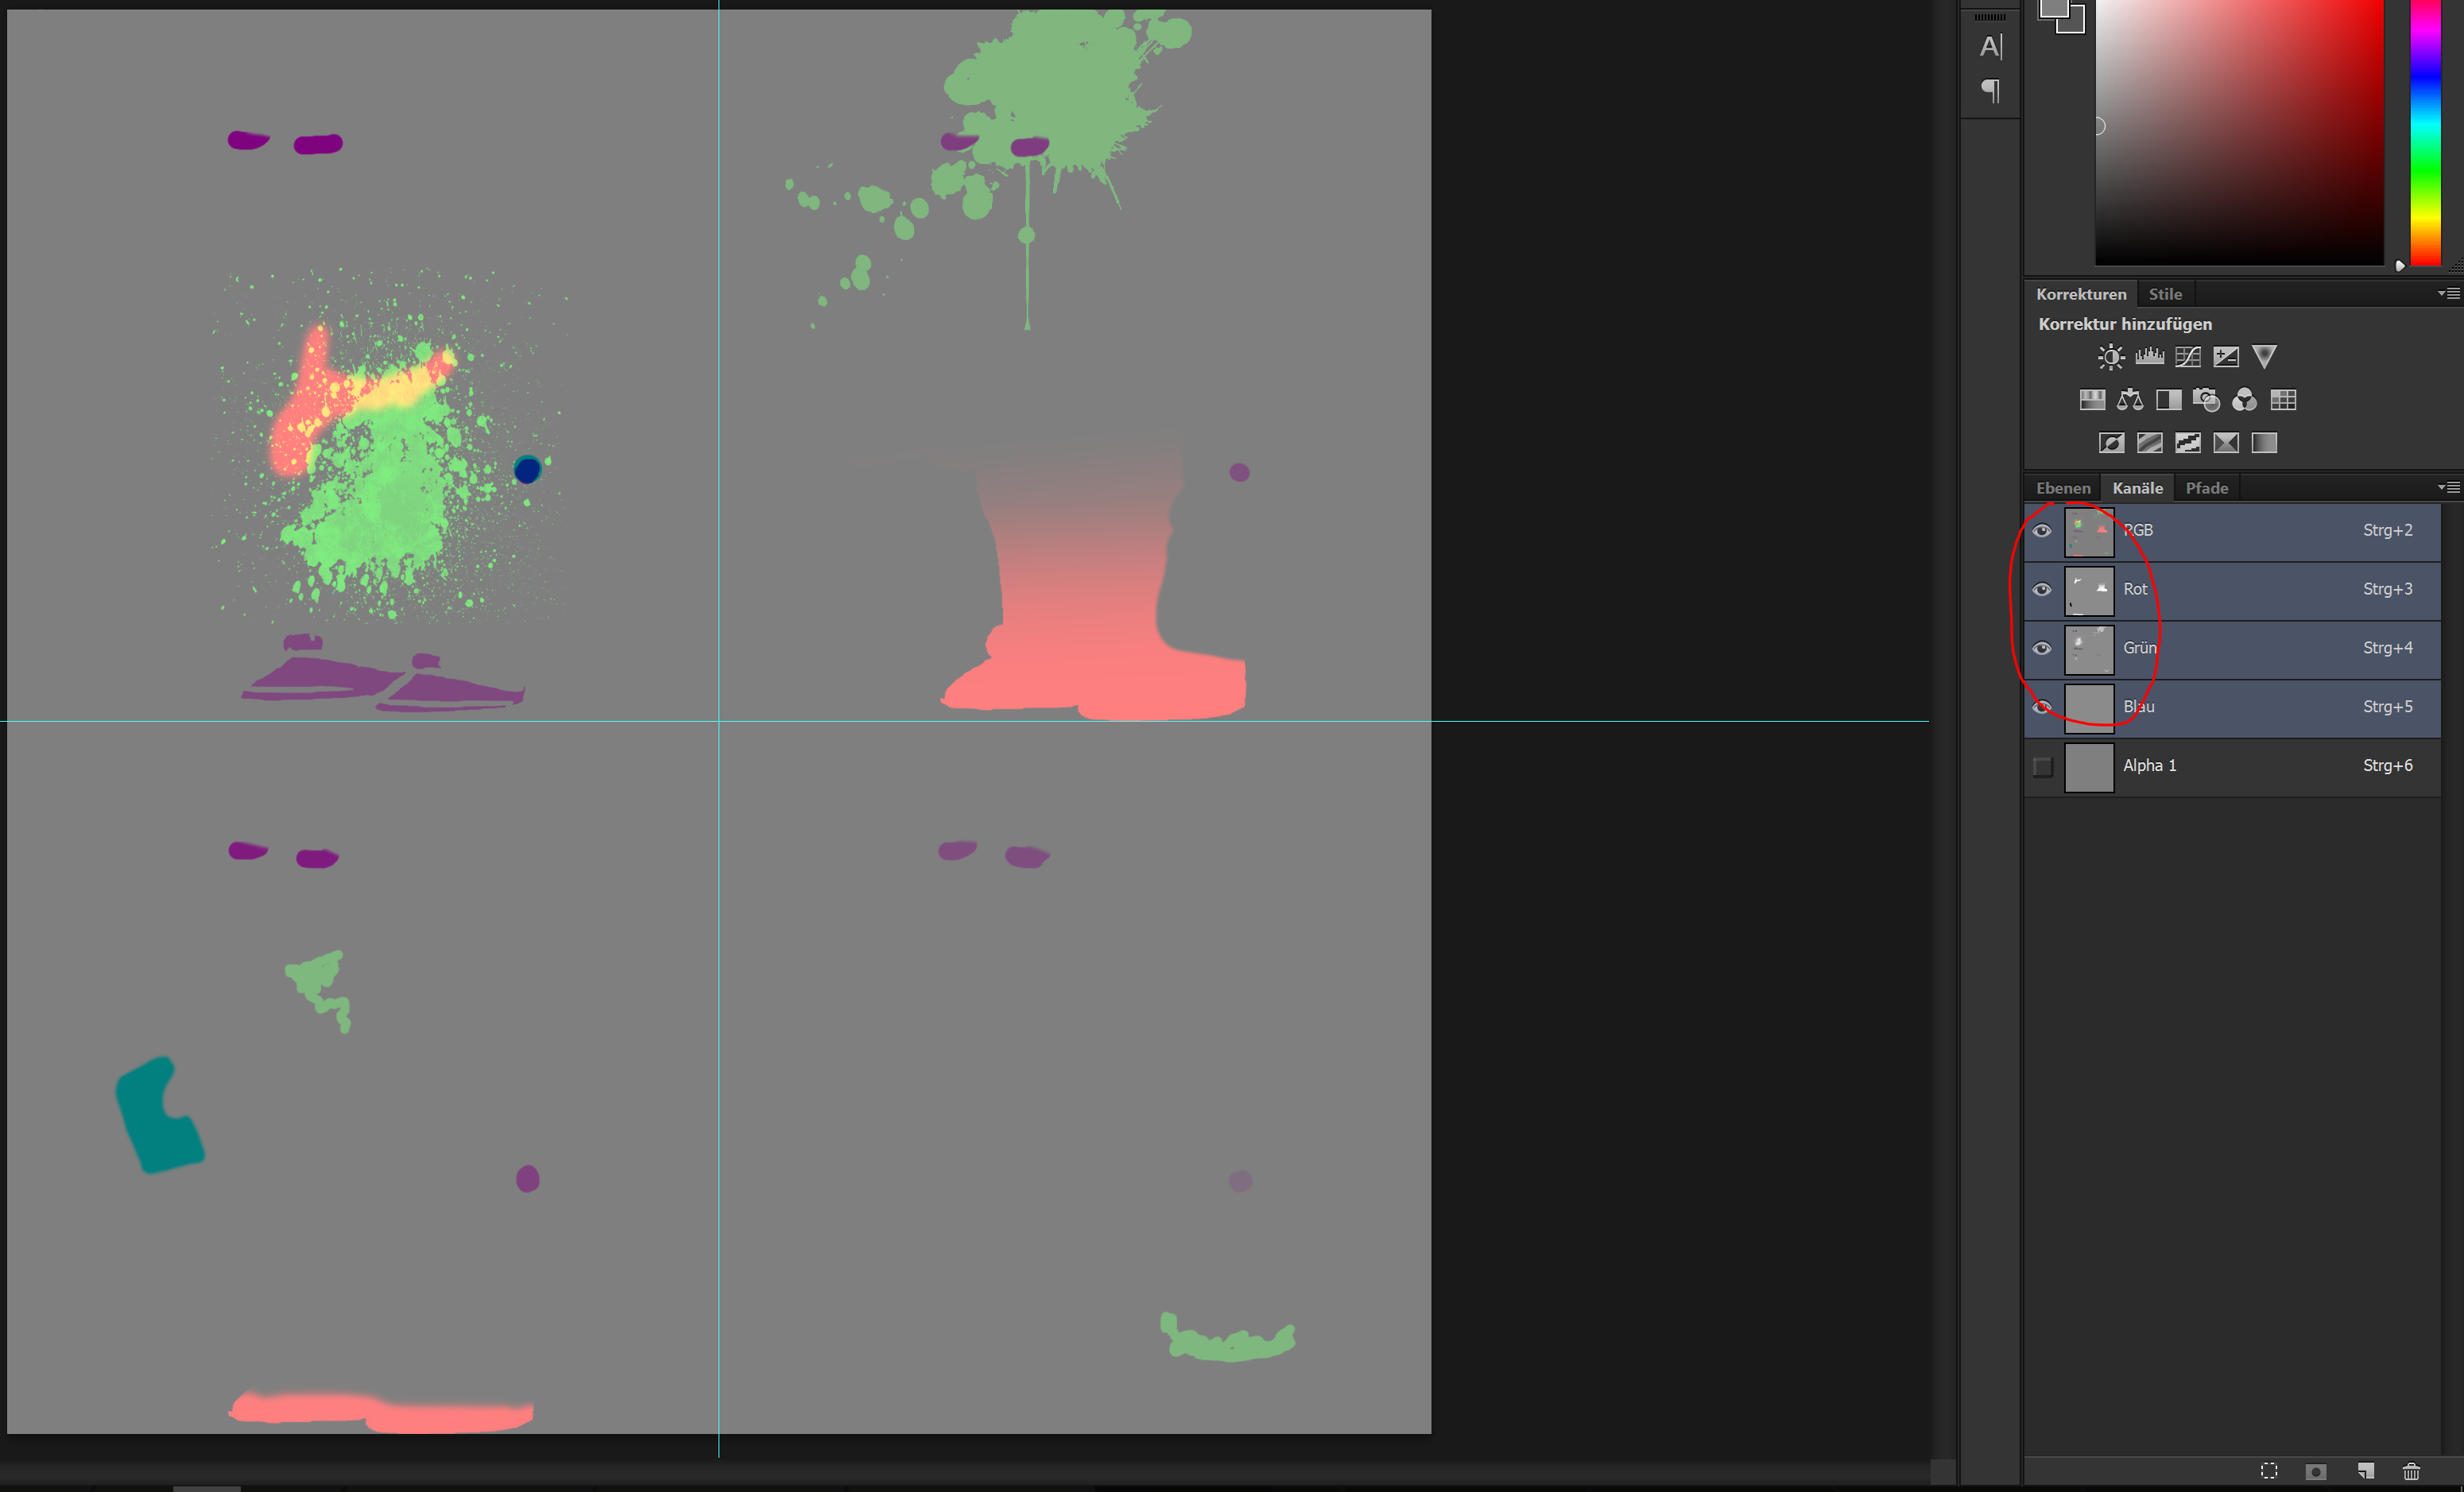
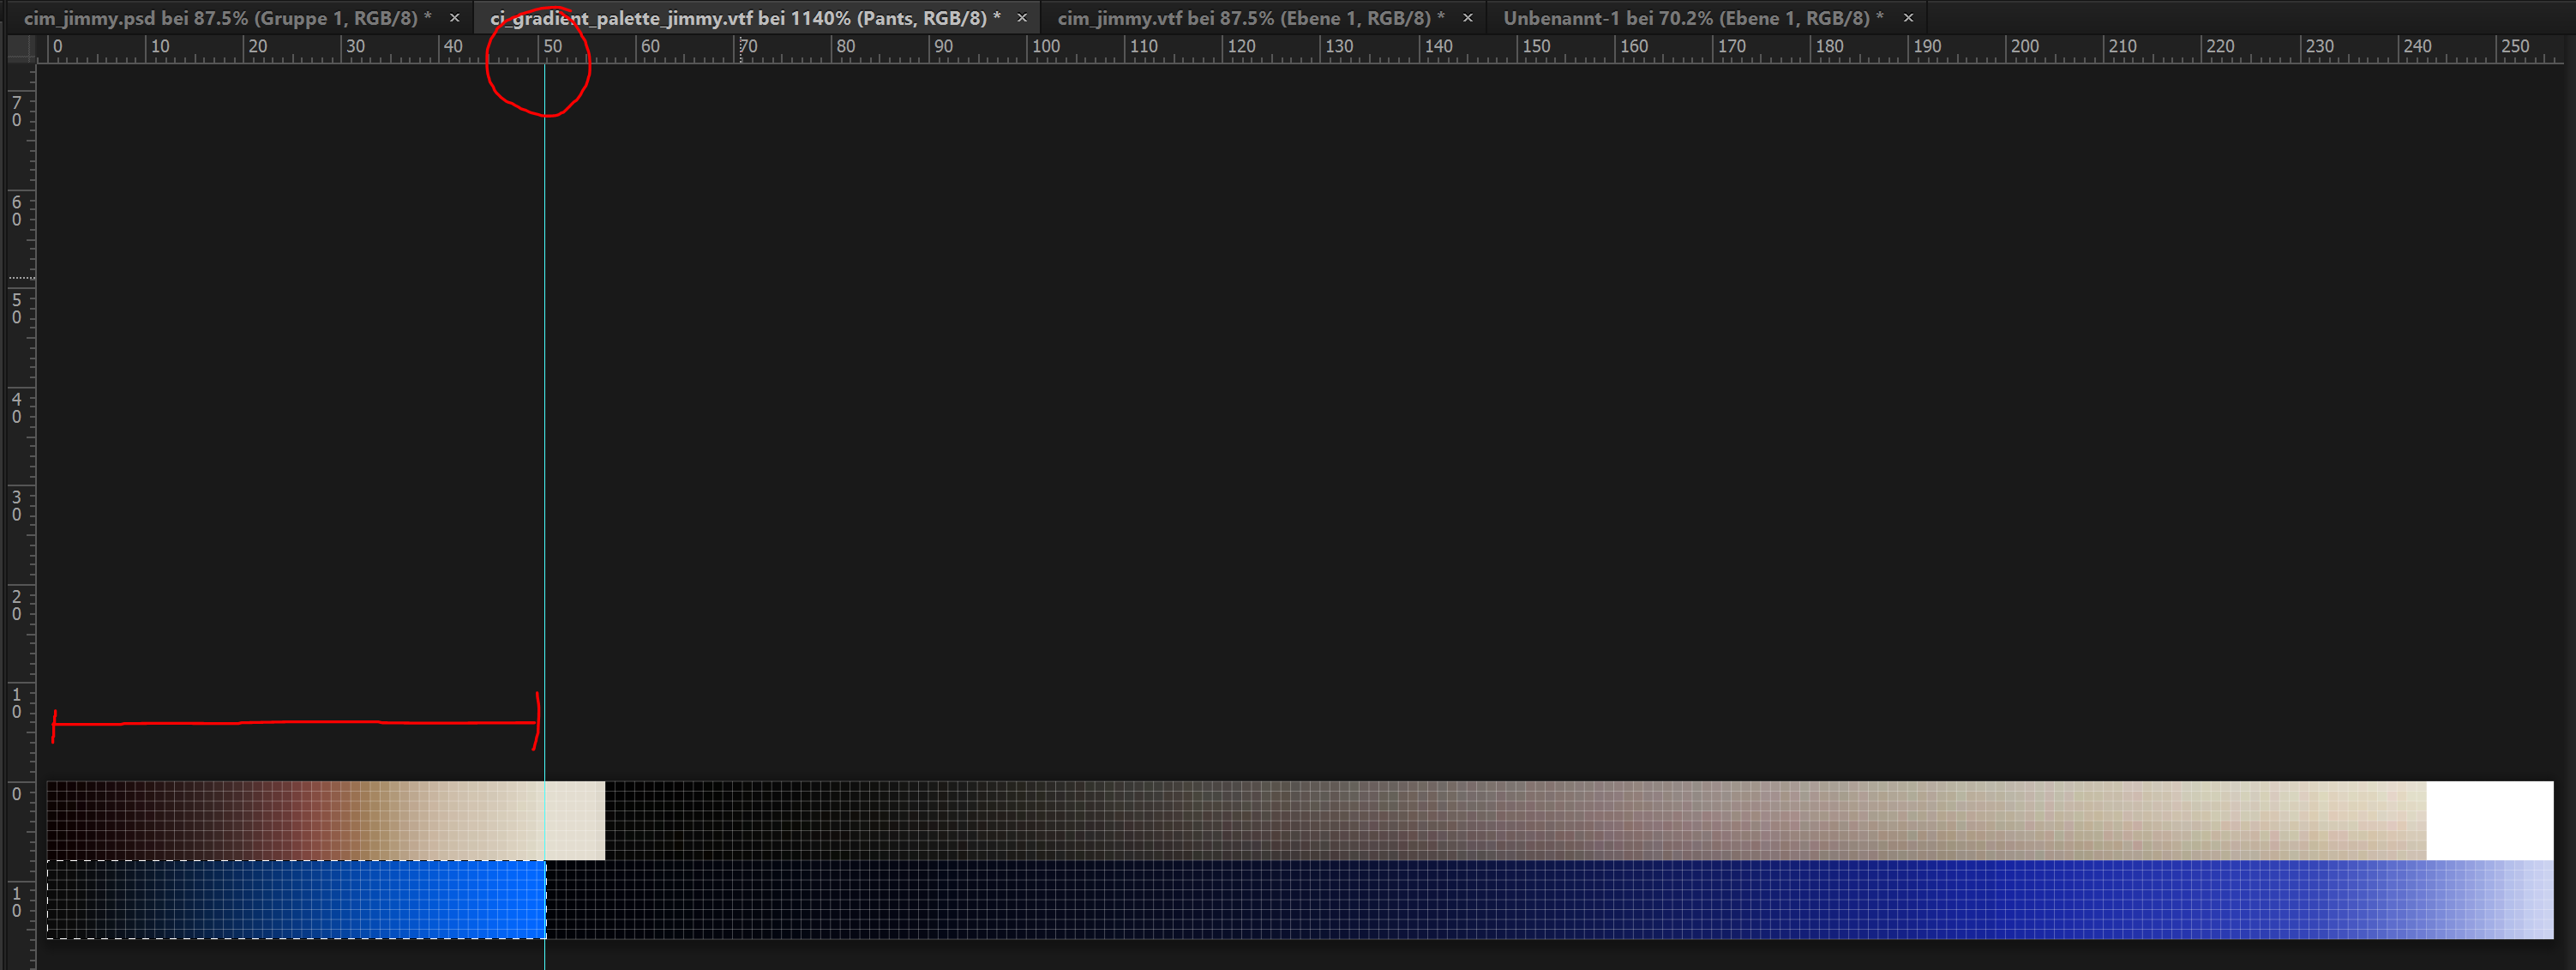
Even if you export with dxt5, sometimes photoshop hangs up and doesn't actually export the alpha channel. in those cases you need to either reimport the vtf and swap the channels and export, or delete the vtf, reboot hammer, and export fresh.
Spongebob 2 Jan @ 9:24am 
could you perhaps tell me how do i export the texture with the alpha channel because everytime i export it in photoshop and import in in VTF it just doesnt appear and instead shows a white texture, because honestly i didnt quite understood
Spongebob 26 Dec, 2024 @ 1:48pm 
technicly when i remove the texture of burning and some other strings
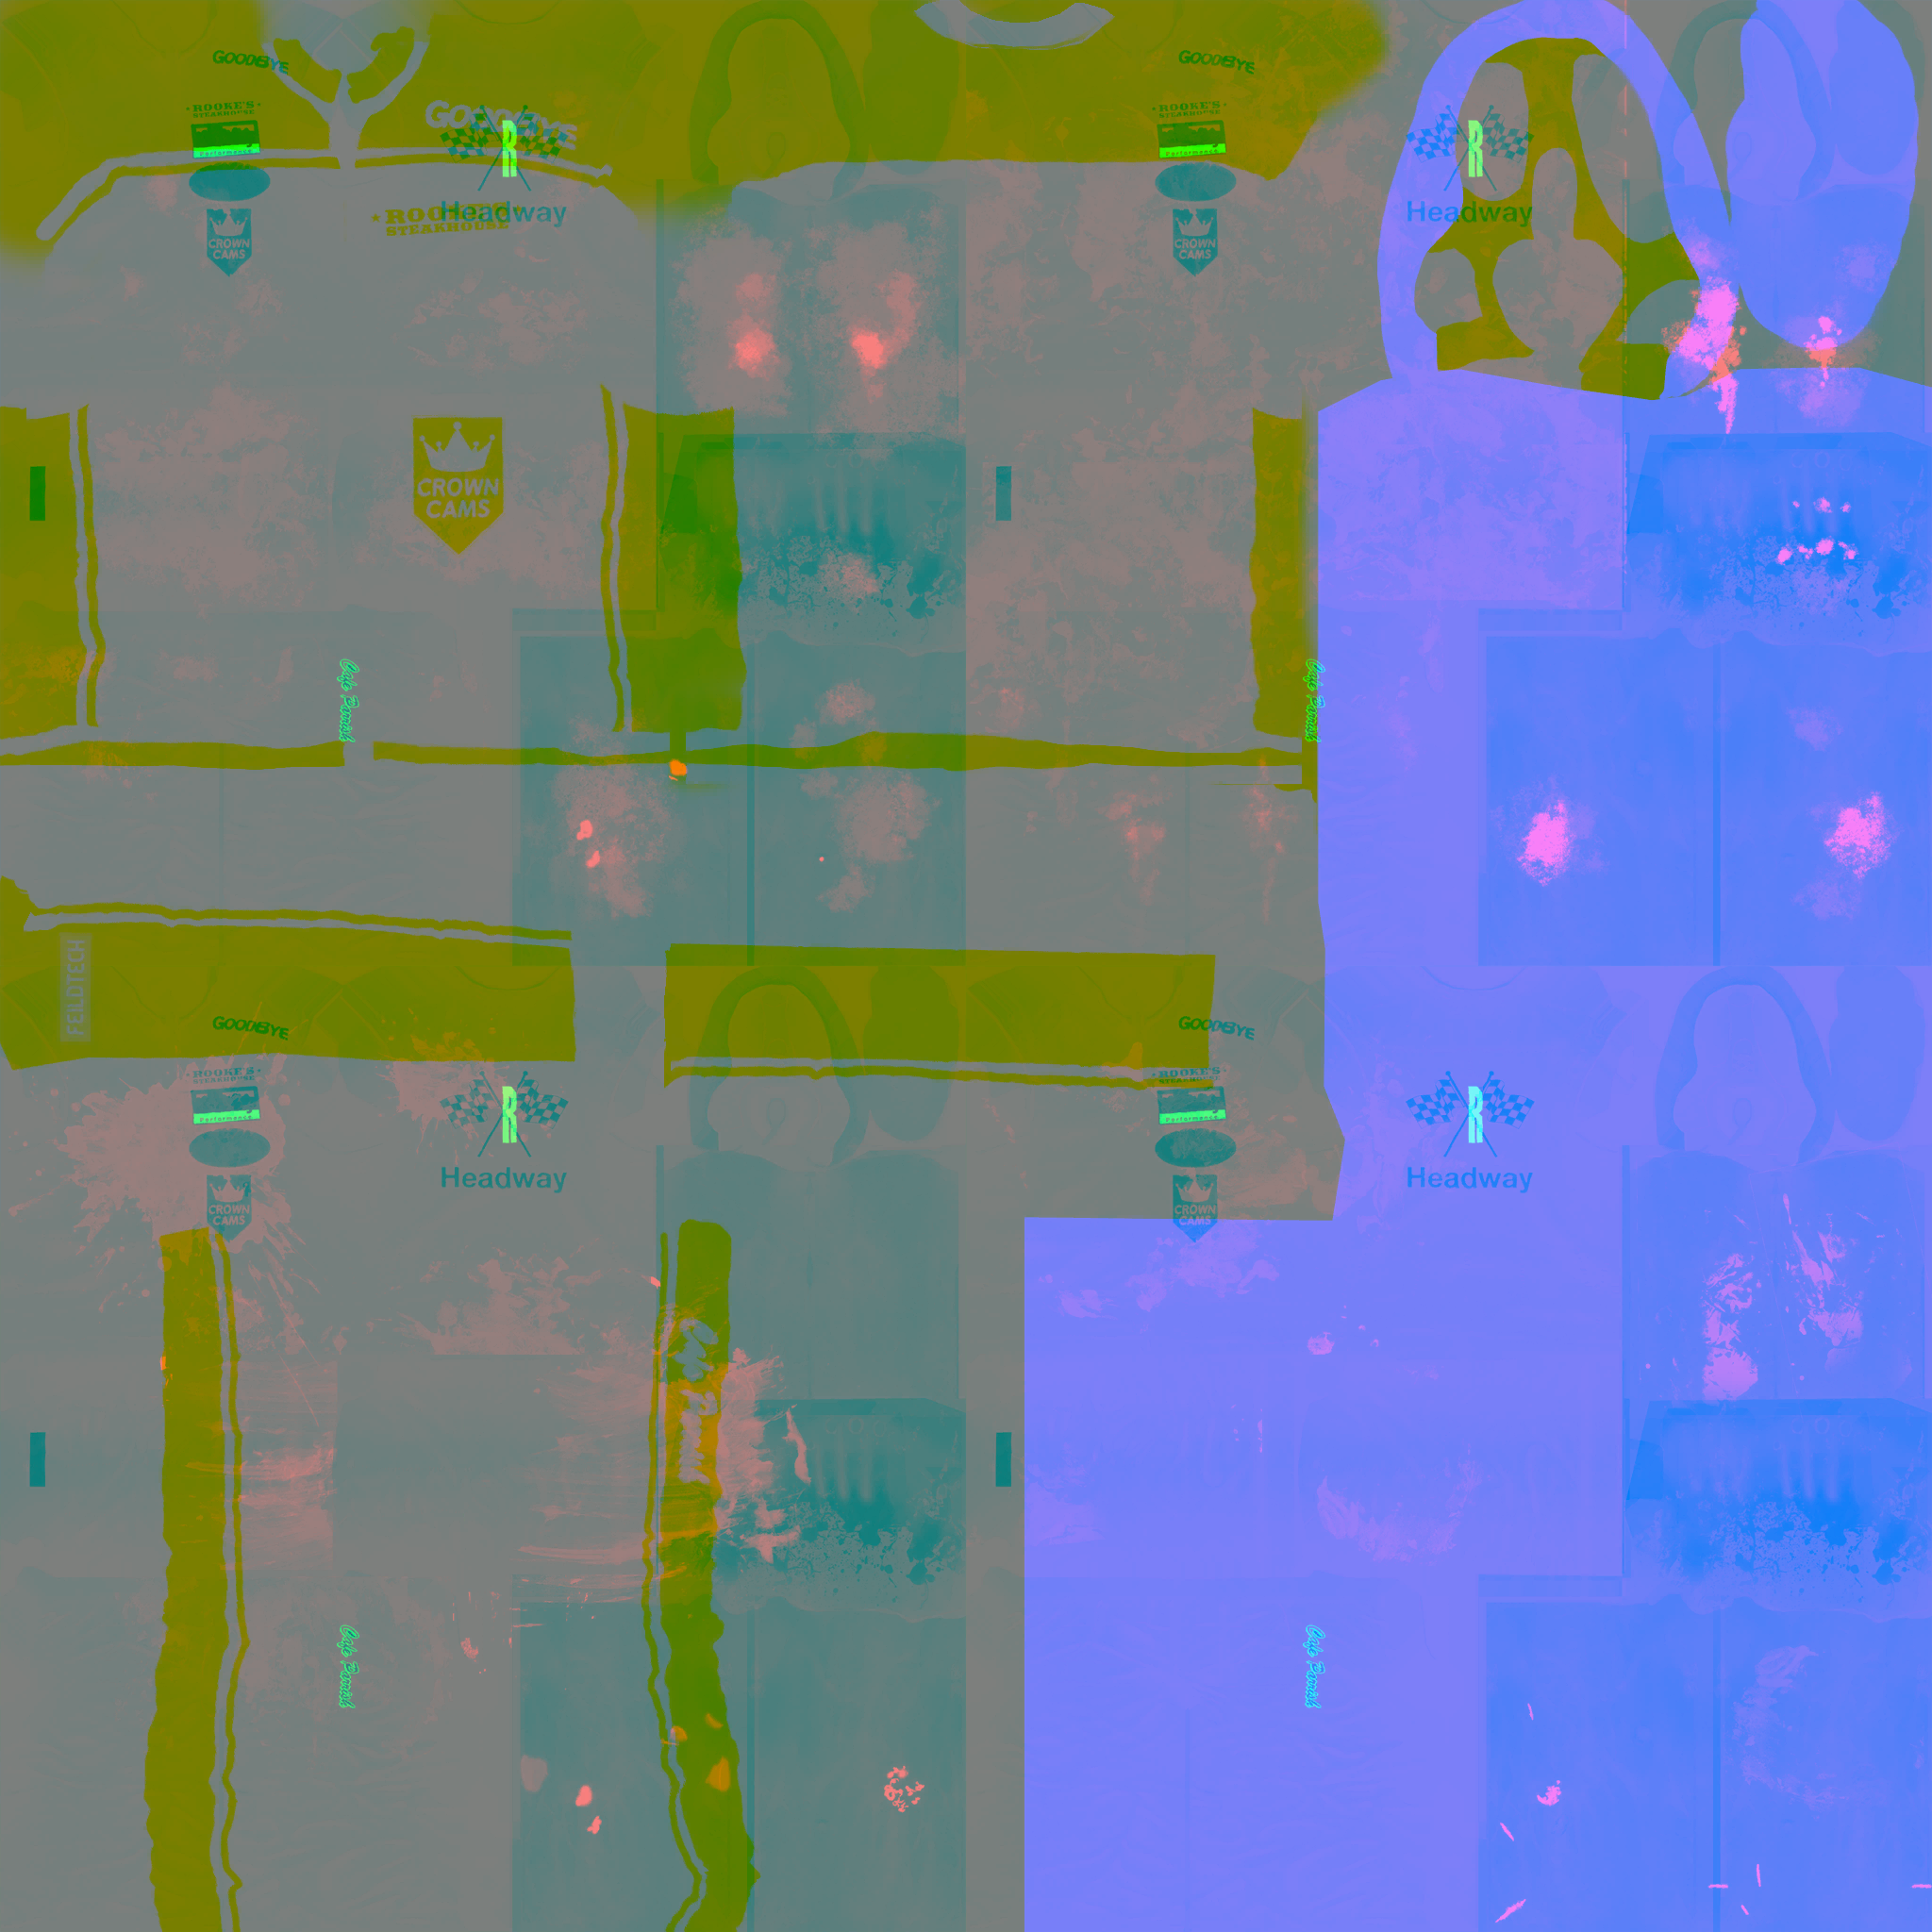
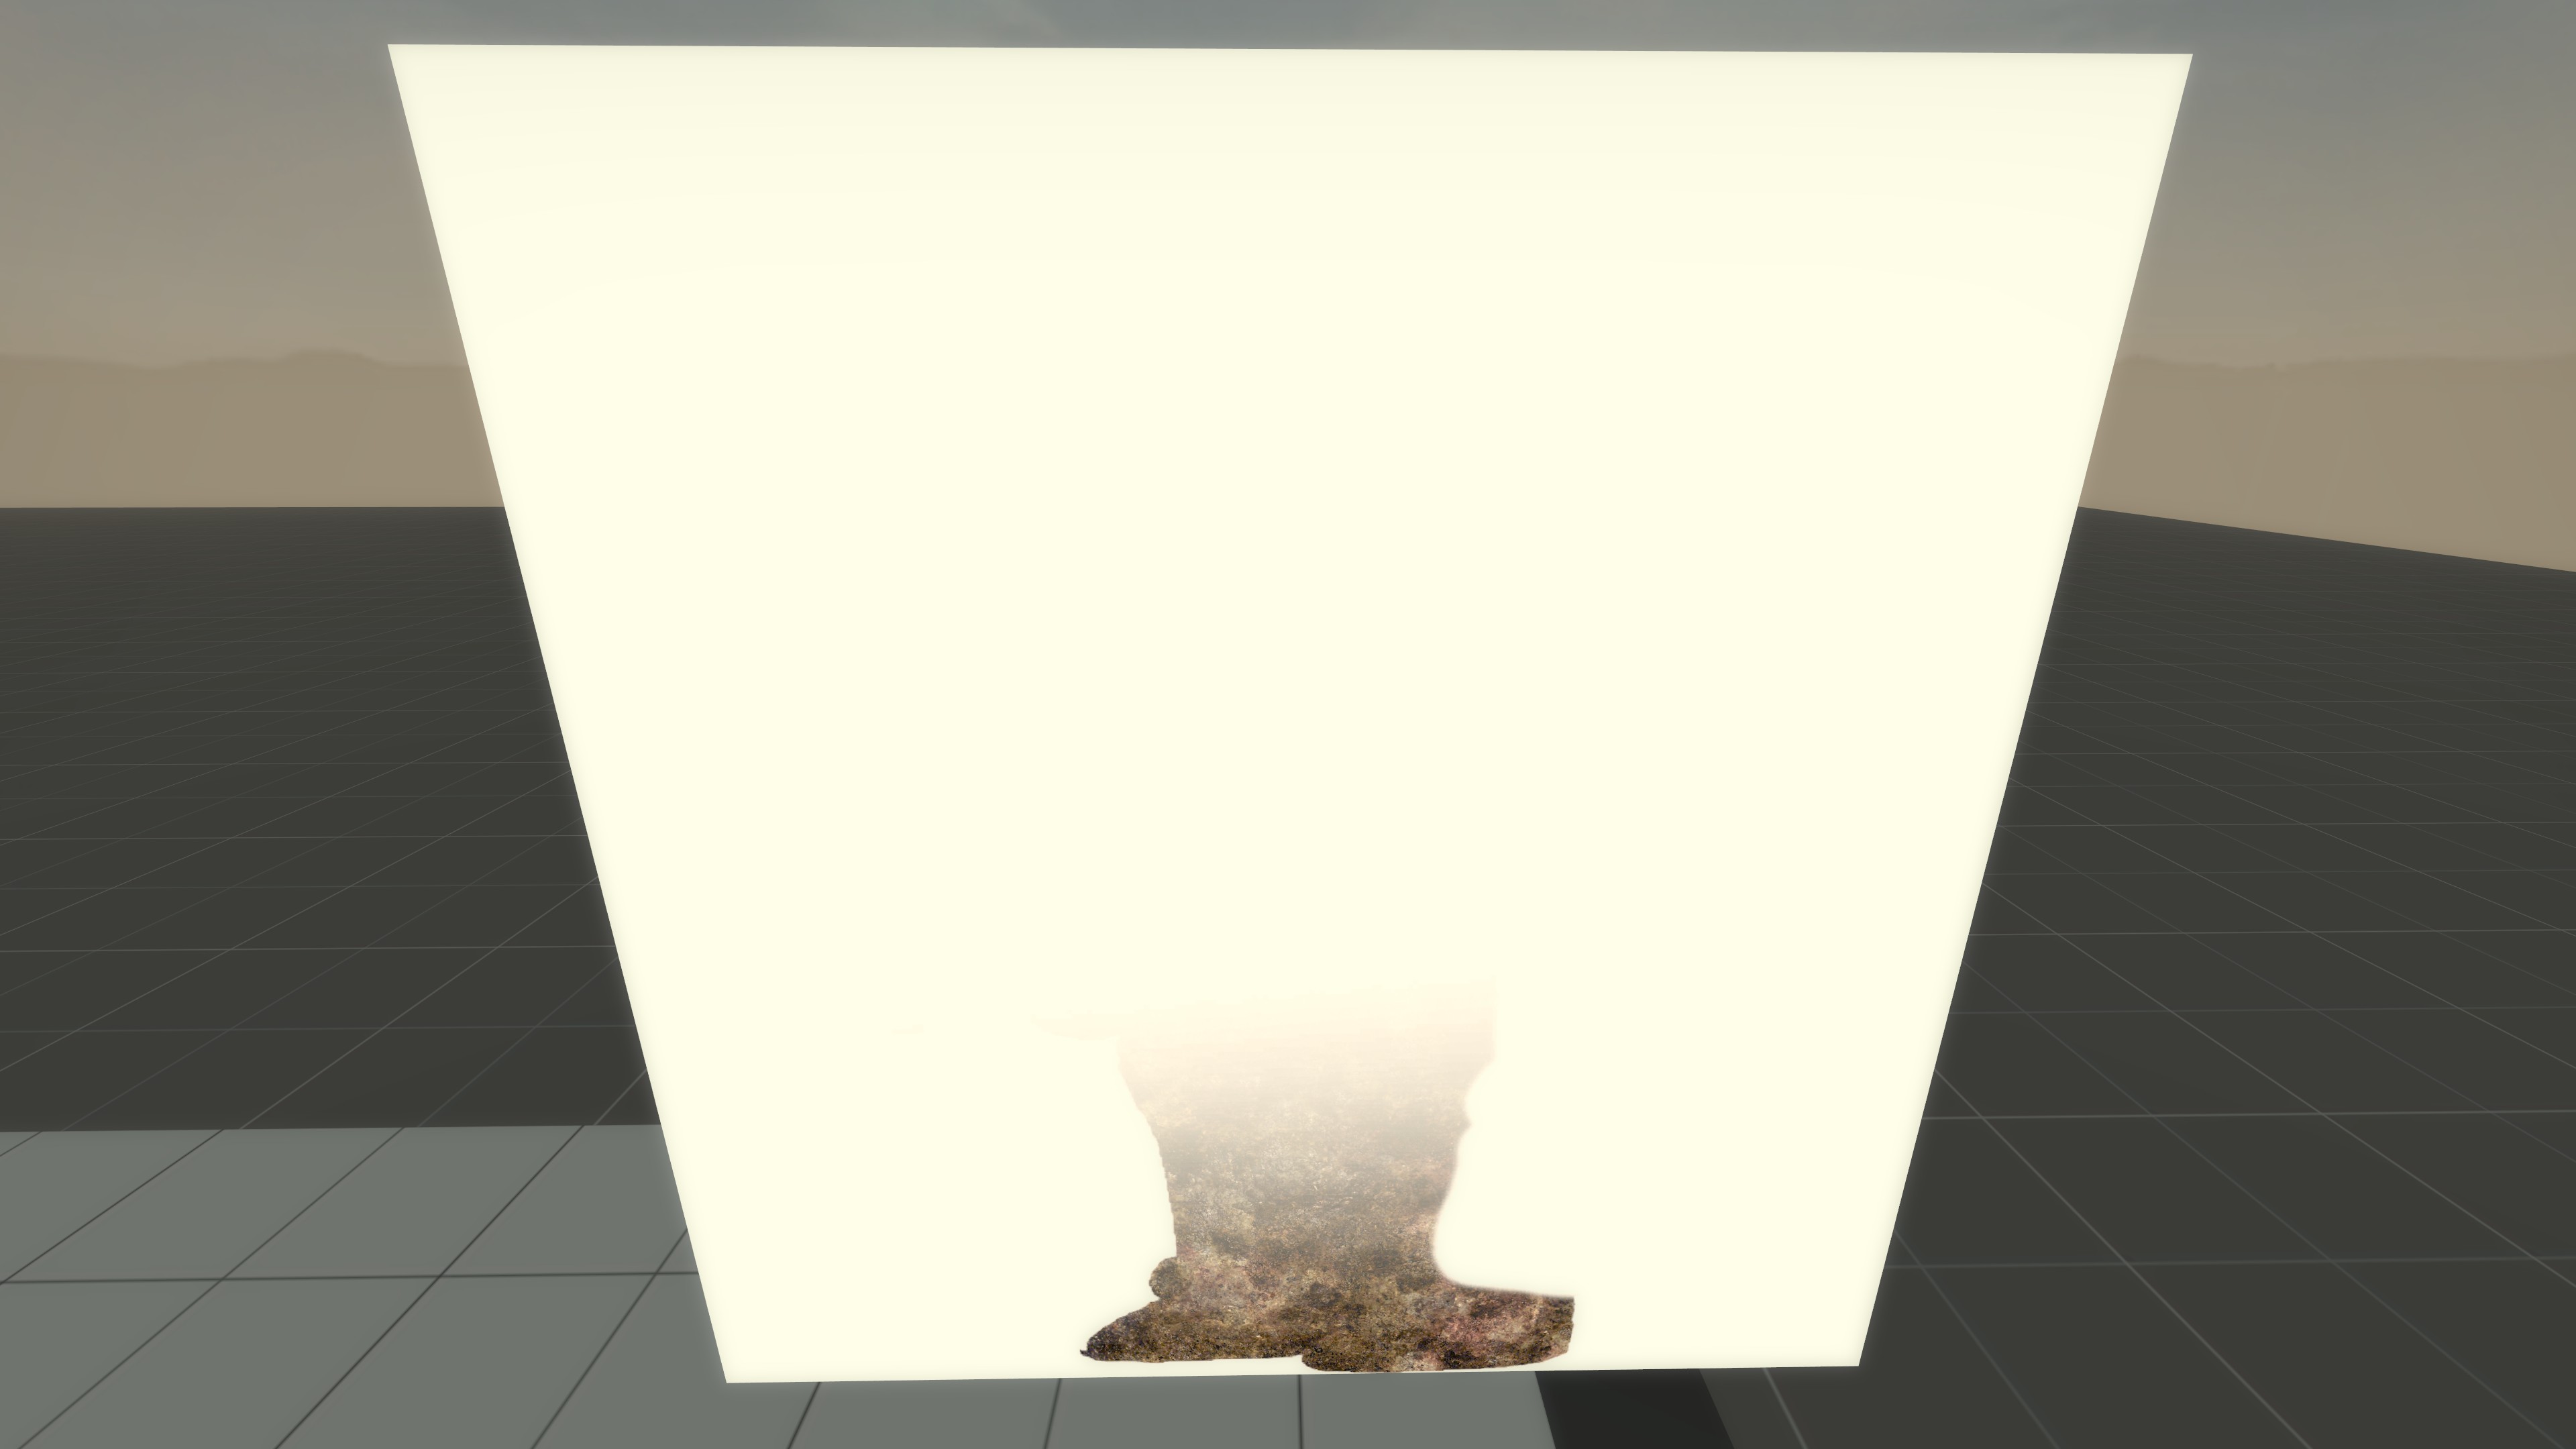
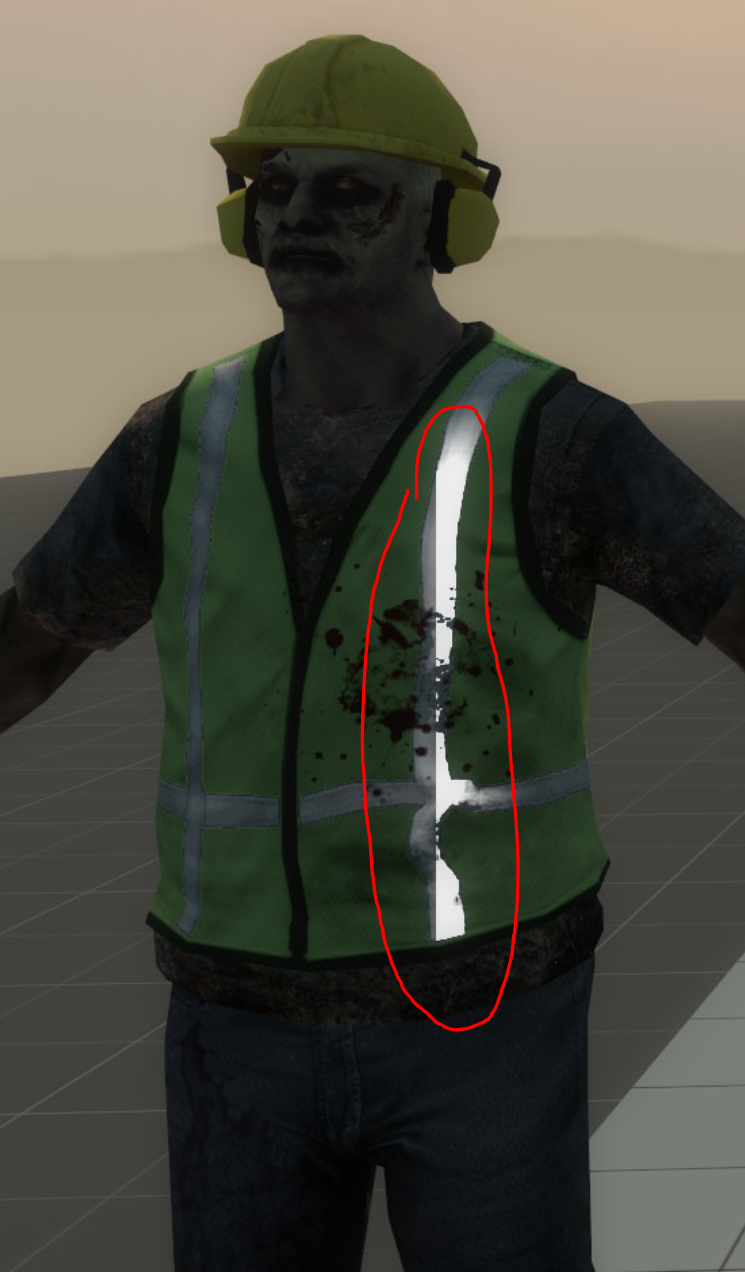
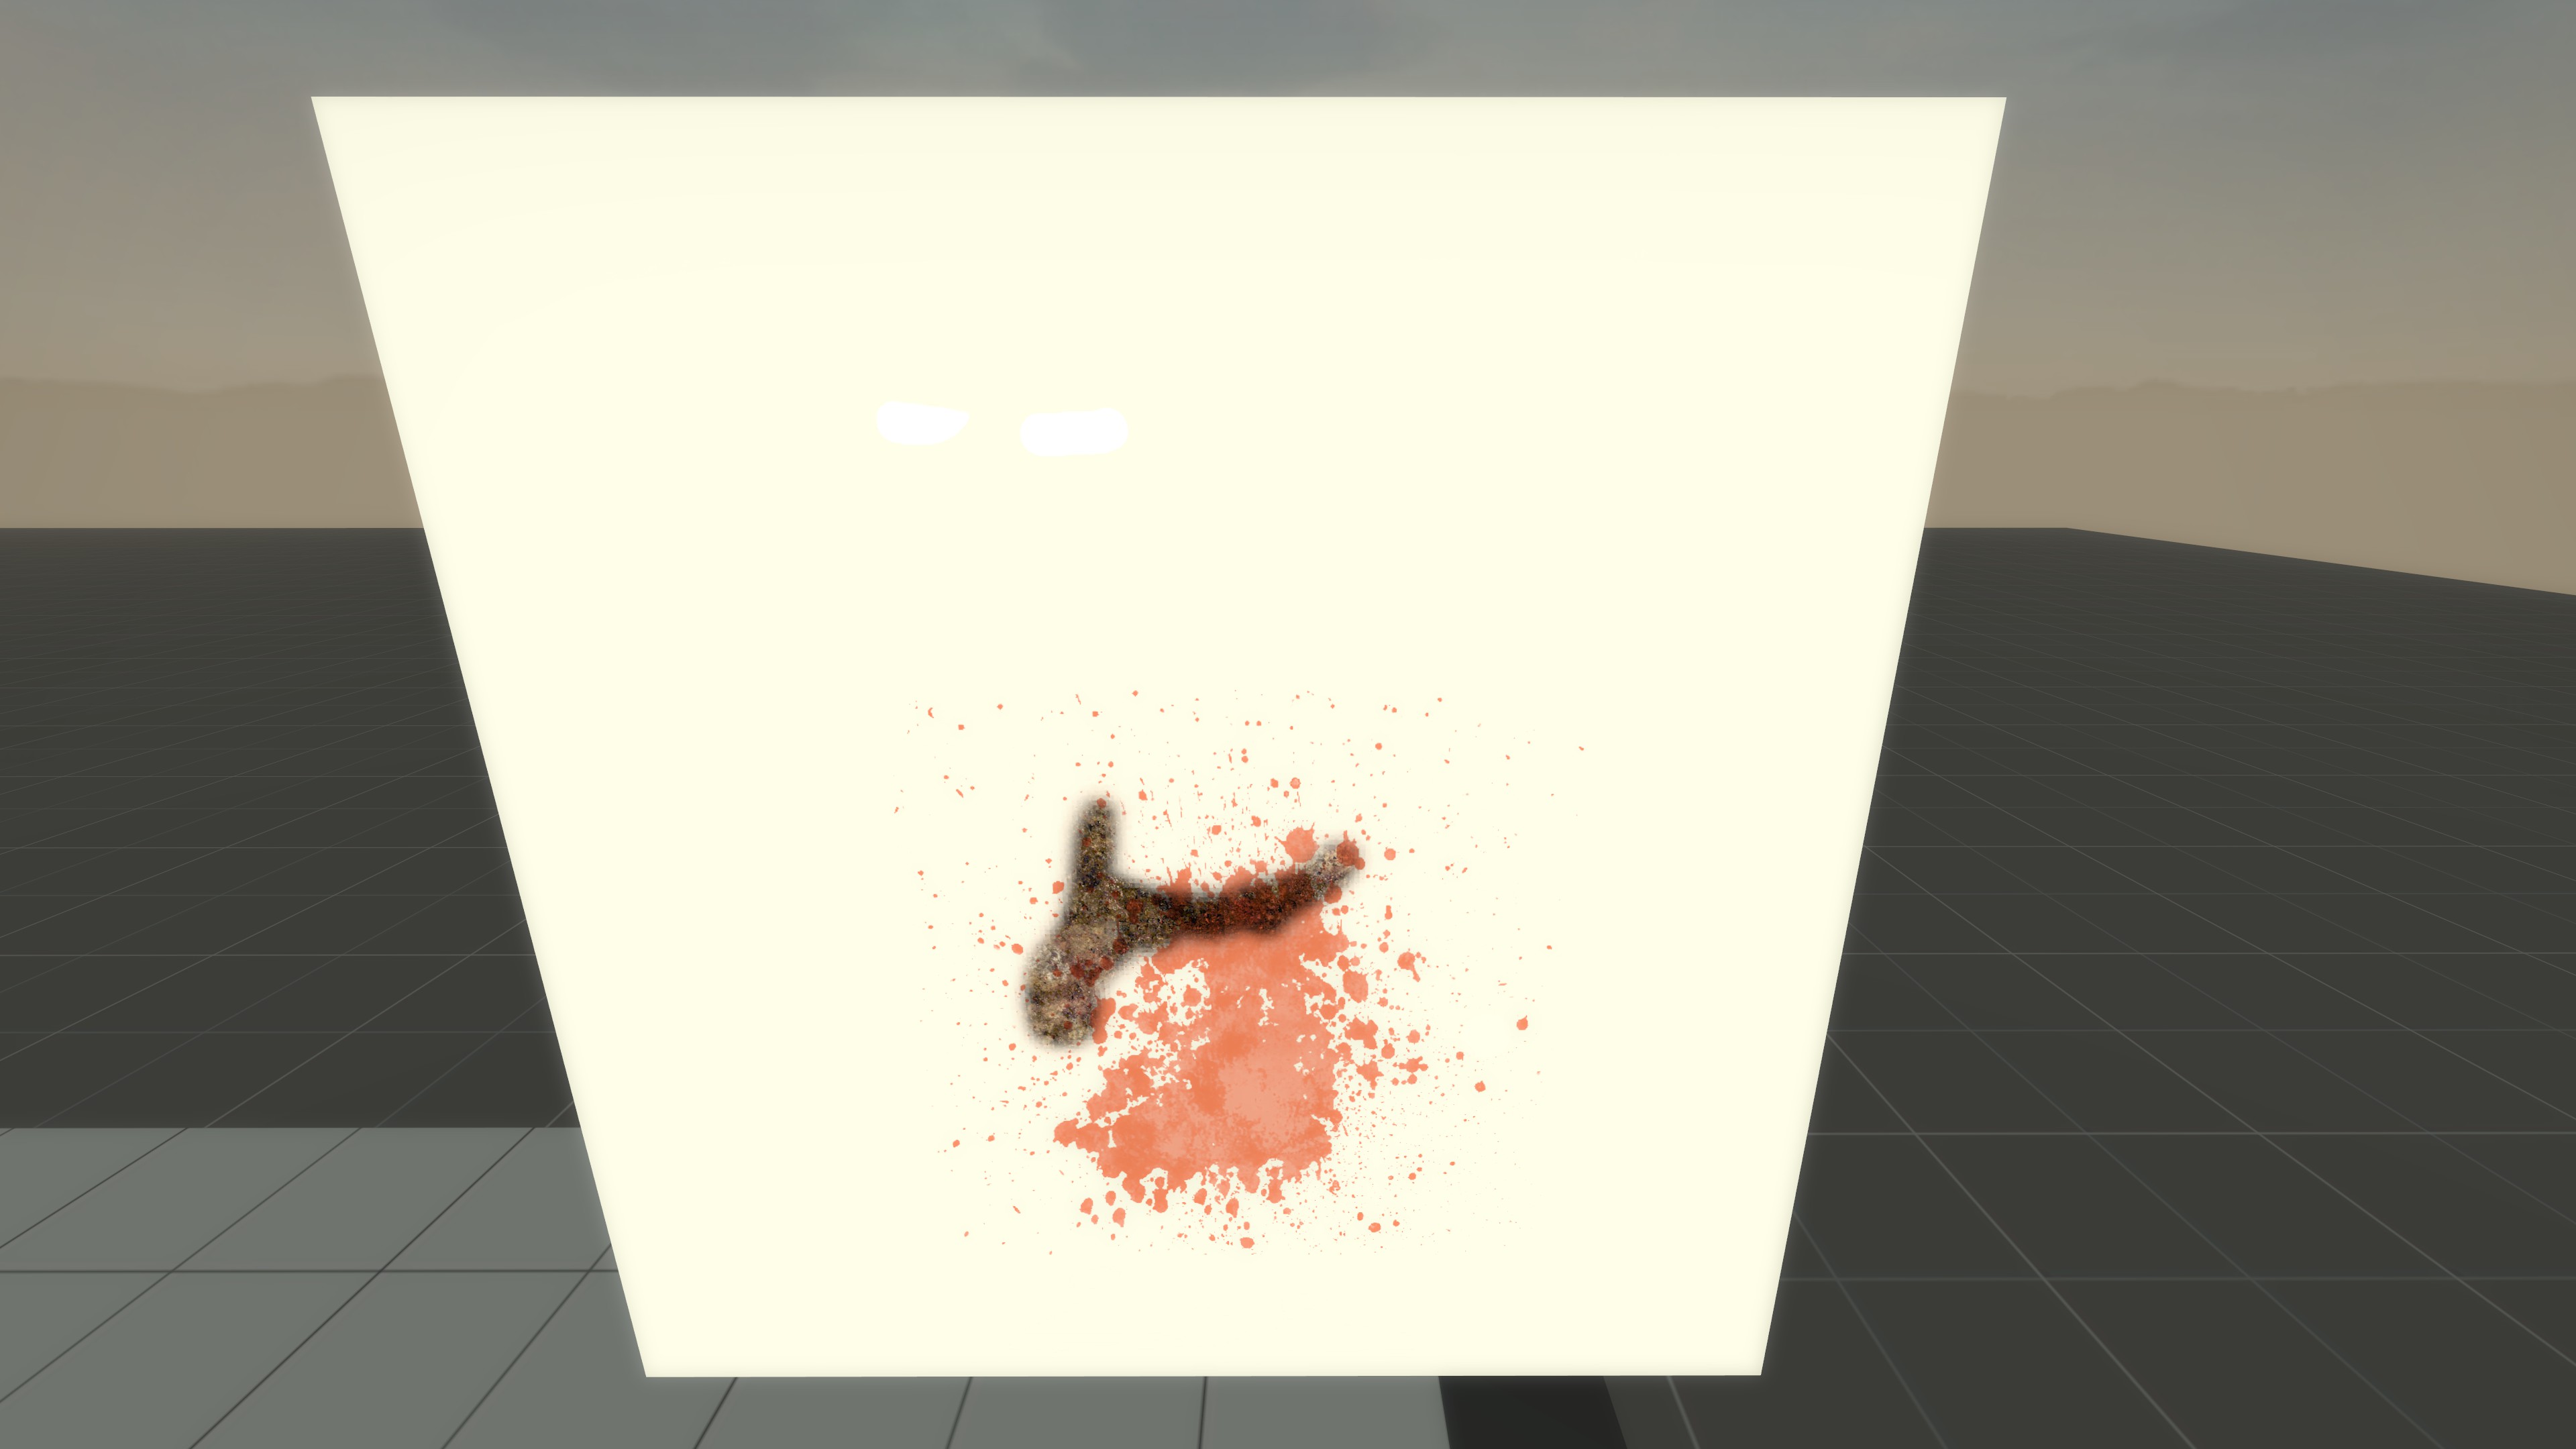
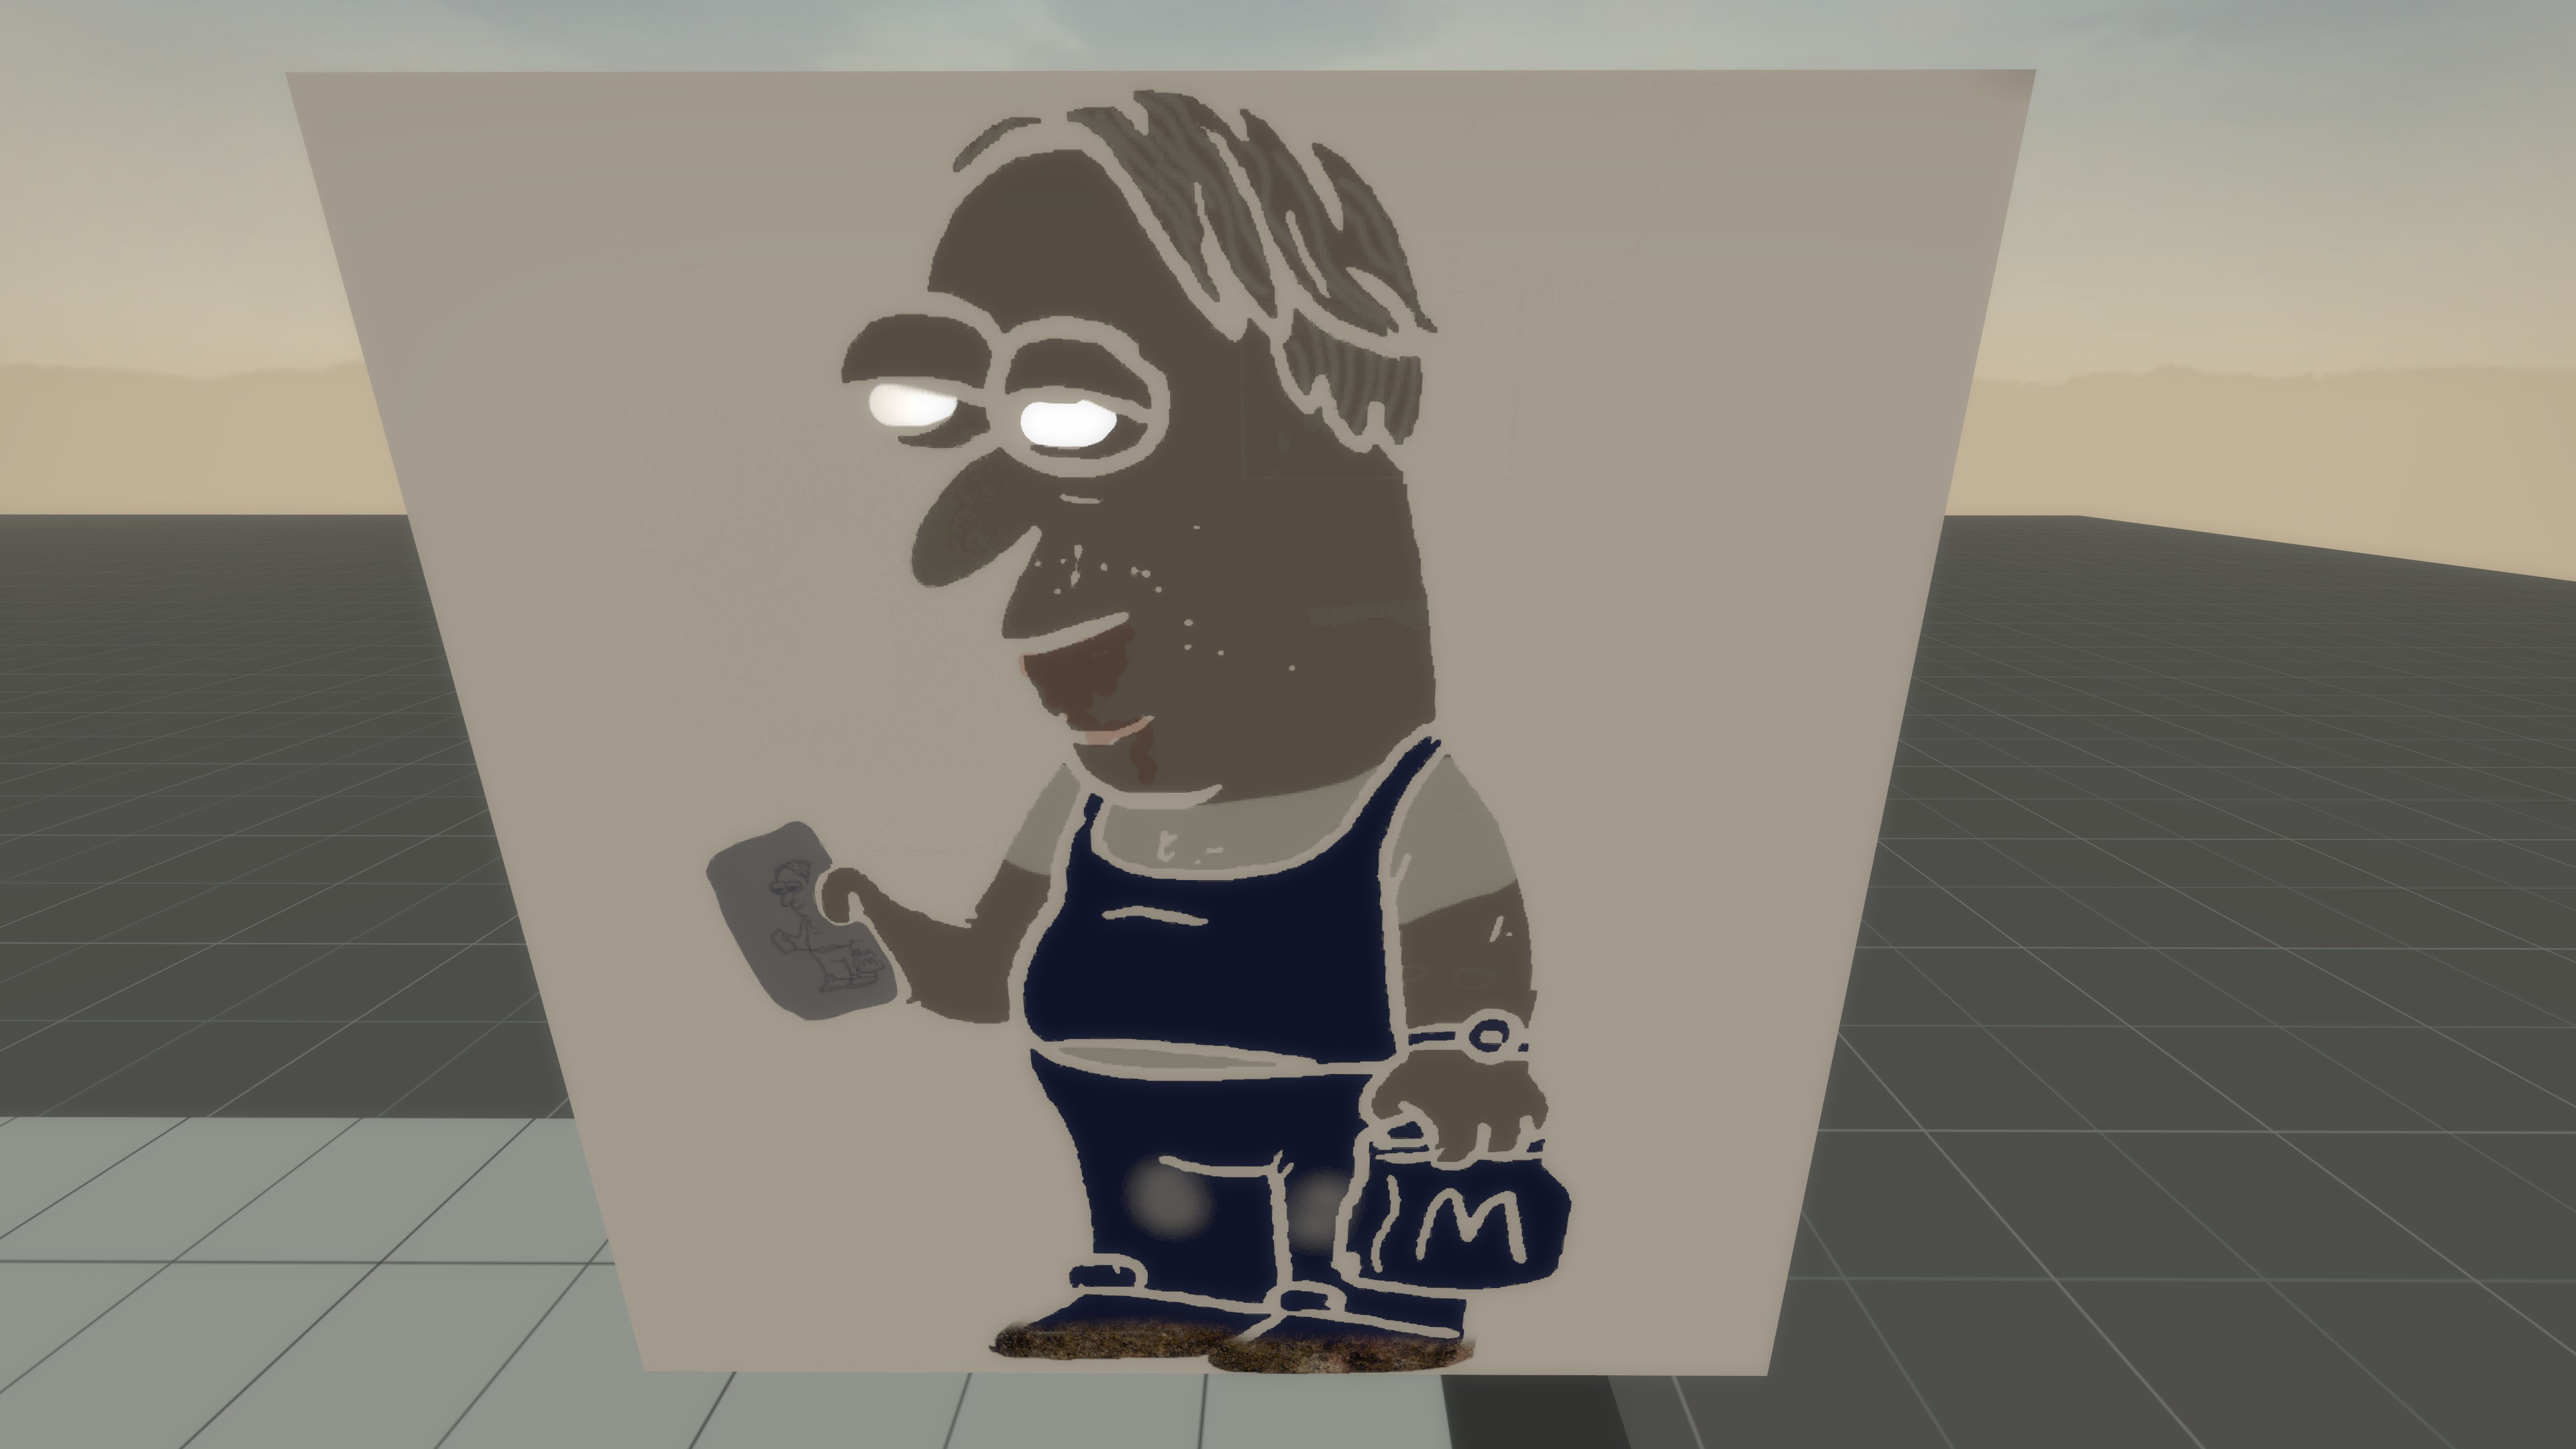
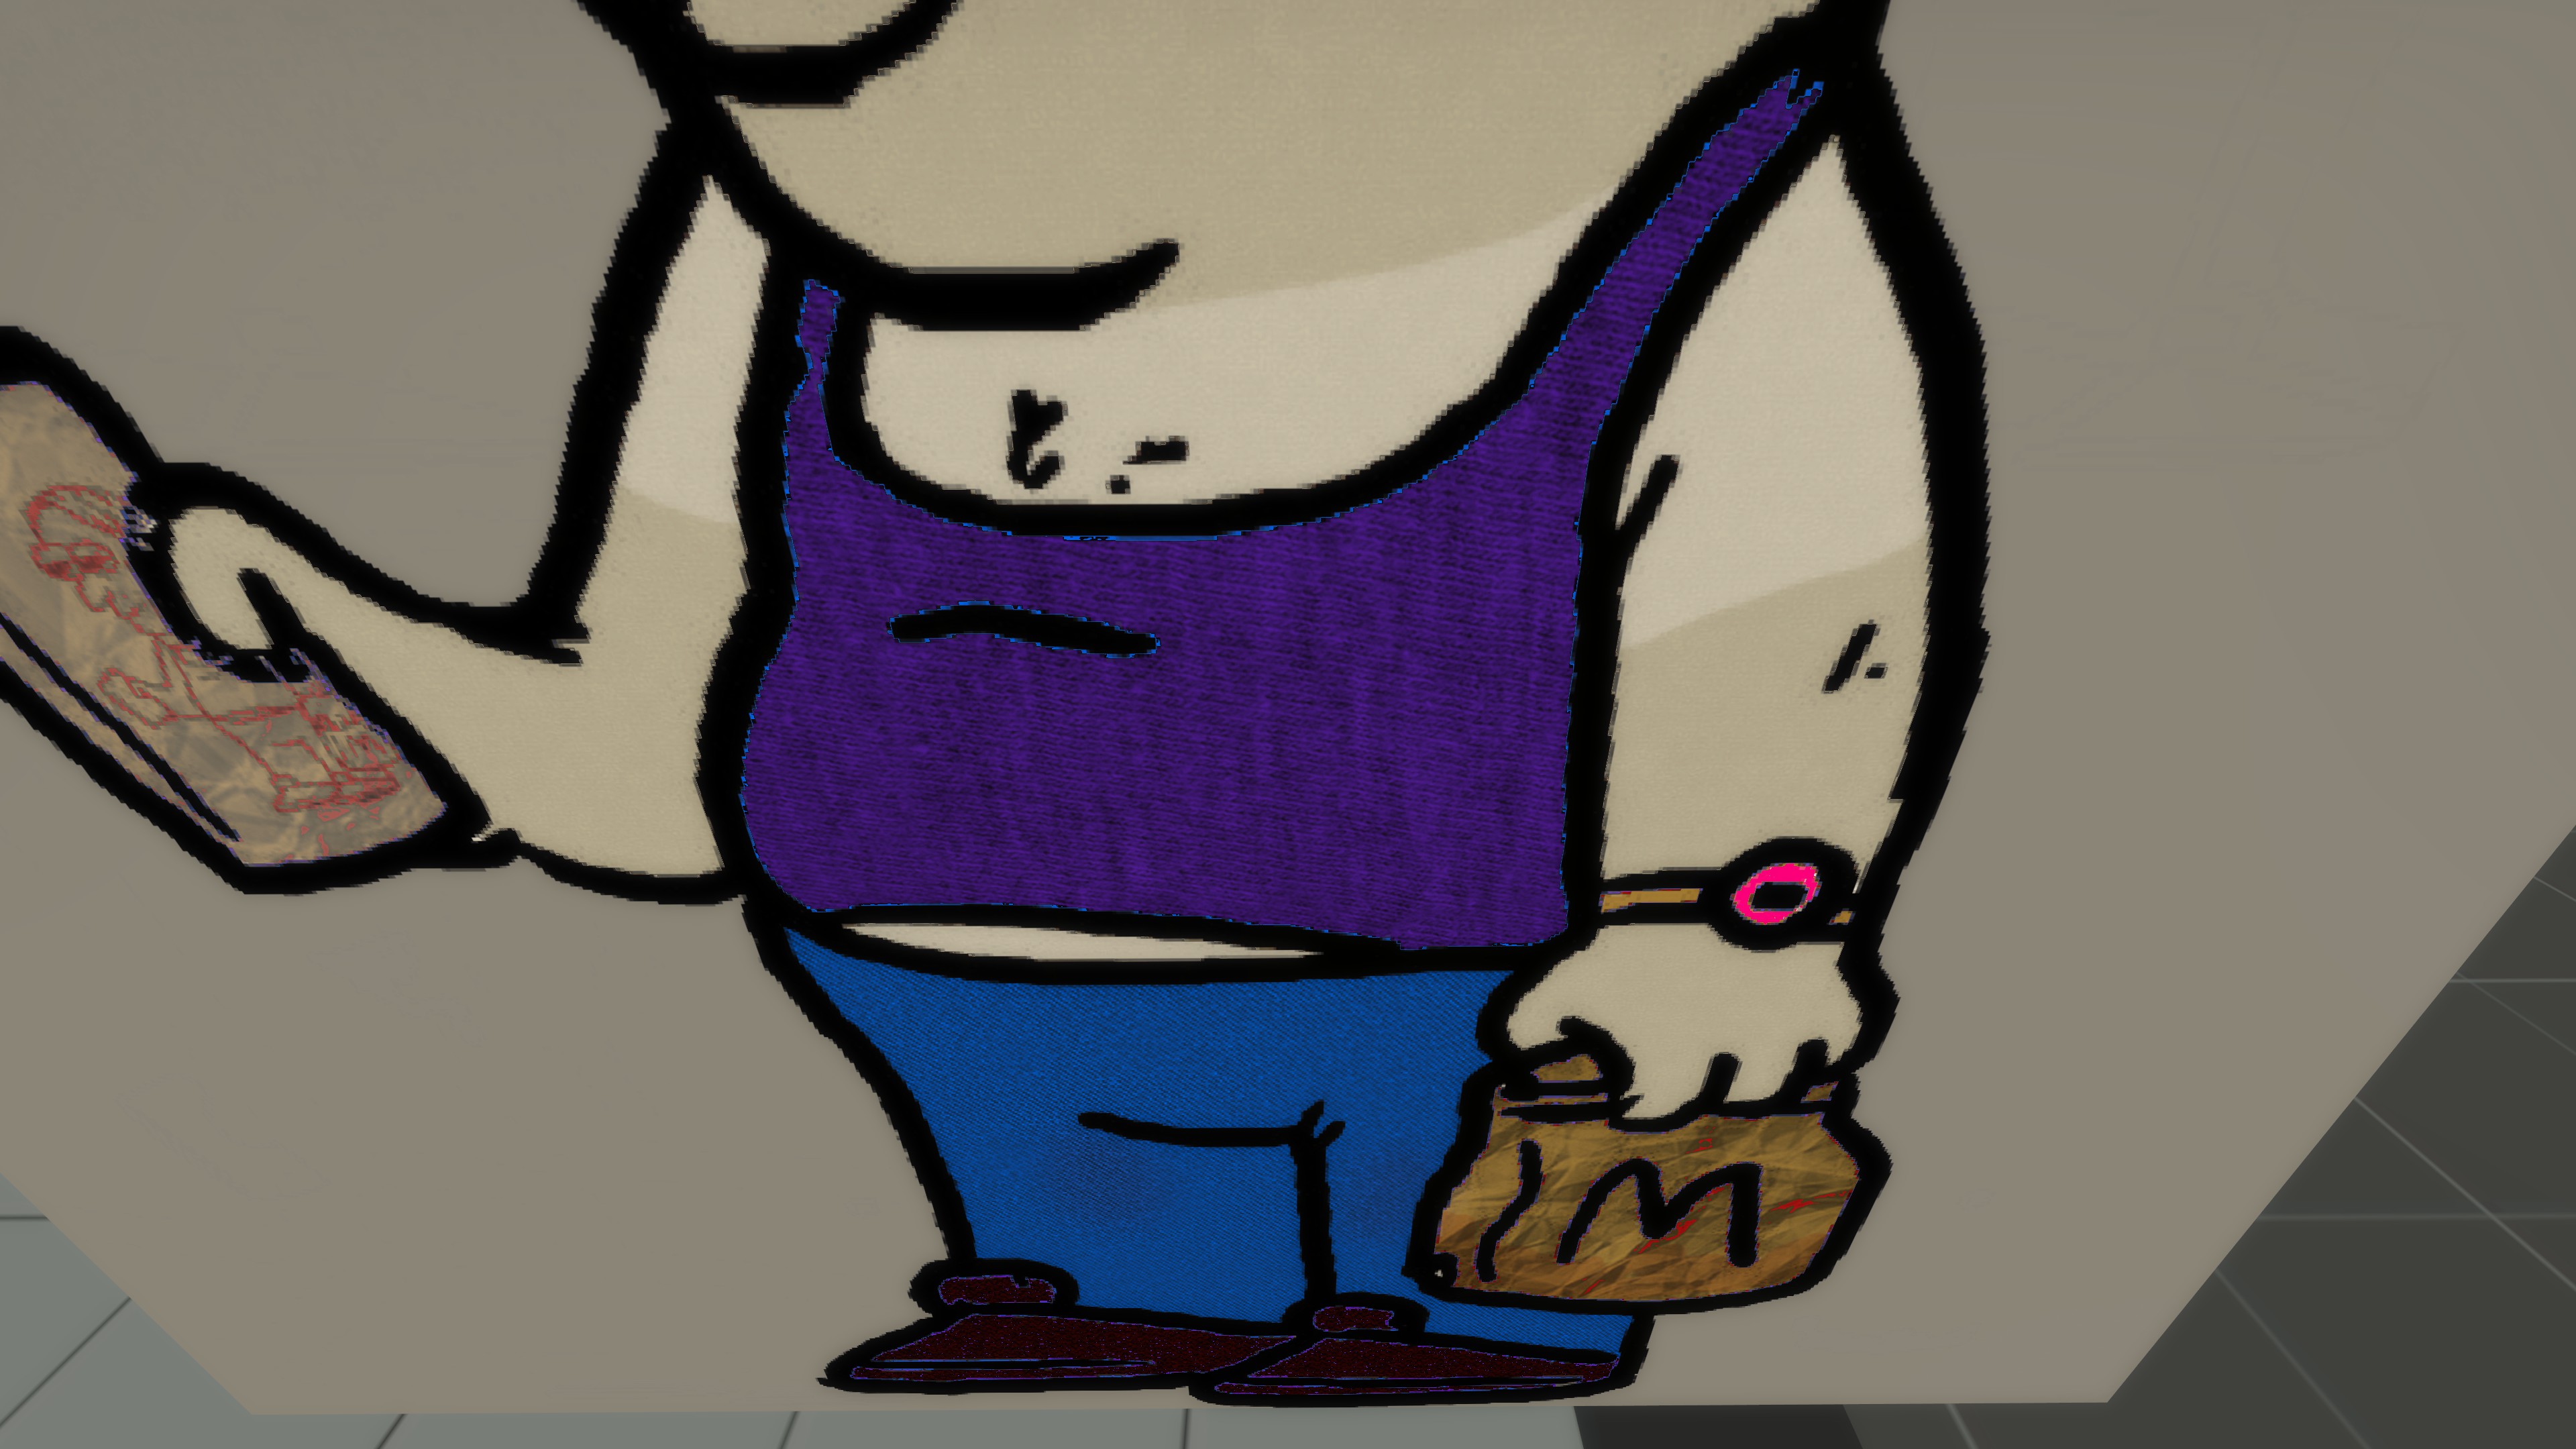
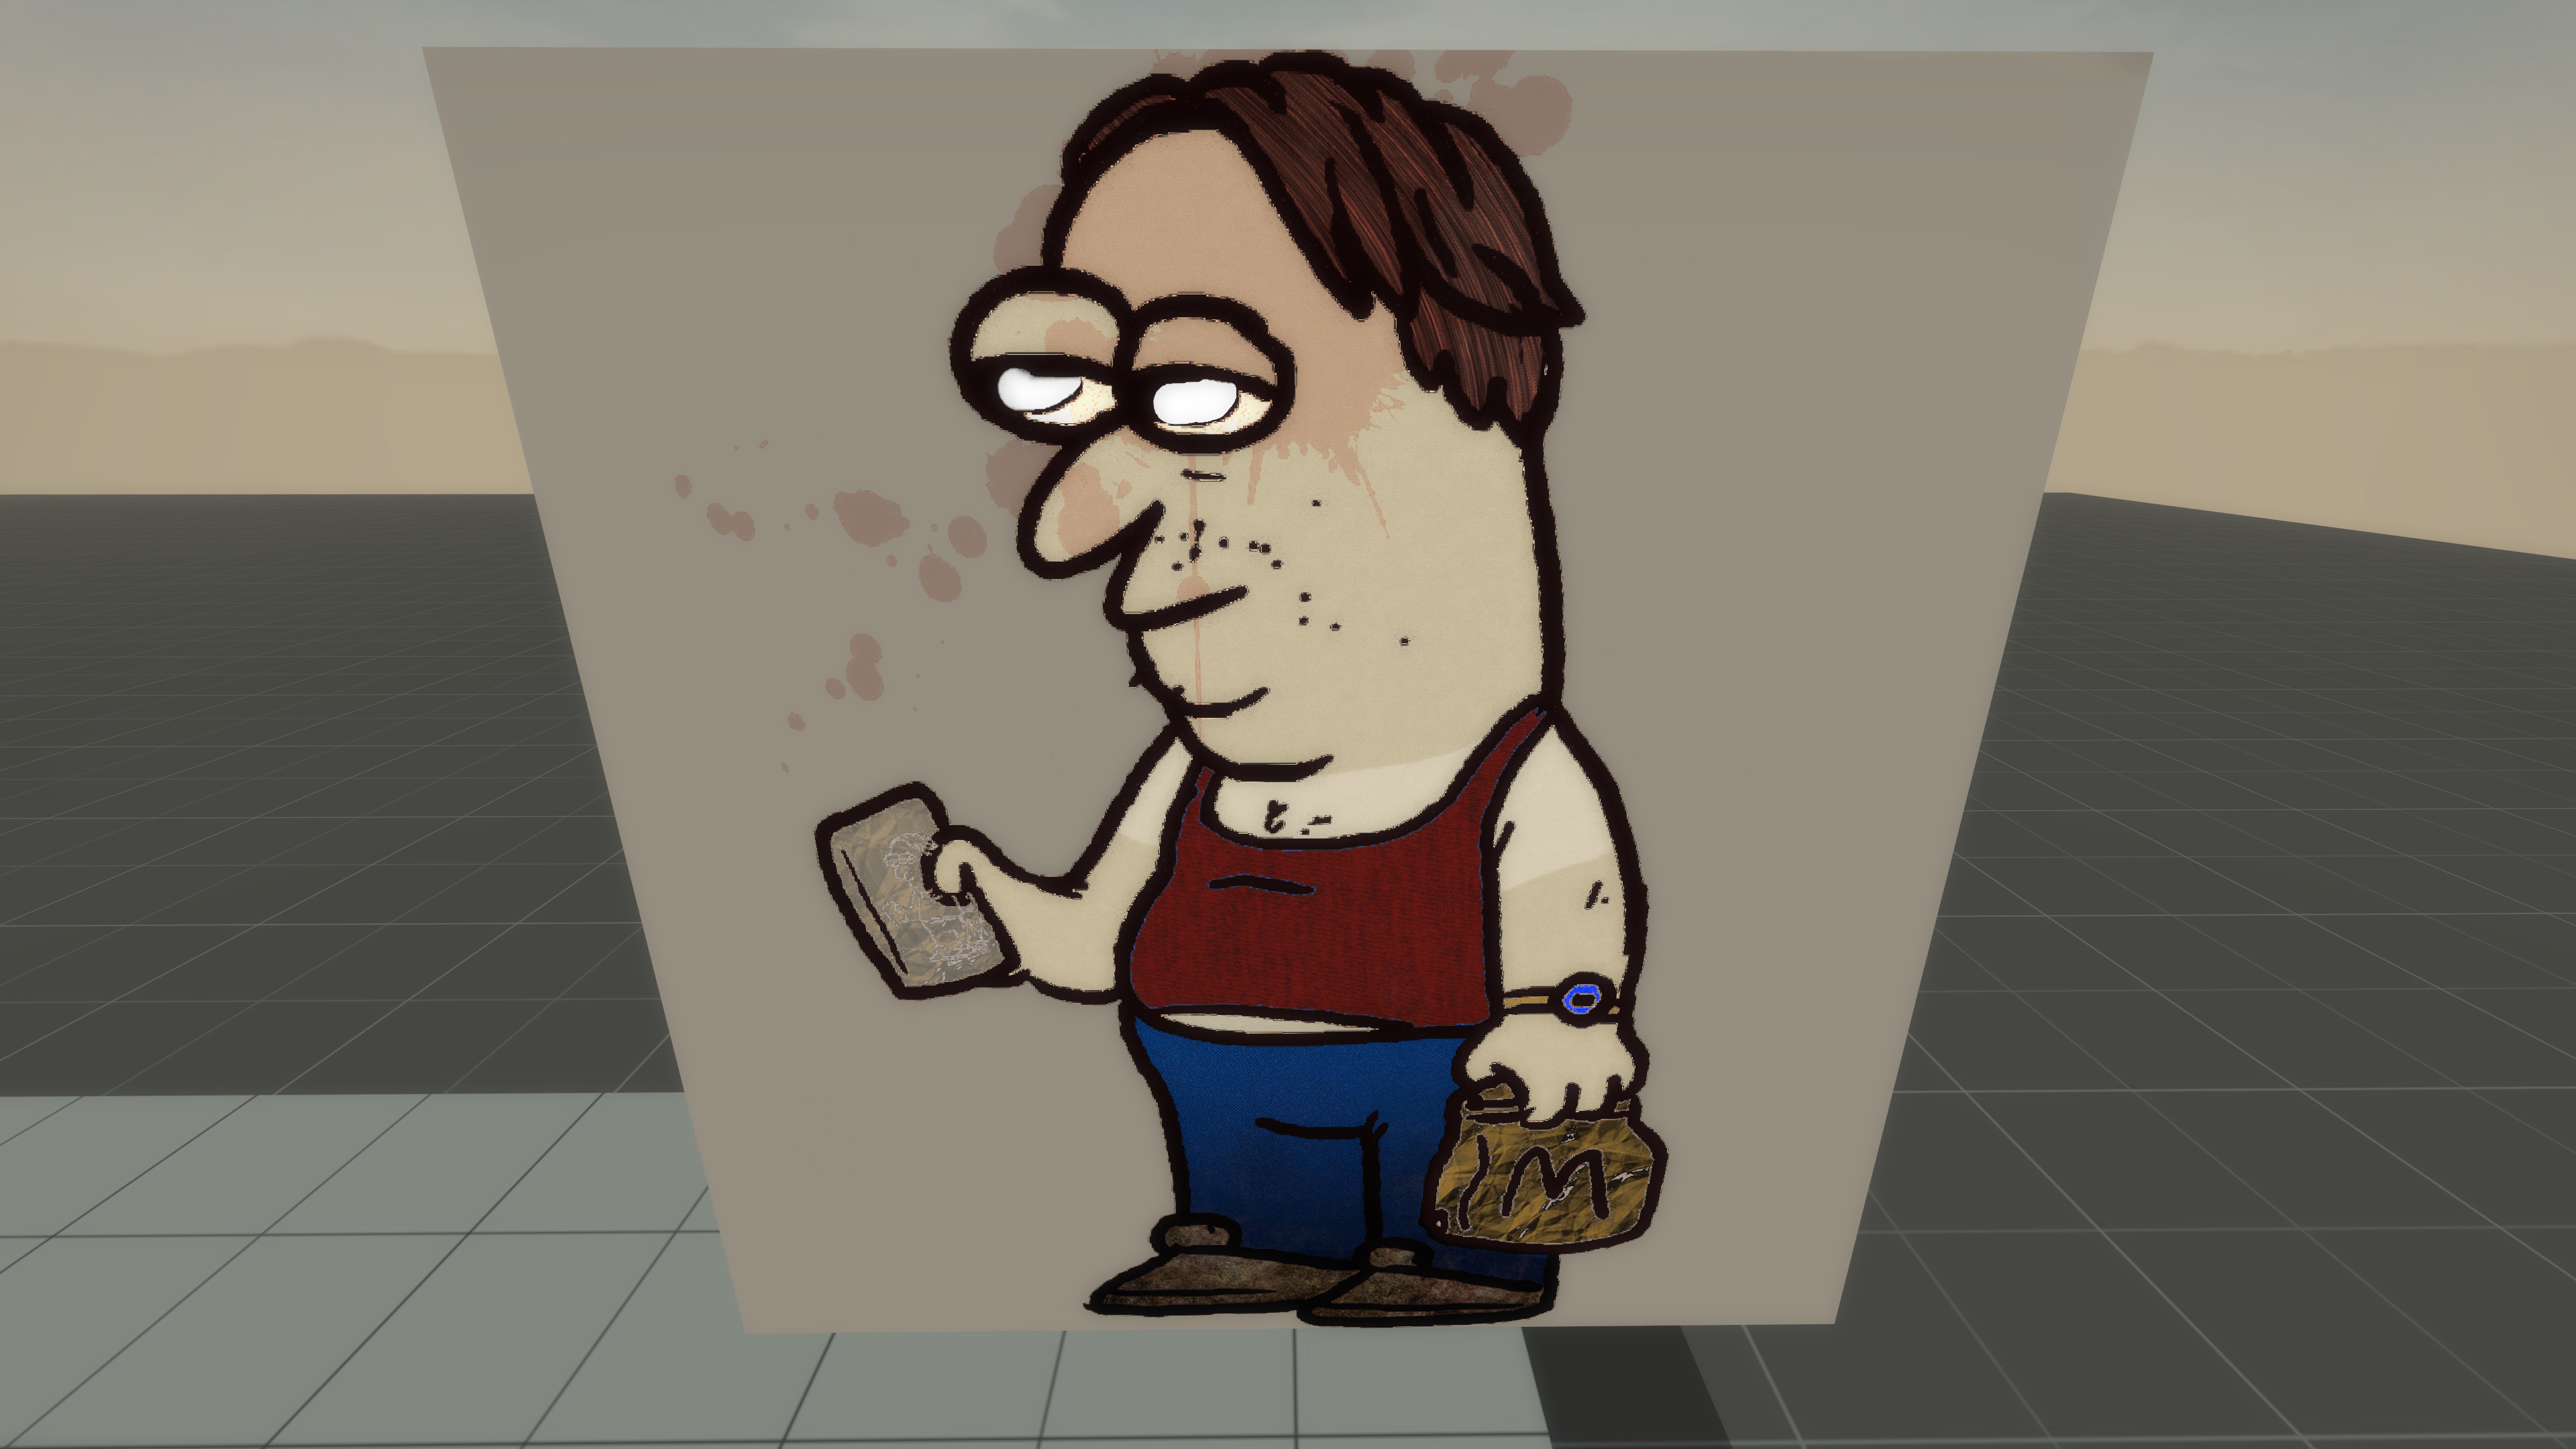
it just leaves the l4d1 infected with a pink like tint (like covered in gum)
even with $disablevariation i dont see much of a change since in common_infected_shared
the $disablevariation is there and its turned on but leaves the infec being fully white (when not removing some string materials)
мяFunreal  [author] 26 Dec, 2024 @ 1:31pm 
well the cutout texture thing should already be up and running for the l4d1 ci models from the update/pak01_dir.vpk. Cause TLS added those. It already uses the infected shader, but with $disablevariation 1, ignoring this whole coloring setup. Those should work in sfm. Unless it uses an older shader that does not support $disablevariation 1. in that case you might need to redo the textures, which is gonna be a pain
Spongebob 26 Dec, 2024 @ 1:02pm 
im having an issue here
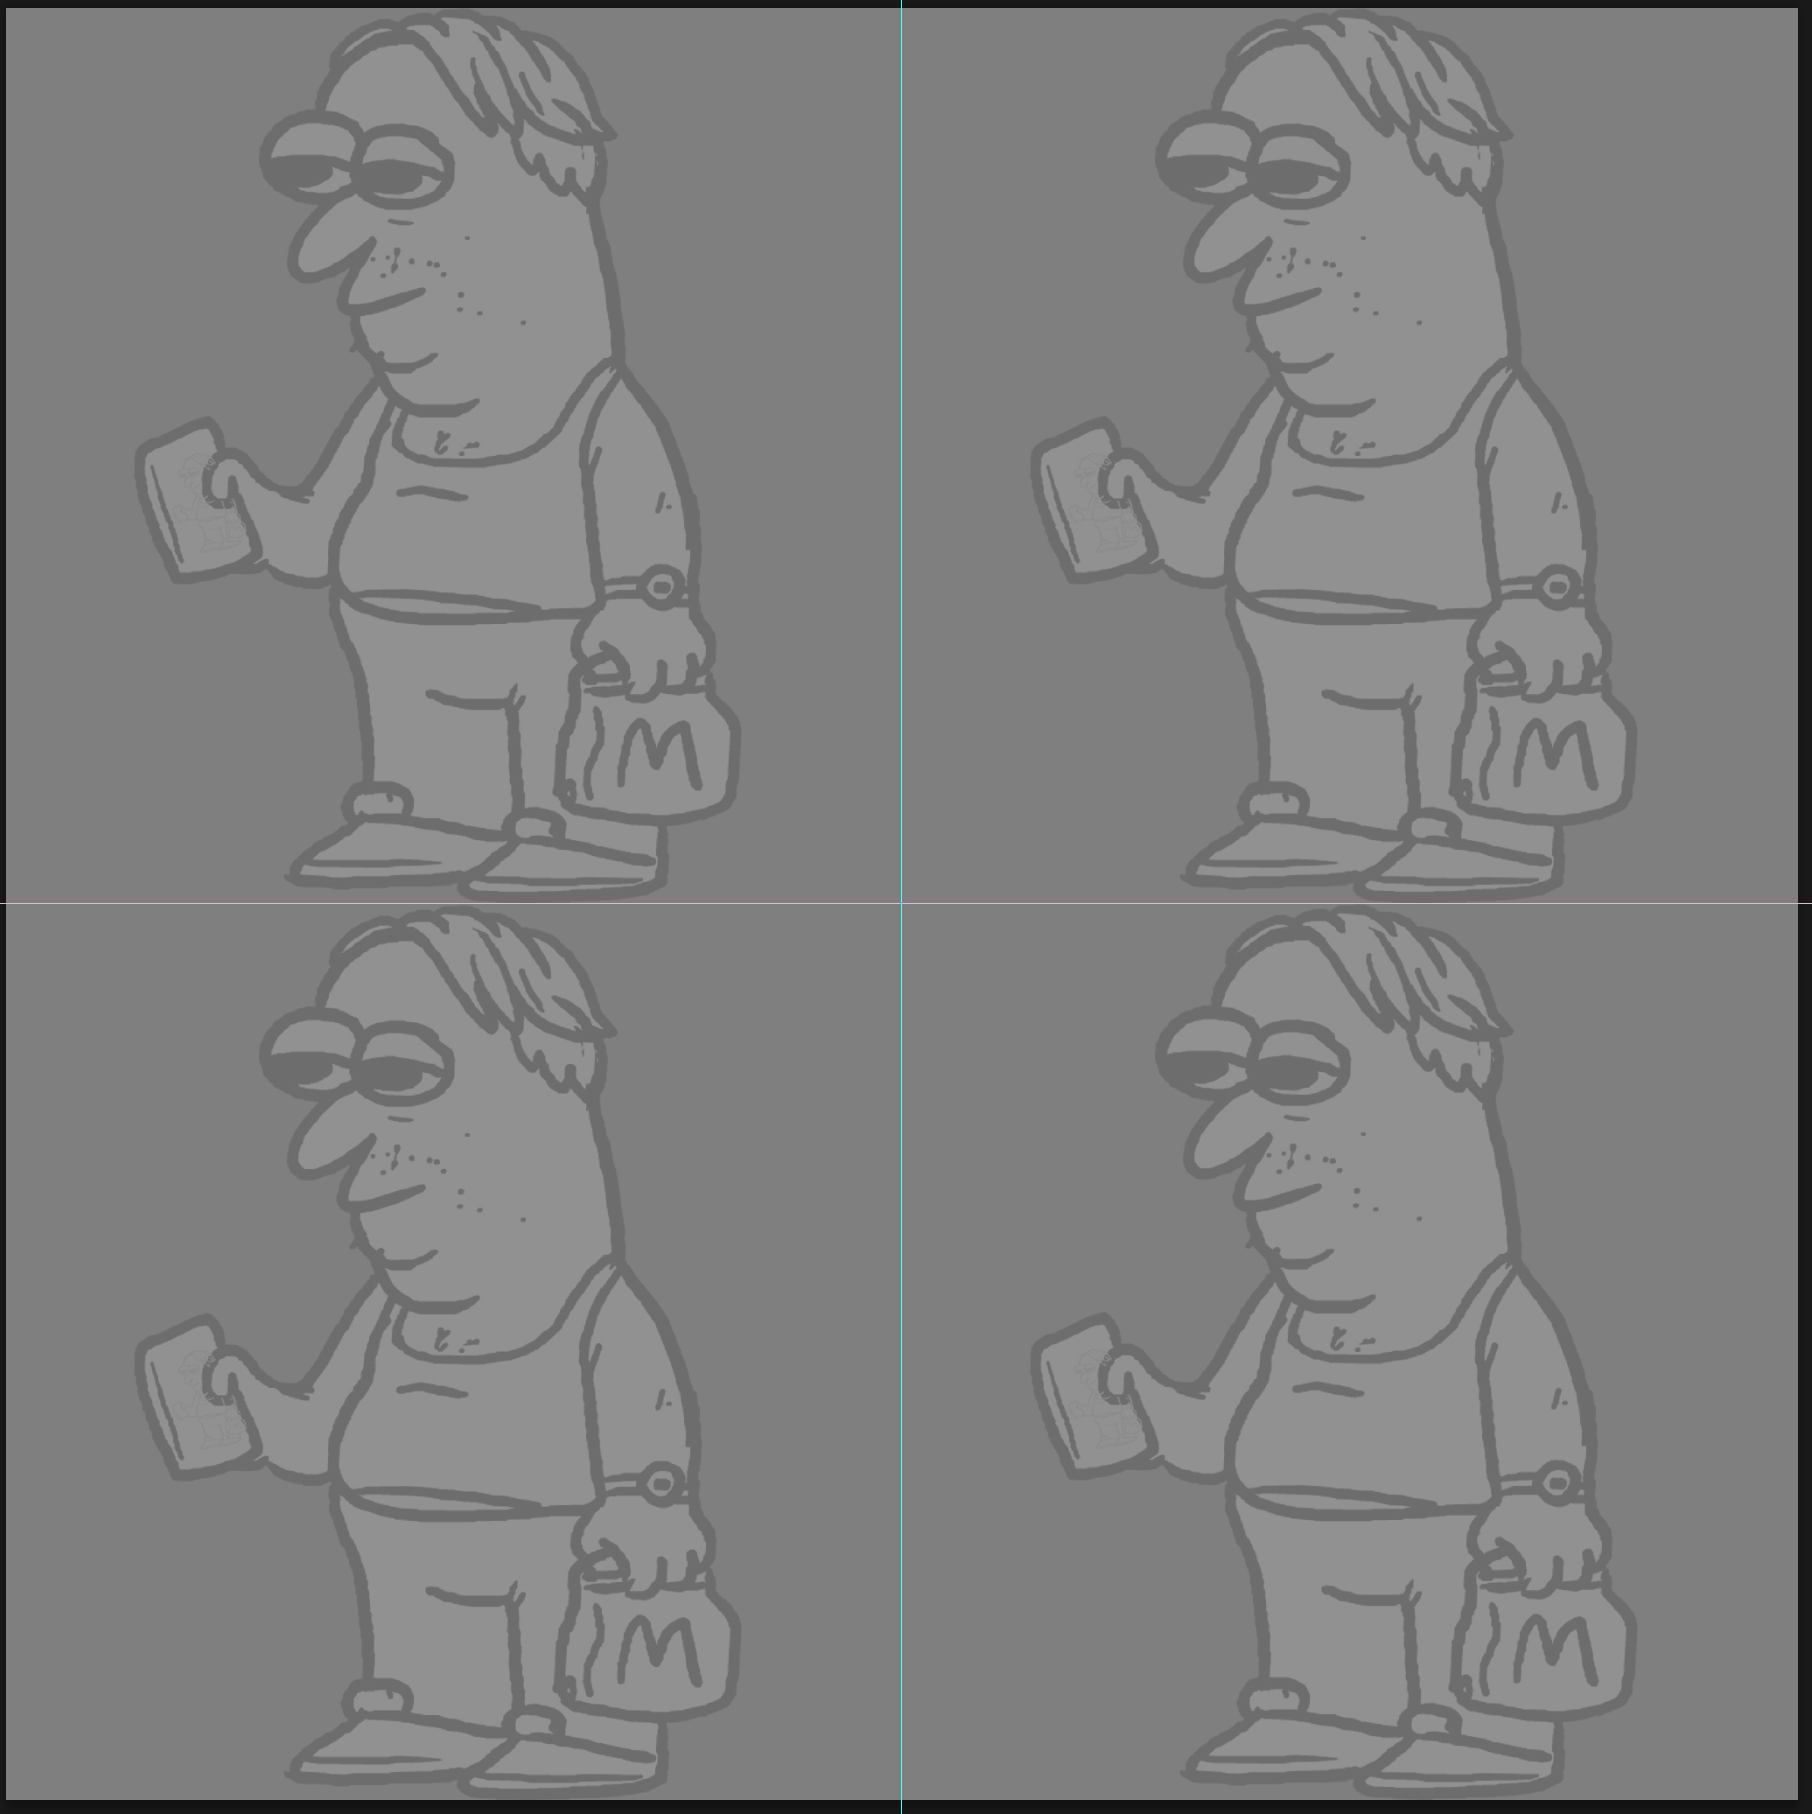
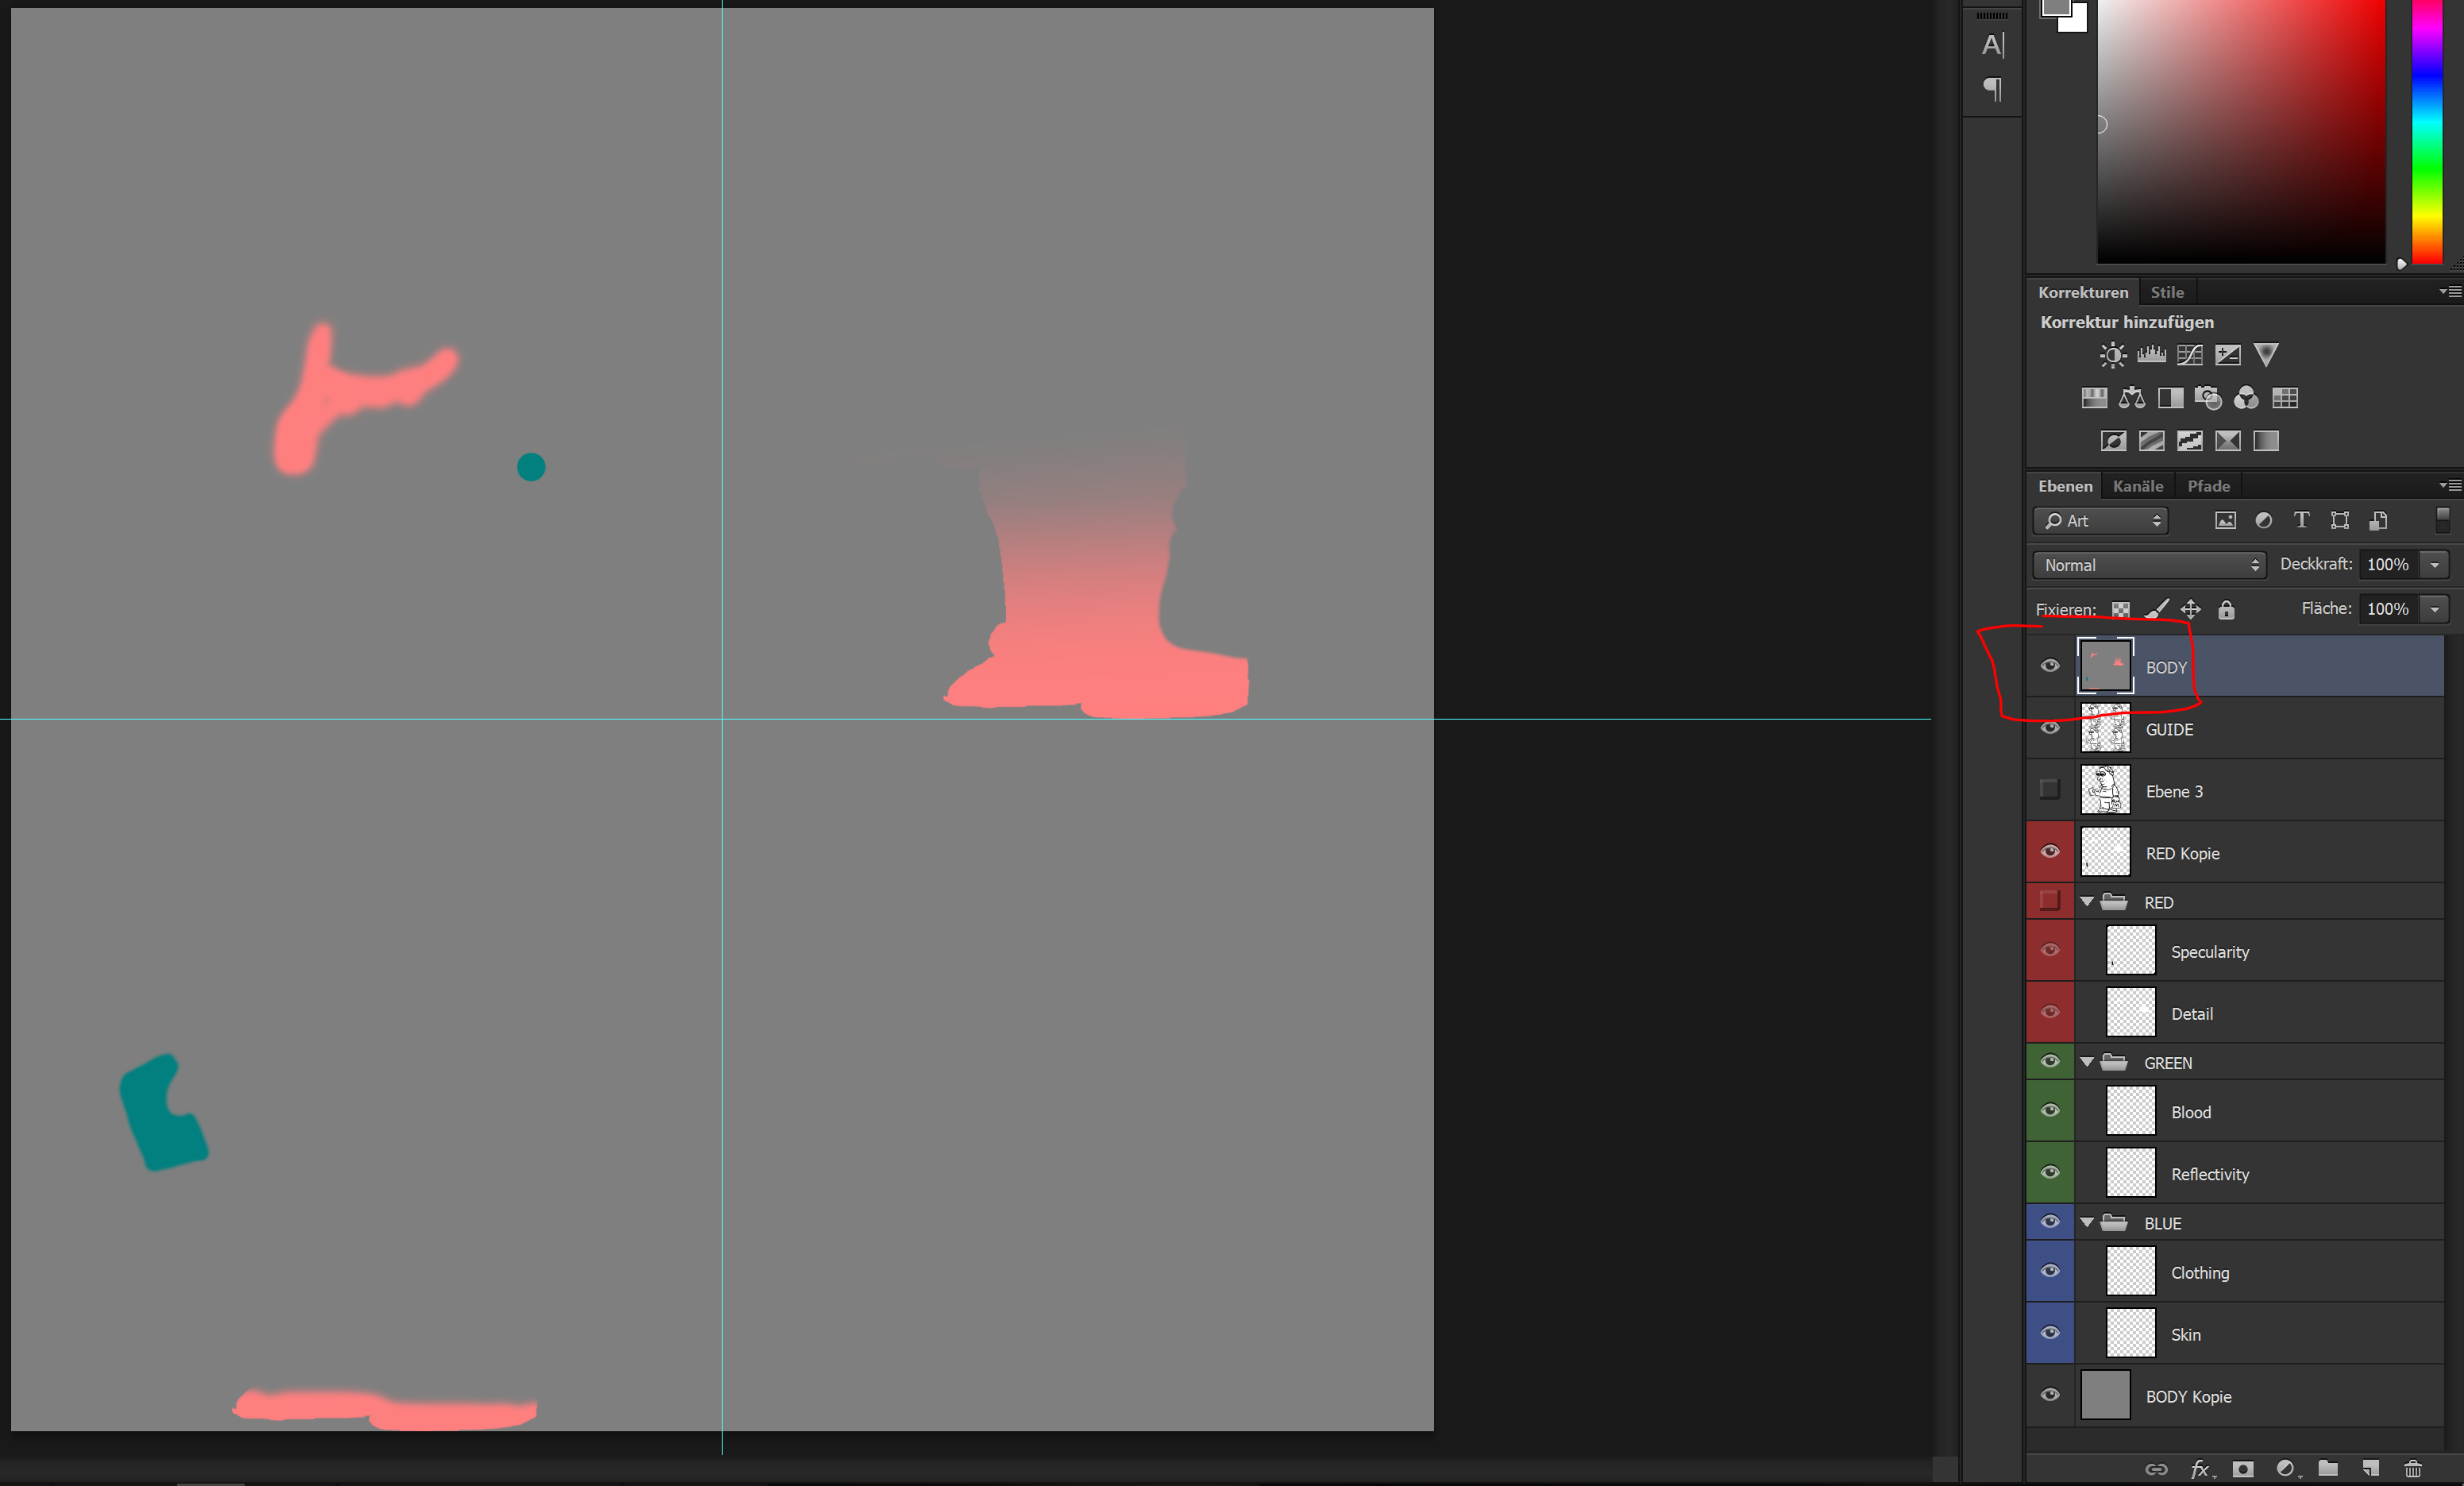
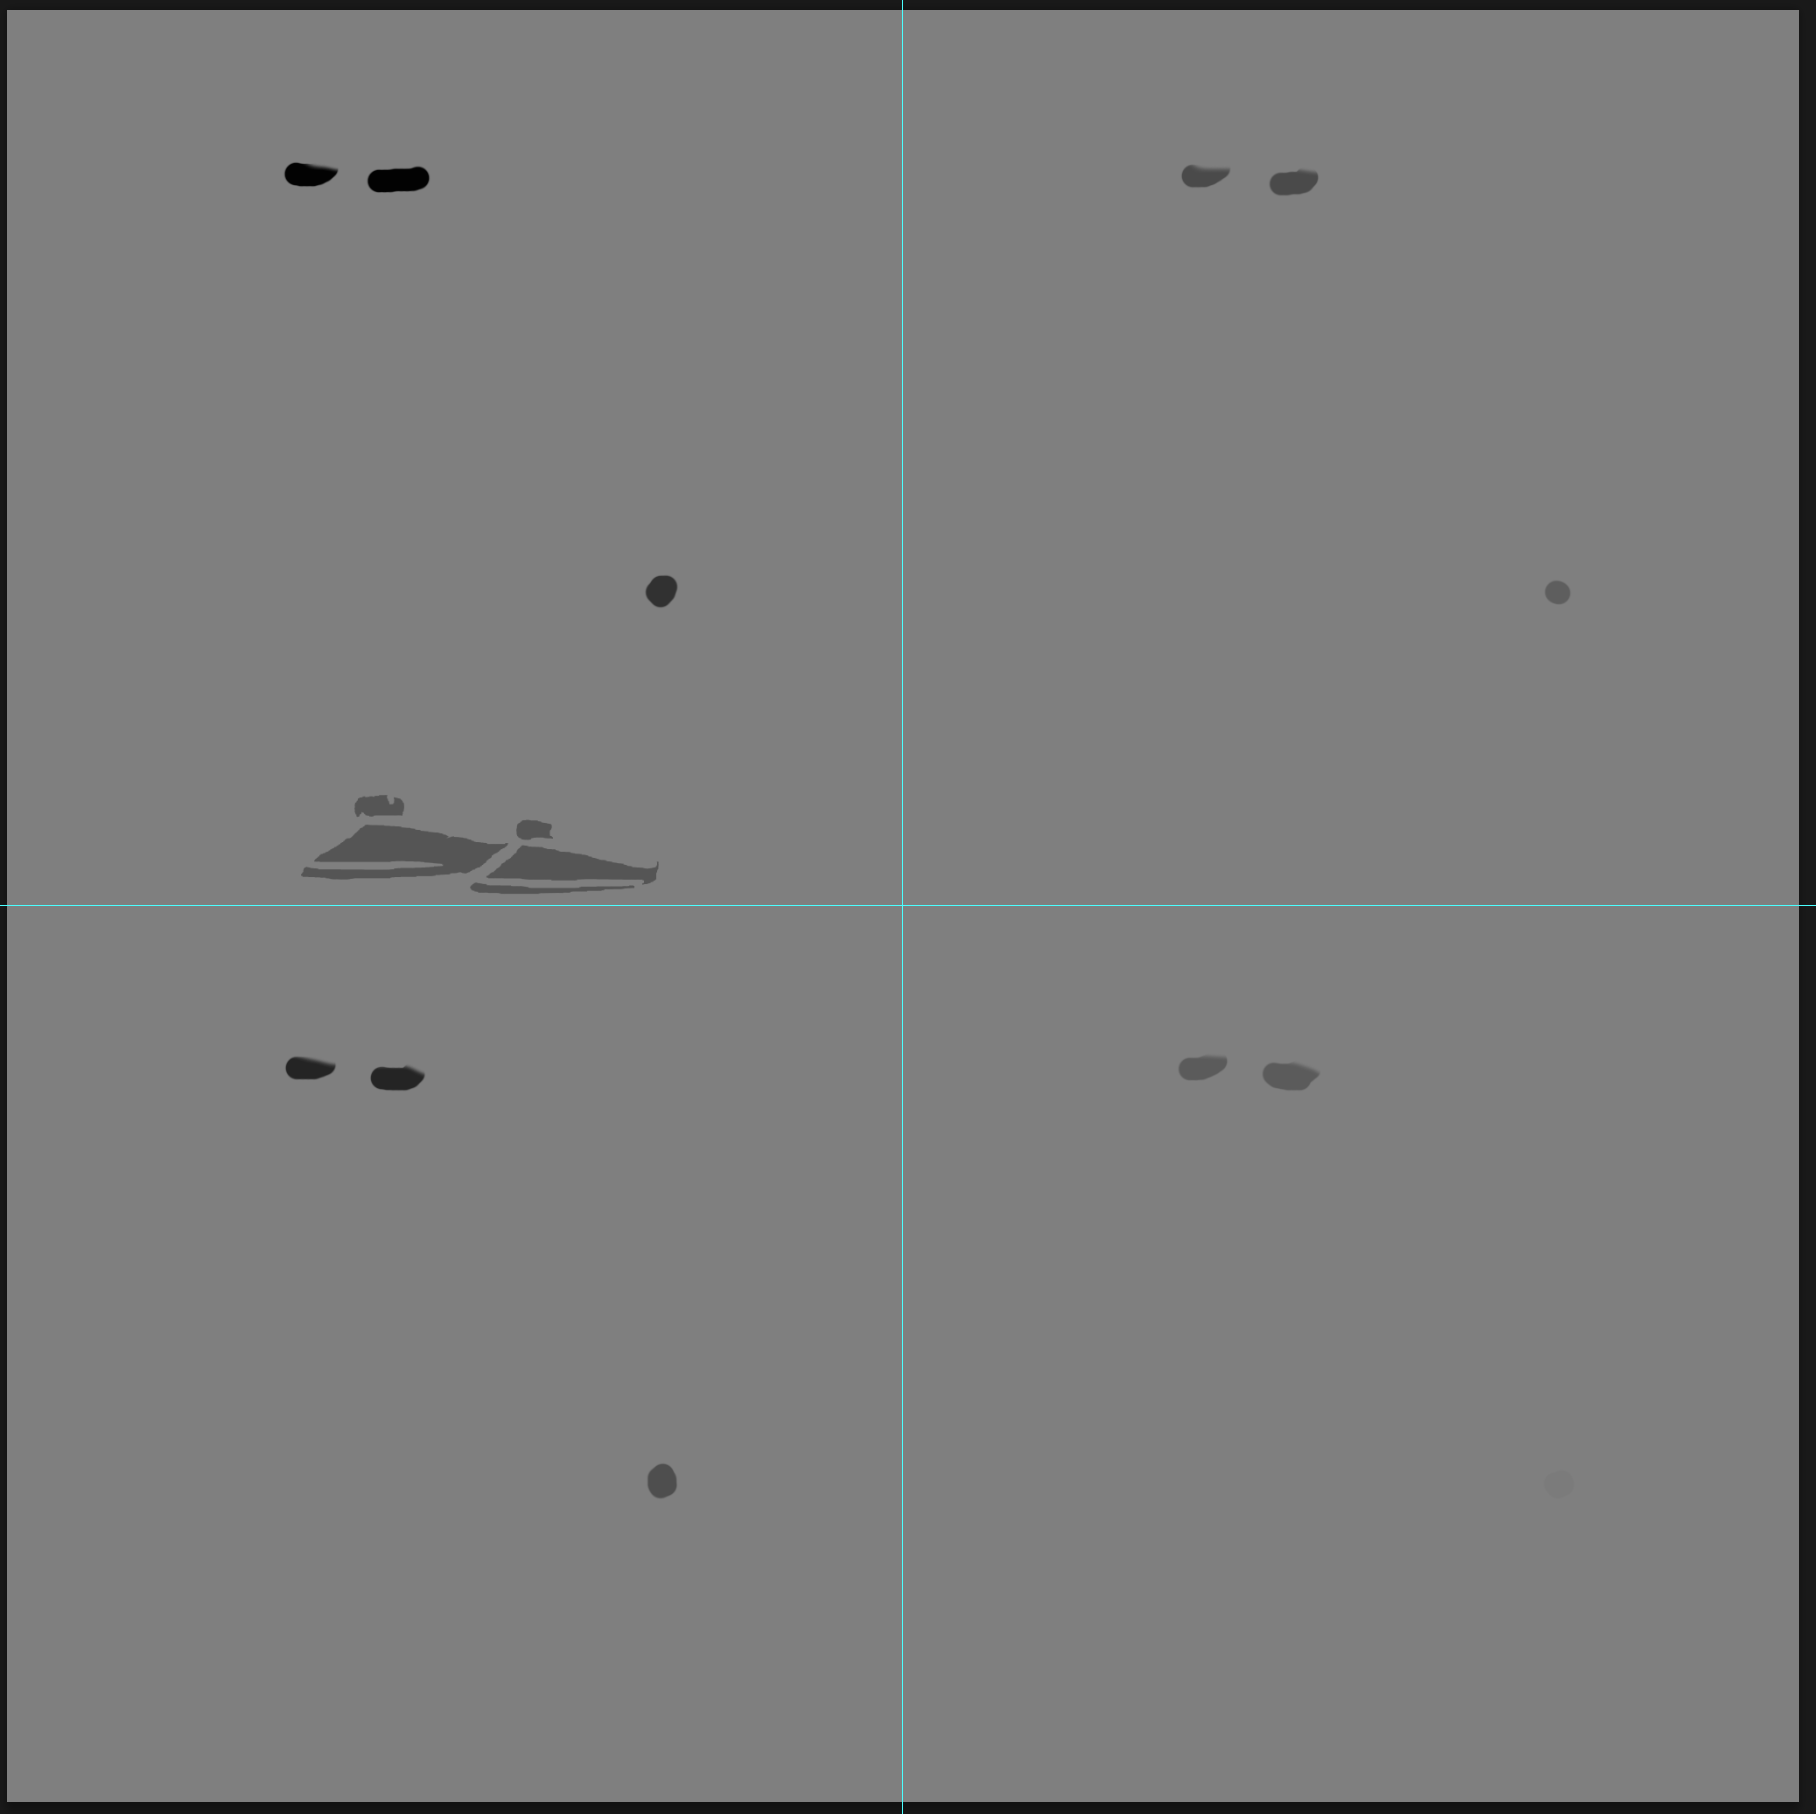
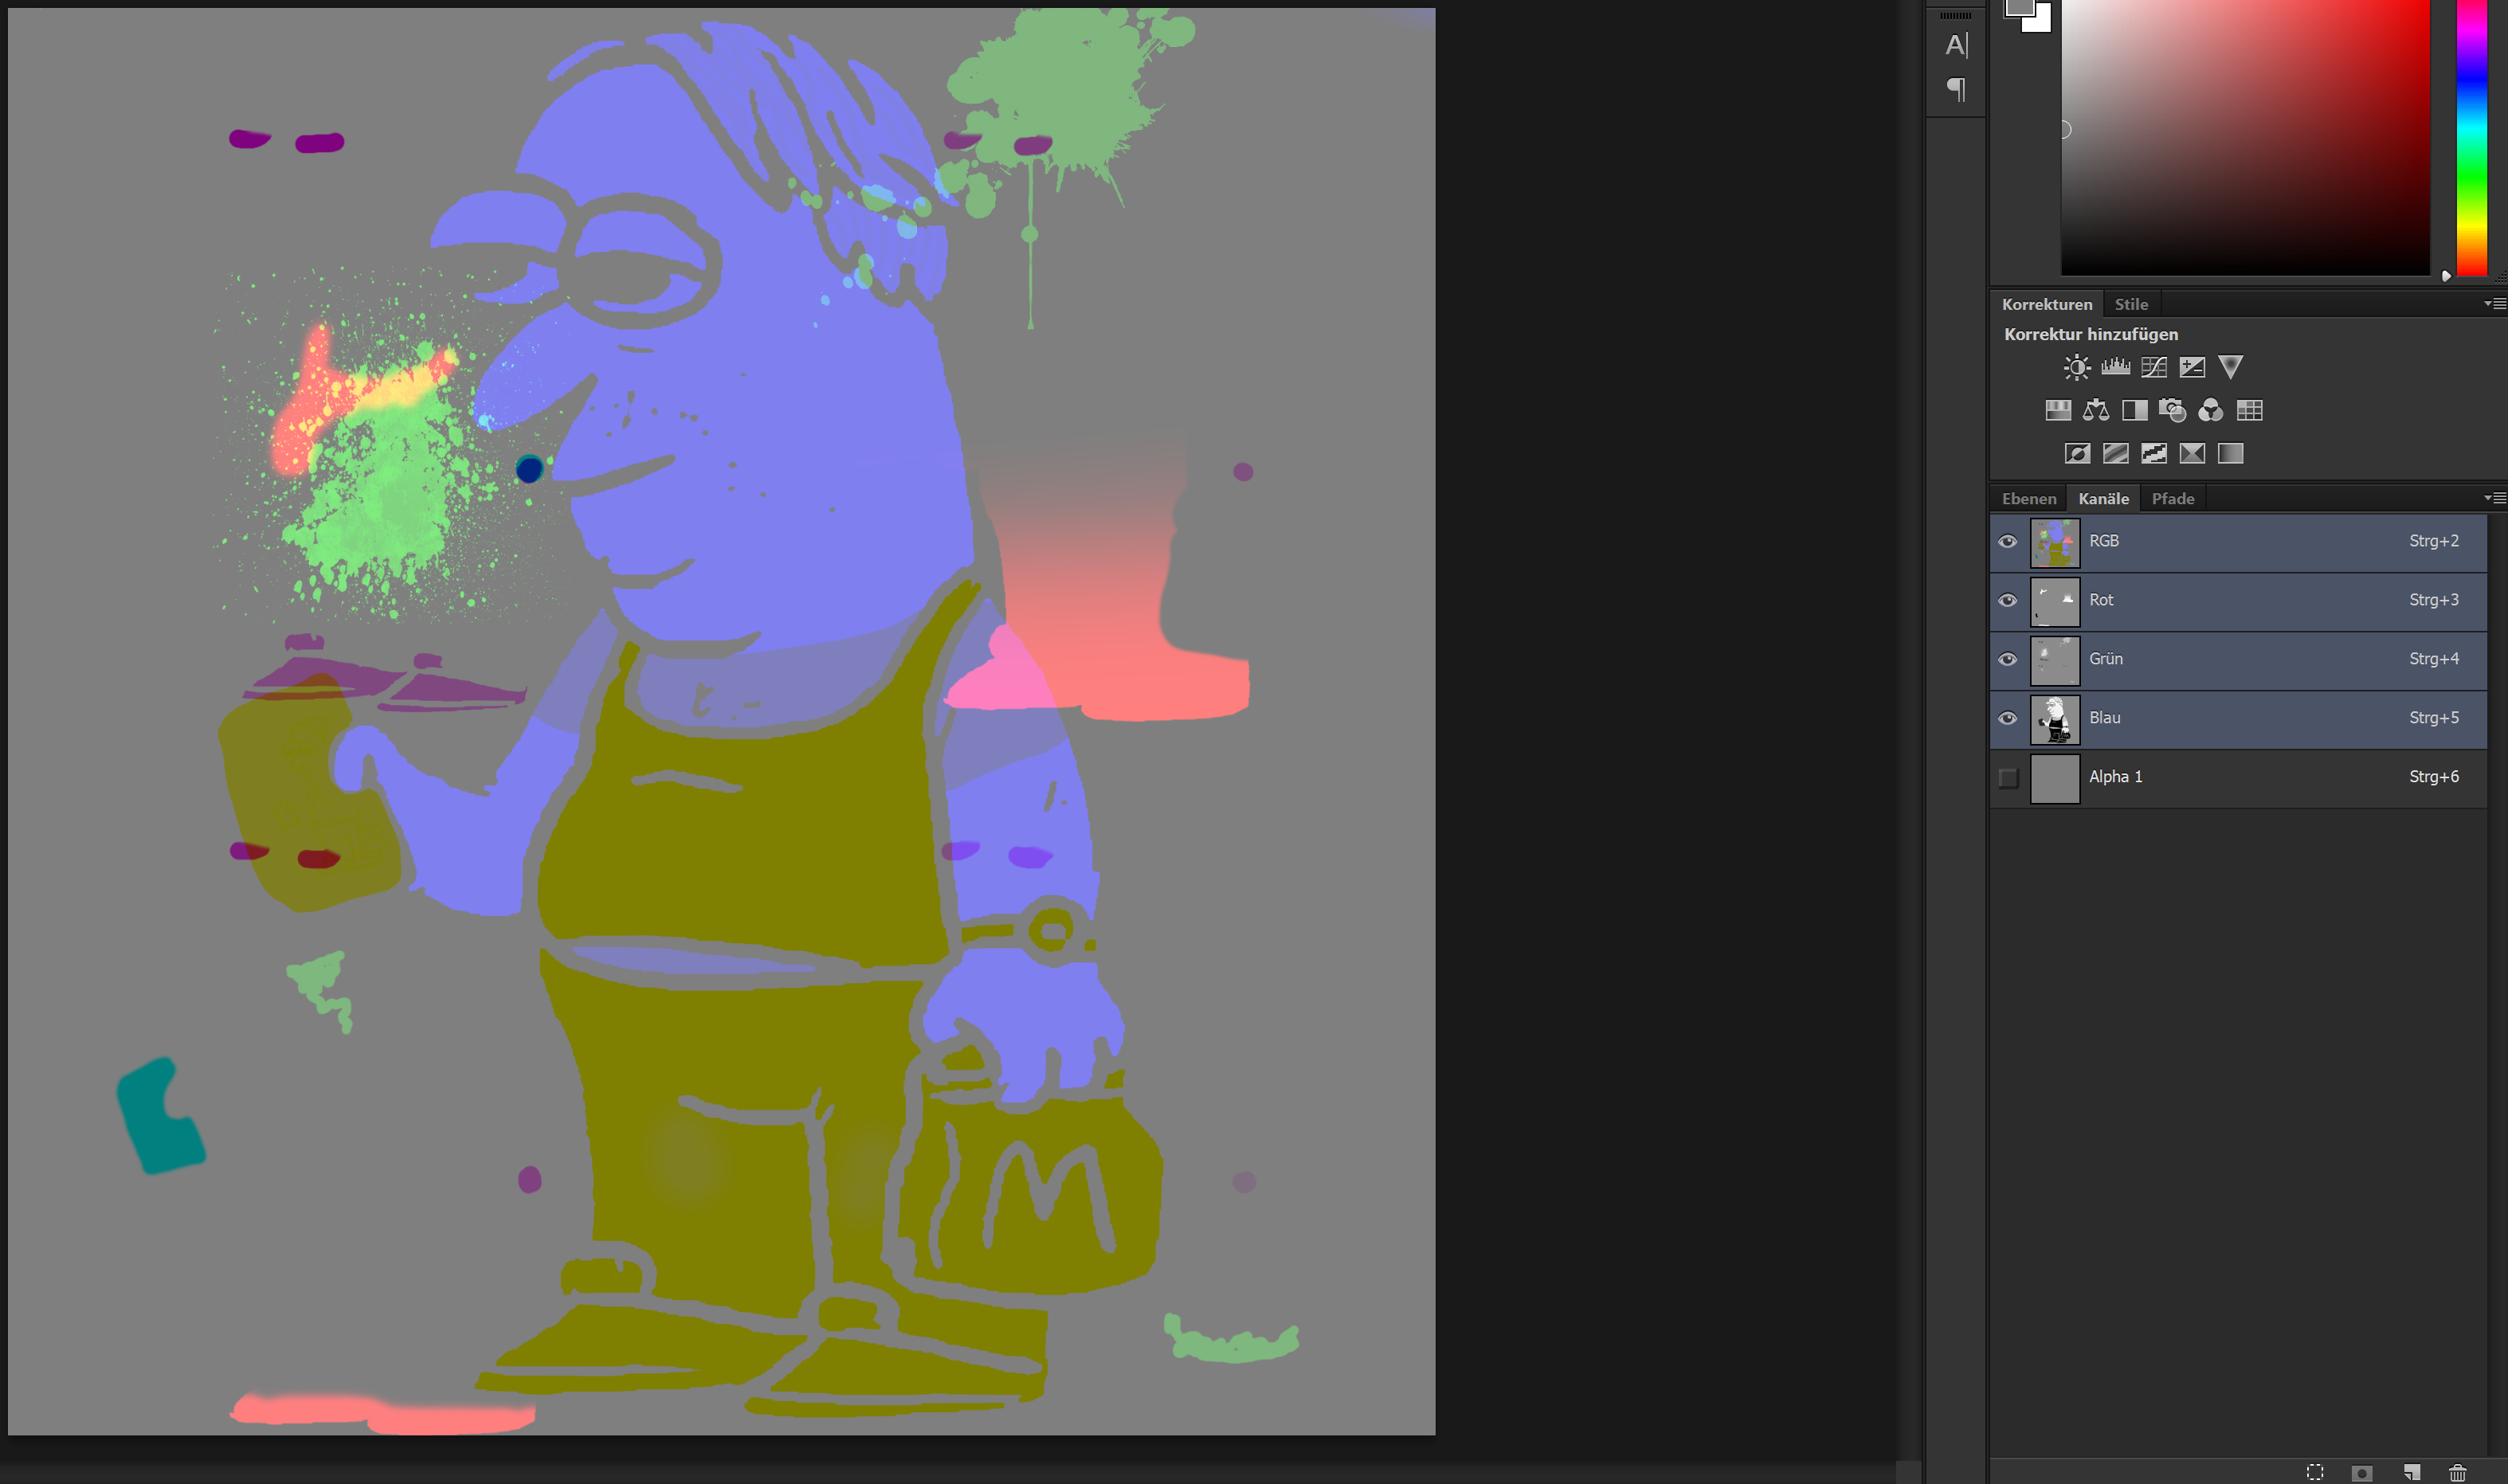
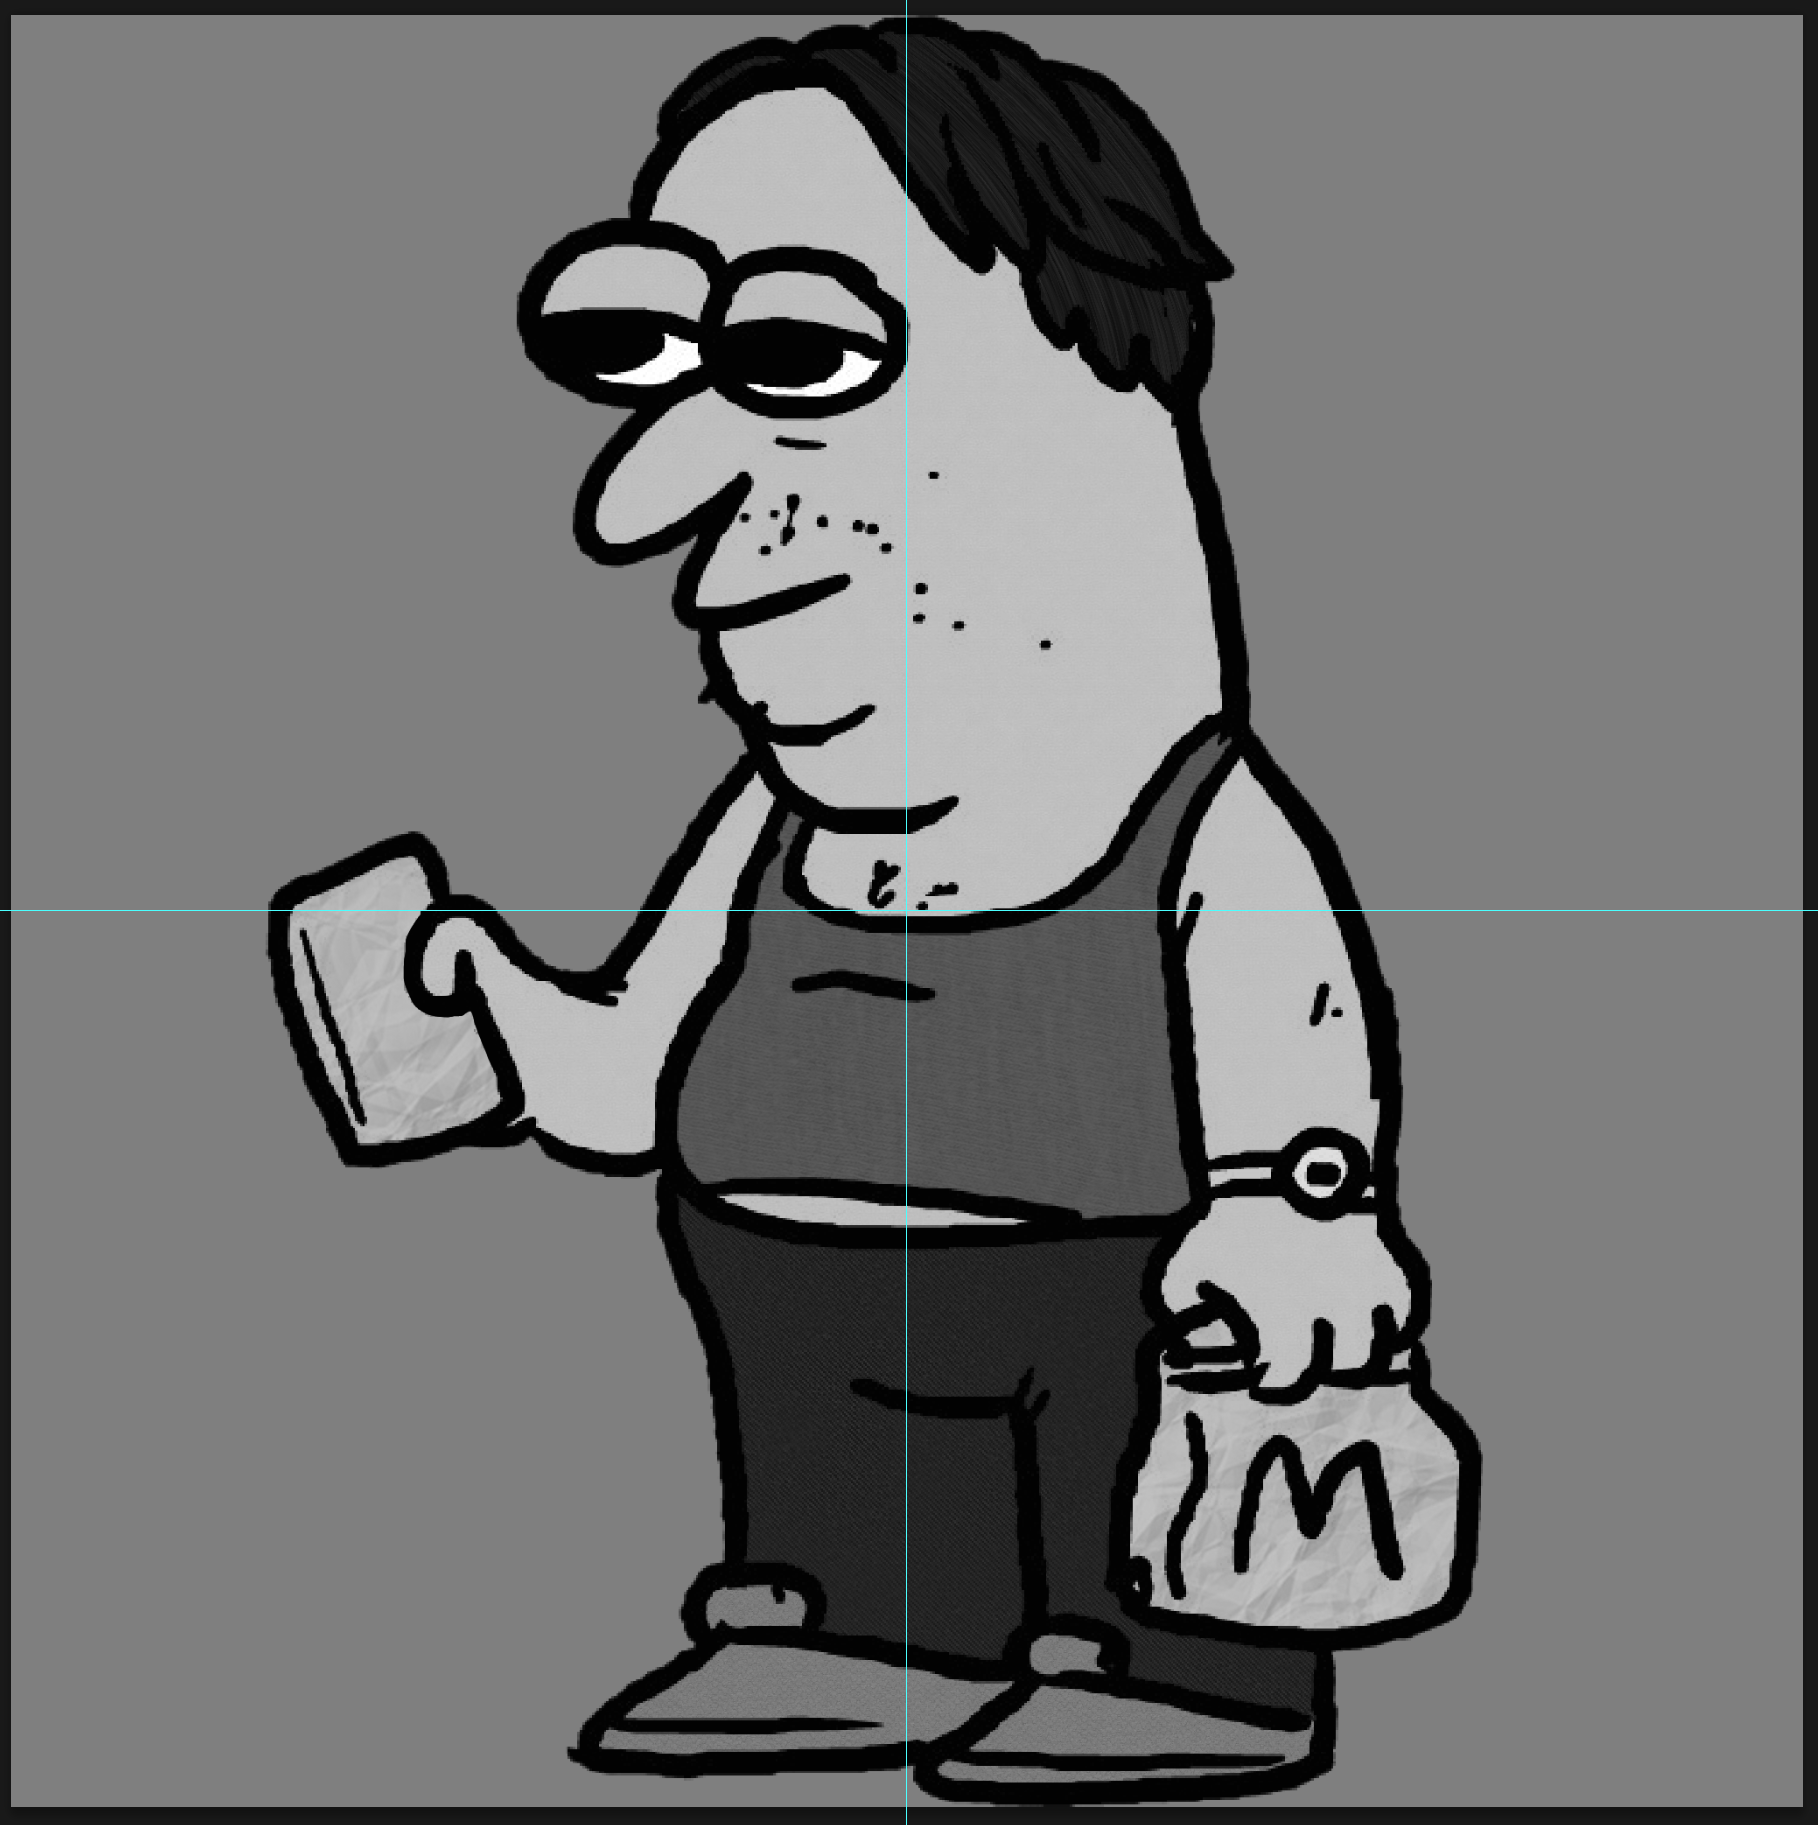
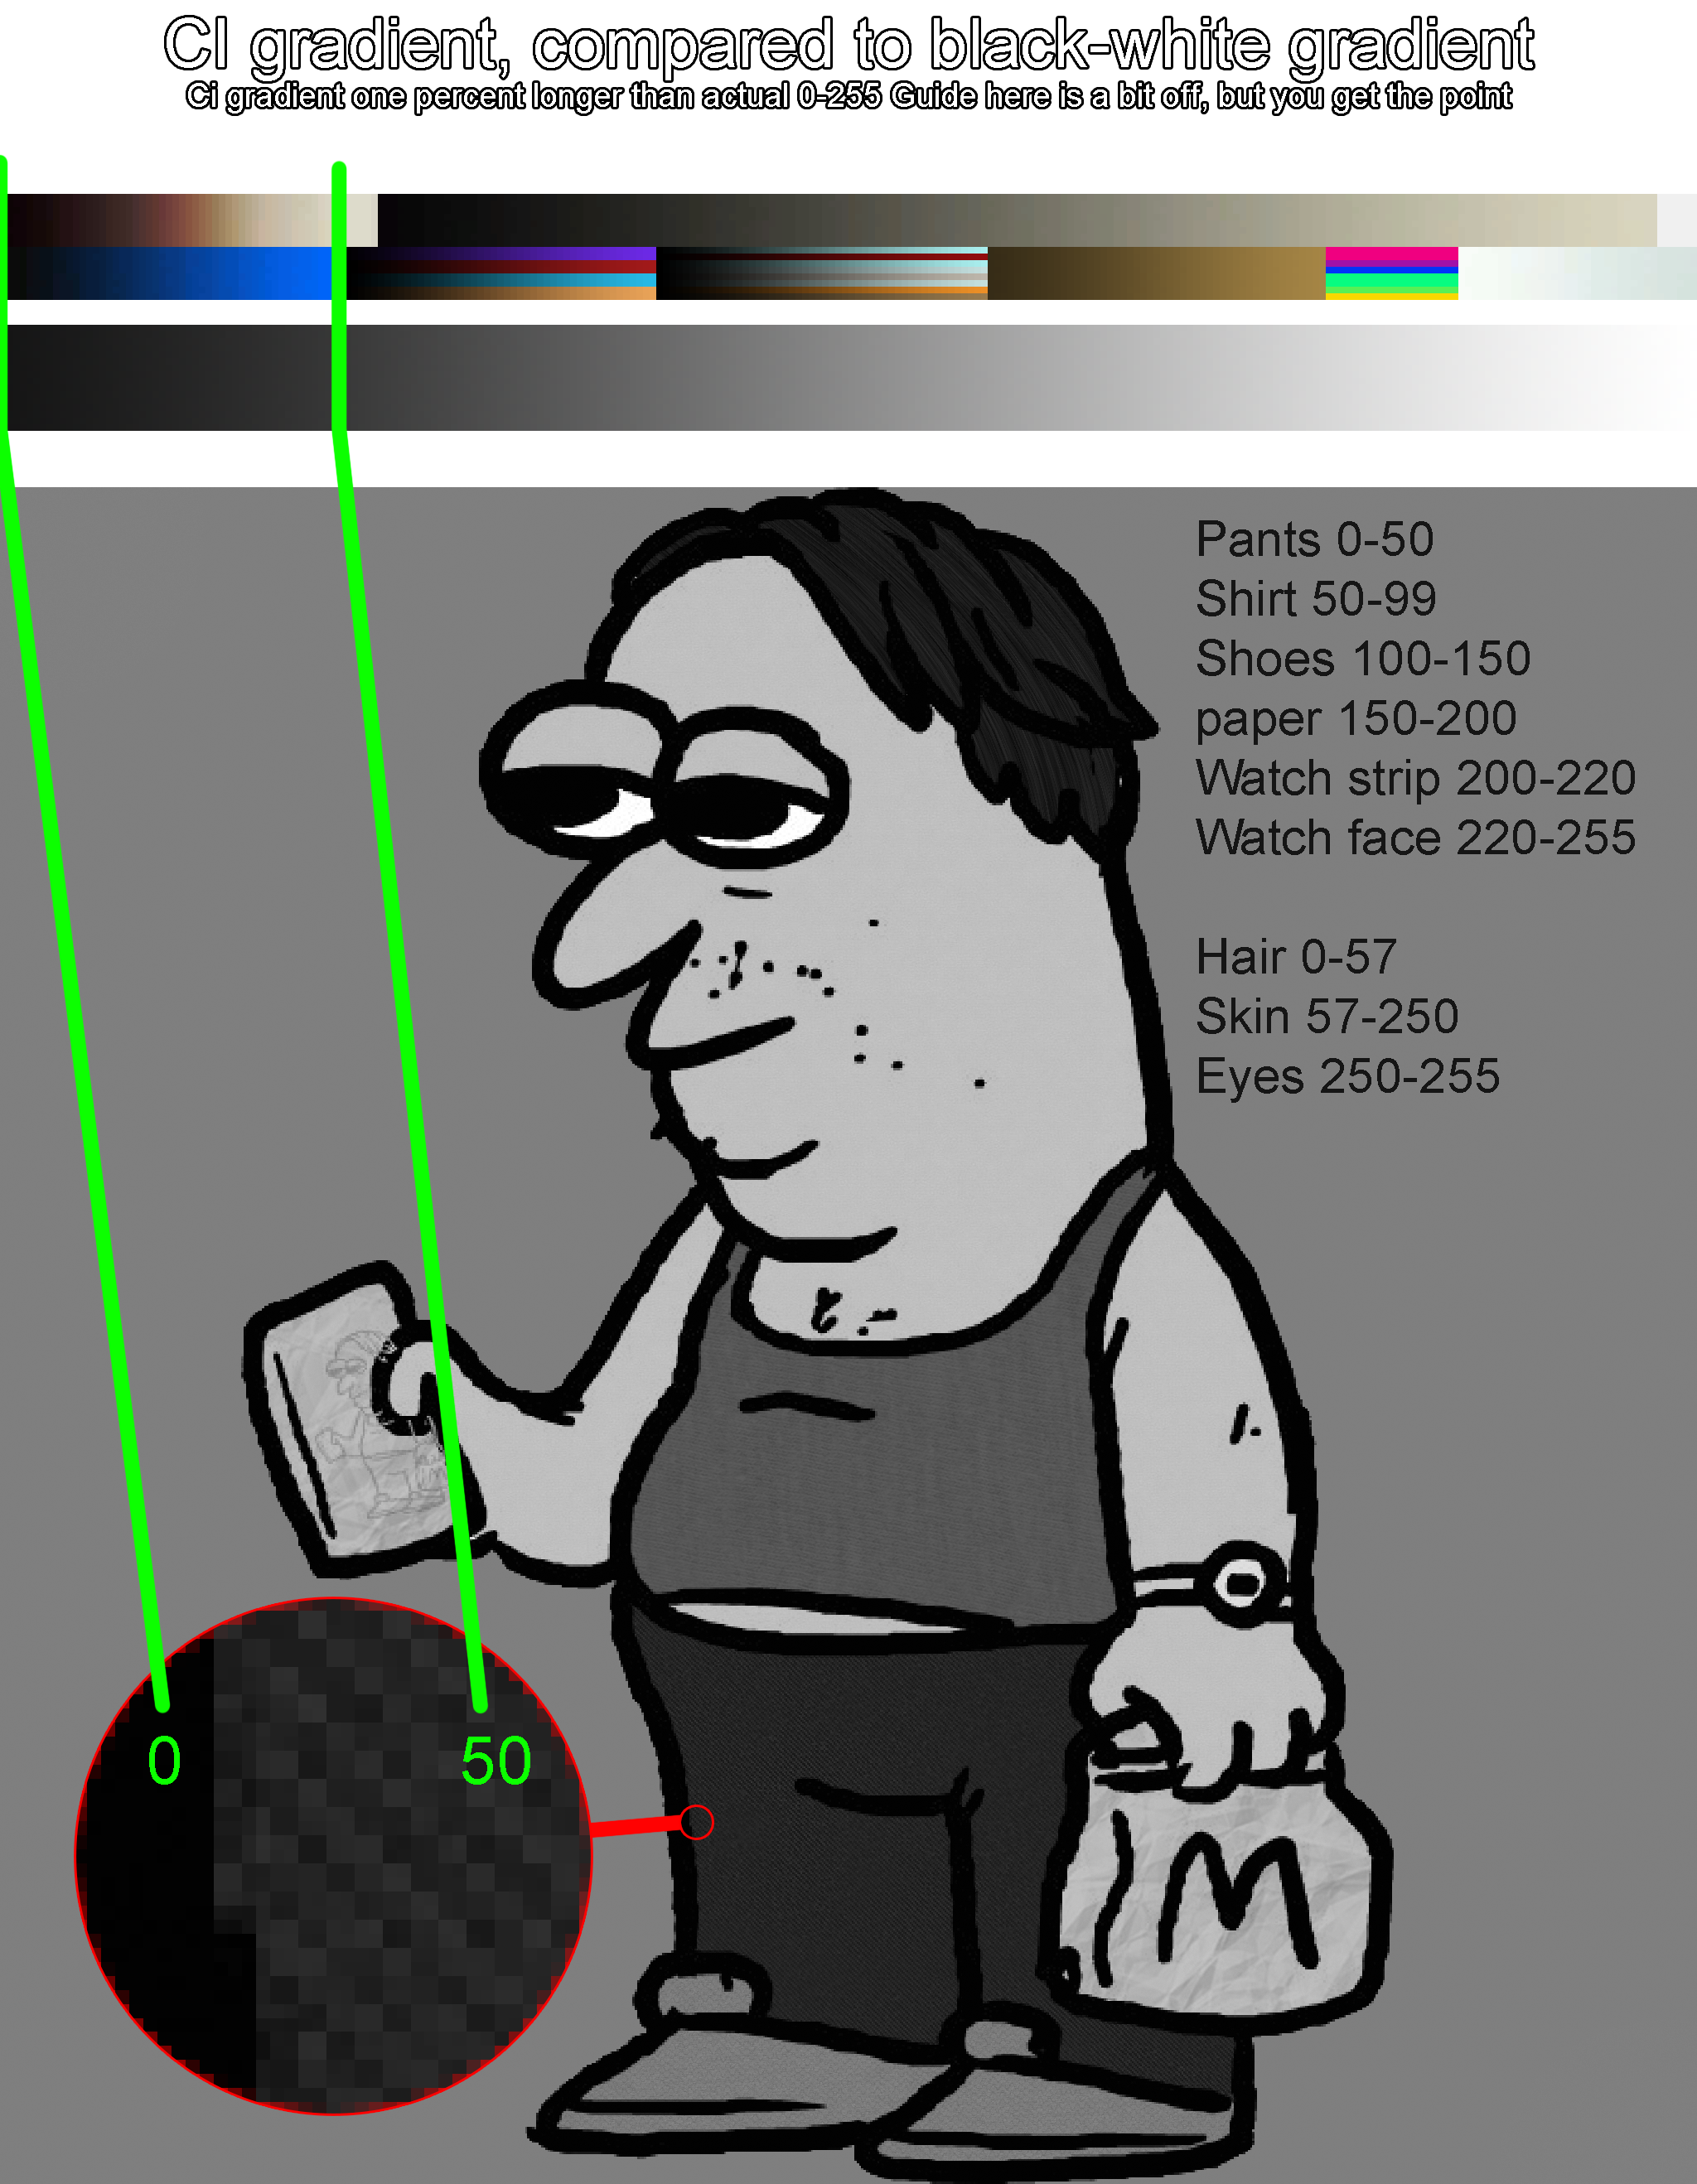
im trying to give ci coloring system to some of the textures of l4d1 infected
but it doesnt really seem to work because i might not have made it accurate or something else
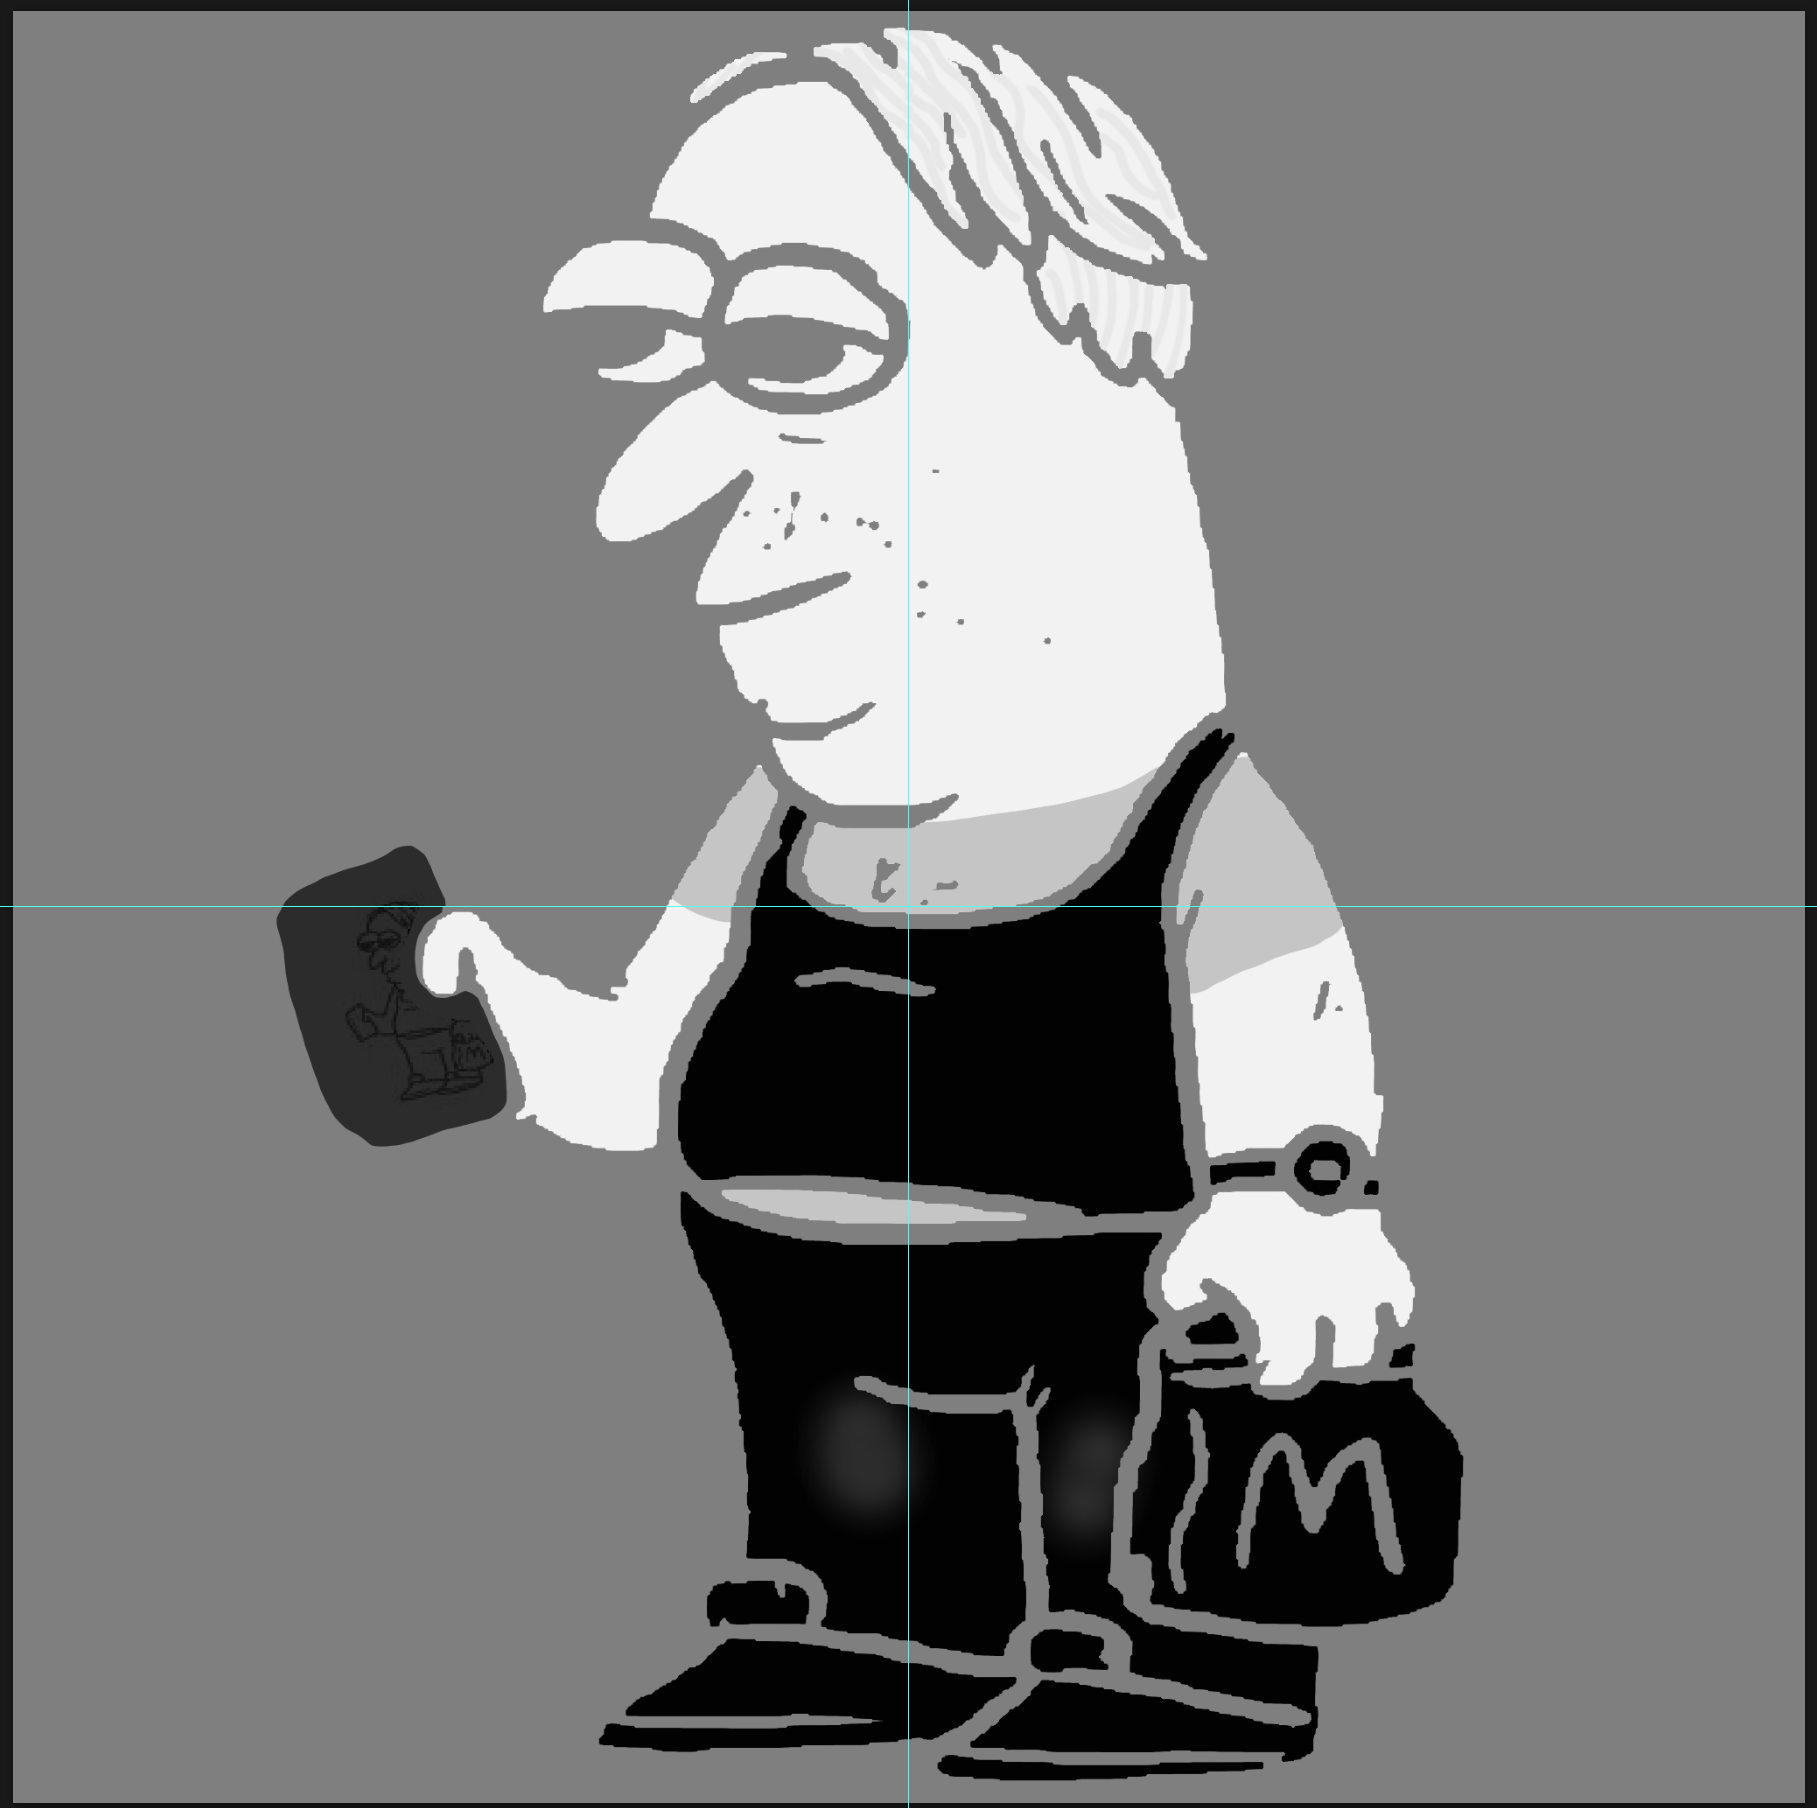
the point is that im trying to make the infected shader work on l4d1 infected so i can add ellipsoid wounds to it, but the shader works on l4d2 infected (cuz of the ci_texture)
its more of an sfm thing but nontheless im still strugling to work it properly and i need help
name8828 17 Nov, 2023 @ 12:56am 
oh ok
мяFunreal  [author] 17 Nov, 2023 @ 12:56am 
Shaders are hardcoded into the game itself.
It can be "ported" by the devs of gmod.
name8828 16 Nov, 2023 @ 8:31pm 
is there any way to port the coloring system to gmod?
xdshot 12 Nov, 2020 @ 2:09pm 
Gradient is separate vtf file?
addicted 24 Aug, 2020 @ 12:59pm 
Excellent guide!