Shadowrun Returns

Shadowrun Returns

30 ratings
Animated Props and Logos In-Game
By GrungePunk
A guide showing a trick I figured out that allows GMs to use animated props and logos In-Game when creating their custom content.
2
   
Award
Favorite
Favorited
Unfavorite
Introduction
Welcoming to Anthony Byland's Shadowrun Returns Guide to In-Game Animated Props and Logos!

This guide will hopefully teach everyone who reads it how to add animated props and logos to their User Generated Content. I figured out how to do this while working on my campaign and thought that it was too useful to not share with the community. Below you'll find a link to my campaign. Check it out if you're interested in seeing some examples of what this guide can help you do in your scenes.

EPIK Episode I - The Conversion

So why don't we get started!
Finding/Making a Prop
Now to begin you must first make an animated prop or if you're like me (not the best artist) you can go on Google and search for Animated Gifs! Once you've found an animated Gif (shorter animations are easier to do so try to keep it simple) you can open it in a program like Adobe Photoshop or for those of you that don't have Photoshop a nice free alternative is GIMP.
Using Photoshop/GIMP to Save Individual Frames
So for this guide I will be working in Photoshop. I'm sure the same can be done in GIMP but it might not look exactly the same as how I'm doing it.


So for this example I am going to be using an animated gif of an isometric grandfather clock I found while searching through animated gifs on Google.

So once you open it in Photoshop it should look like this as you select the different frames.

Now in the screenshots above you'll notice that on the bottom you can see a display of the mulitple frames in the animation. This clock only has four frames which makes it simple plus two of the frames (Frame 1 and Frame 3) are actually the same image which is helpful in reducing the amount of work that needs to be done.

Now we need to go through each frame of the animated gif and save each frame as a .png file using the naming format for Shadowrun Props. So go to File>Save for Web... and select PNG-24 as the image extension in the upper right drop down menu. The image below will show an example of the Save for Web... window.

You need to do this for all three frames of the image that are different. Since frames 1 and 3 are the same image you can get away with not saving Frame 3 as long as you've saved Frame 1.

The image below will show an example of the naming format. Remember to save the image in your Content Pack's art folder which is usually - C:/Users/*YOUR USER NAME*/My Documents/Shadowrun Returns/ContentPacks/*NAME OF YOUR CONTENT PACK*/art/animatedprops/

(if the art folder or the animatedprops folder do not exist you will need to make them. Also the animatedprops folder can be named whatever you want as long as it matches the filename you save the image as such as below.)

Notice that in the file name I use all lowercase and I use underscores instead of spaces. You NEED to do that. It also has to be formatted the way I have it. I also have it in a folder called animationframes so the first part of the name has to be animationframes. I could technically make the next part of the name donkeycrap because it can be anything but if I did that it would show donkeycrap in the Type field in your Assets library. Last but not least, the "e" means it's facing East and the @2x after the filename means it's the HD prop image. You will have to go through after saving all your animation frames and resize them to 50% of their original size. So if the original height is 300 pixels and the original width is 300 pixels you have to resize the image to have a height of 150 pixels and a width of 150 pixels and then go and save each frame as the new size under the exact same names as before but without the @2x at the end. This way if somebody chooses HD Textures it will use the @2x images but if they choose not to use HD textures while playing it will use the half size images.

Some examples below of the resizing I did on the Grandfather Clock below.

After you have all the different frames and sizes saved it's time to go put them in the Shadowrun Editor!
Adding the Individual Frames as Props Inside the Editor
Now in this section I will be under the assumption that you already know how to add custom props to the Shadowrun Editor. If you do not know how to do it I suggest you read the excellent tutorial by the guys and gals at HBS.

How to Add Custom Props[shadowrun-returns.wikispaces.com]

So now that you know how to add and configure custom props you basically have to add each animation frame as a different prop. In the case of the grandfather clock I'm using as an example I setup frame 1 as Grandfather Clock Frame 01 and just changed the last number for each of the additional frames. If you're still confused, here are some screenshots showing some of the stuff I did.

Setting Up the Props, Events, and Triggers for your Animated Prop
So now that you have all your animation frames added as custom props inside the Shadowrun Editor, it is time to place the props inside your scene. To do this you're going to place the first frame of the animation wherever you want the animated prop to be in your scene. Then you're going to place the rest of your frames somewhere outside the playable area of your scene where the player's character can't see them like in the example below.


Now as you can see I have the first frame placed where I want it and the other frames are placed outside the visible area of the player. Now you need to go through and rename all the props in the properties window on the right simple stuff like GF Clock Frm 01, GF Clock Frm 02, GF Clock, Frm 03. Then you need to go through and make all the props interactable by clicking the tiny hammer at the upper right of the properties window. Then in the dropdown menu you want to choose "Dummy Interaction" as the interaction type like I have done in the picture below.


Then you have to go through and make events and triggers to coincide with each prop/frame of the animation. You'll also need to make an animation start trigger. You can see the triggers and events I made to animate the Grandfather Clock below.

So basically what these triggers do is that when an event is run for say Frame 02, the Frame 02 trigger executes and takes the Frame 01 and Frame 03 props and places them outside the map and then moves the Frame 02 prop into the spot where the Frame 01 prop just was. Then after doing this is waits 0.5 seconds and sends out the Frame 03 event which then executes the Frame 03 trigger which moves the Frame 01 prop and the Frame 02 prop out of the scene while moving the Frame 3 prop to where the Frame 02 prop just was. It will basically do this in a never-ending loop. Also because the animation is 4 frames long and uses the same image for Frames 1 and 3 I only made 3 props and just made the frame 3 trigger move prop 01 to the animated props location. You could technically make a Frame 3 prop that looks just like Frame 1 if that's less confusing for you. If you did that you would end up with 4 props instead of 3 though which uses more memory.

Also a side note. When using these event trigger loops to create animations in your scene, remember to set a delay between frames. If there is no delay the game will freeze on startup. You can make the delay anywhere from 0.1 seconds to 0.9 seconds or 2.5 seconds. The longer the delay the more choppy the animation ends up looking. The shorter the delay the more choppy the gameplay ends up looking. You'll have to keep testing your delays to find a good middle ground. Small maps can handle one prop using 0.1 second frame rate. The bigger the map or the more animated props you have on the map the more the fluid animations are going to reduce your overall performance. So experiment away.

Also the Event Trigger Loop I've showed you in this Guide is also usable to get light sources to remain on top of the Player's character. In my campaign I have the player using a Red Flare to see where he's going. You can check the screenshots of my Campaign I linked earlier in the guide or you can play the campaign if you want to see what I'm talking about.

Anyways, I hope this guide helps you all create some amazing looking content for Shadowrun Returns. Feel free to ask me any questions you might have about this process and I will answer them as soon as possible.

- Anthony Charles Byland
9 Comments
☺☺☺☺☺☺☺☺ 31 May, 2014 @ 5:27pm 
to complaccated
Doc Scratch 25 May, 2014 @ 5:50am 
Thanks. That's the exact info I needed.
GrungePunk  [author] 24 May, 2014 @ 4:59pm 
Ah okay. Well it may now. It didn't back when I wrote this though. Wouldn't be much of a point in jumping through all these hoops if you could just use a GIF as is. I lost interest in the editor about a month or two after the game was released though so I'm sure they have added some features to it since the last time I used it.
Doc Scratch 23 May, 2014 @ 7:26pm 
I did read the guide. You deconstructed the gif and put everything in separately. I was talking about the GIF itself, as is, working in the game.
GrungePunk  [author] 23 May, 2014 @ 5:50pm 
@ Dr. Bees

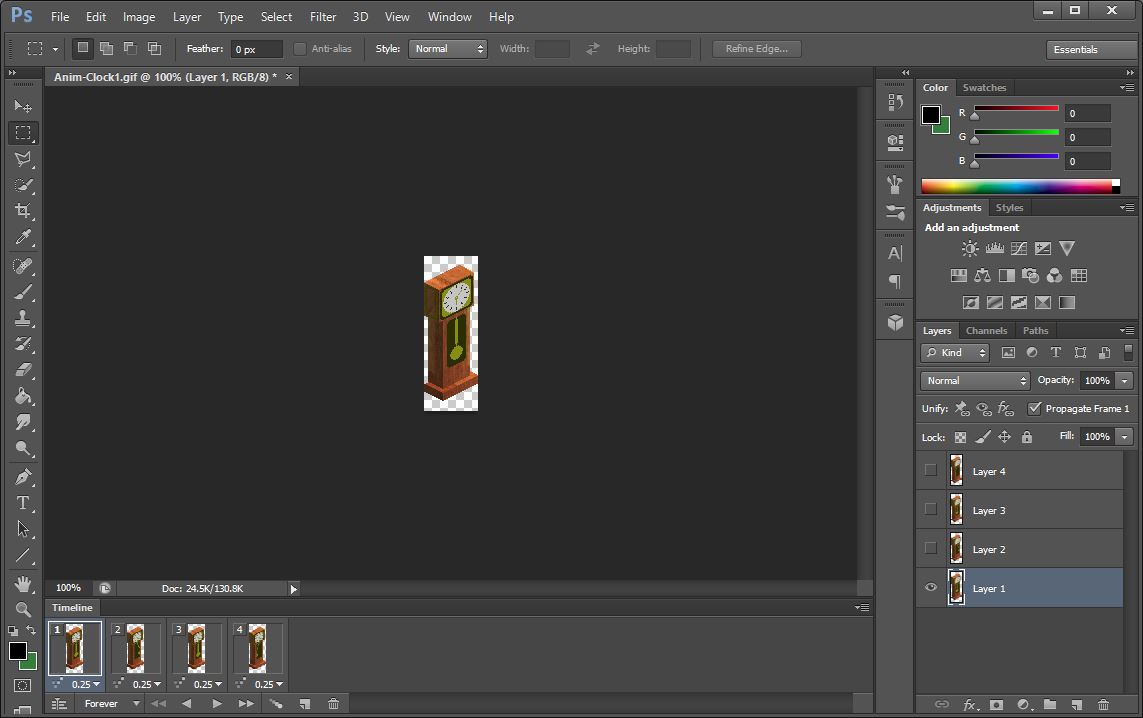
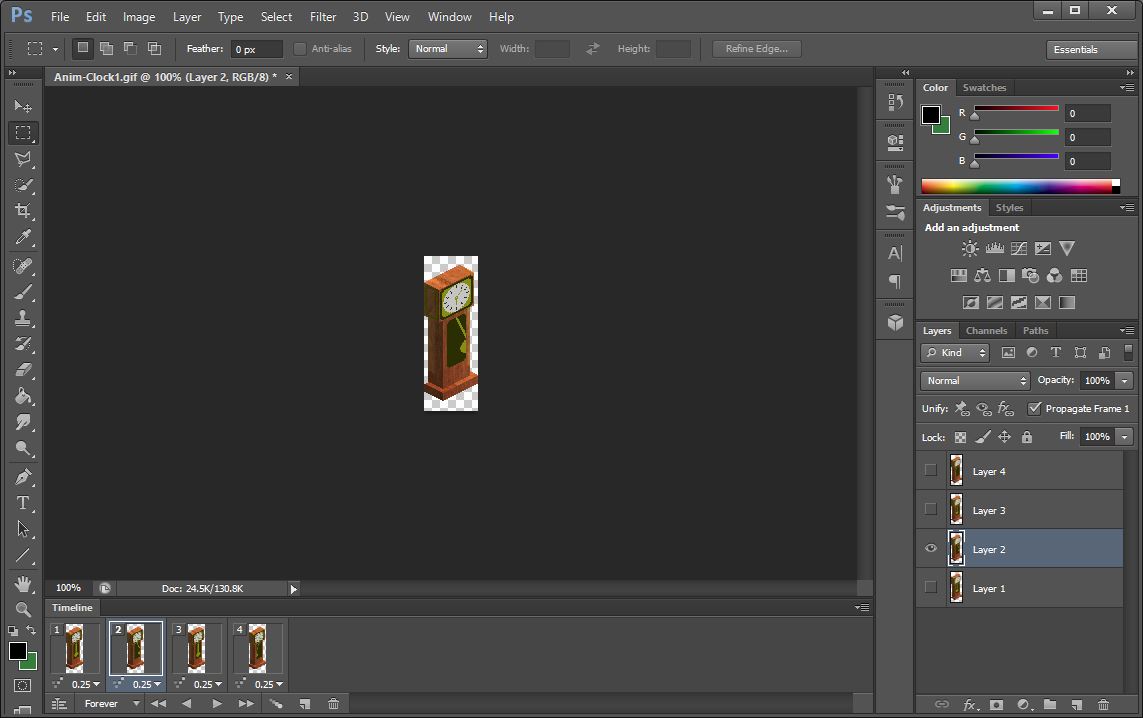
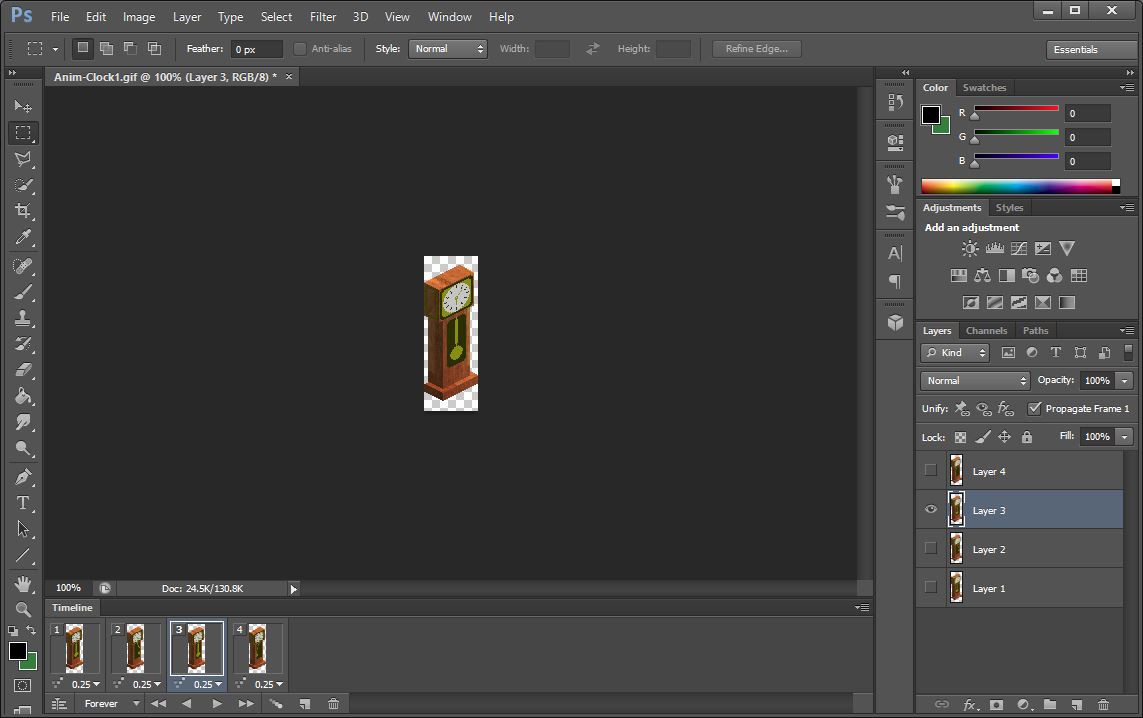
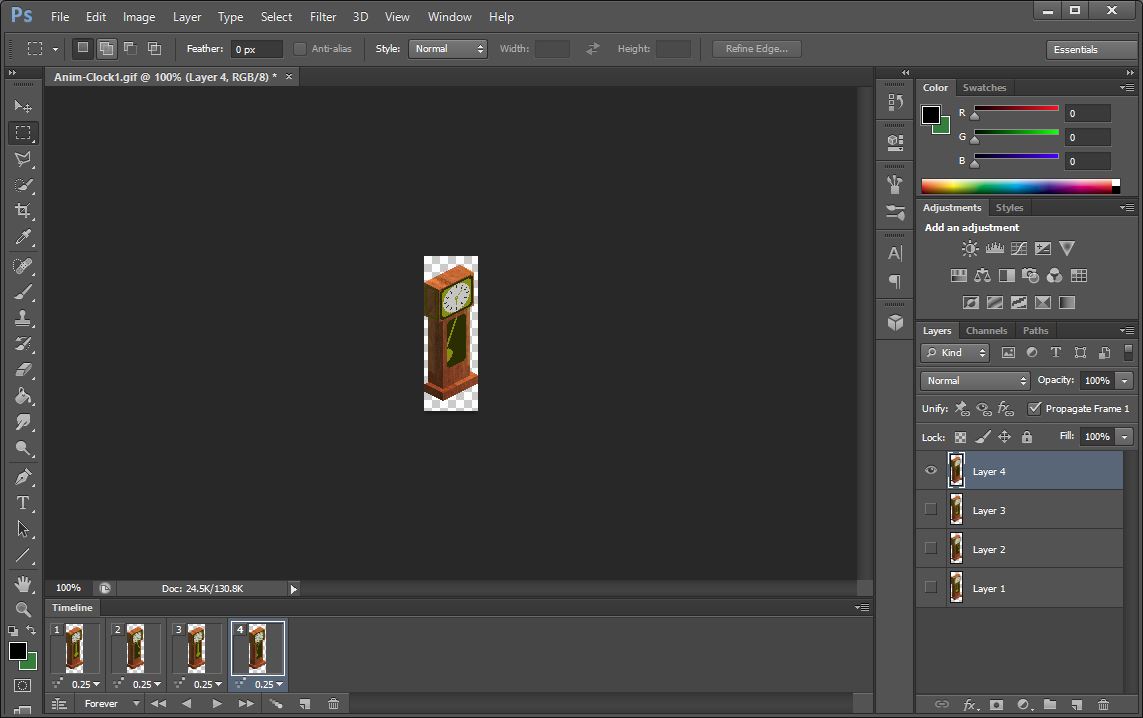
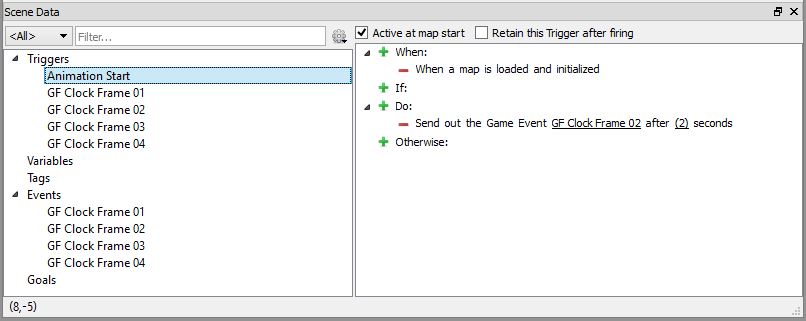
I feel like you didn't read the entire guide or else you wouldn't be asking that question. The reason I think this is because the following is written in the guide.

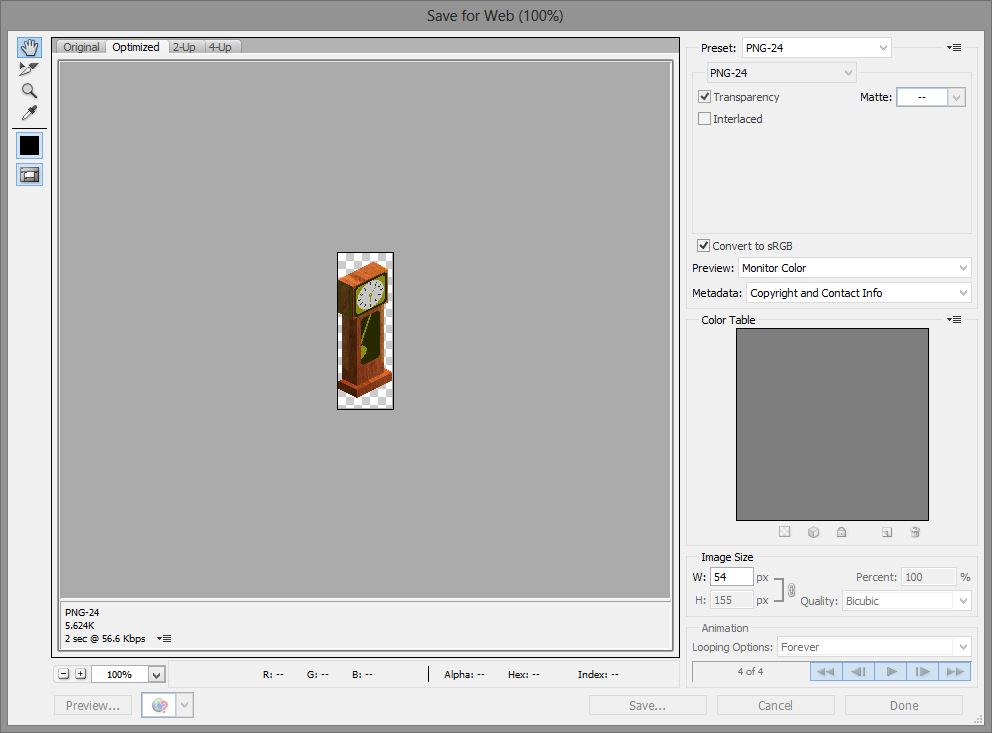
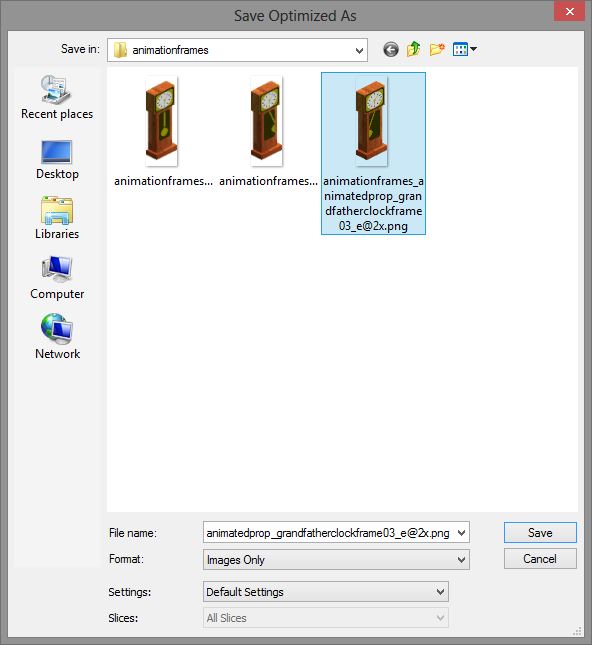
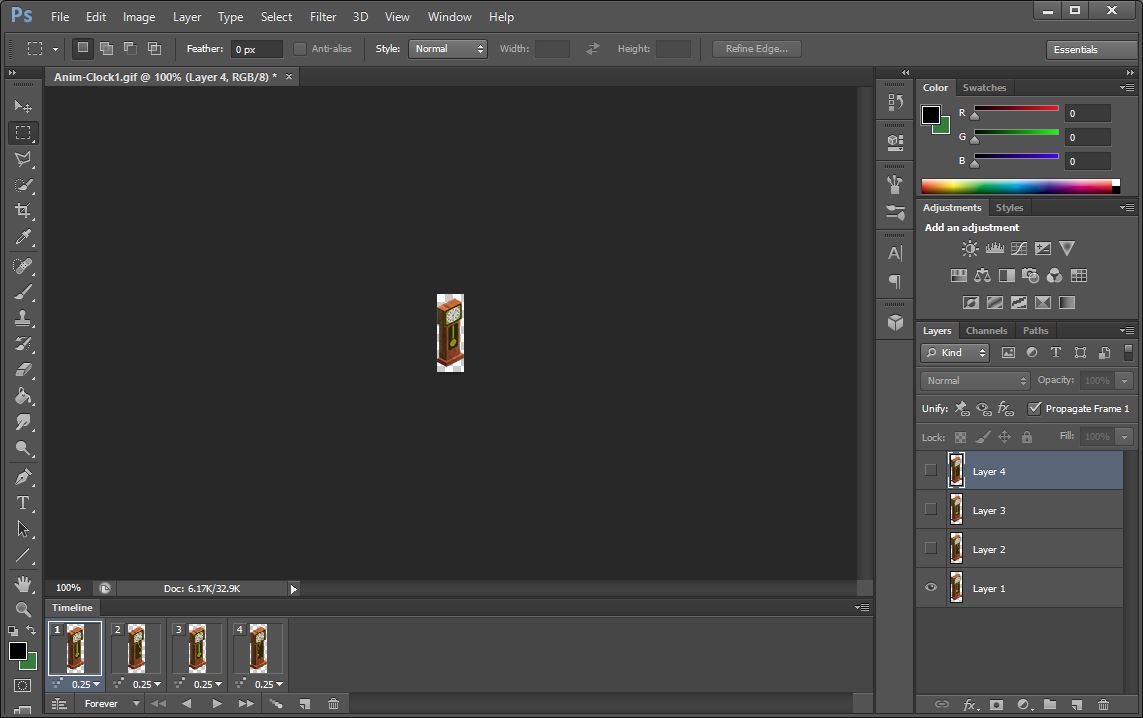
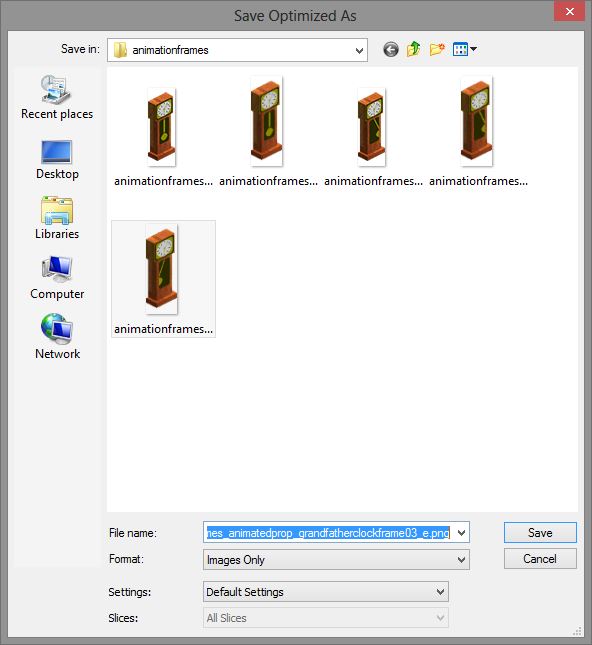
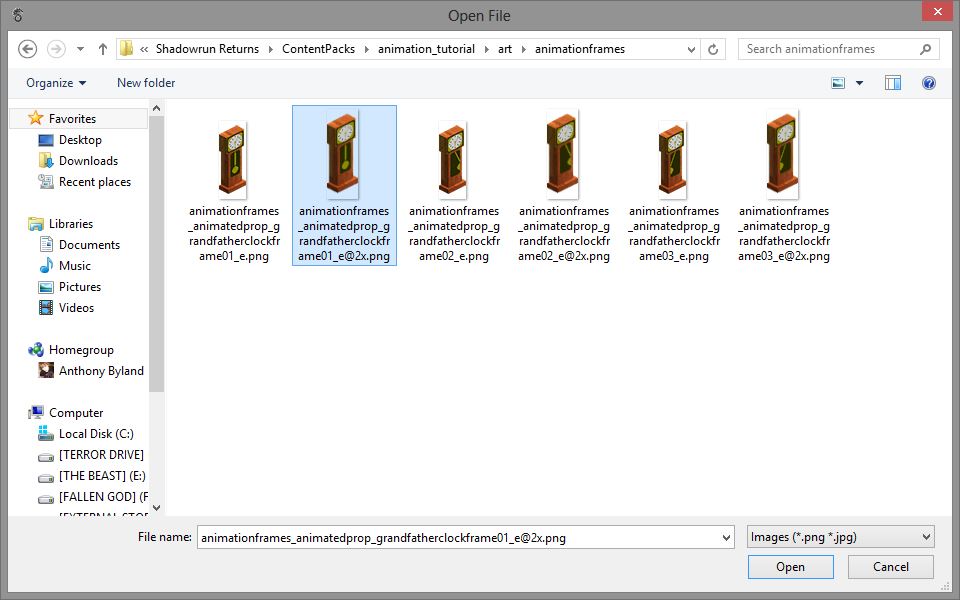
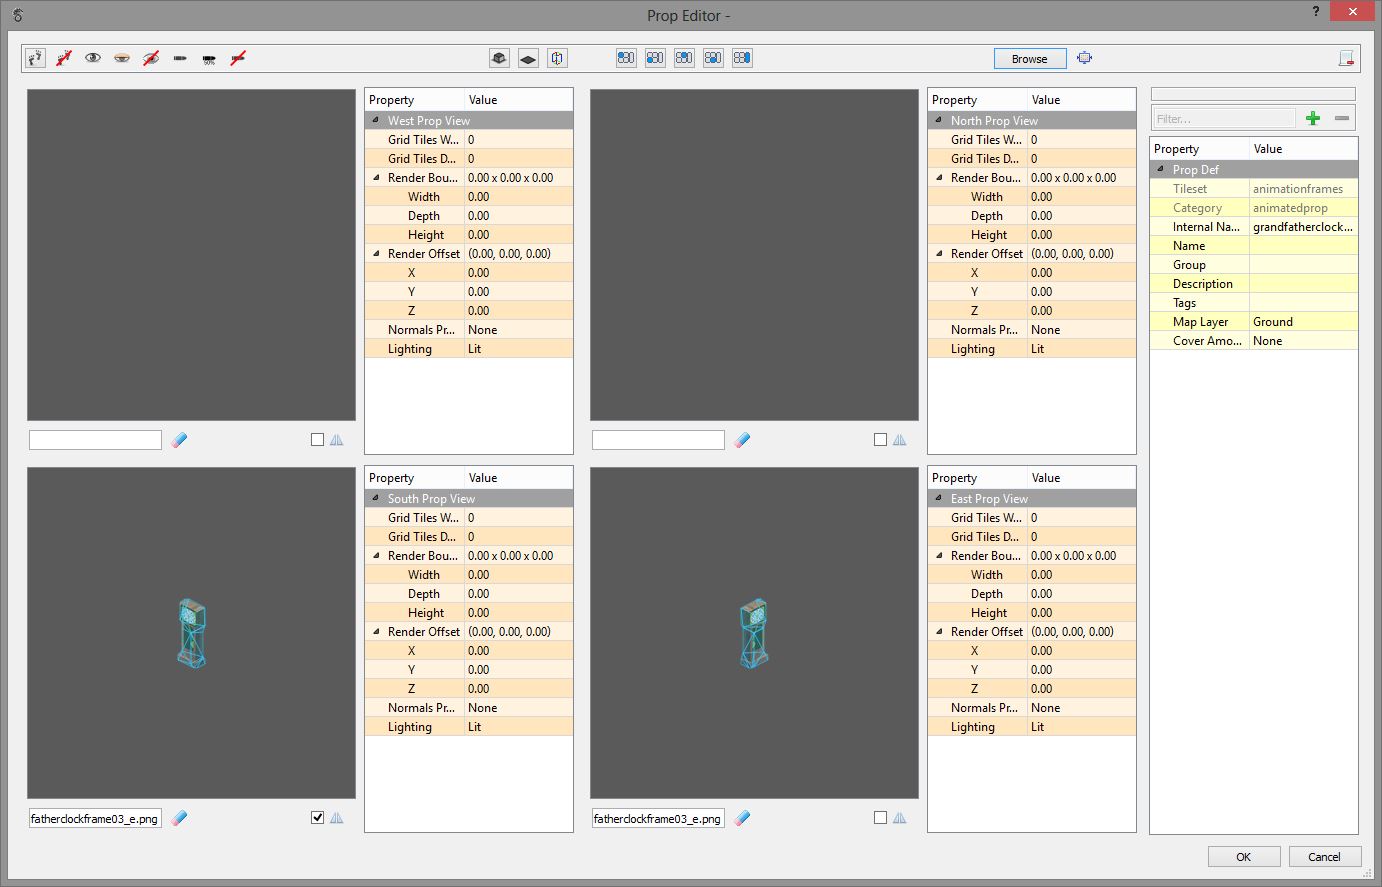
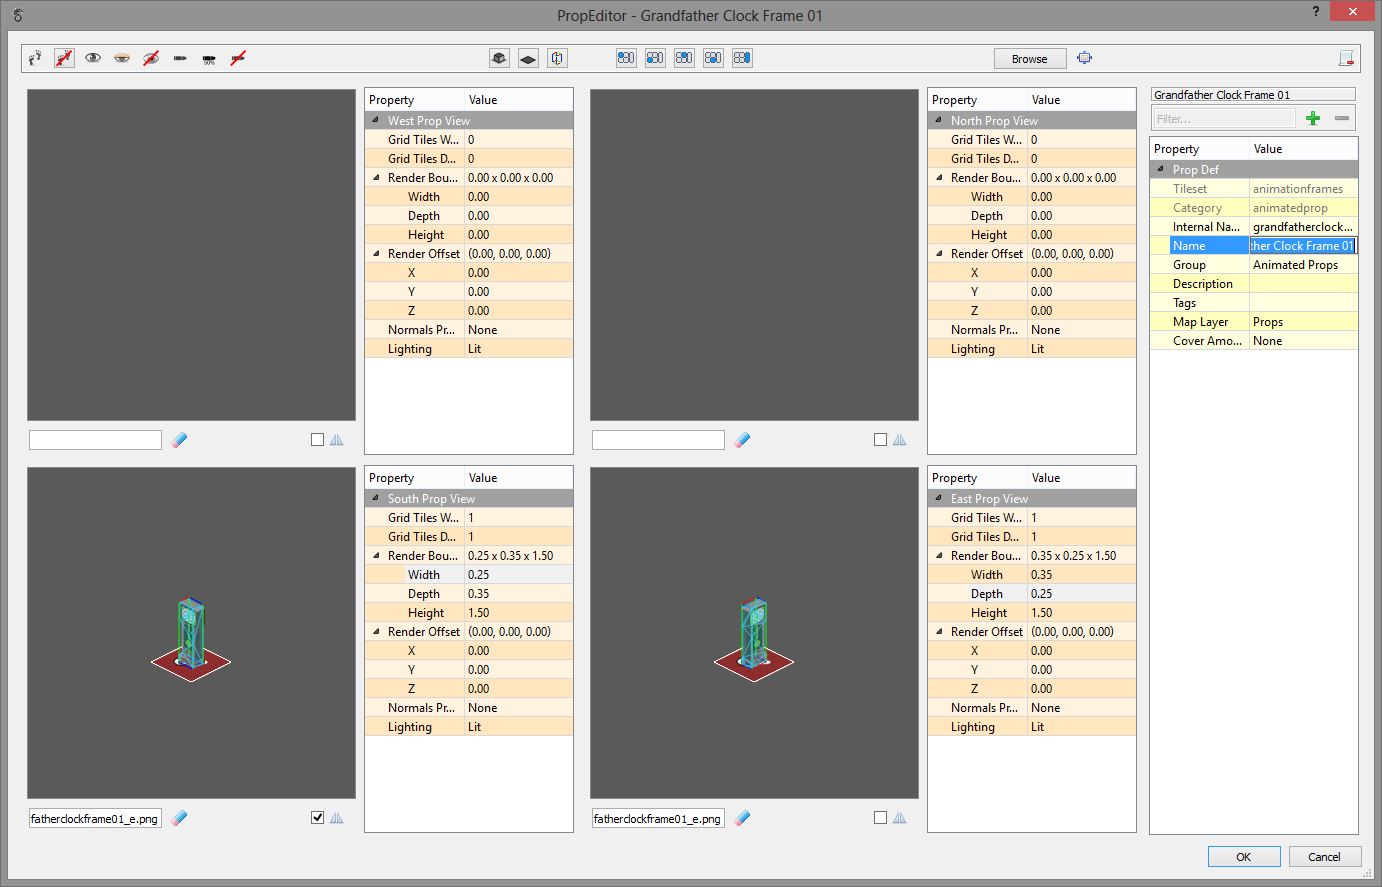
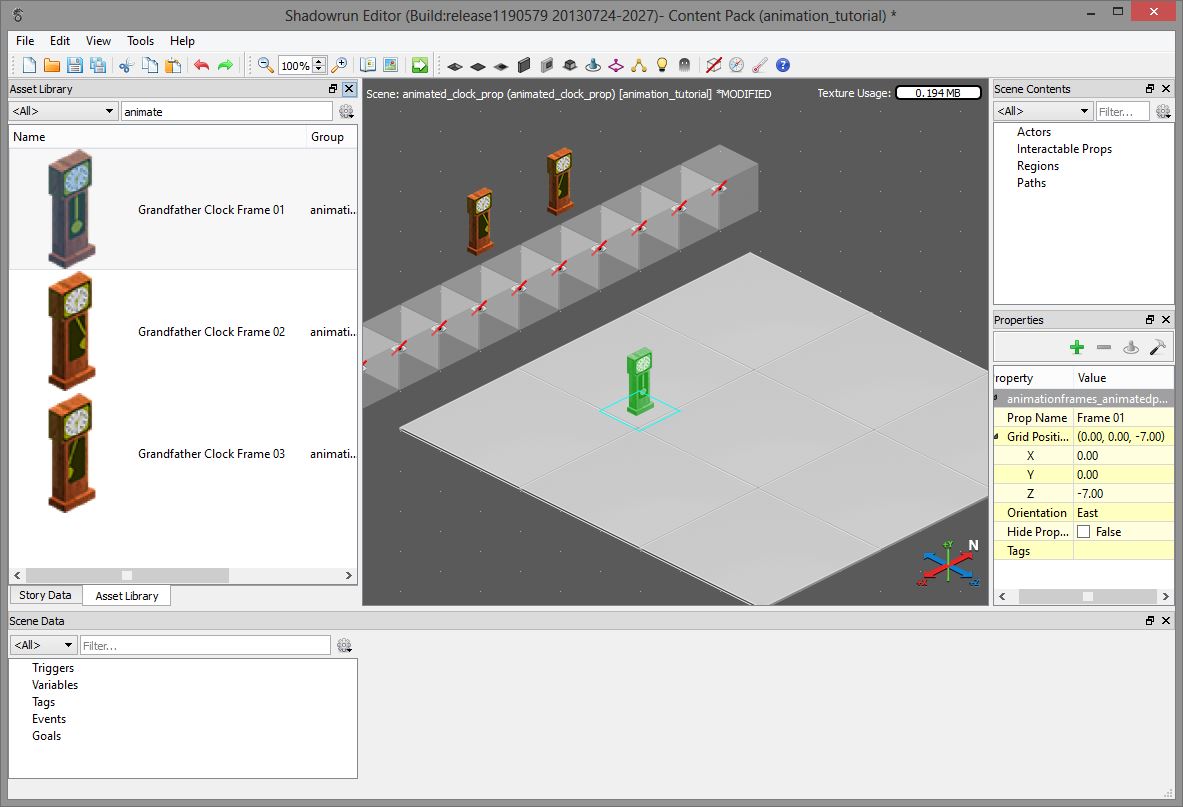
"So for this example I am going to be using an ANIMATED GIF of an isometric grandfather clock I found while searching through animated gifs on Google."

Now having said that I don't blame you for just skimming through this guide as it is quite long. So to summarize the guide for those people who don't want to waste their time reading through the whole thing to find out whether or not they want to use my workaround...
GrungePunk  [author] 23 May, 2014 @ 5:50pm 
Animated GIFs do not normally work with the Shadowrun Returns editor. Atleast they didn't back when I was using it. (PreDragonfall) It's been awhile. So this is a solution I developed as a workaround to allow animated GIFs to be used with the editor. You basically have to turn the animated GIFs into individual frames, save them as PNG files, and then use Triggers to animate the object inside the editor using those individual frames. This allows you to use animated props in your Shadowrun maps which isn't available by default.
Doc Scratch 9 May, 2014 @ 7:19pm 
Does an animated GIF work?
Erinyes 22 Mar, 2014 @ 11:26pm 
Thanks for the tips! Might have to try my hand at the editor again...
VenerableGnat 26 Sep, 2013 @ 8:14pm 
woah. This is awesome. Thanks!