Command & Conquer™ Red Alert™ 3

Command & Conquer™ Red Alert™ 3

125 ratings
Unit Guide: The Imperials
By Fireeye
This guide aims to give a short overview of the various soldiers, vehicles, ships, and mecha attackers employed by the Empire of the Rising Sun in Red Alert 3. It does not include units from the Uprising Expansion Pack, nor does it cover any in-depth strategies for multiplayer battles.
3
   
Award
Favorite
Favorited
Unfavorite
Foreword
Like no other faction, the Imperials make use of speed and flexibility. Many of the Imperial vehicles can switch from one form into another, with each giving them drastically different abilities (and weaknesses). At the same time, the versatility of the Imperial forces means that they often can not directly stand up to their Allied or Soviet counterparts on a one-on-one basis, particularly because most of them are somewhat lacking when it comes to their armor (yet as usual, there are exception). As such, there are two basic things an Imperial Commander needs to know: When and which attack mode is appropriate for any given situation, and when the Imperial forces should risk a direct assault rather than reyling on hit and run tactics.
Basic Infantry


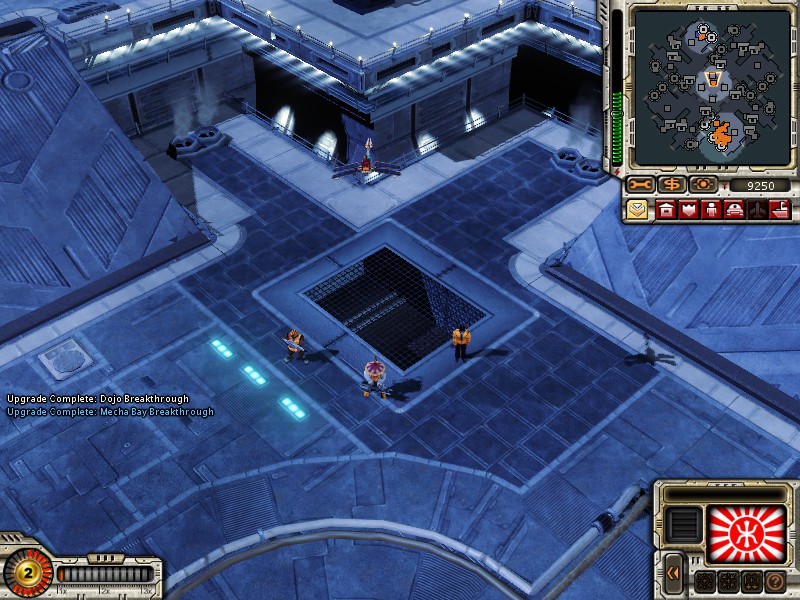
From left to right: An Imperial Warrior, a Tankbuster, and an Imperial Engineer. A Sunburst Drone is flying above.

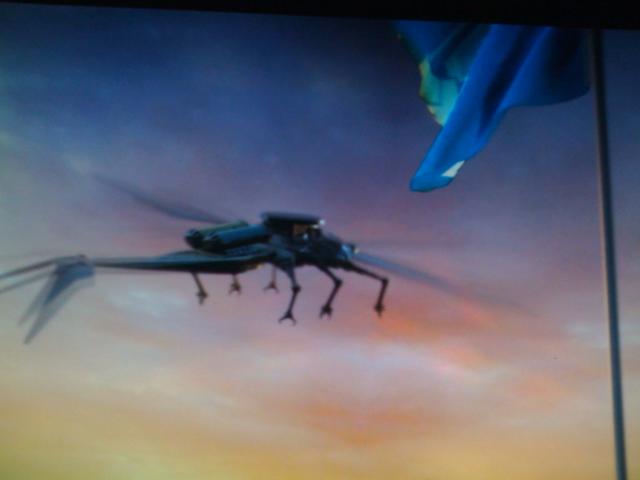
Name: Sunburst Drone
Role: Scouting, Harassment
Cost: 300
Build Time: 5 sec.
Constructed in: Instant Dojo
Flying

Weapon: Magnetic Hooks
The Sunburst Drone may attach itself to enemy vehicles, ships,and aircraft, significantly slowing them down. While attached to a vehicle, the Sunburst Drone can also be attacked by light infantry (Allied Peacekeepers, Soviet Conscripts, and Imperials Warriors) and are automatically destroyed when the infected vehicle comes into the vicinity of enemy repair drones.
Alt. Ability: Self-Destruction
The Sunburst Drone Explodes, dealing damage to nearby enemies (bonus damaged if hooked unto an enemy unit).

Comments: Unlike the Allied Attack Dog and the Soviet Attack Bear, the Sunburst Drone can not instakills ground units with a melee attack (and indeed has no attack in the conventional sense) but in turn can not be attacked by most units either. They die quickly to anti-armor infantry and anything else that can attack air units, though.
The Drones' ability to attach themselves to enemy units can be used in a variety of ways - one may want to attach drones to Allied Vindicators, so as to make them easy pray for the Imperial Jet Tengus. At the same time, many commanders choose to attach them to unprotected ore harvesters, thus decreasing the enemies' rate of income.
The self-destruction ability is a two-edged sword - on the one hand, it obviously results in the loss of a drone, yet on the other hand, swarms of Sunburst drones can quickly attach and explodes themselves on enemy units in quick succession. They may also be used to give an already-damaged unit the death blow.
Like all Scouts, the Sunburst Drone can remove the disguise of Allied Spies and Imperial Sudden Transports.


"I'm in ur base, scouting your planz"

Name: Imperial Warrior
Role: Anti-Infantry
Cost: 150
Build Time: 5 sec.
Constructed in: Instant-Dojo

Weapon: MX2-Type Kinetic Carbine
Effective against infantry, ineffective against vehicles. Can not attack aircraft.
Alt. Ability: Banzai Charge
Swaps out the Warriors Carbine with a Beam Katana. The Beam Katana is a melee weapon that can insta-kill enemy infantry (including Tesla Troopers and Commandos). The Beam Katana can also be used to clear garissoned buildings (killing the Warrior and one of the garrisoned units in the process) and increases the Warriors movement speed. The Warrior will switch back to his carbine after a short amount of time.

Comments: At 150 Credits, the Imperial Warrior strikes a reasonable deal between the dirt-cheap Soviet Conscripts and the tough but expensive Allied Peacekeepers. Imperial Warriors enjoy popularity both in the early game (where they can be used in the notorious Insta-Dojo rushes) and in the later game, where their main duty lies in the extermination of enemy anti-armor infantry.
The Banzai Charge is somewhat situational - while it can bring a very quick end to Tesla Troopers and even Commandos, the Warrior first needs to get up close and personal without getting shot in the face. When it comes to garrisoned buildings, it often is more advisable to just destroy the structure rather than clearing it out with Warriors.


Name: Tankbuster
Role: Anti-Vehicle, Anti-Structure
Cost: 300
Build Time: 3 sec.
Constructed in: Instant Dojo

Weapon: MX-19 "Murasame" Plasma Cutter Cannon
Highly effective against vehicles, ships and structures. Can not attack aircraft.
Alt. Ability: Burrow (Toogle)
The Tankbuster quickly burrows himself into the ground, making him immune to being crushed by enemy tanks and also decreasing the amount of damage he takes. However, the Tankbuster can neither attack nor move while buried.

Comments: Unlike Allied Javeline Soldiers and Soviet Flak Troopers, the Tankbuster can not attack aircraft, leaving the Imperial Commander defenseless until against aerial attacks until either Mecha Tengus enter the field or VX Defenders have been constructed. In return, Tankbusters have a longer attack range than their Allied and Soviet Counterparts (especially when garissoned!) and also deal somewhat more damage.
The Burrow ability is situational. While it can be highly amusing to watch an enemy commander desperately trying to crush your Tank Busters while you have them hop in and out of their burrows, being burrowed does only negate a part of the damage the Tankbusters take and still leaves them as sitting burrowed ducks, so infantry and anti-infantry vehicles still can make short process of them.


Name: Imperal Engineer
Role: Support
Cost: 500
Build Time: 10 sec.
Constructed in: Instant Dojo
Amphibious

Weapon: None
Ability 1: Engineering
The engineer can capture neutral structures (instantly) and enemy structures (with a small delay), as well as repairing the players own or allied structures to full health. He may also repair bridges by entering the small huts attached to them. Using this ability removes the engineer from play.
Alt. Ability: Sprint
Significantly boosts the engineer's movement speed for a few seconds. However, he will quickly run short of breath and thus is briefly stunned after the speed boost ends.

Comments: Engineers are critical units that allow the player to conquer neutral structures such as oil refineries or garages, giving them a distinct edge in battle. Likewise, engineers can also conquer enemy buildings (including the enemy construction yard), albeit this process takes a short bit of time.
As they are completely unarmed, it is strongly advised to guard engineers with a pack of infantry or other units so as to prevent the engineer from getting his throat stuck in the maw of an Attack Dog or Bear.
The Sprint ability allows the engineer to run away from hostile units or may give him an advantage when racing towards the very same neutral structure another engineer has laid his eyes own. However, always keep in mind that the engineer is stunned after the speed boost runs out.
Elite Infantry


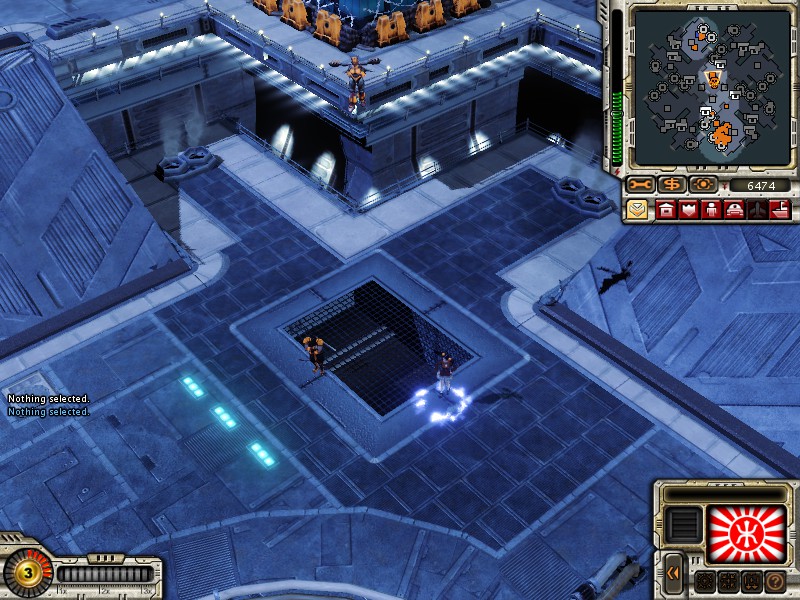
From left to right: A Shinobi, an airborne Rocket Angel, and the Imperial Commando Yuriko

Name:Shinobi
Role: Anti-Infantry, Infiltration
Cost: 1000
Build Time: 10 sec.
Constructed in: Instant Dojo
Requires: Dojo Upgrade
Amphibious

Weapon 1: Ninjato
Melee Weapon. Instakills infantry, including Tesla Troopers and Commandos. Can only target infantry.
Weapon 2: Shuriken
Instakills infantry, including Tesla Troopers and Terror Drones, but not Commandos.. Can only target infantry.
Ability 1: Infiltration
The Shinobi may infilrate enemy structures (safe for static defense structures). While this removes the Shinobi from play, it also results in unpleasant surprises for the owner of the structure (for a list of infiltration effects, see addendum).
Alt Ability: Smoke Bomb
Throws down a smoke bomb. Enemy units nearbly will cease to auto-attack the Shinbo for a short amount of time, but can be ordered to attack the Shinobi manually.

Comments: If you already have Japanese, you also need to have Ninjas, right?
Though not exactly well armored, the Shinbo is extremely dangerous for all forms of enemy infantry, dispatching them with either shurikens from afar or his ninjato in melee. However, the Shinobi can only throw a max of three shurikens subsequently before having to go into a short cooldown and switching to his ninjato (which can be problematic if he is wildly out of melee range).
Though being an infiltrator, the Shinobi can not disguise himself like the Allied Spy, instead relying on his impressive movement speed and his ability to move both on land and sea. Still, well-placed strategic defenses spell a quick death for these shadowy warriors.
Fortunately, the Shinbo can use his smoke bombs: When activated, enemy units will cease to fire on the Shinobi for a short time and can only attack him when directly ordered to do so by their commander. Thanks to his fast feet, this allows the Shinobi to outrun danger unless the enemy commander spots him to begin with.
Shinobis are rumored to be distant relatives of NOD's Shadow Teams from C&C 3.


Name: Rocket Angel
Role: Anti-Vehicle, Anti-Air, Control
Cost: 900
Build TIme: 9 sec.
Constructed in: Instant Dojo
Requires: Dojo Breakthrough
Flying

Weapon:Photon Rocket Pods
Effective against vehicles, ships, aircraft and structures. Ineffective agains infantry.
Alt. Ability: Paralysis Whip (Toogle)
Switches from the Rocket Pods to the Paralysis Whip. The Paralysis whip can completely disable a single enemy ground unit. Does not affect aircraft.

Comments: An interesting unit, the Rocket Angel essentially is a flying Anti-Armor Infantry unit. While this gives them a wide number of advantages (including higher mobility, immunity to being crushed by tanks and against conventional anti-infantry vehicles), their low health and relatively slow speed still leaves them extremely vulnerable to air superiority fighters such as the Soviet MiG or other anti-armor Infantry such as the Allied Javeline Soldier, as well as light static defenses.
Like the VX Chopper, Rocket Angels are extremely useful to raid undefended mining expansions, as their rockets make quick work of both harvesters and the refineries themselves. They also can be used to shoot slow moving aircraft such as Kirovs out of the sky, but simply are to slow as if to keep up with fighters and most Allied aircraft.
The Paralysis Whip can be used to disable major threats on the battlefield, such as Super-Heavy Vehicles (with Apocalypse Tanks pretty much asking for it) or artillery vehicles and ships. If the enemy only has a handful of ground-based anti-aircraft units, it is also possible (but risky) to nail them down with Rocket Angel using the Paralysis Whips and the killing them with other Rocket Angels.
Rockt Angels technically count as aircraft and thus are repaired by repair drones. In return, they can be targeted by the Soviet's Magnetic satellite secret protocol.


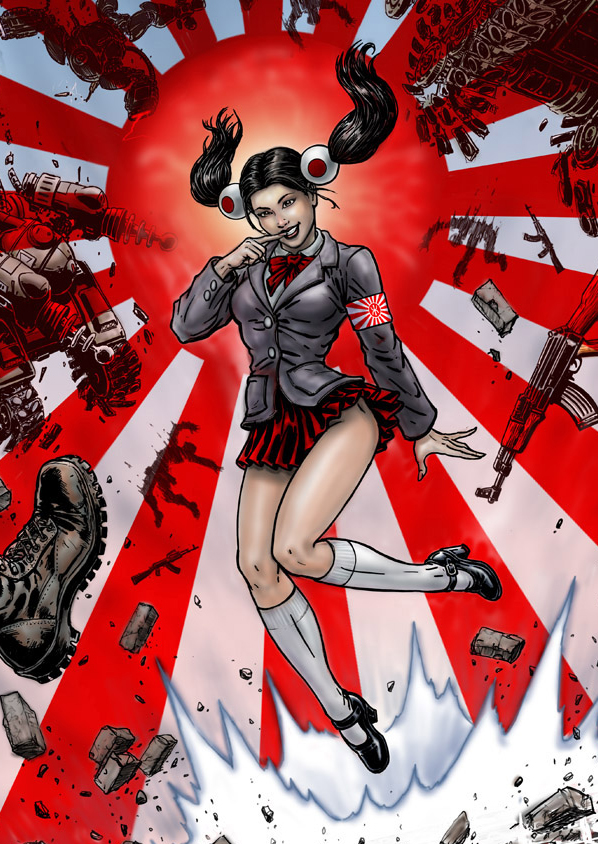
Name: Yuriko (Omega)
Role: Commando
Cost: 2000
Build Time: 20 sec.
Constructed in: Instant Dojo
Requires: Dojo Breakthrough
Amphibious

Weapon 1: Psychokinesis (vs. Ground)
When attacking enemy ground units, Yuriko will slowly lift them into the air, paralyzing them and removing a fixed percentage of their health every tick. When Yuriko chooses another target or stops attacking, her victim will slowly fall down to the ground before becoming able to attack her again. Buildings are not lifted into the air, but still lose a fixed percentage of their health per tick.
Weapon 2: Psychokinesis (vs. Air)
Forces the target to crash, instantly destroying it. There is a brief cooldown before Yuriko can target the next aircraft.
Alt. Ability: Psychokinetic Burst
Releases a psychokinetic burst, killing all infantry units near Yuriko. Has a loon cooldown.

Comments: A magical psionic attack schoolgirl. There is a reason you only see stuff like that in glorious Nippon.
Of all the three Commandos, Yuriko is arguably best against armored targets and structures, as her attack damage is based on the health of the target rather than on a fixed number. As a result, it takes roughly the same time for Yuriko to destroy a mere Conscript as it takes for her to destroy an Allied Assault Destroyer or even a Construction Yard, not to speak of the things she can do to aircraft.
In return, Yuriko has some problems against infantry. While she theoretically can keep multiple enemies in mid air using her primary attack, she still has to kill them one-by-one, making her vulnerable against swarms of infantry.
Her special ability serves as a panic-button of sorts for just such ocassions, as it allows her to insta-gib any infantry that may have surrounded her. However, keep in mind that this ability a) has a rather long cooldown and b) does not affect vehicles, so the latter arguably are Yuriko's nemesis.
And while Yuriko has the highest health of all Commandoes, she still can instantly be killed by Tesla-Troopers and Stingrays, as well as by Attack Dogs, Attack Bears and Shinobis (if the latter engage in melee). The Soviet Commando Natasha also outranges her and can kill her with a signle shot from her trusted Dragunov rifle.
Fun Fact: The name "Yuriko" literally translates to "Daughter of Yuri". Yuri was a madman with similar psychic powers that served as a Soviet Commando Unit in Red Alert 2 and would later become an antagonist with his own (absurdly overpowered) faction in RA2: Yuri's Revenge.


Albeit missing something, Yuriko has a good reason to smile: She has her own Campaign in Uprising!
Imperial Vehicles (Pt. 1)


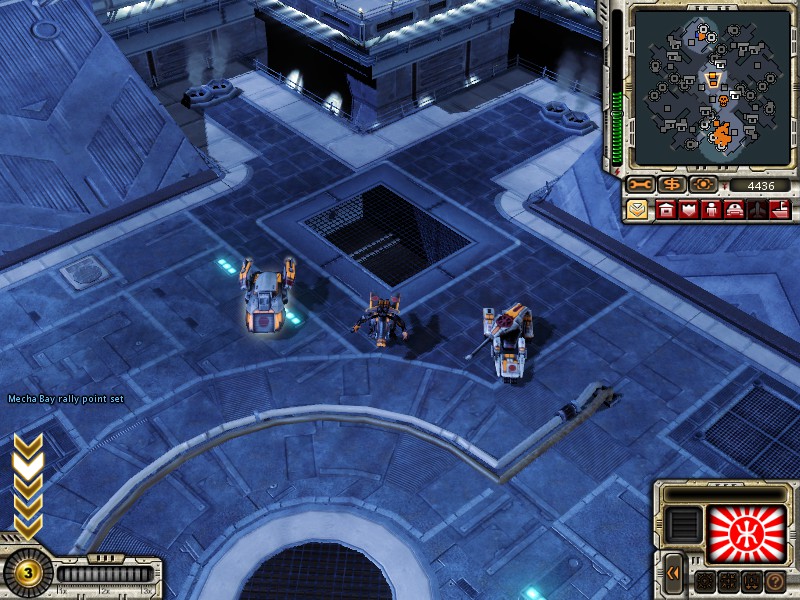
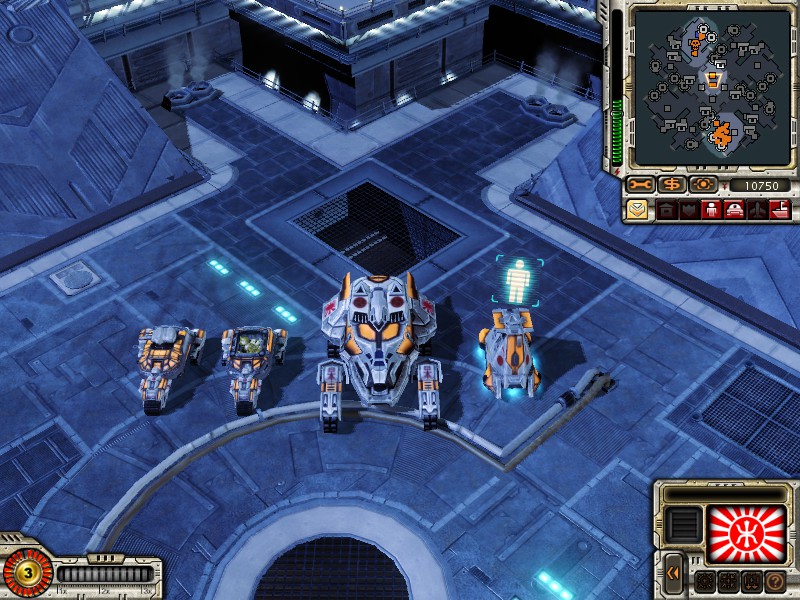
From left to right: A Sudden Transport, a Mecha Tengu, and a Tsunami Tank. Not pictured: Jet Tengu.


Name: Sudden Transport
Role: Infantry Transport
Cost: 500
Build Time: 5 sec.
Constructed in: Mecha Bay
Amphibious


Weapon: None
Alt Ability 1: Transport
The Sudden Transport can carry up to five infantry units.
Alt Ability 2: Disguise
By right clicking on a vehicle or ship, the Sudden Transport will disguise itself as the targeted unit.

Comments: The Sudden Transport is somewhat situational. While it can, in theory, sneak right into the enemy base and drop a pack of engineers or Tankbusters inside of it, this all depends on your enemies not seeing one of their units going somewhere they are not supposed to go. As such, the use of Sudden Transports is generally more succesfull in the later game, when the attention of your enemy lies elsewhere.
It is extremely important to notice that, while the Sudden Transport can disguise itself as both a ship or vehicle, the disguise in question should fit into the terrain - that is, you should not disguise a Sudden Transport on land as an Allied Hydrofoil, nor should you Transport a Sudden Transport at Sea as a Soviet Sickle.
As will all Infiltrators, Sudden Transports will lose their disguise when coming into the vision range of Allied Attack Dogs, Soviet Attack Bears or Imperial Sunburst Drones.
Interestingly, the death explosion of a Sudden Transport deals minor splash damage to nearby units.


Name: Mecha Tengu/ Jet Tengu
Role: Anti-Infantry / Air Superiority Fighter
Cost: 900
Build Time: 10 sec.
Constructed in: Mecha Bay
Amphibious in Mecha Form
Flying in Jet Form

Weapon 1: Kinetic Burst Autocannons (Mecha Mode)
Effective against Infantry. Ineffective against vehicles and structures. Can not target aircraft.
Weapon 2: Kinetic Burst Autocannons (Jet Mode)
Effective against aircraft. Can not target ground units.
Alt Ability: Jet Mode/ Mecha Mode
Toogles between Jet Mode and Mecha Mode. Starts a short cooldown after each transformation.

Comments: Rumored to be piloted by distant relatives of Krusty the Clown ("Hey Hey!"), this vehicle can stalk just about every type of enemy unit. On the ground, its Mecha forms makes short work of infantry and can take on other light vehicles. It also can traverse across the sea in ground mode, albeit its lack of proper Anti-Ship weaponry leaves it vulnerable to all other naval units safe for Allied Dolphins. In the air, the Tengu transforms into a Jet, gaining a massive speed boost as well as potent anti-aircraft weapons.
As with all Imperial Transformers, the Tengu is highly versatile but is generally worse in its specific roles than the dedicated units of the Soviets and the Allies. In Jet Mode, the Tengu stands no chance against Allied Apollo Fighters and Soviet MiGs. While Tengus can defeat the latter two when attacking in superior numbers, the Soviet MiGs' splash damage attack can quickly decimate an entire wing of Jet Tengu and thus the fierce Soviet Pilots should be approached in a spread formation or avoided by switching to ground mode. Of course, the Tengu is both cheaper and availiable earlier than the other fighter aircrafts.
In Mecha Mode, the situation is similar - the Mecha Tengu is plainly outgunned by the Soviet Sickle, and due to its weak armor it also has no chance against the Allied Riptide if left to its own devices. As such, hit-and-run attacks with frequent switches between Mecha and Jet Mode should be the rule.
Keep in mind that the Jet Mode is not only useful to destroy enemy air-to-ground attackers, but also allows you to quickly redeploy your Tengus to another location, wherey they can land again.
Also remember that the Tengu has a brief cooldown after each formation - because of this, you don't want to switch into Jet Mode when you see a group of Bullfrogs advancing towards you.


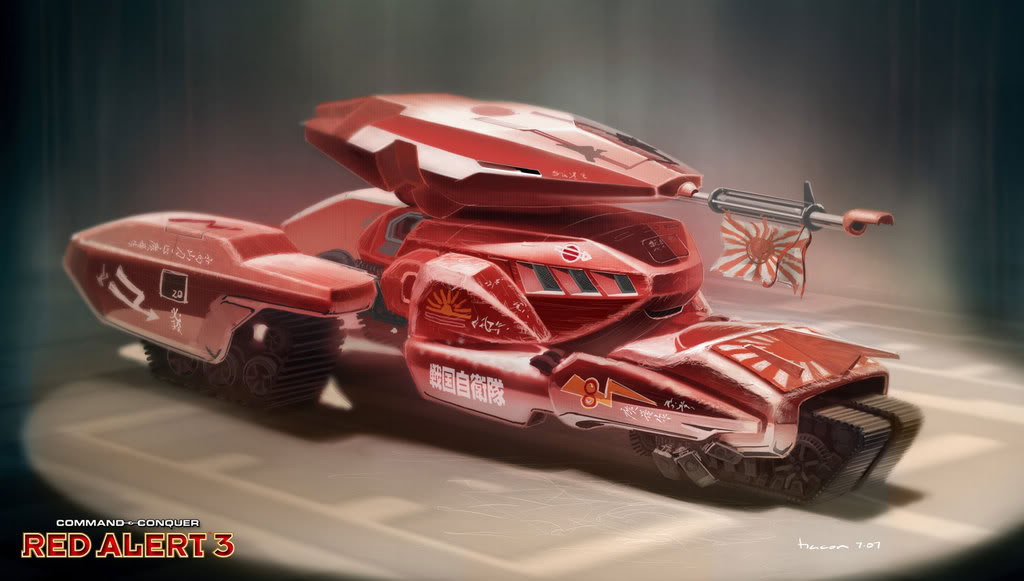
Name: Tsunami Tank
Role: Main Battle Tank
Cost: 1000
Build Time: 10 sec.
Constructed in: Mecha Bay OR Imperial Docks
Requires: Mecha Bay Upgrade OR Docks Upgrade
Amphibious


Weapon: Yoritomo 8.8cm AP Cannon
Effective against vehicles, ships, and structures. Ineffective against infantry. Can not target aircraft.
Alt Ability 1: Deflector Shields
Temporarily makes the Tsunami Tanks immune to all incoming fire at the cost of disabling its main gun. The tank also auto-repairs while the Deflector Shields are active.


Comments: Due to its main gun's rapid fire, the Tsunami has a higher DPS than the Allied Guardian Tank and the Soviet Hammer Tank. However, it will still lose to them in a one-on-one fight because of its very thin armor. Due to this, many experienced players will use larger numbers of Tsunami Tanks in conjunction with their Deflector Shields, allowing the frontmost tanks to simply absorb enemy fire while those in the back rows continue firing. Of course, the Deflector Shields also are extremely useful for emergency repairs and when a tacical retreat becomes necessary.
Unique for a main battle tank, the Tsunami is amphibious. In other words, many maps allow you to land an entire tank bataillon right on the enemy's doorstep, particularly if said enemy focusses on land units and has no defensive structures to guard his or her backdoor. Hit-and-run tactics likewise are a more than viable option with this tank, and plenty of Soviet or Allied Commanders saw their Dreadnoughts or Aircraft Carriers getting in range of the enemy base only to be sunk by hordes of Tsunami tanks swarming out of the base and taking to the sea.


If only they looked that fancy ingame.

Imperial Vehicles (Pt. 2)


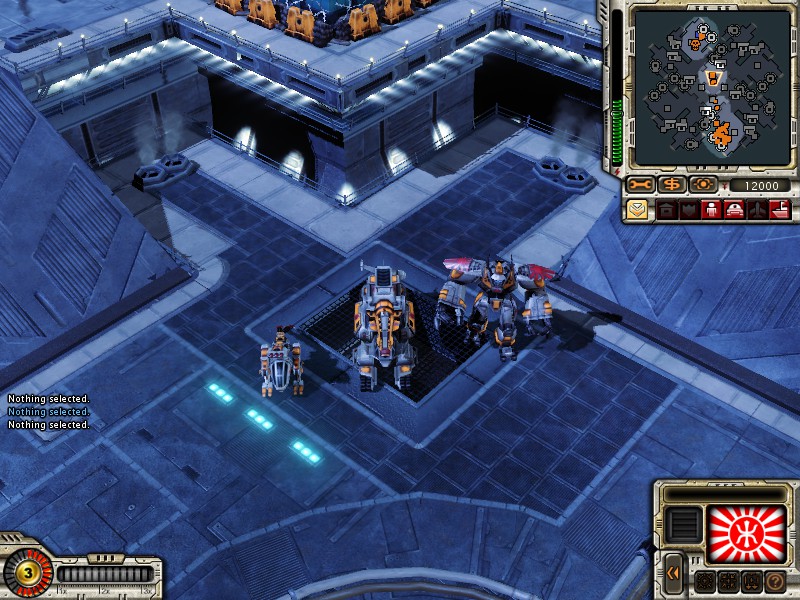
From left to right: A Striker VX, a Wave-Force Artillery, and a King Oni. Not pictured: VX Chopper

Name: Striker VX/ Chopper VX
Role: Ground-to-Air Defender/ Air-to-Ground Attacker
Cost: 1400
Build Time: 10 sec.
Constructed in: Mecha Bay
Requires: Mecha Bay Upgrade
Flying in Chopper Form

Weapon 1: Missile Pod (Striker Mode)
Effective against aircraft. Can not target ground units.
Weapon 2: Missile Pod (Chopper Mode)
Effecive against vehicles, ships, and structures. Ineffective against infantry. Can not target aircraft.
Alt Ability: Striker Mode/ Helicopter Mode
Toogles between Striker Mode and Chopper Mode. Starts a short cooldown after each transformation.

Comment: The sibling of the Tengu. In Striker mode, the VX is a capable, if poorly-armored anti-aircraft walker that secures Imperial airspace, especially when facing Soviet and Allied fighters the Jet Tengu has problems dealing with. In Helicopter Mode, the VX is the bane of tanks and ships alike, its continous stream of anti-armor rockets nagging down their health at disturbing speed, at least as long as no anti-air units are nearby.
Unsurprisingly, the VX and the Tengu synergize extremely well and can defeat just about everything - the Mecha Tengu beats infantry, the VX Choppers takes care of enemy armor and structures and both can make short work of enemy aircraft. However, the fact that both units have cardboard armor and need to switch back and forth for their respective roles makes them far less overpowered than they may initially seem, with the VXs' high price being a second problem.
The Advanced Rocket Pods Upgrade is literally made for this unit, and players strongly relying on VXs while not having the former researched are plainly doing it wrong.
Due to the slow movement speed of its rockets, the firepower of the VX Chopper against fast-moving targets (for instance, IFV Multgunners) is limited.
Despite being a Tier 2 vehicle, the VX Striker can not crush infantry.


Name: Wave-Force Artillery
Role: Artillery
Cost: 1600
Build Time: 14 sec.
Constructed in: Mecha Bay
Requires: Mecha Bay Breakthrough

Weapon 1: Wave-Force Cannon
Devastating against ground units. Can not target aircraft. Has to charge up before every shot.
Alt Ability: Premature Discharge
Decreases the damage dealt by the Wave-Force Cannon but allows the player to circumvent its charge-up time.

Comments: "IMMA CHARGIN' MAH LAZER!" actually describes this unit perfectly well.
The Wave-Force Artillery has the highest damage-per-shot off all artillery units, which obviously is balanced by its slow firing speed.
Although the WF-Gun is not ballistic in nature and thus can not hit buildings that are covered by other structures, this does not hold true for regular infantry or vehicles, allowing the WF-Artillery to obliterate an entire column of vehicles with a single, well-placed blast, though it deals no splash damage in the conventional sense.
The WF-Artillery is actually surprisingly effective against vehicles and, to a lesser extend, infantry, the main reason being its beam attack that can not miss targets (unlike all other artillery units) and its premature fire ability. While the proper use of the latter requires a bit of talent (otherwise making the attack of the artillery either to slow or to weak), it still allows skilled players to attack enemy vehicles in situations where other artillery units would have to retreat.
Like all artillery units, the WF-Artillery has a minimum range and can not fire on targets to close to it.

Name: King Oni
Role: Giant Death Robot
Cost: 2000
Build Time: 20 sec.
Constructed in: Mecha Bay
Requires: Mecha Bay Breakthrough

Weapon 1: Eye Lasers
Devastating against vehicles, ships, and structures. Ineffecive against infantry. Can not target aircraft.
Alt Ability: Bull Rush
The King Oni charges along a straight line, instantly destroying most ground units and severly damaging Heavy Tanks in its way.

Comment: Your classical Japanese Mecha, complete with eye-lasers and everything.
The King Oni is the Imperial Version of the Soviet Apocalypse Tank and thus makes very short work of most enemy ground units and structures. It will lose to the Apocalypse Tank is a one-on-one fight (chiefly because of the latters Magnetic Hook ability), but in return is considerably faster than the notoriously slow Soviet Tank, giving it a higher chance to crush annoying infantry.
The Bull Rush ability allows the King Oni to destroy entire tanks columns in a second or two, and also is highly useful when it comes to quickly getting to (or away from) enemies. It comes with an average cooldown after use.
Unlike other super-heavy vehicle, the King Oni can not regularly crush medium-sized vehicles such as the factions' respective main battle tanks, but can do so when using its special ability.
Be sure to accompany your King Onis with anti-aircraft units, as these giants are particularly tasty treats for air-to-ground attackers. Likewise, anti-infantry units such as Shinobis or the Mecha Tengu will help your King Onis against enemy commandos.


Imperial Ships

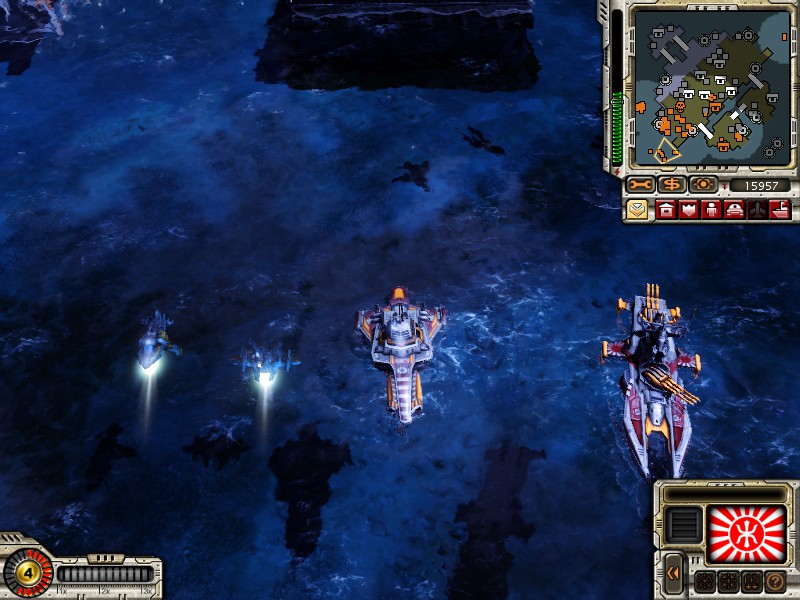
From left to right: Yari Mini-Sub, a Seawing, a Naginata Cruiser and a Shogun Battleship

Name: Yari Mini-Sub
Role: Scouting/ Light Anti-Ship Submarine
Cost: 800
Build Time: 10 sec.
Constructed in: Imperial Docks


Weapon 1: Mozu Mini-Torpedo Tube (x2)
Decent against enemy ships. Can not attack land units and aircraft.
Alt Ability: Last Voyage
The Yari rams the targeted ship and explodes, dealing moderate to heavy damage to nearby enemy units. The Yari is destroyed in the process.

Comments: Small, submerged and agile, the Yari acts as your eyes and ears on the sea. Like all submarines, Yaris can only be attacked by units with torpedo weapons and advanced base defenses while submerged. Allied Assault Carriers also can hit them with their cannons, as can all other units when the Yaris emerge to attack.
Their small size may make them look like toys, but the Yari actually has quite a decent amount of firepower. Though its paper-thin armor means that it will not survive overly long against dedicated ship hunters such as the Soviet Akula, hit-and-run attacks with Yaris can be quite successfull if the target is not protected by static defenses.
The Last Voyage ability, while obviously coming at a high price, allows you to cripple tight formations of light naval units such as Riptides or Stingrays and can be dangerous to even capital ships. Given the very final nature of this ability, it is best used with Yaris that already are damaged. Also keep in mind that Allied Dolphins can simply jump away from the Yari's suicide charge, albeit this requires careful timing on the part of the Allied player.

Name: Seawing/ Skywing
Role: Anti-Air Submarine/ Anti-Ground Aircraft
Cost: 1100
Build Time: 11 sec.
Constructed in: Imperial DocksRequires: Docks Upgrade

Weapon 1: Aozara Rocket Array (Submarine Form)
Effective against aircraft. Can not target ground units.
Weapon 2: Kinetic Pulse Cannon (Aircraft Form)
Effective against infantry. Ineffective against ground units and structures. Can not target aircraft.
Alt Ability: Submerge/Emerge
Switches between Seawing (Submarine) and Skywing (Aircraft) mode.

Comments:The Seawing/Skywing has a very interesting design, but comes with serious flaws. In submarine mode, the Seawing can fire a constant stream of rockets at enemy aircraft, but suffers from one major problem: It must emerge to do so. This process take a short moment, and this short moment is just what most air units (short of Soviet Kirovs) in the game need to simply move outside the Seawing's attack range. As such, the Seawings Anti-Air abilities are lackluster especially when it comes to the lightning-fast Allied Vindicators, but at least the Seawing also can't be attacked by most enemy units while submerged.
In the aircraft mode, the Skywing is a reasonably fast air-to-ground fighter that showers ground units with fire from its pulse cannon. Unfortunately, said pulse cannon is largely ineffective against armored units, and thus the only units that should be genuinely afraid of Skywings are infantry units, especially the Commandos. Like the Allied Bombers, the Skywing is no VTOL aircraft and thus keeps circling when not being ordered to fly somewhere else, which may or may not bring it into the attack range of anti-air defenses in some situations.
Like most Imperial units, the Seawing/Skywing is not particularly well-armored and thus can not sustain prolonged enemy fire.


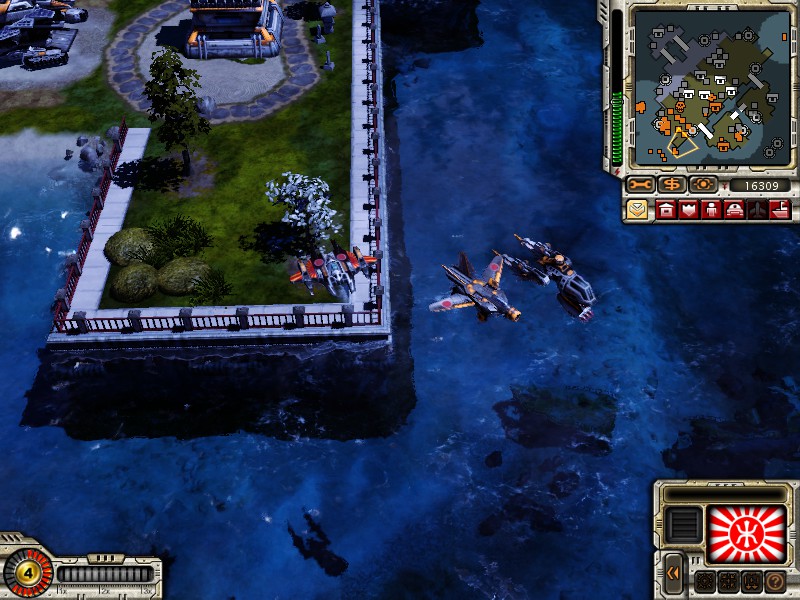
A Skywing, together with a Jet Tengu and a VX Chopper.

Name: Naginata Cruiser
Role: Dedicated Ship-Hunter
Cost: 1800
Build Time: 18 sec.
Constructed in: Imperial Docks
Requires: Docks Upgrade

i]Weapon 1[/i]:Shinya Type X Torpedo Tubes (x2)
Effective against naval units. Can not target land units and aircraft.
Alt Ability: Torpedo Type S
Launches a number of devastating torpedoes in a fan-like pattern. May hit allied Units. Affects submarines.

Comments: Arguably the best ship-hunter in the game (with the Soviet Akula being a close second). While the Naginata may not be able to submerge like the Soviet Akula or to go on land like the Allied Assault Destroyer, it's lack of flexibility also means that it is extremely good in what it can do, and that is punching holes into the hulls of ships as if they were made out of plastic.
The Torpedo Type S ability is a two-edged sword: While it can wreak massive havoc, it can also harm your own units, a fact aggrevated by the firing pattern of this ability. In return, the Type S Torpedos allow the Naginata to stand its ground against multiple light ships (hitting all of them at the same time) or to deal massive damage to a single ship by using the feared "Naginata Shotgun" - essentially a point blank shot that doesn't allow the torpedoes to spread out in the first place.
As devastating as the Naginata is against ships and submarines, it is utterly defenseless against aircraft and land units, especially the Soviet Twinblades and the Imperials' own VX Chopper.


Name: Shogun Battleship
Role: Artillery Ship
Cost: 2200
Build Time: 22 sec.
Constructed in: Imperial Docks
Requires: Docks Breakthrough

Weapon 1: Shirade 400mm Cannons
Effective against ground units. Can not target aircraft.
Alt Ability: Ramming Speed
Supercharges the Shogun's engines, allowing it to ram and severly damage enemy ships.

Comments: Much like the Naginata, the Shogun outclasses its counterparts on the sides of the Soviets and the Allies, not only out-gunning them but also enjoying thicker armor and a slightly higher movement speed (unless a Soviet Dreadnought is using its special ability).
It is extremely important to keep in mind that the Shogun actually has two gun batteries and that both can fire simultaneously. However, the ship must be positioned correctly so as to allow it to use both guns (which the ship does not do automatically). Thus, carefull micro-management of your Shogun Battleships can literally double their firepower.
Compared to the Bomb Drones of the Allied Aircraft Carrier and the Rockets of the Soviet Dreadnought, the Shogun's projectiles have a relatively high missile speed, but suffer poor accuracy, so that actually hitting a small structure or unit can be difficult. The same applies to moving targets.
The ship's ramming ability takes away one of all artillery units' inherent weakness - it allows the Shogun to take up enemies up close, heavily damaging if not outright crushing them. Unfortunately, this ability has a rather longish cooldown, so Shoguns getting swarmed by enemies still are in deep trouble.
Like all artillery units, Shoguns have a minimal attack range and can not attack enemies to close to them (not with their guns, that is).


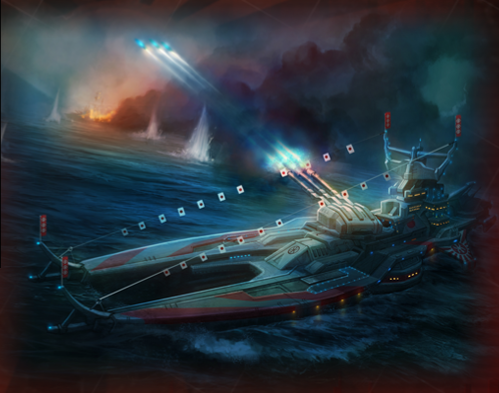
Someone on the other end of the map is gonna have one hell of a day.
Imperial Support Units


From left to right: An Ore Collector in defensive mode, a regular Ore Collector, a MCV, and a Nanocore (the symbol hovering above it identifies it as an Insta Dojo Nanocore).

Name: Ore Collector
Role: Resource Gatherer
Cost: 1400
Build Time: 20 sec.
Constructed in: Mecha Bay/Imperial Docks/Ore Refinery
Amphibious

Weapon 1: Kinetic Burst Cannon
Effective against infantry, ineffective against vehicles. Can not target aircraft.
Alt Ability: Collect Ore/Security System (Toogle)
Switches between resource gathering mode and defensive mode.

Comments: The Imperial Workhorse. As with Soviet and Allied Ore Collectors, the Imperial Ore Collector usually will mindlessly drive back and forth between an Ore Mine and your Ore Refinery. Unlike its Soviet and Allied counterparts however, the Imperial Ore Collector is not limited to awkward attempts of crushing enemy infantry in self-defense (which it still can do) but is also given a gun hidden under its cargo bay. When in distress, the collector can flip over the cargo bay (dropping the ore load in the process) and open fire on nearby enemies, before switching back to its regular role.
While the Burst Cannon is something, it is not much, fit only for fighting back overly curious enemy infantry units. It can attack armored units, but its abysmal damage combined with the Ore Collectors rather thin armor means that even basic anti-infantry vehicles pose a serious threat to it.

Name: Nanocore
Role: Construction Unit
Cost: Varies
Build Time:4 sec
Constructed in: Construction Yard


Weapon 1: -
Alt Ability: Unpack
The Nano Core unpacks into into its respective building at the targeted location.

Comments: Rather than placing buildings from the construction yard, the Imperial buildings instead come as pre-packed nano-cores, amphibious vehicles that can drive to any desired location and unfurl into the required building there once they arrive. This gives the Imperials a massive advantage when it comes to base construction, as they can build literally everywhere whereas Allies and Soviets have to stick inside their base perimeters. As a slight downside, getting the Nano Cores where you want them can be problematic as they are extremely fragile and can be destroyed by even the most basic infantry.
Thanks to the Nano-Cores, Imperial Commanders can utilize various tactics that would be difficult or utterly impossible for Allied and Soviet players. For instance, many Imperial players will quickly built one or two Instant Dojo Nanocores and use them to construct proxy barracks near (and sometimes right inside) the enemy base, drowning the unsuspecting enemy in Imperial Warriors or giving their buildings a surprise visit with Tankbusters. Likewise, VX Defender Cores can be built early on, allowing the Imperial player a tower rush of sorts (albeit this method is highly impractical due to the long Unfurlment time of defensive structures).
While unarmed and practically unarmored, the Nanocores are heavy enough to crush infantry units - a feat used in many rush strategies.
While all Nanocores require only four seconds to be built, the time it takes for them to unfurl into functioning buildings varies (but always takes more than four seconds), allowing players to "stockpile" nanocores for fast expansions.

Name: Mobile Construction Vehicle (MCV)
Role: Construction Vehicle
Cost: 5000
Build Time: 60 sec.
Constructed in:Mecha Bay, Imperial Docks
Amphibious

Weapon 1: -
Alt Ability: Unpack
Unpacks the MCV into a Construction Yard at the targeted location. The Construction Yard can be turned back into an MCV if necessary.

Comments: The mobile form of a Construction Yard. As the Imperials do not require a Base Perimeter to construct buildings in, relocating your MCV is slightly more reasonable for Imperial players than for Allied and Soviet ones, especially as this allows the player to reduce the travelling distance (and thus the risk of being destroyed) of the fragile Nanocores. Unsurprisingly however, an MCV can not produce further Nano Cores until it returns to its stationary Construction Yard form.
When your base is under heavy attack and likely to be lost, evactuating your Construction Yard in MCV form may allow you to rebuild in another location, albeit such blows usually are crippling.
Though the MCV is unarmed, it still enjoys very thick armor, allowing it to survive even concentrated fire. Thanks to its sheer size and weight it can also crush all other land units safe for Allied Assault Destroyers, Soviet Apocalypse Tanks, Imperial King Onis and of course other MCV under its massive treads, even though its slow movement and turning speed make this a rarity.
Given its nature, it is seldomly reasonably to have more than one construction yard at a time, safe as a backup measure.
Imperial Main Structures
Name: Instant Generator
Price (for Nanocore) : 1000
Deployment Time (for Nanocore): 10 sec
Commnents: The Imperial version of the power plant. Having insufficient power will cause your factories to take twice the amount of time to spit out units, and your static defensive structures (i. e. the VX defender) will shut down entirely, leaving your base defenseless, so make sure to always have a bit more generators than you actually need.
The Instant Generator is a bit more costly than its Allied and Soviet counterparts, but in return, it produces more power and can be placed anywhere.

Name: Instant Dojo
Price (for Nanocore) : 500
Deployment Time (for Nanocore): 8 sec

Comments: Trains your basic infantry units, namely Sunburst Drones, Imperial Warriors, Tankbusters and Engineers. The Dojo Upgrade allows the production of Shinobi. The Dojo Breakthrough allows the production of Rocket Angels and Yuriko.
As with all Imperial buildings, the Instant Dojo can be placed anywhere thanks to its mobile nanocore. Good players will use this to their advantage, utilizing proxy dojos (placing Instant Dojos near the enemy base for Infantry Rushes) or deploying them near Oil Derricks and the like to create an engineer right next to them.

Name: Refinery
Price (for Nanocore) : 2000
Deployment Time (for Nanocore): 20 sec
Requires: Instant Generator

Comments: Serves as a gathering point for your ore collectors. Comes with a free ore collector when built and can produce additonal ore collectors when necessary, albeit this ability should only be used when the free ore collector has been destroyed. The nanocore form allows Imperial players to ore mines outside of their main base much faster than Allied and Soviet players possibly could do, albeit Refinery cores naturally shouldn't move unguarded.

Name: Mecha Bay
Price (for Nanocore) : 2000
Deployment Time (for Nanocore): 16 sec
Requires: Ore Refinery
Can only be built on land

Comments: Construct all Imperial ground vehicles, namely Sudden Transports, Mecha Tengus (can transform into Jet Tengus), Ore Collectors and MCVs. The Mechabay Upgrade allows the construction of Tsunami Tanks and Striker VXs (can transform into Chopper VXs). The Mecha Bay Breakthrough allows the construction of Wave-Force Artillery and King Onis.
The Mecha Bay spawns three repair drones that will repair nearby allied vehicles and remove Soviet Terror Drones.

Name: Imperial Docks
Price (for Nanocore) : 1000
Deployment Time (for Nanocore): 18 sec
Requires: Ore Refinery
Can only be constructed on water


Comments: Constructs Imperial ships and certain amphibious units. May initially construct Yari Minisubs, Ore Collectors and MCVs. The Docks Upgrade allows the construction of Naginata Cruisers, Seawings (which can transform into Skywings) and Tsunami Tanks. The Docks Breakthrough allows the construction of Shogun Battleships. Like the Mecha Bay, the Imperial Docks come with three repair drones.

Name: Mainframe
Price (for Nanocore) : 3000
Deployment Time (for Nanocore): 16 sec
Requires: Ore Refinery

Comments: A pure tech building. A mainframe core is required for superweapons and the Breakthrough Upgrade in all Imperial Production Structures, which in turn is needed for the production of Tier 3 units. Other than that, this structure serves no further purpose.

Imperial Defensive Structures


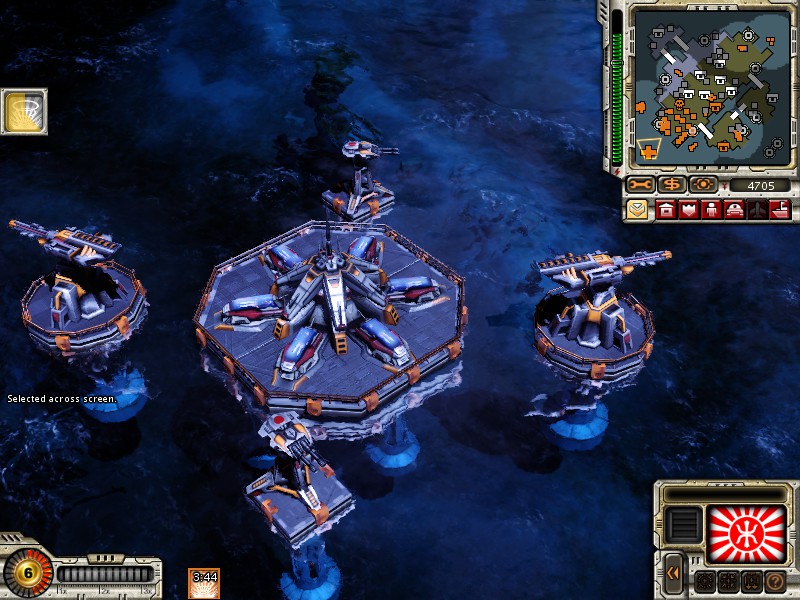
A Psionic Decimator, surrounded by Defender VXs and Wave-Force Towers

Name: Fortress Wall
Price (per piece) : 10
Construction Time (per piece) : 5 sec.
Can only be built on land

Comments: Your basic wall. Useful to keep spies and shinobis away from your key structures, but won't stand long against determined attackers (or super-heavy units that will simply roll over them). The only Imperial building that is built directly from the Construction Yard rather than coming in nano cores.

Name: Defender VX
Price (for Nanocore) : 800
Deployment Time (for Nanocore): 30 sec
Requires: Insta Generator

Weapon 1: Twin Burst Cannon
Effective against infantry and light vehicles. Can not target aircraft.
Weapon 2: Rocket Array
Effective against aircraft. Can not target ground units.
Special Ability: Weapon Toogle
Switches between Anti-Ground and Anti-Air weaponry. Has a short cooldown after every use.
Requires: Insta Generator

Comments: The basic base defense of the Rising Sun. Doesn't stand much of a chance against heavy units, but can stand up to infantry and light vehicles/ships and aircraft. Keep in mind that only one weapon system can be active at a time, and that each change comes with a cooldown of a few seconds. When in doubt, build these in pairs so that each one can give the other one cover with anti-ground or anti-air weaponry.
Due to its long-ish deployment time, Tower Rushes with defenders, while possible, are rarely successfull. However, their nanocore origins still can be used to secure expansions or create defensive hardpoints outside of the enemy base.

Name: Wave-Force Tower
Price (for Nanocore) : 1400
Deployment Time (for Nanocore): 40 sec
Requires: Mainframe

Weapon 1: Wave-Force Cannon
Effective against all ground units. Long firing cooldown. Can not target aircraft.
Special Ability: Premature Discharge
Prematurely fires the Wave-Force Cannon, reducing the firing cooldown but also the damage dealt.


Comments: Essentially a stationary and better armored Wave-Force Artillery without minimal range, these towers can oneshot all but the heaviest armored units at the cost of their painfully slow firing speed. When facing infantry or light vehicles, making use of the premature discharge ability is essential to use this structures full potential.
As with the Defender, Tower Rushes are not recommended, albeit the Tower Nanocores can be used to create heavy fortifications outside of your base.
Keep in mind that Wave-Forces Towers are defenseless against enemy aircraft.

Name: Nano Swarm Hive
Price (for Nanocore) : 3000
Deployment Time (for Nanocore): 25 sec
Requires: Mainframe

Comments: The Empire's secondary superweapon, the Nano Swarm Hive allows you to cover a small area with a dense clouds of nanorobots that could be summed up very nicely with the phrase "Nothing goes in, nothing goes out". Simply put, anything inside the nano swarm cloud stays inside said cloud, but in turn is also fully immune against any and all outside interference, including a direct hit with a superweapon. The exception to this rule is that the player's own and allied units can attack enemy units from outside the cloud, but this is not true vice versa. This opens numerous options for the player: The Nano Swarm may be used to lock away a sizable chunk of the enemy forces (ideally beefy T3 units such as Soviet Apocalypse Tanks or Allied Aircraft Carriers. At the same time, your nano swarm may defend core structures of your base (such as your Construction Yard or your Mainframe) against enemy attacks, give some of your units a brief boost of invulnerability, or block choke points against enemy passage.
Still, always keep in mind that this effect doesn't last overly long, and that the Nanoswarm ability comes with a hefty Cooldown.
Fun Fact: Using a nanoswarm cloud on the projectile of the Allied Proton Collider superweapon will result in a bug that creates what could be describes as a sphere of annihilation, as the proton collider projectile can not despawn and hits the same position time and time again.

Name: Psionic Decimator
Price (for Nanocore) : 5000
Deployment Time (for Nanocore): 60 sec
Requires: Mainframe

The Imperial Doomsday Device. Build it, wait for the cooldown to reach zero, point it towards the enemy base and see said base getting blown up by a giant azure blob of psionic power. Few structures safe for Construction Yards and other Super Weapons can withstand a direct hit by the Decimator.
As with all primary superweapons, the Decimator is revealed to your enemies on the map once it has been built. Thus, expect your enemy to throw everything he or she has against this thing, and for good reason.
Fun Fact: If you turn up the graphics settings and zoom in real close, you can see that the Psionic Decimator actually draws its powers by what appears to be dormant clones of Yuriko. The Empire sure loves its psionic school girls.
Addendum: Engineering Targets, Infiltration Effects
-- Engineering --

Right-clicking one a structure with an Imperial Engineer selected may cause different actions depending on who owns said structure. However, the engineer is always removed from play as soon as he successfully interacts with a structure.

Allied Structure
Instantly repairs the building to full health.
Neutral Structure
Instantly captures the structure, giving the player one form of benefit or another.
Enemy Structure
The Engineer attempts to capture the structure in question. However, this process takes roughly three seconds, during which the engineer is utterly helpless against enemy attacks.
Bridge Houses
Repairs the corresponding bride if the latter has been destroyed (bridges can be destroyed by using the force attack command [Ctrl+Leftclick] on them). No effect if the bridge is still standing.

-- Infiltration --

Being an infiltrator unit, the Shinobi can infiltrate enemy structures, with varying results. Just as in the case of the engineer, the Shinobi is removed from play as soon as he infiltrates a structure.

Power Plant
Disables all enemy plower plants for a short time, shutting down static base defenses and drastically increasing the construction time of all units and structures.
Ore Refinery
Steals up to 5000 ressources from the enemy, given that he or she actually has that much money on the bank.
Production Building
Briefly disables this particular construction building.
Tech Building
Briefly disables the construction of units and structures that require said tech building.
Super Weapon
Resets the Super Weapon's Timer (usually to five minutes)
Construction Yard
Briefly disables the enemy map and removes the fog of war around the Construction Yard's control zone for the infiltrating player.
Acknowledgements
Most of the statistics for the costs and build times of units and structures presented in this guide are taken either from the great EVA Database C&C Wiki or from Carl's Guides.
12 Comments
Seele 21 Feb, 2024 @ 6:41am 
the weakest of all 3
Burning Pyromaniac 6 Aug, 2019 @ 6:35am 
the most spam able unit in game can out match anything with numbers 20 conscripts for intence with moltovs (PER VX DEFENDER) should break down the base reasonabily quick and with mass production is well... how do i put it RIP enemy base... not to count the fact you can also out class most if not all anti infintary units along the way due to numbers and The fucking ammount of moltovs and/or bullets.
Fürst von Motz 7 Jul, 2019 @ 11:24am 
Thanks again for your very detailed Guides! :russtar:
Even though I actually have no problems with fighting against anyone with my ol' trusted Japan, it's always great to refresh the informations and get a different perspective at it.
ChrisSomething11 3 Mar, 2019 @ 12:01pm 
My lord I am such a Noob at this game
incog 5 Dec, 2018 @ 1:01am 
I know it's been 3 years since anyone's commented, but I just gotta say that the Beam Katana is what makes Imperial Warriors good for me. A squad of 5 warriors can mow down an entire battalion. Because of the natually high veterancy rate infantry enjoy, that sweet sweet max vet hp regen kicks in pretty quickly for sword wielding warriors. Of course, there's also no running from them. There have been plenty of times where this abillity has made my opponent invest way more into taking down a squad of warriors than they should have.
Bloomanddoom 14 May, 2018 @ 2:05pm 
i play vanilla multiplayer and ive lost countless tanks to twinblade armadas
Fireeye  [author] 14 May, 2018 @ 1:17pm 
@Bloomanddoom I'm fairly certain they nerfed the ability in Uprising - in RA3 Vanilla, the tanks indeed gets invulnerable while it regenerates health, while it Uprising, it "only" gets a strong damage resistance buff.
Bloomanddoom 12 May, 2018 @ 6:43pm 
the ability for the tsunami tank is wrong or poorly worded. it disables the main gun and gives some damage resistance, health regen and extra speed.
Fireeye  [author] 17 Jan, 2015 @ 7:59pm 
@Awesomesauce: Are you quite sure of this? I just checked the Wave Force Artillery in RA3:Uprising (don't have Vanillay on my PC right now) and it drove backwards if enemies would get to close. Hence I would reason that artillery vehicles (and ships) have a minimum range.
Fireeye  [author] 17 Jan, 2015 @ 7:39pm 
@Awesomesauce Will test and see if this actually is the case.