Garry's Mod

Garry's Mod

48 ratings
SWTOR Extraction Guide
By Sultana and 3 collaborators
This guide provides the tools and methods for extracting files directly from the Star Wars: The Old Republic game assets, and as a result, allows users to extract content for use in modding.

Last Update: Wednesday, May 27th, 2020
   
Award
Favorite
Favorited
Unfavorite
THIS GUIDE IS OBSOLETE
This guide is obsolete.

There are several new methods that make extracting characters significantly easier. Please refer to the SWTOR Slicers GitHub ( https://github.com/SWTOR-Slicers ) for the tools and updated guides.

The tutorial on using sounds is still applicable.
Before Reading...
The tools used in this guide are updated for patch 6.0.0.
The tools and methods within this guide may become outdated over time.
I am not the creator of the tools used; I cannot troubleshoot the tools.


Credits
Sultana, for writing the guide.
SoupPotato, for providing tips and tricks.
LeeThorogood, for proofreading, providing the body type naming system, providing a fixed EasyMYP, editing and providing his converter.bat file, and the Blender .gr2 plug-in.
Venator, for loving support.
Suno, for proofreading.
General Shark, for proofreading and idiot-proof-testing.
Hecc, for proofreading and idiot-proof-testing.
Star, for the upcoming normal map scripts.


Guide Last Updated:
Wesnesday, May 27th, 2020


This guide is significantly out of date. There are several new methods that make extracting characters significantly easier. Please refer to the SWTOR Slicers GitHub ( https://github.com/SWTOR-Slicers ) for the tools and updated guides.

The tutorial on using sounds is still applicable.

When I have free time, I will try to update this guide.
Introduction
Hi there!

I am Sultana, a player of Star Wars: The Old Republic and a moderator for the SWTOR Discord[discord.gg].

My desire to rip the SWTOR files started when I was very interested in cosplaying my character -- I had plans to 3D print her armor and then sew the robes.


It then grew into interest in ripping the files for the game's soundtrack (specifically, music not included in the Collector's Edition CD), and eventually I was performing extractions for some users on the SWRP Developers Discord[discord.gg].

As someone who is..
1. Lazy
2. Busy with college
3. Very nice

I decided to go ahead and post this guide so I do not have to be
1. Harassed about extracting files for people
2. The only method for people to get these files

Whether you use these files to port them into Garry's Mod (a very common request) or want to 3D print your character or pieces for a cosplay, these are the tools and methods you are looking for.

Move along, move along.

(Sidenote: Yes, if you are that lazy, you can use NinjaRipper, but the quality of the end product will suck.)
File Types
Below are the file types that you will run into, and what to do with them.

Meshes
Meshes come in the Granny mesh format, otherwise known as .gr2. This format has a history of being very difficult to work with -- particularly in terms of modifying and re-implementing .gr2 files into the games from which they were extracted. It is also very difficult to get them converted to more useable file formats (.fbx, .obj, etc.), with NOESIS essentially being the only useful program to do so, especially in regards to SWTOR.

It should be noted that, when you are working with wearable items or NPCs, the meshes vary by the sex and body type! This means that, when you are extracting these kinds of files, you should make sure that you are extracting them with the proper sex and body type. These are included with three characters in every file's name. You wouldn't want to end up with a character that is half male body type 3 and half female body type 1, would you? (You probably would, you freak.)

For example, body type 1 for females is _bfa_.

Here's a complete list of sex and body type names:
  • Male Body Type 1: _bma_ (Body Male Anorexic)
  • Male Body Type 2: _bmn_ (Body Male Normal)
  • Male Body Type 3: _bms_ (Body Male Swole)
  • Male Body Type 4: _bmf_ (Body Male Fat)
  • Female Body Type 1: _bfa_ (Body Female Anorexic)
  • Female Body Type 2: _bfn_ (Body Female Normal)
  • Female Body Type 3: _bfs_ (Body Female Swole)
  • Female Body Type 4: _bfb_ (Body Female Big)


Materials
Materials come in the typical texture file format, .dds.

It should be noted that there are typically five textures for every mesh, each with a dedicated pointer as to what exactly it is for. This pointer is almost always at the end of the file's name.

Here's a complete list of the kinds of textures you'll find:
  • _d: The main texture file.
  • _s: The specular (adds gloss, metallic-ness, etc.).
  • _n: The normal map (adds depth).
  • _h: I don't know -- perhaps an "effects" map?
  • _m: The dye map -- when you apply a dye ingame, the colored parts are what are dyed in the game.

It should also be noted that most textures come out in brown or gray shades. You will need to do some fancy PhotoShop/Substance Painter voodoo to change these colors. (Tip: Use the dye map for selection purposes.)


Sounds
The sounds contained in the SWTOR assets are typically encrypted inside of SoundBank files, otherwise known as .bnk. These files can be extracted by using bnkextr. This will extract them out as .WEM files. It should be noted that SWTOR sound files do not typically come named and turn out being a long string of a bunch of characters, letters and numbers included. You will have to, one by one, convert these files to .ogg using ww2ogg. After that, you will need to listen to each file and pluck out the one you are looking for. LeeThorogood has provided a converter.bat file where it does all of this for you. No more doing it file-by-file!

There is no easier way to do this, unfortunately. However, if it is the soundtrack you are searching for, cheetordude is the guy you are looking for; he's typically got updated soundtrack extractions and goes through the process of naming them to some degree for you.
Tools
To extract, you'll need a couple of tools.

The tools[www.dropbox.com] (working as of patch 6.0.0) included are:
  • A website, https://swtor.jedipedia.net/
  • EasyMYP
  • NOESIS
  • SWTOR .gr2 Blender Plug-in
  • Sound File Converters, bnkextr.bat, ww2ogg.bat, and converter.bat

A TL;DR of what they all do:
Jedipedia helps you find filepaths and filenames
EasyMYP is the extractor of the asset files
NOESIS previews the files and converts Granny mesh file formats (.gr2) to other formats (.smd, .fbx, .obj, etc.)
SWTOR .gr2 Blender Plug-in allows you to import the .gr2 files directly into Blender -- no conversion necessary.
bnkextr.bat extracts the .bnk files containing voices/music/sounds
ww2ogg.bat converts the files from .WEM to .ogg
converter.bat mass-extracts and mass-converts any [.bnk] file for you
Jedipedia
Using Jedipedia
The main purpose of using Jedipedia[swtor.Jedipedia.net] is to find the filepaths and filenames of what you are looking for.

Extracting SWTOR content is very complex due to the manner of which SWTOR content is contained within the assets. Most things are not very clearly named. This is typically the phase where many users stop attempting to extract the files because it becomes so overwhelming.

Jedipedia resolves this issue -- with a few rare exceptions, typically due to incomplete data on the website, or in cases of which you are seeking a specific head, complexion, scar, etc.

Items, Objects, Etc.
This part of the guide applies to items, objects, etc. only.

When searching up an item, object, or other content on Jedipedia, you will be greeted with a page that includes all of the data for that content, ranging from whether it is adaptive armor to things such as its Global ID. When searching up the Revanite Champion Headgear[swtor.Jedipedia.net], you are greeted with the following page:


What you will be using is the Appearance section of the data provided to you. In this Appearance section, you will find something known as the Model ID.


Copying this ID and then pasting it when using Find... (CTRL+F) in an index.xml file from an extracted asset will present you with that ID's filepaths and filenames.

After this, it is merely a search game. You will know what the filepath is and can search for the file by ascending ABC order within the proper folder.


NPCs
This part of the guide applies to NPCs only.

When searching up an NPC on Jedipedia, you will be greeted with a page that includes all of the data for that NPC, ranging from its abilities to things such as its model's parts. When searching up Dread Master Brontes[swtor.Jedipedia.net], you are greeted with the following page:


When scrolling down, you should pay particular attention to the detailed section that discusses facial and body details of the NPC:


These filenames are what you should be looking for after you extract your assets. They are a clear give-away to what you need to be grabbing. Included are the names of the meshes (dedicated with no pointer, or with a + pointer) and the texture filenames (dedicated with a pointer, "Material:").

If a mesh has a "+" pointer, it means that it is an "addition mesh" that is not attached to the original mesh -- that means you will also need to extract this mesh as well to get what you are looking for.

This method is particularly useful if you want to extract a specific NPC, or know that an NPC is wearing an outfit or has a hair/face you want extracted for your own character.
EasyMYP
Using EasyMYP
To begin, it is important that you have an up-to-date .hash file.

The .hash file I have included in my upload of extraction tools is prepared for patch 6.0.0, and no further. This means that, up to patch 6.0.0, you will be able to read the file names for the most part. The .hash file ensures that the file names are not a jumbled mess of random letters and characters.

To load a .hash file, place your hashes_filename.txt in the Hash folder. The program will load this file automatically upon opening.

To start your extraction journey, double-click (or, right click and "Run as Administrator") on EasyMYP.exe. You should see the following:


What you will be using to extract the files is the Archive tab and Archive Tree View.
  • The Archive tab is where you will open/close the SWTOR asset files, of which are in fact "archives."
  • The Archive View Tree is where you will be able to read the names of the asset files, and can select what you are wanting to extract -- but it is highly recommended that you simply extract the entire asset file due to program bugs.

Next, you need to set your extraction folder. You can do this by clicking on the File tab and then clicking on Select Extraction Folder. If you do not have an extraction folder set, EasyMYP will not extract content.


Opening Asset Files
It should be noted that the file location for the SWTOR asset files is C:\Program Files (x86)\Electronic Arts\BioWare\Star Wars - The Old Republic\Assets, or your equivalent of this location. The asset files come in the .tor archive file format. Here's a preview of how the folder looks:


To understand what an asset file contains, there is typically a pointer within the file name that gives an idea -- as an example, en_us typically means that that .tor file contains the English voice acting for NPCs and the class stories in that area.

Here's a full list of what these pointers are and what they mean:
  • en-us: English voice content (there will be other pointers for German and French)
  • area: Exclusive to a zone
  • stronghold: Exclusive to strongholds
  • anim: Animations
  • art: Meshes and textures
  • bnk: Soundtrack files, voice files, sound files, etc.

Regardless, I would highly suggest that you open and extract all asset files if you are a beginner (warning: this takes up a lot of drive space), and get used to what is inside of each one. In some cases, even a veteran will need to open a large portion of asset archives to find what they are looking for.

To open an asset file, click the Archive tab and then click Open Archive. Select the asset file you wish to open. Then, click Open, or hit Enter. Give it a moment to load. You should see something like this:


As you can see, I have already opened some of the categories of the files to check out what is in the asset file.. It's .bnk files for Alderaan!


Extraction
Before you extract any assets, make sure that you select your extraction folder.

Next, to extract that asset file, right click on the file within the Archive Tree Viewer and click Extract. For larger asset files, this process will take longer. Allow it to run its course before you begin your search for files.

You may notice that you can open the folders within the archive within the Archive Tree Viewer. It is possible to find your file before you extract the entire asset. It is also possible to extract only a single file, but EasyMYP typically fails to do so and results in an error. LeeThorogood has provided a fixed EasyMYP that will extract single files.
File Hunting
How to Find Files
There are two methods for this.

Method One: index.xml
Almost every asset file contains an index.xml file. This file is made available upon extraction. This file can be opened using NotePad, NotePad+, and other similar programs.

As stated in the Jedipedia section of the guide, one can get the item, object, or content's Model ID and use Find... (CTRL+F) within the index.xml file. Doing this will present you with the filepaths and filenames for what you are looking for.


As you can see, we are capable of figuring out where to find the Revanite Champion Headgear models and textures. It is that simple.


Method Two: NPCs
Looking back at the Jedipedia section of this guide, let's extract Dread Master Brontes' helmet.

Presented here, I have opened the two asset files for faces, as well as one asset file for the head. This is to be safe and ensure that I will extract the proper files.


Meshes
Once the asset file has been extracted, I have gone to the extraction location and have begun to sift through the files to search for her helmet meshes.


Now that I have the mesh files for it, I'll copy them and put them into another folder for now.


Textures
Without textures, the helmet would be one plain color and basically look like a well-shaped blob with no soul.

Grabbing textures is just as easy as finding the mesh, thanks to the details that the website has given us. Unfortunately, the texture we want appears to be in another asset file -- this is a common occurrence.

I have gone ahead and extracted swtor_main_art_dynamic_face_b_1.tor to check for the texture files. After giving it a moment to extract and finding my way around the textures, keeping portions of the file name in my head, I have found my way to the textures:


As stated before, the letter at the end of each file points to what kind of texture it is. I've copied all five of these to my folder from earlier.


(Sidenote: The .tiny files are useless; do not use those.)
This is the end of the extraction portion.
NOESIS
Using NOESIS
To begin, the NOESIS you have been provided with already has the SWTOR plug-in installed. Otherwise, seek this plug-in from the XentAx forums.

Open NOESIS. When first opening it, it can take nearly two minutes to open. Be patient!

This is what you're greeted with:


On the left is where you can find the content you have just extracted. On the right is the viewfinder, where you can preview the content.

To preview the content you've just extracted, all you need to do is double-click on it.

Here's one of Dread Master Brontes' helmet's meshes:


Here's one of Dread Master Brontes' helmet's textures:


You can also use NOESIS to preview the files you've extracted before you decide, "Ah, that's what I am looking for!" This is particularly helpful if JediPedia has failed you.

Now, we need to get these Grannies to turn into a file format we can use in Blender. This part is easy and simple, but there is a very important part that you should pay close attention to...

First, double-click on what you want to convert to make sure it's the right file.
Second, right-click on it and click Export.
Third, choose the file type you want, the file name and path, and then..

MAKE SURE YOU CHECK FLIP UV'S

Fourth, hit Export.

Now, it should be ready for you to open in Blender, 3DsMax, etc., and the UV maps will not be messed up, so your textures should go on properly.


(Sidenote: Try to refrain from renaming your .gr2 files before converting them. If you rename them beforehand, it can cause the conversion to fail.)
SWTOR .gr2 Blender Plug-in
Using the SWTOR .gr2 Blender Plug-in
To begin, the plug-in needs to be installed.

Installation
Installation of the plug-in is easy. Make sure you have Blender installed.

Once you have Blender installed, open the software and let it load. Close out of the introduction box and, along the tabs on the top left corner, click on "Edit." When the sub-window appears, click on "Preferences." A new window should pop up. Along the left side, click the "Add-ons" tab. Near the top right corner, you should find a button saying "Install." Click on this, and then locate your plug-in .rar on your PC. Click on it, load it, and it will install on its own.

Do not extract the .rar file on your own. It will install from the .rar file on its own!

Afterwards, make sure that the plug-in is checkmarked in the window. You may then close out the window and the plug-in will load with Blender every time the software is opened.

Importing
To import your .gr2 files, click on the "File" tab in the top left of Blender. Hover over "Import" and you should see the option to load SWTOR (.gr2) files. Click on this, and find the .gr2 file you want to import.

That's it. And, better yet, it will import with vertex groups, much to your leisure.
bnkextr.bat, ww2ogg.bat, and converter.bat
Using bnkextr.bat and ww2ogg.bat
This part is stupidly simple.

Drag the .bnk into the bnkextr.bat file.
After that, one by one, drag the .WEM files into the ww2ogg.bat file.
Then, listen to the .ogg file and see if it's what you are looking for.

The end.


That was before LeeThorogood edited the converter.bat file..
LeeThorogood's converter.bat file takes a .bnk file and mass-extracts, then mass-converts it, and deletes all of the useless .WEM files afterwards.

It should be noted that the SoundConverter folder needs to be on your desktop for this to work.

With your extracted .bnk file in another folder, open both folders and keep them side-by-side in minimized mode. Drag the .bnk file into the converter.bat file. You should see a cmd window appear. The process of the files being mass-extracted into .WEM files, and then mass-converted into .ogg files, should only take about a minute or less depending on how many files there are. Once the process is done, converter.bat deletes all of the .WEM files to save your computer space -- they are useless once they are converted to .ogg files, anyway.

If your converter.bat file is not working, it is likely because you have failed to follow the above steps carefully.

Please make sure that you follow them exactly as stated.
Conclusion
Now that you've extracted your content..
This is the point where I stop babysitting you and you are on your own. It is your duty to learn how to slap a model together, rig it, prepare it for 3D printing, etc. for what you are seeking to do.

Honestly, once you have done enough extractions, this should become a walk in the park for you, and it shouldn't be so difficult to find what you want. :)

Happy extracting!
43 Comments
Blackflogger 7 Feb, 2023 @ 8:38am 
how to import CLO files? I used blender for this. But the twilek lekku animation bones (as written in the CLO file specs) are not visible in blender.
Sultana  [author] 17 Apr, 2021 @ 9:38am 
You should be able to. You will have to hunt for the files. If you need further assistance I really recommend joining the SWTOR Slicers Discord. (https://discord.gg/XfHFjSN)
dawidos 13 Feb, 2021 @ 3:10am 
Hi. I have a question. Is there is a way to extract images from codexes in big resolution. Without these visual additions, just pure images.
Silver Ranger 31 Jan, 2021 @ 4:26am 
@Jomel Jackson: Strongholds are likely a collection of separate rooms, and items each have their own mesh and texture sets. As to the location: they are a bit all over the place in the game archives.

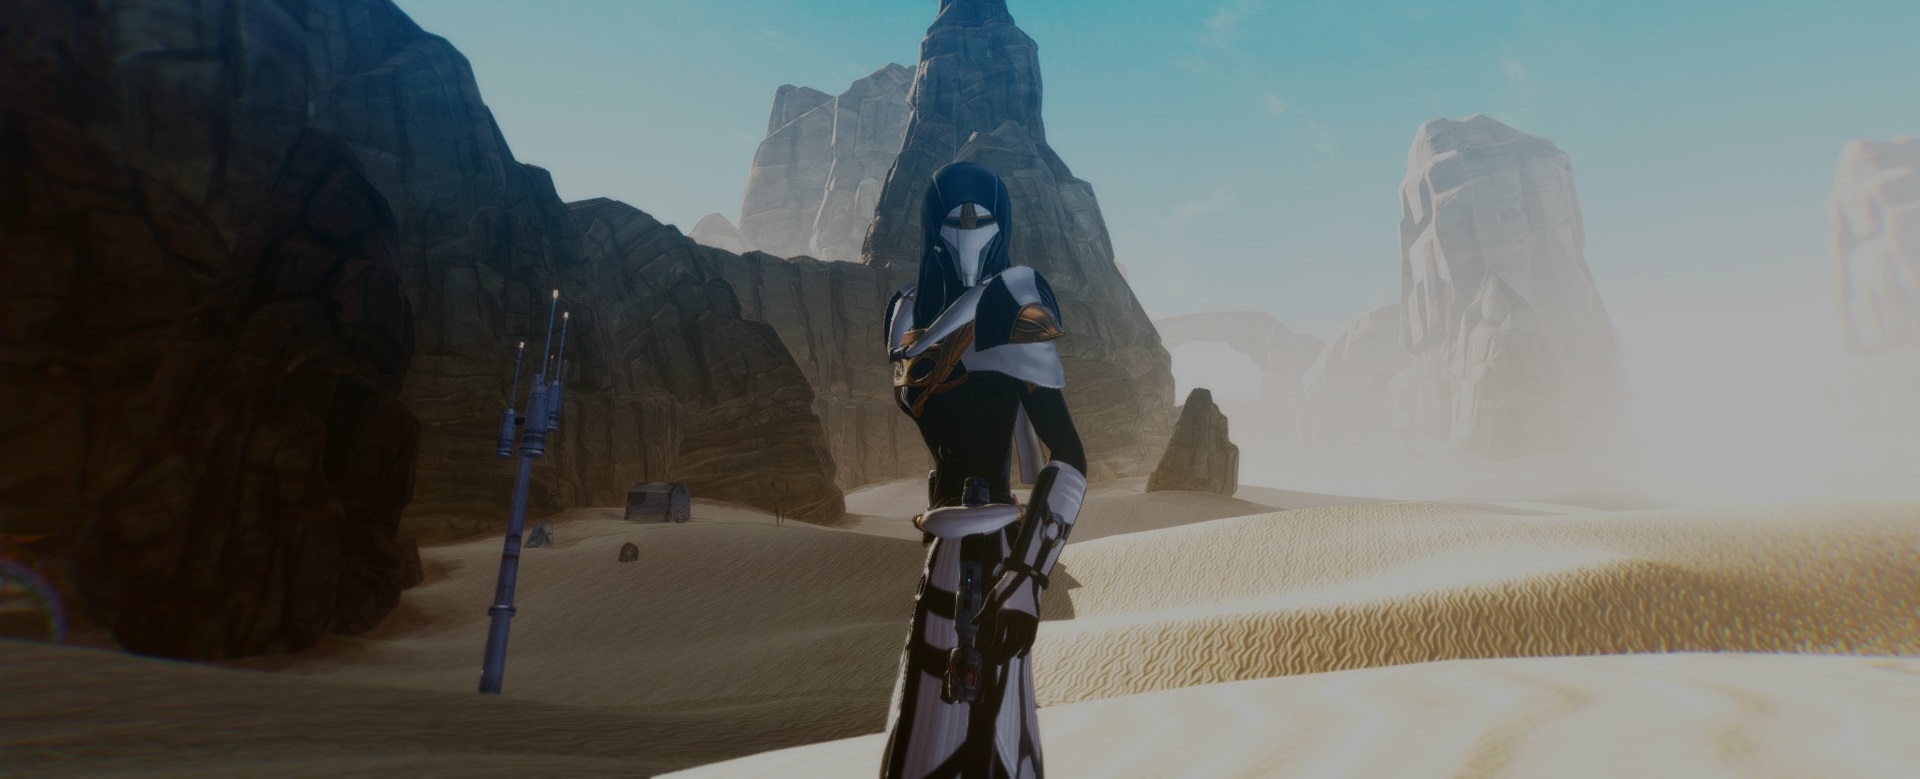
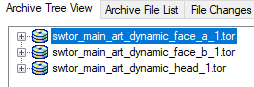
I'm currently in the middle of reassembling and rendering objects for tabletop RPG use, but it is proceeding quite slow.
Rei Lixo 29 Jan, 2021 @ 2:51pm 
Whenever I try to import certain meshes into blender I get an error message that ends with "'GR2 Vertex has no attribute 'normal'". Anyone know how to solve that?
Jomei Jackson 24 Jan, 2021 @ 8:22am 
Are set objects such as strongholds, rooms in one piece or many and do you know how to locate them for making set pieces for our OCs to render in Blender for profile pictures?
Sultana  [author] 7 Jan, 2021 @ 12:47pm 
@Vollis, these are all really good questions that would be best answered in the Discord server (https://discord.gg/XfHFjSN) .

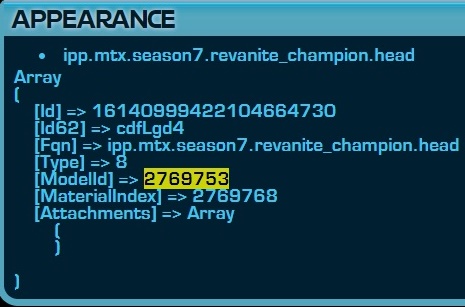
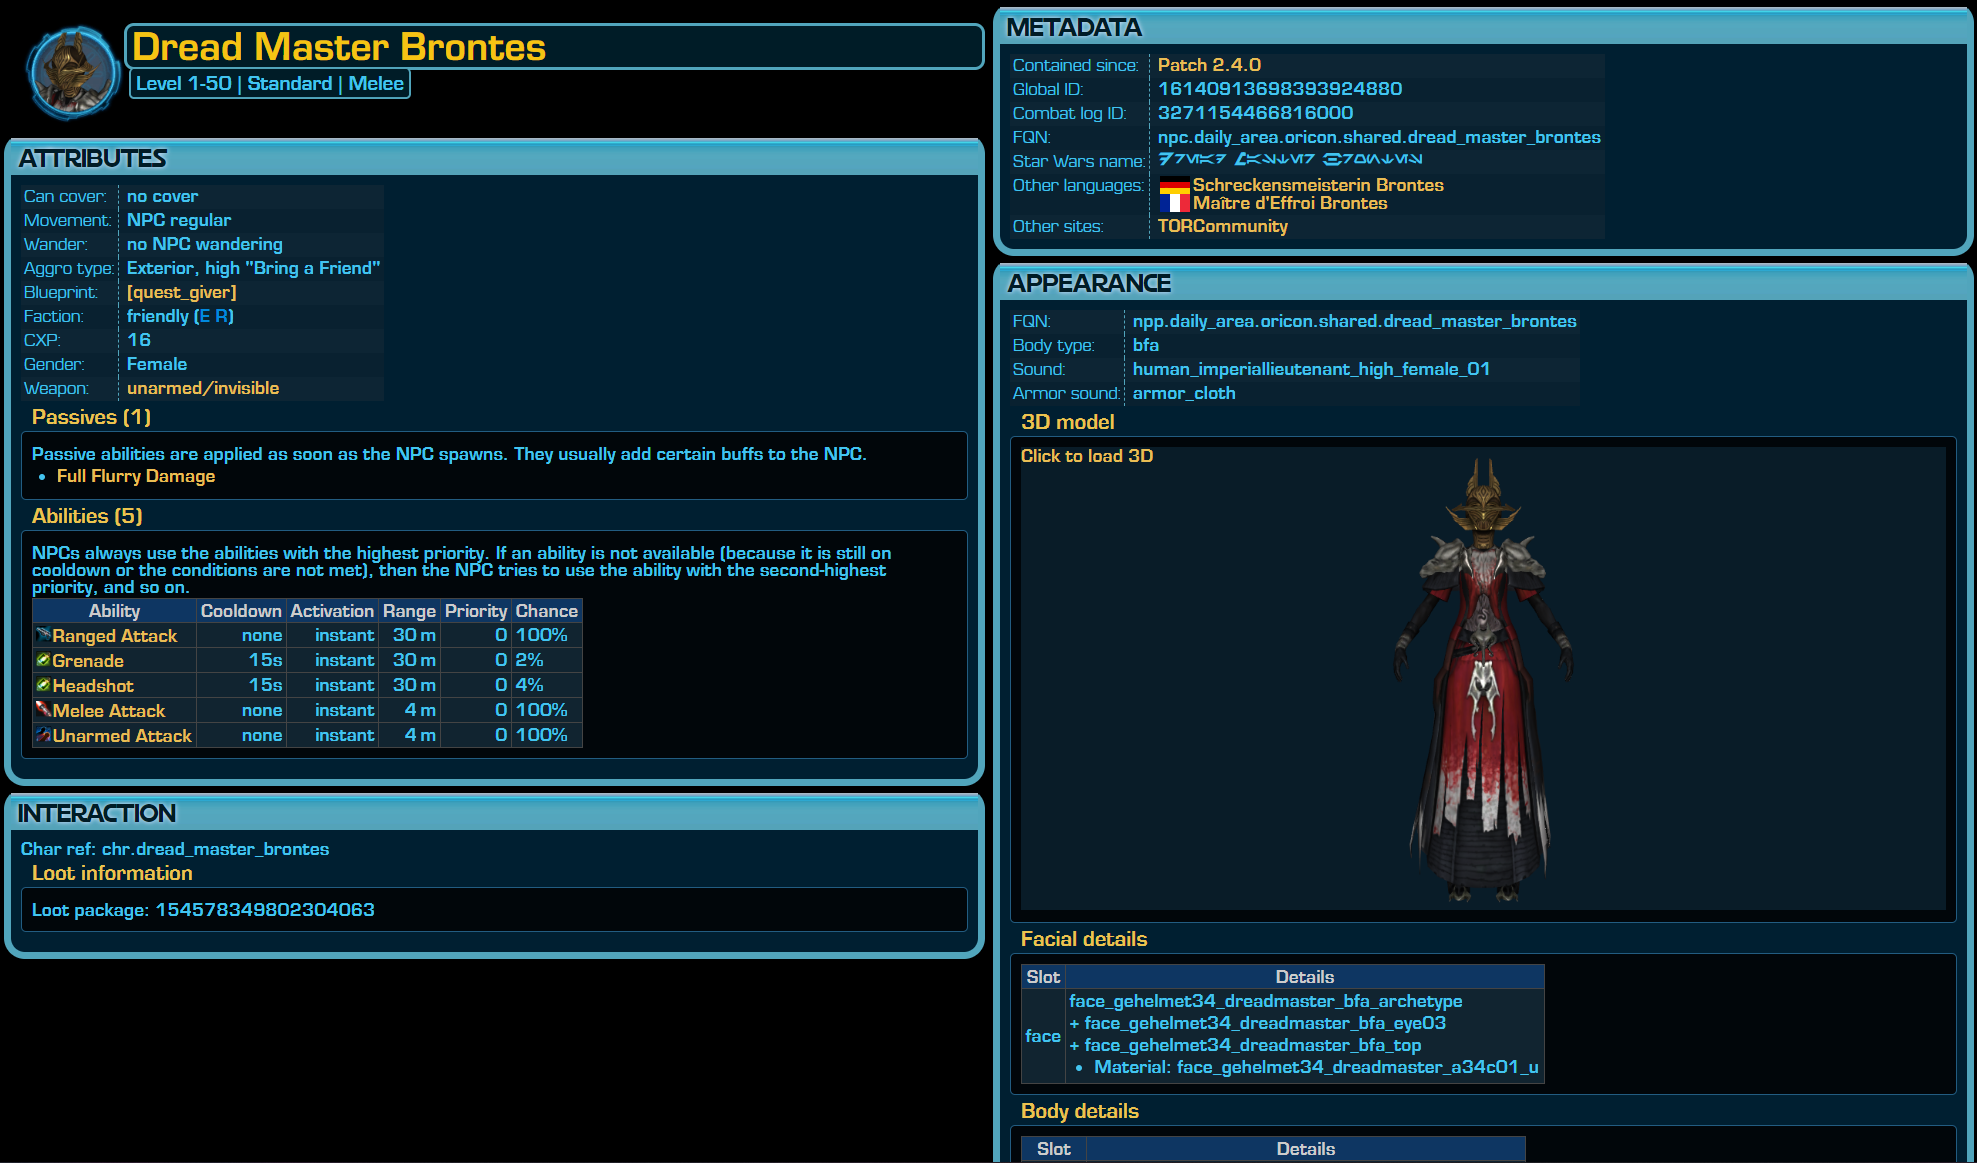
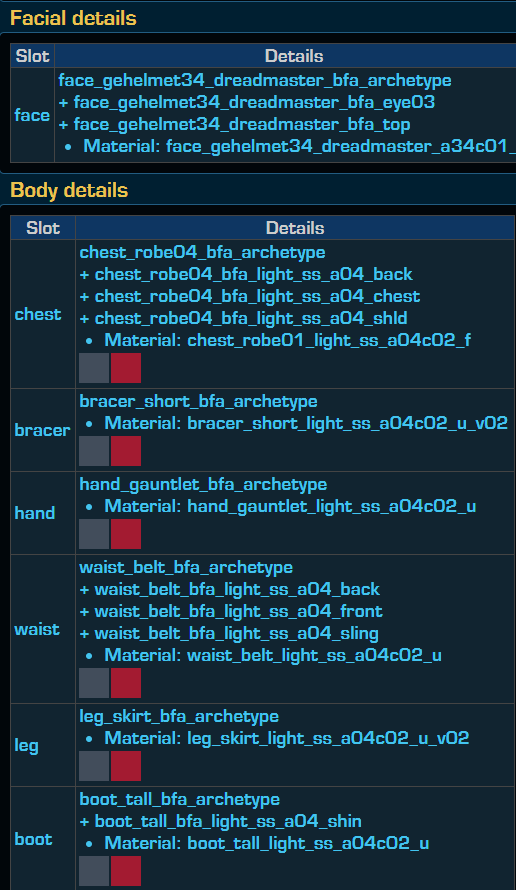
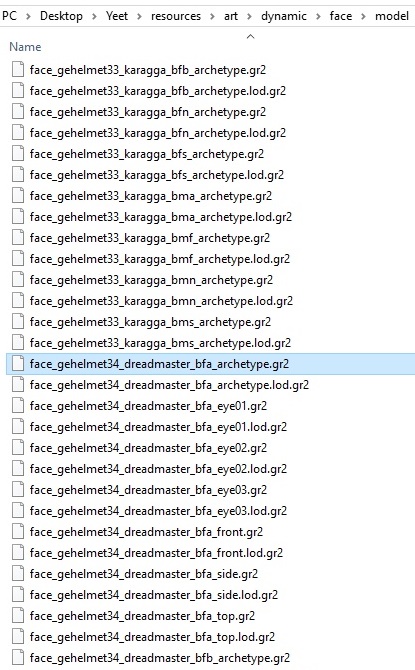
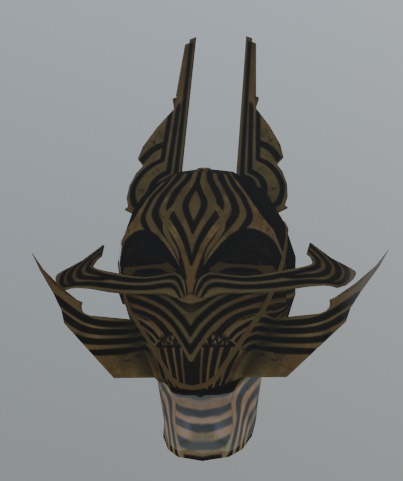
1. When you import the files, they should be importing already aligned, however if they are not then we have several Blender folks who would know how to do it in the Discord. I'm not aware of a tactic as I tend to just manually line them up. I do not think that it would affect the texture as the UV is what controls how a texture fits to a mesh.

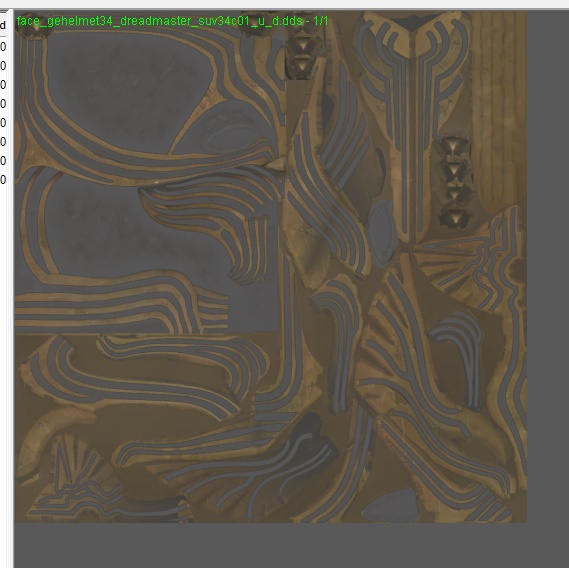
2. You aren't meant to layer or combine these. This should be done by nodes within Blender (another thing we can help you with in the server). These files each do something different and thus must stay separated and be applied in a format that works for the texture's type. Ex. diffuse must remain a diffuse texture, normal maps must remain normal maps.
Darth Vollis 6 Jan, 2021 @ 10:31pm 
Do you by any chance know how to make multiple asset files line up in Blender? I'm trying to make a 3d object of the Dread Master masks, but if the mask additions (Calphayus' crown, etc.) aren't lined up properly, wouldn't that cause the texture to not wrap to the mesh correctly? I can see that it looks like your Brontes mask is lined up properly, so I'm curious on how you managed to do that since they are all separate mesh files.

Also, is it possible to combine or layer the "..._d", "..._s", and "..._n" files so that you're getting the best appearance possible out of the textures?
Zeithri 23 Nov, 2020 @ 9:20am 
You have spoken!
Sultana  [author] 22 Nov, 2020 @ 7:34pm 
This is the way.