
Install Steam
login
|
language
简体中文 (Simplified Chinese)
繁體中文 (Traditional Chinese)
日本語 (Japanese)
한국어 (Korean)
ไทย (Thai)
Български (Bulgarian)
Čeština (Czech)
Dansk (Danish)
Deutsch (German)
Español - España (Spanish - Spain)
Español - Latinoamérica (Spanish - Latin America)
Ελληνικά (Greek)
Français (French)
Italiano (Italian)
Bahasa Indonesia (Indonesian)
Magyar (Hungarian)
Nederlands (Dutch)
Norsk (Norwegian)
Polski (Polish)
Português (Portuguese - Portugal)
Português - Brasil (Portuguese - Brazil)
Română (Romanian)
Русский (Russian)
Suomi (Finnish)
Svenska (Swedish)
Türkçe (Turkish)
Tiếng Việt (Vietnamese)
Українська (Ukrainian)
Report a translation problem


If you are using GIMP 2.10 like me, download normal map addon first, when using it do:
- invert X as a must - so your shadow dosn't go to the west while your sun is in the west too
- invert Y when needed - usually to get black/dark parts of a picture/texture to be deeper and white to be protruding (if not ticked, the opposite is true)
- change filter to make your creases ever more visible or leave it on 4 sample
- if left on 4 sample i usually use scale well over 5.000 (i hardly ever go below 1.00 - but that again may depend on filter type)
And voila... you didn't need to create bricks in blender/sketchup - saved on tris and file size, and you still have them in your game ! :)
see this guide:
https://steamhost.cn/steamcommunity_com/sharedfiles/filedetails/?id=1139018071
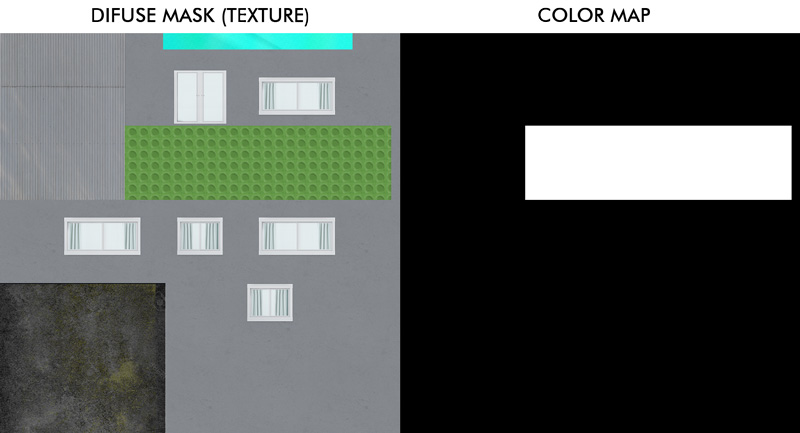
to do so you need to use your defuse map picture, the best is if you have layers there not collapsed (so it's not really a picture but the file with all your materials seperately laid out there) and do normal maps for each one of them seperately depending on your need (or simply use diffuse map png file to create one normal map with same value for all your textures).