HELLDIVERS™

HELLDIVERS™

58 ratings
HELLDIVERS™ | Guide to circumventing the Galactic Campaign and accessing any Enemy Faction at any time (by Citizen Graves)
By Agent Graves
This tutorial for HELLDIVERS™ will teach you how to quickly access and play against any Enemy Faction on any planet of any difficulty type at any time, be it for fun or for unlocking Planet Rewards needed to complete your Arsenal, regardless of the Galactic Campaign progress and the availability of specific enemy factions in an ongoing war!

Following the steps in this guide will effectively enable you to circumvent the progress of the online-based Galactic Campaign and you will still be able to PLAY ONLINE against your chosen Enemy Faction!

We will not be using any cheats or third-party programs to modify the game's files; instead we will simply exploit how HELLDIVERS™ saves your settings and mission selection and create backup save files for our preferred Enemy Faction(s).

To do that we will create our own local save game files, so you should be prepared to also create backups of any save game files tied to your current progress.

I am using Steam on a Windows 10 PC to play HELLDIVERS™ and the steps in this guide do not include any other possible systems or versions of the game.

Disclaimer: We will be copying and deleting the game's save game files, so use this guide at your own risk!

2
2
   
Award
Favorite
Favorited
Unfavorite
Introduction


A couple of years ago I posted a tutorial video for HELLDIVERS™ on how to save a specific planet for online play in order to access regular planet missions for your favourite race during Homeworld Assault Events (which make regular missions inaccessible during the online Galactic Campaign).
The idea of that guide was to "save" missions for that Enemy Faction in case they are defeated during that Homeworld Assault, and for the longest time this has been enough for me.
I’d simply boot up the game in offline mode, save up my favourite Cyborgs Retaliatory Strike map and would make sure to keep it around for the remainder of the ongoing Galactic Campaign, right until the start of the next war.

The problem with that method is that it forces you to never finish that specific mission if you want to keep fighting against the associated Enemy Faction (Bugs, Cyborgs, or Illuminates), and if you want to be able to switch between the available planets in the saved planetary system then you must never complete any of the planets in it, otherwise the Galactic Campaign may lock you out of that system and the associated enemies.

For new players this method is also not very useful since it does not really help with the problem of being locked out of the Planet Rewards progression; so what if you get to save that one planet with that one specific reward you need?!
Once you finish that planet you’ll be locked out of that enemy faction and their associated unlocks just the same!

So even though this method severely limits the options on what you can play during an ongoing Galactic Campaign with defeated enemy factions, for the longest time it has been the most widespread way for many veteran players to save missions or Retaliatory Strikes - and to this day I run into players using this method whenever I Randomdive™.
Upon completion of the mission and boarding of the extraction shuttle the hosting player simply aborts the mission, or disconnects from the lobby, saving this mission for another time.

But then we haven't mentioned the biggest problem with that old method of "saving" planets: you must access and save the desired mission BEFORE the associated Enemy Faction gets defeated and thus eliminated from the game!

If you have been away from the game for a while and spontaneously decide to come back one day, ready for action, then get ready to be disappointed.

Or if you’re a new player and you’ve stuck to fighting just one enemy up until this point, but now want to discover what these other two enemy factions are about (and, of course, unlock their associated Planet Rewards), then you may also end up being pretty disappointed if the current Galactic Campaign leaves you with only one enemy faction to fight against.

Whichever is the case, maybe you then decide to return to the game a few weeks later, once this current war is finished?

But what if the next war is equally disappointing? Maybe your favourite enemy faction gets eliminated within days after the start of the new campaign, and the cycle begins anew?

It's entirely possible!

Maybe, at that point, you simply give up and uninstall the game?!

And I couldn’t even blame you.

I mean, I appreciate the fact that Arrowhead took a chance and tried something different with this shared, online-based, cross-system Galactic Campaign where the entire playerbase, regardless of gaming platform, contributes to the war effort of glorious Super Earth!

These developers are sticking to their guns, too! They could have given us access to all the enemy factions at all times, and they do actually listen to their community!

But ever since the release of the game the Devs have stood by their decision for how the Galactic Campaign works, and I truly respect that.

However, after all these years we have to acknowledge that the way the Galactic Campaign works can be a big turn off for some players, new and old.
Only having one enemy faction to play against for weeks, sometimes months, without an end in sight, can get really frustrating.
New players can’t progress and unlock specific items, and veteran players get bored and lose interest.

Well, not anymore! Largely thanks to a recent video I watched from veteran player and absolute HELLDIVERS™ legend, KOR_Lune!

In her video she demonstrates how to access all the races by going offline and resetting the Galactic Campaign on your ship:

It was this video that inspired me to not only follow the method, but also to dig a little deeper and try to find out if it can not be streamlined and improved, because the Offline Campaign Reset method involves having to delete your save game and starting the game to in offline mode as if for the first time whenever you want to bring back an unavailable Enemy Faction into your own game.

But we want to be able to play whatever we want, quickly and easily, whenever we want!

All we need to do is add a few extra steps so that we can minimize the times we have to reset our game.

If you follow my guide then it is possible that you may never have to reset your game at all! But the worst case scenario is that you'll need to reset your campaign just once!

In all cases your personal progress (XP, rank, unlocks, etc.) will remain completely unaffected!

So let’s dive right in, shall we?!
The Basics of Save Files and Offline Mode
Before we begin you may want to know how the game actually saves your progress and your settings, as well as how to start the game in offline mode:

  • For the PC version the game will save your game-progress, which includes your settings, the game-introduction progress, your ingame Encyclopedia progress, your selected loadout, and your selected mission (which is what we are here for) in one game save file, while your user-progress, i.e. your XP, rank, available commends and reports, and all of your unlocks in a separate user save file, so we will differentiate between the game save file and the user save file.

    Since a game save file includes your saved settings and options, as well as your saved loadout choices, any changes you make to those may later be replaced by whatever is saved in the game save file we are going to back up for later use as detailed in this guide.

    Your loadout choices, for example, are then usually reset to the Starter Loadout (i.e. Liberator, Laser Sight Perk, Ammo, MG-92 Machine Gun, Vindicator, Minigun Turret) with all upgrades from your armory progression intact.

    Be aware that the game save file has absolutely nothing to do with your career progress (i.e. rank, XP, and your armory progression) - all of this information is stored in the user save file - so you do not need to worry about any of that as long as you don't mess around with that particular file (which we do not need or intend to)!
  • The Galactic Campaign backend seems to only track the shared influence points for all players across all platforms. But the actual user progress is saved in a file that is inaccessible on the PSN version (but available for the PC version).
  • What I am entirely unclear on is the specifics of how Achievements are tracked in this game (or on Steam in general), so I once again advise you to follow this guide at your own risk!

    Honestly, I doubt that the Achievements are tied to the local save files in any way, shape or form, but since I do not know I can not in good conscience guarantee that your progress with the game's Achievements will stay unaffected.
  • Additionally, you should understand how the game saves your choices in order to know how you can force a save.

    Whenever you are ingame, be it in the menu, on your ship, or in a mission, the game will save whenever you change a setting in the options menu or the lobby party screen. If you are the host of a lobby and you change your privacy settings (switching between public, friends, and private) you can force the game to save.

    What we rely on, however, is that the game is saved when you exit to the main menu. Pay attention to the HELLDIVERS™ symbol in the top right corner indicating a save, and remember that we will mainly be forcing a save by exiting the game to the main menu.
  • And finally, we will need to run the game in OFFLINE MODE, so be prepared to turn off your internet-connection on your system.

    The easiest way to run the game in OFFLINE MODE is to start the game normally (don't even think about running Steam in offline mode for this! It's massively inconvenient!), then when on the main menu minimize the game and deactivate your internet connection in the system settings (e.g. if you use a Wi-Fi connection then just switch off the signal using the shortcut in your system tray).

    Return to the game and hit Play in the main menu.

    You will receive the following notofication before you can continue onto your ship:


    Now the game is running in OFFLINE MODE.

    To go back to ONLINE MODE simply go back to the main menu, reconnect to the internet, and hit Play again.
  • We will combine running the game in OFFLINE MODE with a complete GAME SAVE RESET by deleting our game save file in order to start the game fresh and get access the default starting systems and planets for all Enemy Factions. Then we will back up our new game save file for later use.
Important Note about the Controls
It has been brought to my attention that forcing a save as used in my guide is not possible using the Keyboard & Mouse control scheme!

There is a critical step in this guide where we need to force a save while looking at the Galactic Campaign map by bringing up the options menu and exiting to the main menu from that particular view without going back to our ship!

On a gamepad you simply hit the Start/Options button to bring up the options menu at any time during the game, but with KBM controls this seems to be impossible because the ESCAPE key is used for bringing up the options menu. However, hitting ESC from the Galactic Campaign view takes you back to your ship before you can view the options menu, negating this step entirely!

So in order for this to work you actually NEED to use a gamepad or emulate one using third-party software!

Luckily, Steamuser NOD has not only pointed out this issue with the Keyboard & Mouse control scheme but has also provided a third-party solution for anyone who does not own a gamepad!

You can find his solution in the comments below, but I have also included his provided links here:


Thank you, NOD! Your help is much appreciated! o7
TL;DR for the actual GUIDE
    The steps in the main GUIDE for Scenario A will teach you how to run the game in OFFLINE MODE, perform a complete Offline Campaign Reset by deleting your game save file in order to start the game fresh and get access the default starting systems and planets for all Enemy Factions, and also to back up your new game save file for later use.

I took it upon myself to explain, in excruciating detail, how you can CREATE and BACKUP one or more game save file(s) for any Enemy Faction(s) of your choosing and which you can safely store for later use, e.g. when the Galactic Campaign progresses far enough that one or two Enemy Factions are eliminated from the game, which is also when the war effort stagnates and many players get bored.

I am providing 2 different scenarios for this method and there is significant overlap between both scenarios. Scenario B is shorter and simpler than Scenario A because an ongoing Galactic Campaign that still involves all Enemy Factions (i.e. all are available and none of them have been eliminated yet) negates the need for an Offline Campaign Reset. I use this method to quickly create various game save files for myself with my favourite maps and mission types.

Once a Galactic Campaign ends, however, these files become unusable!

If you follow the GUIDE for Scenario A and power through all this Offline Campaign Reset stuff then you will end up with one or more game save file(s) per Enemy Faction from which you can quickly and easily generate new, randomized planets and missions independently from the progress of the Galactic Campaign, usable even across wars!

And the best part?

You will be able to play these missions ONLINE without impeding your character progress whatsoever!
GUIDE | Create an Offline Game Save File for Online Play (Scenario A)
  1. Run the game normally via Steam - if you are using Big Picture mode, exit big picture mode for now - then hit play and go to your command bridge on your ship.

  2. Minimize the game and while it is running right-click on the game in your Steam library and go to PROPERTIES, then select the UPDATES tab and UNCHECK the box next to Enable Steam Cloud synchronization for HELLDIVERS™


    Uncheck this box:


  3. Now return to the game and force a save by changing a setting or exiting to the main menu. Once the game has saved your progress, you may exit the game back to the desktop.

  4. Locate the game’s saves directory

    The game’s save files are hidden on your system under your username; for easy and quick access simply open the RUN application, then copy/paste and open the following path:

    %APPDATA%/Arrowhead/Helldivers/


    Before you do anything else, make a BACKUP COPY of the saves folder located in this directory.

  5. You now need to identify the corresponding game save file for your Steam account. If you only have one Steam account on your machine, or if only one user on your machine plays Helldivers, then this will be simple.

    The filename is always formatted as helldivers_steam_combination of multiple numbers and letters and ending in dotOLD or dotSAV.

    Your associated user save file includes _user in its filename; the other filename is your game save file.
    If you are using multiple accounts for Helldivers then you’ll just have to figure this out through trial and error.

    In all other cases you will be faced with two file names of two file types each: dotOLD and dotSAV.


    You only need to care about the game save file ending in dotSAV later on. The dotOLD is simply a backup file created by the game.

  6. Create a new folder to save your maps in. To organize my own saved maps, I use a new folder with three sub-folders (one for each race):


    I also recommend creating a shortcut to this entire directory on your desktop for quick and easy access.

  7. Delete both your game save files (i.e. the dotSAV and the dotOLD) from the saves folder.

    DO NOT delete your user save file!

  8. Turn off your Internet connection. You need to be offline for this next step.

  9. Start HELLDIVERS for the first time.

    Because we have deleted the game save file we have tricked the game into thinking that it is starting for the very first time. Go make yourself a cup of liber-tea while the intro video plays without you being able to skip it.


    When the intro-sequence has played out you can hit PLAY and will then be sent to the Tutorial Mission, which you can immediately SKIP!

    Now, finally, you can hit PLAY and beam yourself onto the command bridge on your ship, but first you will be informed that you are OFFLINE and cannot connect to the Galactic Campaign.


  10. Set up your game! On your ship, you will be greeted with the various intro dialogues, which you have to go through. This is also the time to make certain changes to your settings.
    YOU WANT TO DO THIS NOW!!!

    What is your preferred lobby privacy setting when booting up the game?
    Set it!
    What is your favourite control scheme? UI Scale? Graphics? Brightness? Sensitivity? Controls? Keybinds? Vibration? Sounds? Music? Voices? Voice Chat? Push to talk? Turn off Hints?

    You need to set all of it up because the game remembers nothing from before!


  11. Choose a map for your preferred enemy faction by using the Mission Select console. Since we have deleted our game save files, the game will teach you all about the Galactic Campaign and how it works.

    Power through, soldier, we’re almost done with this!

  12. Pick a map for the Enemy Faction of your choice. It can be any map you want and you don’t need to think too much about it. The map you choose now may be rerolled in a later step.

    Once you have made your choice, force a save by exiting to the main menu.

  13. You can keep the game running in the background while you make a copy of the newly created game save file and place it in that saved maps folder we talked about earlier (or whichever folder you want - just back that file up somewhere for easy and quick access in the future).

    Repeat the last 2 steps for the other 2 enemy factions before you proceed!

  14. Reconnect to the internet. We’re going back online, baby!

  15. Go back to the game (if you exited the game to the desktop, just restart it), then go to your ship and access the Mission Select console. You will be notified that the selected map and region are unavailable due to the current progression of the Galactic Campaign.


    You can choose to play the selected mission, or reroll the entire selection of planets in the current system.

  16. THIS CRUCIAL STEP IS ONLY POSSIBLE USING A GAMEPAD!

    In order to reroll the map selection, exit the selected mission and attempt to go back to the Planet Select view.


    The game will now force you out of the planetary system view and into the Galactic Campaign screen. When the zoom stops and you are looking at the entire Galaxy, force a save by exiting to the menu.


    Now enter back into the game from the main menu.

    This step has rerolled all planets in the available planetary system. Your originally selected mission is still available, but as soon as you exit into the Planet Select view that planet will be rerolled and become unavailable as well; however, now you can move freely between all available planets without the game forcing you out into the Galactic Campaign screen.

    If you ever exit out of the Planet Select view then you will not be able to go back. From the Galactic Campaign view you can simply exit to the main menu and restart your lobby. Otherwise exit the game directly (without going to the main menu and forcing a save).

  17. At any time you can overwrite the game save file in the games saves folder with the map from your saved maps folder.


    Whenever you reroll this map as described in Step 16 all planets will be generated for you at random. Any possible Planetary Unlock Rewards will also be rerolled.

    NOTE: Replacing your game save file only works when the game is NOT running!
GUIDE | Create an Online Game Save File Backup for the current Galactic Campaign (Scenario B)
  1. Run the game normally via Steam - if you are using Big Picture mode, exit big picture mode for now - then hit play and go to your command bridge on your ship.

    If only the HOMEWORLD ASSAULT EVENT mission for your preferred Enemy Faction is available, restart the game in OFFLINE MODE

  2. Minimize the game and while it is running right-click on the game in your Steam library and go to PROPERTIES, then select the UPDATES tab and UNCHECK the box next to Enable Steam Cloud synchronization for HELLDIVERS™


    Uncheck this box:


  3. Now return to the game and pick a map for the Enemy Faction of your choice. It can be any map you want and you don’t need to think too much about it. The map you choose now may be rerolled in a later step.

  4. Once you have made your choice, force a save by exiting to the main menu.

  5. Locate the game’s saves directory

    The game’s save files are hidden on your system under your username; for easy and quick access simply open the RUN application, then copy/paste and open the following path:

    %APPDATA%/Arrowhead/Helldivers/


    Before you do anything else, make a BACKUP COPY of the saves folder located in this directory.

  6. You now need to identify the corresponding game save file for your Steam account. If you only have one Steam account on your machine, or if only one user on your machine plays Helldivers, then this will be simple.

    The filename is always formatted as helldivers_steam_combination of multiple numbers and letters and ending in dotOLD or dotSAV.

    Your associated user save file includes _user in its filename; the other filename is your game save file.
    If you are using multiple accounts for Helldivers then you’ll just have to figure this out through trial and error.

    In all other cases you will be faced with two file names of two file types each: dotOLD and dotSAV.


    You only need to care about the game save file ending in dotSAV. The dotOLD is simply a backup file created by the game.

  7. Create a new folder to save your maps in and place a copy of the game save file from your saves folder into this new folder.

    To organize my own saved maps, I use a new folder called saved maps with three sub-folders in it (one for each race):


    I also recommend placing a shortcut to this entire directory on your desktop for quick and easy access.

  8. If you wish to back up game save files for more than one Enemy Faction then repeat Steps 3 - 7 for each race of your choice. Once you are done with this you can turn Steam Cloud functionality back on.
    If it was necessary to run the game in OFFLINE MODE then turn your internet connection back on!

  9. Whenever the Galactic Campaign progresses to the point that your favourite faction is eliminated, exit the game, turn off Steam Cloud and copy your game save file of choice from your saved maps folder into the saves folder, replacing the existing file in it (if there is one).


  10. Start the game, go to your ship and access the Mission Select console. You will be notified that the selected map and region are unavailable due to the current progression of the Galactic Campaign.


    You can choose to play the selected mission, or reroll the entire selection of planets in the current system.

  11. THIS CRUCIAL STEP IS ONLY POSSIBLE USING A GAMEPAD!

    In order to reroll the map selection, exit the selected mission and attempt to go back to the Planet Select view.


    The game will now force you out of the planetary system view and into the Galactic Campaign screen. When the zoom stops and you are looking at the entire Galaxy, force a save by exiting to the menu.


    Now enter back into the game from the main menu.

    This step has rerolled all planets in the available planetary system. Your originally selected mission is still available, but as soon as you exit into the Planet Select view that planet will be rerolled randomly as well (including the biome and the selection of available missions); however, now you can move freely between all available planets without the game forcing you out into the Galactic Campaign screen.

    If you ever exit out of the Planet Select view then you will not be able to go back. From the Galactic Campaign view you can simply exit to the main menu and restart your lobby. Otherwise exit the game directly to the desktop (without going to the main menu and forcing a save).

  12. At any time you can overwrite the game save file in the games saves folder with the map from your saved maps folder.


    Whenever you reroll this map as described in Step 11 all planets will be generated for you at random. Any possible Planetary Unlock Rewards will also be rerolled for you.

    NOTE: Replacing your game save file only works when the game is NOT running!
Acknowledgements
I would like to once again thank KOR_Lune for posting that video I mentioned earlier! Without it I would have stuck to my old ways and simply saved single planets instead of having any flexibility and mission variety for my favourite races and mission types!

If you don’t know her, KOR_Lune is a veteran of many years and thousands of hours in this game who regularly posts tutorials and helps players to become better Helldivers! Check out her YouTube Channel and Twitch Stream[www.twitch.tv], and make sure to give her some support for her continued service!

I would also like to send a big thank you to all my friends, who have listened to me babble on about this whole issue ingame!

While they were busy dealing with whatever was on screen I just kept rambling about save-games-this and save-games-that, so thank you all!

A special thank you goes out to you, Jules, for your continued support and patience with me!

- Woyzeck Jon Graves (30.06.2020) -
14 Comments
Daegon 19 Nov, 2024 @ 3:25am 
I'm not sure if the guide clarifies this, but a gamepad isn't actually required for rerolling (generating maps and keeping those you like). That step is just an optional shortcut to do so without having to restart on each reroll. You can do rerolls with only keyboard & mouse input, without emulators.

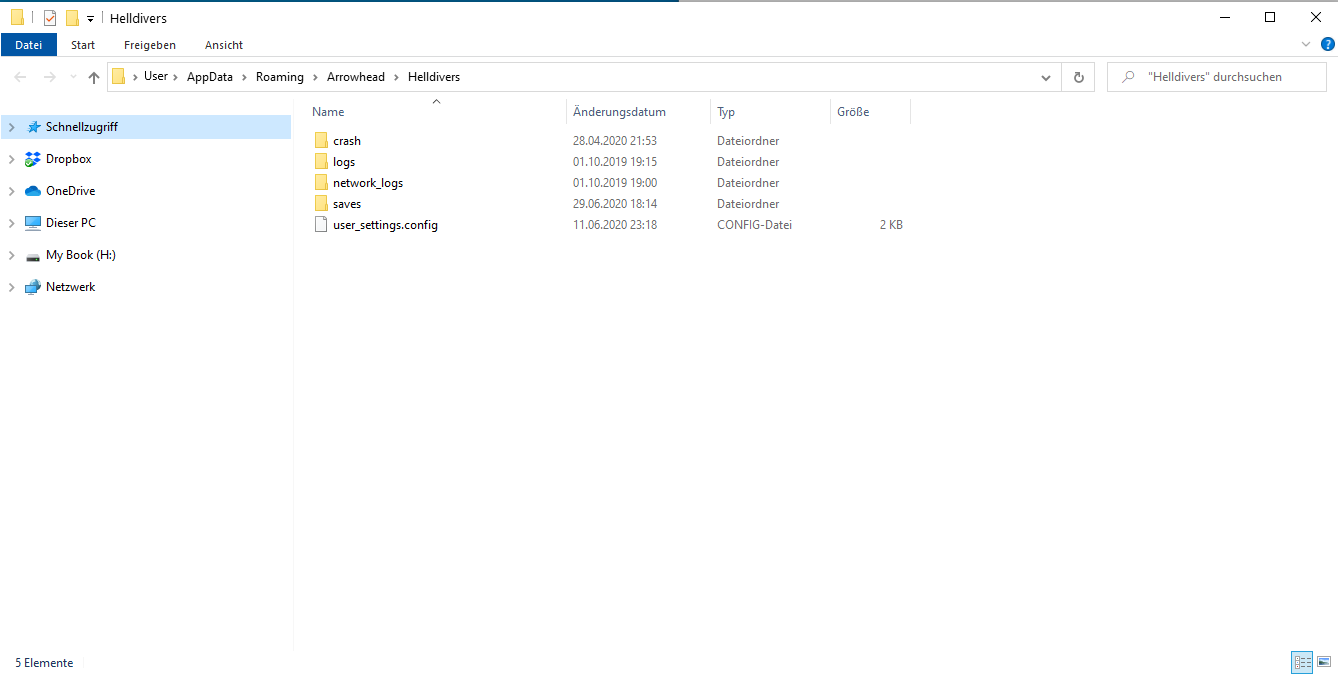
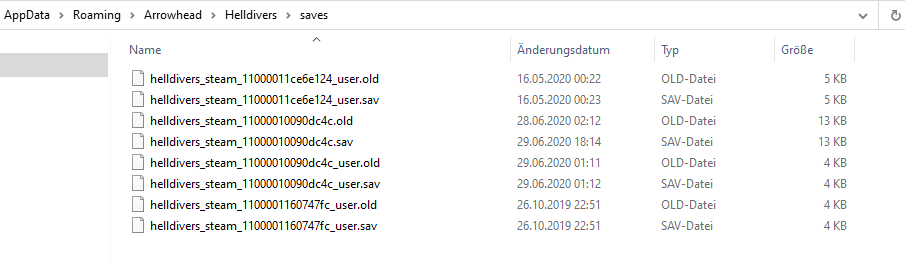
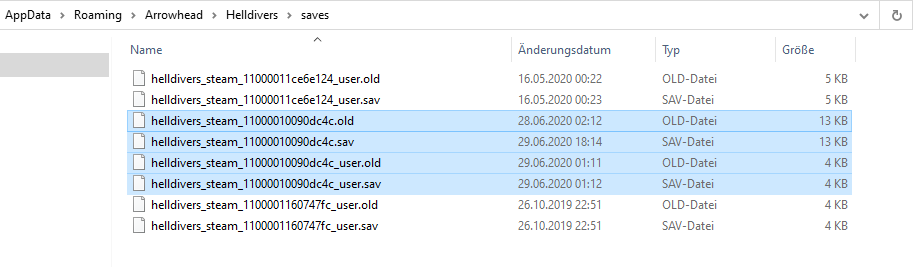
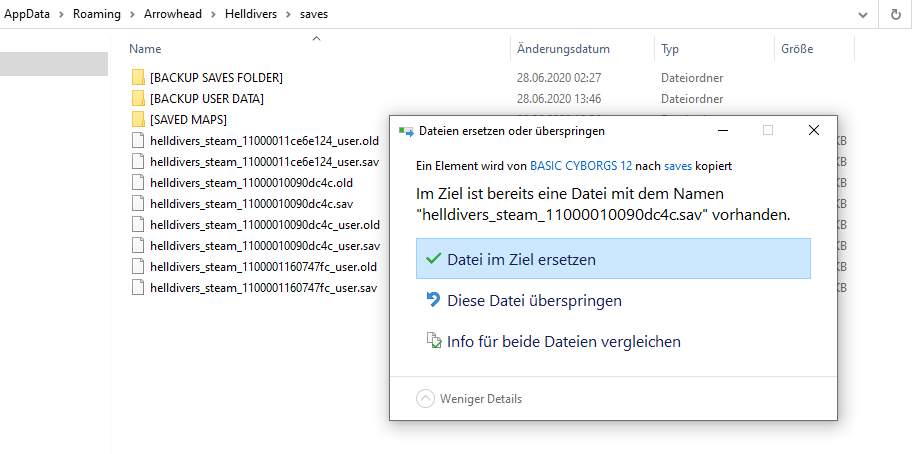
Simply restart the game without forcing a save. When you get a map you want to keep, force save, then copy the save file by renaming it or moving it to another folder. Since the game won't find this file, a clean one will be made, letting you repeat the process.

Better yet, to avoid the intro and changing settings every time, make a copy of the save after doing so once, then use that copy each time you repeat the process instead of having the game make a clean save.

See this video tutorial by Nykozeh that skips the gamepad-only shortcut and explains the entire process:
https://www.youtube.com/watch?v=yG-pzlB6VS0
Daegon 1 Sep, 2024 @ 4:28pm 
Thanks, the info about rerolling the planet selection by forcing save is quite useful even if you are just playing regularly, for example if you want a specific RS d13 Illuminate map! :steamthumbsup:
Qnnrad 5 Aug, 2024 @ 3:11pm 
Thank you so so so much! :p2cube:
YYX 6 Apr, 2024 @ 2:02pm 
Great work
Lavoroxan 31 Mar, 2023 @ 9:36am 
Useful since the community commits total Illuminate death 0.3 seconds after a war breaks out.
NOD 29 Jun, 2020 @ 8:06am 
And most importantly, thanks again to the author for the ingenious solution to the problem with the dead factions of enemies!
NOD 29 Jun, 2020 @ 8:03am 
Instructions on the forum (and on the video, if anyone is more comfortable):
https://www.autohotkey.com/boards/viewtopic.php?t=12249
https://www.youtube.com/watch?v=AEJYoGx_Q6A
NOD 29 Jun, 2020 @ 8:03am 
NOD 29 Jun, 2020 @ 8:02am 
Everything turned out!) I did it through the vJoy driver, which emulates a gamepad and through the UCR program that allows you to assign any key on the keyboard to simulate a button press on the Xbox controller. In game I connect to myself through an emulated gamepad and with this character I go to the control console and there I exit to the galactic screen and exit to the main menu!)
Here is the screenshot in the game and the screenshot for setting up the program:
https://ibb.co/DrNw2wT
https://ibb.co/5TC6hy2
NOD 29 Jun, 2020 @ 6:16am 
Woyzeck Jon Graves
Interestingly, I will try to use the gamepad emulator to get to the menu like, I’ll write if be able to do it :)