Garry's Mod

Garry's Mod

163 ratings
Creating Custom Villagers for GMod (Animal Crossing: New Horizons)
By catcraze777
This guide is intended on providing as much info as needed to help you create a custom AC:NH human villager using assets from several addons.
6
2
   
Award
Favorite
Favorited
Unfavorite
A Brief Introduction
So you want to create a custom villager that isn't a preset? Well this is the guide for you!

This guide contains information on several models, their materials, and their important properties needed for customization. A lot of information is copied and pasted from the SFM guide but any information specific to GMod or the addons used is added. Some tips, when necessary, are included, too.

This guide will also likely be updated occasionally, so please share some of your tips you've found helpful so others can use them too!

Also be sure you understand the tool and utility addons, listed in the important addons section below, prior to reading this guide. A section is dedicated to help explain them but I'd use them in-game first so you understand what they can be used for and how you may potentially use them throughout this guide.
Important Addons
Base Addons
Human Pack: The base addon with preset villagers and assets/models exclusively used by humans.
https://steamhost.cn/steamcommunity_com/sharedfiles/filedetails/?id=2373857504
Complete Clothes Material Pack: Contains ALL clothes textures for tops, bottoms, and socks.
https://steamhost.cn/steamcommunity_com/sharedfiles/filedetails/?id=2318276955
Hat and Glasses Pack: Contains almost all hat and accessory models.
https://steamhost.cn/steamcommunity_com/sharedfiles/filedetails/?id=2336147594
The AC:NH data spreadsheet: Extremely useful for finding clothes textures and accessory names.
Raw clothing texture download: Useful for finding clothing textures. Just replace (dot) with . for the link to work.
https://mega (dot) nz/file/VZ5WyApY#417TpxD6wa3GMVTy4CX-MPfYowX3caAKYRpFwQYDzxw


Important Tools and Utilities
Submaterials Tool: Overwrite submaterials of models with other materials.
https://steamhost.cn/steamcommunity_com/sharedfiles/filedetails/?id=405793043
Proxy Color Tool: Paint specific submaterials of models via proxies put in by developers.
https://steamhost.cn/steamcommunity_com/sharedfiles/filedetails/?id=2063690158
Easy Bonemerge Tool: Merge two models together to act as one.
https://steamhost.cn/steamcommunity_com/sharedfiles/filedetails/?id=170917418
Simple Material Browser: Browse material files for use with material tools.
https://steamhost.cn/steamcommunity_com/workshop/filedetails/?id=110666990
Extended Spawnmenu: An improved spawnmenu that allows you to browse through materials of addons, so its an alternative to Simple Material Browser.
https://steamhost.cn/steamcommunity_com/sharedfiles/filedetails/?id=104603291
PAC3: Extreme PM and NPC customization.
https://steamhost.cn/steamcommunity_com/sharedfiles/filedetails/?id=104691717
Using Tool and Utility Addons
Sub Materials Tool
The sub materials tool allows for overriding individual sub materials of a model, which is needed to change out the eyes, mouths, and socks of the human models. You can copy other sub materials from other models or copy the file path of the material you'd like to use, which is how you'll select materials in this guide.

The Tool Settings


Sub Material Menu for the Base Human


Proxy Color Tool
Proxy Color Tool is a slightly more advanced color tool with the ability to paint specific materials of a model through material proxies. Not all addons support it but Human Pack uses it to paint the Hair, Skin, Blush, and Eyes. NOTE: Hair cannot be painted after a bonemerge and must be painted prior to a bonemerge.


Easy Bonemerge Tool
This tool allows for merging two models that have the same bones together so they act as a single model. Simply right-click the base model you'd like to merge to (for this pack it should be the base human model) and left-click any model you'd like to attach. If a model is incompatible, the tool will let you know, so be sure you are using the correct model variant! (PM models don't bonemerge with ragdoll models and vice versa)

Simple Material Browser
The simple material browser allows you to browse through and use materials with the material tool. In this guide you'll be using it, or a similar addon if you prefer something different, to choose clothes, eyes, and mouth textures to apply to models. You'll also need to use this alongside the sub materials tool by copying the file path of a material and pasting it into the sub materials tool. (See above in the Sub Material Tool info for the field)

The main issue with simple material browser is the console command "materialmenu_open" is needed to open it. It is recommended to bind it to a key via the "bind key materialmenu_open" command, I have it bound to "L" but you can choose.

Basics of PAC3
This section is no longer up to date with the latest version of PAC3, since the experimental section was removed and some elements reorganized. Other more recent PAC3 guides may cover the changes for now. Model and Material path locations outside of this section are likely used the same with the new update and won't need to be changed. This section will be updated soon when I have time.

PAC3 is a powerful but also confusing addon that allows for extreme customization of playermodels. This guide won't cover it in depth but will briefly explain how this addon uses it's material overrides and model additions to customize a human PM as well as how to get started with customizing a human. IT IS HIGHLY RECOMMENDED TO LOOK AT OTHER GUIDES FOR PAC3 OR EXPERIMENT ON YOUR OWN.

Information regarding file paths for materials and models important for PAC3 are listed in their relevant sections. (EX: Eye paths are in Eyes under the base model section)


Initial Setup
Before beginning human customization with PAC3, you'll need to first be the base human playermodel prior to editing your PAC3 outfit. Afterwards, add an experimental entity to your outfit by right-clicking the outfit group, and selecting Experimental > Entity. This should automatically be the human base model if it is currently being used, otherwise change the model to it.


Material Overrides
There are several parts of material overrides important for human customization. To begin a material override, right-click the experimental entity/model and select Experimental > Material3D. This should now make the model a shiny chrome by default without any changes. Don't forget to change the material it overrides to the correct material! By default all materials are overrode.

Afterwards you can load a .VMT file to automatically fill in most configuration information. To do this just click the "..." button next to the "load vmt" parameter in the "Generic" section and browse to the .VMT material file. Afterwards you may need to check the "normalmap alpha mask" parameter to "true" located in the "Environment Map" section to stop a texture from appearing reflective when it shouldn't be.


If the material is supposed to be painted, change the "color2" parameter located in the "General" section by clicking the small color square to the right and adjusting the colors.


Model Adding and Properties
Adding models to a playermodel is fairly easy, just right-click the parent model and select Experimental > Model to add one. To change the model select the "..." button next to "Model" parameter in the "Generic" section.

Most models in this guide are bonemerged to the playermodel. To do this, check the "Bonemerge" option in the "Orientation" section of the model's properties and the model should automatically align and move with the playermodel.

Skins of a model can be changed via "Skin" parameter in the "Appearance" tab of the model properties, however for bodygroups you may need to change them with a bodygroup modifier by right-clicking the model and selecting Modifiers > Bodygroup. From there change the properties of the bodygroup modifier and add more bodygroup modifiers to the model if necessary.

The Base Model
There are several important parts that can be customized within the base model. There is a completely blank body without eyes or a mouth but you can also use any of the existing presets as a base. For the presets you may want to disable some parts, like clothes and hair, to replace them with something different.

All presets have ragdoll and PM variants already made.

For PAC3, all presets and the base model are located in:
models\catcraze777\animal_crossing\humans_acnh\presets
Be sure to use the correct PM variant!

For PAC3, base model materials are located in:
materials\models\catcraze777\animal_crossing\human_textures_acnh\base


Bodygroups

The base model has several bodygroups for customization.

Noses
There are three noses that can be selected, as well as no nose to prevent clipping with some accessories. The following image shows the noses in order, with mNose being the left and mNose2 being the right.


Cheeks
There are only two cheek patterns used, one more sharp with the other more blurred. You can also disable the cheeks.


Ears
Some hats and hair clip with the ears, so you can individually disable each ear when necessary.


Materials

There are several materials used by the base model that can be customized, below is a list of them and how to change them.
  • mSkin_D: The skin of the model. Use Proxy Color tool to paint this.
  • mCheek_D: The cheeks of the model. Use Proxy Color tool to paint this.
  • mSocks_D: The normally invisible mesh where sock textures go. Use the Submaterials Tool to override this with socks found with the simple material browser. (See Clothes > Materials Section for filepaths)
  • mPaint_D: A normally invisible mesh for face paint. Meant for advanced users with an understanding of convertion to VTF files and material overriding. Usage of this material is not covered in this guide.
  • mEye_D: The first material layer of eyes, which is the colors that do not change. Use the Submaterials Tool to override this with eyes.
  • mEye_DP: The second material layer of eyes, which is the colors that change with eye color. Use the Submaterials Tool to override this with eyes then the Proxy Color tool to paint this.
  • mMouth_D: The material for the mouth. Use the Submaterials Tool to override this with mouths.

Skin Colors
A list of RGB values for skin color are below and listed in reading order of the color sample image. To change skin color, use the Proxy Color tool on the base model and change the "Skin Color" color value.
  1. 248 192 154
  2. 245 181 136
  3. 238 174 128
  4. 215 147 98
  5. 195 136 80
  6. 161 108 57
  7. 131 85 43
  8. 97 59 39
  9. 225 228 228
  10. 131 158 108
  11. 97 154 193
  12. 131 117 224


Eyes

To change eyes, override the "mEye_D" and "mEye_DP" sub materials of the base model using the sub material tool or PAC3's material overrides. To gain a filepath for use with the sub material tool, use the simple material browser and copy the file path once you have your desired eye material. You'll need to do this twice since they're are two materials layered on top of each other for the eyes.

There are a total of 26 different eye materials that are named by number. Below is each eye material listed in reading order.

For the Material Browser and PAC 3, eye materials are located in:
materials\models\catcraze777\animal_crossing\human_textures_acnh\eyes


Eye Colors
Below is a list of eye RGB colors listed in reading order. To change eye color, use the Proxy Color tool on the base model and change the "Eye Color" color value.
  1. 52 52 52
  2. 81 59 39
  3. 39 93 97
  4. 76 89 65
  5. 39 65 117
  6. 81 81 89
  7. 190 59 93
  8. 150 85 52
  9. 214 136 52
  10. 164 97 195
  11. 117 117 133
  12. 65 123 108


Mouths

Changing the mouths is the same as the eyes, override the "mMouth_D" sub material of the base model using the sub material tool or PAC3's material overrides. To gain a filepath for use with the sub material tool, use the simple material browser and copy the file path once you have your desired mouth material.

There are only 4 different mouth materials that are named by number. Below is each mouth material listed in reading order.

For the Material Browser and PAC 3, mouth materials are located in:
materials\models\catcraze777\animal_crossing\human_textures_acnh\mouths

Hair
Hair models include the basic hair models, hair models used with hats, and all hats/wigs that use hair for coloring. The hair models are a bit interesting to deal with largely due to hats. Hair is also painted using the Proxy Color Tool prior to a bonemerge.

For PAC3, hair models are located in:
catcraze777\animal_crossing\humans_acnh\hairPM

For PAC3, materials for overrides are located in:
catcraze777\animal_crossing\human_textures_acnh\hair
Some hair models have two materials that need to be overrode for coloring.


Models

There are a total of 36 unique hair models. Below is a list of the models in reading order. Some hair models also have an alternate Cap model used if the villager is wearing a hat.


Using Hair Models with Hats
There are several ways you can change the hair models in order to wear hats. If you plan on putting a hat on the villager, follow the list for tips on how to choose/change the hair models. NOTE: the hair cannot be changed after a bonemerge so be careful when deciding how you want to change the hair!
  1. Is there a specific hair model? Some hair models do have a separate model used for hair. For example, if you wanted to use hair09, look to see if haircap09 is an existing model and use it instead.
  2. Are there parts of the hair model clipping through the hat that are attached to bones? Some hair models have bones you can use to move parts of the hair, such as ponytails. You can move them out of the way with the Advanced Bone Tool to prevent model clipping prior to a bonemerge.
  3. Can only the skin blending part of the model be seen normally? Some hair models use a second material to blend with the skin color, such as shaven parts of hair. If you only see these parts of the hair model, you can make the other part of the hair model invisible using an alternate skin. (See Image)

If none of these tips helped, you may need to change the position of the hat or change hairstyles unfortunately.


Materials

All hair models can be painted to the desired hair color you'd like with the Proxy Color Tool. Other wigs/hats with hair may have skins to switch color variants.

Colors
The following is a list of hair RGB colors listed in reading order from the sample image.
  1. 45 45 45
  2. 59 43 39
  3. 82 46 46
  4. 125 59 39
  5. 164 123 55
  6. 154 152 95
  7. 97 97 97
  8. 153 153 140
  9. 43 97 154
  10. 109 137 145
  11. 39 103 56
  12. 63 148 133
  13. 167 58 58
  14. 185 97 59
  15. 162 112 156
  16. 202 119 133
Clothes
Clothes models are some of the most complicated models apart of human pack, with 17 unique types of tops (not including models for separate sleeve lengths) and 7 bottoms.

For PAC3, clothes models are located in:
catcraze777\animal_crossing\humans_acnh\clothesPM

Tops also have a letter at the end that determines sleeve length. The three variations are:
  • N - No Sleeves
  • H - Short Sleeves
  • L - Long Sleeves


Tops

There are a total of 17 unique clothes models with variants depending on sleeve length. Below is a list of them in reading order with the reference picture.
  1. Aline
  2. Along
  3. Balloon
  4. Blong
  5. Box
  6. Coat
  7. Dress
  8. Kimono/Robe
  9. Marinesuitnormal
  10. Outer
  11. Overall
  12. Puff
  13. Rib
  14. Salopette
  15. Tshirts
  16. Yshirts


In case you need help with determining the clothes model a clothes item uses, here are some tips:
  • Aline/Along and Box/Blong: The bottoms of Aline and Along flare outward while the bottoms of Box and Blong continue straight down.
  • Box and Coat: Box is a onepiece dress (CAN'T wear pants) while coat is a top (CAN wear pants).
  • Outer and Rib: Rib is longer than Outer and you can wear pants with Outer.
  • Overall and Marinesuitnormal: Marinesuitnormal is exclusively used with wet suits and not any other texture type.
  • Overall and Salopette: The bottoms of Salopette are wide while the bottoms of overall are skinny.
  • Tshirts and Yshirts: There isn't really a good way to differentiate the two, but yshirts tend to be used for more fancy clothes, like suits and dress shirts, and tshirts tend to be used for more casual clothes, like tshirts and tank tops.
  • Kimono and Robe: These seem to be identical models, but kimono is mainly used for, you guessed it, kimonos.


Bottoms

There are only 7 models for bottoms. Below is a list of them all in reading order with the reference picture.
  1. Pantshalf
  2. Pantshot
  3. Pantsnormal
  4. Pantswide
  5. Skirtaline
  6. Skirtbox
  7. Skirtlong


Materials
All clothes are blank by default and require material replacements/overrides to work correctly. You can use the material tool, sub material tool, or PAC3's material overrides to replace the default blank clothes material with any a part of the Complete Clothes Material Pack. For socks, use the sub material tool to override the mSocks_D material of the base model.

All clothes materials, which can be used through the Material Browser or PAC3, are located in:
materials\models\catcraze777\animal_crossing\clothes_textures_acnh
materials\models\catcraze777\animal_crossing\clothes_textures_alt_acnh

The alternate path sorts .VMTs by model type instead of alphabetical filename.

AC:NH Data Spreadsheet
The AC:NH data spreadsheet is extremely useful for not only finding clothes textures but also any accessories, hats, shoes, and other things you may want for villager customization. Using ctrl-F you can search through the cloths by the in-game name and scroll to the right to find the filename, which is used in the naming format for the textures of the source engine versions.
EX: Blossom Tee (Pink) > TopsTexTopTshirtsHFlower0 > tops\flower0_tshirtsH_D
A link to it can be found here:

Raw Clothes Textures Download Link
Just replace (dot) with . for the link to work. This is useful if you're having trouble finding textures.
https://mega (dot) nz/file/VZ5WyApY#417TpxD6wa3GMVTy4CX-MPfYowX3caAKYRpFwQYDzxw

Some Tips for Finding Textures
  • Use the AC:NH data spreadsheet to find clothes quickly, if you can't use it then resort to the next tips using the raw textures.
  • Determine the clothes model first then search through the raw files for textures using the same model to find your desired clothes. Ex: A jacket uses Outer L, so I'd search for textures with "outerl" in the name to find my desired jacket.
  • Search by a word to find textures with it. Sometimes effective with simple clothes, such as suit and star.
  • Visibly scan through the raw files using file explorer image previews.
Hats, Shoes, Bags, and Accessories
For PAC3, all hats, shoes, bags and accessories are located in the following locations, be sure to use the playermodel variant (ends in PM) for hats and accessories:
  • catcraze777\animal_crossing\humans_acnh\hat
  • catcraze777\animal_crossing\humans_acnh\shoesPM
  • catcraze777\animal_crossing\humans_acnh\bagsPM
  • catcraze777\animal_crossing\humans_acnh\accessories
All of these clothing items are bonemerged to the model and may have alternate skins for color variants that need to be changed prior to a bonemerge. After a bonemerge you can adjust the position of the accessories via Advanced Bone Tool and several bones, listed below:
  • bip_glass
  • bip_mouth
  • bip_hat
  • bip_ornament
  • Bag
For hats, see "Hair > Models" of this guide for determining how to choose/change the hair for the base model.
Saving
This is a short section, but its still important.

To save a custom ragdoll, just use the duplicator tool to save it for use later.
To save a custom playermodel, just save the PAC3 outfit like any other.
118 Comments
CaliforniaEAS 27 Apr @ 7:01pm 
idk how to do in PAC3 and Submaterial tool with this addon.
Scoops63 Official 27 Apr @ 4:13pm 
Can someone please make a video tutorial. this is too complicated.
Redd 14 Dec, 2024 @ 6:28pm 
May someone anyone make a video on how to do it im a visual learner my dumb brain cant handle words
stuff 11 Nov, 2024 @ 3:46pm 
doubt anyone will reply but might as well ask. Is pac3 even necessary for human npc customization? seems really only important if you're making a pm for yourself. im only interested in making npcs, so i like to think pac3 will serve me no use. I probably answered my own question but just asking to be squared lol.
社会我喜子(Weslie) 23 Aug, 2024 @ 12:28am 
"VertexlitGeneric"
{
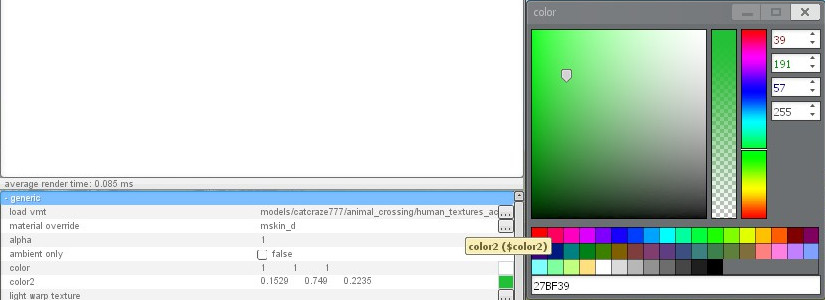
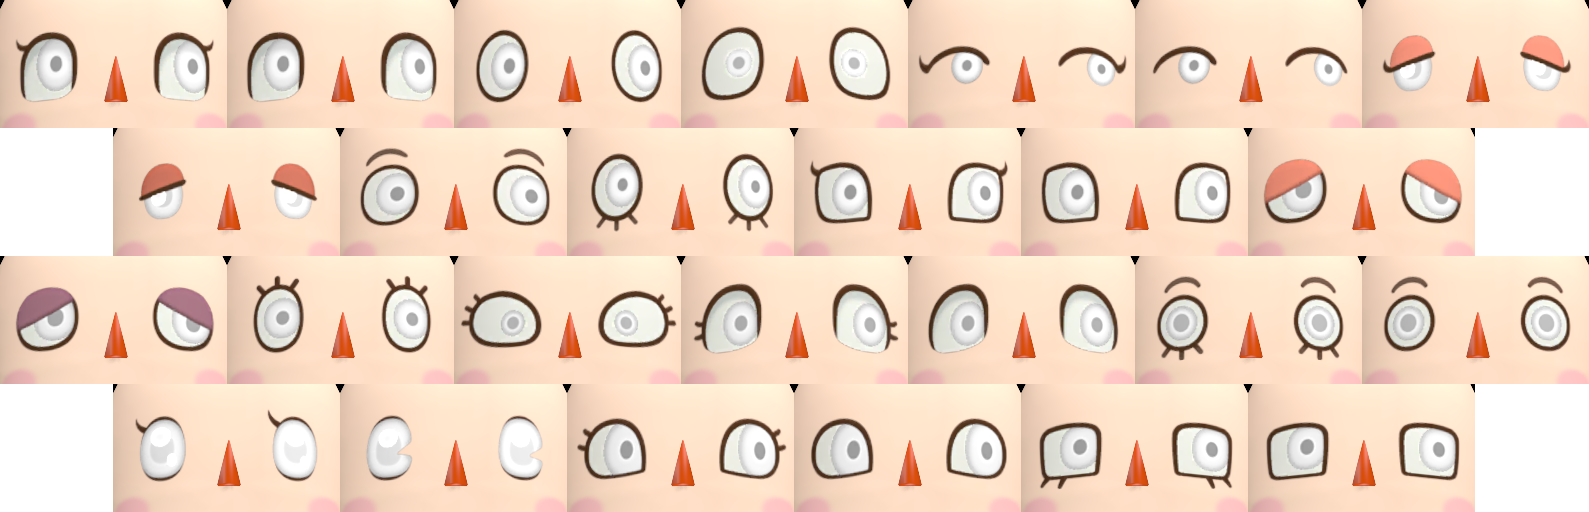
"$basetexture" "models\catcraze777\animal_crossing\human_textures_acnh\eyes\Eye16\mEye0_DP"
"$bumpmap" "models\catcraze777\animal_crossing\human_textures_acnh\eyes\Eye16\mEye0_N"

"$phongdisablehalflambert" "1"
"$color2" "《《[3.4 0.101 0.48]"》》
"$translucent" "1"

"$phongexponenttexture" "models\catcraze777\animal_crossing\human_textures_acnh\eyes\defaultE"

"$phong" "1"
"$phongboost" "23.076"

"$phongfresnelranges" "[0 .225 1]"
}
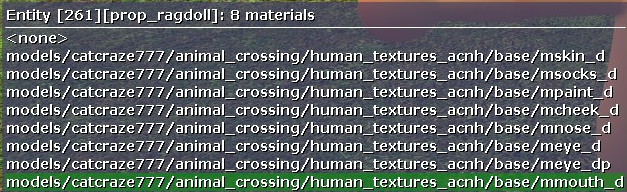
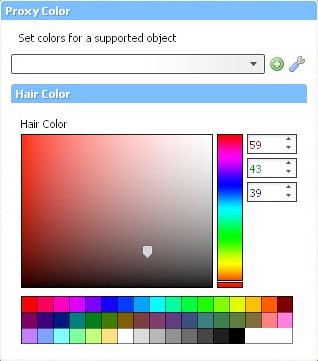
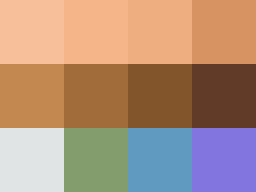
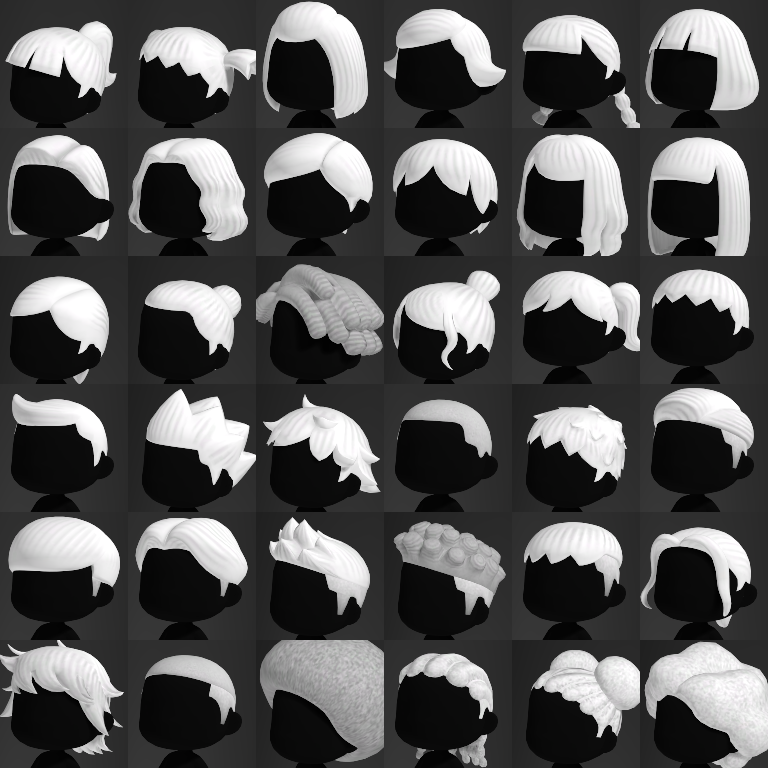
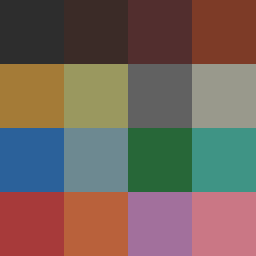
Can anyone tell me the corresponding number of skin, eyes and hair color?
Pinkolol16 1 Nov, 2023 @ 3:10am 
the custom design thing can really be endless. nothing's stopping you from making local versions of the textures yourself, including dumping if you have the knowhow to map them correctly.
EJtrooper99 31 Oct, 2023 @ 10:57am 
For those who want to use custom designs

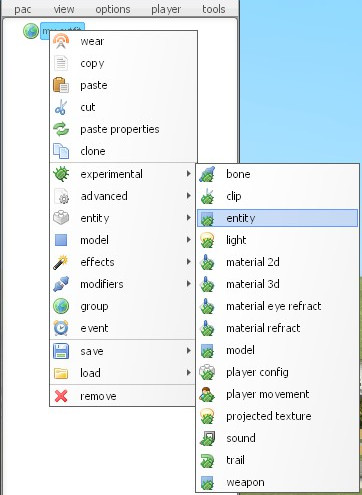
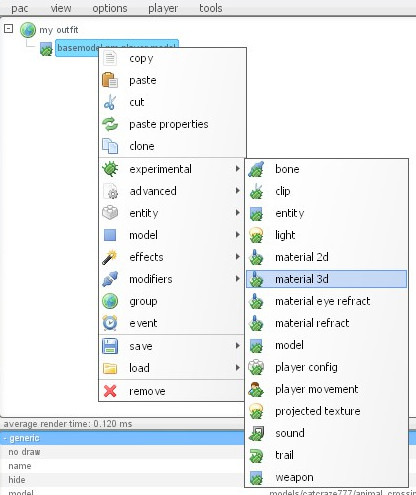
Use the Material URL Tool

It worked for me
(Just make sure you use imgur)
Pinkolol16 25 Nov, 2022 @ 9:37pm 
unsleeved tshirt, check its name it'll have it in it
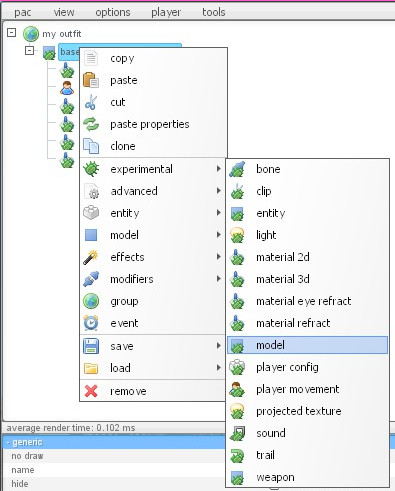
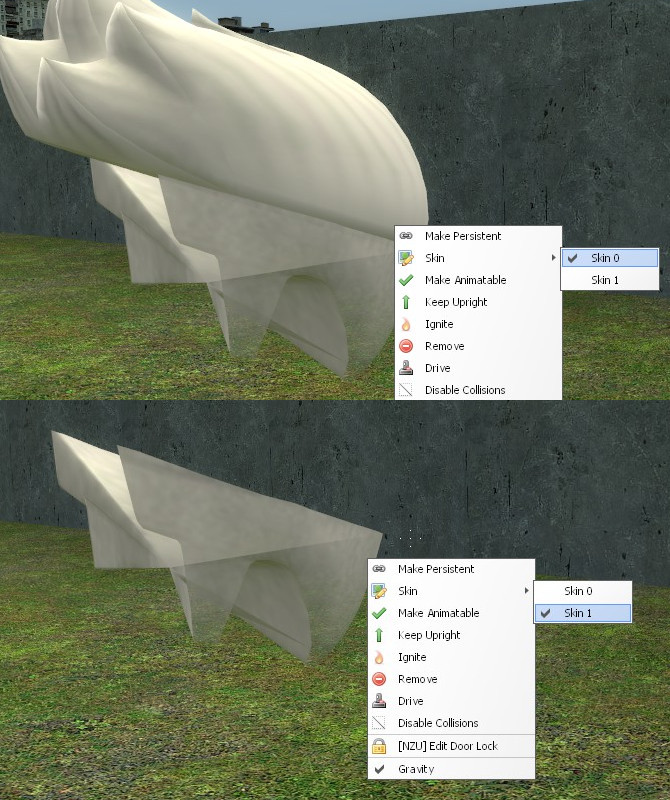
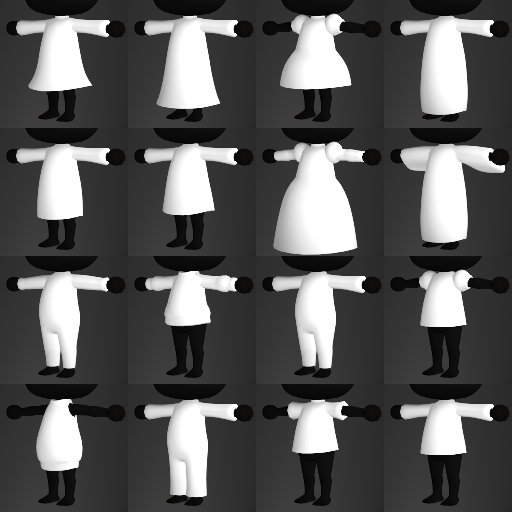
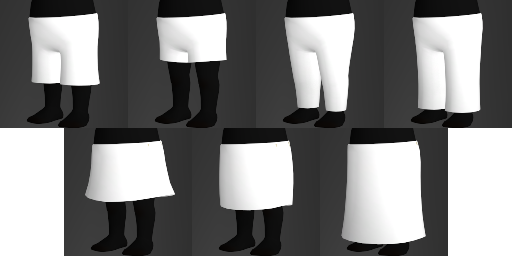
all clothing that uses the shirt/dress/skirt/bottom models use transparency to create the illusion of different clothing
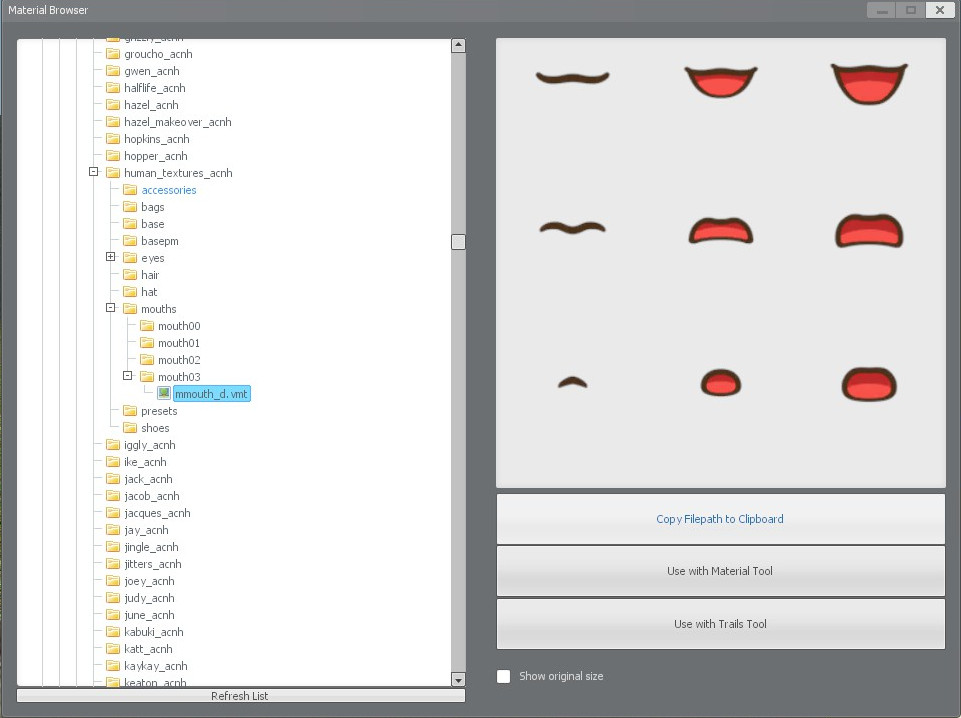
it will be in the name of the texture which one you should use out of the above list
Medic Jigglypuff 25 Nov, 2022 @ 1:08pm 
Is there a shirt model for the tube top? If there is, where is it because i cant find it.
Mikaku 23 Sep, 2022 @ 12:18pm 
:steamthumbsdown::steamfacepalm::steamsad: