Super Amazing Wagon Adventure

Super Amazing Wagon Adventure

47 ratings
Universal Facts & Advice for a Super Amazing Adventure
By Barrelmaker
This guide will tell universal facts about the game, wicked, tricksy, false shenanigans it has up its sleeves, and secrets that may be found.
   
Award
Favorite
Favorited
Unfavorite
Introduction
WARNING: THIS GUIDE CONTAINS ANY AND ALL SPOILERS IN THIS GAME. PROCEED AT YOUR OWN RISK.

This guide will be updated as I discover more in this game. Before the statistics section, here are things you should know:
The Game is Wicked, Tricksy, False

The game is not completely random. It does follow a chain of events that always have the same outcomes. Which outcome appears is determined by RNG, naturally. Now, at the beginning, horrible things may happen right off the bat. It may seem like the first event will always be "...upcoming clearing, they hurried ahead..." and all that, but one of your partymembers may get some disease as the first event once in a while as well. This may seem like death right off the bat, but it's not really. If you can avoid getting hit, disease may actually be a lifesaver as when a partymember recovers, they also recover full health. This is especially true on wagons where you start with low health (The Invisible, The Modern, etc). Healing events (eating, telling jokes, talking about feelings, playing games, reading the Bible) will always heal 3 hearts. With 3 party members, that means 1 for each party member, unless one is more injured than others.
Now while the game can be largely luck-based, skill plays a big part too. If in doubt, say NO to most events. Do NOT investigate the gunshots after you unlocked the train (unless you are a precise shot and are good at dodging shots). Do NOT take quail bets if you have a sword (learned the hard way).
Overall, the game carries some events common to most areas. This includes the oxen eating herbs and gaining or losing manoeuvrability, except in the snowy area, where the funny smelling herbs reverse your controls. During the snowy mountain (avalanche or after Bigfoot, etc.), second river, or desert, the oxen may freak out and run faster.

IMPORTANT: Many events carry rare, undesirable outcomes that may take you by surprise. Let's see in the next section.
Stage 1, Forest
The game always starts here, of course. You must be already familiar with most of the stuffing here, so let's skip over the obvious. Your actions should always depend on which wagon you picked. Hunting will be impossible using the eastern wagon, because fast animals run away from the sword. However, you can pick up bandit horses as animal hides if you kill them too.
Cheap shot trick: If you are really low on health, kill all the bandits but one every wave and wait while horizontally clear of their shots. Items MAY show up as time passes, health included.

Important notes:

  • AFTER you unlock The Fantasy, kill the stupid unicorn. Unicorns are wicked creatures, and so are dragons. Do not follow under any circumstances unless you have a flamethrower for the ambush and a falcon for the dragon.
  • If passing into a cave, it's best to try to avoid the giant creatures instead of fighting them, unless you carry a flamethrower.
  • If the battle passes into a nest of skunks, lasers, flamethrowers, and anything that won't leave the skunk corpses intact are best.
  • In the berry-picking event, the falcon can pick up bushes for you.
  • In the berry-picking event, the falcon is the best weapon. It can wipe out the line of rabid squirrels in 2 moves and do a ton of damage to bears.
  • Mushrooms are evil. Flamethrowers, SMGs, and dinosaur eggs are best for those. If you're feeling MANLY, the sword is also good.

Although the mushroom event is evil, it leads to unlocking The Invisible. In addition, the unicorn event will unlock The Fantasy (fairly obvious).
Stage 2, The River
This is when the guide and the game get interesting. You are given a choice whether to ford or jump the river. The wisest choice depends on the wagon you are using, the weapon you have, and personal preference.

Jumping has 5 possible outcomes:

  • Having you land safely
  • Angering a swarm of bees
  • Awakening a swarm of bears
  • Pulling you into orbit
  • Failing and hitting the middle of the river

Again, personal preference should determine which path you take. I, personally, almost always jump because of the 1/5 chance of having no trouble. When in space, area of effect weapons (even flamethrowers and swords) are best for destroying asteroids. One-projectile weapons like the default pistol are next to no good, and slow-firing weapons that leave lots of little asteroids are actually no good. For the bees, you won't have any hazards coming from the right, so you should move the wagon to the far right of the screen and dodge the bees as best you can. This will give you the most reaction time possible, and the only things that will come from the right will be items. For the bears, if you have a cheap weapon, God help you. What you want to do in this section is kill the bears instead of dodging them like the bees, because when they get behind you, they turn around to chase you. You can get surrounded this way.

Fording will always have you dodge boulders in the river. Then you will dodge lots of boulders. Something something boulders in the river. This is pretty straightforward, unless you brought a MANLY weapon that can tear through boulders, like a sword or falcon (upgraded dinosaur eggs can one-shot boulders too).

IMPORTANT: The river has a low chance of having a line of four boulders AFTER the something something boulder stage. Watch out! After passing the something stage, wait about three seconds before trying to cross to make sure that no boulders appear.

"Stupid boulders."

In addition, the river has a low chance of sporting a pirate ship. Prioritise dodging the cannonballs before shooting, and it will be a piece of cake (but cake can still be hard). It is also possible for the "stupid boulders" event to happen at the same time as the pirate ship, which will be annoying. Dodge cannonballs AND boulders...

Going into orbit and destroying a satellite will unlock The Fast. For the satellite, it's a little like the pirate ship. Focus on dodging before shooting, but the satellite is so big all you need to do is hold down the mouse button. In addition, its shooting pattern is simple with 1 variation. You could move up a little and then move back down depending on which variation it uses. You'll see what I mean when you get there. It's best to kill it fast so you don't have to take asteroids into account.
IMPORTANT: Although swords are good against asteroids, the satellite shoots lots of lasers (or masers, or plasma? What is that?) at a very high rate, so the sword does little good against the satellite. You can't get in close without taking a ton of damage, and deflecting its projectiles will be time-consuming and hard.
Stage 3, The Great Plains
Now you know why I HATE buffalo! Well, not in real life.

Your default pistol is actually adequate for this situation, but most weapons are better. Now, there are some things you should know. Most wagon weapons, default pistol included, fire directly in the centre of the middle in front of the wagon. This means that if a target is slightly above the predetermined path, or slightly below, you can't hit it. This becomes troublesome if you are cornered at the bottom of the screen, shooting buffalo, and one of them gets underneath this path and hits you. There are notable exceptions to this path, and these are:

  • The flamethrower: awesome area of attack, nothing in front of you can dodge.
  • The sword: nothing in front will survive, not even a solid boulder. Bosses are the one exception.
  • The falcon: The falcon flies in a triangle, actually. When you throw, the falcon flies straight, and on the return flight, the falcon flies in a slightly descending angle. This means that on its return voyage, it can hit those "beneath range" buffalo and save your life. However, it is only on the return voyage, so tapping the mouse is a good idea (the time you hold down your mouse button determines how long the falcon flies).
  • The rifle: This one carries auto-aim, so it can shoot anything in front.
  • The eggs (sort of): As long as they have something to hit in front of them, the pterodactyl will fly up and down and hit vertically adjacent targets. Meaning the buffalo below your range.
  • The laser revolver (sort of): same, the diagonal projectiles will kill said buffalo as long as the big projectile hits something.
  • The laser pistol: Three-projectile volley in a column, will vaporise anything in front.
  • The diseased pistol: If the intruding buffalo is adjacent to a target, it will get diseased.

This is especially important when the angry buffalo charge. Similarly to the bee scenario, you should move to the left of the screen to give yourself maximum reaction time. That, combined with a good area of effect weapon makes the buffalo charge easy!

The same goes for the TORNADO. Flying buffalo are no match for a sword combined with rythmic aptitude! Flamethrowers are good for that, too. That and an uzi, rainbow wand, or shotgun. In passing, I would like to make note that the best way to use flamethrowers is to tap the mouse button when the target is in front. That way, you conserve ammunition, instead of losing it all by holding down the mouse and spraying wildly. That should only be done outside the wagon, when surrounded.

As for the fur trader, buying health should be the top priority when able, even above weapons. After all, you want to live to use the weapons, don't you?

The great plains will also have a myriad of evil events. Seeing the injured falcon for the first time will be good, as it will unlock The Wild, but it can be troublesome later on if you don't want to replace your dinosaur eggs with a falcon. You can also experience a diseased monkey attack with an antique pistol find, which will unlock The Diseased, and inverted buffalo which will unlock The Glitch. Another event will be having two characters fall in love (this heals them), which for some reason is followed up with an unrealistic zombie attack (unrealistic because the virus is supposed to kill, not infect animals such as turkeys and buffalo). Any and all high-damage area of effect weapons are good against zombies, because most move slowly and are really packed together. Shotguns are good, flamethrowers are better, and in fact falcons are really the most effective. Remember that the falcon flies for as long as you hold the mouse button. You want to tell it to turn around and get back to you if a horde of zombie turkeys suddenly pop out. Another event possible is that the front wheels of the wagon fall off. This is fairly straightforward; go get them! The wheels can roll into a camp of 4 bandits or a herd of buffalo. Sometimes they may also roll into a coyote den or a haunted graveyard. Next, we have the "heard gunshots" scenario, which either leads you to a bank robbery or a train robbery. The train robbery will lead to unlocking The Coal-Fired. If you've already unlocked that wagon, you musn't accept the quest unless you are in top shape (all people at 4 health) and are feeling particularly confident. If you kill any civilians in the bank robbery, you'll get dragged to jail. Equivalent of death. Unless you have a lot of animal hides, in which case you can bribe the sheriff. As for the train robbery, you'll want a weapon like the wand because you'll be dealing with bandit riders and a bandit machinegun as well as bandit grunts on the train roof. Now, the worst event of all is the wagon axle breaking. You just watch. One character (usually the most injured) will go out to the nearest trading post and be hounded by coyotes.

It was a long journey (especially if you have one heart).

The great plains are huge...

So you think you'll get relief, you think that the game will be merciful because your one-heart character survived the coyotes? Nah!

The great plains are over 500,000 square miles...

Then you have to travel back. Yes, the length of the journey is randomised. You may take three events to get there, but one to get back. On the other hand, your character might die, and then the NEXT one must go. If you don't repair that axle, your entire party will go out alone and get killed by coyotes. The only thing more evil than a buffalo is a coyote.

In that last event, you may find a camp of sleeping travellers. You may or may not steal their supplies. You should only steal out of necessity, you morally questionable rascal. Whether you steal and murder them or just steal doesn't matter, as they'll die anyway. This means that on your trip back you'll have to deal with their ghosts as well as coyotes.

The great plains might also catch fire. This isn't really a problem, just dodge the fire and the buffalo, or if you have a good weapon, dodge the fire and shoot the buffalo. The fire is inexplicably indestructible, like debris.

If you have a civil war battle, rip apart everything in your path and don't take chances.. I started testing to see what might happen if you don't kill anything in the battle. Will both forces still be decimated? Probably. I haven't managed to see that yet, but I've gotten mutual casualties down to as low as 1 or 2 soldiers down, and both forces are still decimated because of the wagon.
Stage 4a, The Second River
No fording this time! You must either take the desert or swim. For this section, we will look at swimming. There is a low chance for a very evil event that directs you to the desert instead of the river if you hit swim. Don't believe me? HERE!

It has been stated that the converse can happen if you try to go to the desert, AND THIS IS COMPLETELY TRUE.

The piranhas in the river will be lining up nicely, so a bow or falcon is the perfect weapon against them. Of course, swords and flamethrowers (don't ask) work too. Dinosaur eggs are also effective against compact swarms of piranhas. That's about it.

Jellyfish are tougher than piranhas. The falcon works better than the bow against them. Swords decimate them, though. They shouldn't be a concern. So long as you kill or avoid them and prevent the piranhas from getting behind you, you're fine.

Narwhals are evil. Dinosaur eggs, falcons, swords (only if skilled, VERY dangerous), and lasers are good against them. They are really quick, so unless you have one of the above weapons, you'll want to avoid them like you did flying buffalo and/or charging buffalo.

From here, there are two possible outcomes: either you see a squid, or you see an island. Let's see the squid first:

The falcon is the best weapon against the squid, as it can knock out multiple tentacles with one strike. I don't recommend the sword agains the squid unless you're a master of swordsmanship. If you time your strikes right, your sword could deflect the ink blasts right back at the squid. Or, you could go up and cut the tentacles right off (and very likely take ink to the face). Dinosaur eggs are very good against the squid as well. After killing the squid, you will very likely find a treasure chest. If you don't want to replace the 999 weapon you have at the moment, do not open the chest. If you do, go right ahead.
Just a heads up, if you open the chest, you will have to deal with the squid again at the end of the adventure.

On the island, you will see something. If you see eggs on the beach, you will fight pterodactyls and raptors, after which you unlock The Ancient. If you see supplies, watch out! You will then fight either a swarm of giant crabs or a swarm of pelicans. Shotguns and flamethrowers OWN pelicans. As for giant crabs, machineguns are good. The falcon works well against crabs, but because it takes time to get to you again, it's not ideal. Flamethrowers will also work fine.

On the other hand, there is a low chance of not seeing piranhas, narwhals, jellyfish, and squids and seeing this instead:
WATER WATER BUFFALO BUFFALO WATER BUFFALO
Stage 4b, The Desert
Right, so here you are. Shotguns, flamethrowers, and lasers are good for this place. Upon entering, you will be attacked by snakes. Be warned that your idiotic party might be afraid of running out of water at any moment and decide to go FASTER. Whoa, slow down, Maurice!

At the beginning, you may meet a gambling cowboy. If you have dinosaur eggs, a falcon, or a diseased pistol, always accept. If you have a sword, do NOT accept. Ha! Hacking away (or trying) with a sword at quails flying way above? You'll be lucky to hit ONE.

If any of your party has died, you may be able to hire a guide at the beginning for about 52 animal hides (amount is random).

Snakes are best avoided. They are wicked, tricksy, false, and they do NOT turn around and chase you. Flamethrowers char them really well.

Scorpions are best killed when you have the chance. They are like fast bears, if you don't kill them quick, they WILL turn around and chase you, and you may get surrounded. Flamethrowers are great against them, and lasers too if you are quick.

Vultures can be killed relatively easily, but are best avoided when not in your way.

What happens next varies. You may get stupid and get lost, turning around and hitting the start of the desert, or you may find a pyramid. The pyramid might have three giant, poison-spitting cobras, a swarm of mummies, or aliens. Dinosaur eggs are the best counter to aliens (bazookas also work well if you dodge their shots), flamethrowers, shotguns, and falcons are good against mummies, and if you are good at projectile deflecting, swords are good against cobras. Otherwise, go with the falcon.

The alien encounter will unlock The Alien after you escape and shoot down the UFO.
Stage 5, The Mountain
She'll be coming 'round the mountain, but only if you have less than 3 party members.

At the start, you may find a sword that will summon a swarm of ninjas. Killing the sword ninjas and deflecting-like-a-Jedi-ing the shuriken ninja to death will unlock The Eastern. Again, this is one of those events that replace your 999 weapon. Most often it gives you a sword, but I have seen it give shurikens too. Another starting event is the standard hunt, like at the beginning of the game, or a very bad, idiotic "must kill 40 animals before nightfall or you'll die" event. Horrible things happen if you fail to kill 40 animals. You don't even have to collect the hides, napalm them (destroy) and it counts. This event is far more idiotic than the "oxen eating funny-smelling" herbs event. Those reverse your controls, and that doesn't even come close to the other thing.

Soon, a pack of wolves will smell the blood. Even if you don't kill anything, they will still smell the blood. Sometimes, however, llamas will start spitting at you instead; then they stop when the wolves arrive. Wolves are worse than coyotes, they are the only thing more evil. When the wolves arrive, completely ignore the animals and kill the wolves. Any weapon will do against them, all you have to do if you have the default pistol is align to them horizontally and kill them. IGNORE THE ANIMALS. WOLVES ARE EVIL. For some reason, though, the rainbow wand seems particularly effective against them.

Snowstorms are fine, but getting drunk can be annoying. Still, this is relatively easy compared to the other events.

If an avalanche starts, avoid the boulders and kill the wolves if there are any. I can't help you much more than that, even I have trouble dodging the debris.

You may also find a bigfoot, some kind of cliff non-snow breed of yeti (why is it in the snow?). Kill it with ranged weapons or falcons.

Worst case scenario: volcano eruption! Dodge incoming lava, volcanic bombs, and fiery wolves.
To add insult to injury: THE LAVA GOT CLOSER. Now you have less reaction time!

In this case, focus on dodging the lava bombs. Don't worry about the wolves unless they get in your path horizontally. The lava bombs CAN AND WILL kill flaming wolves, and they won't turn around and attack you again.

Somewhere around here you may find a fur trader.

In any case, whether you puke your guts out or flee the lava or cliff yeti, you'll fly off a cliff.
Stage 6, Freefall
So you've finally put your foot in it. Gone off the cliff and falling down. From here, you will be attacked by either more buffalo, a swarm of crows, or a swarm of eagles.

The swarm of buffalo is best dealt with by moving to the bottom of the screen and dodging them as they come, unless you have dinosaur eggs or a wand, in which case hitting buffalo is the thing to do, because pterodactyls bursting out of the eggs can and will kill buffalo further above. Wands will directly hit your quarry.

The swarm of crows are the easiest to deal with, because they fly in in droves and try to hit you, and they don't know many complex manoeuvres. All you need to do here is fly up, hold still until the crows appear, and then simply move out of the way. When they appear at the bottom, simply move up again. This elevator motion will allow you to completely dodge them without taking ANY damage.

The swarm of eagles are the worst. Dodge like crazy, kill them when you can. That's all I can say. Dinosaur eggs are the best against them. Rainbow wands are good too, as they hit everything around.

At the end of the fall, you will either plummet into rapids or into a vortex. The vortex will take you to modern times, where you must first dodge cars and then slaughter "bandit" police. This will unlock The Modern.

For some reason, winning THAT will end the game prematurely. Be warned, if you opened a treasure chest earlier in The Second River, you will have to fight a sea monster afterwards, on the sunset closing scene.

Wait, I'm going the wrong way!
Stage 7, The Rapids
Dodging boulders is fine, but you want to destroy them. It makes things easier. Dinosaur eggs, falcons, rockets, and napalms are good for this stage.

You will be attacked by bears, alligators, or sharks, and then bandits.

You know how to deal with bears. Deal with them.

Alligators are slightly easier than bears because they don't actively chase you at first. You want to kill them before you get close.

Sharks are the worst. They're like faster snakes. Avoid them when you can, kill them when you must. All weapons will do, the faster rate of fire the better.

You will then be attacked by shotgun-wielding bandits in boats. Their volleys are really hard to dodge, so you want to kill them as fast as possible, preferably as soon as they appear. Dinosaur eggs and falcons are good for this. Or, alternatively, you could get under their line of fire and hit them with a rainbow wand, but you would still have to deal with incoming whatevers (bears, sharks, alligators).

Finally, you will encounter the riverboat. The rainbow wand, despite being good against the smaller boats, isn't very good against this. Dodging the boat's shots is important, but as the sharks or such will still be there, it's best to be swift. Highest damage weapons are best. Falcons are good, rockets are also good, dinosaur eggs are also good. Falcons are probably best. After this encounter, the game will end (hopefully). This will unlock The Fancy AND The Survivalist if all persons survived.

I said hopefully because it seems that opening a chest in The Second River will summon the giant squid again at the end of the game; who will want the treasure back. Kill it. Even worse, it's like the broken axle event. If the squid kills someone, it won't just take the treasure, leave, and finish the game. The NEXT person will go investigate and then the NEXT until either the squid or you die.
Weapons & Wagons
WAGONS

Each wagon varies in size, weapon, speed, and starting health.
Health is measured in hearts per partymember.

The Standard

Size: Normal
Speed: Normal
Health: 4
Weapon: Default Pistol
Unlock: Default

The Fantasy

Size: Small
Speed: Normal
Health: 4
Weapon: Rainbow Wand
Unlock: Follow the unicorn in the Forest, survive its dastardly trap, and slay a dragon.

The Invisible

Size: Tiny
Speed: Normal
Health: 1
Weapon: Invisible Pistol (reskin of the default)
Unlock: During the Forest mushroom event, survive a battle with demons and painful memories.

The Fast

Size: Large
Speed: Fast
Health: 2
Weapon: Default Pistol
Unlock: Shoot down a satellite after being swept into space during a jump over The River.

The Glitch

Size: Normal
Speed: Normal
Health: 4
Weapon: M.>65BI_*#XEX2
Unlock: Kill the source of the corruption in The Great Plains.

The Wild

Size: Normal
Speed: Normal
Health: 4
Weapon: The Falcon
Unlock: Save an injured falcon and survive coyote attacks in The Great Plains.

The Coal-Fired

Size: Normal
Speed: Normal
Health: 4
Weapon: Hot Air Gun
Unlock: Stop a train robbery in The Great Plains.

The Diseased*

Size: Normal
Speed: Normal
Health: 4
Weapon: Diseased Pistol
Unlock: Survive a diseased monkey attack in The Great Plains.

The Alien

Size: Normal
Speed: Normal
Health: 2
Weapon: Laser Revolver
Unlock: Survive alien and UFO attacks in The Desert.

The Ancient

Size: Large
Speed: Normal
Health: 4
Weapon: Dinosaur Eggs
Unlock: Survive a dinosaur fight after collecting eggs during The Second River.

The Eastern

Size: Normal
Speed: Normal
Health: 4
Weapon: Sword
Unlock: Survive a ninja ambush in The Mountain.

The Modern

Size: Normal
Speed: Fast
Health: 1
Weapon: Uzi
Unlock: Survive a reverse freeway trip and kill "bandits" during Freefall.

The Fancy

Size: Normal
Speed: Normal
Health: 4
Weapon: Revolver
Unlock: Beat the game.

The Survivalist

Size: Normal
Speed: Normal
Health: 4
Weapon: SMG with 250 ammunition.
Unlock: Beat the game without losing anyone.

The Golden

Size: Normal
Speed: Normal
Health: 4
Weapon: Default Pistol
Unlock: Receive 3 stars (survive for 3 minutes) on all Survival modes.

The Random

Size: Normal
Speed: Normal
Health: 4
Weapon: Random
Unlock: Survive in Shuffle Mode for 50 days (events).

The Meta

Size: Normal
Speed: Normal
Health: 4
Weapon: Wagons
Unlock: Beat the game with all wagons.

Weapons

Napalm

Damage: Very High
Description: A plane strikes the screen, wiping out or severely damaging everything in sight. Destroys hides.
Range: Extreme

SMG

Damage: Medium High
Description: Each shot has the same damage as a pistol shot, but it has the highest rate of fire in the game, aside from the flamethrower.
Range: Line

Flamethrower

Damage: High
Description: Flames targets for high damage with a high rate of fire. Chars (but doesn't destroy) hides.
Range: Short

Laser Pistol

Damage: High
Description: Fires three-shot volleys for good damage and good rate of fire, vaporises hides.
Range: Line

Revolver

Damage: High
Description: Burst fires 6 shots, similar to an upgraded pistol.
Range: Line

Rocket Launcher

Damage: Very High
Description: Low rate of fire, high damage, destroys hides. Area of effect at point of impact.
Range: Line

Dinosaur Egg

Damage: High and Normal
Description: The eggs are powerful, the pterodactyl that comes out (two if upgraded) does normal damage. The Ancient starts with this.
Range: Line/Extreme

M.>65BI_*#XEX2

Damage: Normal
Description: Somewhat random firerate, random projectiles. Destroys hides. The Glitch starts with this.
Range: Line

...no, I'm not kidding. If you find this in the squid chest, you open it up and find "M.>65BI_*#XEX2".

Sword

Damage: Very High
Description: Very powerful weapon, once mastered. Very short range. Can deflect projectiles if swings are timed right. The Eastern starts with this.
Range: Short

Falcon

Damage: Very High
Description: Very high damage, flies in a slight triangle, can retrieve hides and items. Low rate of fire. The Wild starts with this.
Range: Long

Invisible Pistol

Damage: Normal
Description: Reskin of the default pistol. Identical in most respects. The Invisible starts with this.
Range: Line

Laser Revolver

Damage: High and Normal
Description: Fires a large laser projectile slowly, which splits into four diagonally-flying smaller projectiles upon hitting a target. The Alien starts with this.
Range: Line

Rifle

Damage: Normal
Description: Same as default pistol, with the addition of automatic aiming.
Range: Line

Bow

Damage: High
Description: Pierces and skewers targets, making for a good weapon against groups. Slightly lower than normal rate of fire, high damage.
Range: Line

Shuriken

Damage: Normal
Description: Highest rate of fire in the game, aside from the flamethrower and SMG.
Range: Line

Default Pistol

Damage: Normal
Description: Normal everything. The Standard and The Golden start with this.
Range: Line

Rainbow Wand

Damage: Normal
Description: Fires a shot in six different directions. Normal rate of fire. The Fantasy starts with this.
Range: Extreme

Hot Air Gun

Damage: Normal
Description: Fires shots in vaguely L-shaped trajectories. Slightly lower than normal rate of fire. The Coal-Fired starts with this.
Range: Extreme

Diseased Pistol

Damage: High
Description: Affects all objects adjacent to the target shot. The Diseased starts with this.
Range: Line/???

Wagons

Damage: High
Description: Projectiles home enemies. Low rate of fire. The Meta starts with this.
Range: Extreme

Flower

Damage: Emotional
Description: It's the weapon of love. It doesn't kill or hurt (for the most part, anyway).
Range: Short

And that's about it for my guide. Of course, if you had THIS baby:
you would win ezpz lemon squeezy.

*It may just be me, but this seems to get one of your people sick as soon as you start.
15 Comments
Amber Slime 22 Feb, 2017 @ 2:26pm 
Personally, I found the time warp into modern times to be easier.
Hamsor 4 Oct, 2015 @ 9:20am 
also in the second river your oxen can get freaked out and go faster.
Hamsor 4 Oct, 2015 @ 9:16am 
the thing about the diseased is that, due to its name, it forced you to get sick every time you can be sick, not just the beginning. I also noticed a little patern where first one of your crew gets sick first then your oxen and then it it goes back your crew.
Torcularis 13 Sep, 2014 @ 4:51pm 
I'm not sure if you plan on updating this guide again, but I figured I'd throw some additions your way.

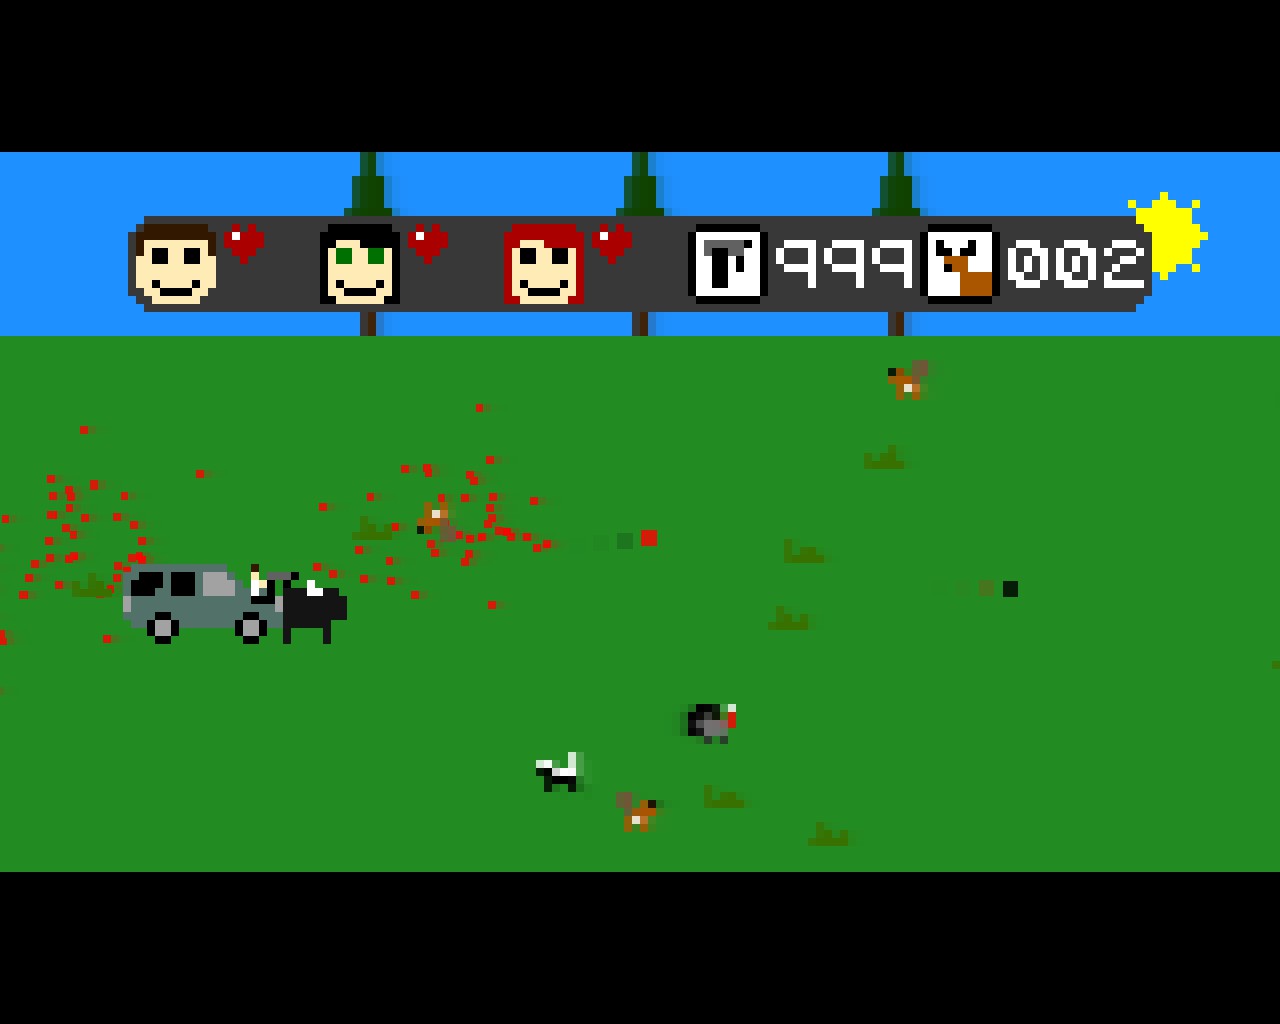
If you try to jump the river, there is a fifth potential outcome. You might "only make it halfway across" and start from the "lot of boulders" screen. Unfortunately, you start in the dead center of the screen, meaning you'll almost certainly take damage.

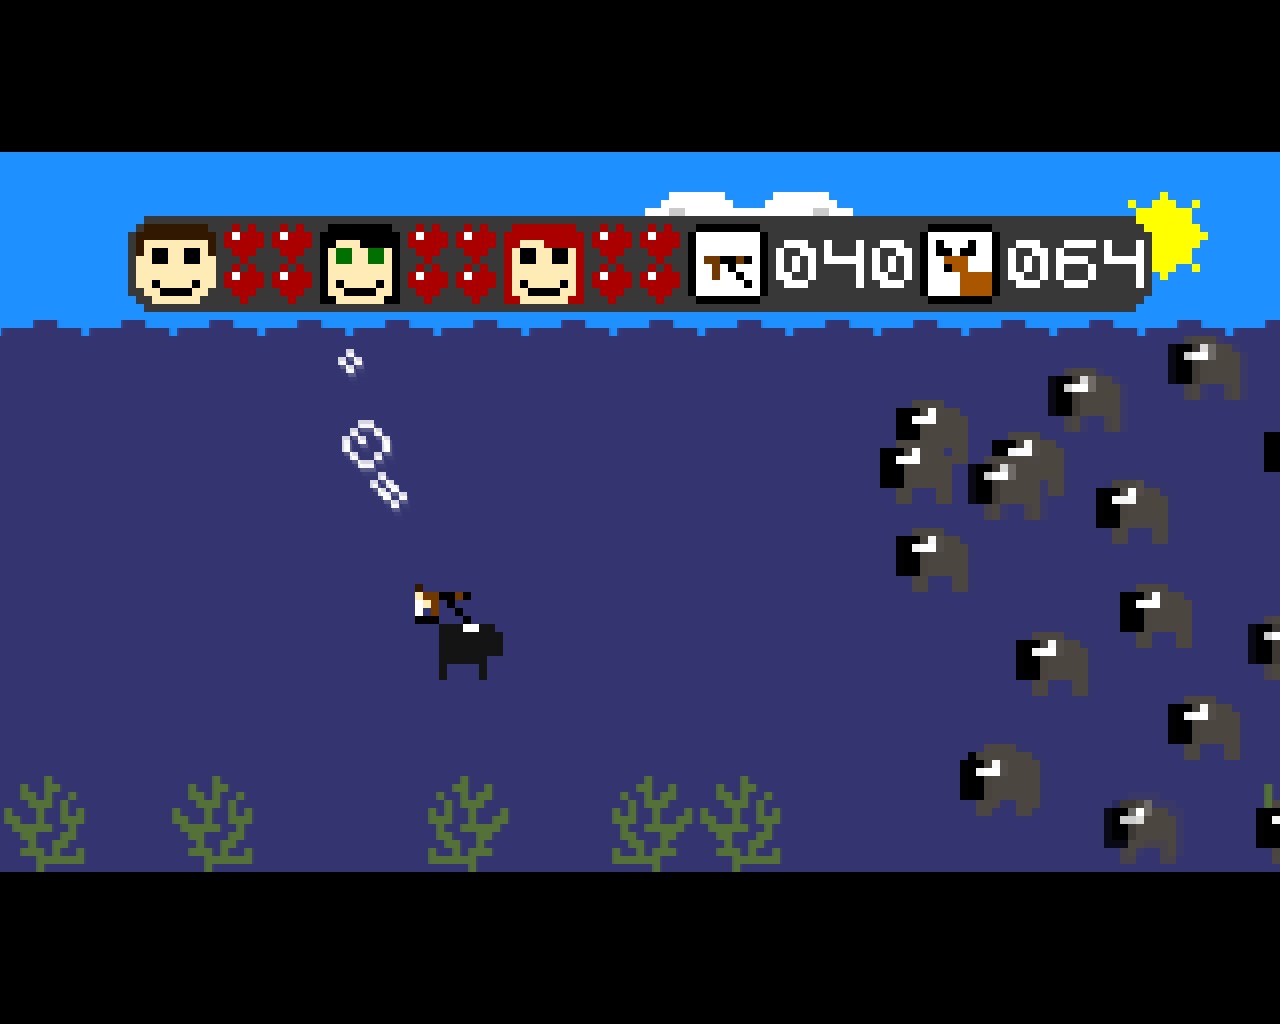
The second river can cause you to forget where you're going and jump in as well. I chose desert once and got that.
Barrelmaker  [author] 23 Aug, 2014 @ 8:27am 
@=T$E= Mistercrit Stay frosty at all times. Be ready just in case you're about to finish and suddenly you fall into the time vortex. The end of the fall is always a dice-roll, so be ready. Even so, I think that the time warp chance is a bit low, so don't expect it every single run.
Mistercrit 23 Aug, 2014 @ 5:08am 
I've gotten so close to finishing!!! I fell down and into the rapids, then my crew died of boulders...
Torchfire 26 Jun, 2014 @ 12:54pm 
Sorry, I might have confused the chest encounter with something I read in another guide. Plus in the 4 times I found the chest so far, I got the uzi in three of them...
Barrelmaker  [author] 26 Jun, 2014 @ 10:36am 
@chakat Torchfire fair point, but we're talking about the wagon, which is where you spend most of the game. Did I say the treasure chest always contains the uzi? No, I just said that it replaces your 999 weapon. Once I found a falcon in there (?).
Torchfire 26 Jun, 2014 @ 10:01am 
Also, the treasure chest doesn't always contain the uzi. Once I found the rainbow wand inside.
Torchfire 26 Jun, 2014 @ 9:36am 
Just a quick correction: The Coal-Fired's Hot Air Gun only fires in an L-shaped arc if it's fired horizontaly. That is because the projectiles travel straight for a certain distance and then curve upward (even in orbit). Firing it straight up will make the shot go in a straight line, while firing it downwards results in it reversing after reaching a certain distance and then reversing.