Team Fortress 2

Team Fortress 2

124 ratings
[MvM] Yet Another Medic Guide
By Swordstone
Stop jamming your medigun up the Heavy's ass and learn to heal the entire team and be a useful Medic. Let's teach you how to be a good all-round Medic, and not just in Two Cities.
   
Award
Favorite
Favorited
Unfavorite
Introduction


In MvM, the Medic plays a strong defensive role, while also providing offensive aid with the occasional crit charge/canteen. His four main jobs are:
  • Ensuring his teammates stay alive through his medigun.
  • Shutting down projectiles from robots, especially giants, using the shield.
  • Buffing teammates with crits/Übercharges so that they can hold their ground and deal more damage.
  • When things go south, reviving teammates so they can get back into action more quickly.

Medic is one of those classes that feels really important in MvM, both while playing it and while having one on the team. But before I go on, let's get the elephants out of the room.

The Medic is NOT some god-tier absolutely necessary class. It is completely possible to beat missions without a Medic. In fact, in Expert missions the consensus is that Medic isn't a core class. Hopefully that takes care of all the diehard Medic fanatics who absolutely MUST have one on every team.

Next up:

The Kritzkrieg is NOT the only medigun in MvM. People consider it the default medigun of MvM, mostly because the periodic damage spike is useful, and because it simply leaves less room for error than the other guns.

However, it's not the only medigun that can be used in MvM. Believe it or not, there are actually an entire three other secondaries the Medic can use!
  • The stock Medi Gun, which provides temporary invincibility with its Übercharge.
  • The Vaccinator, which provides enhanced damage resistance and quick revives.
  • The Quick-Fix, which provides rapid healing and immunity to knockback.
Loadout
There are very few "bad" weapons in the Medic's arsenal; almost every weapon can be practical as long as it's used correctly. Unfortunately, not everyone uses their loadout correctly, so here's some basic tips for getting your weapons together.

A note on primaries: As a Medic, you shouldn't have to pull out your primary weapon too often, unless applying Mad Milk syringes, so this choice is really a matter of personal preference.

Primaries
Item
Name
Description
Syringe Gun
The stock Medic primary. It has no particular downsides, but it has no upsides either. However, if crit boosted, it can put out a respectable amount of damage against tanks. If for whatever odd reason the syringe gun's clip size is upgraded, it literally becomes a minigun of medicine. The same applies to the Blutsauger and the Overdose.
Blutsauger
The Blutsauger is almost identical to the stock Syringe gun, except it has a passive debuff that lowers your natural health regen speed. In exchange, it restores 3 health points for every needle that hits a robot. The health sapping ability can help when low on health and there are easy to hit targets nearby, but the health regen debuff means the Medic can be killed by afterburn.
Crusader's Crossbow
The Crossbow trades damage for utility; syringes from the crossbow heal friendly targets based on how far they travel, up to 100 health per bolt at max distance. The extra range also allows some degree of taking down snipers, but the tiny clip size of only one bolt means you'll be reloading often. Note: The Crossbow DOES have passive reload, so a shot can be fired and it reloads even while using something else.
Overdose
The Overdose is also nearly identical to the stock syringe gun. Its main advantage is that it increases your movement speed based on Übercharge percentage, up to 10% at max charge. Its downside is 10% less damage output.


Secondaries (Mediguns)
Item
Name
Description
Medi Gun
The stock Medi Gun, possibly the least commonly used outside of absolute newbies to the gamemode, is actually a somewhat viable option in MvM. The stock Übercharge can help in the face of tons of heavies/soldiers, and with canteen sharing, it basically becomes a Kritzkrieg but with Übercharges instead. Crit canteens are $100, while Über canteens are $75, however, so keep in mind the stock Medi Gun is more expensive in the long run. In a pinch, two or even three patients can be Übercharged at the same time, but this drains the charge meter much more quickly.
Kritzkrieg
The Kritzkrieg. It's quite possibly the single most commonly used medigun in MvM. It boasts a 25% charge speed increase over the stock Medi Gun, and its Übercharge provides up to 14 seconds of guaranteed crits, which can absolutely tear through giants and tanks. However, its Übercharge leaves the Medic vulnerable, and only one person can be Übered at a time.
Quick-Fix
The Quick-Fix makes the Medic focus on actually being a medic, with a quick shield build rate and faster heal rate in the first few waves. Its knockback reduction also helps on waves with hordes of FaN Scouts/Liberty Launcher Soldiers. However, its Übercharge doesn't provide invulnerability, and can leave you open to backstabs and other instakills.
Vaccinator
The Vaccinator is a useful defensive tool. It has three separate resistances that can be toggled between, and thus three separate Über types. Its Übercharge bar is split into four segments of 25%, and since Übercharges increase revive speed dramatically, it allows for quick revives. During normal healing, the Medic is healed for correctly matched damage his patient takes, and any crits of the matched resistance are passively cancelled out. Since waves of robots are often composed of only one damage type, the single resistance Über meshes well with MvM. However, the Übercharges only provide a 75% damage resistance against one type of damage, leaving the Medic and his patient wide open to the other two types of damage, as well as backstabs and other instakills.


Melees
Item
Name
Description
Bonesaw & Solemn Vow
There's really no reason to use these melees over the other options. The stock Bonesaw has the indirect downside of not being the Übersaw, and the Solemn Vow's only upside, which is seeing enemy health, is already provided by default in MvM.
Übersaw
The Übersaw is pretty much the default melee for MvM. It allows you to gain 25% Übercharge for every hit it lands, which works very well with any medigun, especially the Kritzkrieg and Vaccinator. With the Kritzkrieg, unaware giants and sentry busters can be farmed for free hits, allowing teammates unlimited crits. With the Vaccinator, a single hit gives one, ready-to-use Übercharge, allowing for a quick revive or just to enhance defence. However, it does swing 20% slower than a normal bonesaw, and hitting an enemy to gain Übercharge means exposing yourself to danger. Caution should be used when farming Über; remember to exploit aggro and make sure you're not the target.
Vita-Saw
The Vita-Saw's main benefit is that it retains up to 20% Übercharge on death. However, in practice this 20% saves can often be just as easily regained by a quick hit with the Übersaw. In addition, the -10 health on wearer means you're only easier for the bots to kill. Not really recommended for MvM.
Amputator
The Amputator is seldom used in MvM. The extra +3 health regen means you won't be dying of afterburn any time soon, and its main drawback of -20% damage penalty shouldn't matter much, since you shouldn't pull out your melee too often unless you're farming Über with the Übersaw. However, while its healing taunt can be useful to heal multiple teammates at the same time, it leaves you wide open to attack, and in practice it's just faster to heal them normally.
Upgrades
Now that you've got your loadout set to go, let's talk upgrades.

Projectile Shield
In any mission, this should be the very first upgrade you buy. The shield is one of the Medic's major new mechanics from the Two Cities update, and it should be utilized to its full potential. It also functions as a weapon, dealing some decent damage too, so don't be afraid to run up to robots and vaporize them yourself. Only one point in the shield makes it smaller and less extensive horizontally. Both points in the upgrade means the shield covers your entire field of view.

Healing Mastery
This should be the second upgrade you get as a Medic. Faster heal rate is obviously desirable for many reasons, but it also means you revive faster. This is a must have, especially while using the Vaccinator, which has a slower overheal build rate by default.

Overheal Expert
This upgrade is pretty useful for keeping teammates topped up and fighting at full potential. At max upgrade level, this upgrade keeps your teammates overhealed for much longer, with a much, much slower overheal decay rate, meaning you don't have to top them up so much. It should be noted that this upgrade is substantially more useful while using the stock Medi Gun or Kritzkrieg, as they build overheal quickly compared to the Vaccinator, and they grant more overheal than the Quick-Fix.

--------------------------

Upgrades branch out from this point on. Make calls depending on the upcoming wave composition, and upgrade accordingly. In no particular order:

Crit Resistance
This resistance is quite possibly the most important resistance to have. The full upgrade only costs $450, and easily means the difference between getting killed by one stray crocket and tanking a direct hit. If the upcoming wave has masses of crits/minicrits, get this.

Übercharge Duration
When you have money to spare, this upgrade is really nice to have. It extends your Übercharge from 8 seconds to 14 seconds at max upgrade, which means you get Über for your charge. This is ideal for every medigun, especially the stock Medi Gun and the Kritzkrieg.

Mad Milk Syringes
This upgrade allows you to apply Mad Milk to any robots hit by your syringes, with 1 seconds of milk for every syringe hit, up to a maximum of 4 seconds. It's helpful if there are multiple giants and you have no Scout/he rarely milks. However, keep in mind any time you're applying Mad Milk syringes is time you're not healing your team. Note: This upgrade does not work for the Crusader's Crossbow.

Canteen Sharing
This upgrade can be really great to have or it can be a small convenience, depending on which gun you're using. For the Quick-Fix or Vaccinator, Crit canteens help make up the lost damage, while for the Kritzkrieg and Medi Gun, Über and Crit canteens, respectively, help round off the mediguns and give nice buffs in a pinch.

--------------------------

Notice how Übercharge Rate isn't on the list. Don't bother buying it, it's a rubbish upgrade unless you're absolutely rich in the last wave. What Übercharge Rate tries to do, proper use of an Übersaw does much better.
Strategy


The main Medic strategy is as simple as healing your teammates, shielding damage, and reviving when necessary. Of course, in practice it becomes much more nuanced than that. Here are a few tips to keep in mind whenever playing Medic in MvM.


  • HEAL EVERYONE. This one gets all the emphasis because it's literally the reason Medic even exists. This means stop only healing your pocket Heavy or Soldier and learn to heal everyone else on the team. See the Scout retreating from fire? Give him a quick buff with the medigun to get him back on his feet. Hear a Sentry Buster's about to come? Pay special attention to the Engi and make sure he doesn't die while hauling his sentry, especially if he has the Rescue Ranger's minicrit debuff. Hell, even if the Sniper's calling for you, go out of your way to spare him a crossbow shot or two.

    Something else to add: By healing more than one or two people on the team, you build your shield much faster. If you keep pocketing the same person, you might get a shield up every minute or two. By healing everyone on your team and topping up everyone's overheal, you boost your shield charge rate substantially and can pop out a shield every 20 seconds or so.

  • Know your limits. The shield is only useful for so much; it does actually take some time to kill robots instead of vaporizing them instantly, so if you run right through a crowd of Soldiers expecting them all to die, you're going to explode. If you see someone dead on the other side of the map, realize that they might respawn before you even make it to them, wasting your time in the process.

    In the same vein, if you see someone die, but there's a horde of robots between you and their Reanimator, don't revive them unless you absolutely know you can get out safely. A dead Soldier is better than a dead Soldier and a dead Medic.

  • Use the shield correctly. The shield is both a weapon and a defence, and if you're only using it one way you're using it wrong. It's entirely possible to shield your teammates from enemy fire while at the same time being in the sweet spot where your shield can damage them. This applies to giants too; in practice, there's a very fine line where you can damage a giant and block their fire at the same time. It takes practice to master, but a general rule is that if the front half of their weapon is past your shield, you're too close.

    While shielding, you want to stay as close to the bots as possible without putting yourself in danger. By staying close to the bots, you make it easier for your shield to damage them and you allow your teammates to safely get closer to the bots and benefit from damage rampup.

  • Revive people. This is much easier with the Vaccinator usually, but revive everyone you can. If the Engi just died and a Sentry Buster's on the way, revive him so he can make sure his sentry doesn't go down. If your Demoman is dead and there are Medic bots on the way, prioritize reviving him so they can be taken down.

    Really, the order in which you revive comes down to the situation and common sense. The only class who should be revived first in every case is another Medic (assuming you have two Medics for whatever reason); the second Medic can make reviving everyone else faster.

    Keep in mind that revives take longer or shorter depending on the revivee's class and how often he's been dying recently. A Heavy will take the longest to revive, while Scouts, Engineers, and Spies revive fairly quickly.

  • Stay conscious of the ♥♥♥♥♥♥♥ Sentry Busters. I've died countless times to careless Engis who detonate their Sentry Busters smack in the middle of our wall. When you know a Sentry Buster is coming along, make sure to stay clear of it, and stay wary of it even when it's out of sight until it's exploded for sure.

    Furthermore, if you can see that a Sentry Buster will almost definitely kill a teammate, get ready to revive him as soon as possible. If possible, you can try the instant revive glitch by aiming just over their head while healing them before they die.

  • By extension, stay aware of everything.
    • Glance at the bomb compass every once in a while. If you're on the front lines, but you see the compass is pointing behind you and the icon shows the bomb's being carried, you should go check on the bomb and make sure a Scout isn't making a stealth bomb capture (it happens all the damn time.)
    • Consider the possibility of Spies all the time, even if the HUD icon hasn't showed up yet. Spies are only announced when one is spotted or killed, so it's entirely possible for you to get stabbed before they are announced to you. The only time you're safe from them is right after it's announced that they have all been killed, or on waves with no Spies at all.
    • Pay attention to where Snipers are on the map. If you see a Sniper across the map, call him out to your team and try to stay out of his sightline until he's dead. On the flipside, nearby Sniper bots can make for excellent Übersaw targets, as it takes them 3-4 seconds to actually pull out their melee.

  • Use your tools to their fullest. If you have an Übersaw, use it frequently, as the extra Über can help dramatically while using any medigun. However, be cautious to not get too aggressive and overextend, as you're an easily killed target. If you're not sure you can Übersaw and get out alive, you can use an Über canteen to protect yourself while farming all 4 hits off a giant.

  • Use your Übercharges frequently and appropriately.
    • If using the Kritzkrieg, pop the crits on a teammate as often as possibly while maximizing effectiveness by ensuring there are multiple targets to hit with the crits. It's better to wait a few seconds for giants to spawn than to use the Kritz charge on a group of normal Pyros.
    • If using the Vaccinator, you should always pop an Über while reviving someone. When doing this, remain conscious of the damage types surrounding you, and switch resistances accordingly before you Über to ensure you're not killed while reviving your teammate. Vaccinator resistances can't be changed in the middle of an Übercharge, so make sure you have the right one selected. Vaccinator Übers aren't just for reviving; they can serve as a quick defensive buff in a pinch.
    • If using the Quick-Fix, pop the Über whenever you need a shield immediately or if you or your pocket are low on health. Remember the Quick-Fix Über overheals you as well as your patient, so you can use it as a last-ditch effort to keep yourself alive as well.
    • If using the stock Medi Gun, use your Übercharge when you need to get up in a giant's face and deal some point-blank Pyro/Heavy damage. Most giants will go down from concentrated fire by the time the Übercharge is over. The stock Übercharge is also useful against instakills like Spies and Sentry Busters; if you know for certain that your Engineer or Heavy will get killed by an imminent Sentry Buster explosion, Über them to save their hides. They'll both love you for it.

  • Above all, keep yourself alive. You're not doing anyone any favors by kamikaze-reviving the Scout. By making sure you stay alive, you make sure everyone else stays alive. If there are hordes of projectile classes coming and shielding isn't an option, take cover and heal your teammates from around a corner until the shield is replenished. Being careless with the shield can lead to you being flanked and killed as well; if you're not confident in your ability to use the shield correctly, you can at least use it for defense and avoid getting too close to bots.
Important Extra Info
There are other, more situational things you need to keep in mind while playing Medic.

  • Pay special attention to the Engi when Sentry Busters are announced. If he dies during this period, make sure to revive him as his sentry or dispenser could go down.

  • If you have a Spy on your team, make sure to top off his overheal whenever possible. This allows him to make more stabs and increases his survivability.

  • If you know the Scout has a pretty high overheal from cash and you have some level of Overheal Expert, heal him for a second or two and it will lower his overheal decay rate from normal to whatever your Overheal Expert upgrade is at.

  • If you buy Mad Milk Syringes, make sure to use it on giants especially. Mad Milk is the most helpful when applies to giants, though keep in mind the syringes won't slow down robots like normal upgraded Mad Milk. Additionally, it takes 4 needle hits to apply the maximum Mad Milk duration to a robot, which is 4 seconds.

  • If using Canteen Sharing with crit canteens on a tank, first check if your patient has his own crit canteens. If he does, look for another Soldier, Demo, or Pyro to crit. If there are no other targets, try to coordinate with him so that your canteens get used first; canteens with Canteen Sharing are cheaper, and this way it's more cost-effective.

  • If you spot a Spy bot, don't be afraid to pop your shield to get rid of him. The shield is a great way to get rid of Spies in general, since they vaporize as quickly as Scouts do. If you don't have a shield ready and are good with your saw, you can always melee a lone Spy bot with one or two hits, however be careful that you don't get stabbed in the process (which is a lot more difficult than it sounds.)

  • Know your maps. While playing on a map, learn where the health packs are and where escape routes are in case you need to retreat. There's almost always more than one way to get to a given point; remember every way to get somewhere just in case one path is full of robots.

  • Even if you're not using the Kritzkrieg, you can always switch to it quickly during setup time to give the Demoman his coveted crit stickies. After the stickies are laid, you can switch back to whatever you were using.

  • Don't be afraid to bust out the Übersaw and try to get free hits off normal robots. If it's a robot you know probably won't kill you, like a pair of normal Scouts, run in and try to get some hits on them as they drop. Just make sure you don't get killed in the process.

  • It's entirely feasible to switch mediguns mid-wave. If you're using the Quick-Fix and a tank's taking too long to take down, don't be afraid to switch to the Kritzkrieg quickly to give the extra damage needed.

  • If using Canteen Sharing, try to only use it at max upgrade. It increases the canteen duration from 5 all the way to 8 seconds, and with a 30% price reduction on canteens with all points in the upgrade, the money saved can be useful in the long run.

  • For any medigun, using an Übercharge speeds up revives immensely. This is most apparent in the Vaccinator, which has four separate Über bars allowing for four quick revives.

  • While using the Übersaw, try to put a point in movement speed after your main upgrades. It allows you to keep pace with running Sentry Busters and get a full Übercharge off them.

  • In any form of TF2, MvM included, it's always better to pop your Übercharge prematurely than die and let it go to waste. If you find yourself cornered with nowhere to go, pop whatever Über you have; it increases your chances of getting out alive, and the last second or so of the Übercharge might still be useful.

  • When using the Quick-Fix and a Heavy is getting ready to bodyblock a giant Scout, make sure to focus the heals on him so that he doesn't get knocked away from his post, especially against giant Force-A-Nature Scouts.

  • While using the Kritzkrieg against a horde, you should use your crit charge on explosive damage classes like the Demoman and the Soldier, with the Pyro as a second option if neither are available. If up against giants, it's usually better to crit the Heavy. If you hate the people you're playing with, remember to always crit the Scout.

  • When using the Vaccinator, keep in mind the passive crit negation. If you're up against a giant crit Soldier, you can switch to blast resistance and completely cancel out the critical damage without having to Über. Likewise for a giant crit Heavy.

  • If you know your Engi is using the Rescue Ranger and likes to do quick saves from the Sentry Buster, try not to pop your shield around his sentry. The shield blocks the Rescue Ranger's remote pickup functionality for whatever reason, and it's possible his sentry can go down because you blocked his pickup.

  • If a tank is really coming down to the wire near the end of the wave, use everything you've got on it, especially crit canteens. Your syringe gun, your shield - use any method of damaging the tank possible as a last resort.

  • Remember, people will always try to find a scapegoat. If you're using a medigun other than the Kritzkrieg and your team loses for whatever reason, first consider if you're just a crap medic. If you're sure that's not the reason, remind your teammates of their own shortcomings, instead of just blaming the loss on the stock Medi Gun/Quick-Fix/Vaccinator. Just keep in mind that if everywhere you go smells like ♥♥♥♥, you might want to check your own shoes first.
Credits
The Official TF2 Wiki for item images
All the guys at the Two Cities Veterans group for being awesome teammates and giving me the experience I needed to write this guide
CrudeCuttlefish[crudecuttlefish.deviantart.com] for the Sentry Buster picture
Whoever made that one Medic shielding picture
/u/TMWHerrJon, /u/Tf2McRsWow, and Pluto for critiquing the guide and giving me some tips for it.
itsgalf for the extra tips concerning overheal decay rate and shield charge rate boosting.

Thanks for reading, and I hope this guide proves useful to many future MvM Medics!

If you have anything that you think can contribute to the guide, let me know in the comments, and if I think it's a valid point I'll add it in!
50 Comments
Silvius Frans 30 Jan @ 10:37pm 
Typo on the syringe gun it’s a copy and paste of your medigun summary
Amicdict 23 Sep, 2021 @ 4:43am 
My response [pastebin.com].

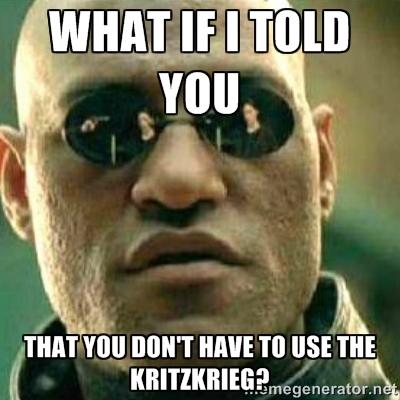
It's feels like an average guide; though it does not fall into the "Kritz good, other mediguns bad" and "Medic required!" traps.
Dr. Dispenser 29 Jun, 2019 @ 5:29pm 
Medic is actually able to perform demo’s job somewhat well, using the shield to incinerate Über Medics before they pop Über.
Pacca 25 Sep, 2018 @ 10:37pm 
This was a great read! I knew most of it already, but some of the more obscure info will definitely be good to know :weasel:
harry potter 1 Apr, 2015 @ 10:33pm 
this is a good guide
medic is a good erm how would i say this in nice words
i guess level lower er as he can revive and heal teammates alot so more room for error can be made.
perfect for starting out mvm newbies who die constantly and make several mistakes
✿✿ Chonky Mlem ✿✿ 1 Apr, 2015 @ 8:27pm 
Stock medi gun is the best for all MvM enough said:jarate:
ded 1 Apr, 2015 @ 5:52pm 
Just my 2 cents
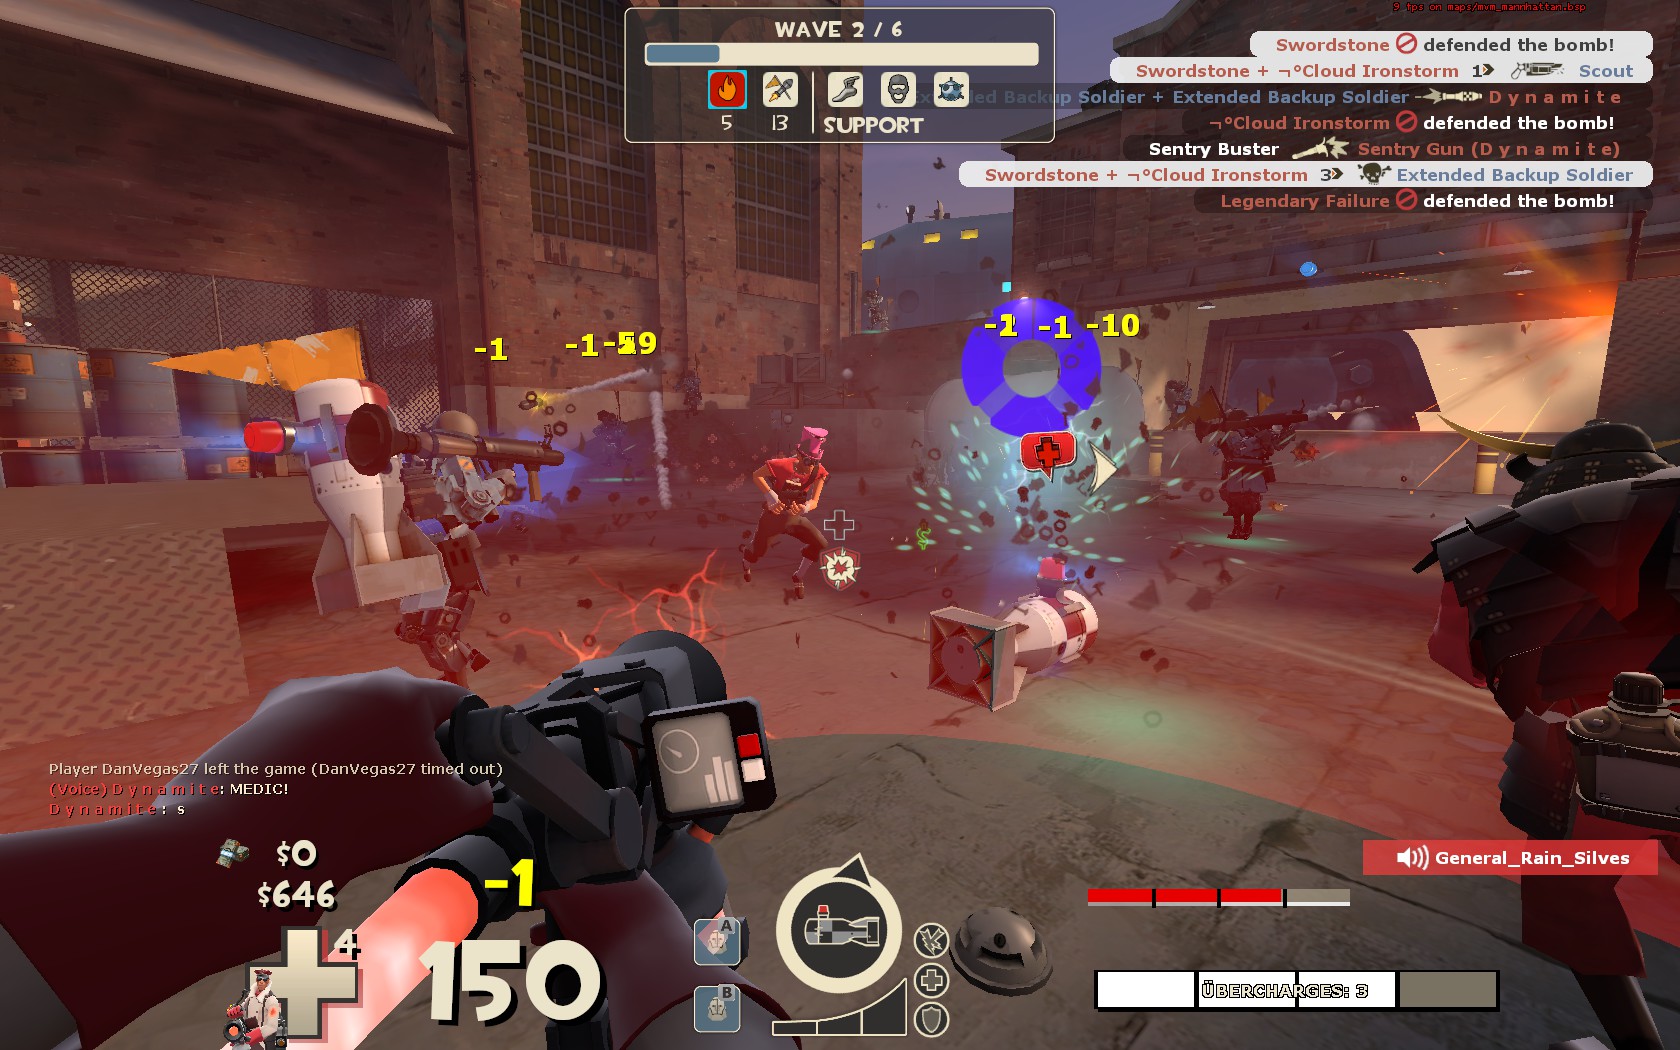
Simply know your surroundings, heal everyone, shield 24/7, ubersaw if possible, start from shield upgrade then split between overheal mastery and healing mastery then to anything else of the medigun while getting crit resistances, maybe other resistances if you really want.

Primary weapon from my perspective shouldn't even be used at all :L, too busy shoving beams up team mates asses.

Idk... Kritzkrieg damage output seems to out weigh every other medi gun, but if you manage to pull through with another medi gun, i would suggest to do it with a team u can actually trust to carry through with ease.

Personally I've found that all other resistances besides crits are useless near the beginning if you max jump height, jumping around while behind team mates reduces plenty of damage, and even then shield should be covering u most of the time.
Someone in Particular 1 Apr, 2015 @ 1:45pm 
Sorry, I don't have the time to read through all the pages of comments, so if this has already been said, please disregard it;

I, personally, use the quick-fix as a way to make sure your teamates cannot stay dead for long, saving them the credits they could be burning to respawn quickly. This is especially true when healing is maxed, as an ubercharge allows you to ignore almost infinite damage (save for backstabs) and revive any dead teammates in a heartbeat
Swordstone  [author] 1 Apr, 2015 @ 9:06am 
Yep, that'll get rid of them.
Agenda 1 Apr, 2015 @ 9:04am 
Maybe it is because I switched class...