The Last Remnant

The Last Remnant

39 ratings
The Arts
By Zloth
I quick overview of the various Arts (a.k.a. skill lists) of the Last Remnant
   
Award
Favorite
Favorited
Unfavorite
Mystic Arts
Mystic Arts are the spells of the game. You put your AP points in and a spell comes out.
Invocations
Pretty much your standard attack spells. Rush will get the list early on and many characters can learn it. Only Permafrost and Wildfire can be used outside of a deadlock.

Spark

This does a little damage to a single enemy. You’ll occasionally get a “shocked” effect but it doesn’t seem to benefit you much. I turn this off once I get Wind Shear going. (Well, I *should* turn it off. It's prettier than Wind Shear so I'll keep it around if I'm not doing anything dangerous.)

Wind Shear
This does somewhat reasonable damage to a single enemy. For hybrid characters that can do decent combat arts, you’ll probably want to turn this off. Pure spell users might be better off keeping this one turned on, though.

Double Time

What the… what’s this buff doing in my attack spell list!? Well, there it is all right, and it’s standing between your character and some really good spells. Use it as much as you can until you get Caustic Blast. I do like to keep it on afterward, though, because characters will often go to it in the later game when you issue a heal command and all the healing gets done before the character’s turn comes up. The speed buff mostly seems to help when the game is determining interference/interception as a battle turn starts (so a sped up union might be able to attack an enemy union on the other side of the field where a slow union will get intercepted by another enemy union before engaging).

Caustic Blast

Yeah, now we’re talking! This spell a rare type of attack called an “area” attack. That means the
damage isn’t confined to just one union. You may end up hitting lots of enemies in lots of unions - or you might end up hitting just one or two enemies. In general, though, it does a fairly nice job of hurting the baddies. Also, if they get an acid burn, the enemies won’t be able to defend as well. (Amazing how well those acid pools work against birds flying above the pit of acid! I guess it’s the fumes?)

Permafrost
This one will hit everyone in a union with a strong frost attack. Occasionally it will freeze an enemy which means they will do less damage to you and can’t defend themselves as well. Definitely a good attack power.

Wildfire

Much like Permafrost, really, only it does more damage and can catch enemies on fire. Burning enemies do not take extra damage every round in this game, though. Instead, they always act last in a turn and can’t defend themselves as well.

Grenade Impact

Another big attack spell only it does even more damage. It can also catch enemies on fire.
Remedies
Mystics aren’t all about dishing out damage - there’s healing, too! This is a really nice heal list, too, in that it doesn’t cost money and won’t run out of components on you in the middle of a fight. However, it takes quite some time to get into the good spells and even longer to get anything that will raise characters from the dead. This is a game where unions get crushed in one round pretty often so, while this is an excellent list, don’t think that you’re going to be able to rely on it exclusively.

Restore

Heals just one character but does a pretty good job of it in the early game. You’ll probably want to turn it off once you get Revitalize.

Refresh

This fixes up most debuffs (burning, silenced, etc.) on a single character. It won’t work on stat down debuffs. Of course, if the character with Refresh is silenced then the spell can’t be cast. It’s still handy enough to keep the power turned on but not by much.

Rejuvenate

This is like refresh only it acts on “stat down” debuffs (speed down, defense down, etc.) and cures the entire union instead of just one character. The stat down debuffs are a bit rare, though, making it harder to advance beyond Rejuvenate to Revitalize. In the early game, you’ll be using Restore so much that it will still push the list advancement along but characters that learn this art late are going to have a rough time advancing unless you go in and gimp all your healers.

Revitalize

Revitalize is an awesome healing power. In most circumstances, it will fully heal whatever union it’s used on. If you’ve got two healers in a union with this power and that union is asked to heal, they will typically heal the union requested then heal themselves as well!

Support

This essentially does three stat buffs increasing a union’s speed, strength, and intelligence by 15%. It’s not critical but it’s nice to have. Like Double Time above, healers can switch to doing this when everyone is already healed up.

Kiss of Life

For much of the game, you’ll be pulling back unions from the dead by using Vivication from the Herbs list then Revitalize from this list. Once you get Kiss of Life, you can do both at the same time. It’s quite expensive when it comes to AP but at least it’s there if your herbs run out.

Second Chance

I don’t really get the point of this power. Its effect is pretty much the same as Kiss of Life. It can also act like the Refresh power on a full union. The cost in AP, though, is extremely high. Once you get near the end of the game and action points are generating faster than you can possibly spend them it can be nice just to have a new animation to watch. (Or if you just don’t want Baulson kissing anyone. ;)
Evocations
Evocations are very similar to Invocations. All but the final power can be used at “long range.” The status effects are more useful, too, IMHO.

Mystic Missile

This does a little damage to a single target - much like Spark. Turn it off once the character gets Flash Arrow.

Flash Arrow

Pretty much the same story as Wind Shear in Invocations. Characters with good weapon skills will want to turn it off once Silencer is learned. Those that don’t can turn it off for a little bit but, once Eclipse is learned, probably should get it turned back on.

Silencer
This is where Evocations start to get handy. Silencer not only does decent damage, it will turn off all mystic attacks if it manages to silence your enemy. That makes this spell handy even against single targets at times - though don’t expect much damage from it in that case.

Eclipse

Eclipse is another union attack that does more damage than Silencer but doesn’t give any status effect. It also has a rather long and, IMHO, dull animation. Turn it off once you get Snare Shot on your list.

Snare Shot

Watch it - this is another one of those area attacks just like Caustic Blast on the Invocations. Maybe you’ll get a bunch of enemies, maybe not. This one adds a black out status, though, which can be really handy. An enemy that gets blacked out is done for the rest of the battle turn. It won’t get to attack back and it won’t even build up AP while it’s seeing stars. Quite a few rares & bosses are immune to the effect but not all of them!

Palsy Skein
I don’t know what the name means but it sure does serious damage to everyone in a union. You’ll likely get a personal introduction near at the end of the first half of the game. It also has a paralyze effect that will turn off the targets’ combat arts.
Mystic Mine

This spell is at the top of the Evocation heap. It does massive damage to a union but doesn’t hit the targets with any status effects. No biggy when attacking unions as they will all be dead anyway but it would have been nice to have against the rares and bosses.
Psionics
You probably won’t see this one until about half way through the game. It doesn’t do a lot of damage but it can push the morale bar in your favor. When that bar is pegged to the right, you’ll be doing quite a bit more damage with every attack and you’ll take a lot less, too! As an added bonus, the spells take less AP to cast than the other mystic arts.

Bluff

This does nothing but move the morale bar but it’s still, IMHO, the best first power of any art in the game. It’s a union attack so you’ll get a much better morale boost if you hit a union with a lot of enemies but it’s still worth using even against a single target.

Confuse

This is effectively just like Paralyze Gas in Hexes.

Enrage

This does damage and drops enemy defenses but it also increases their attack strength! I would really rather not buff my enemies, thank you. I turn this one off once I get to Addle.

Addle

This is a lot like Bluff only it does damage and doesn’t affect morale as much.

Maledict

Don’t you just hate those big birds casting curse on your characters? This lets you do the cursing! Unfortunately, most of the enemies that are worth cursing are immune to the power (including the birds). Well, at least it does some damage and doesn’t cost many action points to cast.

Stealth
A union that’s stealthed typically won’t get attacked unless it’s the only union left. Area attacks still hit, of course. This power has some uses in certain situations but those situations aren’t common. As a result, this power tends to stop my advancement in the art. If I do manage to get Mixed Message, I’ll turn this power off and only turn it on again for certain rare monsters. Sometimes I’ll even turn it off before I get Mixed Message and hope the other powers in the art get me to the top of the list!

Mixed Message

This is just like Bluff only it helps morale far more. Hitting a small union with this can take your morale bar from 0 to max. Hitting even a single target with this will give the morale bar a big push!
Hexes
This one is my favorite of the three mystic attack spell lists. It does great damage and dishes out great status effects. It’s harder to find people that know the list, though, and Rush can’t learn it until late in the game. All the attacks hit an entire union and all but Dispirit and Cachexia can be used at long range. The highest level attacks do status effects that can’t be resisted, making them handy even against single target nasties.

Poison Gas

This is a great little starter spell - but then you won’t have anybody at the start of the game that
knows it unless you’re playing through a second time. The damage from the power is weak but it keeps doing damage if the enemy gets poisoned and that damage seems to be based on the unit’s max hit points. Naturally, most of the really huge enemies are immune to poison but it can still do pretty hefty damage against some of the big-but-not-huge enemies.

Paralyze Gas

Damage becomes decent and the spell can turn off all the enemy’s combat arts if the paralyze effect takes hold.

Silent Gas

I don’t think you’ll ever see a game with silence spells as deadly as the ones in Last Remnant! This one will do fine damage and it will turn off the enemy union’s mystic arts for a time if the silence effect works.

Smoke Canister

This is the only dud in the list. Its damage is good but there’s no status effect at all. Once you get Dispirit learned, turn this off.

Dispirit

This one is really handy. Not only does it do great damage, it pushes the morale bar over in your favor. The amount the bar moves will be greater if there are more enemies in the union but, IMHO, it’s worth casting even against a single target.

Bewitch

Bewitch is just like Dispirit only with bigger numbers and enough range that you don’t have to be deadlocked to use it.

Cachexia
I consider this the best spell in the game, barring those crazy Arcane spells. If there are several enemies in the target union, the damage will kill them outright (the same as any other top level mystic attack). Even if the union survives, though, their Action Points will be set back to 0. Almost all special attacks they try in that round won’t work because of insufficient AP. Best of all, nothing can resist this kind of attack if you hit with it.
Wards
This one doesn’t heal or do damage but it sure is handy. It’s another one you probably won’t see until the last half of the game.

Orphic Ward

This puts a barrier up around each character in a union. The next mystic power to hit that character will have no effect. Unfortunately, it isn’t real easy to tell which attacks from monsters count as mystic and which count as physical. Still, this is quite a handy power.

Protection

This is like Orphic Ward only it works against physical attacks instead of mystic attacks. (One of Rush’s special arts acts exactly like this power.)

Decoy

I’ve never been able to use this effectively. It’s supposed to make enemy unions attack the decoyed union (much like a taunt power in an MMO) but I think that only applies to unions that aren’t deadlocked. I haven’t given the spell much chance, though. I turn it off soon after I get it and let the lower level powers push the list up to Cheer.

Cheer

This provides a heck of a morale boost, especially if cast on a 5 character union!

Band of Champions

Boosts every stat by 15%. Note that these boosts are not cumulative. If you cast Double Time then cast Band of Champions, you’ll notice that “+SPD” won’t show up. The buff is certainly nice to have but, most of the time, I would rather have a Cheer boost morale.
Item Arts
Item arts look like the mystics but they work under a very different system. Instead of simply using action points, they use components from your inventory. Sometimes those components are cheap and sometimes they get quite expensive. As you get better at a given ability, the number of components you will need becomes smaller. One big pain, though, is that you’ll get no indication when you run out of a ingredient. The options to use it will simply vanish. If you’re using these arts, you’ll need to make a habit of stopping by the stores to keep your stock up.

Every item list has one store that will sell every single component there is for that art. Those components won’t all be there at the start of the game but they do unlock eventually. Given how trivial it is to go from town to town in this game, you’ll want to learn where those shops are for your “shopping sprees.”

Item powers also can’t be stopped very easily. They aren’t counted as mystic or combat so silence and paralyze won’t stop any of these powers. With zero AP cost, they are all going to be available right at the start of a battle - even an Art Sap won’t stop them!

If you play the game through a second time using the “new game plus” option, you’ll start the game with a huge wad of cash. Many of these arts get too expensive to use in your first playthrough but, if you’re playing a plus game, you’ll have the money to burn!
Herbs
This is a pretty critical art simply because it gets the ability to raise dead unions early on. The components are very cheap and easy to find. Athlum has a store that eventually sells every component but most of the basics can be found in every town.

Restorative Herb

This is a single target, low power healing ability. Unlike Restore in the Remedies list, though, you might want to keep this turned on for characters that don’t have any other healing. It doesn’t burn any AP and the ingredients are super cheap so why not? (Assuming you’ve been keeping your stocks up, of course. You don’t want to use up all your party’s relaxing herb and turn off the Vivification ability!)

Vivification Herb

This is the ability that makes the whole list worth it. Toss this on a union that’s gone down and they stand right back up again! The more advanced you are at the power, the more health the union will get back. The union will probably still need some healing after waking up, though. If you can pair up a Herb user with a Remedies user, the Remedies user can follow up with a Revitalize and the dead union will be at full health!

Vivification Herb, Eye Cream, and Revitalize

Life Powder

Life Powder a pretty nice little union-heal power as long as it keeps up with your party’s stats. Even Life Powder V will eventually pale compared to what the Remedies list can do but even a modest heal is better than nothing at all. It’s just a little sad to see it get used then have a Remedies user fire off Revitalize right after - a power that would have healed the whole union anyway.

Restorative Tincture

This is just like Restorative Herb only it cures more hit points of damage. Unfortunately, by the time you’re likely to get this, you’ll probably have characters using Remedies that leave it in the dust and don’t hurt your wallet. Unless you’re playing a plus game, you probably want to turn this power off as soon as you get it.

Vivification Tincture

This heals unions better than Vivification Herb but they will still need a big heal afterward, so what’s the point? The only difference between doing a Vivification Herb + Revitalize and doing a Vivification Tincture + Revitalize is that the latter costs a lot more. This is another ability for the new game plus users only, or perhaps in the very late game when even Revitalize could sometimes use some help.

Frost Tincture

Don’t expect to see this outside of a “plus” playthrough. It’s a devastating attack but very expensive. If you are playing a plus game, you’ll find it quite easy to get this power as the monster’s increased attack power means a lot more of your unions will be needing vivification!
Potions
This is my least favorite art in the whole game. The buffs they give just aren’t that strong (15%) and you can’t do them multiple times to get a cumulative effect. The first three powers do give a boost to your action points so they can be nice to use if you’re trying to learn high AP powers. Personally, though, I just turn the whole art off. You can buy all the components in Celapaleis.
Lotions
This is another healing list. It’s a lot more expensive than Herbs but it’s better at curing status ailments. You probably won’t see anyone with this art until roughly mid-game. All the components are available in Elysion.

Antivenin

This simply cures poison for everyone in the union. Unfortunately, it tends to act as a wall to advancement for characters that are just starting to learn the art. Very few enemies can poison entire unions and Remedies has a spell that can cure a single individual so it’s tricky to get the cure in before anyone else does.

Eye Cream

This is exactly like Life Powder in the Herbs list only it costs more and has a weird name. (You’re healing people by putting cream on their eyes!?) By the time you get characters with this ability you should be able to afford it but don’t make it a commonly used power unless you’re playing a plus game.

Throat Salve

The ability to cure a whole union of the silence status while being silenced isn’t needed often but, when your best healing unions get their Remedies shut down, this ability will keep the battle going without having to wait for your healers to get killed and revived. Make sure somebody in your party has this power in the last half of the game! It’s a bit pricey but it doesn’t get used much so it won’t cost you much.

Invigorating Cream

This cream is just like Throat Salve but it cures paralyzed unions. Yes, Remedies can do this as well but this cures an entire union instead of just one character at a time. It’s expensive but, again, it doesn’t end up getting used all that often so it shouldn’t set you back too much over the course of a game.

Hartshorn

This is a lot like Vivification Tincture but it can heal up to 70% of hit points healed by the time you get up to Hartshorn 5. That is actually pretty nice. Unfortunately, the components are rather expensive. It might be worth it to have one or two characters with the power but I wouldn’t go beyond that. If you’re playing a plus game, though, you don’t need the money but you do need all the reviving you can get your rich little hands on!

Cyclone Cream
Another healer attack spell! This does even more damage than Frost Tincture but the status effect isn’t quite as good. Non-plus users might even see Gaou get to use it. It costs well over 2000g per shot when it’s first learned, though, so they probably won’t be able to afford to max it out.
Explosives
These are much like Hexes doing damage and causing status effects. They can’t ever be used at long range, however, and they cost a bundle. If you’re running in plus mode, this art suddenly becomes not just viable but pretty deadly! Try to give the skill to Rush in your first play-through so he can have it at the start of your next. As this is basically plus-mode-only, I'll skip the details. All components can be bought in Balterossa.
Traps
This is another plus mode favorite but it’s cheap enough to be of some use to normal mode players. It’s rough to train up but some characters (like Allan) come with some nice training right off the bat. All components can be bought in Melphina.

Stun Trap

This will black out a single target. The skill is FAST so the chances are good that you’ll get the enemy knocked out before he/she/it attacks you. Most rares/bosses are immune to the effect but the attack is great against the few that aren't!

Land Mine

Land mine does fair damage to a single target though the cost is such that only plus users should pay to use it once Retreat Flare is learned. It also hurts the enemy’s ability to generate AP, which could be handy against some of the rares and bosses. This is the only ability in the list that does any damage.

Retreat Flare

This is a lot like Bluff only it costs money. Anything that can help morale is a good thing in my book, though. The more characters that can do something about bad morale, the better.

Pandora’s Box

Blah. This is mostly just a more expensive Retreat Flare. It adds the curse status but, as I mentioned above, too many enemies are immune to that effect. It’s animation does make for some fun screen shots, at least.

Rousing Flare

This is a lot like Cheer, only expensive in money instead of AP. By the time you get this, though, money really is no object so go ahead and use it.
Shards
Even for new game plus players, this art is pricey! Gravity Tempest will set you back 1500g per shot! Except for Moonlight, these are all area attacks so it’s difficult to judge how many enemies you’ll hit. Moonlight is actually a very strong heal power costing a lot of cash but 0 action points and it works fine even when silenced.
Even if you’re playing a plus game, I would suggest limiting this art to just one or two characters to keep your costs down. Components are only available in Nagapur and you won’t be able to buy enough components to use any of the powers until you unlock the ability to field 18 characters at once (roughly two thirds of the way through the game).
Combat Arts
These are almost all single target attacks and as such tend to work best on smaller unions. There are some that do union or area attacks, though, so you might want to take a look at the the Wikia’s Combat Arts table[lastremnant.wikia.com]. For many characters, you won’t really have a choice about what they wield but you’ll sometimes get to pick between one handed or dual grips. Rush can pick out any weapon he wants and use it. It’s
definitely best to pick one of them early on and stick with it, though. (You can pick a different wield style or simply turn off the combat art you don’t want.)

Something you do need to watch out for when you make that grip choice are weapon arts. When your characters finally upgrade their weapons up near the top of their chain, they will often get a special “weapon art” that does superb damage. However, it will only do it with one grip.
Special Arts
I just mentioned the weapon arts. These are special attacks associated with a high end weapon. To use one, the character will need the weapon and will need to have the required grip leveled up pretty high. They are not as devastating as some of the other special attacks and might not even do as much damage as the top end combat art for the grip but they are still nice to have (and they look cool).

There are also unique attacks that certain leaders have. Rush’s Omnistrike and David’s Gae Bolg are examples of this. The leader has to actually be leading a union to pull this off.

There are three summons you can do in the game. These add a special “guest” union consisting of just your summoned beasty. To use one of these, the owner not only has to be a union leader but the union must also be out of deadlock.

Finally, there are remnant weapon arts, which are a combo of a weapon art and a unique art. You’ll need special weapons to pull these off and most of them require a particular grip, too. Also, the character pulling it off must be a union leader.
Arcana
Eventually you will find one of your commands to do a lot of mystic attacks gets replaced. You’ll see everyone’s attack switch to “Synergy” and a massive attack will hit every enemy on the map! Congratulations, you just discovered your first Arcana Art. These things are devastating and can make a lot of difficult battles into cake walks. Most aren’t so great against a single rare/boss. I’ll leave off how to activate them to keep the spoilers to a minimum. If you want to know then simply look them up on the Wikia site[lastremnant.wikia.com].

These can actually get annoying at times. After all, waltzing through a battle with one of these can mean a lot of missed opportunities to learn new skills. You won’t be able to stop the first one each leader learns but, once you learn it, you can switch it off just like any other art.

All of these are long range so your union doesn’t need to be deadlocked to fire one off.

Blackout

This simply hits all your enemies with a strong attack. There’s a chance for a shock side effect but it’s really nothing compared to the damage dished out.

Whiteout

Just like Blackout only it does frost damage, possibly freezing enemies, and does more damage.

Animalcule

Not only does this do huge damage to all your enemies, it paralyzes them, silences them, blacks them out, and even poisons them! Even a lot of rares/bosses are going to find this one nasty.

Animalcule firing off. Note all the enemy unions listed off to the right.

Rejuvenating Water

This one isn’t an attack at all, it’s a heal! Every union in your entire party recovers a lot of hit points. This is great when it goes off at a time when you've got a lot of hurt unions but it can actually be bad if you've got multiple unions down. This is just a heal, it won’t raise KO’d unions or cure status effects.

Fatal Eclipse

This won’t do any status effects but the damage is higher.

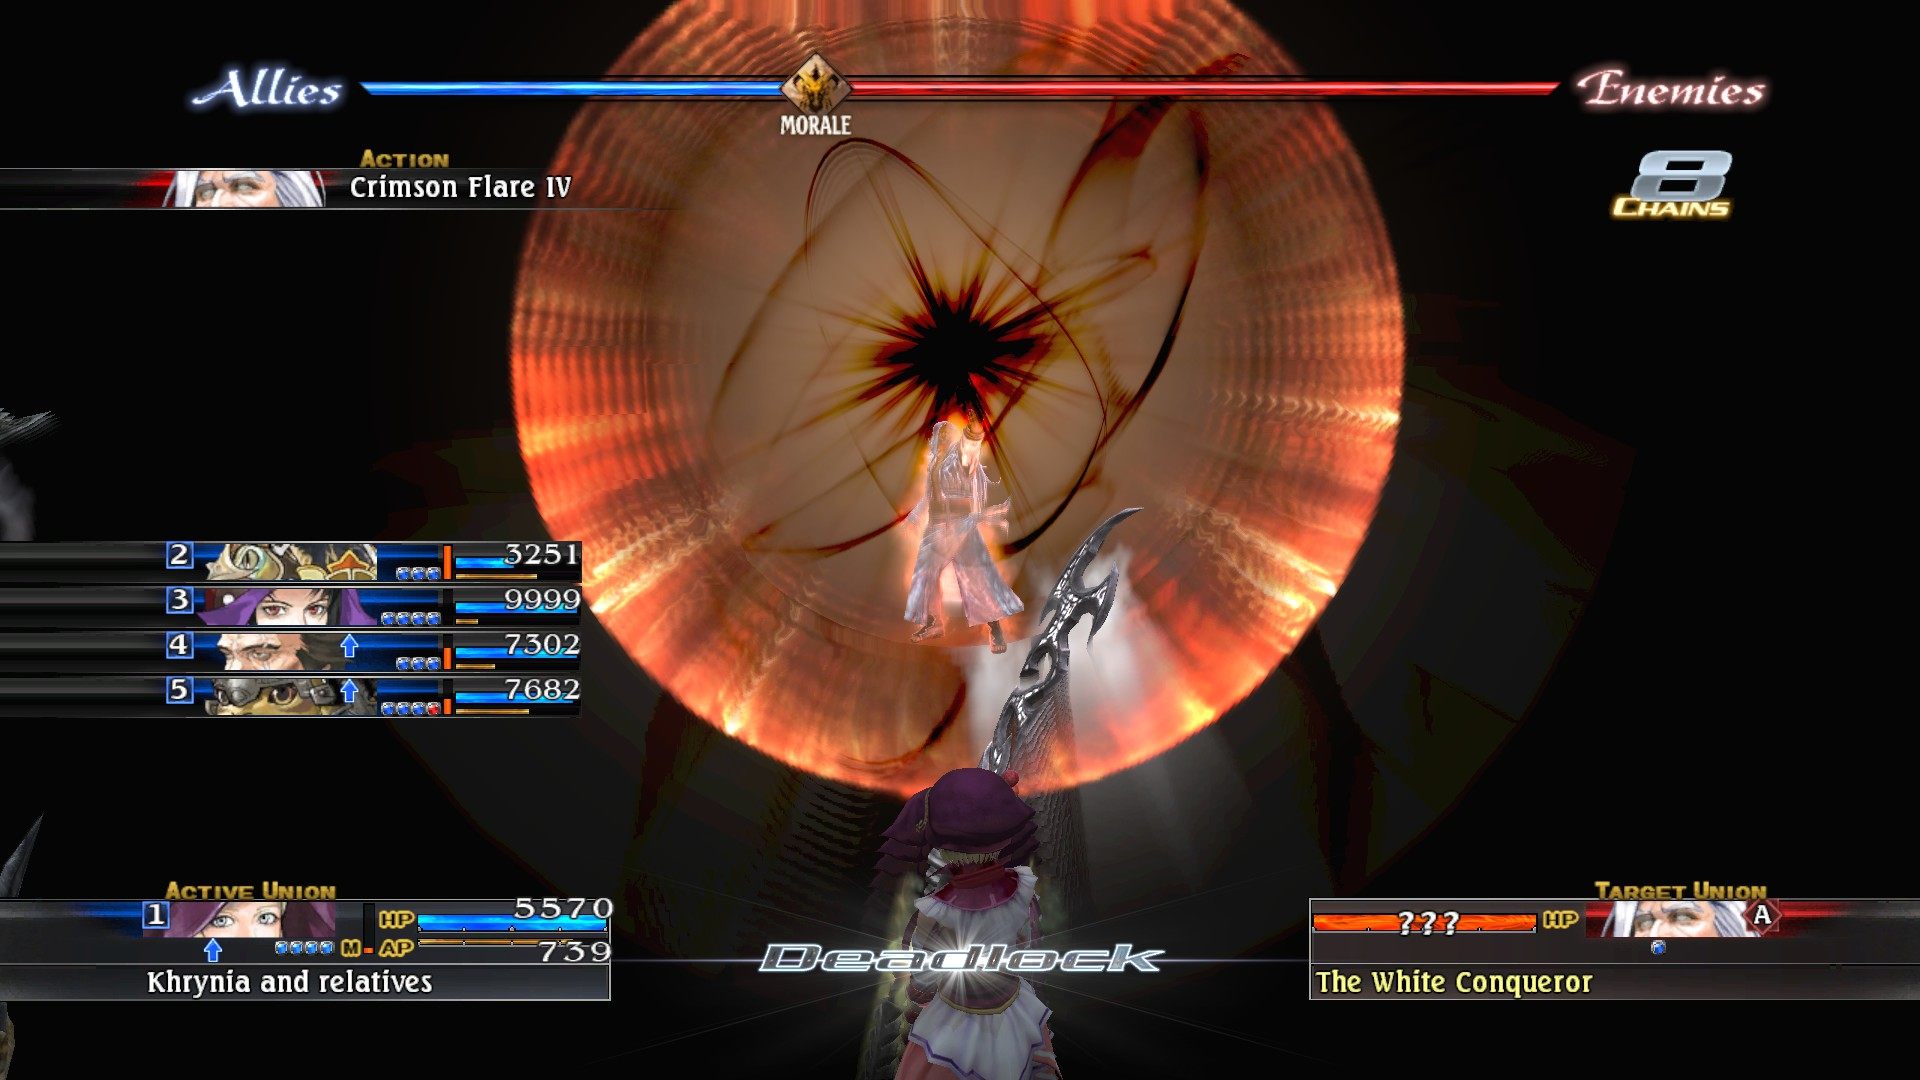
Crimson Flare

Pretty much the same as Fatal Eclipse but it does a bit more damage.None of these are limited to just your unions, of course. You will know fear, you will know pain, and then you will die. Good day! ;)
13 Comments
yarow12 20 Jun, 2020 @ 4:20pm 
In that case, it sounds like it does both but is worded to encompass both scenarios. :|
If two different units have Frozen or Shock, would Refresh cure them both or just one?
Misfiring 19 Jun, 2020 @ 11:30pm 
Refresh will get rid of status ailments that affect the entire union, like Poison, but it will only get rid of status ailments that affect a single person, like Frozen or Shock, on the person that Refresh is cast at.
Zloth  [author] 19 Jun, 2020 @ 6:59pm 
It's been a lot of years but... if something works on a union, how would not not be working on a unit when doing so?
yarow12 19 Jun, 2020 @ 6:46pm 
The game says Refresh works on a unit or unions. Is this an error in the game or the guide?
Misfiring 12 Aug, 2016 @ 1:02am 
Second Chance is really, really powerful in that it is Kiss Of Life, Refresh and Rejuvenate all in one, with the added bonus of being able to get rid of Curse as well. Against a dead union it is functionally same as Kiss of Life, but on a cursed, half dead, crippled union it is the best thing ever.
Azure_Sky 8 Jan, 2016 @ 1:39am 
When I get the arts on Torgal/Caedmon in my 5 man challenge I'll show you the arts :)
Zloth  [author] 7 Jan, 2016 @ 7:13pm 
The first ones were so bad that I've never gotten to see the top two!
Azure_Sky 7 Jan, 2016 @ 7:19am 
Man, you're really letting Potions down tbh, even though the first four arts are bad except when fully trained, the fifth, Def pot (Eva and Def), and the 6th, Flane Bottle (Union flame dmg) are the only ones worth it imho.
geogyf 13 Dec, 2014 @ 9:22am 
I had Pagus as Leader with some other healers and he casted Rejuvenating Water.
It is sometimes OP and sometimes trash depending on the timing.
Zloth  [author] 12 Sep, 2014 @ 4:59pm 
You're welcome!