Adventures of Shuggy

Adventures of Shuggy

65 ratings
Complete Boss Guide Solo Campaign (Adventures of Shuggy)
By That Wun Wabbit
Tips on how to complete all the boss "battles" in the solo main campaign
   
Award
Favorite
Favorited
Unfavorite
Intro
This is a visual guide showing the map of the boss levels.
I show you how to use the map to your advantage during gameplay.
Boss 1 - The Boiler Room

Specialty: Fast-forward time

Strategy:
  • Go counter clockwise around the room.
  • Step on each button and fast forward time until the smaller pressure gauge goes into the red zone. Beware enemies can fall on you, so move up to a nearby ledge as needed.
  • By the time you step on the 4th button, the boss will be defeated.
  • Head to the bottom of the room and collect gems or wait in a safe spot until the clock shows you defeating the boss again.
Boss 2 - The Gallery

Specialty: Shuggy x3

Strategy:
  • This room is set up like a classic pinball machine.
  • Place Shuggys under platforms and send each one at a time until you find a button you want to try.
  • Look for the right button with your Shuggys while the ghost is hiding at the opposite end of the room.
  • If one is left open to attack, quickly switch to it, and hide him under a platform.
Boss 3 - The Graveyard

Specialty: Lifting objects

Strategy:
  • Pick up crosses and place them on ONE staircase at the SAME height on all flat surfaces. The right side works quite well for this.
  • Holding a cross makes you invulnerable to attack (only while holding)
  • Chase the scarecrow clockwise around the stage to cause him to step on a cross.
Boss 4 - The Clocktower

Specialty: Magic Rope

Strategy:
  • Wind up the clock hands to bounce a bomb back in its direction.
  • The fastest way to do this is to wind the rope around both gears and PULL! Go counterclockwise on the right, then clockwise on the left.
  • It takes 2-3 hits each to take them down.
  • Avoid robots by jumping ontop of gears and such. They will exit the screen eventually as shown. Robots and bombs will not spawn when the spawner is defeated!
Special Thanks
...to my friend GuTS for the game key!
Mission Statement
Thank you for reading this guide. Feedback is important - please rate and comment!
If you want more, go to my guides section and “follow”!
I am one of the leading guidewriters on Steam, having written dozens of guides, from troubleshooting to achievement hunting.
I enjoy helping people play games, but I can’t do it alone!

Encourage your friends to write guides…for games!
-Catherine
13 Comments
That Wun Wabbit  [author] 14 May, 2015 @ 8:48am 
lol, yeah that's kinda how it went for me aswell. I end up derping around before I figure out what I'm supposed to be doing. Other than that, these guides I write are just a bunch of formatting, screenshots and text...
14 May, 2015 @ 7:15am 
The crosses should be placed at the same height also be on the same side ... I realize it after chasing the boss for about 10mins,ehhhh
That Wun Wabbit  [author] 19 Nov, 2014 @ 12:23pm 
@j.w.yergan
I have to agree the Gallery Boss was a serious pain:gravestone:
Thanks for the feedback!
A_Phosphorus_Invention 19 Nov, 2014 @ 1:38am 
I had the absolute worst time with the Gallery Boss. Seriously.
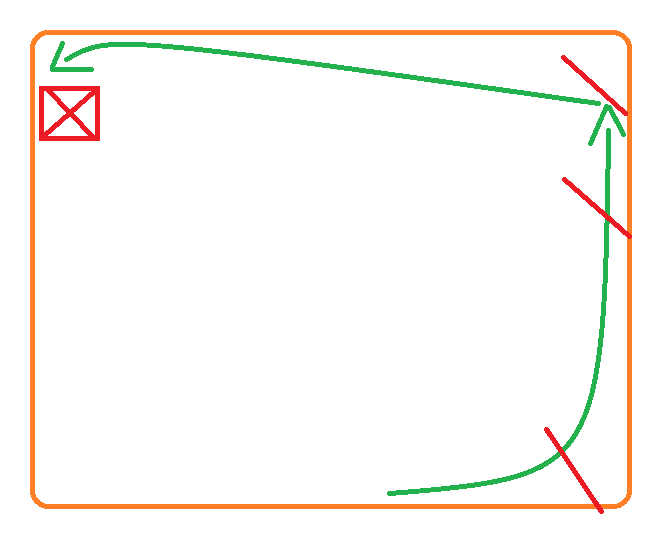
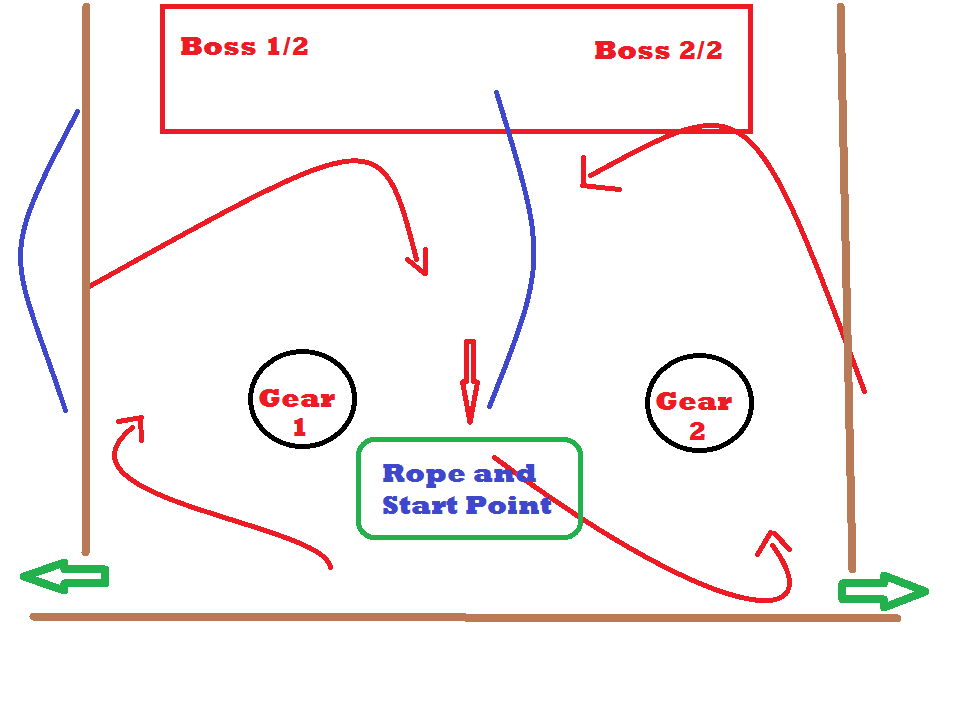
Once you get the combination right, and the Ghost is being electricuted, hold until the top row of paintings is destroyed and he goes to the second row. Immediately lift off the buttons to make sure all your Shuggies are safe. Then simply repeat the process.
The falling paintings can really be rough to dodge, especially with fewer rows and less time to get the comination.
Trial and error to get the combination and then timing it exactly right to zap him is really the best and only strategy.
This game was one of my weakest percentages starting this year, but it's all done thanks to Vhampster, our Guide for Games. Cheers to you girl for being awesome.
littleirishman 6 Oct, 2014 @ 4:14am 
@Guides Thanks m8
That Wun Wabbit  [author] 5 Oct, 2014 @ 6:59pm 
@(FP-SU)
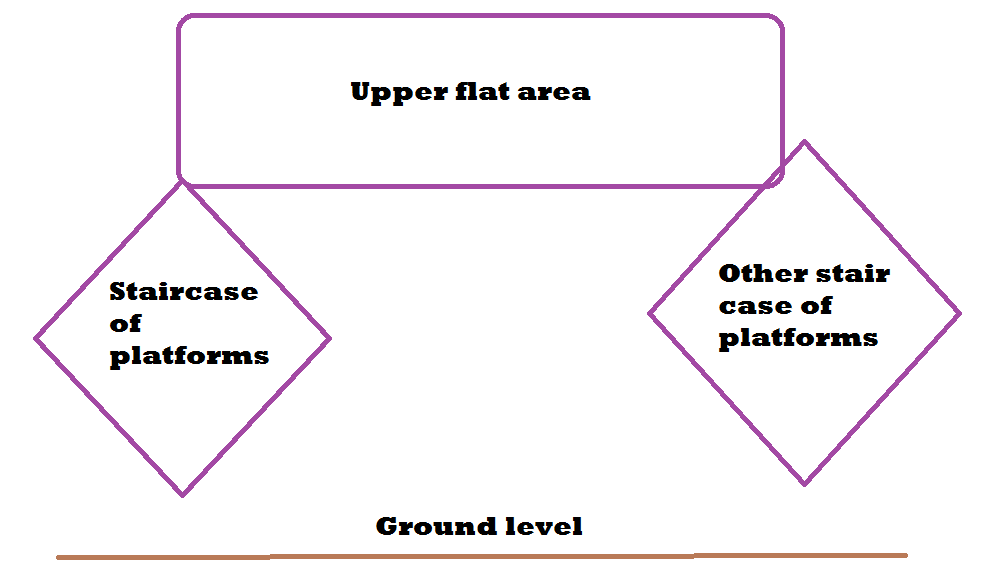
The goal is to use the buttons to electrocute the gallery ghost.
(Pardon me, it's been awhile since I played)
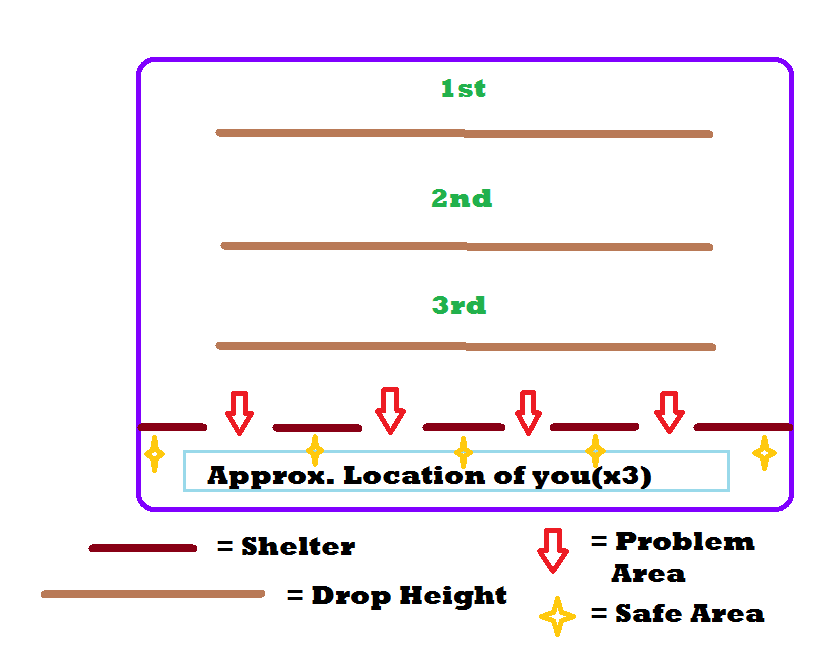
IIRC, when you push the right button set, the boss now has less paintings to hide behind, but also is closer to you.

When the boss is closer to you, you're more likely to get hit because the paintings drop from a lower height
littleirishman 5 Oct, 2014 @ 4:22am 
It's a great guide, got me through the bolier room boss. But could you make it more clear on what you have to do on the gallery boss?
Thanks anyway.
jeab 15 Aug, 2014 @ 8:10pm 
:)
Pasatempo 30 Jun, 2014 @ 9:02am 
bom
That Wun Wabbit  [author] 28 Jun, 2014 @ 7:17pm 
you're welcome, hope it was helpful :D: