Project Zomboid

Project Zomboid

124 ratings
Build 41+ Multiplayer Server Settings and Game Config
By Kimsemus
It doesn't seem like ~anyone~ has compiled a one stop shop guide for setting up a hosted server to do what people want to do, so here we are.
3
2
3
5
2
   
Award
Favorite
Favorited
Unfavorite
Introduction
The purpose of this guide is to compile, from start to finish, how to get a hosted server setup in Project Zomboid, for Build 41.

I have scoured the internet and no one seems to explain this process, and it's not at all straightforward. I will try to make this as simple and understandable as I can, but be patient, I basically had to teach myself everything over the past week and some things are still a WIP.
Best Host
Personally, I recommend G-Portal[www.g-portal.com]. They aren't the cheapest, but still reasonably priced, gives you the hardware you need, and allows the easiest way to edit your files.

Since PZ build 41 came out, a lot more hosts have picked up the game as well, so shop around! Whatever you pick though, make sure they give you enough dedicated RAM, as this game is VERY thirsty on memory!
Basic Configuration
The entire gamestate is dictated by 4 variable files, located in:

/server

in your server root directory. There you will find 4 files:


  • Servertest.ini: The basic server config controlling things like servername, etc
  • SandboxVars.lua: The stuff controlling gamestate, like number of zombies, amount of gas, brightness of night, perk points, etc.
  • Spawnpoints.lua: Controls where you allow players to spawn in the world
  • Spawn_regions.lua: What regions exist in the world. If you add custom map portions, this file should be edited automatically (more on this in a bit).

On most server hosts, these are created automatically, and default to Survivor, the default game settings.

No doubt, you will want to edit these files, so let's cover that next.
Customizing Your Game World
By *far* the easiest way to do this is as follows:

1. Boot up a default Project Zomboid game (no mods installed, as this can alter the settings you can manipulate).

2. Click "Host" on the main menu

3. Under the first host screen that pops up, click "Manage Settings"

4. Click "Create New Settings"

NOTE: DO NOT NAME YOUR NEW CONFIG FILE ANY DEFAULT FILE NAMES! Name your config "420MLGSERVERDEATHGOD" or whatever you want, you will need to know the name to find them later.

5. On the next screen, you are going to want to configure these settings exactly like you would want to see them on your real server.

We do it this way because you can edit these config files with the benefit of the game GUI, instead of having to edit the variables by hand without an explanation as to what they do.

6. Save your settings, and exit the game.

These settings will save in: C:\users\%userprofile%\Zomboid\Server by default, you are going to need to be able to find them later!
Customizing your Server World
If you went with G-Portal for hosting, you can edit the basic server settings like the server name and password on the Basic Settings tab independent of other config, which will allow you to stand up the actual server and allow people to find it.

However, you probably want to get that custom game state onto the server, right?

There are two methods of doing so:

No matter what, you are going to need to FTP into the server itself. This info is provided by the hosting provider, but you will probably need a program to actually do it. I personally like Filezilla[filezilla-project.org], but you can use whatever interface you want.

You would also benefit from a more robust GUI text editing program to open your .lua files and read them. I personally like Notepad++[notepad-plus-plus.org] but you can use the default Windows Notepad if you like to play life on hardmode.

By default, most server hosts only read default config file names:


So, to get around that:

METHOD 1: right click all 4 of those files in the /server directory, and download them. Open those files, and your created filed found in that directory path I told you earlier about for the settings you made in game, and then overwrite the servertest files with your created config, or open both and compare the variables and edit them by hand. Copy the edited servertest files back into the /server folder and overwrite. You're done.

METHOD 2: This method is a little more confusing, but you could rename your edited gameworld files to the exact same name as the ones found in the /server directory, and then overwrite. You're done, but you need to keep track of which is which.

Once this is done, restart the server, and your game will be ready to play in your custom state!
Deleting a saved world on a server
This is actually easy if you know what to look for, but for some reason no one bothered to write it down.

To completely wipe a server game world and revert it back to a "new world" state, delete all the files in the following folders:

1. \db
2. \Saves\Multiplayer\
3. \Server

Important: Don't delete those root directories themselves, otherwise you're gonna have a bad time (and have to recreate them).
Modding your Server
This is actually a two part process:

One for adding maps (a pain)

One for adding mods (less painful)

Adding Custom Map Assets (mapmods)
Just bear with me. Adding map assets is strange, compared to how straightforward adding mods are to servers. The issue is most servers don't know what to do with maps or how to get them in game, but fear not, I am here for you, and I'm gonna use my own server files to show you.

First things first: subscribe to the map files you want in the Workshop. Make sure they are compatible with each other.

Once that's done, Boot back into PZ, open up your custom config, go to mods, add the map mods to the gamestate and save.

We do maps first because servers can only read maps at the top of the load order, and we need the maps to "name" the maps in the servtest.ini file (or equivalent)

Mine look like this when done:


That is the "map" line in the servertest.ini file.

Once that is done, the game should have automatically edited the spawnregions.lua file as well to look like this:


Make sure the game created a spawnline command for each map.If not, try again, or write your own in.

Next, re-FTP into your folder. Overwrite/edit your spawnregions.lua files and copy the info from the mod= line in your servertest file to match the one in the server, either manually or by overwriting.

Thought you were done? lmao

But wait, there is more!

Navigate to C:\Program Files (x86)\Steam\steamapps\workshop\content\108600

Now, in the server FTP, navigate to: /media/maps

now, go into each map mod directory in your workshop directory on your computer, copy each map folder into the /media/maps folder

My server looks like this when done:


Once that is done, restart your server. Maps should all be installed and working.

Note: Make sure Muldraugh, KY is at the end of your maps= var load order. If not, nothing else will work. IDK why. Spaghetti code.

Note: I'd like to add a note here that your particular server provider may not require you to copy maps into any directory, but it is impossible to know which do and which do not, and there is no harm in completing the extra step even if not required. This might eliminate some guesswork you might otherwise subject yourself to.
Adding Mods to Your Server
Luckily, this is easier than maps.

Just like before, subscribe to the mods you want in the workshop. When done, go into PZ, mods, activate them all like before, then go into your server configuration (host, manage settings, then load your config, whatever you named it) go to the mods tab, turn them all on after the map mods, and save.

Next, on the server FTP, go to /server, download or open the severtest.lua file, and copy your modlist order from your own servertest file to the server-side one. There are TWO lines you need to copy:

1. Mods=
2. WorkshopItems=

When done, it should look something like this:

  • WorkshopItems= (your workshop items listed numerically by workshopid)
  • Mods= The name of the mods, such as: BedfordFalls;Blackwood;Fort Benning;WestPointExpansion;1521582441;82oshkoshM911;86oshkoshP19A; etc

Each item in both cases needs to be separated by a semicolon with no spaces.

Depending on your server host, you may have to copy the same data into the Basic Settings field on the G-Portal website or elsewhere.

RESTART YOUR SERVER

Assuming you did all of that exactly right, your server should be ready to play and with working maps and mods!
In Closing
Like I said off the top, I had to teach myself all of this, and I'm sorry ahead of time if things seem complicated. Remember that this is the first release for PZ where multiplayer is truly fleshed out, and I hope over time Indiestone will make setup more straightforward. The experience is also radically different across hosting providers and most aren't even updated to the latest stable release.

That's really it though, I hope this guide was helpful, and enjoy playing with friends!

34 Comments
Covidian Masktard 9 Apr, 2024 @ 6:45pm 
That thumbnail is hilarious!
Kimsemus  [author] 27 Mar, 2024 @ 4:46pm 
Happy to help my friend! When I wrote this guide, I saw nothing that clearly explained these steps, so I help people find it helpful!
c.anthony.baker 8 Mar, 2024 @ 5:11pm 
Thank you for the map portion, I have been having a hell of a time finding a guide! Cheers!
Marshall 8 Jul, 2023 @ 10:10am 
Hello, anyone did it on Nitrado.net ?
I believe i did all as requested in matter of maps (mods are easy) but my game after load goes black and it is not letting me play
Majo 15 Feb, 2023 @ 5:16am 
where i can find servertest.ini if i host my own server to play with friends
SuperCoolDude 6 Apr, 2022 @ 1:17am 
@Captain Butthurt
This is a problem with the game, not the server itself. I recommend advertising on Discord. Nothing you can do about it.
Ducky 5 Apr, 2022 @ 5:24am 
I've been wondering about this for a while, so thank you for the guide! :D
Captain Butthurt 13 Jan, 2022 @ 4:48am 
Hello!
So, I decided to go with the g-portal as a server hosting service and configured my server pretty much in full accordance to this guide.

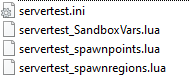
All of the values in servertest.ini and 3 .lua files are set correctly and triple-checked both through an FTP client (FileZilla) and on the g-portal website ("configuration files" tab in your server's window)

Problem is - my server just doesn't show up in the in-game server browser. At all. g-portal website tells me it's online and is using resources (0.30% CPU and like 5 gigs of RAM), but the damn thing just doesn't show up in the server browser. I tried ticking all filter boxes, I tried waiting for like 15 min until the last Chinese server shows up - nothing. Mine is nowhere to be found.

Do you have any experience with this problem? Any help would be appreciated. I've already created a support ticket.
Kimsemus  [author] 10 Jan, 2022 @ 2:10pm 
@bekkar The simplest way is to copy your mods from the mod directory in your workshop folder and copy them into the mod directory of the server, then decouple them from the mod= list

However when a player updates, sometimes this causes errors on their end or they cannot connect.
bek 10 Jan, 2022 @ 3:42am 
nice guide. thanks for that. do you also have an idea to prevent a light respawn every server-restart? for example: when there are some mods updated i have to restart my g-portal server which causes the game to respawn items (bottles, pots, chips etc) on ground/table/counters etc. (not inside containers - this works fine, no respawn there).