MADNESS: Project Nexus

MADNESS: Project Nexus

84 ratings
[Story Mode] COMPLETE Guide (Game-Basics / Tips / Tricks / Mission Walkthrough)
By May and 1 collaborators
This guide is made for people who wants to conquer STORY mode of M:PN.
All of the walkthrough and strategies are based on our experiences through "Tough" and "Madness" Difficulty.

[Major Spoiler Alert!!!] : This guide has all the info for every mission! Which means it will spoil all the 'new experience' if you watch the walkthrough section! I recommend to play each missions first-hand and then watch each walkthrough, just so you can enjoy the game to its full extent.
2
2
5
   
Award
Favorite
Favorited
Unfavorite
About the Story-Mode

[The BIG thing has come.
The "Mad-Boys" are called for duty, and they are very ready for a fight.

Buckle up your pants, this fight is NOT gonna be easy.
Unlike those babies that play tourist and call themselves "Madness Fan", we aim towards the highest of difficulties. Yes. We mean the 'Madness-difficulty'.

If you fail during a mission, don't worry.
Just come back here, learn a thing or two... Then you try again.

We will see you victorious in the end.]

1. Basic Game Mechanics
"Like in almost every game. You have the basic movement to move around. You see that guy with red glowing glasses? That's Hank Wimbleton, protagonist of the Madness Combat series and we'll get to him sooner."


Each of these commands sounds very basic, but using them properly in-game is a different matter.
Especially, if you are thinking of doing higher difficulties, knowing when to do certain attacks are VERY important.

Enough jibber jabber...
Let's see what we can do!
(1-1) Corpus / Tac-Bar / Loadouts / Difficulty
- - - - -


"Corpus"


Each "Corpus" block is your health.

The more you have, the longer you'll able to endure all of the pain.
Each corpus will regain itself if it`s not completely broken, and you can speed it up by hurting enemies.

Once the block is broken however, the only way to recover it is by using a medical station.


They always glow green and have shape of cross. Makes easier to locate them. Corpus recover depends on the difficulty.

Using a medical station also recharges your Tac-Bar instantly(regardless of difficulty).


- - - - -

"Tac-Bar"


"Tac-Bar" is a meter that gives you damage reduction against enemy projectiles.

The meter will be decreased everytime you get hit by your enemy`s projectile(thrown melee weapon, bullets, throwables...etc), and once it reaches 0, you will start receiving full damage.

Damaging enemies will recharge your Tac-Bar meter.

- - -

{{How to Avoid "Snipe" attacks}}

https://steamhost.cn/steamcommunity_com/sharedfiles/filedetails/?id=2773339960

- - - - -

"Loadouts"


Each time finishing a stage, you will unlock new loadouts. After unlocking it, you can switch between the available loadouts while playing a stage.


{{Best Loadout}}

Best "ARMOR" Loadout
Best "WEAPON" Loadout
"Sandford Alternate 2" & "Deimos Alternate 2"
"Christoff Loadout(Not Savior Loadout)"
Gives you {+2 Corpus}
x20 Homing throwables that melts enemies + Best non-element sword in game
Unlocks after beating "Shakedown" or "Climb!"
Unlocks after beating "Sleeper labs"


- - - - -

"Difficulty"


△ - "Tourist" Difficulty - △


May`s Quote
"HAHA NOOB"


ⴲ - "Normal" Difficulty - ⴲ


Enemy Behavior
Enemy Accuracy
Incoming Damage
Corpus
Ammo
Less aggressive, with lesser attack frequency
Average
Normal
{Full Corpus} from every Health-Station
{+2 Ammo} for a "New" weapon(not used by enemy)


ⴲ - "TOUGH" Difficulty - ⴲ


Enemy Behavior
Enemy Accuracy
Incoming Damage
Corpus
Ammo
Very aggressive, with more attack frequency
Very High
High
{+1 Corpus} from every Health-Station
{+2 Ammo} for a "New" weapon(not used by enemy)


- - - - -


ⴲ - "MADNESS" Difficulty - ⴲ


"{MADNESS} difficulty is unlocked only after you beat the TOUGH difficulty.

Every health point is reduced to 33%, which applies to you & all your enemies & environments(only applies to health, not Tac-bar)."

Enemy Behavior
Enemy Accuracy
Incoming Damage
Corpus
Ammo
Extremely Aggressive, with extreme attack frequency
JESUS CHRIST
Hurts like in REAL LIFE
{+1 Corpus} from every Health-Station
Just one. NOT "additional", just one.

(1-2) "Movement" / "Basic(Criticals) + Unarmed Attacks"
- - - - -

"Movement Basics"


Walk : Press "W, A, S, D" or combine two of them to move at a single direction. You can also press "CapsLock" once to auto-walk.


Sprint(or Run) : Double tap "W, A, S, D" to run, or press "CapsLock" twice for an auto-sprint.


Snap-Dodge : Tap "Space" while pressing "W, A, S, D" to quickly dodge to a certain direction.

Originally posted by May:
You can recover much faster than a Full-Dodge.


Break : Snap-Dodging while when you are about to get "Hit-Stunned" will let you "Break" out from the next enemy attack.

Originally posted by May:
You can attack right away after a Break, giving yourself the advantage on a dual-situation.


Full-Dodge : Tap "Space" twice, or hold "Shift" while pressing "Space".

Originally posted by May:
You are immune to lot of attacks while doing this.

- - - - -

"Basic Attacks"


Stealth Takedown : Press "E" while behind an enemy that has yet noticed you.

Originally posted by May:
This will not alert other enemies, while deleting a single corpus of your target.


Takedown(Dazed) : Press "E" while near an enemy that is "Dazed". Dazed enemies have a blue mark above them.

Originally posted by May:
This attack also deletes a single corpus of your target.


Light Kick : Press "Middle-Mouse(scroll button)" to kick.


Originally posted by May:
You can do this while holding a Melee/Ranged weapon.


Dash Punch : Press "Left-Mouse" while sprinting. You can do this by pressing Middle-Mouse(scroll button) too.

Originally posted by May:
Normal sized enemies will be knocked down easily.


Heavy Kick : Press both "Middle-Mouse(scroll button)" and "Shift" while sprinting.
You can do this while holding a Melee/Ranged weapon.

Originally posted by May:
Enemies hit with this attack are easily knocked away, except for G03LMs and most Boss type enemies.

- - - - -

"Criticals"

"Critical" hits happen when certain conditions are met with some of your attacks. These kind of hits deal much more damage than usual, while giving you the chance to instantly kill enemies can revive multiple times.

Most enemies killed with a "Critical" hit will be gibbed(spaghetti, but made of brains and intestines).

{{How to do "Critical" Hits}}


UNARMED & MELEE : Click right before your punch hits your target(slow double click)

Originally posted by May:
Works with normal, heavy, and charged-up attacks.


RANGED : The target must be inside the "Sweet-Spot"(Green Highlighted area)

Originally posted by May:
Using head aiming increases damage further.


THROW : The target needs to be hit with the right spot of your weapon(ex. blade of your thrown knife)

Originally posted by May:
Don't try getting critical hits with throwables. It comes naturally, not like you can control it every time.


- - - - -

"Unarmed Basics"

"Unarmed attacks might seem weak, but it has the highest Daze potential of all of the attack types. After having more than 10 combos, every single punch you do have higher Daze chances(depends on combo count)."


Light Punch : Quickly tap your "Left-Mouse" for a light punch combo.

Originally posted by Sub-Zero:
The damage is weak, but you can do rapid attacks.


Heavy Punch: Press-Hold "Shift" while tapping your "Left-Mouse" for a heavy attack.

Originally posted by Sub-Zero:
The damage is stronger than a light punch, but you will attack slowly.


Charge-up Punch: Press-Hold "Left-Mouse" until you hear a whoosh sound.

Originally posted by May:
The second charge does more attacks than the first one.


Guard : Press-Hold "Right-Mouse" for a guard.

Originally posted by May:
You can reduce incoming unarmed&melee damage.


Counter : Press-Hold "Right-Mouse" just before your enemy does a Melee/Unarmed attack to you.

Originally posted by May:
Enemies that are hit with a counter attack are easily knocked down, while also getting dazed(about 50% of the time)


https://steamhost.cn/steamcommunity_com/sharedfiles/filedetails/?id=2763399768

Counter, Charge : Press-Hold "Right-Mouse" just before your enemy does a charging, or grab attack to you. This can also be done with a melee weapon equipped, but not with only holding ranged weapons(Melee + Ranged weapon works).

Originally posted by May:
You will throw the same enemy far away, even making them thrown into hazards. Enemies that are thrown this way are dazed for a long time.
(1-3) Weapon Command / Melee / Ranged Commands
- - - - -


"Weapon Command"
- Commands that applies to both Melee & Ranged weapons. -


Weapon Pickup : Press "Q" while your Cursor is on the weapon you want to pick up. You can also do this while dashing.


Weapon Drop : Press "R" while you have your weapon equipped.

Originally posted by May:
Dropping a weapon is much more quicker than throwing one. Very useful when your "Huge" gun is empty.


Weapon Throw : Press "Left Mouse" while Holding "Q". You can decide which way to throw with your mouse aim.

Originally posted by May:
Large weapons make you throw them slowly(except for Jebus Christoff), but deals much more damage.


Swap Weapons : Press "Tab" to switch between your primary and secondary weapon.

Originally posted by May:
You can 'save' a good weapon for later on, by using your secondary slot.


Dual Wield : Press "Q" while Holding down "Shift". You can dual wield 'guns', 'melee weapons', or 'gun & melee weapon'.

Originally posted by May:
Just know that some weapons cannot be dual-wielded at all.


Dual Wield - Melee attack : Press "Middle mouse(scroll button)" to swing your melee weapon, while holding a gun in your first hand.


- - - - -

"Melee Command"

"Melee weapons CARRY you from start to finish, especially when you are playing on higher difficulties. Knowing how to use them properly is crucial for mastering the game.

Your swing speed will be faster each time the Combo meter goes up."


Light Swing : Quickly tap "Left Mouse". Does lesser damage than a heavy swing, but is great for hit-and-dodge.

Originally posted by May:
Some melee weapons can even one shot normal type enemies, when you are playing on "Madness difficulty".


Heavy Swing : Tap "Left Mouse" while holding down "Shift".

Originally posted by May:
You can hit multiple enemies with this attack, while also dealing huge chunks of damage. However, you cannot dodge while doing this.


Charge-up(Melee) : Press-Hold "Left Mouse" and let go after you hear a 1st or 2nd whoosh sound.

Originally posted by May:
Combining this attack with a crit can almost triple a single melee hit damage. A quick 1st level charge up at a right moment can easily melt down even a tough boss.


Guard : Press-Hold "Right Mouse" to guard incoming melee & unarmed attacks.

Originally posted by May:
"Hank" and "Christoff" can even block incoming bullets with guard.


Parry : Doing a melee guard just before your enemy strikes you will connect with a "Parry".

Originally posted by May:
Your opponent will be stunned for a short time, allowing you to strike him right away.


Takedown(Melee) : Press "E" while having a micro weapon or shard. Micro weapons & Shards(by-product of broken melee weapons) will allow you to instantly takedown a single enemy.

Originally posted by May:
If your second hand is empty, think of holding a screwdriver or scalpel for a next fight.


- - - - -

"Ranged Command"

"Guns are good. But remember that every bullet runs out fast.

Use it quick, then throw it away.

DON'T RELY on just one gun. Always think of a way to completely kill that sum-biach even when your trigger goes click.

From the start, Madness Combat was all about SPRAY & KILL, NOT 'I wanna suck my favorite gun before Night-Night, Mama.'"


Head-aim : Press Hold "Shift" while aiming your gun at your target.

Originally posted by May:
Your aim will automatically aim for your enemy's head, allowing you to deal more damage to them.


Off-Hand Aim : Press "Right Mouse" while aiming for better accuracy.


Originally posted by May:
You can Shoot single rounds while doing this, even when you are using a full-auto rifle(however not very useful). Standing still + Off-Hand Aim will greatly deduce your gun's recoil.


Dodge-Shoot : Dodge while shooting.

Originally posted by May:
Quite useful against enemy hellfire. Nough' said.


- - - - -

Sweet-Spot

"Sweet-Spots are Green - Highlighted areas that your bullets are most effective.

Any enemy that are standing in this spot will receive full bullet damage even their Tac-Bar remains, and the same bullets will deal Critical damage."


Originally posted by May:
Every weapon has their own Sweet-Spot range. Using it is good, but don't crave it.
(1-4) "Throwables" / "Interactive Objects"
- - - - -

"Throwables"

"Throwables are unique disposal weapons. They cannot be picked up when thrown. So they can be used as your last ditch or to finish up enemies."

Originally posted by May:
Throwables are automatically recharged when you load to a next stage(at checkpoint).


Pickup : To pick a Throwable, press "Q" beside standing it.


Throw : To throw one, press "G" while aiming at your target, or where you want it to drop.

Originally posted by May:
Most throwables such as Grenades will drop right where you put your mouse cursor. So it is best if you place your aim right at your enemies directly, or at least near them.


- - - - -

Throwable Types :

{{Knife Type}} : Comes in better numbers(25~40). Thrown straight, with less curved ark.


{{Grenade Type}} : Only 7 at a time. Thrown in a curved ark, with an devastating explosion after a short fuse time.


Originally posted by May:
FlashBang explosions do little damage, but has a great chance to daze enemies. It is best advised to throw ahead of where your enemy would travel, so they would not dodge away it's explosion.


{{Nexus Bolt}} : Best throwables in the game, dealing 20(60 on Madness) damage while homing on targets. Counts are up to 20.(Auto equipped for Christoff)


{{Magic Bolt}} : This is only obtainable by using "Crackpot's Loadout". Counts are infinite, but with very slow cast time and cooldown. You throw 3 homing projectiles, which will travel in a slow, curved ark.


- - - - -

"Interactive Objects"

"Throughout out the game, you'll encounter various stuff to interact. Such as books, logs, computers, switches, doors and etc. Whenever you're close to an Interactive Object, the game will highlight that object.


You can use Interactive objects by pressing "E"."


Originally posted by Sub-Zero:
You can see what stuff you need to interact when holding Q button.


Objectives

"During the playthrough and progression. The game will give you tasks what you will to do and you will need to finish them with strategy."

Originally posted by Sub-Zero:
It's usually ignored as you start blasting everything in your path.

Originally posted by May:
Was there an Objective in this game...? Weird.


{{Destructible Object}}

Some objects needs to be destroyed before you proceed.

Originally posted by May:
Some are hidden, and needs to be shot with guns. So look around if you think you're stuck.


- - - - -

{{Explosives(C-4 required)}}


"Sanford" is the only character that can set up "Explosives".
You need to obtain "C-4" before making the explosion.

Obtaining "C-4", putting it down setting it up can be all done with "E"


{{Computers(hacking)}}


"Hacking interactive" are usually done by Deimos. Some computers contain information about the story.

Originally posted by May:
Hank doesn't do hacking.

- - - - -


Keycards : Required to open up a locked door. Press "Q" to pick it up.

Originally posted by May:
They are usually near you. Find it.
(1-5) "Teammate Control"
"The automatic combat system for this game is pretty stupid. Your computer-driven teammate will jump off cliffs, head straight into explosions, beaten up by crowds, steal your weapons....and MUCH MORE!!! (applause)"

To prevent them from, you know, doing their normal stuff. You should give them certain commands.

So, here are a list of commands that would be very useful in-game.

- - - - -

<<List of Teammate Commands>>


{{Change Control}} : Tap "Ctrl" to take control of your available teammate.

Originally posted by May:
You cannot control downed(all corpus broken) teammates.


{{Select Individual Teammate}} : While holding "Ctrl", press "Right Mouse" to select individual teammate. If you don't do this, all of your teammates will follow the same command.


{{Move Teammate}} : "Ctrl" + "Left Mouse" at where you want to move your teammate.(Blue signal)

Originally posted by May:
Sometimes your teammate will not follow this command. If so, just spam your L.Mouse.


{{Attack Enemy}} : "Ctrl" + "Left Mouse" at an enemy.(Red signal)


{{Place Teammate}} : "Ctrl" + "Middle Mouse" at where you want to move your teammate.(Blue signal)

Originally posted by May:
If place your cursor right next to a barricade, teammates will automatically hide behind it.(Yellow signal)


{{Pickup Weapon}} : "Ctrl" + "Left or Middle Mouse" at a weapon.(Yellow signal)


{{Activate object / Heal up}} : "Ctrl" + "Middle Mouse" at an object or Health station.(Yellow signal)


Originally posted by May:
If you want a specific teammate to heal up, Select him individually

2. Advanced Tips & Tricks
This part of the guide is for people who wants to play "TOUGH" difficulty or higher.

Some of these tips and tricks sound hard at first,
but it will be pretty easy if you keep on trying.
(2-1) Advanced Tips
◈◈◈ Heal Priority - "Heal YOURSELF first!" ◈◈◈

1st
2nd
3rd
4th
Yourself(Character you use the most)
Hank
Christoff
Sanford or Deimos

Use heal kits for your main character first.
If your character has full health, then you can heal up your companions.

Originally posted by Helmet:
This is because the AI in this game is very inferior. It's very likely for your teammates to lose a corpus in a very stupid way.


◈◈◈ Boss Fights - Using companions as a "BAIT" ◈◈◈

Most of the bosses prioritize killing the character YOU control.
Swap to your teammate if a boss starts a pattern that you are not familiar with.

When the boss uses the same pattern upon your "Bait", quickly swap to your original character and proceed attacking.

Example(Spoiler Alert) :

https://youtu.be/7KJi60Sy_dE (watch 0:50~0:57)


◈◈◈ Do not use guns against "Bullet-Sponges" ◈◈◈


These types of enemies are usually way bigger than you, and the bullets you shoot at them deal significantly less damage.

For example, when you shoot this Mag with a "AN-2500"...
The "13" Full Damage will be reduced to mere "1" Damage.
Even using a full clip will only do 150 damage.

Even though some weapons like the "Revolver" does a bit of pierce damage, its better of taking them out with melee or unarmed.


◈◈◈ Try not Dying before a checkpoint(loading screen) ◈◈◈

OR you will have to start from the beginning.

Originally posted by Helmet:
OR you will find yourself quitting the game.


◈◈◈ Dealing with enemy waves - "Melee, Heavy-swings" ◈◈◈

Spam heavy-swing attacks while moving backwards, while facing against a crowd of enemies.

Originally posted by Helmet:
"Katana" is the best weapon for this.

Example : https://youtu.be/c9zNaL70cIU


◈◈◈ DON'T USE HUGE MELEE WEAPONS ◈◈◈

Sluggish attack time, and if you get stunned once between that, your whole attack gets canceled.


◈◈◈ Melee vs Melee / Guns vs Guns ◈◈◈

Use melee weapons against melee wielding enemies.
Use guns against enemies that shoot at you.

Originally posted by Helmet:
This way you can save your ammo, also saving some time from switching weapons.


◈◈◈ Akimbo - 'How to use them properly' ◈◈◈

Originally posted by Helmet:
In "Tough", use it freely.
In "Madness", no.

Don't use akimbo(dual wielding guns) in battle, at least on Madness difficulty.
In Tough difficulty or below, you will got extra magazines. But in Madness, no.

Use this ONLY to move your weapons to the next door, or a locked area.

Originally posted by May:
It's because of gun recoil. Not only akimbo shooting reduces your accuracy greatly, you will have no control over bullet spread.


◈◈◈ How to SKIP DIALOGUES ◈◈◈

If you aren't interested in the story at all, Just skip all dialogues with "Shift + Ctrl + Enter"!!!
(2-2) Advanced Tricks
Quick jab : This is a trick which you repeat a dash punch. You can keep knocking down a single enemy without much trouble.

https://steamhost.cn/steamcommunity_com/sharedfiles/filedetails/?id=2770712670
Originally posted by May:
Extremely useful against normal sized enemies, especially ones that deals lots of damage.

- - - - -


Charge-up Cancel : You can dodge out to cancel a charge-up. Great to use when enemies come faster than you expected.


Originally posted by May:
Charge-up, cancel with full-dodge(making an enemy miss an attack), quickly attack with a first charge-up. Usually works.

Charge Teleport : You can move close to your enemy while initiating a charge-up attack. Click spam at your target when you send out the attack.

https://steamhost.cn/steamcommunity_com/sharedfiles/filedetails/?id=2652767540

Originally posted by May:
The example is a bit exaggerated, but it works even in Story Mode too. Just know that doing this allows you a feet closer to your enemy.


Motion Cancel : Quickly back-dodge when your charge-up attack is finished.


Originally posted by May:
Combine this with "Charge Teleport", and you can melt even a Mag unit.

"Charge-up Advanced" - Video Demonstration

https://www.youtube.com/watch?v=mf5LXbUWLnc

- - - - -

Abandon Teammate : When you see a next door opened(and no Health stations near you), just proceed without reviving your teammates. They will retrieve a single corpus automatically when you enter the next room.


Originally posted by May:
Don't feel bad. I abandon my teammates all the time!(...Not a joke)


- - - - -

Stealth Charge-up : If you press "left mouse" and quickly hold "Ctrl", you can use charge-up attacks without needing to hold yourself in one place.

https://www.youtube.com/watch?v=Zhxrao5zsTc&t=41s

Originally posted by May:
You can even RUN while holding your charge-up!
Which means you can now use charge-up attacks at any given time.


3. Characters

Hank J Wimbleton :

/
Stats
Role
...Killing stuff
Health
18 (3x)
Strength
36
Endurance
36
Dexterity
36
Tactics
26
Unique Ability
None
Unique Skill
Block bullets, Melee : You can block bullets with a melee - guard
Core Dodge Lv.3 : You can 'ninja roll' while full-dodging
Core Melee Lv.3 : You can swing melee weapons much faster, while swinging some weapons twice

{{Loadouts - Hank}}

Loadout
Weapons
Default
None
{Hank Alternate} : {+1 Corpus}
{Hank Loadout} : "N9011(pistol)" + Katana

Originally posted by May:
Hank, although has lower health than other characters, has the best physical stats. It's recommended to play as him most of the time.


Sanford

/
Stats
Role
Destroying objectives with "C-4"
Health
25 (3x)
Strength
35
Endurance
35
Dexterity
20
Tactics
35
Unique Ability
Wire Explosives : Needs "C-4" in advance
Unique Skill
Shuriken Ark : Thrown "Hook" type weapons return to him, while dragging an enemy

{{Loadouts - Sanford}}

Gear
Weapons
Default
{Sanford Loadout A} : "Cp5(Shotgun)" + "Meathook(Melee)" + "Grenade"
{Sandford Alternate 1} : (+1 Corpus)
{Sanford Loadout B} : "NP-5(SMG)" + "Hook(Melee)" + "Grenade"
{Sandford Alternate 2} : (+2 Corpus)
{Sanford Loadout C} : "NK33(Rifle)" + "Hook(Melee)" + "Grenade"

Originally posted by May:
Sanford has better stats than Deimos, which allows him to dual wield guns that are much heavier. His hook can return to him when thrown, dragging a single enemy along the way.


💀 Deimos

/
Stats
Role
Hacking into "Computers"
Health
25 (3x)
Strength
27
Endurance
28
Dexterity
35
Tactics
35
Unique Ability
Hacking : He can hack into computers, to open doors and stuff.
Cursed : His days are numbered.
Unique Skill
None

{{Loadouts - Dedmos}}

Loadout
Weapons
Default
{Deimos Loadout A} : "T9(SMG)" + "BNP-9(Pistol)" + "Flashbang"
{Deimos Alternate 1} : (+1 Corpus)
{Deimos Loadout B} : "TN45(SMG)" + "NS19(Pistol)" + "Flashbang"
{Deimos Alternate 2} : {+2 Corpus}
{Deimos Load out C} : "FMS(Rifle)" + "Deagle(Pistol)" + "Flashbang"

Originally posted by May:
This guy is cursed beyond belief. Whether you control him or not, he will ALWAYS find a new way to die horrendously. Just... use him whenever you need to hack into computers. Other times? Use him as BAIT.


Christoff

/
Stats
Role
YOU STAND NOT A CHANCE Disabling turrets, Retrieving objects
Health
25 (3x)
Strength
35
Endurance
30
Dexterity
40
Tactics
40
Unique Ability
Retrieve Object : He can retrieve objects that cannot be obtained normally(Q+Left mouse)
Flying Dodge : He can Fly a short distance while full dodging.
Dissonance Charge-up : He will do a wide smash down attack which knock down enemies around him. The second one deals much more damage.
Unique Skill
Disarming Shot : If he shoots an enemy that is reloading, that enemy will be disarmed
Throw Big Weapons : He can throw "Huge" weapons very easily.
Lawnmower : Bladed weapons that he throws will fly horizontally, killing multiple enemies in the way
Deflect Bullets : Guarding with a melee weapon can deflect incoming bullets back at enemies.

{{Loadouts - Christoff}}

Loadout
Weapons
Default
{Christoff Loadout} : "N-500 L(Pistol)" + "B.Shard(Melee)" + "Nexus Bolt"
{Christoff Alternate} : {+1 Corpus}
{Christoff Loadout} : "N-500 L(Pistol)" + "B.Shard(Melee)" + "Nexus Bolt"

Originally posted by May:
Christoff's stats are almost good as hanks, though difference is that his Charge-up attacks and throwables are changed with his dissonance ability. He can also retrieve objects that are out of reach.

4. Mission List - Walkthrough (*SPOILER*)
We have a LOT of spoilers from now on.
Please read when you are stuck at a mission, or you do not care of spoilers at all.

- - - - -

Here are your Missions in their periodical order.

LOCATION
MISSIONS
{{4-1}} Nexus City Outskirts
  • "The Escape"
  • "Power Play"
  • "Road to Nexus City"
{{4-2}} The Industrial Sector
  • "Warehouse Raid"
  • "The Boom Factory"
  • "The Station Fortress"
{{4-3}} The Residential Sector
  • "Inner City"
  • "Beat the Streets"
  • "The Scenic Route"
{{4-4}} The Commercial District
  • "Seeking Asylum"
  • "Sleeper Labs"
  • "Deep Storage"
{{4-5}} The Mining Sector
  • "Flood Control"
  • "Chasms"
  • "The Last Leg"
{{4-6}} Science Tower Courtyard
  • "Base Jumping"
  • "Shakedown"
  • "Climb!"
  • "The Rush"
  • "Project Nexus"

{{4-1}} Nexus City Coutskirts
- - - - -

Enemies & Strategies

{{Bandit}}
Status
Corpus
1
Tac bar
X
Size
normal
Special
None
Effective Strategy
Shoot & Slash

Originally posted by May:
Easily dealt with any attack. Heavy melee attacks work best.


{{AAHW Agent}}
Status
Corpus
1
Tac bar
X
Size
normal
Special
None
Effective Strategy
Shoot & Slash

Originally posted by May:
Easily dealt with any attack. Heavy melee attacks work best.


{{AAHW Engineer}}
Status
Corpus
1
Tac bar
O
Size
normal
Special
None
Effective Strategy
Shoot & Slash

Originally posted by May:
Easily dealt with any attack. Heavy melee attacks work best.


{{AAHW Soldat}}
Status
Corpus
2
Tac bar
O
Size
normal
Special
Sometimes does a charge-up attack when holding a melee weapon.
Effective Strategy
Shoot & Slash

Originally posted by May:
Easily dealt with any attack. Melee attacks work best.


- - - - -


Bossfights

▣ "MAG BANDIT" ▣

Status
Corpus
6
Tac bar
X
Size
EXTREME
Effective Strategy
Charge-up attacks, and takedowns with screwdrivers

{{Attack Patterns}}

1. Heavy punches
2. Back smash (when player is behind him)
3. Debris throw (on low corpus)
4. Pillar smash (on low corpus)

Originally posted by May:
This boss can be really easy if you know how to use charge-up attacks well.


- - - - -

Puzzles

{{Power Play - All puzzles}}
https://www.youtube.com/watch?v=Iz4FUoINiRU

- - - - -

Walkthrough Videos

▣ "The Escape" : https://www.youtube.com/watch?v=DwTRfchI6Fw

▣ "Power Play" : https://www.youtube.com/watch?v=DISPCevwJfk&t=8s

▣ "Road To Nexus City(Mag Bandit)" : https://www.youtube.com/watch?v=DwTRfchI6Fw
{{4-2}} The Industrial Sector ┓
- - - - -

Enemies & Strategies

{{Merc Grunt}}
Status
Corpus
1
Tac bar
X
Size
normal
Special
None
Effective Strategy
Shoot & Slash

Originally posted by May:
Easily dealt with any attack. Heavy melee attacks work best.


{{Merc Laborer}}
Status
Corpus
1
Tac bar
X
Size
normal
Special
Wears a helmet that sometimes works as a second corpus
Effective Strategy
Do not use blades against them. Hammers work, but the best is Fist heavy swing

Originally posted by May:
Use FIST or HAMMERs against Laborers. Avoid wasting bullets on them since they are sort of a bullet-sponge.


{{Merczerker}}
Status
Corpus
1
Tac bar
X
Size
normal
Special
Uses a headbutt attack when triggered. Always spawns with two melee weapons in hand
Effective Strategy
Headshot is the most effective way, but Dodge away whenever it tries to headbutt you

Originally posted by Helmet:
Find a gun, Aim for head and feed them lead. You can also 'counter' his headbutt.


{{Merc Sniper}}
Status
Corpus
1
Tac bar
O
Size
normal
Special
Has a high chance to 'Snipe' you.
Effective Strategy
Throw one or two Grenades at their feet if you cannot reach them easily.

Originally posted by May:
There are ample grenade refill chances in these missions. Don't worry, use grenades.


{{Merc Gunner}}
Status
Corpus
1
Tac bar
X
Size
Big
Special
Always appears with two guns in each hand. Becomes dazed after receiving lots of damage.
Effective Strategy
Use melee weapons and get really close to him. That way, he cannot shoot spam at you.

Originally posted by Helmet:
these guys can be easily put down with "Saw" or "Drills" heavy swings. You can also use corners for a charge-up.


{{Merc Sargeant}}
Status
Corpus
2
Tac bar
O
Size
normal
Special
none
Effective Strategy
Shoot & Slash

Originally posted by May:
Easily dealt with any attack. Kill these guys first, if possible.


{{Merc Captain}}
Status
Corpus
3
Tac bar
O
Size
normal
Special
Has extreme mobility. Has short time invincibility after losing a corpus
Effective Strategy
Attack him normally, and whenever he becomes invincible, just dash attack.

Originally posted by May:
This guy is practically a Mini-Boss mob. Just stun him with melee or unarmed attacks so he can't do sh-it.


- - - - -

Bossfights


Status
Corpus
3
Tac bar
O
Size
normal
Special
Has short-time invincibility after losing a corpus.
Effective Strategy
Charge-up attacks & Dropkicks / Dash punches when on invincibility

{{Attack Patterns}}

1. Shoot gun like pew pew

Originally posted by May:
Just dropkick the hell out of his face.


▣ "Sheriff Bossfight(includes puzzle)" : https://www.youtube.com/watch?v=3EVTM1W6SiU
{{4-2}} The Industrial Sector ┛
▣ "Church" ▣

Status
Corpus
2
Tac bar
X
Size
Large
Effective Strategy
Charge-up melee attacks, shooting with Gorge's Mhatti-999 sniper rifle

{{Attack Patterns}}

1. Charge-Rush attack when angered (100% dazed when hit)
2. Heavy Punch (High chance to daze)
3. Dash attack (High chance to daze)
4. Electric explosion - Recovery (Extremely deadly, uses when knocked-down)


▣ "Jorge" ▣

Status
Corpus
2
Tac bar
X
Size
Large
Effective Strategy
Charge-up melee attacks, shooting with guns

{{Attack Patterns}}

1. Charge-Rush attack when angered (100% dazed when hit)
2. Heavy Kick (High chance to knock you out)
3. Snipe shot (Ignores your tac-bar)
4. Normal shot (still hurts like sh-it)
5. Spin up - Recovery (Is not that deadly, uses when knocked down)


Originally posted by May:
Let Church come to you first, while you wait at the bottom location. Use the ledge against Jorge's snipe attacks, while you melt Church with charge-up attacks. The rest is easy, get close to Jorge with your team, and melt him with charge-up attacks.

▣ "Church & Jorge (v1) Bossfight" : https://www.youtube.com/watch?v=ZjALjkDMQAg

- - - - -

Puzzles


- - - - -

Walkthrough Videos

▣ "Warehouse Raid" : https://www.youtube.com/watch?v=rRpjy1igd7g

▣ "The Boom Factory" : https://www.youtube.com/watch?v=xaUdj7bFyPY

▣ "The Station Fortress" : https://www.youtube.com/watch?v=Cn0_y6oGEQQ
{{4-3}} The Residential Sector ┓
- - - - -

Enemies & Strategies

{{Survivor}}
Status
Corpus
1
Tac bar
X
Size
normal
Special
Tries to throw rocks at you.
Effective Strategy
Shoot & Slash

Originally posted by May:
Easily dealt with any attack, but don't give them time to throw rocks at you.


{{Bandit Brute}}
Status
Corpus
1
Tac bar
X
Size
Large
Special
Does an anger attack that cannot be countered.
Effective Strategy
Make him get angered by melee/unarmed attacks, and do a takedown from behind

Originally posted by May:
Kill other enemies before dealing with this guy, then kill him separately.


{{Zed}}
Status
Corpus
1(works as 3)
Tac bar
X
Size
normal
Special
Can revive multiple times if its body isn't broken. Does a lunge & grab attack when dashing.
Effective Strategy
Shooting at the head on "Tough", {+Critical Melee attacks on "Madness"}

Originally posted by May:
Critical hits are extremely useful against these things. Long melee weapons charge-ups can also kill it instantly.


{{Swamp Zed}}
Status
Corpus
1(works as 3)
Tac bar
X
Size
big
Special
Can revive multiple times if body isn't broken. Does lunge & grab attacks when running, and also spits at you. All attacks from it deals poison dot damage.
Effective Strategy
Shooting at the head on "Tough", {+Critical Melee attacks on "Madness"}

Originally posted by May:
Critical hits are extremely useful against these things. Don't do charge up attacks to these guys though, you'll get spit in your face.

- - - - -

Bossfights


▣ "Burger Gil" ▣

Status
Corpus
3
Tac bar
X
Size
Large
Effective Strategy
Charge-up melee attacks

{{Attack Patterns}}

1. Charge Rush - Only Outside (Full corpus, falls over after this)
2. Melee swings (While holding Cleavers)
3. Burger throw (After obtaining burgers from shelves)
4. Charge Rush - Inner Circle (Low corpus, falls over after this)

Originally posted by May:
This boss can be really easy if you know how to use charge-up attacks well. USE IT.

▣ ""Burger Gil" Bossfight" : https://www.youtube.com/watch?v=2hm1MLbKt0U

- - -

▣ "MAG BANDIT" ▣

Status
Corpus
6
Tac bar
X
Size
EXTREME
Effective Strategy
Charge-up attacks with long melee weapons. There is a shovel in the left-side, tall lockers.

{{Attack Patterns}}

1. Heavy punches
2. Back smash - 3 Debris fall (when player is behind him)
3. Debris throw (on low corpus)
4. Pillar smash (on low corpus)

Originally posted by May:
This boss can be really easy if you know how to use charge-up attacks well.

▣ ""Mag Bandit(2nd)" Bossfight" : https://www.youtube.com/watch?v=bfag4d3ikx0
{{4-3}} The Residential Sector
▣ "Church (v2)" ▣

Status
Corpus
3
Tac bar
X
Size
Large
Effective Strategy
Throw a grenade at his feet to knock him over. Charge-up melee attacks with 'Rapier'

{{Attack Patterns}}

1. Jump towards target (Target gets knocked down when stomped)
2. Charge-Rush attack when angered (100% dazed when hit)
3. Heavy Punch (High chance to daze)
4. Dash attack (High chance to daze)
5. Electric ball - (Follows the target, 100% dazed when hit)
6. Electric explosion - Recovery (Extremely deadly, uses when knocked-down)
7. Massive Judo - Instant Takedown (Rarely happens, but dashes and does a grab-takedown to his target.)


▣ "Jorge (v2)" ▣

Status
Corpus
3
Tac bar
X
Size
Large
Effective Strategy
Throw a grenade at his feet to knock him over. Charge-up melee attacks with 'Rapier'

{{Attack Patterns}}

1. Charge-Rush attack when angered (100% dazed when hit)
2. Heavy Kick (High chance to knock you out)
3. Prepare Flamethrower (Needs to do this first before firing)
4. Fire Flamethrower (Spreads in a large radius, deals dot damage)
5. Recovery (Doesn't do damage, uses when knocked down)


Originally posted by May:
Before entering the bossfight, a Swamp Zed will always drop a 'Rapier'. You can also find a single scalpel inside the giant locker. A single charge-up critical hit with a Rapier does over 110 damage on madness.

Let Church comes to you first, while waiting on the left side end.
Throw a grenade at his feet to knock him over.
Use Deimos as bait, while you do charge-up attacks at Church with the rapier.(you can use scalpel to stop an action).
When you're done, Jorge is an easy target.

▣ "Church & Jorge (v2) Bossfight" : https://www.youtube.com/watch?v=zybp7J728Rg
- - - - -

Walkthrough Videos

▣ "Inner City" : https://www.youtube.com/watch?v=tpW3LWyVbZk

▣ "Beat The Streets" : https://www.youtube.com/watch?v=qa4-K_xCSMs

▣ "The Scenic Route" : https://www.youtube.com/watch?v=eglj_k7fHBU
{{4-4}} The Commercial District ┓
- - - - -

Enemies & Strategies

{{Patient}}
Status
Corpus
1(works as 2)
Tac bar
X
Size
normal
Special
When wrapped in straitjacket, Dropkicks and headbutts that have high "Daze" chances. When released, attacks with fists and dodge-grabs.
Effective Strategy
Bladed critical Melee hits can one-shot kill these these guys, and Charge-up "Blade" hit guarantees a one-shot kill. Headshots also works well.

Originally posted by May:
You can counter it's dive attack. Performing a takedown leads to a instant kill too.


{{Orderly}}
Status
Corpus
1
Tac bar
X
Size
Big
Special
Grab attacks that leads to throwing(100% daze chance).
Effective Strategy
Snap dodging everytime he tries to grab you. Shoot & Slash. Also, you can leave them fighting off patients instead of you.

Originally posted by May:
Easily dealt with any attack. Just don't get grabbed.


{{Harmacist}}
Status
Corpus
1
Tac bar
O
Size
normal
Special
Shoots 3 needles that makes your speed much slower than usual(ignores tac-bar). After using all needles, he will try to do a melee needle attack(same effect). He also does takedowns when you are dazed.
Effective Strategy
Melee attacks. Also, you can leave them fighting off patients instead of you.

Originally posted by May:
If you are slowed, just snap dodge for a while until the effect wears off


{{Asylum Brute}}
Status
Corpus
1
Tac bar
X
Size
Large
Special
Very high health, angered with 5 melee/unarmed hits. Anger attack cannot be countered.
Effective Strategy
Hit five times, go to his back and perform a takedown. You can also melt it with a melee Charge-up attack.

Originally posted by May:
Also guns work. Just aim at his head.


{{Turret}}
Status
Corpus
1(80 health)
Tac bar
X
Size
normal
Special
Safe on Green light, Dangerous on Yellow. Will MELT you on Red(detected target).
Effective Strategy
Use nearby hazards, Sneak past them or throw grenades. Throw Nexus Bolts, while hiding behind a corner.

Originally posted by May:
Usually, there will be a second route for you to bypass these things.

{{Sleepwalker}}
Status
Corpus
1(works as 3)
Tac bar
X
Size
normal
Special
Grabs nearby weapon to use. Can revive 3 times, with the last one being a devastating explosion(Shines Red before explosion).
Effective Strategy
Slash & Shoot. Attacking with melee Charge-ups(blade) for an instant kill. Make sure you have enough distance before the explosion.

Originally posted by May:
A takedown against these guys can remove the mask that revives them.

{{Sleepwalker G03LM}}
Status
Corpus
1(works as infinite)
Tac bar
X
Size
Large
Special
When wrapped in straitjacket, Dropkicks and headbutts that have high "Daze" chances. When released, attacks with fists and dodge-grabs.
Effective Strategy
Bladed critical Melee hits can one-shot kill these these guys, and Charge-up "Blade" hit guarantees a one-shot kill. Headshots also works well.

Originally posted by May:
You can counter it's dive attack. Performing a takedown leads to a instant kill too.
{{4-4}} The Commercial District ┫
{{Nexus Agent}}
Status
Corpus
1
Tac bar
X
Size
normal
Special
VERY aggressive.
Effective Strategy
Slash & Shoot, it's important to kill them before they attack you properly.

Originally posted by May:
These guys will usually try to get really close to you. Heavy melee hits are very good when they come in huge numbers.

Originally posted by Helmet:
Trained version of AAHW goons

{{Nexus Scientist}}
Status
Corpus
1
Tac bar
X
Size
normal
Special
These guys usually carry a "laser pistolette"(100 accuracy with no bullet spread).
Effective Strategy
Slash & Kill, quite a lot of them can be dealt with a takedown(if they are working).

Originally posted by May:
haha Nexus Nerds.

{{Nexus Scout}}
Status
Corpus
1
Tac bar
X
Size
normal
Special
Has very high chance to "Snipe" you. Has a hit-and-run behavior which means getting close to you and smacking your face down.
Effective Strategy
Slice him, Shoot him. Kill him quick. Dodge whenever he snipes you.

Originally posted by May:
He can snipe you from miles away. Seriously.

Originally posted by Helmet:
Trained version of AAHW goons. But unlike Agents he took basic sniper training

{{Nexus Support}}
Status
Corpus
1(works as 2)
Tac bar
X
Size
Big
Special
Has very high Armor. Most smgs or shotguns are not great against him. Always spawn with a 'BreachMare'. He also does charge-up attacks time to time. He will become dazed after getting a lot of damage(recovers shortly after).
Effective Strategy
Dropkicks will knock these guys over real quick. Pistol shots(pierces armor), Melee attacks work great too. Charge-up melee attacks works very well too.

Originally posted by May:
Dropkick in the face, Charge-up melee to his balls. Easy kill.

Originally posted by Helmet:
Heavy-swing or charge-up. Pick your poison

{{Nexus Riot Guard}}
Status
Corpus
1(works as 2~3)
Tac bar
X
Size
normal
Special
Always spawn with a "Riot Shield" and a "Shock Baton". He can block all kinds of damage that come at him. Also, he has very high armor that sometimes give him more health that it seems.
Effective Strategy
Dash attacks can easily knock them over. Knock him over and kill him, or just charge-up melee attack him. Multiple dropkicks are also an easy way to kill him.

Originally posted by May:
This thing is an TEAMMATE KILLER. Your teammates are not programmed to deal with his shield block, so you need to deal either kill these Riot guards first, or command your teammates to get far away.

Originally posted by Helmet:
It also means you can shoot or cut their spines, while they're too busy knock down your companions.

{{G03LM mk.2}}
Status
Corpus
2
Tac bar
X
Size
Large
Special
Has Extreme Armor which bullets or melee attacks can't normally penetrate at all. His unarmed attacks has a high chance of dazing you, and the Grab attack(when angered) will do devastating damage.
Effective Strategy
Hit if five times with unarmed or melee while circling around his back. After him being angered, take off his helmet from behind and pour attacks into his face.

Originally posted by May:
You can also counter his grab attack(100% Daze chance), which can be connected with a takedown or hazard kill.
{{4-4}} The Commercial District ┛
- - - - -

Bossfights

▣ "Jebus" ▣

Status
Corpus
3
Tac bar
O
Size
Normal
Effective Strategy
Slash and Shoot. Dropkicks or dash attacks also work really well.

{{Attack Patterns}}

1. Shoot
2. "Snipe" with Nexus bolt(does extreme damage)
3. Melee attacks with Binary sword(and shard)
4. Charge-up smash(knocks you over)

Originally posted by May:
I'm not uploading a bossfight demonstration. He's an easy boss that needs no baby-sitting.

- - -

▣ "Unfinished Mag" ▣

Status
Corpus
3
Tac bar
X
Size
Huge
Effective Strategy
Charge-up or heavy melee attacks, or just pour bullets at him.

{{Attack Patterns}}

1. Heavy Punches
2. Smash attack

Originally posted by May:
This thing is easy to deal with. Just a slow moving target that does slow but powerful punches.


- - -

▣ "Tricky's Show" ▣

This is not a boss, but we do have a quite difficult end-fight.
There are 3 enemies that appear in here. All of them needs to be quickly killed, or they will do devastating damage.

{{Honk Zed}}
Status
Corpus
1
Tac bar
X
Size
normal
Special
Grab & bite attacks when grabbing. Explodes after death(high daze chance).
Effective Strategy
Shoot it from far with guns(one shot with revolvers on Madness)


{{Mini Turret & Drone}}
Status
Corpus
1
Tac bar
X
Size
normal
Special
Shoots lasers that does quite a lot of damage.
Effective Strategy
Shoot them as soon as you see one. QUICK.

Originally posted by May:
These things are very deadly, kill these quick or you die quick.

{{Zap Turrets}}
These thing are not things you can kill, but it always shoots a powerful zap beam into an "X" direction until it disappears.


{{Trap Patterns}} - Marked with red signals

1. Obstacle Pop-up
2. Fire Trap (Dot damage)
3. Platform remove
4. Mini-Turret(shoots lazer)
5. Zap Turrets (Always X direction)


Originally posted by May:
The best way is to use guns against turrets and zeds. Other enemies can be dealt with melee weapons. Snap dodge away if you can't deal with a lot of enemies.

Originally posted by Helmet:
Wave 1. Use guns only, they will drop regularly during wave.

Wave 2. Swap to Katana, use heavy swing if you're swarmed

Wave 3. Same as the wave 2, but prioritize sleepwalker GO3LM. DO NOT let them corner you

▣ "Tricky Bossfight" : https://www.youtube.com/watch?v=fe4j824_qVg&t=184s
- - -

▣ "Gestalt (v1)" ▣

Status
Corpus
Invincible
Tac bar
X
Size
Extreme
Effective Strategy
This thing cannot be killed in a normal way. You need to activate the Compressor above him to win this fight(destroy the four safe-locks).

{{Attack Patterns}}

1. Heavy Punches
2. Smash attack
3. Debris Throw

Originally posted by May:
This fight is basically a puzzle.

▣ "Gestalt(v1) Bossfight(Puzzle)" : https://www.youtube.com/watch?v=4PtYMS1yxqs&list=PLgYPeTebgzifnARvDy32bXgG5xafNNC5e&index=6
- - - - -

Walkthrough Videos

▣ "Seeking Asylum" (Christoff Bossfight at 7:20) : https://www.youtube.com/watch?v=dsBuxU-vSso&t=1s

▣ "Sleeper Labs" : https://www.youtube.com/watch?v=vNN9DQueZcc

▣ "Deep Storage" (Unfinished Mag Bossfight at 3:20) : https://www.youtube.com/watch?v=Ti0KdZznT-o&t=37s
{{4-5}} The Mining Sector ┓
{{Zed}}
Status
Corpus
1(works as 3)
Tac bar
X
Size
normal
Special
Can revive multiple times if its body isn't broken. Does a lunge & grab attack when dashing.
Effective Strategy
Shooting at the head on "Tough", {+Critical Melee attacks on "Madness"}

Originally posted by May:
Critical hits are extremely useful against these things. Long melee weapons charge-ups can also kill it instantly.
Originally posted by Helmet:
Guns to head 99 percent success rate

{{Swamp Zed}}
Status
Corpus
1(works as 3)
Tac bar
X
Size
big
Special
Can revive multiple times if body isn't broken. Does lunge & grab attacks when running, and also spits at you. All attacks from it deals poison dot damage.
Effective Strategy
Shooting at the head on "Tough", {+Critical Melee attacks on "Madness"}

Originally posted by May:
Critical hits are extremely useful against these things. Don't do charge up attacks to these guys though, you'll get spit in your face.

{{Fanatic}}
Status
Corpus
1
Tac bar
O
Size
normal
Special
Always spawn with throwing daggers in hand. Tries to throw both daggers and melee weapons every given opportunity.
Effective Strategy
Shooting or Slashing {+Critical Melee attacks on "Madness"}

Originally posted by May:
Critical melee hits one-shot kill these guys on madness difficulty.

{{Fanatic Prophet}}
Status
Corpus
1(works as 2)
Tac bar
O
Size
normal
Special
Always spawn with a 'Crescent Sword(hook)', and tries to throw it. If you are hit by the hook, you will be knocked down and dragged towards him. Revives once if body is not damaged.
Effective Strategy
Dash punch, or melee/unarmed stun him. Do a quick charge-up attack when he is knocked down.

Originally posted by May:
The thrown hook is extremely deadly. Keep on eye as he does a throwing move before actually throwing it. You can charge-up attack to prevent him from reviving.

{{Graveseeker}}
Status
Corpus
1
Tac bar
X
Size
Large
Special
Always spawn with a "Shovel". Uses charge-up attack now and then. Digs a hole towards you to move closer.
Effective Strategy
Throw a grenade at his feet, and after he is knocked down, Charge-up melee at him.

Originally posted by May:
His shovel is a very useful charge-up attack weapon. Great to use normally too!

{{Nexus Liftbot}}
Status
Corpus
1
Tac bar
X
Size
big
Special
Does a special spin attack when you are close. Pretty sturdy.
Effective Strategy
Shoot him with guns, or Dash punch until it's knocked down, followed by a melee attack.

Originally posted by May:
I use charge-up melee attacks after knocking it down with a dash punch. Helmet just shoots it. Your choice.
Originally posted by Helmet:
shoot or melee him in the BACK.

{{Abomination}}
Status
Corpus
1(works as 2)
Tac bar
X
Size
normal
Special
Before freed by it's straitjacket, it will bite or dropkick at you. After being freed, it will do unarmed attacks which are very deadly.
Effective Strategy
Shooting at his head. When you need to use melee, try snap dodging away while seeking for an opening. When it's knocked over, quickly do a charge-up melee hit for an easy kill.

Originally posted by May:
I'd just use charge-up melee hits. And you can also counter it's dropkick too.
{{4-5}} The Mining Sector ┫
{{Nexus Agent}}
Status
Corpus
1
Tac bar
X
Size
normal
Special
VERY aggressive. He also has infinite ammo.
Effective Strategy
Slash & Shoot, it's important to kill them before they attack you properly.

Originally posted by May:
These guys will usually try to get really close to you. Heavy melee hits are very good when they come in huge numbers.
Originally posted by Helmet:
Trained version of AAHW goons

{{Nexus Scientist}}
Status
Corpus
1
Tac bar
X
Size
normal
Special
These guys usually carry a "laser pistolette"(100 accuracy with no bullet spread).
Effective Strategy
Slash & Kill, quite a lot of them can be dealt with a takedown(if they are working).

Originally posted by May:
haha Nexus Nerds.


{{Nexus Scout}}
Status
Corpus
1
Tac bar
X
Size
normal
Special
Has very high chance to "Snipe" you. Has a hit-and-run behavior which means getting close to you and smacking your face down. Has infinite ammo.
Effective Strategy
Slice him, Shoot him. Kill him quick. Dodge whenever he snipes you.

Originally posted by May:
He can snipe you from miles away. Seriously.
Originally posted by Helmet:
Trained version of AAHW goons. But unlike Agents he took basic sniper training

{{Nexus Support}}
Status
Corpus
1(works as 2)
Tac bar
X
Size
Big
Special
Has very high Armor. Most smgs or shotguns are not great against him. Always spawn with a 'BreachMare'. He also does charge-up attacks time to time. He will become dazed after getting a lot of damage(recovers shortly after).
Effective Strategy
Dropkicks will knock these guys over real quick. Pistol shots(pierces armor), Melee attacks work great too. Charge-up melee attacks works very well too.

Originally posted by May:
Dropkick in the face, Charge-up melee to his balls. Easy kill.
Originally posted by Helmet:
Heavy-swing or charge-up. Pick your poison.

{{Nexus Riot Guard}}
Status
Corpus
1(works as 2~3)
Tac bar
X
Size
normal
Special
Always spawn with a "Riot Shield" and a "Shock Baton". He can block all kinds of damage that come at him. Also, he has very high armor that sometimes give him more health that it seems.
Effective Strategy
Dash attacks can easily knock them over. Knock him over and kill him, or just charge-up melee attack him. Multiple dropkicks are also an easy way to kill him.

Originally posted by May:
This thing is an TEAMMATE KILLER. Your teammates are not programmed to deal with his shield block, so you need to deal either kill these Riot guards first, or command your teammates to get far away.
Originally posted by Helmet:
It also means you can break their spines, while they're too busy knocking down your companions.

{{Nexus Engineer}}
Status
Corpus
2
Tac bar
O
Size
normal
Special
SHOOTS LIKE CRAZY. He always tries to find cover while running around. He also has infinite ammo.
Effective Strategy
Shoot at him, if no bullets are present, try killing him by melee weapons.

Originally posted by May:
These guys become real scary when more than 3 spawns at the same time. They should be your No.1 target in most scenarios.
Originally posted by Helmet:
Remember sweet-spot? This skill will mow them down. Lacks of ammo? I'm hoping you saved some durability of Katana.

{{G03LM mk.2}}
Status
Corpus
2
Tac bar
X
Size
Large
Special
Has Extreme Armor which bullets or melee attacks can't normally penetrate at all. His unarmed attacks has a high chance of dazing you, and the Grab attack(when angered) will do devastating damage.
Effective Strategy
Hit if five times with unarmed or melee while circling around his back. After him being angered, take off his helmet from behind and pour attacks into his face.

Originally posted by May:
The G03LM units are very slow, try avoiding them until other highly-mobile enemies are dead.
{{4-5}} The Mining Sector ┛
- - - - -

Bossfights

▣ "Church (v3)" ▣

Status
Corpus
3
Tac bar
X
Size
Large
Effective Strategy
After killing Jorge, throw a grenade at his feet to be knocked over. Charge-up melee attacks with melee(longsword is the best choice), and dodge out before he recovers.

{{Attack Patterns}}

1. Jump towards target (Target gets knocked down when stomped)
2. Harpoon Throw : Very deadly, drags you towards him.
3. Harpoon stab
4. Charge-Rush attack when angered (100% dazed when hit)
5. Dash attack (High chance to daze)
6. Electric ball - (Follows the target, 100% dazed when hit)
7. Electric explosion - Recovery (Extremely deadly, uses when knocked-down)
8. Massive Judo - Instant Takedown (Rarely happens, but dashes and does a grab-takedown to his target.)
9. {{Environment}} Backup call : Lots of mercenary enemies appear(When one of the twins is killed).

▣ "Jorge (v3)" ▣

Status
Corpus
3
Tac bar
X
Size
Large
Effective Strategy
Throw a grenade at his feet, if he gets downed, quickly melt him with charge-up melee hits.

{{Attack Patterns}}

1. Charge-Rush attack when angered (100% dazed when hit)
2. Gun Smack (High chance to knock you out)
3. Prepare Sludge Gun (Needs to do this first before firing)
4. Fire Sludge Gun (Spreads in a large radius, deals dot damage)
5. Recovery (Doesn't do damage, uses when knocked down)
6. {{Environment}} Backup call : Lots of mercenary enemies appear(When one of the twins is killed).


Originally posted by May:
There are obstacles that can stop a lot of Church's attacks. Make sure there is an obstacle between you and Church. This way, nearly all of his charge-rush attacks are stopped right away.

- - -

▣ "Crackpot" ▣

Status
Corpus
3
Tac bar
X
Size
Normal
Effective Strategy
Stun-lock him with melee/unarmed. Attack him with your teammate.

{{Attack Patterns}}

1. Shoots Magic Missile (x3) : Knocks you out for a long time.
2. Teleport
3. Heavy Swings - Melee
4. Teleport - Melee : Gets right in-front of you when attacking with melee.
5. Executions : He will takedown against you when you are dazed.

Originally posted by May:
The biggest problem with this bossfight is two Fanatic Prophets that appear in here. Quickly kill them, and the fight will be much easier.

- - -

▣ "Ghoul" ▣

Status
Corpus
3
Tac bar
X
Size
Large
Effective Strategy
Charge-up melee attacks when it moves around. It's easy if you get used to it. You can also make it target your teammate, so you can attack freely

{{Attack Patterns}}

1. Laser Beam : From one of the corners(you can stand behind it to avoid the laser)
2. Snip attack
3. Smash attack
4. Jump - Smash : Targets the character you are controlling(Does this attack until it hits one of the elevator locks).

Originally posted by May:
The biggest problem with this bossfight is two Fanatic Prophets that appear in here. Quickly kill them, and the fight will be much easier.

▣ "Ghoul Bossfight" : https://www.youtube.com/watch?v=7KJi60Sy_dE&t=4s

- - - - -

Walkthrough Videos

▣ "Flood Control" (Church&Jorge Bossfight at 15:30) : https://www.youtube.com/watch?v=dEIEpEfvKIY

▣ "Chasms" (Crackpot Bossfight at 11:30) : https://www.youtube.com/watch?v=r5YfEOWynm8

▣ "The Last Leg" (Ghoul Bossfight at 13:10) : https://www.youtube.com/watch?v=azroly6DgcM
{{4-6}} Science Tower Courtyard ┓
- - - - -

Enemies & Strategies

{{Nexus Agent}}
Status
Corpus
1
Tac bar
X
Size
normal
Special
VERY aggressive. He also has infinite ammo.
Effective Strategy
Slash & Shoot, it's important to kill them before they attack you properly.

Originally posted by May:
These guys will usually try to get really close to you. Heavy melee hits are very good when they come in huge numbers.

Originally posted by Helmet:
Trained version of AAHW goons

{{Nexus Robutler}}
Status
Corpus
1
Tac bar
X
Size
big
Special
Uses a special 3 strike attack. Pretty sturdy too.
Effective Strategy
Slash & Shoot, to its back. Dash punches and dropkicks also work well.

Originally posted by May:
Dashpunch or dropkick to knock them down, then a easy kill.

{{Nexus Scientist}}
Status
Corpus
1
Tac bar
X
Size
normal
Special
These guys usually carry a "laser pistolette"(100 accuracy with no bullet spread).
Effective Strategy
Slash & Kill, quite a lot of them can be dealt with a takedown(if they are working).

Originally posted by May:
haha Nexus Nerds.

Originally posted by Helmet:
In Climb! Chapter, do not underestimate. Especially, Section where you can find Dissonance gears

{{Nexus Scout}}
Status
Corpus
1
Tac bar
X
Size
normal
Special
Has very high chance to "Snipe" you. Has a hit-and-run behavior which means getting close to you and smacking your face down. Has infinite ammo.
Effective Strategy
Slice him, Shoot him. Kill him quick. Dodge whenever he snipes you.

Originally posted by May:
He can snipe you from miles away. Seriously.

Originally posted by Helmet:
Snipers. Kill them before it shoots you.

{{Nexus Support}}
Status
Corpus
1(works as 2)
Tac bar
X
Size
Big
Special
Has very high Armor. Most smgs or shotguns are not great against him. Always spawn with a 'BreachMare'. He also does charge-up attacks time to time. He will become dazed after getting a lot of damage(recovers shortly after).
Effective Strategy
Dropkicks will knock these guys over real quick. Pistol shots(pierces armor), Melee attacks work great too. Charge-up melee attacks works very well too.

Originally posted by May:
Dropkick in the face, Charge-up melee to his balls. Easy kill.

Originally posted by Helmet:
Nexus goon. Just try kill them first

{{Nexus Riot Guard}}
Status
Corpus
1(works as 2~3)
Tac bar
X
Size
normal
Special
Always spawn with a "Riot Shield" and a "Shock Baton". He can block all kinds of damage that come at him. Also, he has very high armor that sometimes give him more health that it seems.
Effective Strategy
Dash attacks can easily knock them over. Knock him over and kill him, or just charge-up melee attack him. Multiple dropkicks are also an easy way to kill him.

Originally posted by May:
This thing is an TEAMMATE KILLER. Your teammates are not programmed to deal with his shield block, so you need to deal either kill these Riot guards first, or command your teammates to get far away.

Originally posted by Helmet:
It also means you can shoot or cut their spines, while they're too busy knock down your companions.

{{Nexus Engineer}}
Status
Corpus
2
Tac bar
O
Size
normal
Special
SHOOTS LIKE CRAZY. He always tries to find cover while running around. He also has infinite ammo.
Effective Strategy
Shoot at him, if no bullets are present, try killing him by melee weapons.

Originally posted by May:
These guys become real scary when more than 3 spawns at the same time. They should be your No.1 target in most scenarios.

Originally posted by Helmet:
Remember sweet-spot? This skill will mow them down. Lacks of ammo? I'm hoping you saved some durability of Katana.

{{G03LM mk.2}}
Status
Corpus
2
Tac bar
X
Size
Large
Special
Has Extreme Armor which bullets or melee attacks can't normally penetrate at all. His unarmed attacks has a high chance of dazing you, and the Grab attack(when angered) will do devastating damage.
Effective Strategy
Hit if five times with unarmed or melee while circling around his back. After him being angered, take off his helmet from behind and pour attacks into his face.

Originally posted by May:
The G03LM units are very slow, try avoiding them until other highly-mobile enemies are dead.
{{4-6}} Science Tower Courtyard ┫
{{Conduit}}
Status
Corpus
1
Tac bar
X
Size
big
Special
Does a charge-up which leads to a Kamikaze explode. When angered, it will dive bomb into you.
Effective Strategy
Keep enough distance from it. Full dodge away if it tries to dive bomb. If you need to kill it, shoot it quick.

Originally posted by Helmet:
SHOOT THEM FIRST!!

{{Unfinished Mag}}
Status
Corpus
3
Tac bar
X
Size
Huge
Special
Heavy punches, Smash attacks that make you fly high.
Effective Strategy
Heavy / Charge-up melee attacks. Dodge away when you need to.

Originally posted by May:
Before it was a boss. Not anymore.


{{Tower Guard}}
Status
Corpus
1
Tac bar
X
Size
Large
Special
Charge-rush attack when normal angered. Charge-up attacks with its melee weapon(spin attack, heavy swing). "3 AIR STRIKE - ANIME STYLE"(very important), when hit 5 times with melee/unarmed.
Effective Strategy
Circle around while hitting him with your fists. When he starts the 3 combo attack, dodge out of his way and quickly follow him for a takedown.

Originally posted by May:
The Blackguard. But weak

{{AAHW Agent}}
Status
Corpus
1
Tac bar
X
Size
normal
Special
None
Effective Strategy
Shoot & Slash

Originally posted by May:
Easily dealt with any attack. Heavy melee attacks work best.


{{AAHW Engineer}}
Status
Corpus
1
Tac bar
O
Size
normal
Special
None
Effective Strategy
Shoot & Slash

Originally posted by May:
Easily dealt with any attack. Heavy melee attacks work best.


{{AAHW Soldat}}
Status
Corpus
2
Tac bar
O
Size
normal
Special
Sometimes does a charge-up attack when holding a melee weapon.
Effective Strategy
Shoot & Slash

Originally posted by May:
Easily dealt with any attack. Melee attacks work best.


{{Nexus Soldat}}
Status
Corpus
2
Tac bar
O
Size
normal
Special
Very evasive, Very aggressive. Always spawns with dual melee weapons. It's hard to break out of his melee stuns. Sometimes does a charge-up attack when holding a melee weapon.
Effective Strategy
Heavy melee swings while keeping distance, Dodge, then Shoot him while he is swinging his melee.

Originally posted by May:
An extremely dangerous enemy, especially on that window-break in on "Climb!" mission. Fall back you cannot deal with them all at once.

{{Lamenter}}
Status
Corpus
1
Tac bar
X
Size
normal
Special
Very evasive, Very aggressive. His punches cannot be guarded, while also being devastating. Tries to jump grab you when angered, and always ninja roll away while dodging.
Effective Strategy
Heavy melee swings while keeping distance. Dodge when you are being attacked. Charge-up melee also works.

Originally posted by May:
Fall back to Right side, upper corner if you cannot deal with them all at once(leaves some on the left). Attack with your teammates.

{{Odium}}
Status
Corpus
1(250 health)
Tac bar
X
Size
normal
Special
Very aggressive. His tentacles cannot be guarded, while also dealing HUGE damage. Will ground pound towards you if it tries to get to you. Charge-rush attack(100% daze chance) when angered.
Effective Strategy
DON'T stand idle in front of him. You will get punished hard. Heavy melee swings behind him. Dodge when you are being attacked. Charge-up melee also works nice if your teammates are being eaten alive.

Originally posted by May:
Fall back to Right side, upper corner if you cannot deal with them all at once(leaves some on the left). Attack with your teammates.
{{4-6}} Science Tower Courtyard ┫
{{Ghoul}}
Status
Corpus
1
Tac bar
X
Size
large
Special
Comes in numbers. Shoots 12 dissonance shots at you and your team(auto homing). Snapping attacks when close. Explodes violently on death.
Effective Strategy
Dodge left and right when it shoots projectiles at you. You can kill it with heavy, or charge-up melee attacks pretty easily. Use laser guns in the lockers. DON'T USE THE SHOTGUNS AND SNIPER RIFLE on top at them.

Originally posted by May:
You'll gonna need the "Mhatti-999(sniper rifle)" at the next boss. I repeat, DON'T USE IT HERE. You'll need it at the "Dissonance G03LM" bossfight.

{{Robot Arm}}
Status
Corpus
1
Tac bar
X
Size
large
Special
Stationed in place, and will attack if you are close. Its attack has a high knock-down chance.
Effective Strategy
Kill them after all other Bots are destroyed. Your teammates will automatically destroy them. Don't waste any bullets.

Originally posted by May:
Not a difficult enemy, just keep your distance from it.
{{4-6}} Science Tower Courtyard ┫
- - - - -

Bossfights

▣ "MAG Unit" ▣

Status
Corpus
3
Tac bar
X
Size
EXTREME
Effective Strategy
Heavy or Charge-up melee attacks. Don't use guns at him, he's gonna eat all your ammo.

{{Attack Patterns}}

1. "Snipe" : A high damage snipe attack if you are far away from him.
2. Anger - Grab : Tries to grab you while dashing (you can dodge it).
3. Grab - Behind : Tries to grab you if you are behind him.
4. Anger - Dash punch : Does this rarely, but knocks you over when does.
5. Kick : Tries to kick you if you are too close to him.

Originally posted by May:
You can melt him pretty easily with charge-up melee hits. Whatever you do, don't waste bullets on this guy.


- - -

▣ "Blackguard" ▣

Status
Corpus
4(invincible before armor is taken off)
Tac bar
X
Size
Huge

{{Attack Patterns}}

1. Charge-rush attack when angered(100% daze chance).
2. Charge-up attack - Melee Spin
3. Heavy swing
4. 3 Air strike - When hit 5 times with melee/unarmed. (You need to do two takedowns with seperate characters.)
5. Minigun - When all armor is destroyed

{{How to remove the FIRST armor}}

1. Hack the upper computer(middle) with Deimos.
2. Make the 'Conduit(kamikaze robot)' dive bomb near the Blackguard.

{{How to remove the SECOND armor}}

1. Do two relay takedowns with seperate characters after making him angry (while you do the takedown, quickly switch to another character and do another takedown)
2. Find "C-4" in one of the breakable objects(place is totally random) and do a takedown with it.

Originally posted by May:
Use teammates as bait. Seriously.

▣ "Blackguard Bossfight" : https://www.youtube.com/watch?v=_23Pey1w0ik

- - -

▣ "The HIVE" ▣

Status
Corpus
6
Tac bar
X
Size
Large
Effective Strategy
Watch out for alert signs, only attack when its Guts are exposed. Heavy melee attacks, or guns work best. Quickly shoot down agents that appear from the windows, and use the guns they drop.

{{Attack Patterns}}

1. Missile attack - aiming : Targets you and your teammate.
2. Hive slug spawn : After this, he exposes his guts.

{{Hive}}
Status
Corpus
1
Tac bar
X
Size
normal
Special
Comes in numbers. Tries to explode on you.
Effective Strategy
Shoot, slash. What are you doing, KILL IT.


3. Shockwave : Smacks one of the wall, releases a huge shockwave that covers half of the map(Exposes his guts while doing this). "Agent"s will drop from the window when this happen.
4. Missile SPAM : Shoots missiles all over the map.
5. Cane swing : Tries to hit you with his cane if you get too close to him
6. MISSILE SPAAAAAAAM(On Death) : Shoots missiles like crazy. Lasts for 10 seconds

Originally posted by May:
Er... watch out for missiles. And erm... EWW.

▣ "The Hive Bossfight" : https://www.youtube.com/watch?v=4LBvRunSxws

- - -

▣ "Dissonant G03LM" ▣

Status
Corpus
2
Tac bar
X
Size
Large
Effective Strategy
Equip all your teammates with shotguns from the earlier stage, You equip with "Mhatti-999"(sniper rifle). Shoot its head with "Mhatti-999", and make sure every shot counts. Heavy melee swings if you are out of bullets.

{{Attack Patterns}}

1. Charge-up : Heavy 5 stabs in a straight line
2. Teleport smash (usually targets you, rather than your teammate)
3. 4 Teleports, Last one followed by a Heavy smash. (Uses when a corpus is lost)
4. Heavy swing (unblockable)

5. {{Environmental}} Dissonant laser beam (The upper laser hits the bottom area, the lower laser hits the upper part.)

Originally posted by May:
Dodging is key. You need to really focus here. (I would just use charge-up melee). If you can save the "N.Dozer E(electric shotgun)" it's better to save it for the "Crusher Bot Fight(G03LM Robot)"

- - -

▣ "Crusher Bot" ▣

Status
Corpus
2
Tac bar
X
Size
Huge
Effective Strategy
If you have saved 'N.Dozer E' until here, shoot it at them. If not, just use laser guns that are scattered around. Christoff's nexus bolts also deal great damage to them(can recharge either left or right).

{{Attack Patterns}}

1. Electric shock : Knocks targets around it with small damage.
2. Charge-up : Spin Punch which makes targets fly away(with great damage).

3.{{Environmental}} : Robot Arm Spawn(it attacks you if you get too close).

Originally posted by May:
Not really hard. If you keep calm.
{{4-6}} Science Tower Courtyard ┛
- - - - -

PROJECT GESTALT

▣▣▣ "Gestalt" ▣▣▣

Status
Corpus
9
Tac bar
X
Size
EXTREME

Originally posted by May:
Until first to third corpus, you need to put in the plugs when Gestalt is placed "CENTER". The charge will fail if it is placed far left or right.

{{ATTACK PATTERNS}}

1. Foot Stomp : Results of Debris Falling.
2. Shockwave (3 projectiles) : After smashing its hand to the ground

- ■ FIRST Corpus Lost ■ -

1. Foot Stomp : Results of Debris Falling.
2. Shockwave (3 projectiles) : After smashing its hand to the ground
3. Tentacle Trap : After piercing ground with its hand

- ■ SECOND Corpus Lost ■ -

1. {{Environmental}} Tentacle Block : Needs to be destroyed before throwing in the plug (best way is to shoot it, or throwing melee weapons)
2. Foot Stomp : Results of Debris Falling.
3. Shockwave (3 projectiles) : After smashing its hand to the ground (comes straight down)
4. Tentacle Trap : After piercing ground with its hand (attacks all of you and your teammates)


- ■ THIRD ~ FIFTH Corpus Lost ■ -

1. Meteor : Explodes when hit
2. LASER BEAAAAM : Warned before shot(Usually targets you). Follows you after.
3. Homing nexus bolts : Shoots about 10~12. Auto targets you and your teammates.


▣▣▣ "DIRECTOR PHOBOS" ▣▣▣

Status
Corpus
6
Tac bar
X
Size
Large

Originally posted by May:
Now, it is a Chicken race. Just retry until you make it.

{{ATTACK PATTERNS}}

1. Teleport
2. Teleport - Disarm Zap : You will be disarmed and knocked down if hit (Usually targets you)
3. Fly - Kick : You will be knocked far away if hit
4. Charge-up : Results in a powerful explosion.


- ■ FIRST Corpus Lost ■ -

1. Skull Missile : Attacks all of you and your teammates, 3 each.
2. Teleport - Disarm Zap : You will be disarmed and knocked down if hit (Usually targets you, and it happens right after the skull missile)
3. Teleport
4. Fly - Kick : You will be knocked far away if hit
5. Charge-up : Results in a powerful explosion.
6. Nexus Bolt : Shoots three projectiles after "Snipe"


- ■ SECOND~THIRD Corpus Lost ■ -

1. Debris : Throws 6 giant debris (Usually targets the character you control)
2. Skull Missile : Attacks all of you and your teammates, 3 each.
3. Summon - Ghosts

{{Ghoul}}
Status
Corpus
1
Tac bar
X
Size
Big
Special
Comes in numbers. Teleports, and tries to punch you.
Effective Strategy
Shoot them down. Easy to kill them.

4. FAST Melee Strike (x2) : Appears at random, targets the character you control.
5. Teleport - Disarm Zap : Once for each you and your teammates(just after melee strike, after that, he uses it just once).
6. Heavy Swing : Very wide, high damage melee swing.
7. Charge-up(Circle) : Results in a powerful explosion.
8. Energy strike : After charging up, fires a high damage strike at a straight line.
9. Blade throw : After preparing, throws his whole blade(follows you while spinning).
10. Nexus Bolt : Throws three high damage nexus bolts after "Snipe"
{+11}. Sword Slam} : After losing the third Corpus The blade follows a single character while slamming multiple times(usually the one you control)


- ■ FOURTH Corpus Lost ■ -

1. Skull Missile : Attacks all of you and your teammates, 3 each.
2. Teleport
3. Teleport - Disarm Zap : You get disarmed if you are hit by this.
6. Heavy Swing : Very wide, high damage melee swing(usually after a teleport).
7. Advanced Charge-up(Circle) : Results in a more powerful explosion. The radius is much larger.
8. Energy strike : After charging up, fires two high damage strikes at a straight line.
9. Energy strike : After charging up, fires a high damage strike at a straight line.
10. Blade throw : After preparing, throws his whole blade(follows you while spinning).
11. Nexus Bolt : Throws three high damage nexus bolts after "Snipe"

- ■ FIFTH Corpus Lost ■ -

1. Debris : Throws 6 giant debris (Usually targets the character you control)
2. Sword Slam} : After losing the third Corpus The blade follows a single character while slamming multiple times(usually the one you control)
3. Skull Missile : Attacks all of you and your teammates, 3 each.
4. Nexus Bolt : Throws three high damage nexus bolts after "Snipe"
5. Summon - Ghosts
6. Teleport - Disarm Zap : Once for each you and your teammates(just after melee strike, after that, he uses it just once).
7. Heavy Swing : Very wide, high damage melee swing.
8. Charge-up(Circle) : Results in a powerful explosion.
9. Energy strike : After charging up, fires a high damage strike at a straight line.
10. Blade throw : After charging up, fires a high damage strike at a straight line.

▣ "Project Nexus" Bossfight ▣

https://www.youtube.com/watch?v=0n0wfYdWkIA&t=2s

▣ "Phopos" Bossfight (No Corpus Lost) ▣

https://www.youtube.com/watch?v=fWFrbRkE9oA

- - - - -

Walkthrough Videos & Puzzles

▣ "Base Jumping" : https://www.youtube.com/watch?v=s9Xa14WmoWk
- The {{Lift Puzzle}} : First Button(5 times), Second Button(2 times), Third Button(6 times)

▣ "Shakedown" : https://www.youtube.com/watch?v=VKxLNNa6R4A
- The {{Robot Puzzle}} : Press "Ctrl" + "Left Mouse" to move the robot.
- The {{Gestalt Chase}} : There is a computer that you need to hack to disable the barrier.

▣ "Climb!" (MAG Agent Bossfight at 6:30 & 11:35) : https://www.youtube.com/watch?v=0e7yi5d6KTI&t=860s

▣ "The Rush" (Dissonance G03LM Bossfight at 6:10 / Crusher Bot at 9:35) : https://www.youtube.com/watch?v=RPkewIpWEzM
M:PN Story Mode Guide Crew
Making of this guide (Final words)
{{GOOD PEOPLE who made this guide possible}}


Originally posted by Helmet:
To be honest. It is THE FIRST time, myself helped somebody's guide.When May asked me "you interested in making guide" and I said "what can go wrong." I thought it will be over really soon. However, we literally spent the WHOLE NIGHT trying to forge and better it. (Took videos, advice and ext)

Well not gonna lie, May did the 88 percent of the job. It is May's guide afterall.

Anyway, hope you find something useful in it.

Originally posted by May:
The. EXPERT. Helped in making all walkthrough videos(especially the hard ones), while giving great tips for me for the Nexus Missions. To be honest, this guy tripled the work speed that I usually do.

Originally posted by May:
The man who suggested me to make this whole thing. Helped me in the early stages of making this guide, and told me how to win the early stages of Madness difficulty.


- - - - -

{{People who have helped me from the M:PN Discord Server}} :

Human Grunt (#3048)
Galunogk (#4794)
Whoever this guy is (#9472)

Yeah, even THE big man, Krinkels gave me some help.

46 Comments
Wingidon 23 Mar @ 7:53pm 
(Sorry I can't help you, MH, just wanted to comment on something with the guide)
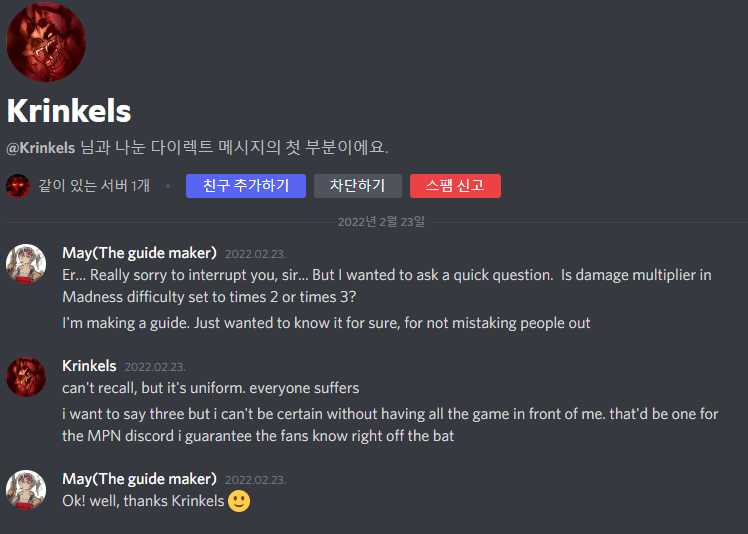
With regards to difficulties:
- I don't think lower difficulties actually increase/decrease damage? You might want to check that with someone.
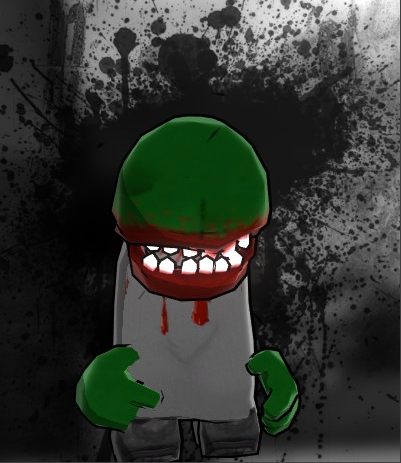
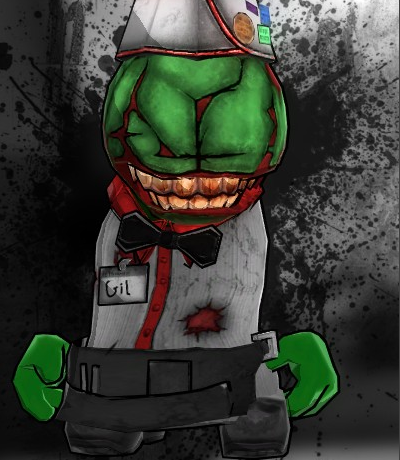
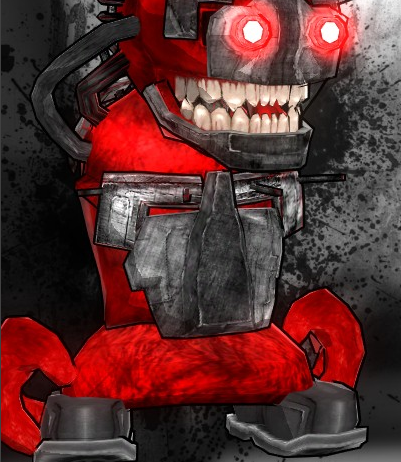
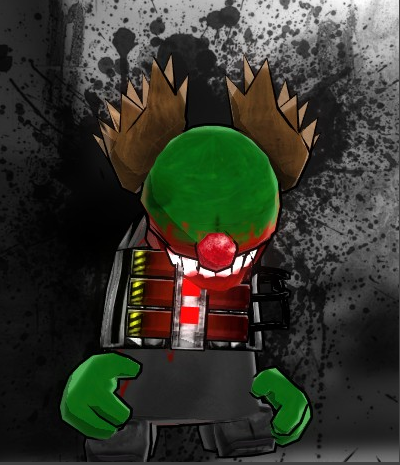
- Madness Difficulty does indeed reduce everyone's health by 66% (so technically, each health point is worth 34% as much, but that's a nitpick). One thing I think you should mention, though, is that larger characters are affected less by Madness Difficulty's health penalty. The 66% reduction is divided by the character's size. For example, Mag Agents (3x size) only have a 22% reduction in health, whereas characters of a particular smaller scale (such as Sweet Tony at 0.8x size) may have an 82.5% health reduction.
[MH-Arrlyx] 23 Mar @ 7:26pm 
the issue is that the robot isn't actually destroying the plate of spikes for some reason
[MH-Arrlyx] 23 Mar @ 3:58pm 
many months later and im having the same issue as cornflakes, me and a friend tried it for like 2 hours
May  [author] 10 Aug, 2024 @ 3:43pm 
Just watch the god damn video man
May  [author] 10 Aug, 2024 @ 3:43pm 
There should be a button / lever that spawns a exploding robot. You should bait that robot to explode next to the boss.
cornflakes 10 Aug, 2024 @ 11:12am 
i do that, but they dont latch on, he keeps the spikes on his back so he just pushes off
May  [author] 12 Jul, 2024 @ 11:57pm 
@tic

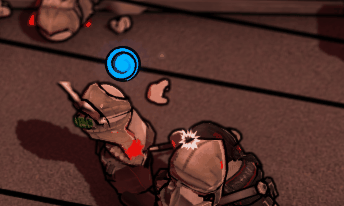
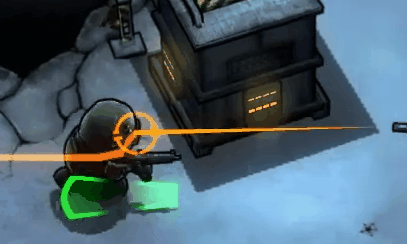
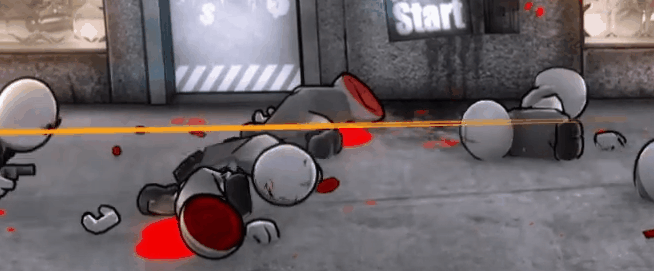
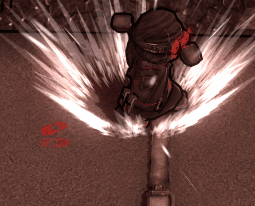
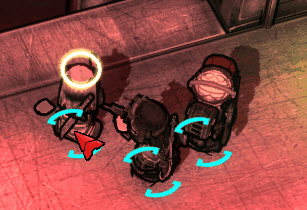
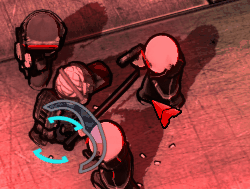
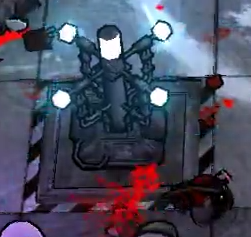
melee/unarmed to make the boss angry, execute with one of the character and switch with other character to execute fully
cornflakes 12 Jul, 2024 @ 9:56pm 
question, when i use the suicide bot on blackguard, his back armor stays on him, what am i supposed to do if that happens?
duckliege 31 Mar, 2024 @ 8:37am 
idea: add the nexus core church and jorge, you can fight them in the playground mode
contastic6418 3 Dec, 2023 @ 6:55pm 
Thanks Wingidon!