Source Filmmaker

Source Filmmaker

156 ratings
Ultimate Guide Series: New Effects with Material Overrides + Resources for Advanced users
By 8BEATER
This guide will explain to you how to add override materials, change existing ones and copy them to get some really great effects. But most importantly, you’ll be able to not only understand how material overrides work, but also know where to look to find more information on other shaders if you want to get even more deeper in this topic.
4
5
   
Award
Favorite
Favorited
Unfavorite
Material Overrides Guide for Beginners + Useful Resources for Advanced
Guide made by 8BEATER, $basetexturetransform information added by SierraFoxtrot. Feel free to copy its parts and reupload it anywhere as long the author is credited.
Information on This Guide
A material is a set of settings that dictate how an object should be rendered on your screen.
Materials are seen on almost everything from inanimate objects to characters to water. The settings that materials control can specify a texture, how reflective this object is, its transparency, additional details like bumps and much much more. Normally materials are made before a model is used in the engine, but Source Filmmaker lets us change it to look at familiar objects from an unexpected perspective and achieve stunning results.


------------------------------
This guide will explain to you how to add override materials, change existing ones and copy them to get some really great effects. But most importantly, you’ll be able to not only understand how material overrides work, but also know where to look to find more information on other shaders if you want to get even more deeper in this topic.
------------------------------
Introduction to Materials
What you need to understand is that a material is just a list of shaders with certain values. That's it. The final image is dictated by these specified shaders, not the material itself, so there the process for editing materials is very simple.

A screenshot of a pure material file, just a bunch of settings with values.


-----------------

Every material changes a set list of properties. Examples of them are:
  • $basetexture {string} — the main texture of the material. In this example I've set the texture of the body to "nature/rockground002"

  • $phongboost {float} determines Phong intensity. You can generally think of Phong as shininess of the object

    -----$phongboost 0

    -----$phongboost 30

  • $alpha {float} which is general transparency of an object (as a number with a value between 0 and 1)

-----------------

Every line in the material file is a setting and a value. The format of the value depends on the setting itself. If you have ever programmed in a language where you have to set a variable type before using it, like C#, C++, Java or many others, you’re most likely already familiar with this concept.
  • For example, $nofog, which prevents fog from overdrawing a material, is a boolean, or bool. A boolean means that the only acceptable values are on and off (1 and 0).
  • $phongboost is a float. That means that only decimal numbers are accepted, like 1.6, 42.93, 5.0, etc.
  • $basetexture is a string, or a set of characters, like a file's location: “nature/rockground002”

Changing our First Attribute: $basetexture
Since materials are a very complex subject, I strongly advise you follow this guide exactly step-by-step, with exactly these models and textures, in order to fully grasp the basics, and later you’ll be given more freedom to experiment, along with some important notes on fixing errors that might occur on your way. Okay? Okay. Let's start.

For now we’ll focus on learning how to browse common textures and add a $basetexture attribute to change how our object looks.

------------------
Okay, let’s hop into the Source Filmmaker and make our own custom “weapon”.

Add a c_sandwich1 model to start off our adventure
To change the material, we need to:
  • Right click on our model in the Animation Set Editor and press “Add Override Materials”

  • Click “Show in Element Viewer > Model”


From now on we can open the Element Viewer tab above

The material information is stored in the “materials” subfolder. Let’s open the sandwich tab.

To add a material, we need to right click on it, “c_sandwich” in our case (not the materials tab), and click “Add Attribute”.


Here we’ll see a bunch of variable types. As I already have shown you earlier, attributes need to be paired with a variable type. Since we want to change a texture, we need to specify its file location, and any kind of normal text usually is a string.

Select string


Now we need to specify our attribute’s name. It must be typed correctly, as otherwise it won’t work.

  • Type $basetexture — Make sure not to forget the dollar sign $ before the name

----------------

There are many ways to browse textures in the game’s files, but the best way for me is through the Hammer Level Editor, as it allows for viewing many materials at once, provides filters for type, transparency, etc.
  • Open Hammer Editor. By default it’s located in
    [SFM’s directory]/game/bin/hammer.exe
  • If Hammer from SFM’s directory doesn’t work, you can use one from any other Source Engine game you’re taking the assets from. If it’s Team Fortress 2, you can find it in TF2’s directory.


The only thing we’re interested in is the menu to the right. There’s a small icon with something that appears to be a missing texture (yours might be different) and two buttons: Browse and Replace.

Press Browse.


Currently there are far too many textures for us to list through. Type in the name of your texture in the Filter box.

  • If you can’t find something, try using synonyms of that word
  • Or maybe even take textures that just look similar. For example, if you can’t find a good enough sand texture, how about searching for rock textures that are yellow?

We’ve chosen our texture. Now, we don’t want to actually select it, but rather remember its name. I highlighted it in red below.


Type the name of the texture into the text box.


And there we have it, our new teeth-breaking tool is ready.
Solidifying our Knowledge: $basetexturetransform
Now I propose to you learning a new attribute which lets us change a texture’s position, scale and skew.

  • Add a simple flat object like a corkboard.
  • Find a texture that has some sort of pattern, like a tiled floor or a wallpaper.
  • Apply it the way we did it earlier.


Now, add a new parameter called $basetexturetransform with a format of {matrix}.
Think of a matrix as a 4x4 table with different float values.


Every cell in this table corresponds to a specific setting.

X scale
X skew
?
X position
Y skew
Y scale
?
Y position
?
?
?
?
?
?
?
?

The bigger the scale value, the more times the texture repeats and the smaller it looks.

Ta-da! Look at how our texture now looks like.


UPDATE: At the time of writing this section I didn't really understand the real way how to use the matrix and, more specifically, how to rotate the texture. Thankfully, the user Sierra Foxtrot explained it to me in the comments, so here's their response:

"$basetexturetransform actually uses a rotation matrix [en.wikipedia.org] as the top left 2x2. Check "Common rotations" for helpful 90 degree turns. You can also multiply these values by your desired scale. So the values look something like this:

cos(angle)*scale
-sin(angle)*scale
sin(angle)*scale
cos(angle)*scale

Some practical examples:
If you wanted a 45 degree turn, it'd be:

0.707107
-0.707107
0.707107
0.707107

And if you wanted that texture at half the size (i.e. x2) they'd be

1.414214
-1.414214
1.414214
1.414214

Also note that you can flip the textures in different ways by changing around the signs"
Finding the Resources: $alpha
So far we learned how to use only two attributes. What if we want to utilize a new one? Where do we find information about this shader, its function, its format and correct usage?

  • The best resource by far is the Valve Developer wiki.
    I’d consider this the definitive place to find information about the Source Engine as it's been run for a very long time, has a great structure, is editable by anyone and even contains some material written by Valve employees. If we want a list of shaders, these two pages are the most useful ones:

    https://developer.valvesoftware.com/wiki/Category:Material_System

    https://developer.valvesoftware.com/wiki/Category:Shaders

    -------------------

  • https://steamhost.cn/steamcommunity_com/sharedfiles/filedetails/?id=2162570606
    This guide doesn’t mess around. It contains tons of shaders and lists upon lists of different attributes. It doesn’t feature any illustrations or detailed descriptions so it’s very hard to guess about the function without the use of Valve Dev Wiki. However, it’s probably one of the most full lists out there.
    If you don’t know where to start from and want to check out something interesting, I’d recommend looking at the LightmappedGeneric and UnlitGeneric categories as they can be applied in most daily situations.

But if you're just starting out, use the Valve Developer wiki as your guide.

--------------------


Now you’re working on your own. Let’s imagine we read about the $alpha attribute which makes our models look transparent https://developer.valvesoftware.com/wiki/$alpha.
What if we want to apply it on medic to make a ghost effect? Let’s start.


Many models use more than one material. The material depends on the current selected skin, the part of the model, etc. We can guess which material we’re editing by the name or by slightly changing or adding parameters like $basetexture, $phong, etc.

---
---
---

As we found from the wiki, $alpha requires a float between 0 and 1. Let’s add it.


There we have our effect. Let’s apply this effect to other parts of the model, such as the head or the gloves.


Great work!
Looking at Other Materials: $phong + variants
Sometimes we need to check out materials from other sources, like what attribute is used in this material in the game’s files. How do we know about it if SFM doesn’t show the full properties? Well, for that we need to check the source files themselves.
  • VTFEdit lets you create and open Valve Texture Files and Valve Material Files easily.
  • There also exists a newer Open-Source program called "VMT Editor" which adds new functionality, such as drag and drop conversion, autocomplete and many others. Although many people use it, I personally didn't use it yet. But in theory, this guide should be compatible with both programs.

  • Download VTFEdit https://nemstools.github.io/pages/VTFLib-Download.html
  • Download VMT Editor https://dima-369.github.io/VMT-Editor/
After you downloaded it, we’re ready to change our demonstration man’s glasses or, more specifically, their reflections.


  • Judging by the screenshot above, the model path seems to be at “[SourceFilmmaker’s folder]\game\tf\models\workshop\player\items\all_class\jul13…”

  • If we get to this folder in the explorer, we won’t find any texture files. The thing is, the actual texture location name is hidden inside the materials folder: “[SourceFilmmaker’s folder]\game\tf\materials\models\workshop…”. The material is always located inside the materials folder.


As you can see, there are two types of files here: .VTF and .VMT
  • .VTF is Valve Texture File. It’s just a format of an image, similar to the traditional .png or .jpg
  • .VMT is Valve Material Type. It’s a list of parameters which says what should be included in the material itself. In Source FilmMaker we’re only overriding the .VMT file and can’t change the texture image itself.
Now we know that we should open the .VMT files to edit the material. However, that still leaves us with two of them. Which one should we select?

If we play around with the materials we can figure out that “jul13_sweet_shades” is for the lenses on the glasses, and the “_1” version is for the frame itself. We want to remove the reflections from the lens, so we’ll open only the first file.


There it is, our material in its purest form. We see a lot of options here, but the ones we’re interested in are: $phong and its options, like $phongexponent, $phongboost, etc.

Let’s manually copy the values into the Element Viewer and…


There we are. If we want to fully disable the glow, we can just untick the box at $phong, but we're done here


--------------------

The same way we can copy materials from one object to another.
Troubleshooting
Blend textures
Some materials which can be found in Hammer aren’t accessible in SFM if you try to type its name. Files which have “blend” in their name or seem like they are a gradient between two textures in the preview are made to smoothly transition between two types of surfaces.

You can mostly see it with organic materials like grass/sand, rock/cobblestone, etc.


The fix for this is navigating to the material's folder and selecting one of two textures you actually want to use.

-----------------------

Reloading materials
  • Some materials might not react to being changed.
  • One of the reasons behind this might be that they require reloading before use.
  • To do this, type the “mat_reloadallmaterials” command in console.
  • Some extreme cases (from my experience, not 100% accurate) might require even restarting SFM in order to work, so before you do that, ensure that all attributes are set correctly.
Additional resources
My main mission with this guide isn't to give you instructions on doing things, not to give tips and not even try to explain information to best understand how the system works.

This guide's purpose is just to start off your learning and provide the resources to not get lost in this complex, sometimes confusing, but beautiful world of materials.

So here's the list we've all been waiting for. I'll update it over time and add some links to interesting topics around material overrides.

Lists of materials and information on them


That's it. If you have noticed any mistakes, inconsistencies, didn't understand a part of the guide or would like to add something new to it, please tell me about it in the comments, and I will edit the guide to feature that information. Thanks a lot for your attention and for reading it to the end. Goodbye.

-8BEATER


8 Comments
nickearnest918 19 Apr @ 5:48pm 
well sadly the hammer thing isnt for me since i have no idea what to do cant use the light copy and paste method due to out of string space so i may as well avoid custom materials
Acey Drgn 16 Dec, 2023 @ 12:22am 
I'm late to the party, but the explanation on $basetexturetransform and what the text fields controlled - SUPER HELPFUL! I used to take a texture in an image editor and just copy it a million times until it was 4x and use that - Never again! xD
8BEATER  [author] 5 Oct, 2022 @ 4:00am 
@Sierra Foxtrot Sorry for the late reply. I finally got around opening SFM and I tested your method and it works perfectly. I had no idea these values were multiplied by scale, so that's what confused me the most. Now that everything is checked, I'll add your information into the main guide. Thank you a lot for helping me!
8BEATER  [author] 21 Aug, 2022 @ 7:10am 
@Sierra Foxtrot huh, I also thought it was a rotation matrix, though nothing seemed to happen if I changed the values of the other slots. Now that I know which cells I should edit, I'll try it out the next time I open SFM.
Sierra Foxtrot 15 Aug, 2022 @ 10:22am 
$basetexturetransform actually uses a rotation matrix [en.wikipedia.org] as the top left 2x2. Check "Common rotations" for helpful 90 degree turns. You can also multiply these values by your desired scale. So the values look something like this:
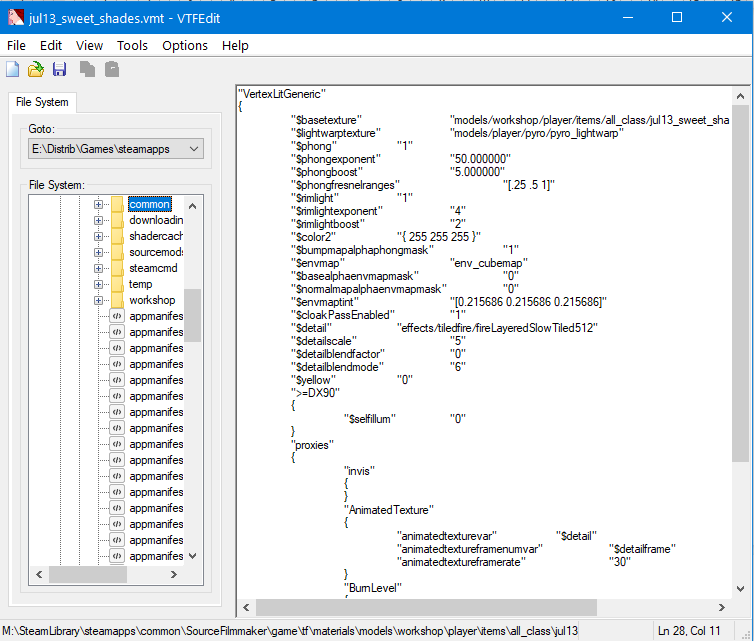
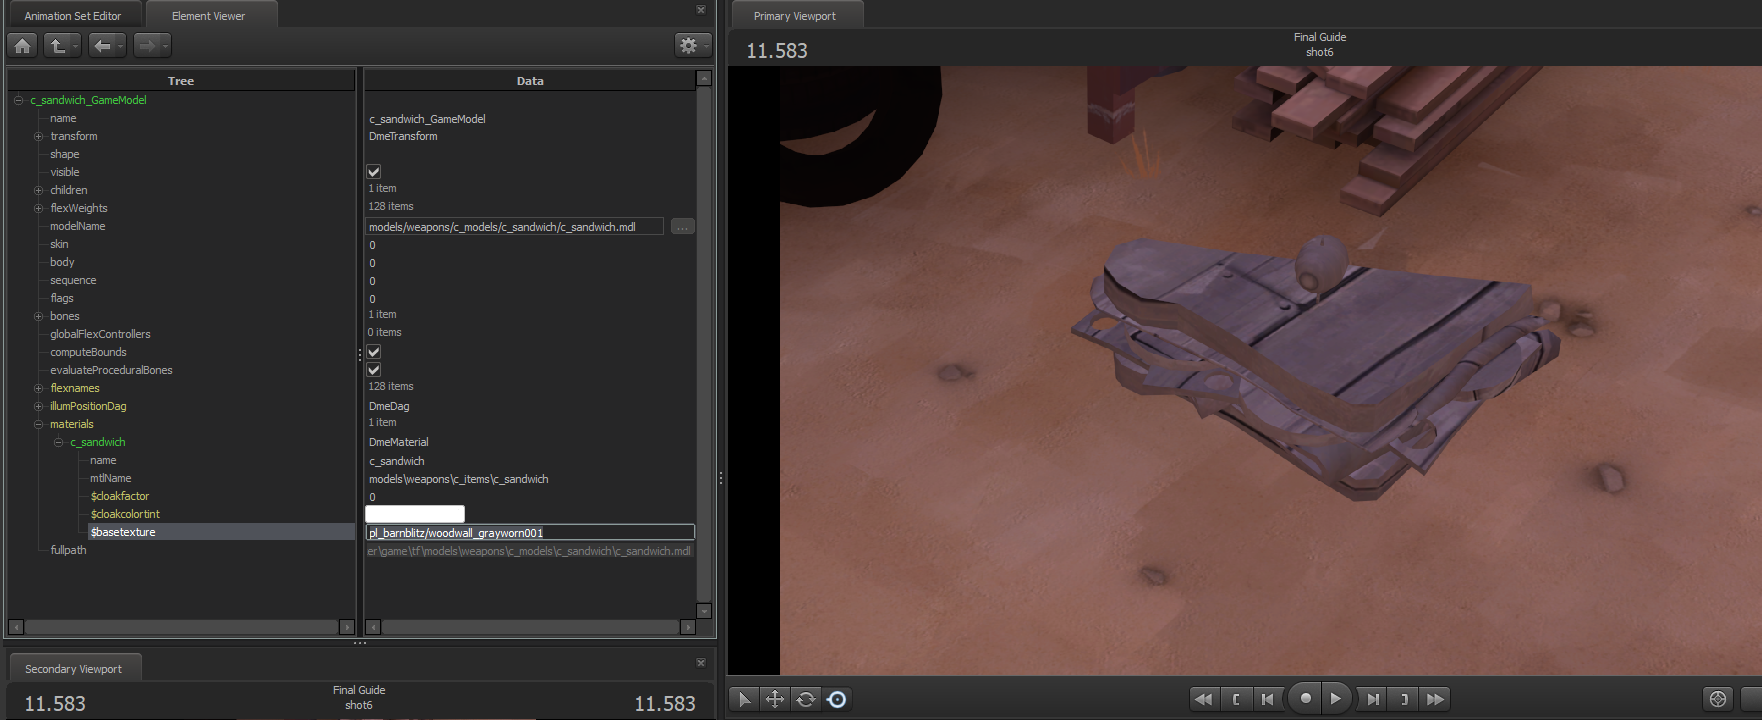
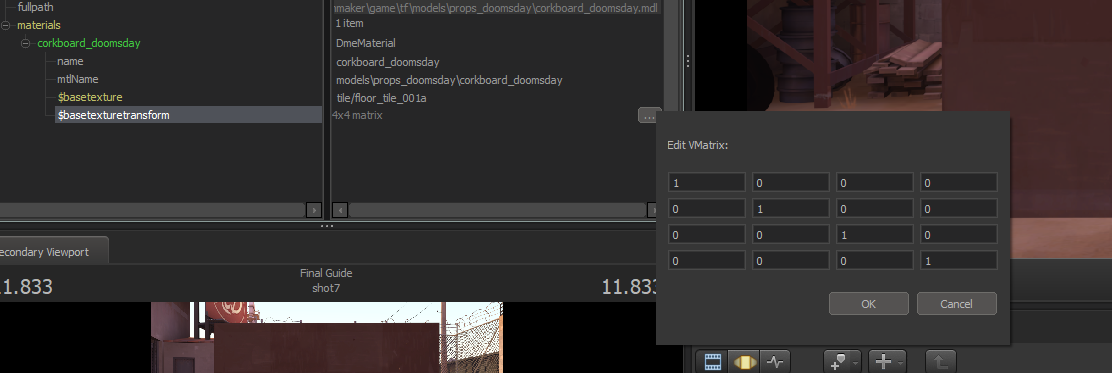
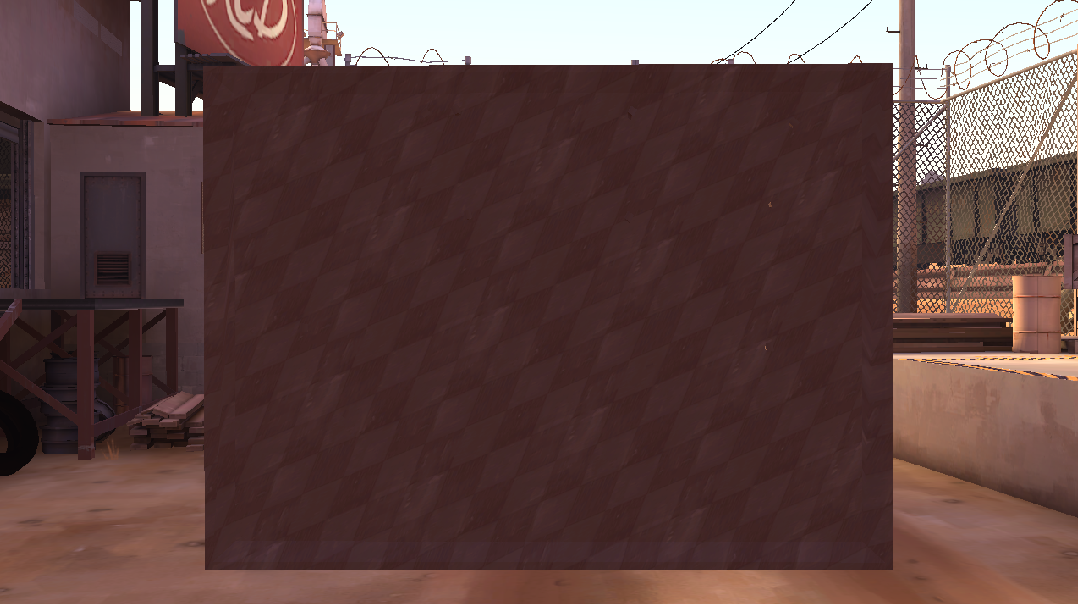
[cos(angle)*scale][-sin(angle)*scale]
[sin(angle)*scale][cos(angle)*scale]

Some practical examples:
If you wanted a 45 degree turn, it'd be:
[0.707107][-0.707107]
[0.707107][0.707107]

And if you wanted that texture at half the size (i.e. x2) they'd be
[1.414214][-1.414214]
[1.414214][1.414214]

Also note that you can flip the textures in different ways by changing around the signs.
Mits 14 Jul, 2022 @ 3:53pm 
Absolutely amazing guide went over everything for the basics
dr uber 24 Jun, 2022 @ 3:53am 
Neat
8BEATER  [author] 23 Jun, 2022 @ 11:32am 
Some things I wanted to add.
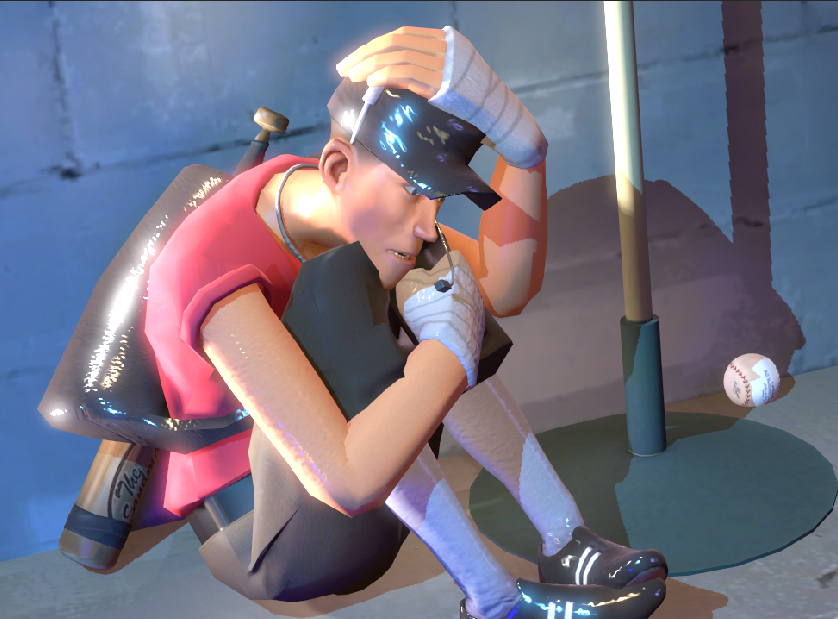
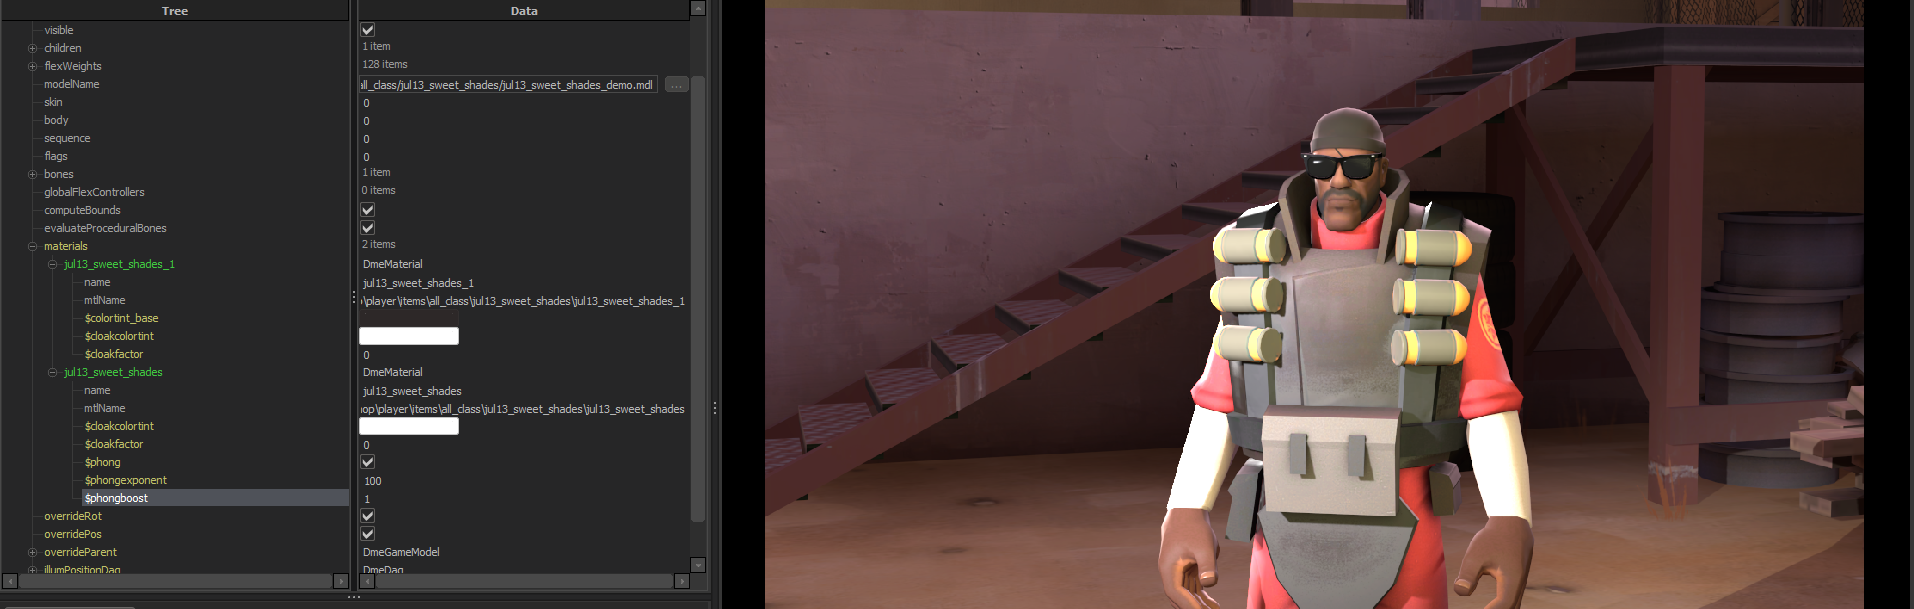
The rain effect you see on the thumbnail was made using a normal map from a concrete texture and increased phong. I don't currently know of a way to have phong be impacted by an individual texture, so that's why Scout looks bumpy here.
The $ambientocclusion[/b] attribute lets you change the AO effect's intensity for individual objects and other values, such as color.