Against the Storm

Against the Storm

120 ratings
Efficient Starting Town Layout , Embarkation tips, And Many More
By HydraSalza
Layout Guide for placing your blueprint building be it for housing, industrial, or even services. the goal of this guide is making sure your worker work more and walk less
3
7
3
3
2
   
Award
Favorite
Favorited
Unfavorite
How to gauge that you're playing efficiently.
The game give u some pretty nice time limit to finish a settlement. in 10 years u get a free Cornerstone for every years. so lets just assume that 10 years is the time limit

In Prestige 1 Game you need to fill 18 reputation to win the game
Usually the list goes on like this

Speed runner / Fully upgraded Smoldering City Player : 5 year
Seal Rusher Player / experienced player : 6 - 8 Year
Oh ♥♥♥♥ I forgot buying things in trader player / Bad Rng player : 8 - 10 Year
Average Player : 9 - 12 Year
City Builder Enjoyer : 8 - ∞ year

7 year is a sweet spot for for your time limit, even in adamantine seal objective where you face so many obstacle you still get the 105 seal fragment. (Assuming you take risky world modifier though)

Be warned though the longer you finish your settlement citizen will be easier to leave the town because in this game the resources you got is not infinite. also in higher prestige game its not really that easy finishing the game in 6 - 8 year especially with bad world map modifier.

So just play slowly and dont rush to higher difficulty, especially if your Smoldering city upgrade is minimal.

( Also when i play to make this guide picture im just playing a relaxed game with no intention to finish the game faster so please dont judge me harshly. :) )
Basic Starting Layout
This layout is only for you to easily visualize where to put all path and the building because all hearth spawn location is random

* To make it easy for you to place the building, build the road / path first then the building will fit.


If you get this layout then congrats you just win a jackpot (assuming no small glade ruined it)
Layout Rule
This layout is optimized for a quick climb from prestige 1 to 20, but it works fine in viceroy and lower difficulty
(Note some glade placement may make your layout blocked especially small glade, but its still doable as long as you expand and follow my layout guide)

This layout is for a level 1 starting hearth to lvl 3 district consisting of
* 20 - 24 population ( 25 - 50 population require second hearth)
* 1 Services Building
* 16 Comfort , 8 Aesthetic , and 4 harmony decoration
* 12 - 16 Species Housing
* 1 - 2 Blightpost
* 1 Trading Post ( far from hearth)

I am a speedy gamer so i design this for a quick game and i play with 3 x speed and pause combo
so i am sorry for people who want to make a beautiful town because i usually just place bench/Barrel and Flower for my decoration (the more time you spend decorating mean your worker work less)
--Build The road/path first then its easier to place the building later--

The most important material is Plank for a faster hearth upgrade and species housing
1 woodcutter camp for cutting glade and 1 woodcutter camp for opening your hearth zone

Builder Priority
1. Housing spot ( Build behind your hearth and far from warehouse)
2. Industrial spot (Build Near Warehouse and blightpost)
3. Decoration Spot ( Build In empty spot and far from warehouse)

if your town is having 5 idle builder even in the storm the youre doing something wrong

*Building blueprint priority (be it from trader, reputation,or order reward)
1. Bulding material = plank > brick > fabric ( workshop superiority)
2. complex food grade 1 = jerky , porridge / Camp ( the one that spawn in your biome or glade )
3. choose 1 from 4 of extra fuel / flour / pack of provision/farm ( this depends on 3 population of your race)
4. complex food grade 2 = skewer / biscuit / pie
5. one service building
6 service building Consumable maker ( even for the one you don't own)
7. More Service building

why i didnt place road around my first hearth ? because your worker destination is always like this

work place ==> warehouse (to take food) ==> hearth ( to rest) ==> back to work place.

so the important road is the one that connect warehouse and hearth and since early Game space is limited and you want to built house fast enough a little less road is not a bad thing at all.


Optimal Main Heart Layout


Optimal Second Hearth Layout and Range From Main Hearth
Main Building Size And Color Guide Plus Some Tips
*Special zone consist of 2 x 3 area and perfect if you find 2 x 3 industry building, other wise just build the 4 regular starting building type 2 x 2 and put 2 decoration so you can level up your hearth fast in early game. the spot near warehouse is good for industrial building while the one near the hearth is good for industrial or home if its far from the main warehouse ( i usually use the one beside the warehouse and place 4 decoration)

its called special because no tree,farm or harvestable thing can spawn on that location so its a guarantee spot for your building before the season start

2 x 2 building = crude workstation , rain collector, make shift post, field kitchen
You can even move 3 of this building to make space for more important one, that's why this area is special

*Trading Post = unless you got some market / trader Corner stone i usually refrain from building this thing, because u want to have a backup plan when opening your first dangerous glade, build this thing when u want to open that glade! trading/ buying things early year 1 is rarely worth it and making early pack of provision is bad for your food. (place it in inside your first glade or outside your hearth zone)

*Blight post = on early prestige 1 - 9 blight corruption is less dangerous but its better to build it early in year 2 - 3 always place 1 worker to keep this thing working, make 20 because better safe than sorry, if your corruption start at 200 % abandon every worker job and start building the 2nd blight post or you will suffer 6 + death villager. ( this thing require stone / brick so its better to build it early, because some times you didn't get stone deposit and forgot to buy it at the trader and some glade event require purging fire )

building 2 of these can be useful if u want to abuse rainwater to max and good for your idle woodcutter
Prestige 10 ++ game require you to build 2-3 of this

* Hydrant = one of this thing will save your time and make your blight fighter burn more corruption place it near the furthest industrial zone from your blight post ( remember unburned cyst stay and make your next storm harder)

how hydrant help blight fighter
worker take 1 purging fire from blight post >> use it to burn the nearest building >> then return to blight post to take 1 more purging fire >> burn the next nearest building
hydrant is just a tiny blight post for your worker to take purging fire and by using it you save time by allowing your worker to walk less between burning cyst

*Big Shelter = The reason i prefer this over shelter because it save time and space and 4 shelter itself is enough to upgrade the hearth to level 3, and it easy enough to build a species housing when u want to replace it. comparing it if you replacing shelter to a species house you maybe need the extra space from the main hearth and also more builder time since your builder walk more far away .

*Species Housing = Provide a little resolve Boost to your specific population, some people just prefer to not built it. but i remind you this bonus resolve is permanent and unlike Complex Food or Services where u need to make it every time you want it (Some Glade event rarely affect Housing while Food glade draining event is Plenty)

*Decoration = better place and built it early for the extra resolve district bonus, Place it far away from your main warehouse, i usually place 4 in special zone early for a quick level up. building 1 (2 x 2) decoration is faster than 4 (1 x 1) ( start mass building this thing in the storm with your idle woodcutter)

* Forsaken Temple = build this thing far from your hearth and your small hearth , quickly build this thing if your reputation almost pass the red mark the Corner Stone you get is worth it. this building is also useful if you got an overpopulation problem ( you can even demolish it after max sacrifice to get the material back)

*Small hearth = usually people never expand and keep abusing the first heart until it got no space left, the quicker you expand the more people you can take, small hearth is usually used at farm location or 2- 3 abandoned building. try to expand before year 6 (just place it in the center of 3 dangerous or forbidden glade).

*Service Building = take 1 for upgrading your heart even if you cant produce the service, this thing is good for your idle woodcutter, place it far away from your main warehouse( my recommendation is monastery,guild house , tea house , forum)
Main Warehouse Layout
This is the most optimal layout but in reality your building blueprint size may vary and even if you fill all of this space you probably playing your game for too long (some small glade may even block this layout)

Your first warehouse is the center of your city production. you don't really need to make another industrial zone in another hearth (except you found a 3 good ruined building in dangerous glade)

Orange colored area mean that hearth may spawn on that location ( it also the best location for your building, prioritize it)

* place one hydrant on the farthest side from the blight post

* you got enough space for all the worker building, if you don't then you need second hearth to relocate your housing


this is an example of a good starting hearth for industry, sure my left heart is blocked but my worker work faster because the front of my hearth is open

* Your worker can still enter the building even if the entrance of your building isn't a road but another building
Special Zone Layout

* Layout 1 is Industrial Focused early game where you can swap the building for the better one like in layout 4
* Layout 2 is used when your the distance between your hearth and main warehouse is far or you just want to rush building house early
* Layout 3 is a balanced starting build order where you don't plan to remove or replace the building
* Layout 4 is your late game Important Industrial building placement (Assuming You got it of course)


After all choosing the layout depend on your play style in early game
Industrial Zone Layout
this is for those who want to make a second hearth an industrial zone

*hydrant is a must have if you using rainwater on the building
*hydrant isnt really necessary when playing bellow prestige 10 so just build more building
*making a small warehouse for less than 5 building is a waste, but if you got a spare parts then just spend it
* unlike an industrial building, a 2 farm zone is a good place to place a warehouse

Housing Zone Layout
All of this layout consist of an extra house meaning if u build all of the house, your hearth will be overpopulated because you only need 20 people for a level 3 hearth zone so build efficiently !


Generally you want to build your early house behind your hearth (far away from your main warehouse)
Use housing layout 1 if your hearth isnt blocked by your main warehouse or a small glade. use layout 2 otherwise.
Layout 3 is your final housing for late game or you can use it early if you didnt find any plank building blueprint
Layout 4 is for Someone who wants to make your town looks functional with road even if your vilagers rarely walk that path

*If a small glade is blocking the area behind your hearth then built it beside the right road or left but far from your warehouse

* if your population is starting to reach 25 its time to expand to second hearth !
Tips and trick

* 4 big shelter is also a safe number for a sudden population boost from glade event or Corner stone reward when u didnt pay attention (also usefull to plan your species housing on second hearth just look at the 4 big shelter and built the species that reside in it)
* Replace your big shelter with species housing after the storm ends and when you get a newcomer ( you still get your full building material back by destroying it)
* its better to build more empty house early before the newcomer arrive ( some glade event disable house room)
* during early game always set your house building priority to 1 because builder prefer to build road than house


Housing layout 2 example (industrial zone spot is more important than housing)


Housing layout 1 example
Small Hearth Layout


Just kidding you can completely ignore the layout i dont even place the house or decoration neatly usually because of the cache and some hasvestable material that i cant gather

- Always think about your 2nd hearth at the start of the game, and quickly clean the tree around it

- The important thing is build your small warehouse first before the hearth and quickly lvl up your hearth to at least lvl 2

- Place one hydrant even if you dont have a worker building or blight post because cyst can spawn anywhere anytime

The first perfect place for your second hearth is between 3 dangerous glade or forbidden, dont build industry around it because it make your blight fighter job harder.(plan your 2nd hearth at the begining of the game)

The second perfect place or your second hearth is when u find a ruined town containing 3 repairable building ( u need to built the another blight post thought)

The third place is near a farm field.

example of a great second hearth location ( the marked tree zone)


Embarkation Bonus Choice

Embarkation Bonus is usually used to make your early game easy to manage, sure you can take 2 service delivery line for an easy late game or Glade event solving but your villager usually have some glaring weakness early game that needs to be minimize to avoid villager leaving early game.

Don't take it if the cost is higher

Good general pick
- 1 Point Meat or vegetable (get all if it cost 1)
- 2 point plank ( you always need this early, mid even late game)
- 3 point pack of provision ( this is your money making tool early game, sell only 1 stack of things)
- 3 point amber (generally good for every prestige game but 4 is too expensive though)
- 1 point wood ( in prestige 5 ++ this is actually a really good because u have 56 wood start and can build 3 (45 wood) shelter and 2 wood cutter camp early at the start of the season then built the 4 decoration slot later and have a level 2 heart as early as middle drizzle, this is useful because u can make your population hungry early to save food)
- 3 point part ( for early selling at trading post, they make a good amber )

Situational
- 2 point brick ( if you start with Lizard)
- 2 point cloth ( if you start with harpy)
- 4 point oil ( if you confident opening glade without preparation, usually its not needed resulting a wasted point)
- trapper camp ( take it when you start at marshland even if it cost 5)
- 1 point newcomer = start with human and beaver and take vegetable and meat.(They are trading based species more worker early more things to sell), or you start with 8 harpy or 8 foxes (because that species is bad if alone) good early harpy population is 2 - 6 and fox fire keeper is useless early game thats why a random 3 newcomer help it.
- 5 - 6 Point Training gear delivery line (the sword one for opening chest)
- 4 point any farm ( if you start at cursed royal woodland, the best one is herb garden)
- 2 point stone ( you pick this not because you want to make brick but you want to use it as road for faster movement, pretty niche if u ask me)
- 5 Point Farm (only in prestige 11 ++ )
- 1 point roots ( only good for eating raw or you want to have a flour material early)

Bad pick
- Royal permit (you take Randomness for fixing your Randomness, taking late Corner stone is fine)
- Any services consumable delivery line (You Take 1 item and hope randomness bless you, it still too expensive)
- Parts (Usually people take this for selling them at trader day 2, you got enough for 2 camp, 2 blight post, 2 woodcutter post, and 1 rain collector)
- Reed or leather ( your biome tree generate enough for your fabric unless harpy is involved)
- Clay ( unlike stone, clay cant be used for early game boost. just take brick, dangerous glade provide enough chance for it to show up)
- Coal ( unless you also take oil for reckless day 1 glade opening)
- herbalist, forager, trapper camp ( this building is high risk high reward, even if you start with the optimal species camp user. still if you like to gamble go for it. )
- egg (only good for early raw food eating because it cant be used for anything early / if you want to make provision but why though? you got nothing to trade in year 1)

Small Glade Vs Big Glade Difference

Note : Big glade = Dangerous Glade / Forbidden Glade

* Small Glade (0 - 3 per game)
Positive
- You can almost harvest everything in this glade at the start of the game ( Except Glade event)
- You don't need big camp upgrade to use everything inside it (Trapper , Forager, etc)
- You can always open it on every season without any risk
- Good choice if you low on food
- Good choice if you still learning the game ( Settler - Veteran Difficulty)
- Small caches is a good and cheap early boost reputation while still good enough late game
- Require less tree cleaning from your woodcutter and less road for your builder ( This means you got more wood efficiency)

Negative
- 2 small glade got less resource than 1 big glade while costing the same hostility
- Opening small glade at mid or late game is considered a bad move if you play at high prestige game
- Less resource make you open more glade more easily and make your hostility rising more quickly
- It sometimes ruin your first hearth layout even if you don't open it
- Bad place for your 2 - 3 hearth expansion

When You Should Open it ?
- Human Passive Ability = Farm Field Provide unlimited food supply and its worth it
- Fox Passive Ability = only open it if its a drizzle water or storm water
- When your first 4 blueprint offer you no camp building
- early game when you bring 12 + citizen and no food at embarkation choice (And your starting node resource provide Farm Field and stone)
- When you open your 1 - 3 big glade and found no food ( while also cant harvest it because you got the wrong camp building)

* Big Glade ( 3 - ∞ Per game )
Positive
- More Reputation and Resource can be gained than small glade
- You can also find a good cornerstone from the glade event
- Big caches Is a solid game plan for almost every map and every difficulty
- Finding Building in Glade means you just safe 20 - 40 amber and your blueprint building stock
- Good Place For your 2 - 3 hearth expansion
- Good for opening your first hearth layout

Negative
- Require Big Camps blueprint if you want to use it fully ( Trapper , Forager , etc)
- The only time you can safely open it without spending burnable fuel is at late storm and early drizzle because some glade event can make your storm season harder by messing with the people resolve or even your ability to manage the town
- Even if you are prepared at opening it in year 2 only 75 % of its event can be solved by your starting resource and building, that's why its called dangerous glade ( this drop by 50 % if you open it at year 1)
- You lost your town efficiency by sending 2 - 3 people at the glade event, this means you usually need to abandon some workforce every time you do that if you open the glade early ( this means less food, less wood and that means slower hearth upgrade)
- Require More tree cleaning from your woodcutter and More road for your builder ( This means you got Less wood efficiency)
- Failing to solve the glade event makes your game harder and also punish you with some impatience point ( generally 3 fail event is the maximum you can take more than that require some experienced player to win)

When You Should Open it ?
- You got Big Camps blueprint
- In late storm season so you can prepare the necessary resource needed to solve it
- You prepare enough resource to solve the glade event
- The trader arrive in your settlement so you have a backup plan in case you don't have the resource
- You got some idle builder / worker to sent

* General Tips About Glade
- The most important tips I can give you is use all the resource in the first and second glade you open because opening the glade without using it only make your town condition worse, remember that hostility itself is a resource and should not be used recklessly. this means i really don't recommend the 1 year 1 glade opening strategy because the glade reward in those glade isn't worth the hostility and your woodcutter time you sacrifice
- The ideal big glade you should open is 4 glade because 4 is usually got enough resource you can use to trade or consume to win the game
- never open big glade without having at least 1 big camp you usually only get to use 1 resource and cant harvest the camp resource
- experienced player can almost fix all the negative big glade because they learn enough about the map resource and the embarkation choice they should take at year 1, but don't be discouraged 1 - 3 mistake is fine if you still learning the game
- its better to quickly drain 1 type of resource in glade than slowly drain it because you can save part for your camp when u need it
- You can win by using small glade so don't be discouraged
- unlike dangerous glade forbidden glade offer more reputation from the event at the cost of more complex resource you should offer but the risk is also high ( that's why its a bad idea to open this glade early year 1-2)
General Year 1 Layout Set Up
I bring a safe embarkation resource and not seeing my first 3 building to show a general starting strategy
This is a pretty bad starting Hearth and Main Warehouse location. not only my top industrial zone and housing zone is blocked by small glade the starting resource is pretty bad. the good thing is my 4 special spot and path is not blocked by some starting resource

why do i rush building blight post and rain collector ? because some glade event need it and in high prestige rushing to build and make the stuff is usually too late for finishing the event

- The first area you should clear with wood cutter is housing zone then top industrial zone for blight post. then you can start working to your first glade
- Always use 2 - 3 builder and make them work if all building is complete
- I usually make my citizen hungry year 1 to save some food and make them eat mid storm. because my hearth lvl is upgraded early starving them is less risky ( You can also use lizard fire keeper for a safer condition)
- Quickly harvest the starting Resource, because you might need to re use parts for something else (Mine , Event, Etc)
- The Field kitchen is a really good building, and i really recommend you unlock it early. you save so many food by using this thing for porridge and jerky ( you can see i feed my population with complex food early)
Random Tips And Tricks
- Main Hearth Keeper Tier List (D - S)
Keep in mind a lower tier in hearth keeper doesn't mean the overall species is bad, i value species based on map usually

1. Human (Slower Impatience Generation): The Safest Option early game when your smoldering city lack any upgrade and you still learning the game, human is good for a late game ending resolve because they give more time, and time is a good resource for a good player or even a bad player. don't be fooled though later in prestige 10 - 19 permanent human fire keeper can be used to make risky play using a full forsaken temple sacrifice ( A Tier in any prestige game )

2. Beaver (Slower hearth Fuel Usage): a niche and situational usage when you don't find a plank building and in rare wood biome, beaver provide a nice fuel reduction, the weird thing is beaver also help producing wood so its really a strange scenario. but in high prestige game you also make a lot of purging fire in blight post so this make beaver good at least ( C tier in low prestige game , B tier in prestige 10 ++)

3. Lizard (+ 1 Resolve Bonus): A good pick if you want to utilize hunger early game, early resolve reputation,live saver at certain glade event, and a reliable helper at storm season. but it usually a bad idea to make lizard a permanent fire keeper, because the bonus resolve is too little (B Tier in any prestige Game)

4. Fox (Glade Grant Less Hostility): Fox is like lizard but far worse early game, but better late game pick. The thing is if you open too many glade just for using a fox fire keeper its a bad play. this mean fox fire keeper need to be used at the right time. starting with all foxes population is as hard as harpy ( D Tier early game , B Tier late game if used correctly )

5. Harpy (+ 5 Population carrying capacity) : The best all around, because harpy upgrade all of your population capacity, be it for : Glade worker, Builder , wood cutter , industrial worker, etc. it goes both ways from storage or to storage usage. harpy save time and give your worker more things to do. but sadly easily replaceable by marketplace building ( S Tier in any Prestige game)

6. Frog (50 % Faster Newcomer Arrival Rate) A medium risk and high reward choice that help faster building expansion or more workforce in early game. usually i just use it at year 1 to year 4 because too many people in your settlement also means more food and hostility. frog fire keeper beat harpy at early game but lose at medium to late game. ( A Tier in any prestige game)

-Trading Post Buy and Sell Recommendation
*Buy this thing if trader have it
1. 10 - 20 Plank, you always need more ( for quicker hearth and house building )
2. 10 - 20 fabric and brick if you use crude workstation or cant produce it fast enough
3. Food if you low :Vegetable , herb, wheat , Meat, and insect. ( this is good for field kitchen to save food )
4. 10 Pipe ( its cheaper to buy it than make it if. you only use crude workstation)
5. 20 Copper Bar / Dew Bar ( If your tool production building set up)
6 . All Complex Food and service building material in late game ( Don't hoard your amber, just spend it for a quick game)
7. Always buy Camp And 1 Farm building from trader even if you dont see the resources now.

*Sell this thing be it from trader or trading
1. 150 ++ basic Food ( its better to pack it into pack of crops or provision )
2. 100 ++ Complex food
3. 30 ++ building material, : plank , brick , fabric ( only sell it if you max 2 hearth and your species housing)
4. 100 ++ Fuel : oil, coal, Sea marrow ( you only need 100 for certain sacrifice)
5. 2 ++ wild fire essence (after you expand enough and having a steady supply of all rain water)

- How to save Some Food From Blood Flower glade event (the important one )
1. Use field kitchen and makeshift post
2. Go make pack of crops, pack of provision and all complex food
3. Enable all recipe. set to only make 1, then remove your worker when he began working something
4 . now your food will be stored in the workspace inventory
5. Take it back by removing it. after the event end
this is also working with thermite event for building material (you can also use more than 1 makeshift post)


- How to Safe time with some little micro management
1. Make an empty 2x2 spot in front of your main warehouse or warehouse
2. use it to quickly build decoration or camp. after its done then place it in your desired spot (also useful for a quick house building, but it cost some wood)
3. this spot is also useful when your wood cutter camp or any camp when its full, just place it there to empty the storage quickly then move it back to the last spot. your worker will walk less.

- 1 farmer can usually handle 4 farm field but for general rule is 3 farmer for a small glade farm. 4 farmer for a dangerous glade farm ( only if your warehouse and hearth is close to the farm)

- Always favour lizard at the end of clearance season (10 - 30 second before the storm start) after the storm starts cancel it, the extra +5 resolve is useful for keeping the lizard happy in the storm because it drop very slowly compared to other species ( it can even help the other species by favoring them in the storm)

-Recipe Limit
Always make 10 of each item because its good for trading in trade route ( except pack of thing)
1. Building Material ( Plank, Brick, Cloth) = 7 Early - 30 mid / late
2. Complex Food (Jerky, Skewer, etc) = 150
3. Service building Consumable item ( Wine , Ale , Incense) = 33
4. Other Consumable item (Coats) = 50
5. Pipes = 10 (dont make it early with crude workstation)
6. Crafting Resources ( Water skin ,Pigment, Flour, Copper bar) = 30 Minimal - 100 if its important (Flour)
7. Fuel ( Coal, Oil,) = 200 for Coal - 50 For Oil
8. Tools = 50
9 . Trading goods ( Pack Of building , Provision, Crops , Etc) = 3 For Trading - 20 For Selling to trader
Real Example
*this is my prestige 1 play where i take oil and trapper camp because meat is plenty in this biome, i choose beaver because wood are rare in this biome and must find plank building for sustaining my resolve. i choose housing layout 2 because my left hearth is blocked.

early game before the timer start i start building 2 woodcutter and i got lucky i got lumber mill and granary for my species housing ,i didnt open the dangerous glade because i got a low population and i prefer to level up my hearth first. start colecting rainwater if your 2 builder stop building


Before the second year start i already fix my housing problem and upgrading my hearth, now im ready to open my first dangerous glade

In midgame i always use the sacrifical ritual anytime i get it its better to get suffer now than latter (Beaver and harpy is always the primary target for my grudge )

in this long game i showed you why housing and hearth upgrade is important, i never use the service building even in the storm to showcase the power of extra resolve housing and hearth, im not opening a crate and done all my queens order, the only death i got is from sacrificing in forsaken altar and altar of decay glade event. i dont even sacrificing wood / coal in the hearth at storm


my second hearth fully upgraded

*Prestige 10
Early Game (i build shelter instead of Big shelter because i got no plank building)


Second heart location ( i choose this Location because i bring farm building


Late Game


*Prestige 20 Game
I start with amber and trapper camp and draft Granary and herb garden, the Greater threat Forest of mysteries is dangerous for a longger game so i tried to finish it quickly.


Second hearth location

I got lucky and found smithy for 1 star biscuit, if ur population has harpy you need to make field kitchen for a good resolve boost, now i just need flour building


Late Game
i got really lucky this game by finding clohtier and pie recipe building, and surprisingly harpy is my best friend. complex flour food helps my game (also i take full forest lowering hostility threat)

Video Gameplay Example
This is the second viceroy game in a new profile ( the first one is boring because no trade and
rain water even the 2nd heath upgrade is disabled)

This is a pretty balanced game where i got some good thing and bad thing. i play with a new profile to show its posible to beat viceroy on minimal upgrade.

On that video you will see how i deal with some scenario like
1. Low on food situation
2. Bad early order
3. unclearable glade event
4. No early complex food
5. Overpopulation With idle worker causing deadly storm
6. Late Hearth Expansion
7. Some Useless early or even late Cornerstone (useless mean i got no use of it even if it late game)
8. Rushing for a Quick Victory

The bad thing with minimal upgrade is you really cant use rainwater effectively. and cant even choose food consumtion resulting a bad eating habit
The funny thing is i win without opening chest while i got tool building early and i not using archeologist station

**Fully Upgraded Smoldering City Prestige 20 Gameplay Example
My biggest problem in this game is food shortage, but my building material is secured fom the glade, the extra villager camp in the glade doesnt help either because i need food to use them, my order is decently late game

-The key to succesfully clear prestige 20 in my opinion is always swapping your ideal population in every situation.
- Always Burn All the corrruption,population death in prestige 20 is a really bad thing. ( i rarely use forsaken temple because of this)
- Field Kitchen jerky and porridge is your best friend to save food
- Prioritize picking easy to make order (Burn blightroot / Rain Water) or the free one (glade solving / glade opening) . building required spesific order is bad because too random ( tavern + ale / guild house + Wine). timed order are trap because if you fail 2 dangerous glade your city is ruined and its hard to recover (farm timed order in settler difficuty, its way easier and faster)
- The best early order reward is parts, so you can make more camp and expand more.
- the best late game order is the one that can be solved easily (usually 10 human , beaver, etc)
6 Comments
Shadorei 29 Nov, 2024 @ 11:34pm 
This is an insane amount of work put into this guide.
Thank you for all the time and effort to share this useful information.
Miedzic 21 Nov, 2024 @ 3:58am 
hello, can i expect some update or maybe you are not playing anymore?
HydraSalza  [author] 10 Feb, 2024 @ 12:49am 
3. the 1 point newcomer meaning is = if you start with 8 harpy or 8 fox this is bad because you cant use the favoring while making your villager hunger. harpy is the worse one than fox because they waste so much food earlier and work less in early year 1 - 2. fox firekeeper is also useless early game you got nothing from it, even beaver solo is better (early game harpy population is usually better 2 - 5). i already revised my word in the guide
HydraSalza  [author] 10 Feb, 2024 @ 12:41am 
@ Miedzic
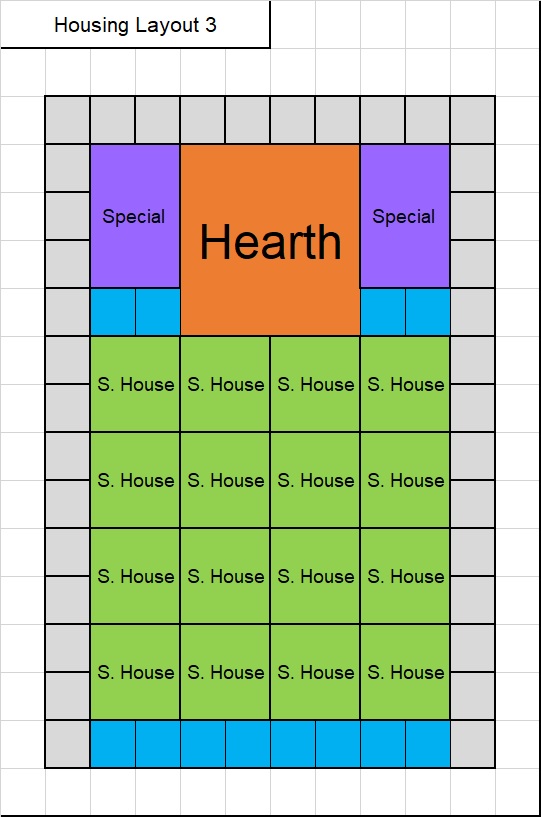
1. Coral Forest is a low wood biome so your decision to take plank was a good choice, a 2 cost vegetable and meat is not worth it

2. for taking amber and provision its usually depend on the starting species lineup
if you start with a trading base species (Human and Beaver) take provision because early game both of them dont need some complex food to help them. but if you starting with resolver base species ( Lizard and Harpy or fox) then amber valued highly because you can use it to buy meat to make jerky easier and help sustain you in earlier storm. but if you start with mix species ( Human and harpy or beaver and lizard) then amber and provision became equal value, you just have to trust your guts
Miedzic 7 Feb, 2024 @ 10:18am 
Damn this guide is soo good. It's weird i has just one comment.
I had a question though. What would you take if you had 5 embarkation points? I had this case in Coral Forest and couldn't decide whether take 3 points provision or amber (couldn't get both), and added 2 planks to it because both meat and vegetable was cost 2.
Also i don't understand this one
"- 1 point newcomer (start with human and beaver and take vegetable and meat. late game species, or you start with 8 harpy or foxes because that species is bad if alone)"
Did you suggest having both harpy and foxes?
Duke_Bubblez 28 Jun, 2023 @ 2:01pm 
aaahhh, i sooo didnt realise that you could box houses inside like this!!! I thought there was some "real-wolrd" type thing going on meaning a building NEEDED access somewhere on an edge to let villagers enter/exit them!!
This is gonna make things soo much simpler! Im really glad i caved & came here to look some stuff up!

Great work btw dude!!