Warhammer 40,000: Gladius - Relics of War

Warhammer 40,000: Gladius - Relics of War

29 ratings
Modding in Gladius for Amateurs
By Doc
This guide is intended to help complete novices learn to build their own units in Gladius. I'm hoping to make your life a little easier by sharing the pitfalls and successes I encountered when learning to build a mod. If I can do it, you can too!
4
3
   
Award
Favorite
Favorited
Unfavorite
Introduction
When I started making my Gearheads Mod, I knew next to nothing about modding this game, except some basic familiarity with the file structure from modding the City Names, Unit Names, etc.

Thanks to the generosity of the community, most especially Devian, I was able to cobble together a fairly adventurous mod which used a lot of tricks and techniques to make new units for each faction.
I’m hoping I can share my experience and perhaps make modding more approachable.

There are already basic guides on how to create new units, and I suggest you include those in your reading.

If you’re trying to learn the basics of modding like I am, maybe you can learn from my mistakes and successes. To best use this guide, I recommend you subscribe to my Gearheads Mod and look at the files and units I've created while reading along. Yes, that’s shameless self-promotion, but it will really help!

This guide does not include creating and importing new meshes, which is quite possible but involves a completely different skill set!
Getting Started
Source Folders
You will be working out of the Data folders to both find your material and build your mod. The Steam source files will be in this folder: … \steamapps\common\Warhammer 40000 Gladius - Relics of War\Data….

And the Data directory for your mod will be in this folder in your operating system drive:
C:\Users\the_w\OneDrive\Documents\Proxy Studios\Gladius\Mods\Doc's Gearheads\Data…

Mods you’ve subscribed to (including your own) will be in …\steamapps\workshop\content\XXXXXX\YYYYYYY… The XXXX’s represent the Steam ID of the game (Gladius for me is 489630), followed by the YYYYY’s, which are the Steam IDs of the various mods you have installed. Naturally, this can be confusing! You really only need this location if you’re using other people’s mods as examples for your work. So I needed it a lot…thanks again, Devian.

Recommended Programs

The only program you really need to download is Paint.net so you can work on icons.

For Programming
For working on the .xml, I did about 60% of this mod in Notepad, but switched to Visual Studio Code (a freebie from Microsoft) eventually which provided a little better environment for comparing files and for block commenting. I wouldn’t start with that, though, because the sheer simplicity of Notepad actually makes it more friendly to beginners (in my opinion.)

Icon Creation
A more sophisticated paint program can be handy for icon work. The GIMP is free and emulates Photoshop well, but you’ll need to use it a while before it becomes intuitive.
Organizing for Success
Folders
Having a good organizational structure will save you time and heartbreak. Many of the files will have the same names (including my tinkering files, I have a half dozen named OilSquig), and many will even have the same file type (OilSquig.xml). It is distressingly easy to accidently copy old work over new work, erasing progress. Equally, you need to keep known working copies of your files so that you can revert if you end up in some sort of unsolvable error.

Don't Tinker Directly in Your Mod Folder
Create a Tinkering folder for files you want to work on in various formats, such as icon files. This should also be a safe spot for the “last known working version” of the entire Mod folder…in my case, the Doc’s Gearheads folder and all subfolders. I back this up all the time! I learned the hard way…it’s like one of those games where you wish you’d saved right before the boss fight, but you didn’t, and so now you’ve got to do all that jumping puzzle stuff again.

In the Tinkering folder, make a folder of shortcuts to all the various Gladius subfolders you’ll be returning to frequently (at a minimum, the three Data folders for your mod, the base game files, and for downloaded mods).

Test Games
You’ll need to test your mods as you go, so a good structure for test games will speed this along. I recommend the following game settings:

  • Mods: All disabled except the one being tested.
  • Player Name: Something consistent (I put “Bug” in all my names) so you can distinguish them from other saved games.
  • Game Speed: Very fast.
  • Difficulty: Easy.
  • Advanced: Neutral forces to Very Low
  • Researched Technology to 10. This allows you to quickly build the building you need to generate the unit you’re investigating. Other settings don’t matter much.

Once you’ve started a game, I recommend you find a spot with +10% production for your city. This will speed the next few turns somewhat. Save a Test file 1 at the opening of the game. Save another file again right before the unit building is produced, and again right before the unit itself is produced.

If you start with the building already built, then changes to the building file will crash the game even if there’s not an error; similarly, if you start with the unit created, then changes to the unit file may crash the game.

Time Commitment
For me, creating a new unit from scratch took many hours for the most complex ones, like the Talos (Squigs were a little simpler). By the end, I could add an action to a unit in about an hour, including all the associated testing, icons, traits, descriptions and sounds I needed.

Give yourself some peace while working. If you’re distracted, you’ll forget what you were doing, and may end up taking fifteen minutes just to get back where you were in the process.

If you get stuck, walk away. Get some exercise, food, or sleep. Many times an answer would pop into my head when I wasn’t even (intentionally) thinking about this stuff.

Keeping up with the Data Folders
Take a systematic approach to editing, because you’ll probably screw up the folder hierarchy at least once and spend an hour realizing that it should have been

:\Users\...\...\Documents\Proxy Studios\Gladius\Mods\Doc's Gearheads\Data\Video\Textures\Icons\Units\Orks

instead of

:\Users\...\OneDrive\Documents\Proxy Studios\Gladius\Mods\Doc's Gearheads\Data\Video\Textures\Units\Orks.

Bleh.

Source Folders
You’ll be working out of three main folders (and maybe occasionally a fourth) within the Data folder: World, Core, and Video (plus possibly Audio). None of these is particularly helpfully named.

World
This is where most of the programming construction happens. You create files which describe to the game what you want Units, Traits, etc. to do (i.e. attacks, effects, etc.). Most crashes are the result of problems here.

Core
Not really the Core of anything, this is where the language files live. Your unit may work perfectly, but the player won’t see any text descriptions if you haven’t written them here. Errors here result in question marks (?) where text should be.

Video
Here’s where you have mostly graphics, such as icons and textures. You can borrow graphics assets from the main game by referring to them in your World files, or you can move them to your own Video section which makes them a little more portable with the mod. You probably won’t be working with the meshes, but if you’re daring, you can at least tinker with the colors and icons of your units. Errors here often result in questions marks (?) where icons should be, but these can cause crashes as well.
My Procedure for Building a Unit
When I’m building a unit, I like to keep a relatively standard approach to help me not miss anything.
While doing this I'm often keeping folders open in both the game’s original files and my own at the same time to make sure I keep up with all the folder layers.

  • 1. Open the World folder within both the game files and your own mod files. You’ll be working in your mod folder, and using the games files as a structure guide.

  • 2. Build the unit file. Usually this begins as a copy of the unit file which will use the graphics options I want, and then I fill in the text with the actions and traits I need.

  • 3. Edit the building file. Nearly all units need a building to produce them. (This can be done by writing to Infantry.xml.ext and just adding your changes instead of editing Infantry.xml, which will make it more compatible with other mods which use the same building.)

  • 4. Edit the Traits files.

  • 5. Edit the Weapons files (rarely needed).

  • 6. Open the Core folders.

  • 7. Edit the Language files (for my monolingual self, it’s always the English folder). Write descriptions for the Actions, Traits, and Units (and maybe weapons) in their separate files.

  • 8. Open the Video folders.

  • 9. Edit the Materials and Texture files. (Assuming you’re not into 3D modeling, only edit the Animations and Meshes if you’re copying these from somewhere else (like a mod which has new animations and meshes not in the core game), or if you want to use the same meshes with a different name.)

  • 10. In Materials, dig down to Units/Orks (or whatever faction) and edit your material “pointer” files to indicate where your skins are coming from.

  • 11. In Textures, go into Icons and fill in icons for Actions, Overlay, Traits, Units, and Weapons. All of these are 160x160 pixels, white and transparent, and .dds files. The sole exception is the Overlay, which is the same except 30x30 pixels.

  • 12. Still in Textures, go to Units and make sure each unit has a HairSquigDiffuse.dds, HairSquigNormal.dds, HairSquigSIC.dds file, which are the targets of the text in the Video/Materials folder (obviously, use YOUR unit name here😊 ).

Now try to run it, and be ready for the crashes!
Crashes & Fixes
Crashes
As frustrating as they are inevitable, these can tell you valuable information, or none at all.

Generally:
  • Crashes just after the launcher are often somewhere in the World folder (mine were usually in the Units file). The pop-up crash report is often so vague as to be useless, but sometimes will point you to a specific problem. For example, if you see the word “World” in the crash report, then the error is in one of those data files.

  • Crashes when loading the test game are usually easier to find and fix, because they aren’t in the complicated Unit.xml file, and the crash log is more likely to be useful. Make absolutely sure there aren’t any other mods loaded which could be incompatible with your test game. Also, if you've changed your mod substantially, you may need to start a new game or the units in the old save won't be compatible

  • If you crash when you try to use a unit ability, then the problem is obviously there somewhere. Check and make sure you have all abilities and traits in order.

Fixes

  • Start with simple grammar checking. When copying and pasting, it’s easy to leave off a quotation mark or a closing carat />. Keep a similar known-to-be-working file open as you scan line by line to look for little errors like this. You’ll have less and less of these as you practice.

  • Look for bad file references. Again, copy/paste is handy, but you can accidentally throw in a Neutral/Kroot reference when you meant to do Tau/Demiurge instead.

  • Check file structure, and make sure every opening “argument” has a close…<unit> must have a </unit>, etc.

  • Make one change at a time. If you’re not sure where to start, comment out sections of your code to see if that eliminates the issue. If it does, you know where to look.

  • Don’t worry about icons and text descriptions at first. The game will start even if those are messed up, so they can wait until the main .xml file is functioning.

Text Mods - A Good Place to Start
I recommend you start as I did, by modifying the text files found in \…steamapps.. \Data\Core\Languages\English. Maybe you’re asking: Why should I start here when I just wanna make cool units!?!

  • The text files require no programming to point to other files.

  • You’ll begin to understand the folder structure of mods.

  • Mistakes don’t crash the game (well, as far as I know…)

  • It’s all contained in one file, so you can start slowly on learning how to organize yourself.

  • You can learn the Mod upload system within the game itself, and how to edit a mod once you’ve put it in the Workshop.
Creating New Units
Ready to take the plunge and try to make some units? To best use this guide, I recommend you subscribe to my Gearheads Mod and look at the files and units while reading along. Yes, that’s shameless self-promotion, but it will really help!

How to take the Techpriest from the Astra Militarum and allow it to be produced as an Anointed Techpriest in the Auxiliaries building of the Adepta Sororita:


Procedure
Open the Gladius folder in the Steam Directory to find the Techpriest Enginseer.
.../SteamLibrary/...Data/World/Units/AstraMilitarum/TechpriestEnginseer.xml

  • Put this file in your Mods folder: C:\Users…\Data\World\Units\SistersOfBattle

  • Rename the unit to "AnointedTechpriest.xml;" this will be the core name that the game will use.

  • Locate the Auxiliaries Building in the game files, and copy to your Mod subfolder:
    C:\Users…\Data\World\Buildings\SistersOfBattle\Auxiliaries.xml

  • In order to make the unit trainable in the building you want, you just have to add this line with the other units produced by the building in the Auxiliaries.xml file (or better yet, in the Auxiliaries.xml.ext file).
    <produceUnit unit="SistersOfBattle/AnointedTechpriest"/>

  • Now give your Anointed Techpriest an official name/description/flavor to display when selecting the unit in-game. You’ll add some language files in the Mods "Core" folder.
    C:\Users …Data\Core\Languages\English\Units.xml

This will be the "Units" file that will be useful and the following entries will do the job:

<entry name="SistersOfBattle/AnointedTechpriest" value="Annointed Techpriest"/>
<entry name="SistersOfBattle/AnointedTechpriestDescription" value="The description you want"/>
<entry name="SistersOfBattle/AnointedTechpriestFlavor" value="The flavor you want"/>


Correcting the Icon in the Unit Building
After all of the above steps, you’ll be able to build the unit, but the icon in that production building will be a question mark placeholder. To fix this:
Locate a suitable Icon file in
C:\Users …Data/Video/Textures/Icons/Units/AstraMilitarum/TechpriestEnginseer.xml
And move it to your equivalent folder in your Mod, renaming it to match your unit.
…Data/Video/Textures/Icons/Units/SistersOfBattle/AnointedTechpriest.xml

Hints & Tips:
• CAPITALIZATION MATTERS!!
• Your mod folder will initially have no subfolders. Create only the ones you need, and make sure you’ve got all right layers of subfolders to avoid crashes.
• Units may not need the same type of currency to build. Make sure that they use either requisitions or ore depending on the faction.
• The game uses forward slashes / to indicate directory locations, whereas Windows will use backslashes \ when you identify a directory (maybe programmed in Linux?).
• You don’t need the whole file you’re replacing in most cases, just the new parts.
• If you use the .xml.ext method, only add the new lines. If not, use the whole file in Buildings.
• For errors, look first for small mistakes such as spelling mismatches, missing quotation marks, or forgetting to close a process like </action>.

Use comments liberally to remind yourself of changes you’ve made, and the reasons you made them. This is the syntax: <! -- Your comment here --> Put comments between sections, as the end brackets seem to interfere with some commands.

Use white space to separate out sections of code for easier readability. Spaces and line breaks don’t affect the code at all, but help you distinguish different sections.
Creating Custom Actions
First, you can’t create a custom ability name in the Unit.xml file. (Well, I’m sure someone can, but it isn’t me.) The ability name is important for two reasons:

1) the effects it creates when activating, so you may want to pick one that matches the effects you’d like to see.

2) The AI won't use genericUnitAbilities, so only use this for passive abilities.

I’ll use the example of my Bonesinger unit, which is derived from the Aeldari Warlocks infantry unit. (Gladius uses the term “Eldar” to identify Craftworld Aeldari items in the file structure).

I filled all of the folders noted in the description of the Anointed Techpriest above. I added a unit production line to the Bonesinger’s Chantry (the building building building) to create the Bonesinger unit.

Then, to transform the Warlocks into a repair unit, I added the following text into the Bonesinger.xml file (I’ve left out the unchanged Enginseer text in the middle). The lines are only there because Steam Guides don't put in tabs, apparently :)

<! -- REPAIR BASED ON TECHPRIEST ENGINSEER -->
<genericUnitAbility cooldown="1"
-------------------- name="SongOfRestoration"
---------------------icon="Actions/Eldar/SongOfRestoration">
-------------------------- <model>
---------------------------------<action animation="Units/Eldar/WarlockAbility"

</genericUnitAbility>


A few important notes on this step:
• GenericUnitAbility is a good option for custom abilities, but you can use other existing ability names, and you won’t get any effects if you use the generic one. You just can’t make up your own; this is apparently hard coded.

• Don’t forget the < and > to close out sections of the code. It took me much debugging to properly place the carat after the icon pointer.

• If you get a question mark in the ability area of your unit in game, it means that either you didn’t create an icon, or you put it in the wrong folder.

• Most units have an “Ability” animation which can be used so your unit doesn’t just stand there when it takes an action.
Adding the Ability for one Unit to Build Another
Next, I wanted the Bonesinger to be able to build new Webway Gates, as the Aeldari currently have no way to do this and can “run out” of gates to build cities on. The Techpriest Enginseer can build Imperial Bastions, so the code for this action is a natural source to build the Webway Gate.

The Webway Gate icon is already in the files as an Eldar unit, but you’ll need flavor text for the name=”SongOfCreation” or it will default to the text for the Imperial Bastion.

I have also included a technology requirement. Here the “Construction Building Bonus” is the technology “Bonesingers’ Convocation.” Unlike most files in Gladius, Upgrade (technology) names are often quite different than the actual technology name.

The image below is from Visual Studio Code, which is the free .xml editor I mentioned.

Changing the Look of the Unit
Changing the unit’s look is important to reduce confusion when the new unit shares a faction with the unit you’re “borrowing” from. In this case, I wanted to make my Bonesingers look different from the Warlocks. Easier changes included decreasing it to one unit and increasing that unit’s size, which can be quickly done in the World Unit.xml file

To change the colors or add markings requires a bit more work. Creating 3D animated models is enormously challenging, but I can change the “paint job” on the unit more readily. I prefer to leave areas “as is” if they change color based on the player’s faction color (in this case, the Bonesinger’s robes are the same color as selected by the player). However, the hair is a fixed color and very visible, so I chose this as my target for customization.

To do this, I used the Paint.net program, which is free and relatively easy to use. This allows me to open the .dds files which contain the paint job for the unit.

Finding the Files

First, I retrieved the WarlockDiffuse .dds file from the Steam …Data\Video\Textures\Units\Eldar folder. The other two files aren’t needed for this color change. I then saved a copy in a working folder (i.e. a non-game folder) as BonesingerDiffuse.dds. Fortunately, Paint.net has an excellent recolor tool, so I used this to recolor the Warlocks’ red hair to a golden blonde color.

Now, the altered BonesingerDiffuse.dds file can go in the Mods texture folder (\Mods…Data\Video\Textures\Units\Eldar). Then, you’ll need to rewrite the .xml file referred to by the Unit file (in bold below). (The mesh file should continue to point to the Warlock, as I wasn’t messing with the structure of the unit.)

<unit mesh="Units/Eldar/Warlock"
---------------------material="Units/Eldar/Bonesinger"


This file is located in …\Mods…Data\Video\Materials\Units\Eldar. Alter it so that it refers to your new BonesingerDiffuse file. The other file pointers can stay the same because you’re not altering the highlighting or Normal (i.e. 3D texture) files.

Note: The WarlockSIC file is very useful for showing you which parts will be recolored to match the player’s faction color. If it’s blue in the SIC file, it will be turned into the faction color.

This is the Material file I used:
<?xml version="1.0" encoding="utf-8"?>
<material>
----------<textures>
-------------<texture name="Units/Eldar/BonesingerDiffuse"/>
-------------<texture name="Units/Eldar/WarlockNormal"/>
-------------<texture name="Units/Eldar/WarlockSIC"/>
-------------<texture name="ShadowMapColor"/>
---------</textures>
</material>

And voilà, her hair is blonde! (For the final model, I also added Bonesinger symbols to her shoulders.)
Buffing One Unit With Another with a Custom Icon
Next up was the Space Marines. While they had no big deficits in their support unit lineup, I always felt a little sorry for the Stormtalon Gunship…in the lore, they’re heroic, but in Gladius, they tend to be overlooked. In keeping with the theme of the faction, I wanted a Stormtalon to be able to buff another Stormtalon (and the Stormraven as well) if adjacent. This encourages building more of the little planes, and helps support the faction’s aerial campaign.

Creating the Formation Flying Icon

This was surprisingly challenging. First, after some missteps, I was able to create my first custom icon for this unit’s passive ability, featuring two Stormtalons together, based on Gladius’ Stormtalon icon. Tips for this step:

• Open an existing icon file of the correct size (160x160 pixels in this case) in Paint.net.
• Use this to build and save your icon by dragging over the image you want into that file and adding it as a new layer. Manipulate it in Paint.net until you’re happy.
• I found if I tried to create an icon from scratch (not in an existing .dds file), I would get an error which said that Stormtalon.dds was “not a .dds file.” Probably a format incompatibility.
• Icons will look jagged if you save in the default .dds format. Use a Gaussian blur to soften the edges (or whatever you prefer), and then save as at least BC3 (Linear, DXT5). Non BC file types may prevent the game from reading the file.

Place this file in the Mods…\Data\Video\Textures\Icons\Actions\SpaceMarines folder so you can refer to it. It can probably also go in Traits or elsewhere, as long as you refer to it correctly (it’s both an action and a trait in this case.)

The Trait


This will now allow the unit to reference this FormationFlying trait and apply it appropriately to all allied Space Marine Flyers. Conversely, you can take out the faction name to broaden it to all allied flyers.

Now, open the unit file and add an "Action" to have it apply the buff.


This creates a passive ability for the Stormtalon.xml unit to create a zone around itself which will grant the Formation Flying trait to the units described in the FormationFlying.xml file. I added excludeRadius=”0” when I noticed it was buffing itself. There are probably other ways to make this work, but this seemed fairly straightforward.

Finally, you need to make sure you have a description file as usual, this time in Mods/...Data/Core/Languages/English/Traits.xml, which gives custom text to your new trait.


Creating Complex Buffs – The Cadian Sergeant Major
Now, on to the Astra Militarum. I’ve always loved the Guard, but they are so weak! How about a unit to improve them? I decided they needed a Sergeant Major to show them the way.
I created his actions (both passive and active) along with icons for each. Below are some tips I discovered while building these:

Hints on trait & buff descriptions

Watch subfolders when adding traits and their descriptions! For example, below note the need for a subfolder in the Core description of the Veteran’s Discipline trait but not in the Formation Flying trait. This is because the Discipline trait is itself in a subfolder in the World folder.

<entry name="FormationFlying" value="Formation Flying"/>
<entry name="FormationFlyingDescription" value="Increases ranged damage reduction when adjacent to a Stormtalon or Stormraven."/>
<entry name="FormationFlyingFlavor" value="Stormtalon pilots are particularly adept at flying in formation with other aircraft. The elegant maneuvers serve to distract enemy weapons and radar while the Stormtalon relentlessly closes with its target."/>


<entry name="AstraMilitarum/VeteransDiscipline" value="Veteran's Discipline"/>
<entry name="AstraMilitarum/VeteransDisciplineDescription" value="Provides damage reduction to the Sergeant Major and nearby infantry."/>
<entry name="AstraMilitarum/VeteransDisciplineFlavor" value="Good discipline in the field is the key to surviving a firefight...a fact not obvious to new troopers. The Sergeant Major's presence is an anchor of calm in the chaotic sea of battle."/>


Granting a Buff to TWO other unit types
This one was a challenge, and I was lost until some community mentors stepped in to help. There’s a command found in the Spiritmark trait which can easily allow you two buff two (and only two) units:
<conditions>
<unit>
<allied/>
</unit>
<unit match="Any">
<type name="Eldar/Wraithblade"/>
<type name="Eldar/Wraithknight"/>
</unit>
</conditions>

This match=”Any” command turns the usual “and” function into an “or” function (i.e. makes it inclusive, rather than exclusive. This should obviously work for more than two units.

Creating the Sergeant Major’s Icons

I created the two ability/trait icons using the same steps as for the Stormtalon’s Formation Flying above. The new challenge was creating an icon for the Sergeant Major himself, as I wanted it to be completely custom. I first started with a picture I liked, then cut out the image using Photoshop CS3 (I bought it years ago as a student, and I refuse to buy it again 😊 ). I colored it completely white. To draw the collar and facial features, I freehand “drew” using an eraser. I resized it to 160x160 saved it as a .png to preserve transparency, and opened it by dragging it within an existing icon in Paint.net (this ensures that all features will be correct).

• To match the format used by the game, use only white and transparent pixels.
• To remove any jagged pixel edges, use the paint.net Gaussian blur to create anti-aliasing (radius 3 or so).
• Save the file as a 160x160 (the icon used by the Infantry building) and 30x30 (the overlay icon used on the game map).
• Use the Linear DXT5 save format (others may work also) to preserve anti-aliasing and transparency.
• Place these files in the appropriate folders (under Video/Textures…) I initially forgot to place the Overlay icon, and was quite stumped for a while until I figured it out.
• Keep icons simple! They are too small for complexity…you’ll just end up with a confusing mess.

Editing the Sergeant Major’s Weapon
This was probably the most straightforward change in that it worked the first time! I copied the Lasgun file from World/…/Weapons, put it in the equivalent place in Mods, changed the name to Cadian MG IA Lasgun, and edited it to be a better weapon (he’s a single unit, so overall damage still isn’t much). In Mods/…/Core/…/Weapons, I created a short file describing the new gun. In the CadianSergeantMajor.xml unit file, I referred to the new weapon, but left all other references the same. Done!

Editing the Sergeant Major’s Appearance
Here's a guide to point you in the right direction for editing the Diffuse and SIC texture files:
https://gladiusrelicsofwar.fandom.com/wiki/Modding:Textures

For the Sergeant Major, I wanted to make him more distinctive with a green camouflage helmet and pants. Basically, this meant picking out a pattern, dropping it into the GuardsmanDiffuse.dds, and cutting out cloth pieces which fit the pants and helmet.

Because the helmet defaults to player color in the SIC file, I had to edit the helmet area in that file by painting black over the helmet region, which tells the file to not paint over that area with the player’s color.
Adding Visual and Sound Effects to the Nanoscarabs’ Action


Visual Effects
The below code is the beginning of the Nanoscarab Repair action.

<orationOfRestoration cooldown="1"
----------name="NanoscarabRepair"
----------icon="Actions/Necrons/NanoscarabRepair">


As I’ve noted, the first-line name can’t be customized, but you can customize the in-game name easily with the next line.

Using Generic Abilities versus Specific

You can always use genericUnitAbility for the name, but that won’t create an effect. Sometimes that’s a good thing, especially with passive traits. But sometimes you want a little feedback. The “Effect” is tied to the name, so by using orationOfRestoration, I can get that effect when I use the Nanoscarab Repair.

I’m not completely sure, but I think some of my crashes were related to the effects used by my choice of action, so go with genericUnitAbility if you are getting hard locks when using an ability.


Sound Effects
Sounds are selected under the model section of an action:
<model>
-------<action animation="Units/Necrons/CanoptekScarabsMeleeDefense"
--------------------bone="Bone018"
--------------------sound="Actions/MechanicalBuff"/>
</model>


You have a wide range of sounds to choose from in the Audio folder. Simply refer to the one you want, and it will play along with the action. Alternately, you can record or download other audio and use that. If you follow the custom path, I recommend you use an online audio trimmer to cut it down to around 4 seconds, and give it a fade in and out.
Replacing One Unit with Another


One fun trick I decided to try with my Biophagus was turning one unit into another. The good Doctor can overcharge the DNA of his Neophytes and turn them into Aberrations. How to do that was a challenge, because I couldn’t figure out how to do two actions like that at once. Once again, Devian came through and showed me like it was nothing! Below I’ve put in some code snippets…you’ll need to look at the mod itself to see the whole thing.

First, make sure you’re only targeting the right unit (if you don’t do this, you’ll be able to target any square, and the action will be used, but nothing will happen if the Neophytes aren’t on it.)


Then, target the unit itself, and get rid of it:


Then you’ll want to replace it with the Aberrations:

Grenade Tips
Grenades are common to many units, and they're easy to add to any unit. In general, add this in the weapons section:

<weapon name="PlasmaGrenade" slotName="PlasmaGrenade" enabled="0">
<model>
<grenadeWeapon muzzleBone="Autarch_Hand_R"/>
</model>
</weapon>

And this in the actions:

<throwGrenade weaponSlotName="PlasmaGrenade" cooldown="10"
requiredUpgrade="Eldar/PlasmaGrenade">
<model>
<action animation="Units/Eldar/AutarchGrenade"
beginFire="1.0"/>
</model>
</throwGrenade>
Simple enough, right?....as long as you make sure that keep all the upgrade requirements and animations consistent with the unit you're working with.

But you'll often find that some grenades act weirdly. Most commonly, your krak grenades are useless because they do less damage to all targets than your primary target. Or maybe that melta you gave to your hero isn't doing anything. Why is this, and how do you fix it?

Krak Grenades
Krak grenades are essentially like frag grenades with lower damage and more armor penetration, but they are missing a key trait which helps the fragmentation grenades: Blast. This trait adds to the "members hit," which often lets frag grenades wipe out whole units.

So, groups of units don't often hit the "sweet spot" where the krak is helpful because they have either very low armor (Kroot Hounds) or very high armor (Space Marines). In the former case, the frag is much better, and in the latter the primary weapon often wins.

To fix this, you can either create your own weapon or mess with the unit file.

Changing the unit file
Let's start with the easy method of working with the unit file, which is quick but less tailored to your new unit.

By increasing the number of meleeAttacks (in the "modifiers" section), you will also increase the number of krak grenade attacks. Yes, this also helps the frags, but since the cooldown is 10 turns on both, the kraks may be more useful. Alternatively, you can increase the "count" of krak grenades (in the "weapons" section), and now your unit will throw more of them (a count of 2 doubles the total, for example). This is more specific, but can look a little odd in the stats within game...why does that unit throw three grenades?

Note that "count" is defaulted to "1," and does not appear in the weapons section by default. Simply add the line count="2" within the grenade code.

Creating a custom weapon
First, you *don't* need any sort of mesh materials to create a weapon. The weapon is just a projectile which emanates from a bone in your model, and you should feel free to use existing bones. If you pick a "Head" bone, for example, then the projectile will originate from the center of the head. Unconfirmed, but you may need to use a bone with a period in the name to get correct directionality...i.e. .Muzzle.

So take the KrakGrenade weapon .xml file, and give it a new name (I used PrimarisKrakGrenade, for example). Copy the KrakGrenade icon and rename it to the same name. Finally, create a description in the Core.../Weapons file so that your new weapon has in-game descriptions.


Working with Features
Features are the various terrain additions, ranging from Desert to Holy Sites. Each of these has an effect, and those effects can be modified. For my Magos Explorators, I wanted them to be able interact extensively with the landscape. You can do that in two ways…if you just want to remove a feature, then you just need to create an action and use the command removeFeature = “OrkoidFungus” for example. Then, I created a self-targeting action so that the unit could benefit from the feature removal.


Editing the Features

If you want a movement change (i.e. eliminate movement penalties), you need to edit the feature itself. You can instruct the feature to ignore your unit when removing movement. This is why Flyers can move over all terrain easily, for example.

The feature itself can also grant traits, such as the way the Orkoid Fungus adds a little mushroom icon to an Ork Boy when he enters the tile. That trait, for example, lets the Ork heal while sitting on the tile.

Another feature item is Exploration. Looking at the Ruin of Vaul (ruin.xml), for example, you can see that the file awards a unit a random boon from a long list. This can be further limited, like with the Sisters’ Hospitaller unit, so that only that particular unit can get the reward from the Holy Site.
Icons - Creation and Frustration
Icons are a critical part of modding in Gladius, as each one gives your custom traits, actions, and units a unique feel. I've created well over 100, and have a reasonable workflow...but they still take a while to create.

Using existing icons sort of works, but is visually confusing when the original unit shows up. So how to create your own?

Icon files (found in the Texture folder) are almost all 160x160. The exception is the overlay icon, which is only used for the unit symbol on the main game map.

How to do it:

Find an image that you like on the internet or wherever. It should be stylized (i.e. cartoony), because detail will be lost at the low resolution...mainly focus on the outline of the image rather than any internal details.

  • Open it in your image program of choice and cut out the outline of the image, deleting any background.

  • Create a black layer underneath your image (once the image is filled with white it will be very hard to edit otherwise). Remember to turn this off when saving your icons...Gladius uses a transparent background for its icons.

  • Work with the image in its native resolution to get what you want.

  • Now, fill it completely with white (on a transparent background) and shrink it to 160x160.

  • At this point, I usually import a sample icon from Gladius onto a new layer. This "sample" should vaguely resemble the one I want to create. This gives me an idea about how much detail to try to create, orientation of faces, sizes, etc. This will help make your icon look right at home with the ones from the game.

  • Using the game's icon as a guide, tweak your custom icon to the correct style. Save it (and convert to .dds with Paint.net if needed). Place them in the correct Data/Video folders.

  • Only for unit icons: shrink it to 30x30 and save an Overlay version. Do not save over your master file with this tiny image!


In the game, these icons will almost certainly be too sharp. You'll need to carefully blur the image:

  • Open in Paint.net (you can also use GIMP or Photoshop). Use the Gaussian blur feature, setting somewhere around 1.5 to 2.5 radius (no two are exactly alike).

  • Traits are the easiest because they only appear at very small sizes. They usually require a fair amount of blur.

  • Units are the most finicky because the same icon is used at a very large size for the compendium and a much smaller size for the build menu. I blur them until they resemble the ones in the compendium, which usually leaves the others slightly sharper than I'd like.

  • Actions are somewhere in between.
Texturing - Diffuse, Normal, and SIC files
The models in Gladius are "low polygon," which means most of the look of the units is created by the textures (i.e. skins) of the units rather than actual three dimensional details.

Diffuse
Diffuse is the easiest to understand...changing the images here will directly change what shows up on the unit. Use a paint program to alter this file, and the unit will look different but have the same shape (because the mesh underneath will be the same).

Comment from DexGattaca: Transparencies in the Diffuse file will make the mesh see-through - effectively removing that part of the mesh. The only issue is it will still cast a shadow. Which is not a big deal if the parts are small.

Normal
Don't mess with these unless you're a bit advanced. They are automatically generated in texturing programs such as Blender or Substance Painter. You can also create them in GIMP using greyscale images as a source.

Unless you're ready to jump into this world, create the illusion of depth in the Diffuse files by using drop shadows and beveling. Create a dummy normal file which is entirely 8080ff in color.

SIC files
These are NOT typical image files like the other two, but rather a neat trick specific to Gladius to combine a bunch of effects into a single file. The RGB color codes effects into the Diffuse file:

  • Red
    Red makes the image more "metallic," or reflective. Values around 100 or so give reasonable metal textures. Often, very "red" colors are used to allow the texture below to shine through (i.e. an aquila or Evil Sunz decal) but this works more through the lack of the green and blue values. In other words, 0, 0, 0 black works also if you just want the underlying colors to come through exactly as in the Diffuse file.

  • Green
    Green regulates "emission" or glowiness :) High green values produce a weird blinding effect, but moderate values are good for headlights, etc.

  • Blue
    Blue is a unique Gladius variable (as far as I can tell), indicating "team color." In other words, if you are playing the Yellow team, then a high blue value in the SIC file will make your surface more Yellow. A bit confusing, but it works.

In summary, choose SIC colors by individually picking values of Red, Blue, and Green, rather than trying to use the actual resulting final color.

Choice of Resolutions
First, last, and most important: Don't overdo it!!!!!

If 1K (i.e. 1024 x 1024) is good, then 4K must be like a million times better, right? Absolutely not! This not only makes your mods overweight, it actually worsens the results. Very high resolutions will produce final textures with a weird jitter around the edges.

My advice? Work with your images in 4K, but resize them to 1K (or at most 2K) for use in the game. You'll get clean texturing and all the detail you need for these tiny units.

Tips about resolution choice:
  • The textures don't need to be square...i.e. you can have a Diffuse file in any dimensions you want as long as it fits the UV map of the mesh file. This only applies if you're messing with the 3D file, of course.

  • The sizes of the Normal and SIC files can be a lot smaller than the Diffuse, but they do need to have the same dimensions or they won't line up. It's no problem to have a 2K Diffuse with a 1K Normal and a 0.5k SIC.

  • Even though I use multiples of "K" in my examples, images can be any dimension, such as 848 x 324 pixels. "K" is used for convention, though, and most Gladius files are 1K.


Tips for creating good-looking UV maps (i.e. textures)
In layered image programs, you can non-destructively adjust the red and blue for easy use on large areas of your model (hulls, armor, etc.) Decals and logos should be done individually.

  • Any areas which you want to be "Team Colors," make greyscale in the Diffuse image.

  • Create a layer above the diffuse image composed entirely of red (set to 255,0,0) [255=FF in hexadecimal], and one of pure blue.

  • Select the areas you want to be team colors, trim the blue layer to match, and use an Add setting (sometimes called Linear Dodge) on the blue layer. You can adjust how much blue will go through using the fill percentage.

  • Repeat this process with the red layer, adding a bit of red into the blue of the SIC image to make it shine somewhat. A little goes a long way!

  • The areas you don't want to be team colors, do the same by creating and trimming a new red layer above the non-colored areas. This doesn't have to be greyscale in the Diffuse, as you're not trying to overwrite the native color with the team color.

You may want to remove all Green from your SIC, except areas which are specifically meant to glow. To do this, create an all-green layer and use Subtract to remove any trace of green from your SIC file. This will remove any unwanted glowiness. Headlights, etc. can be on their own layer and thus retain their glow.

I'll say it again: SIC and Normal images do *not* need to be as detailed as Diffuse files to work perfectly. If you're using a 4K (probably don't) or 2K texture, then you can go with a 1K or half-K Normal and SIC file.

Changing the Colors of Weapons and Effects
When I did the Banewolf, I wanted the tank to have two gas attacks, one for infantry and the other for armor. But it would be confusing if the attacks were exactly the same. I had toyed with the idea of trying to figure out how to change colors, but this unit finally kicked me into actually doing it.

This is advanced! Don't tangle with it until you've got the basics of unit modding.

First, figure out which effect you want to mess with. I wanted the gas effect, which is the "Toxic Miasma" effect, which in turn traces back to the "Flames" effect.


Find a unit with the effect you want. In this case, I wanted to the use the Malanthrope's gas breath as my base effect.
Now look in a folder you won't often use: Data/Scene/Blueprints/Effects/ToxicMiasma.xml
This .xml file uses the material "Flame," which you can view in the Data/Video/Textures/Effects folder. Like unit textures, it also has a corresponding Flame.xml file in the Video/Materials/Effects folder. You won't need this for method one.

Leave the Emitter files alone...they don't appear to mess with color (I think they describe the way the animation works).

Method One
This method takes the graphic file and overlays the color of your choice on top of it. With this I took a green gas cloud and turned it red, for example.

  • I copied the Scene file and renamed it "Bioprimidazole" to fit my custom weapon. Within that file, it directs the effect to use the Flame material, but then later in the file it has a section called <colorAffector> This has a range of numbers you can alter, but what are they?

  • I'm basing the following on experiment, and I could be wrong:
    The first four numbers represent R, G, B, and transparency. 1.0 represents full color (i.e. Red 255), 0.5 represents half color (e.g. Red 128). Use a paint program to mix a color you like, look at the RGB values, and divide each by 255 to get the fraction to plug into the .xml file.

  • (Using all 1's seems to keep the original color of the graphic in the Textures/Effects folder.)

  • I believe that the beam (or cloud, or whatever) can change color as it animates, and this is controlled by the "progress" percentage. So you could change your red beam to green halfway through the animation, for example. When I wrote this, I hadn't tried this trick, so best of luck.


Method Two
If you want to avoid reprogramming colors as numbers, you can directly edit the .dds graphic file in the Textures/Effects file. This is a little more complicated but gives you more control over having multiple colors in the effect. I used when editing the Questor's weapon color.

  • Open the file and change the colors to whatever you want. You'll have to change any MuzzleFlash files to match, or they will clash.

  • The Questor uses Melta Beams, which use the RedBeam as their source texture.

  • In my case, for the Questor I copied the RedBeam graphics files to create PurpleBeam and PurpleMuzzleFlash files, which are--unsurprisingly--purple. (I did this by using GIMP to do a color shift from red to purple.)

  • Now, copy the two MeltaBeams files from Scene/.../Effects, and rename them to PurpleMelta (I chose the name to help me remember the source file, so I'd remember what it looked like). The only change in these two new files is at the beginning of the file...change the Material from RedBeam to PurpleBeam (or PurpleMuzzleFlash). This refers to the files you're about to create.

  • Don't mess with the <colorAffector> numbers. The numbers should all be 1 if you want to keep your base colors from your custom graphics files.

  • Finally, create a third pair of new files for the Video/Materials/Effects folder. These will be called PurpleBeam and PurpleMuzzleFlash and will refer to the appropriate .dds files which you created first.

  • All the new files are done; you need to edit your weapon file (in this case, the Tormentor Cannon) to refer to the PurpleMelta files instead of the Melta files.

And wow, my Titan shoots pretty purple beams to match the crazy Slaanesh-themed livery!


Method Three - Not Recommended!
I only include this because it's the method used by one of the most popular mods..."Red Laser Beams." It's incredibly simple...the author just overwrites the base Scene file for LasBeams, by changing the line simpleParticleSystem material="Effects/YellowBeam" to RedBeam.

Now, full credit...this brilliant bit of editing gave the Guard a much-needed upgrade to red lasers! By changing the core file, however, *all* lasers in the game are now red. For lasers, this is probably fine. For most of the other effects, you probably don't wan't to do this. If you do, be a good modder and warn your users that everything will change!

Conclusion

This is complicated work; I strongly recommend downloading my Scrapyard mod to see these files for yourself so that you can have a "checklist" of all the files to change.
Editing Mesh Files
After noodling with this for awhile, I decided to at least attempt to play with the .msh files to alter units. This is quite a long road, but here's the path if you decide to try it. I want to especially thank DexGattaca for his advice and assistance.

It boils down to using an app that the developers gave us, but that I didn't know about.

In Blender
>Edit/Preferences/Addons -> Install.
Point it to: C:\Program Files (x86)\Steam\steamapps\common\Warhammer 40000 Gladius - Relics of War\Resources\Blender.zip

This will give Blender the option to export as Proxy Studio Mesh (.xml).

You put that mesh into the game's mesh files folder, and Gladius will convert it into a game mesh file when you launch it.

Blender is a free 3D editor which is very powerful but also has a steep learning curve. Still, folks have created some amazing things with it, and the price is right.
Errors and Fixes
I changed the code, but the unit is exactly the same
This is probably a misspelling of the unit.xml name, or the file is in the wrong folder.
Alternately, if you simply load a game with an existing unit, it may not have changed (it usually does, however). Go back to a save before you built the unit, build it, and the changes should be there.

My new unit isn't visible to build!
New units need an entry in the Buildings Folder to add them to a production building. Also, any building built before you add a new unit won't be able to produce it.

My new unit has weird glowy textures!
Your textures aren't linked correctly...make sure the Materials file points to the right folder, and make sure everything is spelled right and has the correct suffix (i.e. SistersRhinoDiffuse, SIC, etc.)

My new unit has the right textures but they move when the unit moves!
You're trying to use animated textures, which means you have to line everything up correctly or you get this weirdness. The easy fix is to change the uvAnimated="1" to a zero in the Unit.xml file.

I see the new unit, but I can't build it (greyed out).
Did you copy it from another faction, say one that uses requisitions to build new units? That's the problem.

Crashes on start! Help!
Read the error message! These are actually incredibly helpful once you get used to them. They often tell you which folder to start with, such as World or Video. For unit file errors, the error may even include the line number of the missing code. Errors which mention "expected" often point to a missing closing statement in an action.

Crashes after I load a game and move the new unit! Help!
This is a good sign overall...these errors are usually quite fixable. Most commonly, you're trying to use an old save and it's conflicting with a change. Try starting a new game and building your unit from scratch. If that doesn't do it, I often find the errors in the Weapons section.

Traits are applying unpredictably

I had a strange error where I could apply Ancient Glory to allied units after the Cerberus moved, but the trait would vanish after the affected unit moved, even if it ended in a hex next to the Cerberus.

It turns out that I was applying the condition "allied" twice, and this was somehow resetting the trait.

The Problem
Look at the highlighted portion of the code:


The trait itself was checking the same "allied" condition, so this was unnecessary. I'm not sure why it was also problematic, but it definitely proves the rule of minimizing code as much as possible to prevent strange overlaps.


The Fixed Code
Conclusions
I have alternately been overjoyed and frustrated by modding this game. You can get stuck for an hour on a trivial detail, and then suddenly be amazed when the unit does exactly what you hoped it would do! My hope is that this guide will help ease some of the pain of the initial learning cliff, and it will encourage you to add to this great community.

If you remember one thing from this guide, remember this: One thing at a time! If you try to incorporate too many things at once, you’ll never know what caused that latest crash…

Good luck with your own projects, and please give feedback and suggestions based on your own experiences.

Acknowledgements:
Many thanks go out to various people who helped me along the way:
  • Xazeru for getting me started
  • Devian (and others on the forums) for helping me solve specific issues and having infinite patience with my noob questions
  • Nimajneb for playtesting

...and anyone who's tried my mod!
Appendix A: General Thoughts on Coding in Gladius
As I’ve struggled my way through all these units and features, I’ve picked up a few generalities that have helped me understand the system we’re using. This stuff is a little wonky, so feel free to skip this whole section if you just want practical information.


Is .XML a programming language?
Well, yes and no. The “L” stands for language in Extensible Markup Language, so technically it is. But .XML by itself doesn’t do computations, it mostly just tags data for other programs to use. This is what makes it simple, but it also limits it.


The Importance of Traits
Essentially, what we modders are doing is feeding conditions into the mysterious black box that is the Gladius engine. Traits (and unit types) are probably the main currency we use when making our custom units, so you should make extensive use of them. They can be used to program your units, because the Engine will see these and react.

Tags like these allow you to do AND and OR statements that you couldn’t normally use in .XML. For example, the Spiritseer’s Spiritmark can affect the WraithKnight OR the Wraithblade, by using the type=any modifier, whereas the Haemonculus’ Fleshcrafting ability requires the unit to be both Allied AND a Drukhari.

So, use lots of traits! Once a unit has a trait, you can tell other things what to do to it just by adding the condition trait=”Rare” for example. A trait doesn’t even have to do anything to be useful at identifying the unit.


Modifying the Unit Meshes
The game uses .msh files to indicate its meshes. This is not a standard file type like .jpg, but rather a "package" that Proxy uses to compress its Blender files into a useable mesh. This has the side effect of making them hard to use for regular folks because you can't just import .msh files into Blender.
However, the game provides tools to export animations and meshes from Blender into .msh and .anm files for use in the game.

I may write a tutorial on this at some point, but this is a much more complex path than editing the abilities of existing units. Blender is actually quite intuitive and easy to use....after using it for 100 hours :)


Appendix B: Rationale and Lore for Gearheads Units
My thought process for building units within the lore:

Astra Militarum
Gameplay
I felt the poor Guardsman needed a hand, as they are all but useless against stronger enemies. The Cadian Sergeant Major supports basic Guard troops with his Veteran’s Discipline, giving them the fortitude to finally survive against harder threats and shoot back. This aura works as well from the Chimera as on the battlefield. He can also bolster Guard and Scions with Cadian Resilience, which sends them into the fray with new resolve.
Lore
Cadia was finally destroyed in the Black Crusade, opening a galaxy-spanning rift in the Warp and throwing the Empire into chaos. Obviously, seasoned veterans of Cadia are now among the rarest and most valuable of Astra Militarum, and they can inspire your basic troops to acts of bravery and discipline…and even survival.

Necrons
Gameplay
I felt that the Necrons have limited infantry healing outside of their own regeneration. The Nanoscarabs are inexpensive and fast, and can quickly get to a group of wounded Necrons. Once there, they self-sacrifice to heal all units nearby both immediately and over the next two turns.
Lore
The Scarabs are often the first creatures encountered by those foolish enough to enter a Necron tomb. Although some are like the Scarabs in Gladius (essentially disposable melee units) others are depicted as incredible builders. Nanoscarabs fill that role, repurposing their own mass to restore their fellow Necrons.

Space Marines
Gameplay
The Space Marines are already well balanced in their lineup of units, so I wanted to elevate an existing unit. Stormtalons are rather underutilized compared to Stormravens in my opinion, largely due to their fragility. This new trait gives them substantial protection against ranged damage when escorting another aircraft, which allows them to support their fellows more effectively without every mission being a suicide mission.
Lore
These pilots are incredibly brave and steady, and are experts at tight maneuvers. I hope to see them used more like they are shown in the Warhammer lore, and so now they can fly in formation with their kindred.

Orks
Gameplay
I wanted to give the Orks a chance to use more squigs. Yeah, the Warboss has a pet squig, but now you can breed them to explode in combat, power your vehicles, and even build the confidence of your units by wearing hair squigs (one of my favorite sillinesses in the Warhammer universe.)
Lore
Squigs make varying degrees of appearance in the lore, but there’s a huge number of types. Now you can add three more types to your squig menagerie. They’re cheap and very useful, if a bit fragile, just like in the books.

Craftworld Aeldari
Gameplay
The Aeldari can be one of the most powerful factions in the very late game, but a nagging frustration is the inability to heal your buildings and vehicles. Another is the gradual disappearance of all the Webway gates, which give the Aeldari their greatest asset in mobility. The Bonesinger assists with both, able to sing songs of Restoration to help vehicles (particularly those early fragile ones) and Creation to make new Webway gates, ready for travel or settlement.
Lore
Bonesingers are a familiar part of Aeldari society, but they are only represented in the abstract in the game of Gladius (in the form of the Bonesingers’ Chantry.) Now they are functional units in their own right, practicing their arts on your units and structures.

Chaos Space Marines
Gameplay
I always felt like those neutral Chaos cultists ought to respect a real Chaos power, like you (the player). The Daemonhost can finally dominate those pests. On the battlefield, the Host erodes morale in a large radius and can directly invade the minds of the weak-willed around it. Naturally, they are quite rare.
Lore
Cults of Chaos are depicted as desperate people foolishly willing to pledge themselves to powers they barely understand. A Daemonhost is a Warp creature incarnated into a human vessel, and thus can walk freely in the material reality. They sweep up those weak Cultists into minions, and then stalk out to fascinate and terrorize everyone from the Militarum to the Inquisition.

Tyranids
Gameplay
Those Neophyte hybrids wandering around are supposed to be waiting for the arrival of the Tyranid Overlords. So why are they trying to kill you? The Biophagus can create the hybrids, indoctrinate them into the Broodmind, and even tinker with their genes to transform them into something far worse.
Lore
One of the most sinister aspects of Tyranid invasion is the “pre-invasion,” where citizens are unknowingly infected with Tyranid genes to ease the takeover and erasure of their planet. In Gladius, these are represented by the quasi-human Neophyte Hybrids. The Biophagus is key to spreading the genetic curse as far as possible and then aiding the various Gene Cults into joining together when the Broodmind signals.

Drukhari
Gameplay
What if you could do what the Haemonculus does, hand-crafting creatures to do your will? The Talos can be just a lab assistant and bodyguard…but, if you’re willing to feed it a few of your more expendable allies, you turn it into a truly terrifying monster.
Lore
The dark Aeldari, bound to a vampiric life of torturing others for sustenance, are probably best exemplified by the Haemonculus. This twisted physician can heal, certainly, but is at his best when using his art to extract fluids and soul-essence from victims. The Talos is both the ultimate reagent dispenser and cage, swallowing victims and using their forms to enhance its own.

Adeptas Sororitas
Gameplay
The Sisters share with the Aeldari a lack of vehicle repair. This means lots of time sitting in the back line, healing, rather than smiting the heretics. Their infantry already have many buffs and heals; I felt there was no reason the Sororitas couldn’t work with Techpriests to fix their vehicles and thus make them a little more fun to play.
Lore
Martian Techpriests have a rather uneasy relationship with the Sisters because of their belief in the Omnissiah; however, the Sororitas need vehicle repair and maintenance just like every other branch of the Empire. So they come as reinforcements to help the same way Enginseers help the Astra Militarum…by keeping the gears turning and the machine spirits appeased.

Adeptus Mechanicus
Gameplay
I wanted to see more interaction with map features, and the Mechanicus can use a more flexible source of income in the early game since they are best played when confining a single type of building to each tile. The Explorators allow a player to scoop up some otherwise-heretical sources of various incomes, easing early game pressure on the economy.
Lore
Belisarius Cawl is a truly ancient Archmagos Dominus who has finally emerged from sequestration to show off truly new discoveries and technologies, such as the stronger Primaris Space Marines. I imagined that this would inspire other Techpriests to push the limits of old Martian orthodoxy, even sampling some xenos technology. In this mod, they explore Gladius’ xenos elements, and then produce an applied benefit from each of them.
Appendix C: Getting Help
I love helping people fix their mods! It wasn't long ago when I didn't understand even the very basics of modding, and help from other modders was critical to encourage me to keep at it. So please ask about any problems your hitting.

With that said, do a couple of things to help me help you:

  • Carefully check all spelling for capitalizations and spaces in unit names. If you are having multiple new files, make sure that all the names are correct and in the right folders.

  • Please consider using Visual Studio Code, as it will find some errors for you and at least really help you see the structure of the file when we discuss it. If I download any of your code, that's how I'll be looking at it. It's free and lightweight.

  • For me to really look, I need all your code! Vague statements about errors are very hard to troubleshoot. The best way to do this is to upload your mod and post a link; I can then download it to see if I can find the errors.

  • Consider downloading one of my mods, because I've had to deal with most of the problems you'll encounter, and I can often point to a specific unit in one of my mods where I created a custom unit which does the thing you're trying to do (or a variation of it).
171 Comments
Baalystyx 25 Jul @ 5:14am 
This is one of the first mods I installed as well as one of my first attemps to modify this game. I'm glad to share this secret
Doc  [author] 24 Jul @ 3:01pm 
Interesting! I wasn't aware of the levelMax command (although I had seen a mod which raised the level...now I see the secret!)
Baalystyx 24 Jul @ 6:55am 
I don't know if this meassage can be any help, but that's how I added a trait which add 2 actions, increased max level to 50 (for units and heroes), get +3 movements and +3 sight (range). Only for human player.

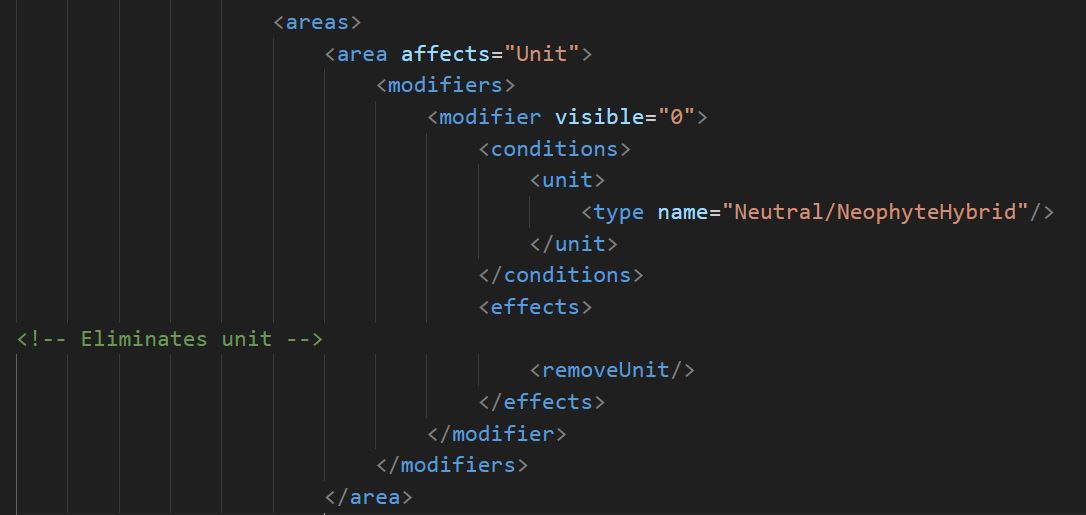
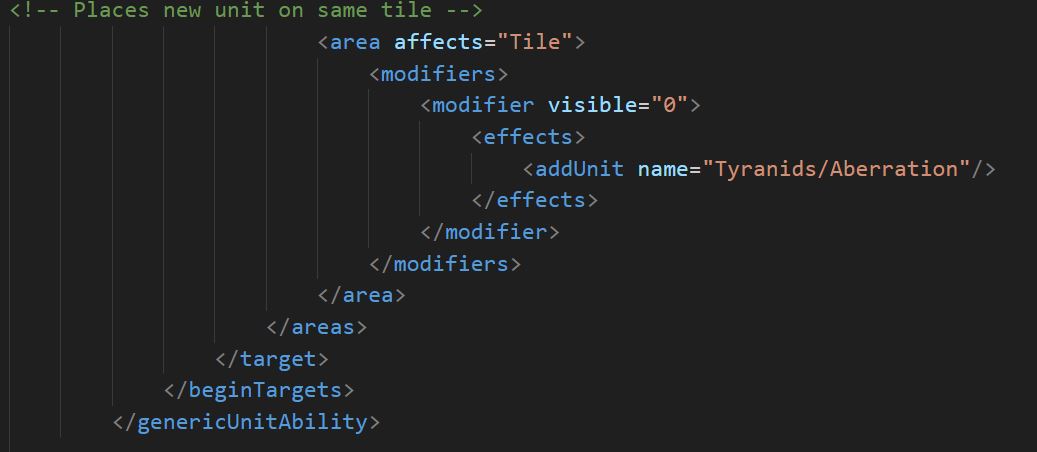
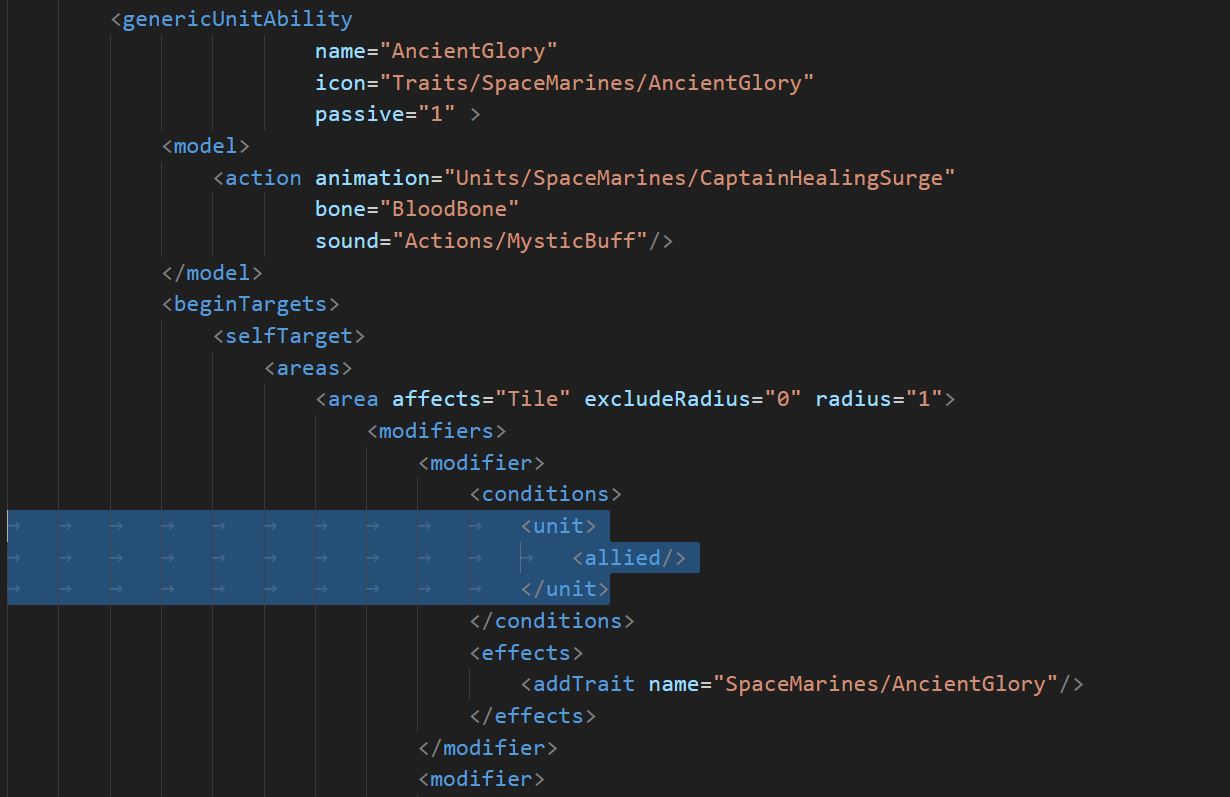
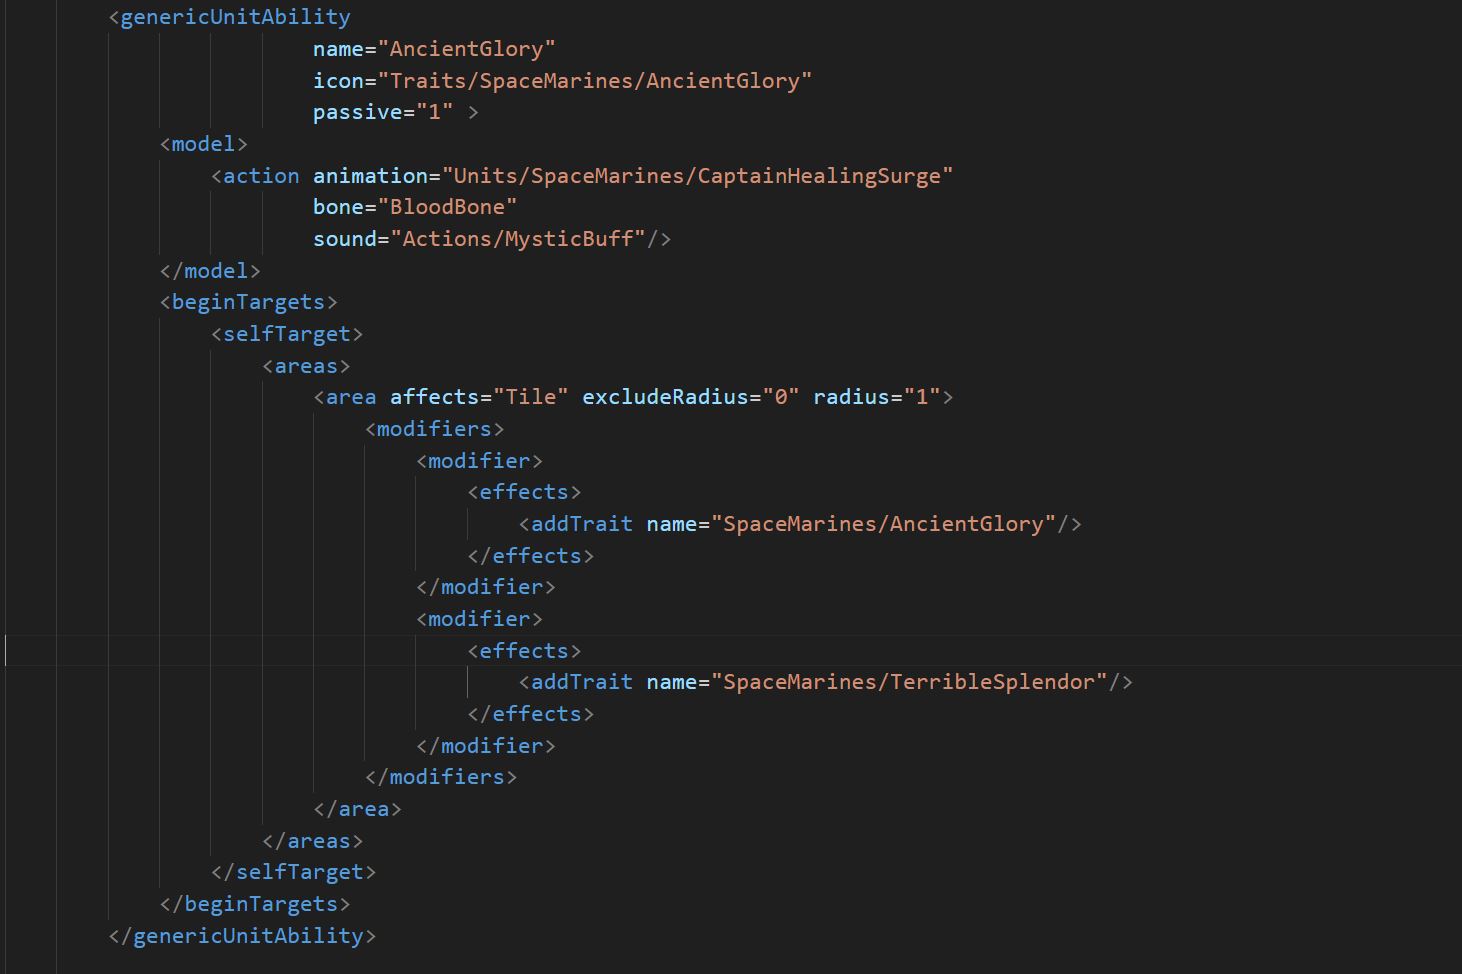
It may interest you to add this method to your guide since it took me hours to figure the trick.
Baalystyx 24 Jul @ 6:49am 
First create a new trait file (folder Data/World/Traits), name it the way you want, I chose to name it "IncreasedHeroUnitStats", then edit the new file like this

<?xml version="1.0" encoding="utf-8"?>

<trait icon="Traits/IncreasedHeroUnitStats">

<modifiers>

<modifier>

<conditions>

<player>
<notAIControlled/>

</player>

</conditions>

<effects>
<actionPointsMax add="2"/>
<levelMax add="40"/>
<movementMax add="3"/>
<sight add="3"/>
</effects>

</modifier>

</modifiers>

</trait>

And for getting the script to work, you have to add the following trait after the other ones in the end of the file for each unit you want or create a xml.ext file (folder Data/World/Units) :

<traits>
<trait name="IncreasedHeroUnitStats"/>

</traits>
Doc  [author] 5 Jun @ 7:24pm 
Research is called "upgrades" in the folders. You'll need to create an upgrade, then add the unit to the Building file with the xml.ext file type (to prevent file conflicts with other mods).

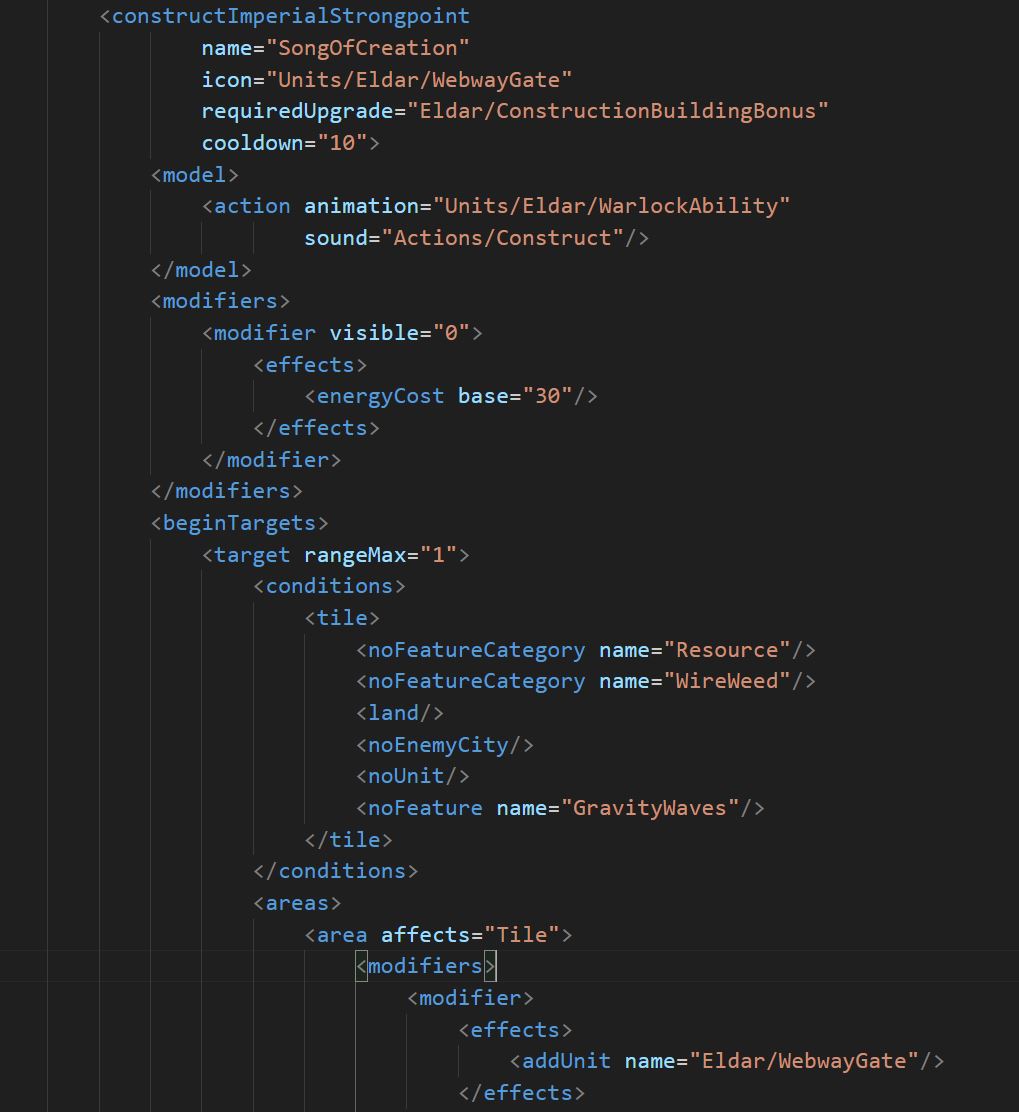
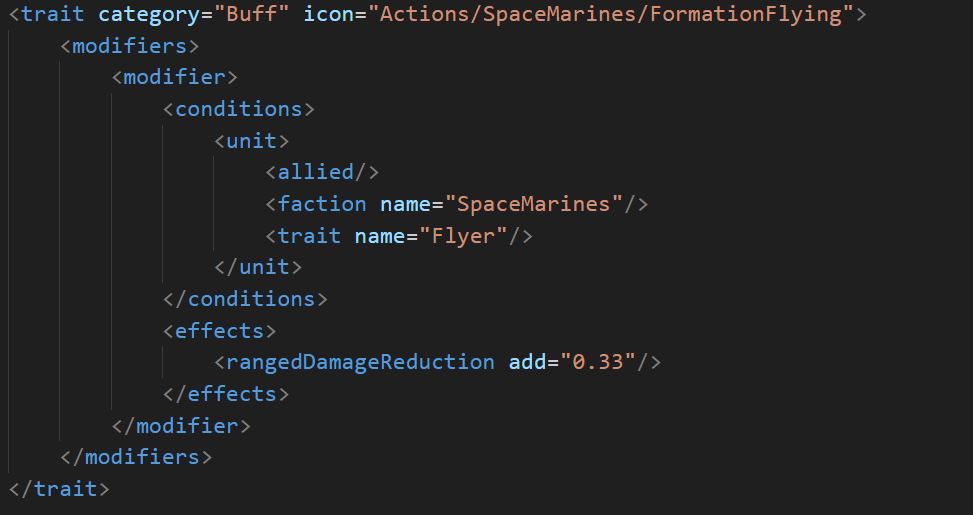
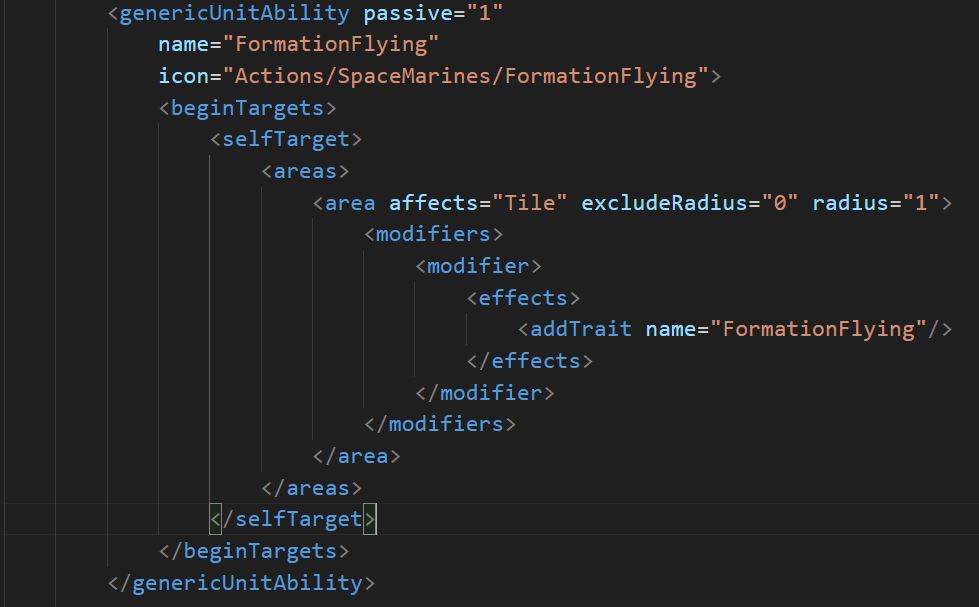
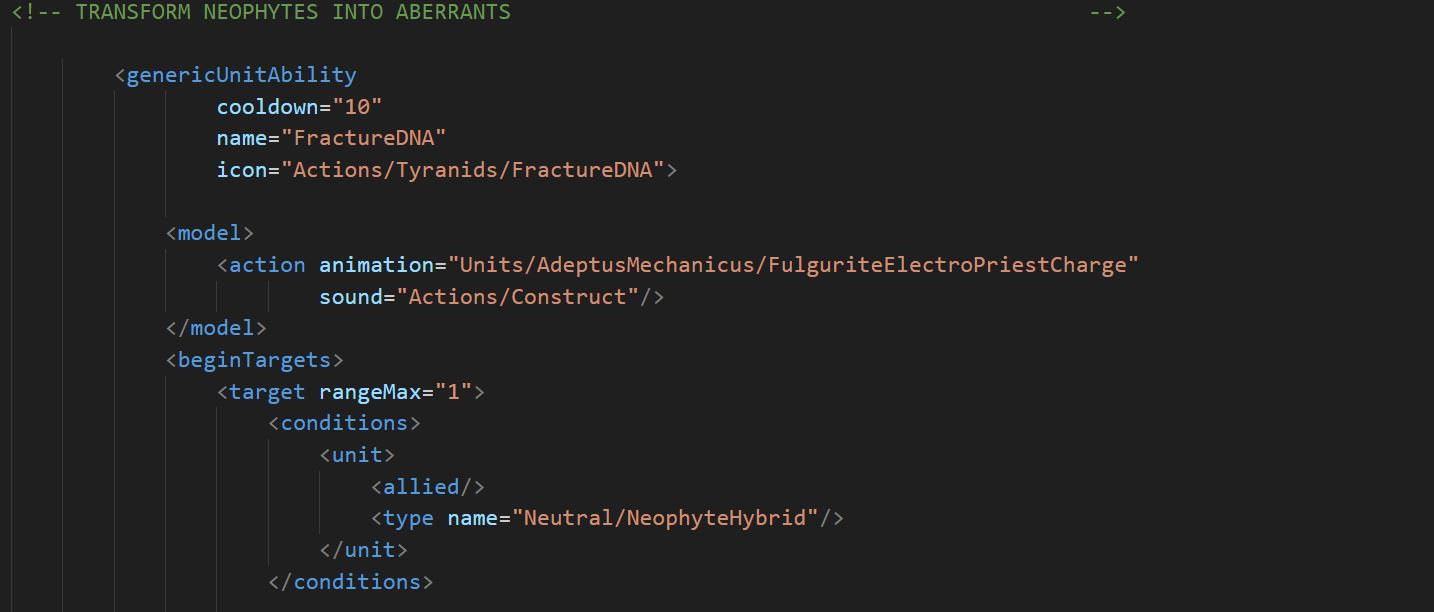
If you haven't use .ext files before, I recommend you download my Scrapyard mod and look at examples of how I added units to the Building and Upgrade folders.
Promaster777 5 Jun @ 5:12pm 
I don't mean to add a research to a faction, for example the research of obliterator in space marine faction (I don't know what I mean).
Doc  [author] 5 Jun @ 4:50pm 
Are you asking about a story (quest line) for a faction? If so, I've never tried, but the files are in there. I'm not sure you could add a second one, but you could probably change the ones already there.
Promaster777 5 Jun @ 3:14pm 
(sorry for my english I am using a translator) maybe what I am going to say is a bit stupid but I would like to know how to add an investigation to a faction.
Doc  [author] 26 May @ 10:01am 
So I can definitely say that 1K textures are better than higher resolutions. I've played with a couple of units, and the higher resolutions give a weird sparkle. My new practice is to work in 2K or 4K, and then downsample.

And don't forget, the textures don't have to be a square! Any shape you want.
BlissDefiler 14 May @ 3:07pm 
Awesome, thank you very much. I'll try messing around with things, using the Chaos Lord plasma pistol, when I get the chance. If I'm able to get stuff working, it'd be great to eventually try retexturing a Commissar and making a Cadian Castellan from him.