Workers & Resources: Soviet Republic

Workers & Resources: Soviet Republic

102 ratings
Workers & Resources: Soviet Republic Beginner's Guide
By Antony (Hooded Horse) and 1 collaborators
A beginner's guide on the basics of Workers & Resources: Soviet Republic, from user interface to mechanics, and early gameplay/helpful tips!
4
2
   
Award
Favorite
Favorited
Unfavorite
Gameplay Overview

Take part in building the ideal Soviet Republic in this in-depth city-builder as you harvest and process raw materials, design logistical infrastructure across land, air, and water, and provide everything your loyal citizens need to thrive!

​This city-builder features a range of complex simulations that will bring your republic to life:

  • Create a truly realistic economy, complete with intricate production chains and global trade, where the price of goods reflects supply and demand.
  • Lead your people with the ability to follow any citizen throughout their life, influencing their education, access to employment, and loyalty to the party through fulfilling their needs and desires, and when that fails - propaganda.
  • Have complete freedom to build wherever you want on massive maps, planning out multiple connected cities to meet the demands of your ever-evolving economy.
Your new republic awaits.
Game Setup


When you first set up a game in Workers & Resources: Soviet Republic, you’ll have various options for map and difficulty settings. Selecting from the Overall Difficulty options at the top of the menu will set you up with default options to help save you time. For those who want a more customized experience, see the options below.

  1. Population - The starting population on the map spread out across existing buildings if there are any on the map you chose.
  2. Money Amount - The amount of starting money, both in Western Dollars and Eastern Rubles.
  3. Realistic Mode - With Realistic Mode enabled, materials must be on-site before construction begins. When disabled, construction and its material costs are paid for automatically, and construction begins immediately by default.
  4. Unsatisfied Citizen’s Reaction - The reasonableness of citizen happiness.
  5. Energy Management - The energy requirements of your city, from completely disabled, limited to buildings, or all buildings and vehicles requiring energy.
  6. Water Management - The level of water management for your city.
  7. Waste Management - The waste production of the city, from completely disabled, to people/factories producing waste, to demolition requiring a demolition office.
  8. Maintenance - Whether vehicles require maintenance or not.
  9. Seasons - Enabling seasons will impact a variety of mechanics, such as farming, heating, road conditions, and the availability of outdoor leisure activities.
  10. Building Fires - Frequency of building fires occurring.
  11. Global Events - Global events that can affect market pricing, supply, and demand.
  12. Pollution - Whether there is pollution from factories or not.
  13. Education Simulation - The complexity of education systems. On Simple settings, children are automatically educated, and parents can work when children are under 6 years old. On Complex settings, you will need to teach children in school, and parents with children under age 6 can only work if children are in kindergarten.
  14. Crime & Justice - When enabled, crime will occur, and a justice system (police, courts, and prisons) will be necessary.
  15. Traffic Simulation - The complexity of traffic systems. On Simple settings, traffic adheres to a “first come, first serve” basis regarding priority/right of way. On Complex settings, traffic adheres to a “priority to the right” or “rule of the right hand,” giving way to the vehicle to its right.
  16. Researches - When enabled, you will need to research technologies through a university to unlock new policies, buildings, and vehicles.
  17. Night/Day cycle - For aesthetics only, you can have a day/night cycle.
  18. Vehicles Availability - The level of vehicle availability
    1. All - All vehicles are available at all times
    2. Lock start according to year - Vehicles are available from the year they were introduced and never expire.
    3. Lock according year - Vehicles are available from the year they were introduced and expire once their timeframe ends.
  19. Year of Start - The decade in which your game starts. Depending on the above customizations, this will affect technologies, buildings, and vehicle availability.
Once you are satisfied with your customization choices, start your game!

The Basics - User Interface


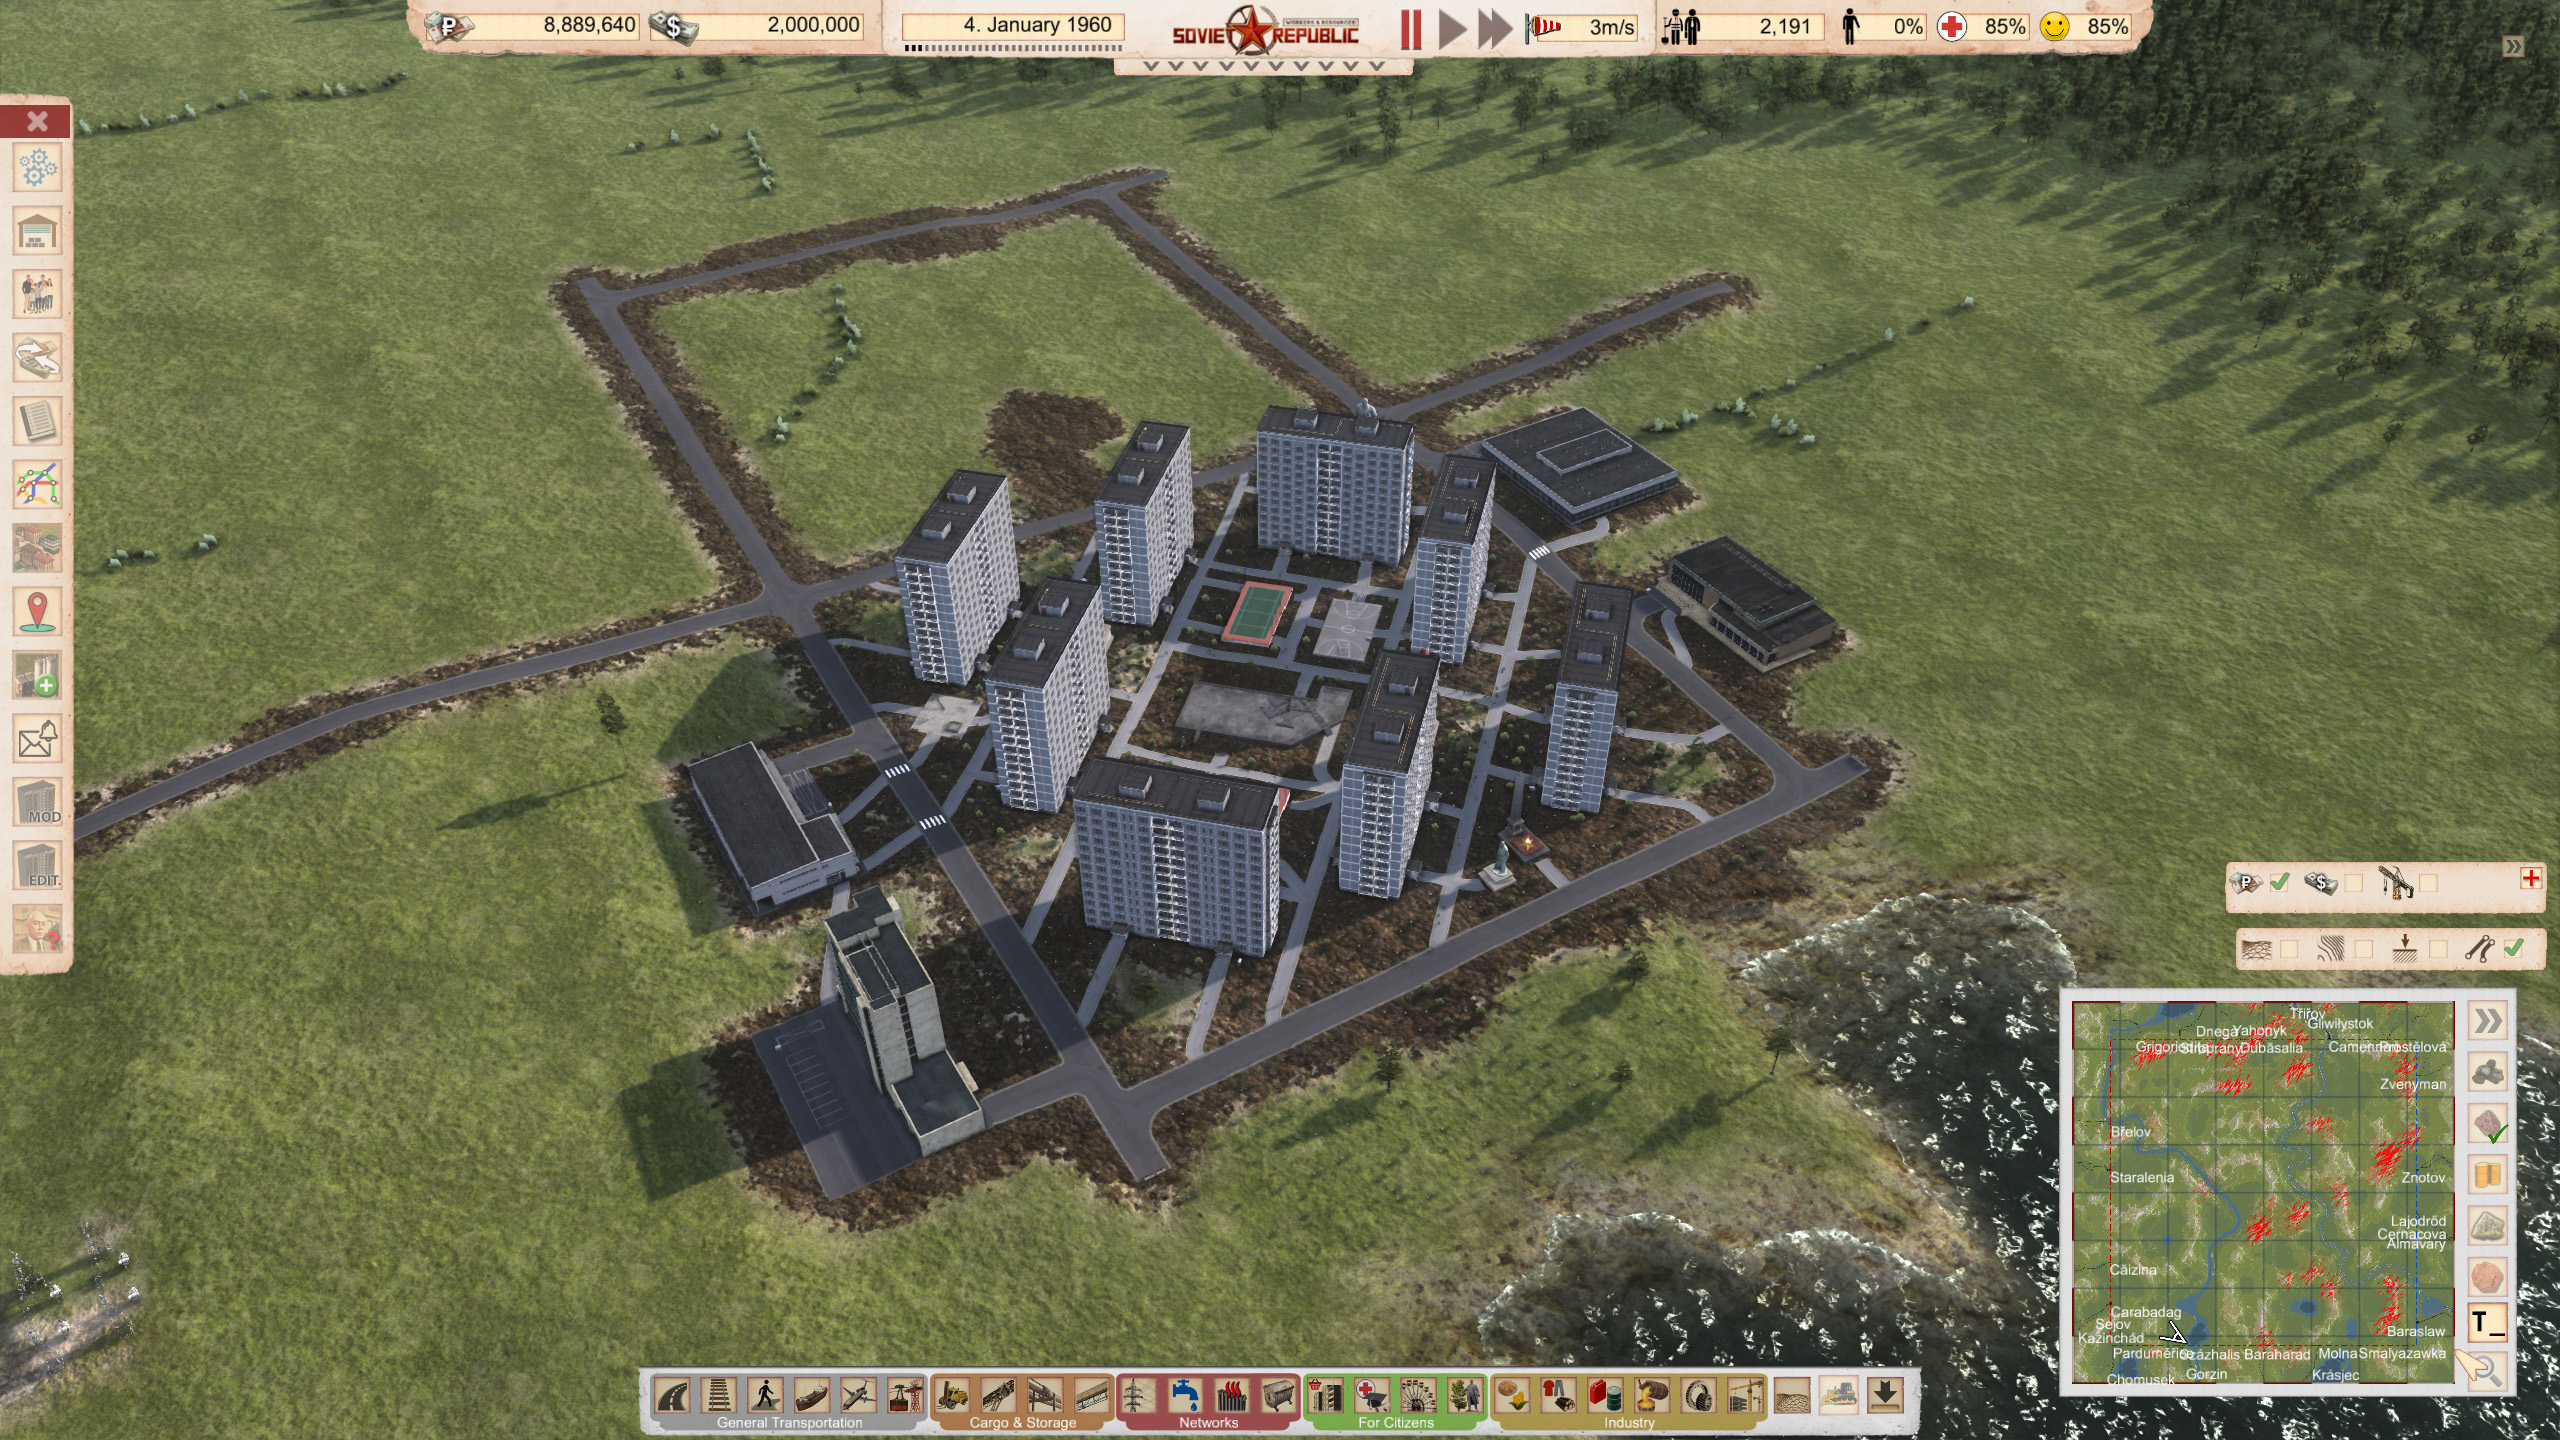
Understanding the User Interface of Workers & Resources: Soviet Republic is crucial to building the perfect Soviet city.

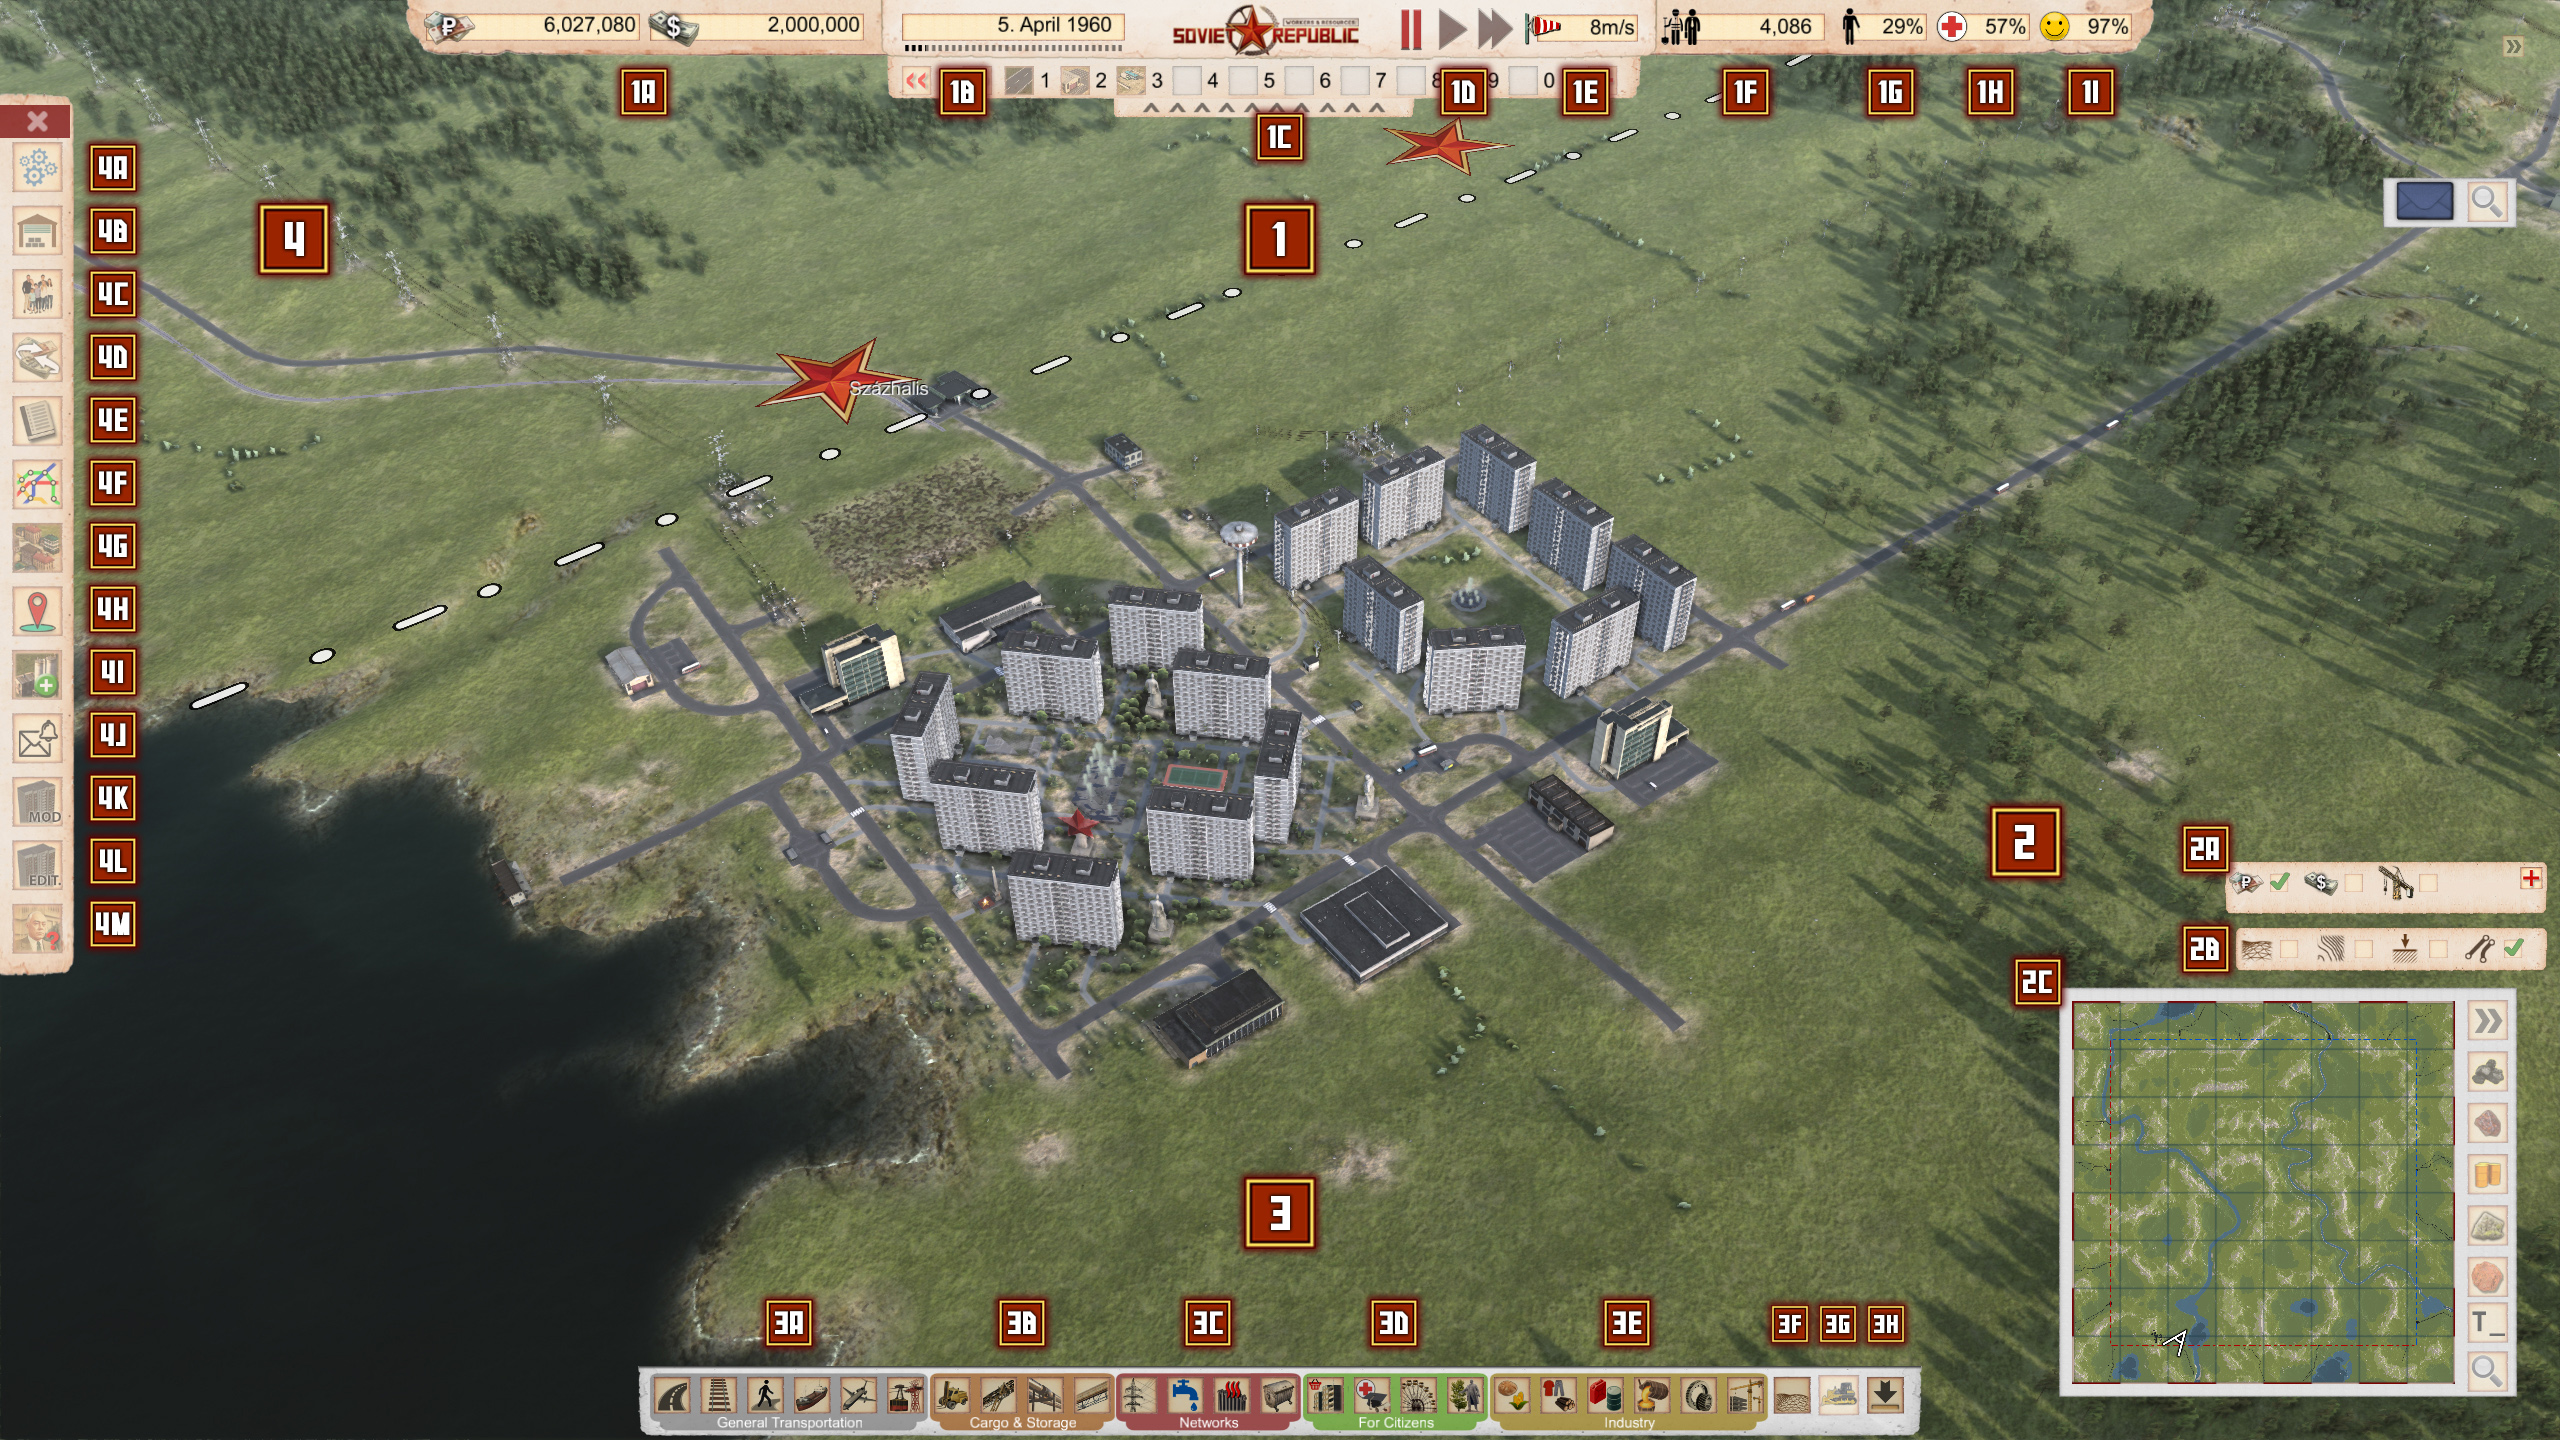
  1. City Overview - Top-level menus providing information about your city.
    • 1a Money - The current amount of money in both Western dollars and Eastern rubles. Note that all buildings, vehicles, and resources can be bought with either currency. Hovering over either currency will show your financial income and expenditure breakdown.
    • 1b Current Date
    • 1c Shortcut Bar - This bar allows you to customize a set of buildings you’ll most commonly use while building your city. Drag and drop these buildings into the corresponding slots, then access these shortcuts by using the top number bar on your keyboard.
    • 1d Game Speed.
    • 1e Wind Speed - Affects pollution spread when pollution is enabled.
    • 1f Current Population - Hovering over the population will show a detailed breakdown.
    • 1g Current unemployment rate - Hovering over this will show a breakdown of unemployment factors.
    • 1h Current health rating - Hovering over this will show a breakdown of health factors.
    • 1i Current Happiness rating - Hovering over this will show a breakdown of happiness factors.
  2. Construction Methods - Various methods to construct the buildings in your city.
    • 2a Auto Build & Building from resources. You can auto-build using either Dollars or Rubles, or construct using the currently stored resources.
    • 2b Overlays & Construction Aids
      • Wireframe - construct along a wireframe of the map. Hit F1 twice to bring up the wireframe and snap to grid, allowing you to build along precise angles.
      • Topographic overlay - Topography matters, and you will have to flatten terrain to build, or use winding roads to climb steep terrain.
      • Underground Toggle - Allows you to see and perform underground construction such as water/sewage pipes, road and rail tunnels, underground electrical lines etc.
      • Near Snap - When placing roads, near snap will snap your roads to logical angles and curves.
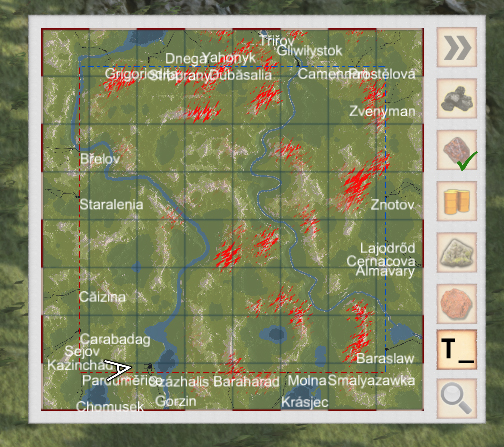
    • 2c Minimap - The Minimap will show you resource locations and your cities. Depending on your settings, resources can only be found when the appropriate technology has been researched.
  3. Building Menu - This is where you will select all of your buildings and infrastructure to grow your city.
    • 3a General Transportation - All transportation services across land, water, and air.
    • 3b Cargo & Storage - All cargo and storage services.
    • 3c Networks - All infrastructure networks - electricity, water, heat, and waste management.
    • 3d For Citizens - Citizen buildings - Residential buildings and residential services, state infrastructure, tourism, and decorations.
    • 3e Industry - All industrial services that produce both raw materials and finished goods.
    • 3f Terrain Editor.
    • 3g Demolish button.
    • 3h Hide Building Menu.
  4. Stats & Tools Menu
    • 4a Settings Menu
    • 4b Objectives - Depending on the scenario, provides step-by-step objectives for you to accomplish.
    • 4c Resource Status - Details about each resource’s location, quantity, and value within a certain range of your current location.
    • 4d Population Stats - Range of stats to gain a quick overview of your population.
    • 4e Economy & Trade - A breakdown of different economic stats, including imports/exports, consumption of goods and services, supply and demand, and tourism statistics.
    • 4f List of current vehicles and buildings in your city.
    • 4g List of Lines - A list of transportation lines created across all transportation services.
    • 4h Make City - Allows you to add a group of buildings to a “Make City” collection, separate from the top bar, where you can quickly switch between buildings by using the Q/E keys.
    • 4i Show Overlays - Displays a range of overlays to show various satisfactions and accessibility across your city.
    • 4j Construction offices assign tool - Options to quickly assign and unassign construction projects from the various construction offices within your city.
    • 4k Mod & Script Tools - For advanced users, the ability to add modded buildings and scripts into the game.
    • 4l Timelapse Camera - Options to have the game automatically take screenshots from a fixed position at fixed intervals, saving them to your computer so you can combine them into a timelapse.
    • 4m Questions & Answers - an encyclopedia of different aspects within the game.

Basic Infrastructure


Knowing where to begin building your first city can be difficult. This section will address some of the starting considerations for establishing your new republic. Note that this section is written with the assumption that you have the following custom settings:
  • Realistic Mode: Disabled
  • Energy Management: Buildings Only
  • Water Management: Enabled
  • Waste Management: Enabled
  • Seasons: Disabled
  • Education simulation: Simple
  • Research: Disabled
  • Starting Year: 1960
To begin, you’ll need to decide where you want to build. It’s recommended that you build close to an Eastern Bloc custom house with a power connection, as you can purchase and sell resources and electricity in Rubles, of which you have vastly more than the Western Bloc Dollars.

Beginners should also build close to a river for simple waste management, as will be detailed later.


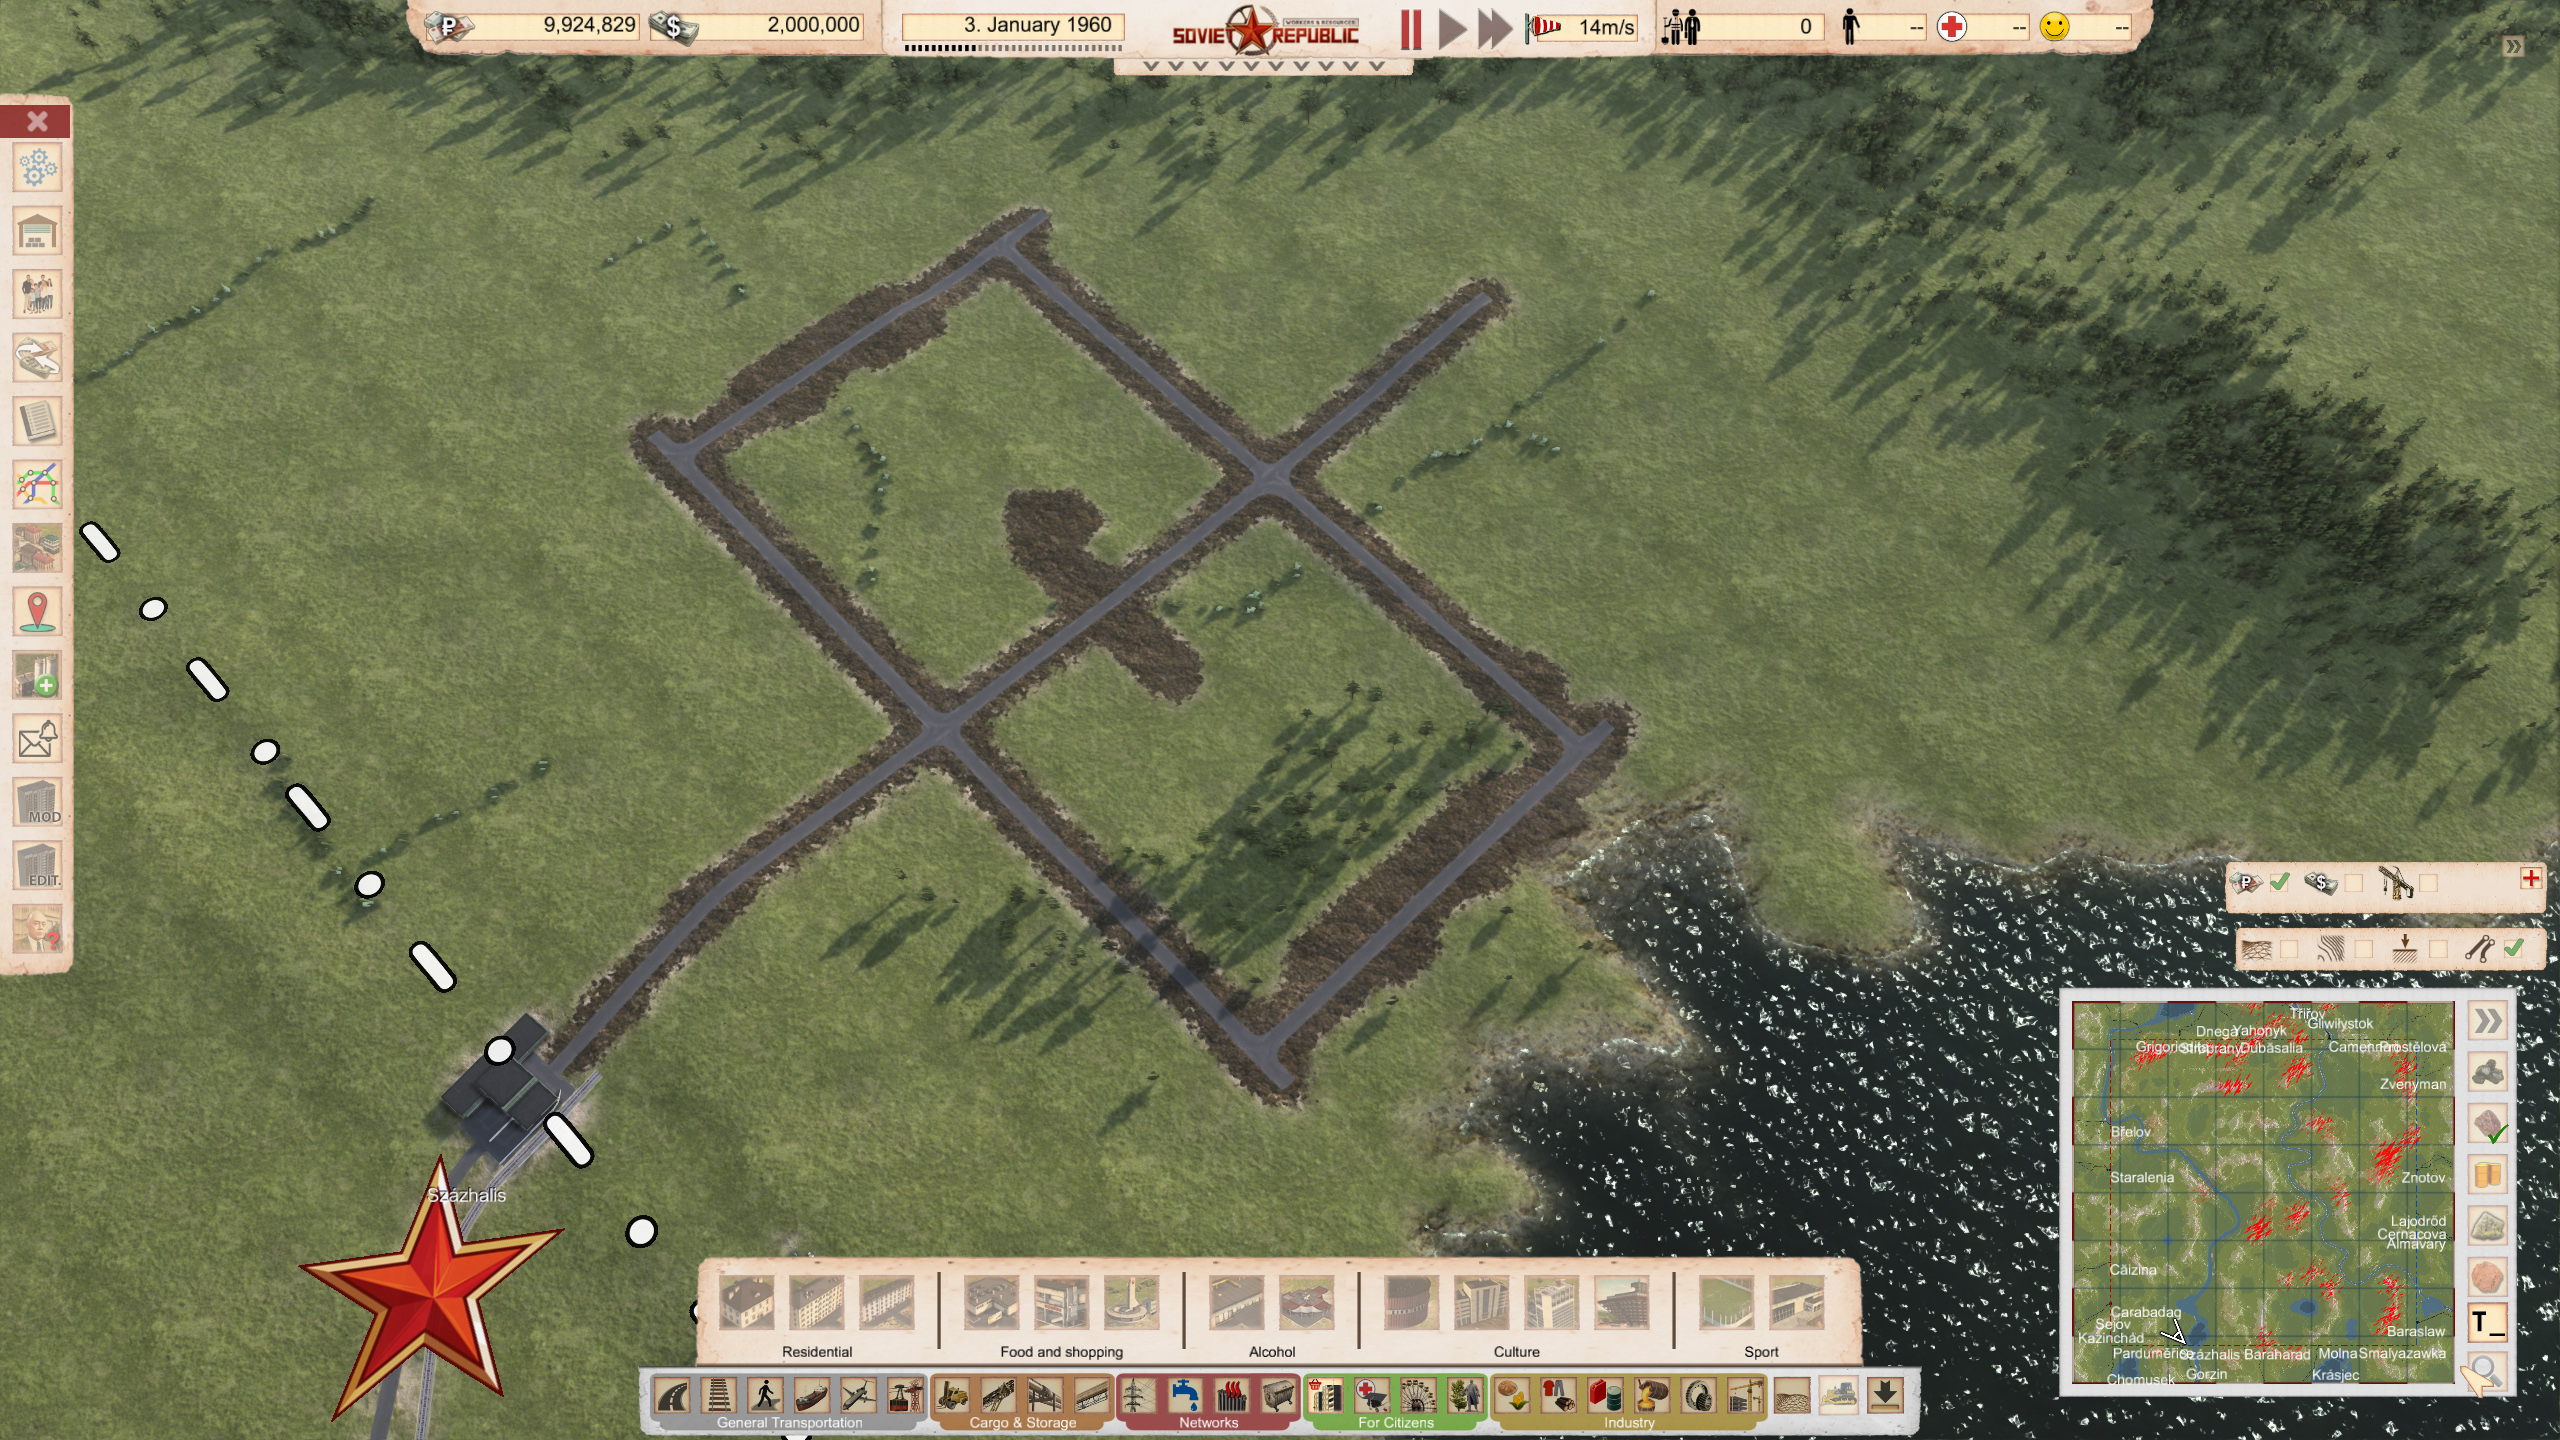
Next, construct a set of roads, connecting it to the Eastern Bloc custom house. Your starting city should include the following buildings to take care of all basic needs for your people:
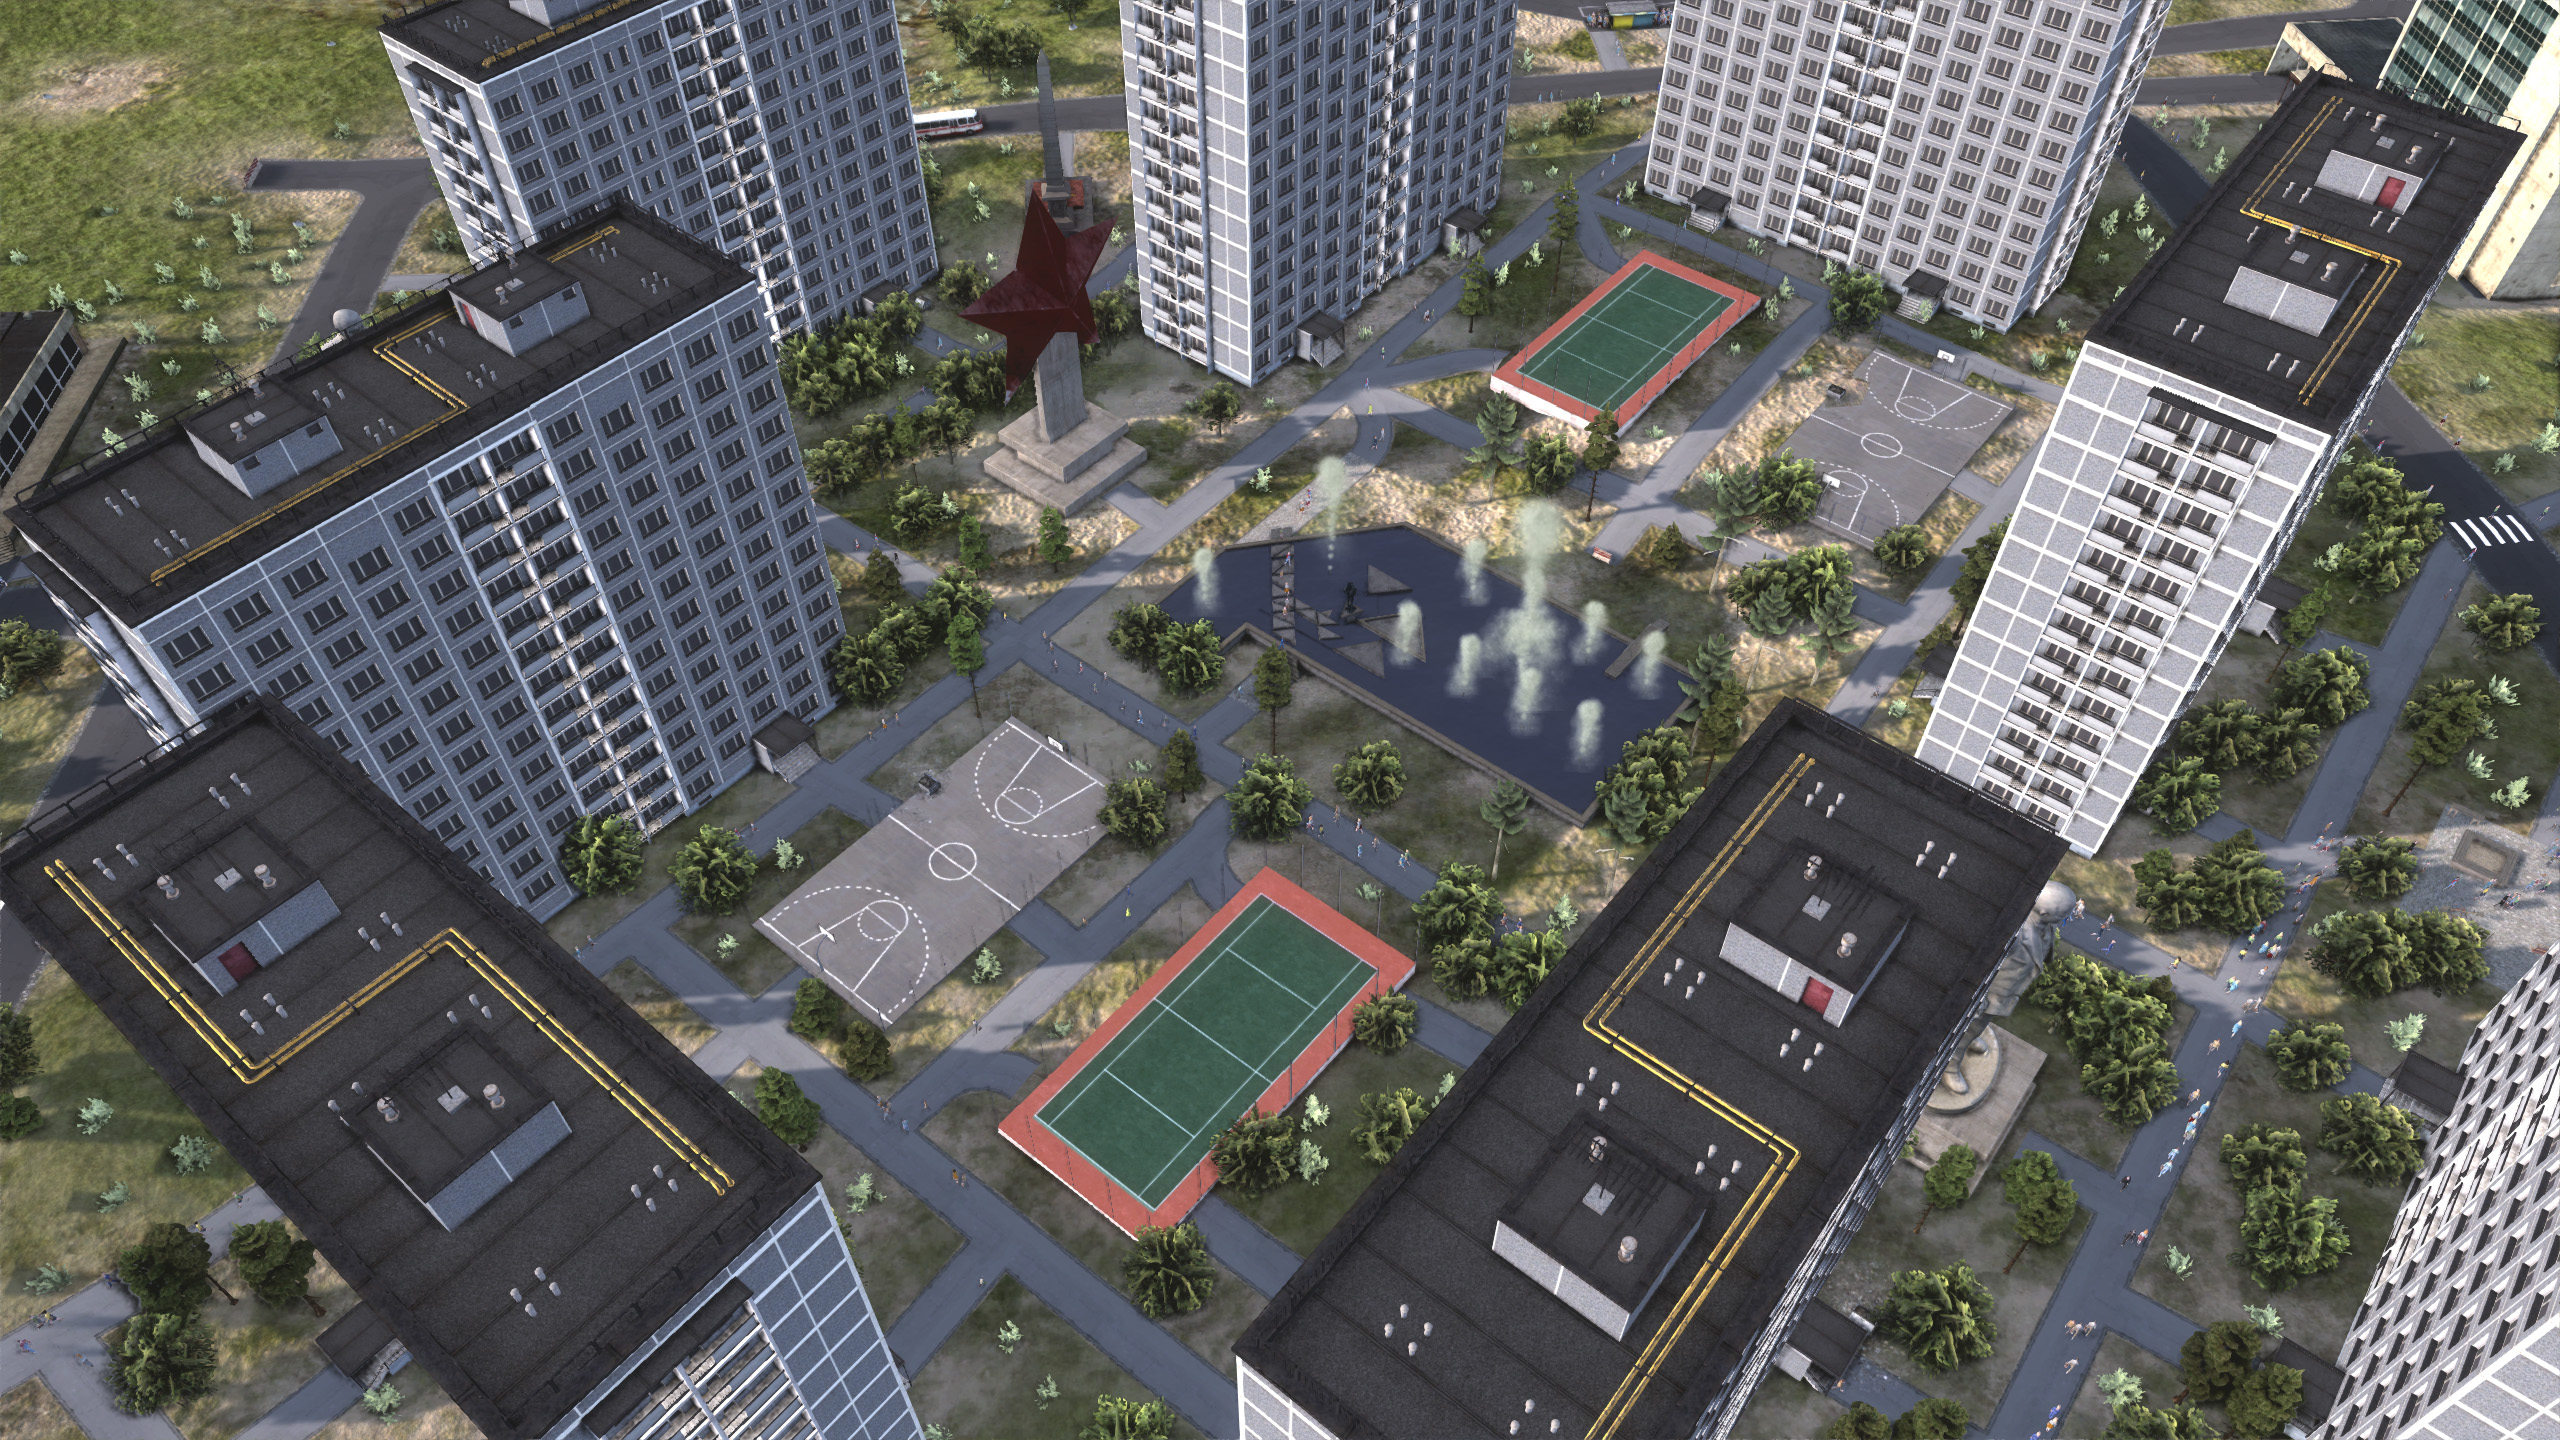
  • 4-6 Housing Flats - Found in For Citizens -> Residential Areas -> Residential.
  • Small Shopping Centre for Food & Clothing - Found in For Citizens -> Residential Areas -> Food and Shopping.
  • Pub for Alcohol - Found in For Citizens -> Residential Areas -> Alcohol.
  • Sports Entertainment - Found in For Citizens -> Residential Areas -> Sport.
  • Hospital - Found in For Citizens -> State Infrastructure -> Emergency.

Electrical Infrastructure
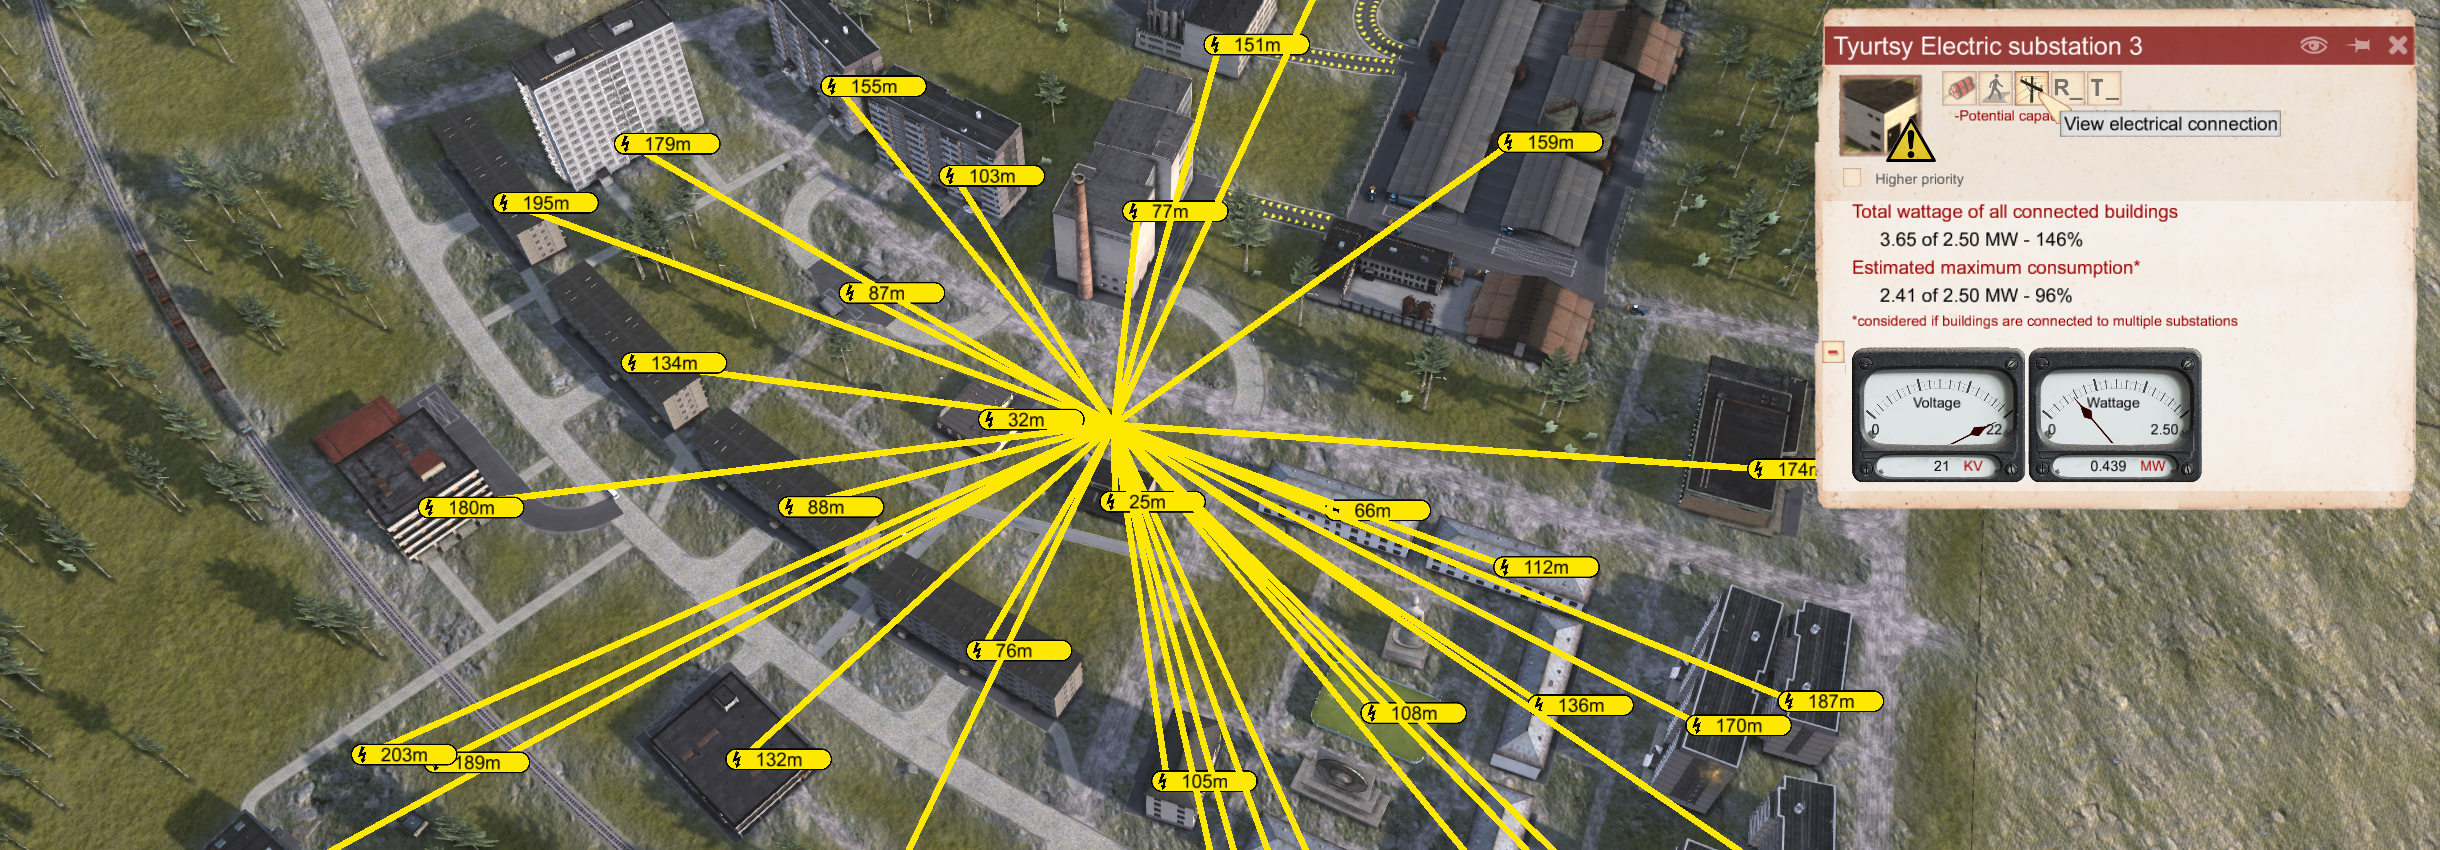
  • Build a Power Transformer connecting the foreign high-voltage output to your city, providing several medium-voltage outputs to build your electrical grid. The transformer can be Found in Networks -> Electricity -> Conversion.
  • Connect via Medium voltage wires - Found in the same Electricity category.
  • Build an electrical substation, ensuring all of your buildings will be connected, as indicated by a yellow line.
  • Once built, click on the outside power source, select Import (purchase) mode, and determine how much power you want to import. Note that you will only pay for the electricity used by your buildings.
Plumbing Networks - Water Infrastructure
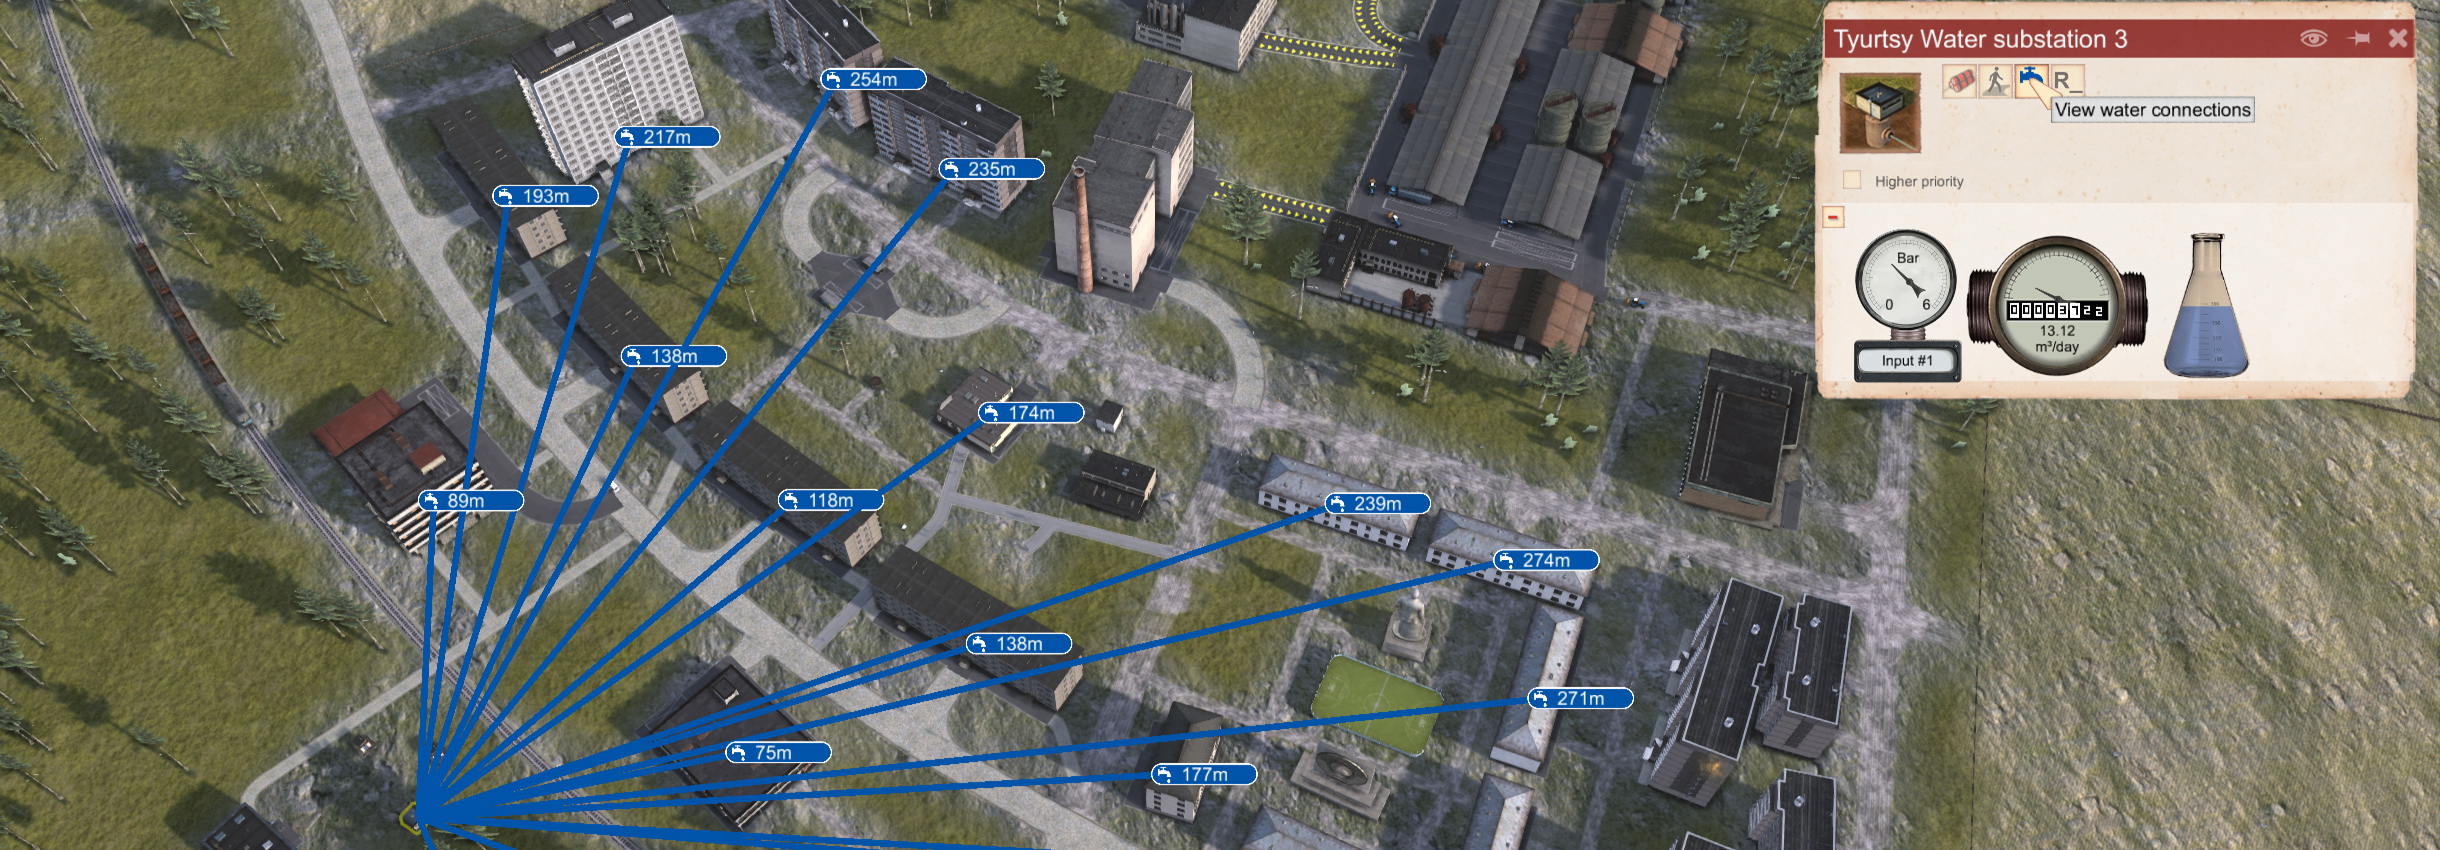
  • Go to Networks -> Water and, in order, build: Water Well, Water Pumping Station, Water Tower, Water Substation. When building the Water Substation, ensure all of your buildings will be connected, as indicated by a blue line.
  • Connect these buildings in the following order: Water Well -> Water Pumping Station -> Water Tower -> Water Substation.
  • If powered and connected correctly, click on your water tower, and you will see water filling up. Subsequently, your Water Substation will start pumping water to buildings.
Plumbing Networks - Waste Infrastructure
NOTE: this setup assumes you have close access to a river or lake for waste dumping.
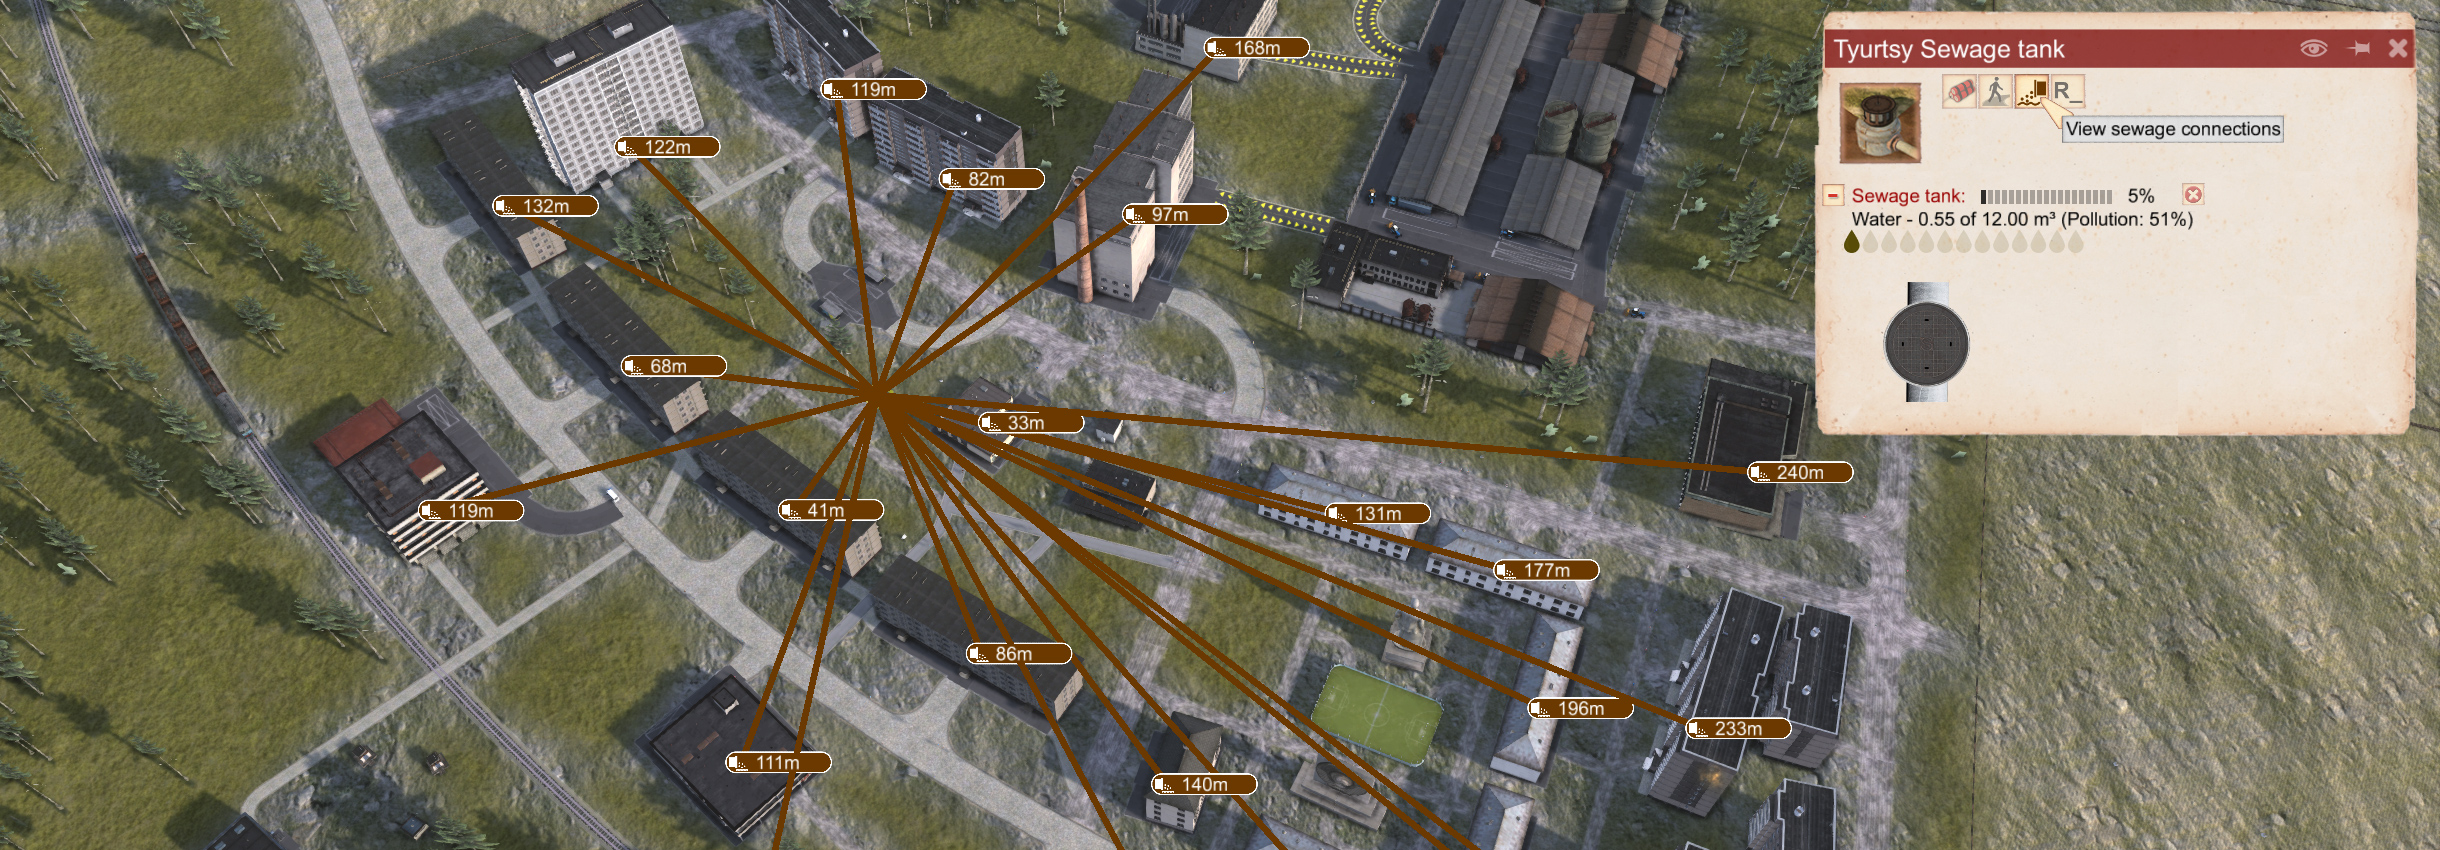
  • Build a Sewage Discharge on the water’s edge - Found in Networks -> Sewage.
  • Build a Sewage Tank - Found in the same location, with placement ensuring all of your buildings can be connected, as indicated with a brown line.
  • Connect your Sewage tank to the Sewage Discharge via Sewage Pipes.
  • If powered and connected correctly, click on your Sewage Discharge, and you will see the sewage meter pumping.
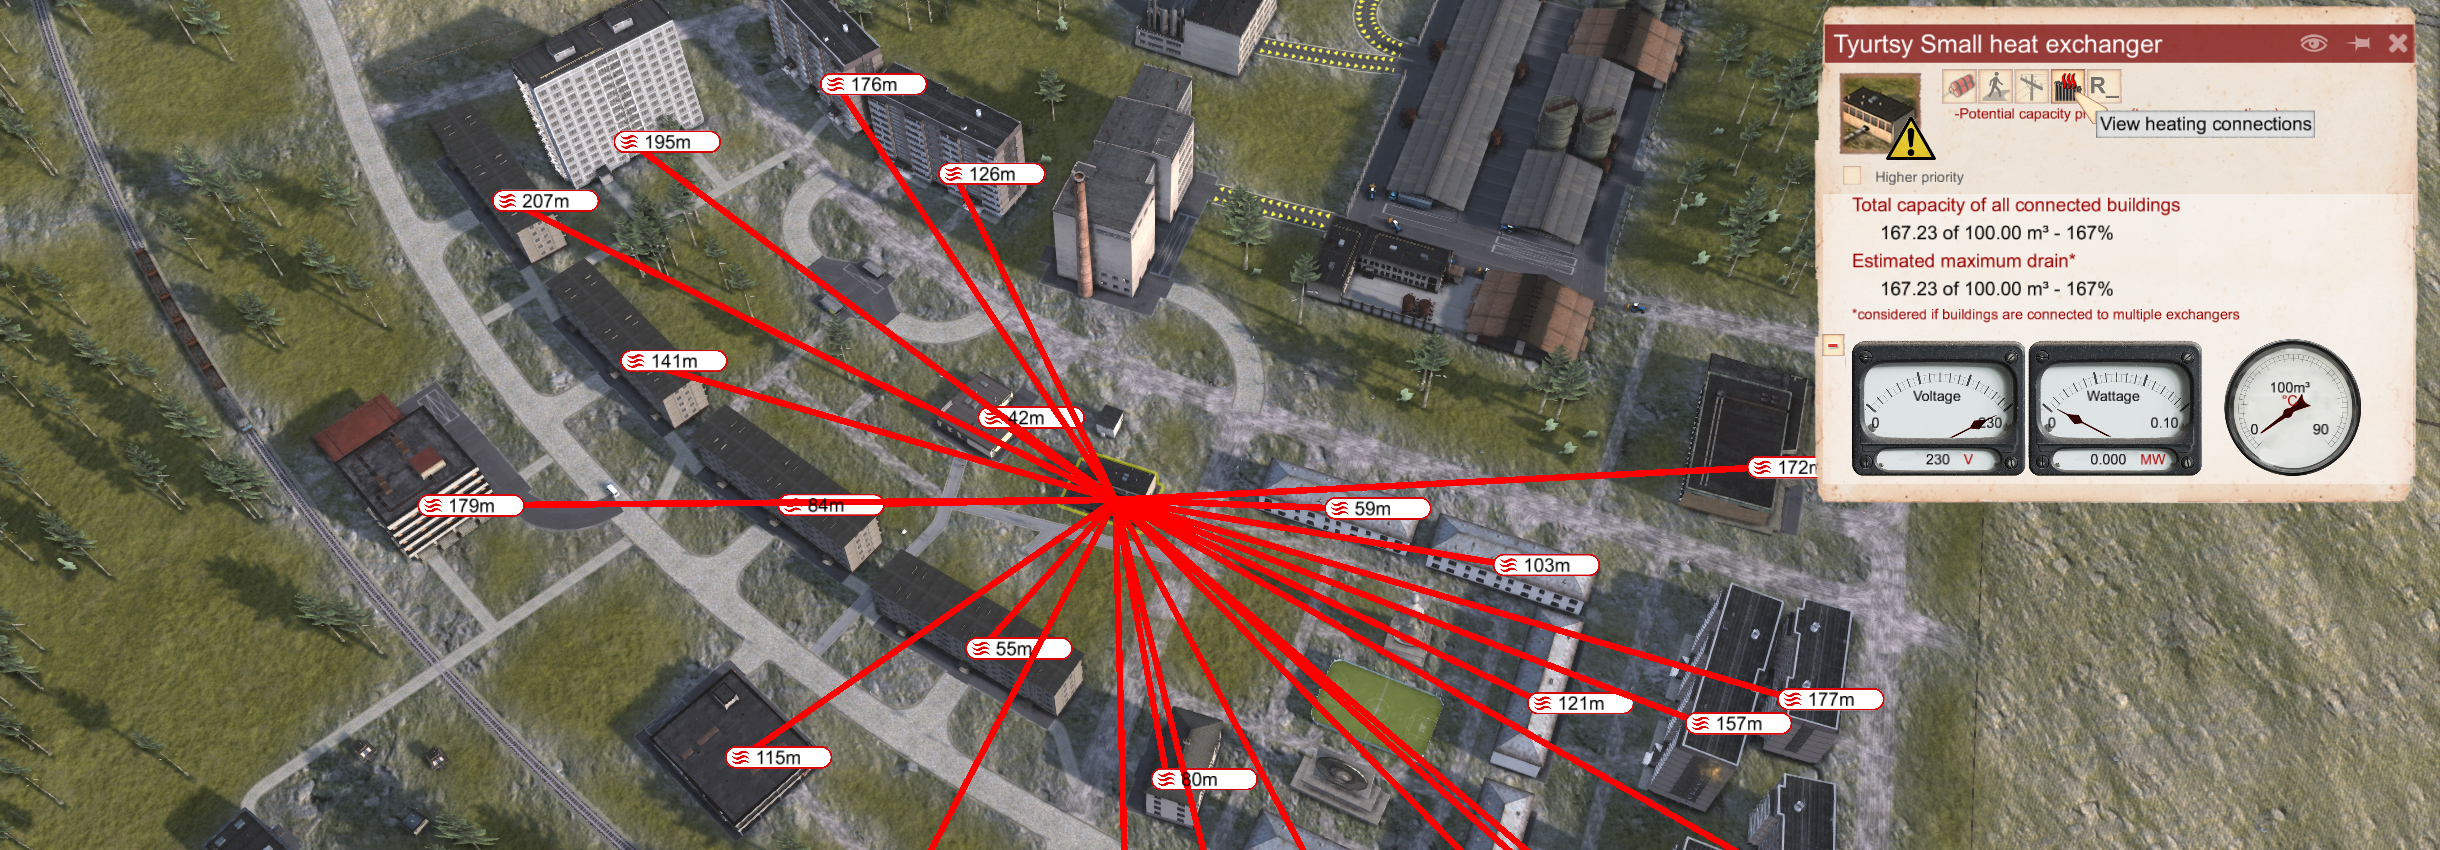
Heating Network - Should you have seasons enabled, you will need to set up heating infrastructure in preparation for the winter seasons.
  • Build a heating plant - Found in Networks -> Heating
  • Build a substation - Found in the same location, with placement ensuring all of your buildings can be connected, as indicated with a red line.
  • If powered and connected correctly, you can click on your substation and see heat being pumped to your buildings. Heating stations need coal to operate.
Resource Production & Refinement

In true Soviet Republic form, resource production and refinement are the backbone of your republic, allowing you to locally acquire building materials and provide a source of revenue when exporting through custom houses.

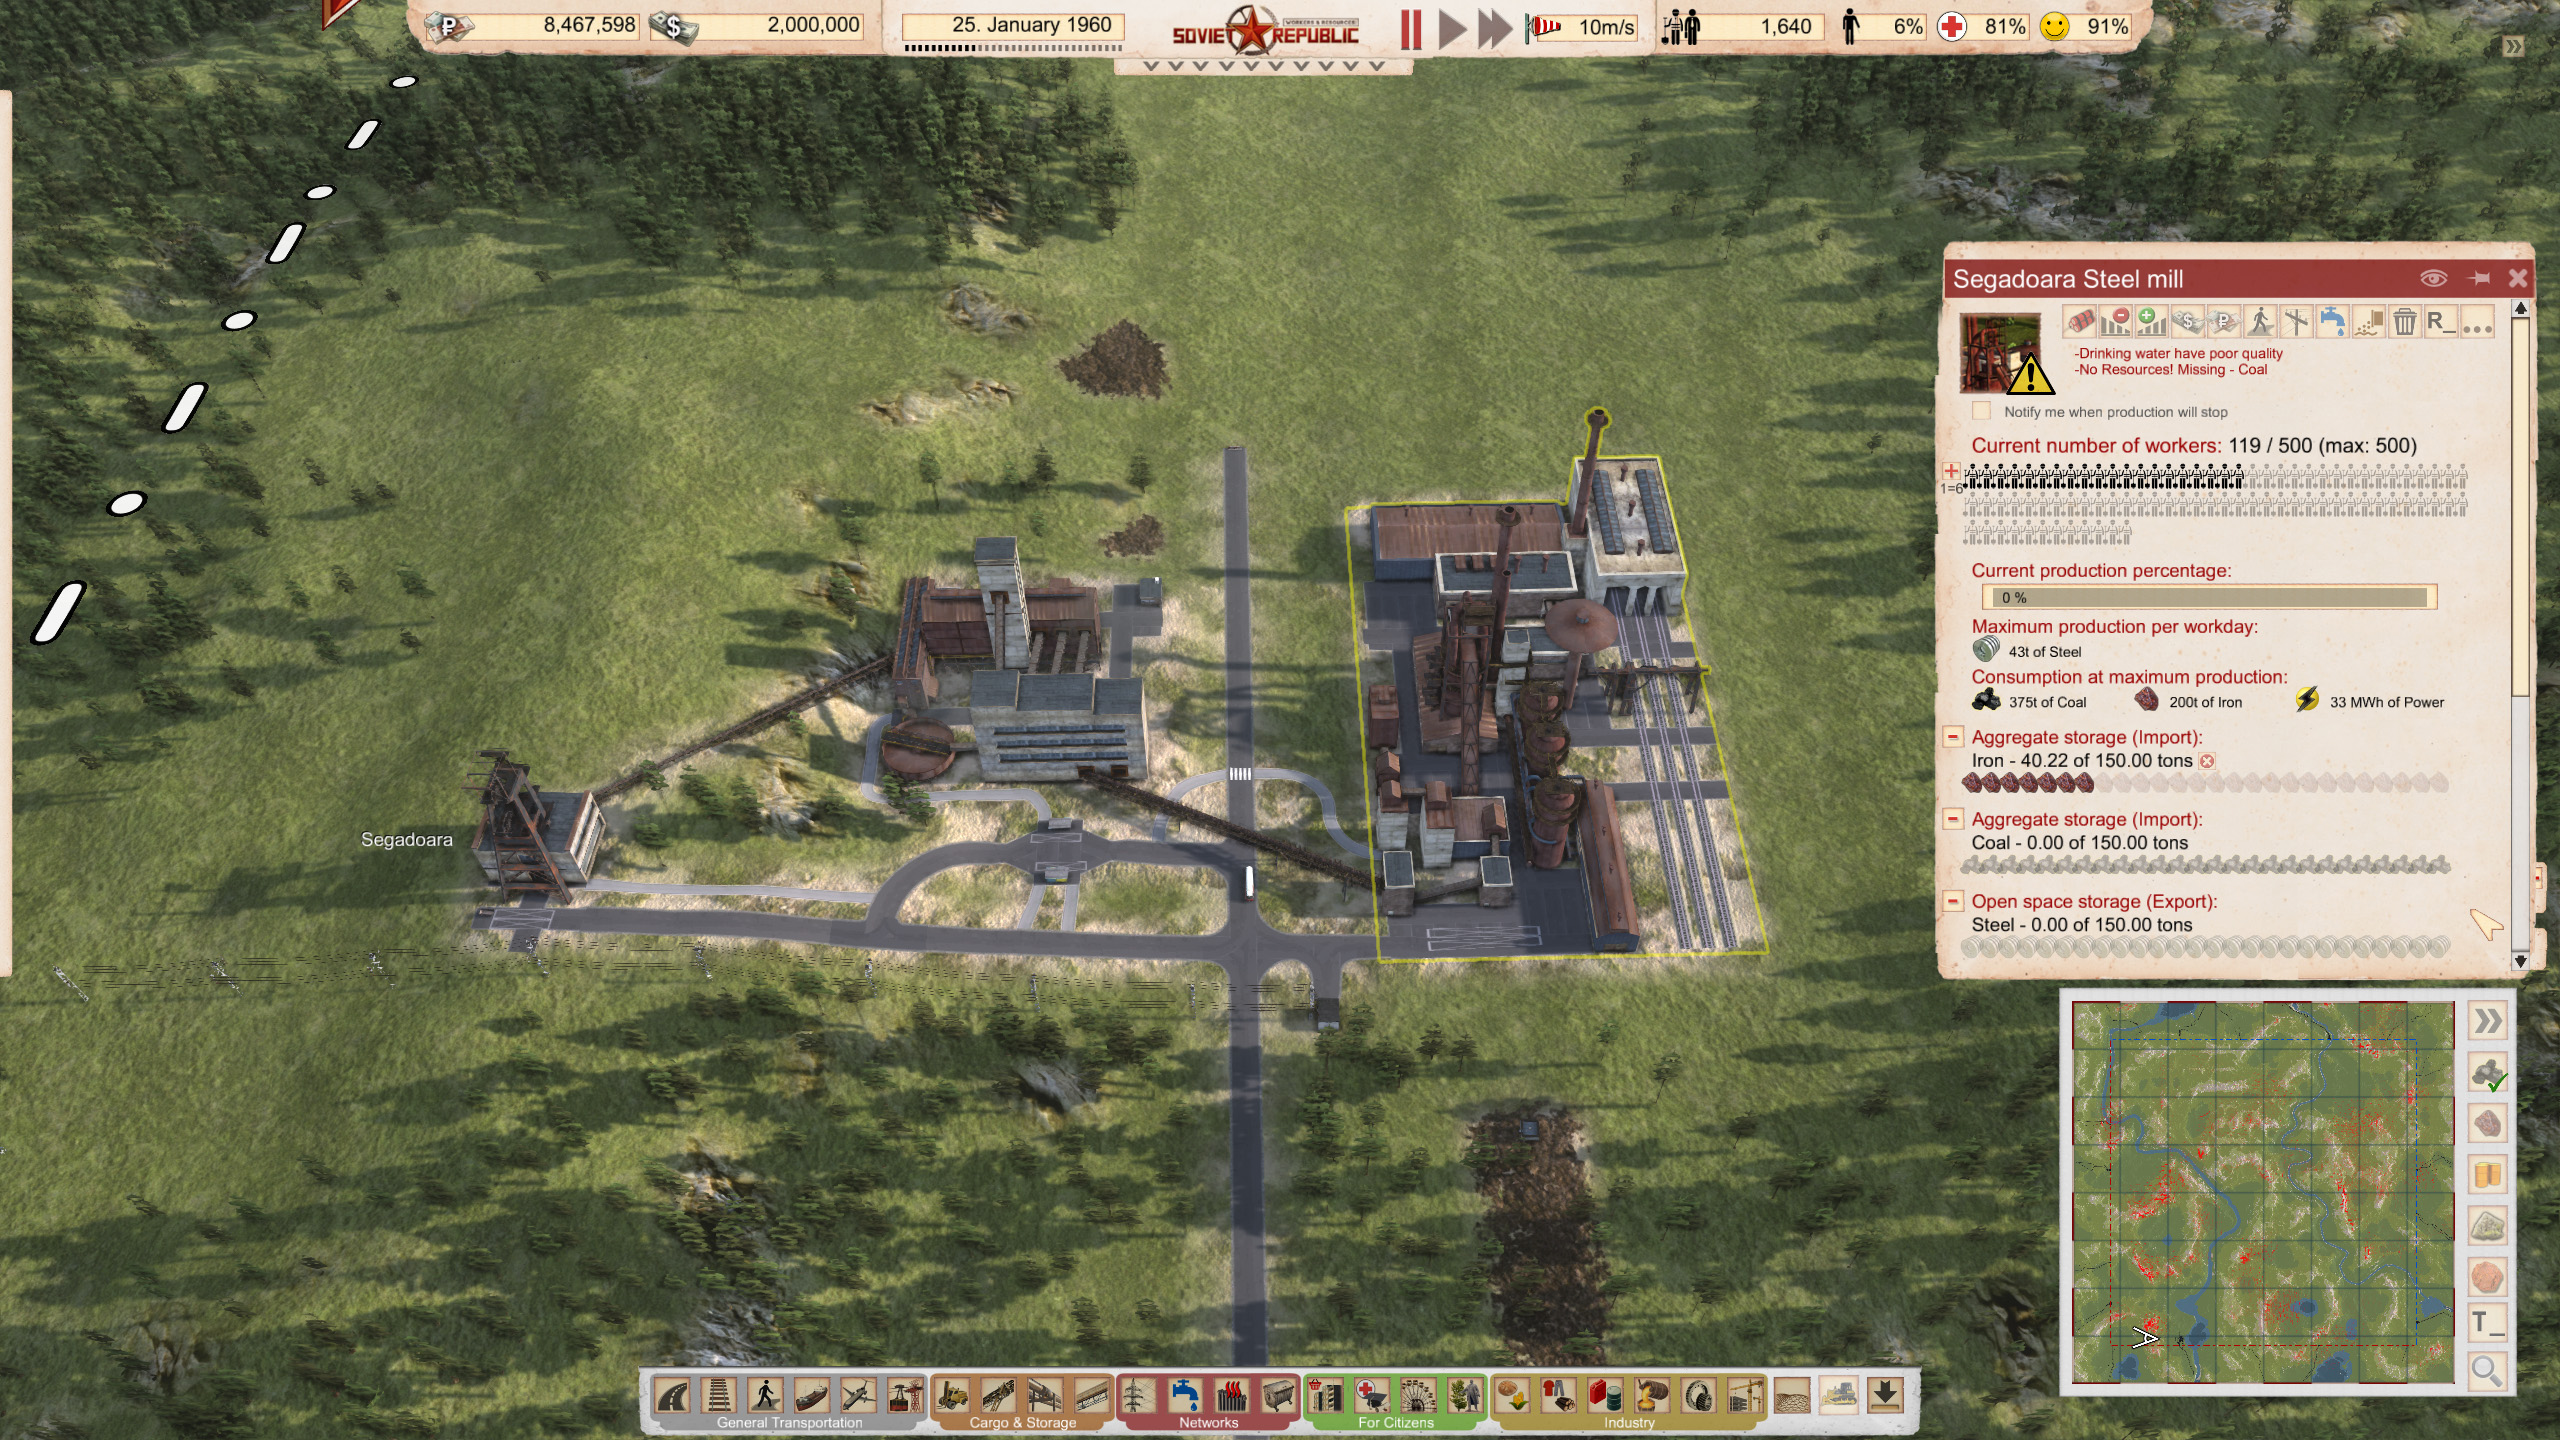
We will not cover all resources in this guide; instead, we will focus on Steel and Coal to establish a basic idea of the infrastructure involved. Note that most resources follow a similar path, and understanding how these two work will aid in the transition to other processes.

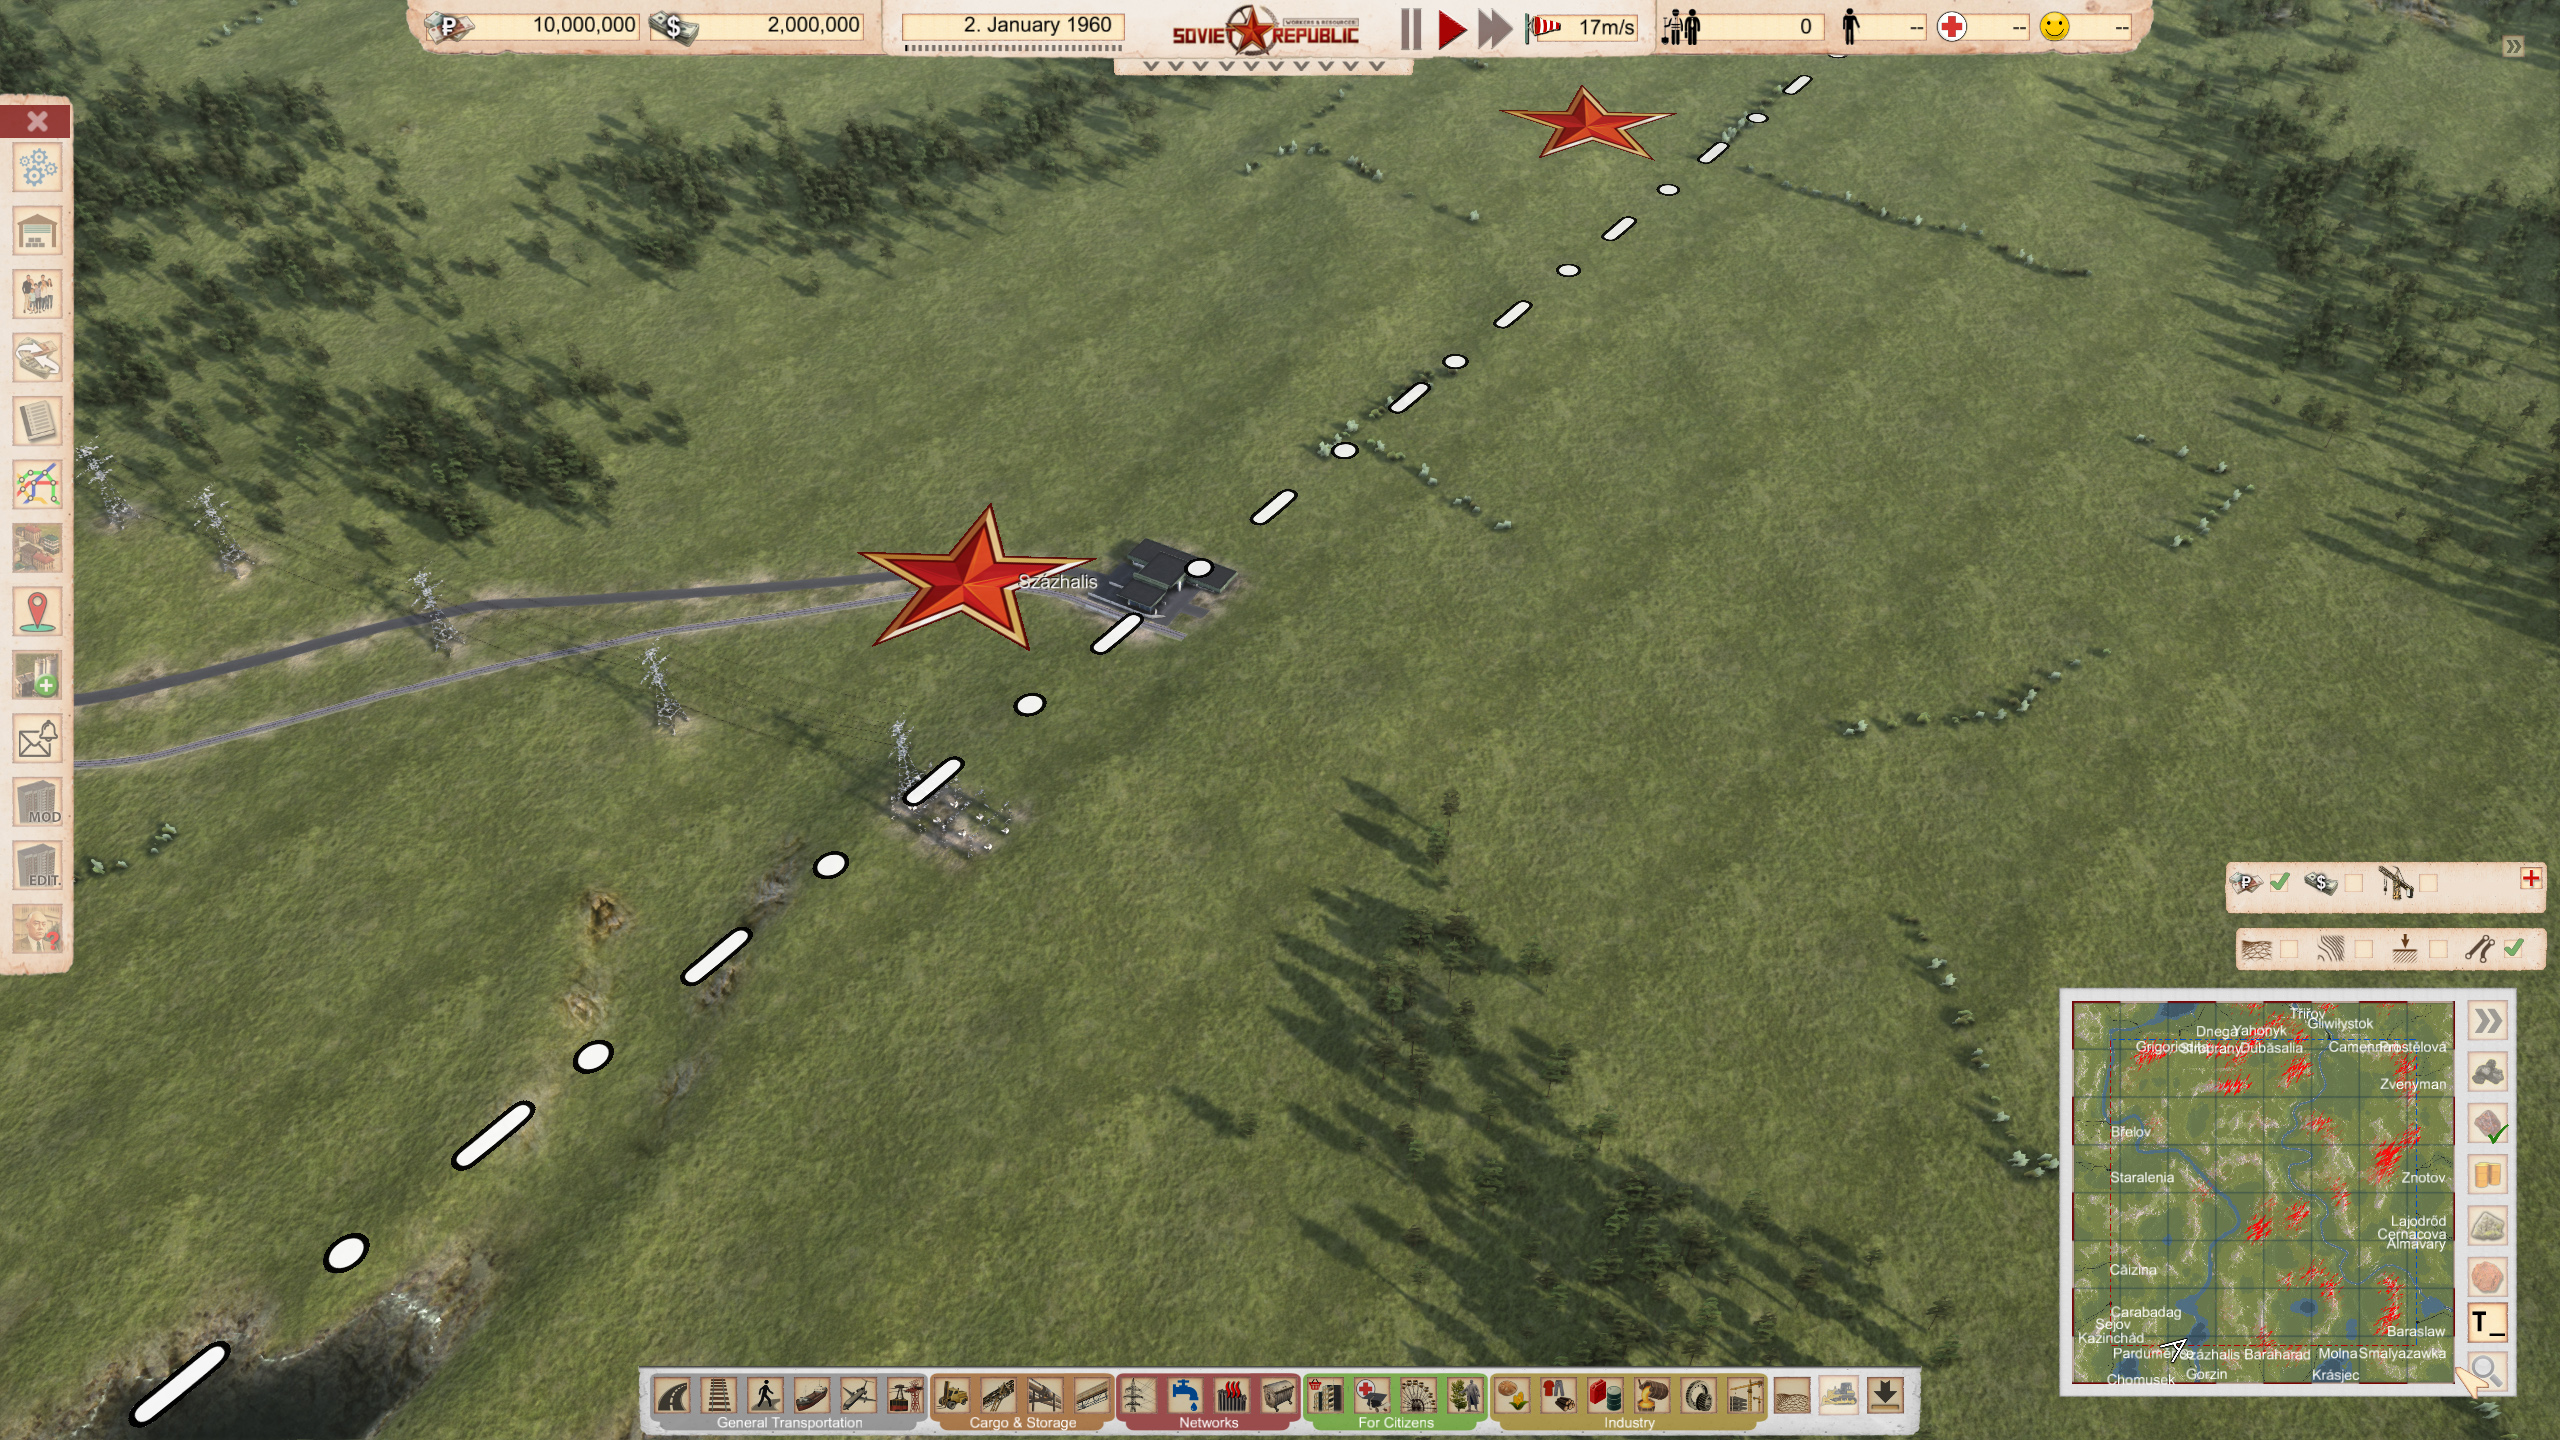
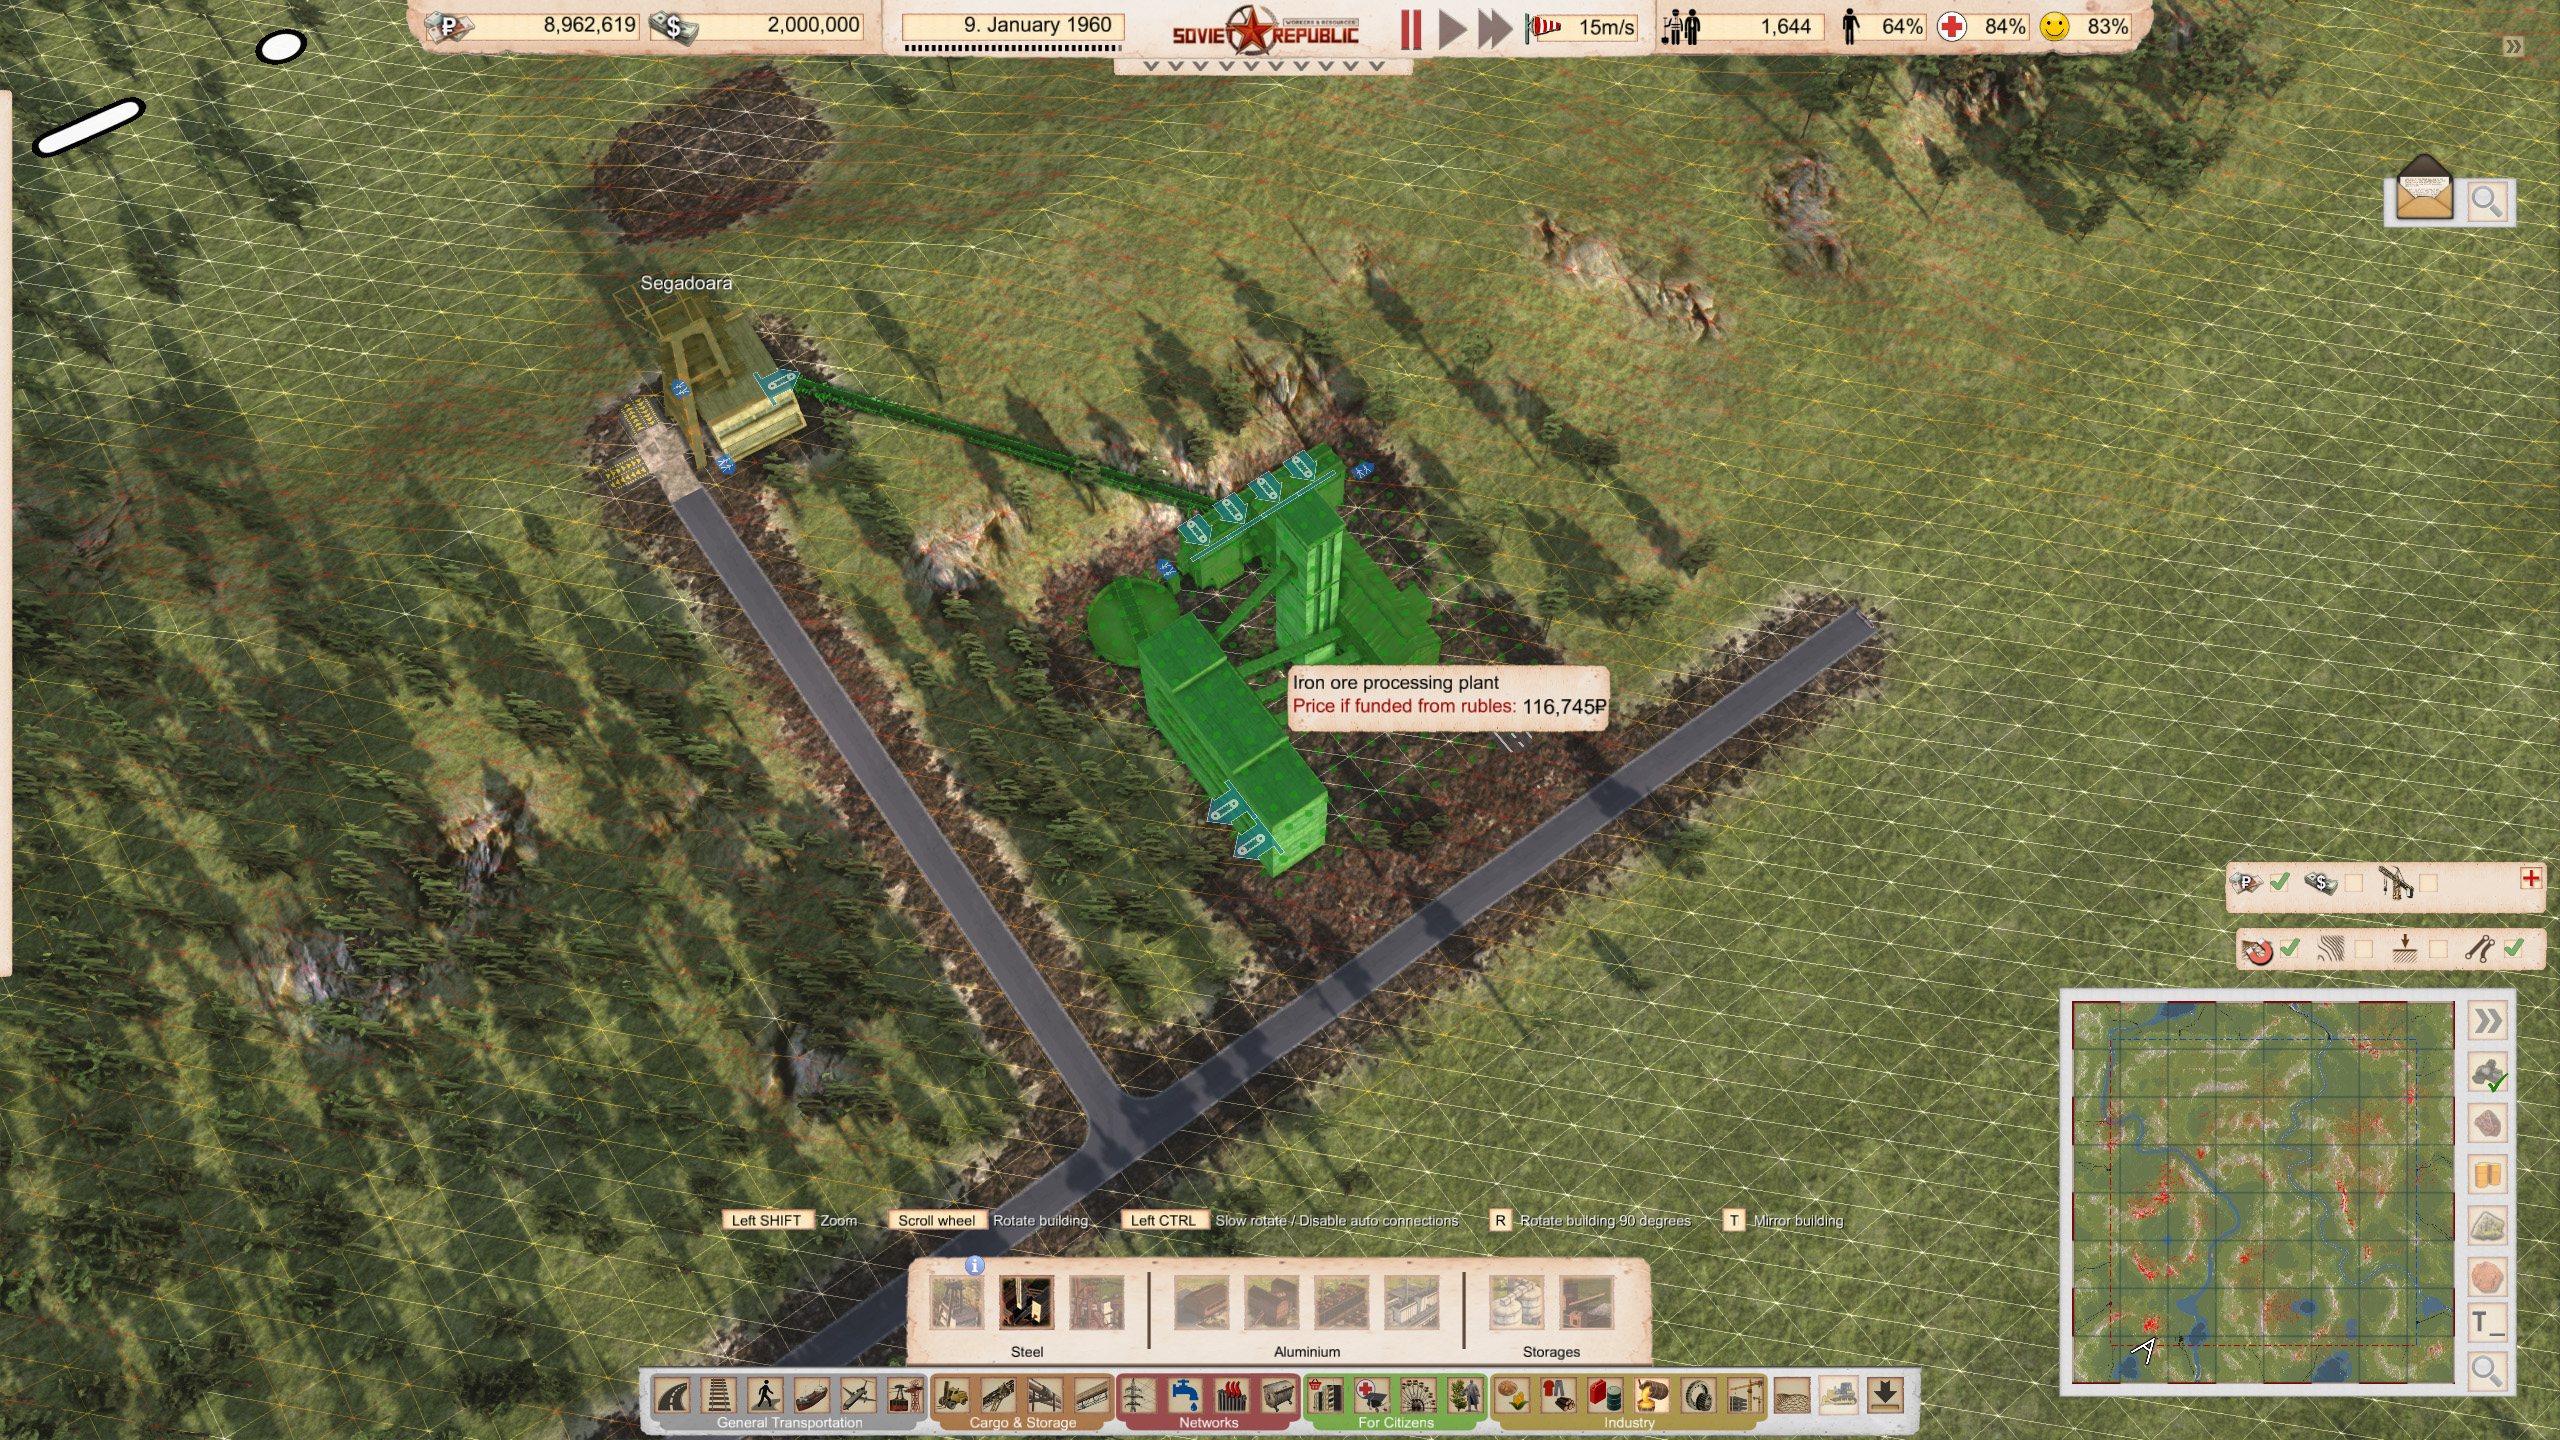
To start, find a source of iron by selecting your map at the bottom right of your screen and selecting the iron resource icon. Anything in red indicates a deposit of that resource. Note that this overlay is only available because the Researches setting was disabled when setting up the game. Otherwise, you would need Geological Mapping researched at a University before you could use the minimap in this way.


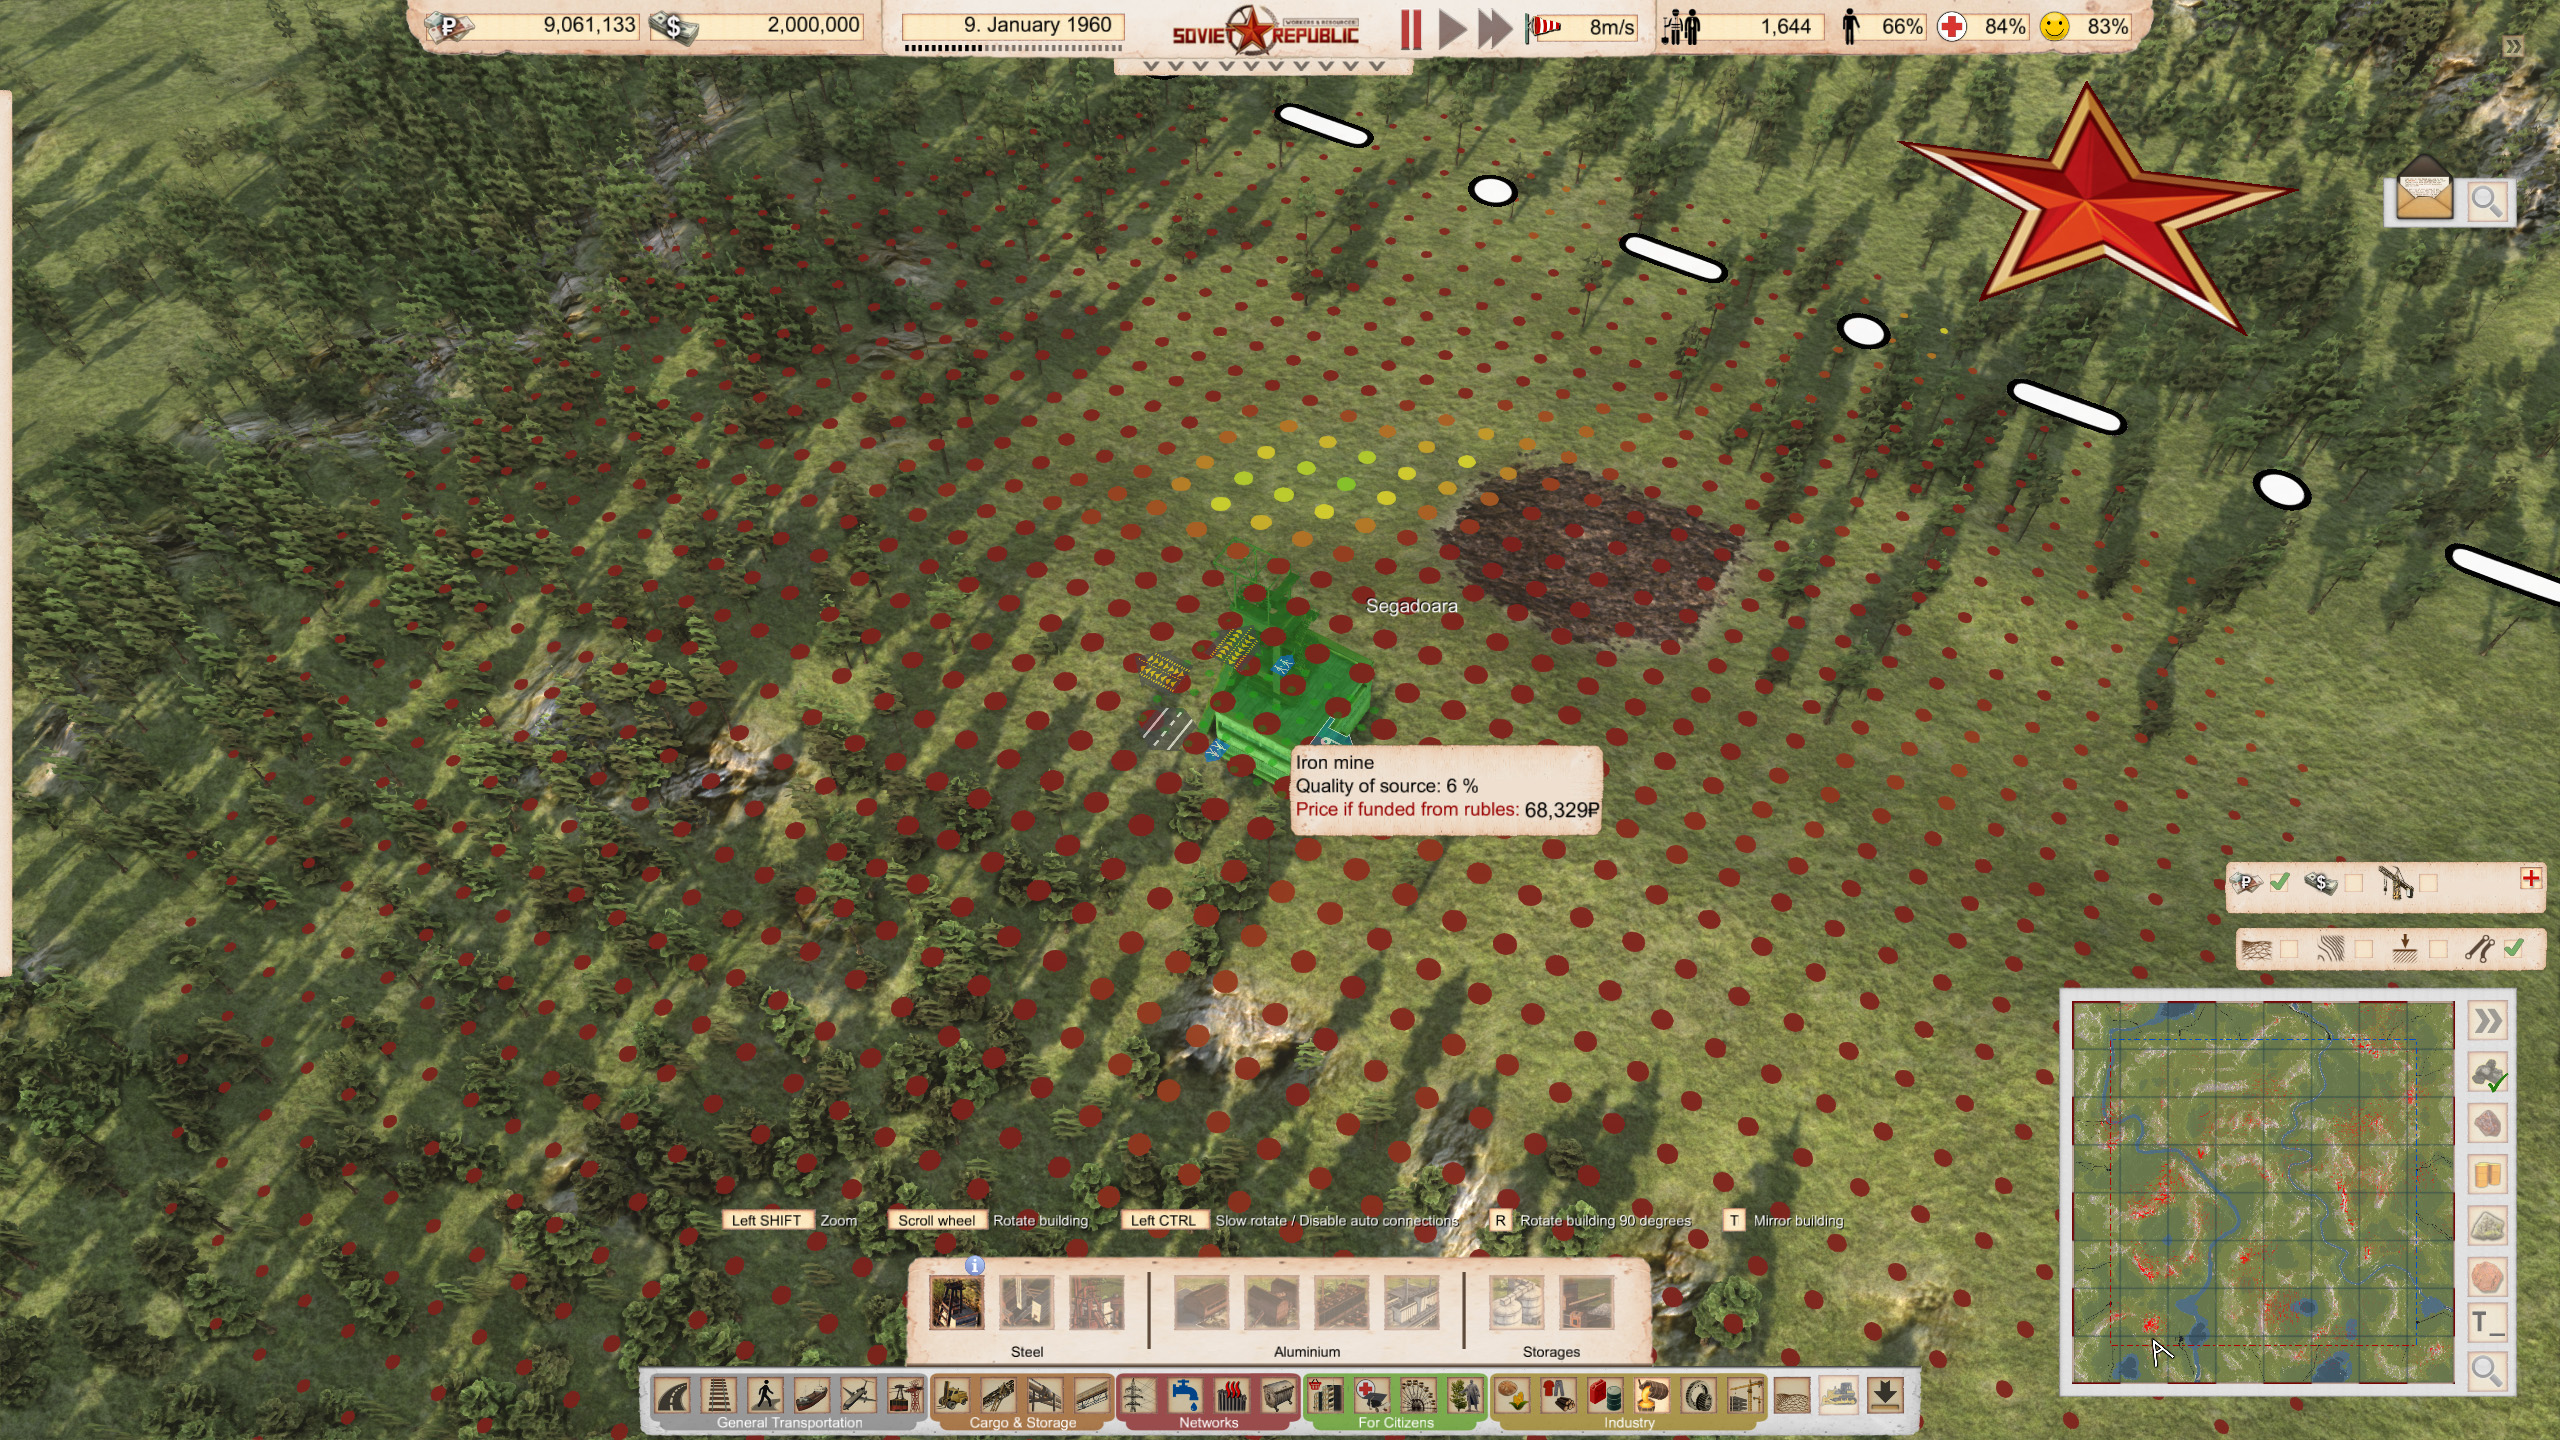
Select the Iron Mine building found in Industry -> Metallurgy -> Steel. Once selected, hover the mine over the deposit, where you’ll see the gridded dots from red to green, with green noting a rich deposit of that resource. If you were playing with Researches enabled, you would not see this grid, but you would still be able to find resources by selecting the appropriate mine type and hovering over different parts of the map.

Place your building in the best spot around that deposit. You may have to flatten the area to place your building, and be sure to hook it up to your electrical grid.

All ore resources will be mined in ore form, transported via aggregate conveyor belt, and processed by their resource-specific processing plant before being used for various purposes. In this case, Iron needs to be processed to be turned into steel, so the process goes like this: Mine -> Processing Plant -> Steel Mill.

Each building will have input/output slots for your conveyor belts, indicated by the arrow direction. When placed close enough, these conveyor belts will automatically connect. If they do not, it’s possible that you’re placing them too far away, or with too much of a height difference. You may be able to connect them yourself by using the aggregate conveyor belt options available in Cargo & Storage -> Aggregates. If conveyor belts are not an option, other transportation methods may be necessary, such as vehicle loading and unloading.

However, two resources are required to create steel - Iron and Coal. We will set up the coal system in the same manner as our Iron. Once the Steel Mill has access to both processed resources, it will start creating steel!
Public Transportation

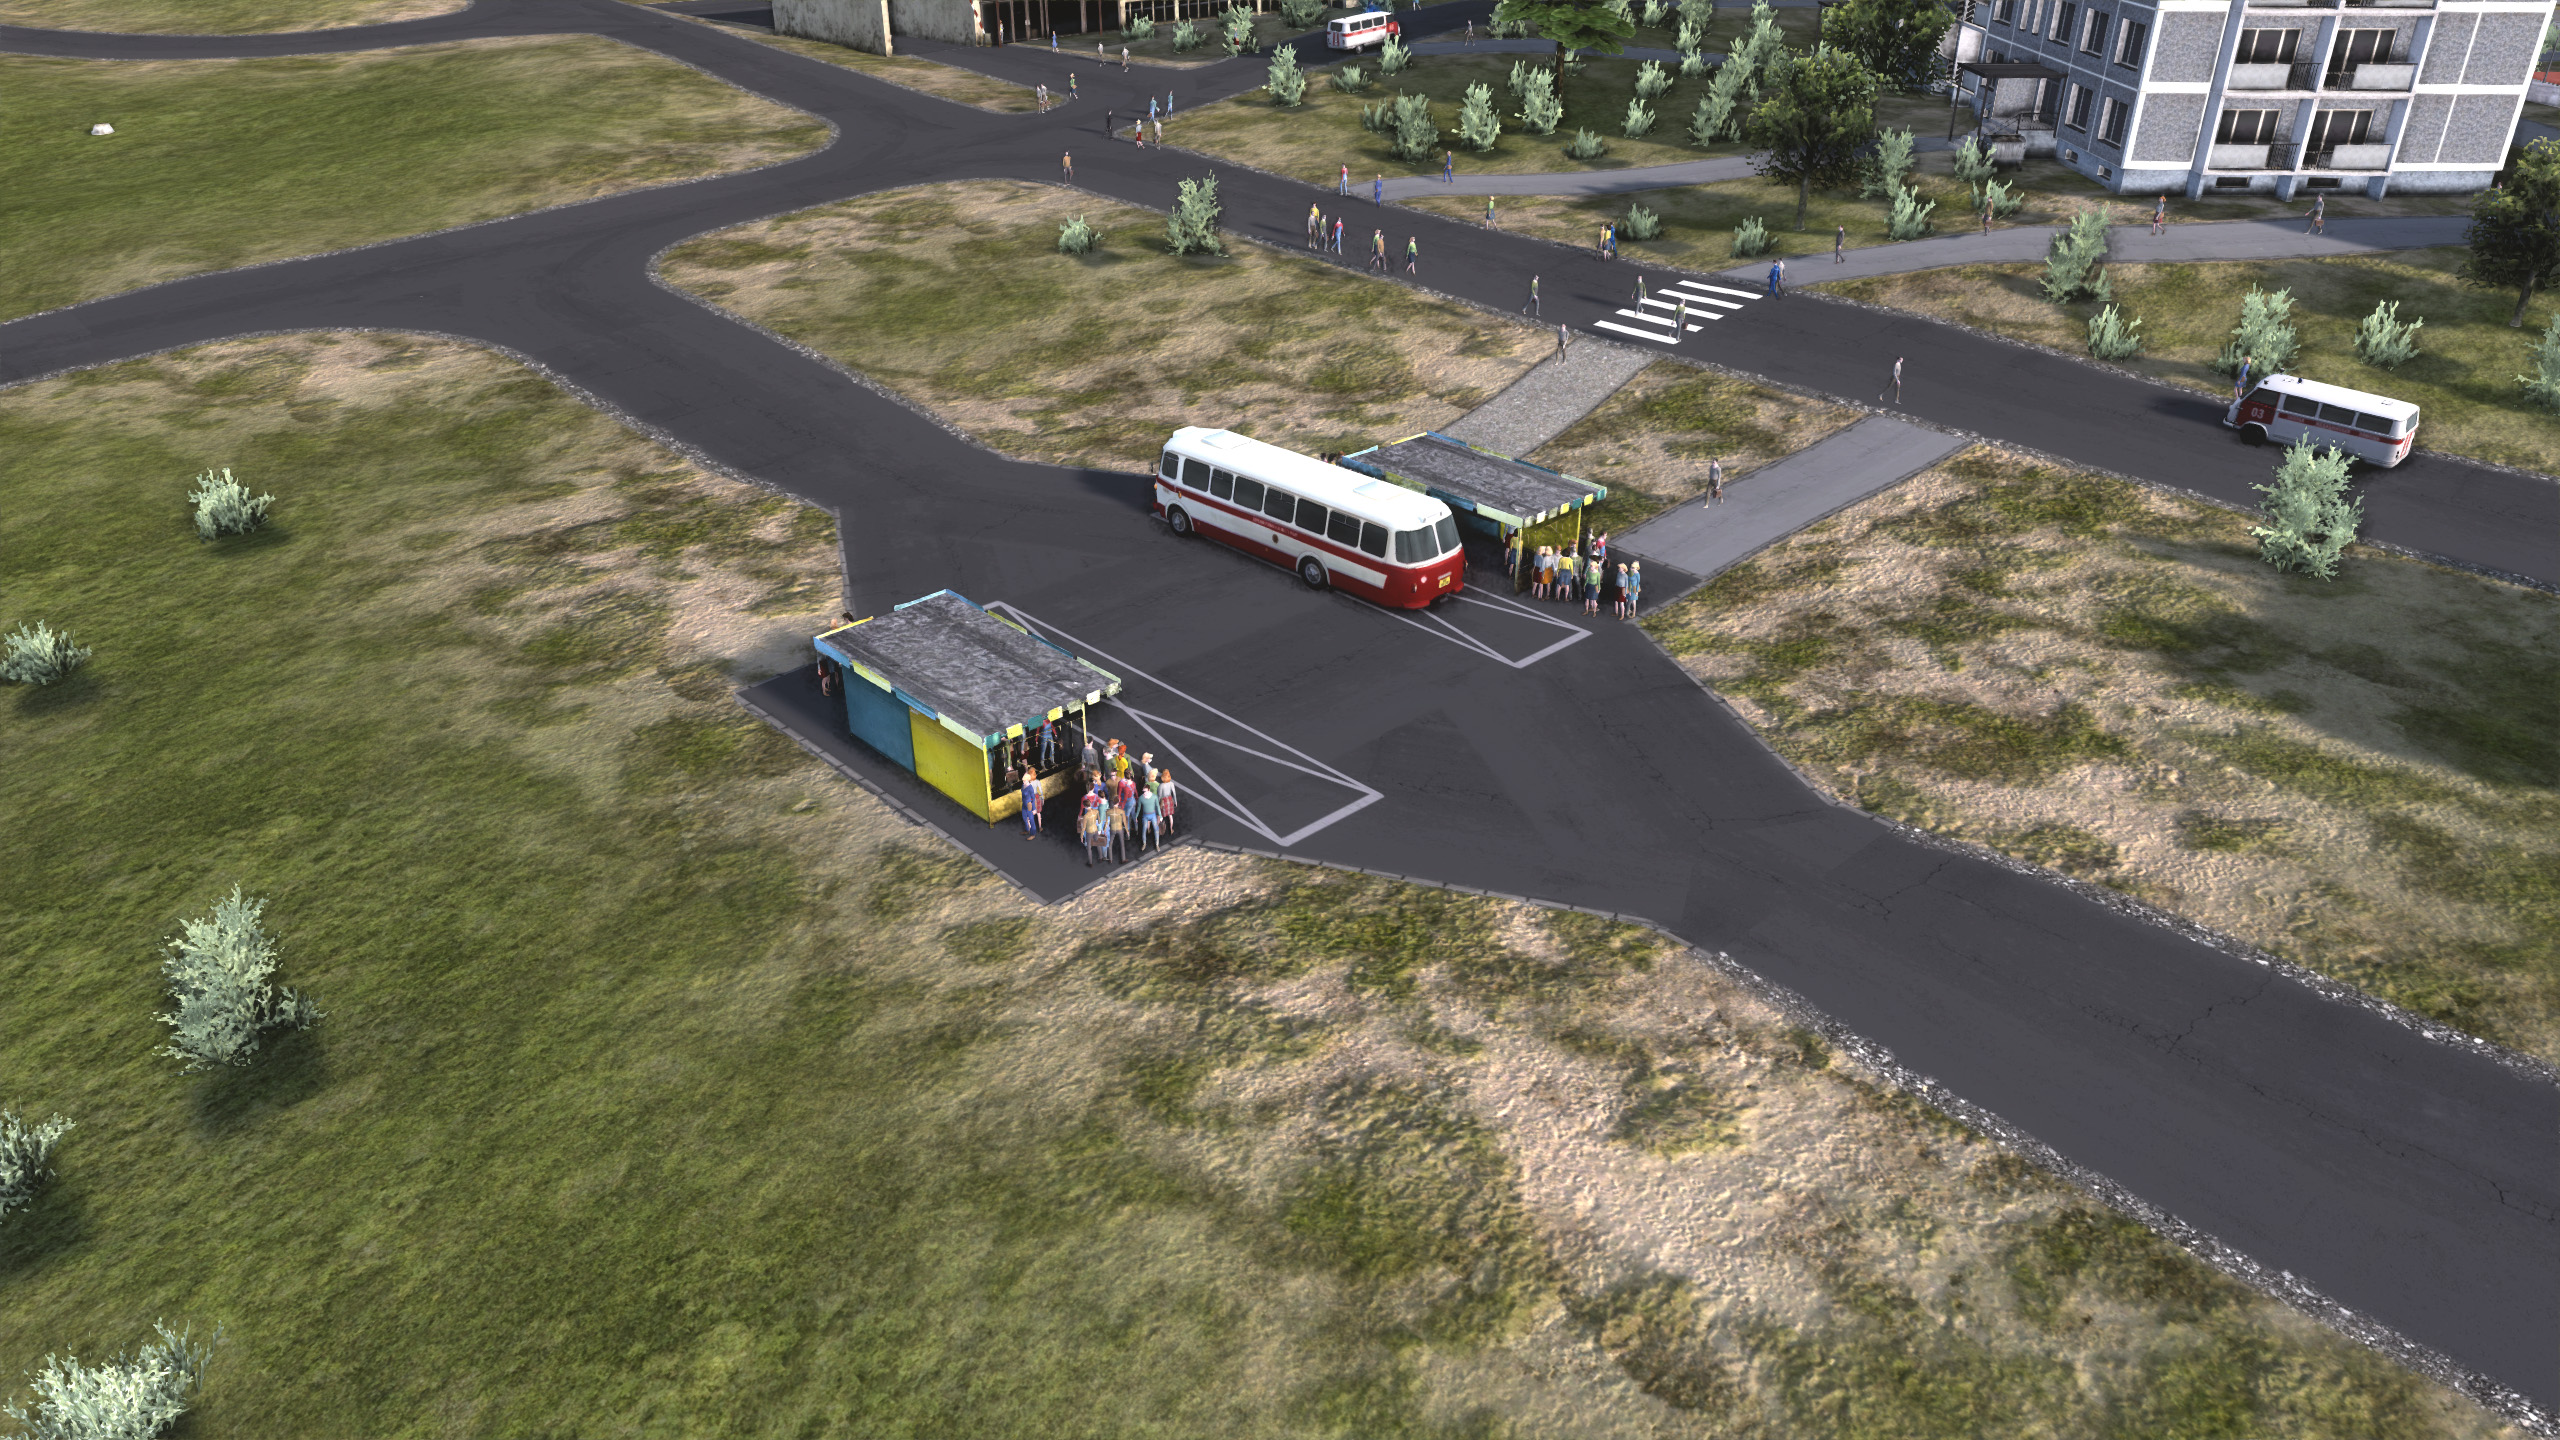
Public Transportation will allow you to move your population between key locations within your nation. Though walking is an option and private vehicles are available too, public transportation is a great way to move large numbers of people at a time, reducing congestion, and avoiding the need for massive parking lots. Workers & Resources: Soviet Republic uses buses, trams, trains, planes, and more to accomplish these tasks, but we will focus on buses as most beginners will focus on them first.

To begin your bus transportation services, you will need to build the following:
  • 2 Bus Stops - Found in General Transportation -> Roads / Vehicles -> For Citizens. You will need 2 bus stops as you cannot establish a bus route without 2 locations.

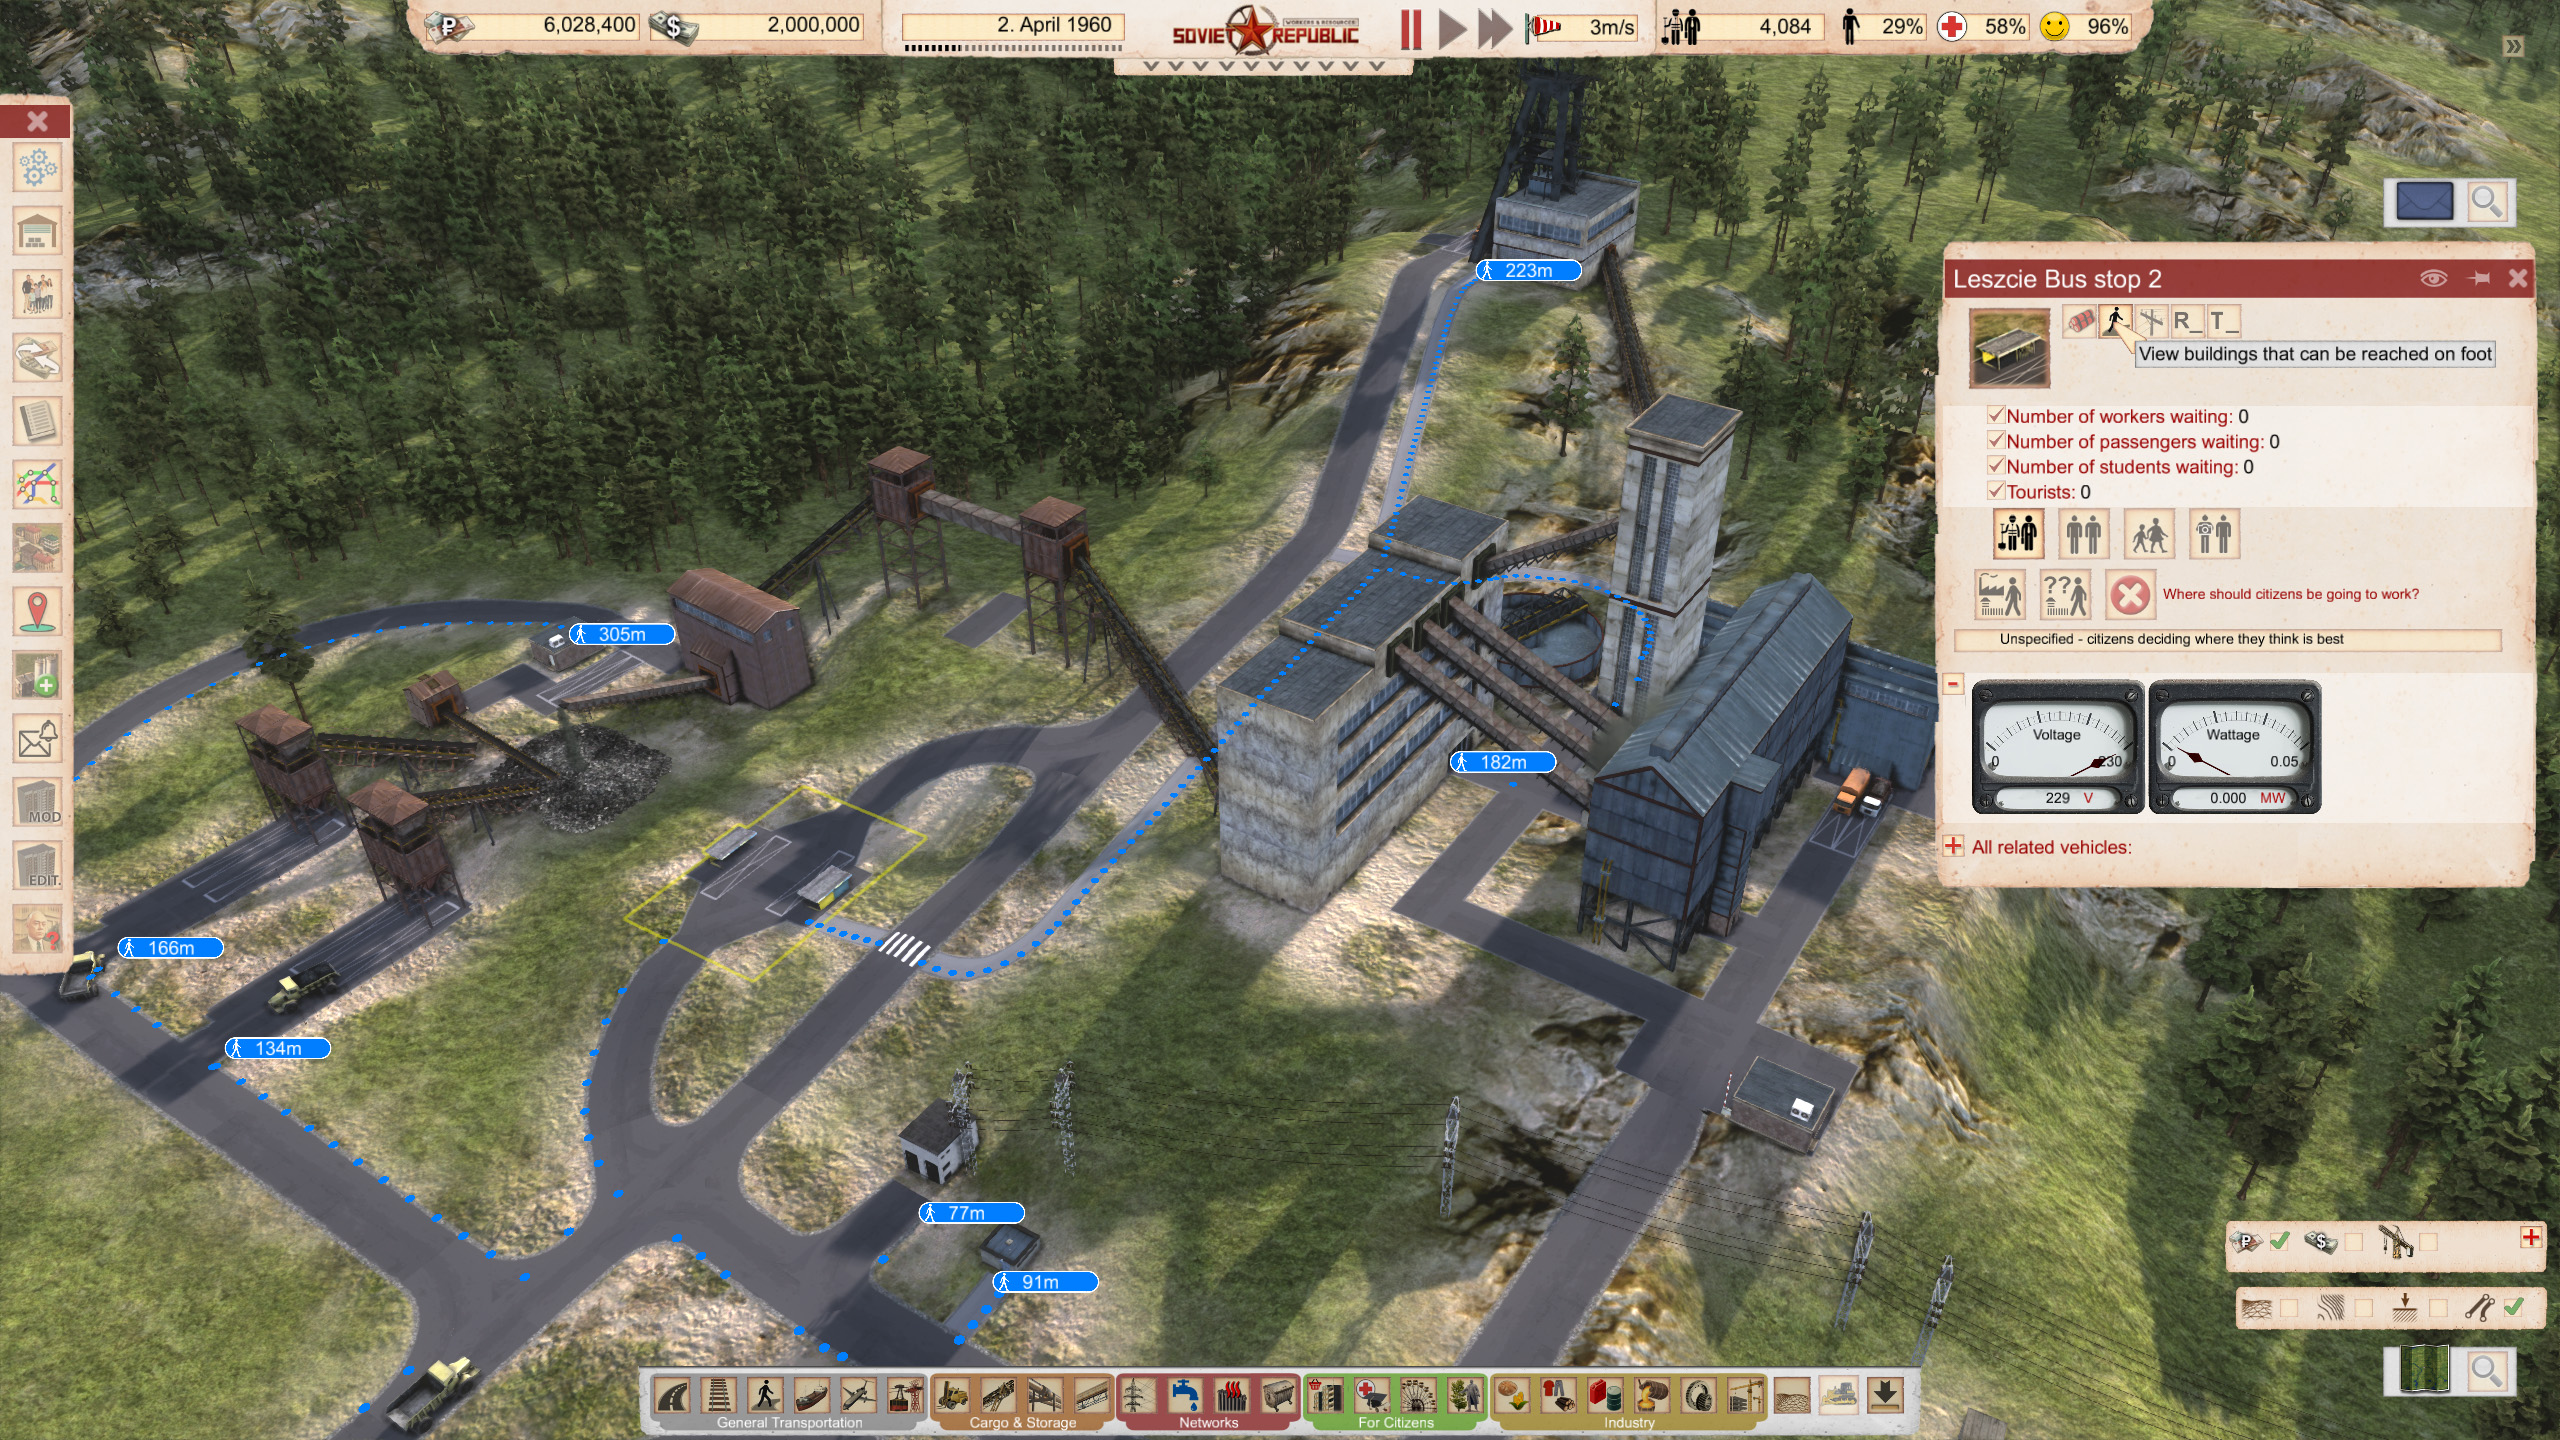
When placing stops, make sure that your desired destination from said stop is within walking distance, as indicated by the blue dotted line and the distance marker that shows over the top of buildings within walking distance. Without private vehicles, citizens will only go to and from buildings within walking distance of each other. For example, residents in an apartment building will only go to a nearby bus stop if it’s within walking distance, and when the bus drops them off, they’ll only go to work or shop at locations within walking distance.

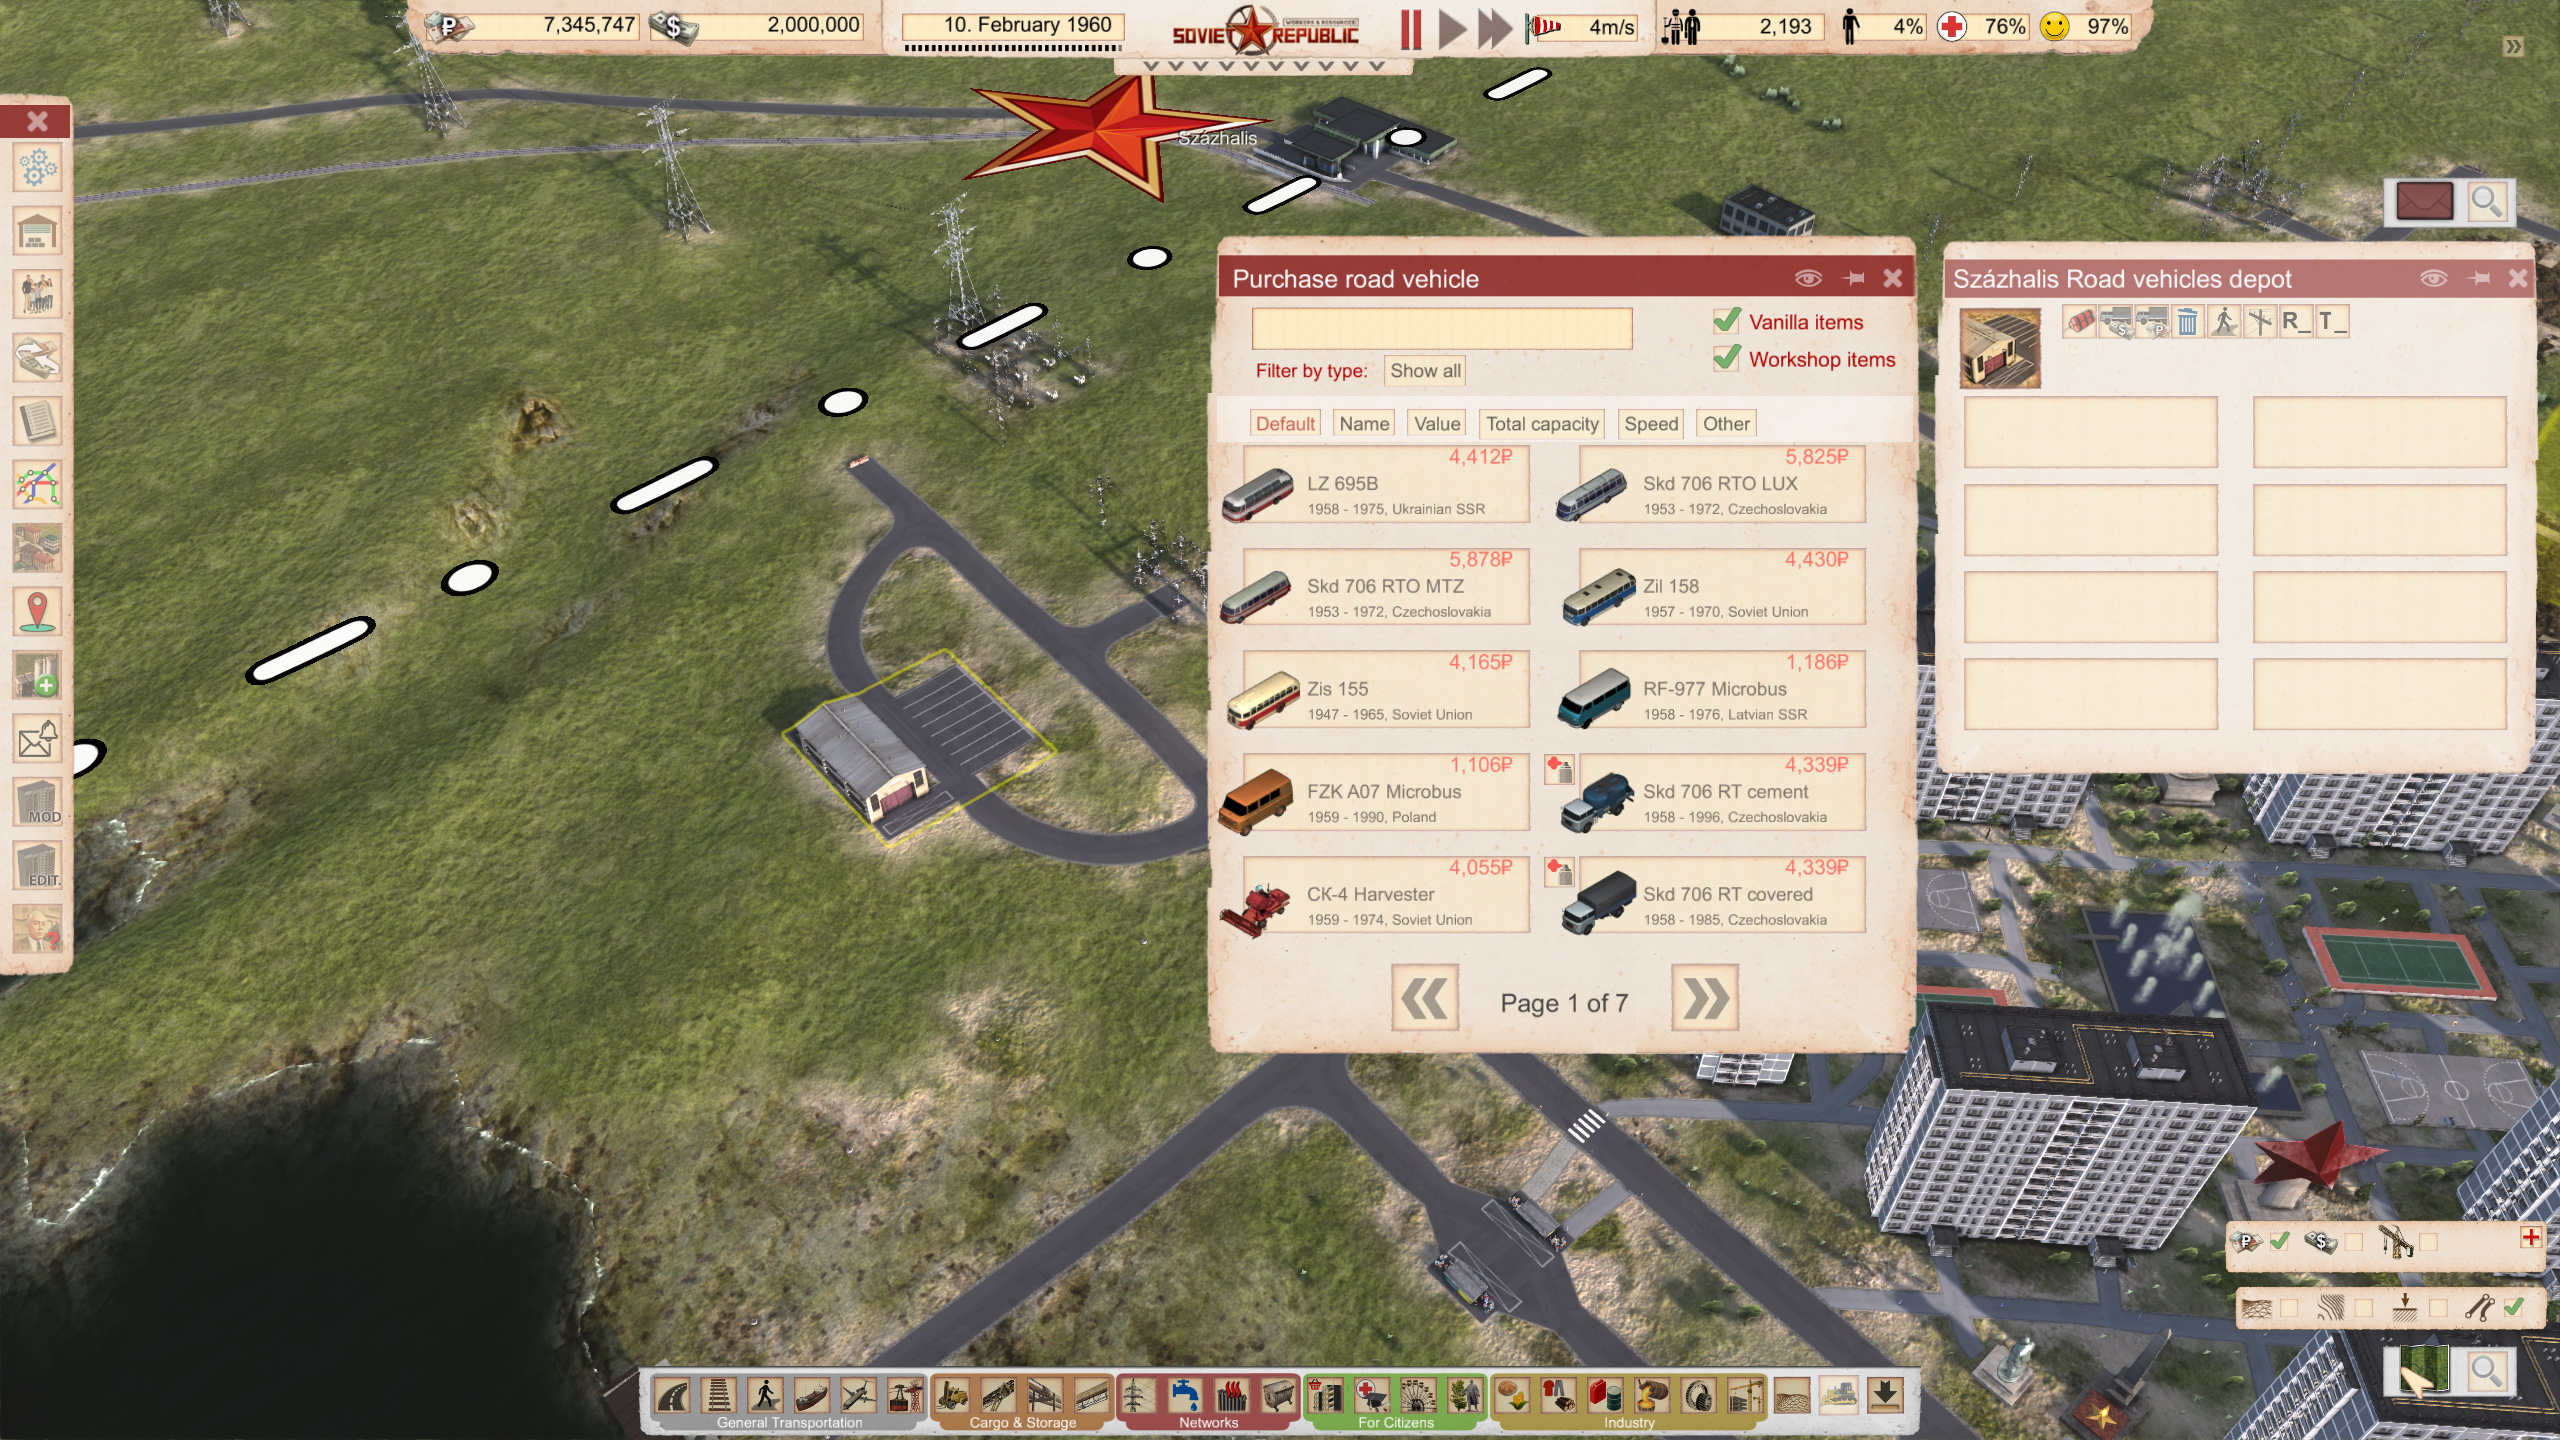
Road Vehicles Depot - Found in General Transportation -> Depots.
  • This is where you will purchase all manner of road vehicles for various parts of your nation, and where they will be stored when not in use elsewhere.
  • Once construction is finished, select your Road Vehicles Depot and click “Buy new vehicle or mechanism,” which will bring up all available vehicles. Purchase at least one bus of your choice, and double-click on it to bring up the bus information.

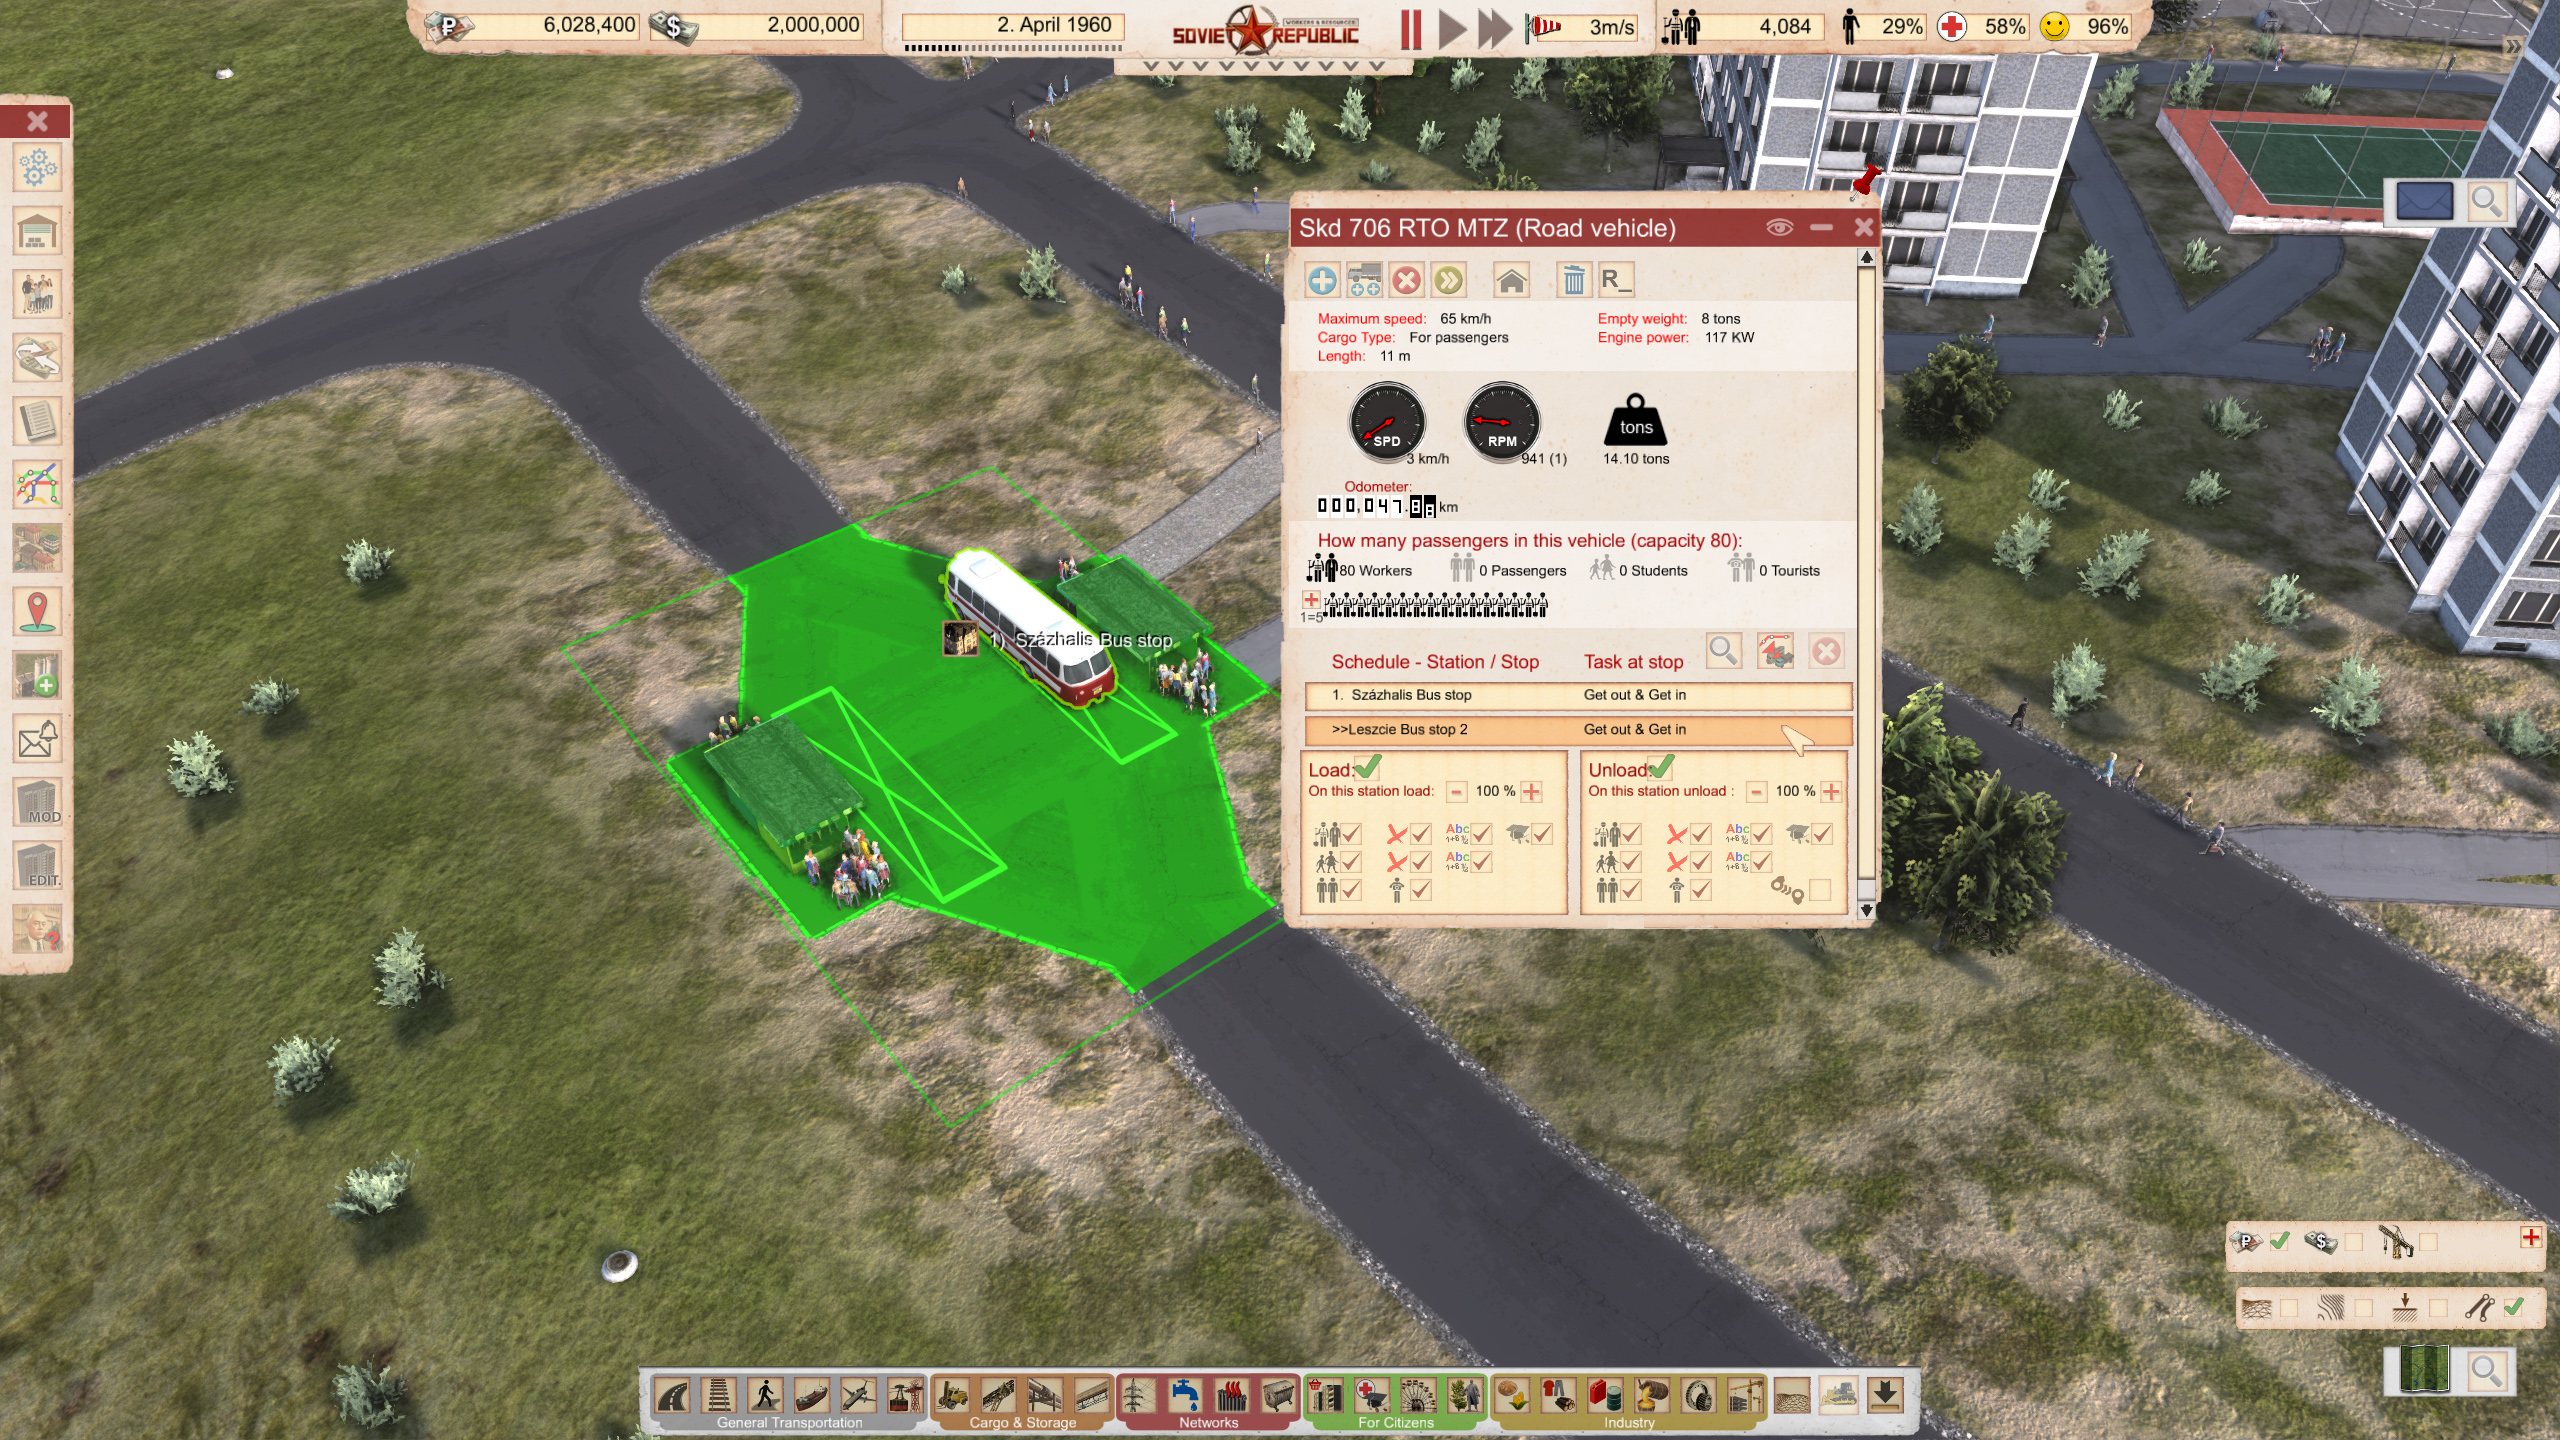
To create a route, click on New Stop, select the first bus stop to pick up passengers, and then select the other bus stop to drop them off. This is an excellent method for providing simple access for workers and, eventually the general public to your growing city.
Logistics
In Workers & Resources: Soviet Republic mastering logistics is essential for a successful economy.

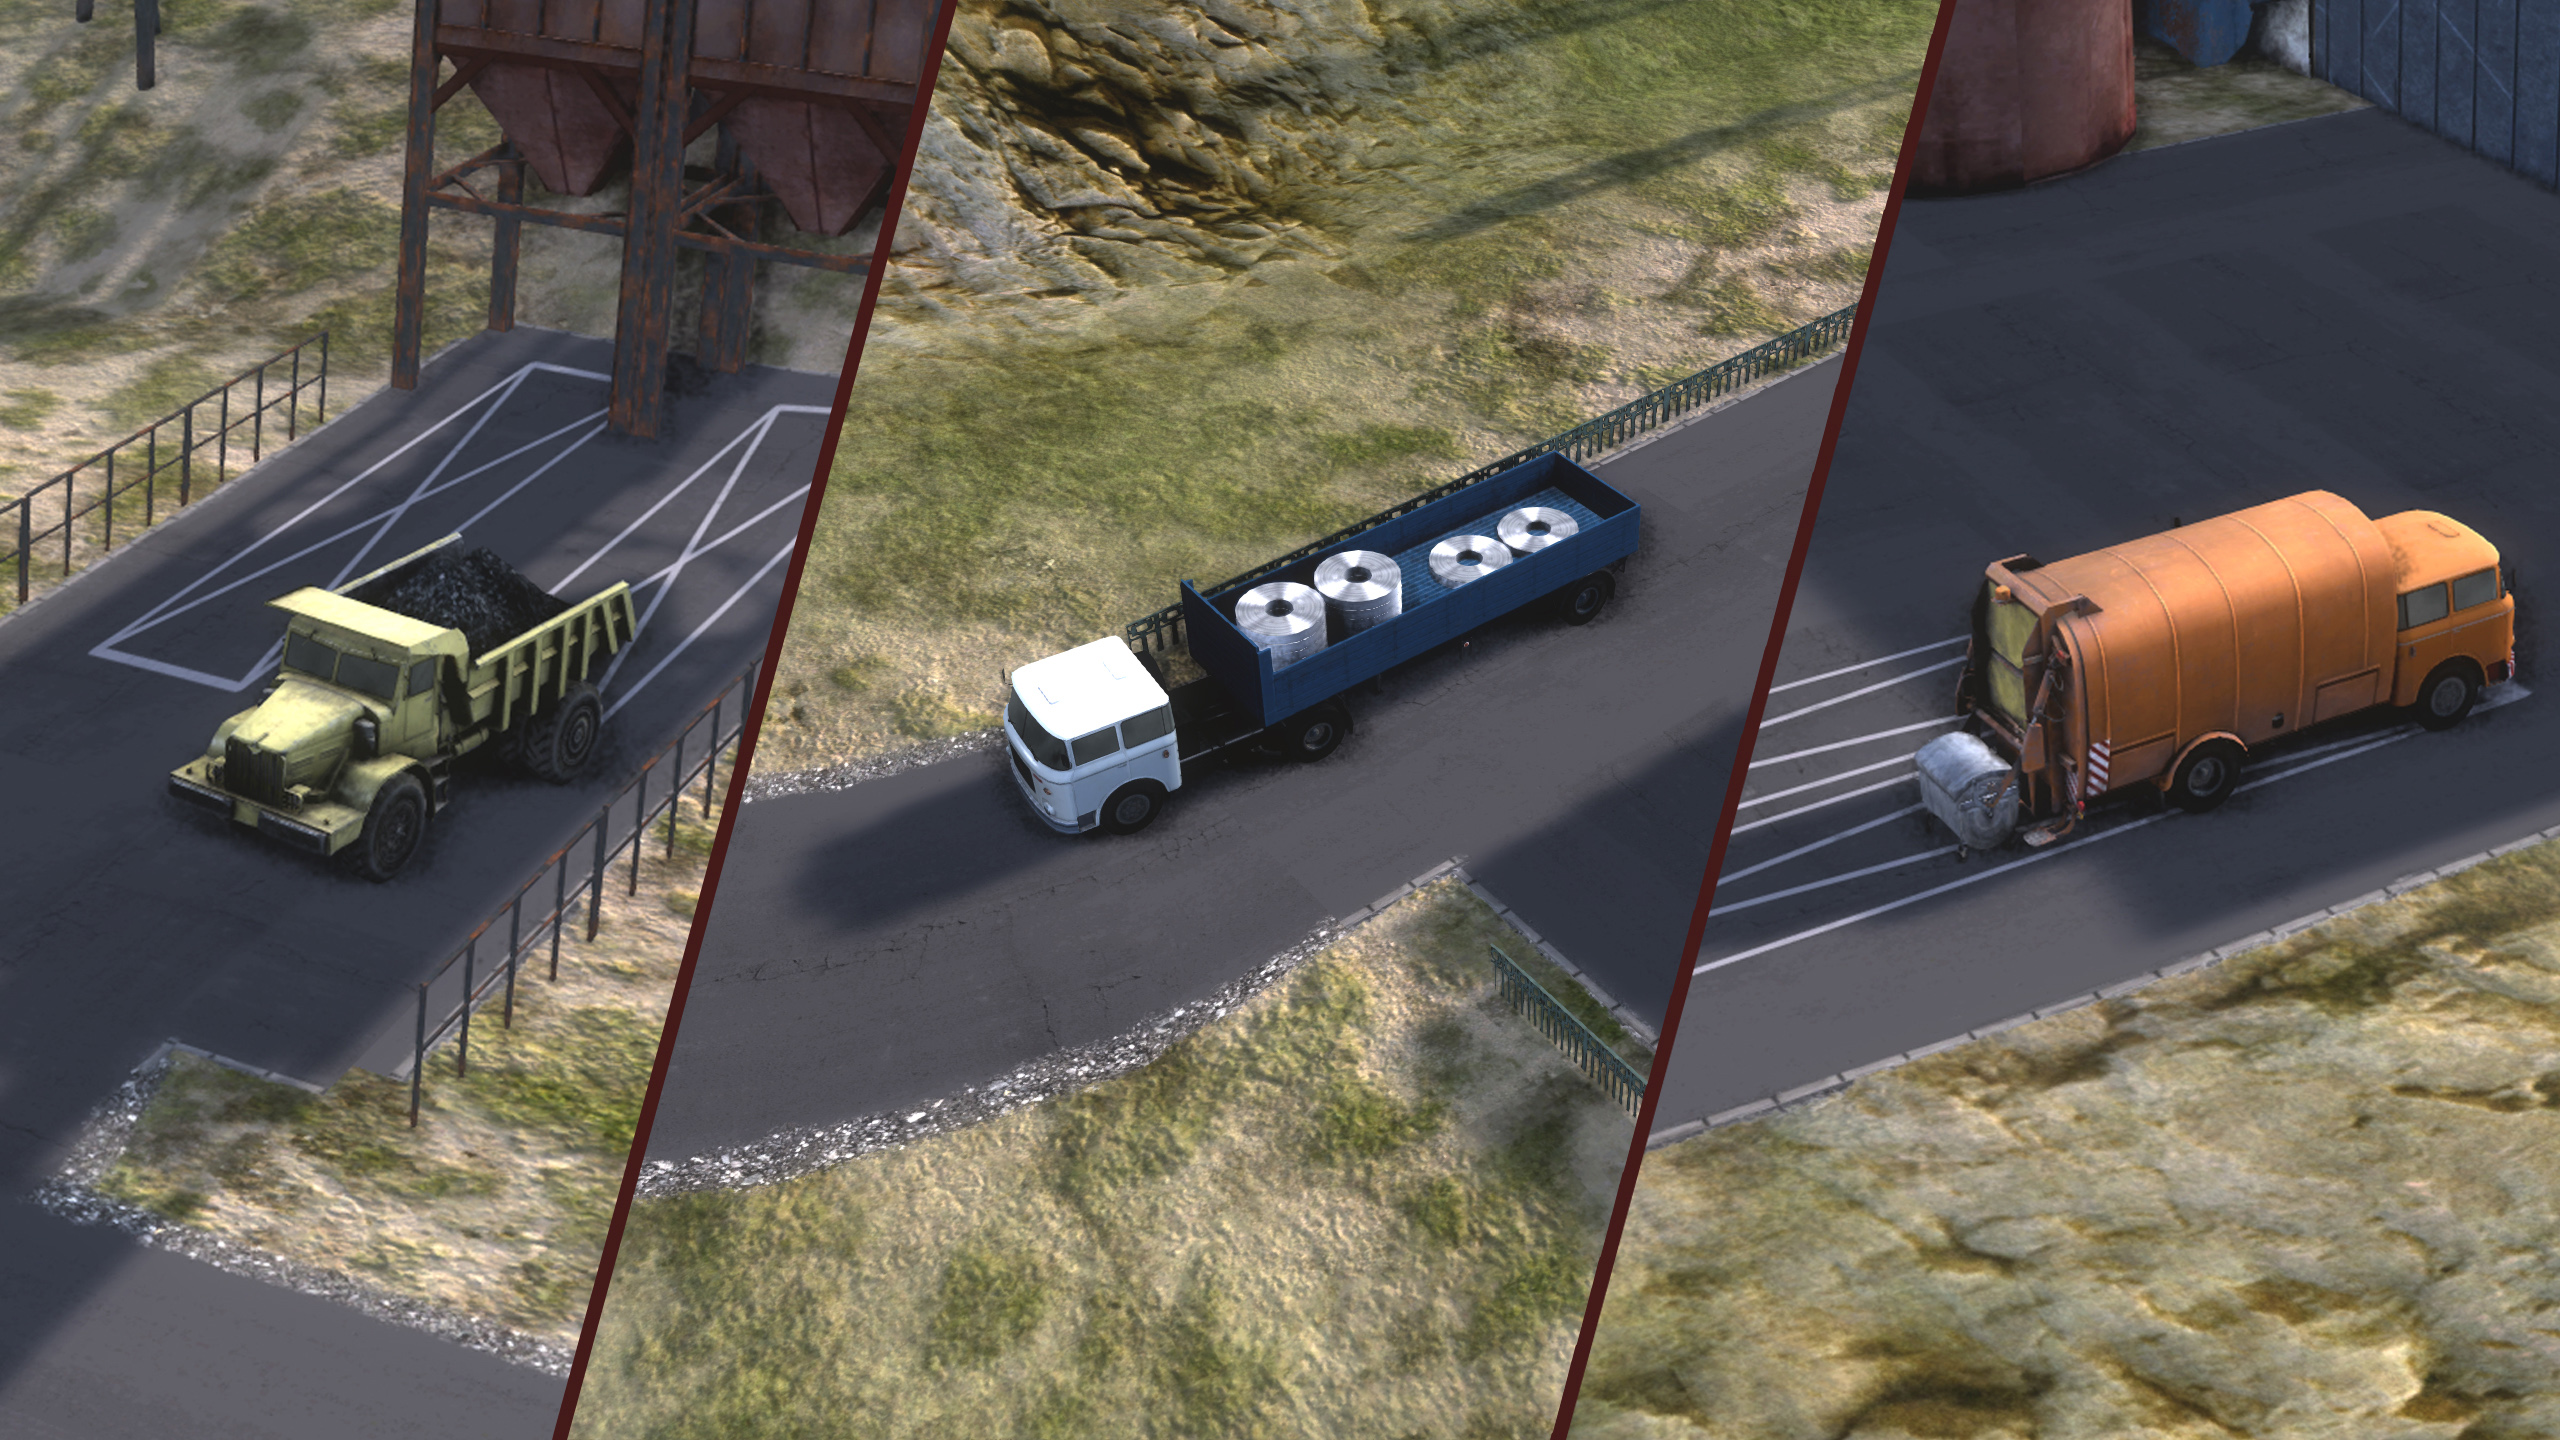
With several different resources available in the game, not all vehicles are capable of transporting everything. Opening up the Road Vehicles Depot again, take a look at the different vehicles and their capacities. You’ll find everything from open hull trucks that transport a range of raw and refined materials, to oil tankers, to covered trucks that transport crops, fabrics, and technical goods - spend some time figuring out what you need and when.

Don’t forget to set up your vehicle’s routes as described in the Public Transportation section - your vehicles will not move without them.

There are also two offices within the realm of logistics that are important to grasp.
  • Distribution Offices - Found in Cargo and Storage -> Distribution.
    • When set up with the right vehicles assigned to the right buildings, Distribution Office will automatically manage and deliver resources along their route, such as delivering goods to your shopping center.
  • Construction Offices - When Realistic mode is enabled, or if you otherwise decide you’d rather do all your construction with local workers and resources, you will need to have all resources present locally before you can begin construction. A Construction Office will aid you with the vehicles necessary to acquire said workers and resources and the vehicles necessary to construct your buildings.
Citizen Satisfaction

Satisfaction is important for the citizens of your republic. Increasing the level of satisfaction will lead to increased productivity, while emigration will occur should satisfaction drop too low, leading to a city with no workers.

Satisfaction is influenced by several preferences, such as:
  • Loyalty
  • Health
  • Food/Shopping
  • Culture
  • Sports
  • Alcohol addiction
  • Crime
  • Religion

Explore your options in the For Citizens section of the bottom menu to see how different buildings can increase citizen satisfaction and help your republic thrive.
Early Gameplay Tips


  • Starting with Research Disabled will allow you to see all resource deposits on the minimap. Research Enabled will require you to research the appropriate technology that unlocks resource deposit visibility.
  • You can automatically import any resources you need for buildings by clicking on the building and going to “purchase resources with Rubles/Dollars.” This will keep you stocked, but be mindful of your finances.
  • The global market fluctuates, and monitoring its current prices is vital to finding the right products to import or export.
  • Pressing F1 twice will bring up a snap grid, which allows you to construct your republic more precisely.
  • While you can build a coal power plant and auto-purchase coal to start your electrical infrastructure, consider starting your city close to a customs office with access to outside power for a cheaper alternative.
  • You can copy/paste routes to vehicles to quickly assign multiple vehicles to a task. Click on the vehicle with the route desired, click on the icon “Copy schedule to another vehicle,” and double-click on the vehicle you want to have the same route with.
  • Switches can be used to establish a long-term electrical/plumbing/heating infrastructure, as they allow for growth and expansion.
  • Roads, pipes, and train tracks can automatically snap next to existing tracks, providing a clean-look method of expanding infrastructure.

If want to learn more, check out our Workers & Resources: Soviet Republic Wiki [hoodedhorse.com]
3 Comments
Ξ 28 Dec, 2024 @ 8:05am 
Troll & Bait
qbabq 21 Jun, 2024 @ 11:43am 
There is a slight understatement in "Game Setup". In point "15." for complex are also priority signs and traffic lights. In point "17." at night electricity consumption increases, and there is also rainfall, which slows down vehicles.
In "The Basics - User Interace" the image is ok, but the description isn't. For "4k" there are only mods - scripts have been added to the main menu. For "4l" there are buildings from the editor built into the game - timelapse is also in the main menu.
In "Basic Infrastructure" -> "Water" I think it is worth mentioning that the water should be purified, because otherwise it will lower the health of the workers.
juliejayne 21 Jun, 2024 @ 2:21am 
Did you ever resolve the issues with the UI in so far as it cannot be enlarged for those of us with poorer eyesight.