Quake Live

Quake Live

Not enough ratings
Custom banners for your Quake Live server
By mobi
This guide will describe the easy (and correct) way to make your amazing artwork show up for everyone on the server as banners of different size and shape.
   
Award
Favorite
Favorited
Unfavorite
Start
There are a number of servers with custom banners on maps. However it doesn't look like many people know how to do it.
So here we are - I've decided to put it all together, hopefully it will be useful for a new or existing QL server owner who wishes to customize their servers.

First of all you need to create your own (unique) images. Please do not use anyone else's artwork on your server! Here are some example how the banners look in game.
Making images of correct size and aspect ratio
There are 4 sizes of banners that are used in QL maps.


If you look in your pak00.pk3\textures\ad_content folder which is located in your baseq3, you will find these .jpg files:
ad1x1.jpg
ad2x1.jpg
ad4x1.jpg
ad8x1.jpg

These are default Quake Live logo images that are used on all QL stock maps as banners. Use them as your reference.
These are the files we are looking to replace.
When making your own banners, use the information below:

Sizes: ad1x1 is 256x256 pixels ad2x1 is 512x256 pixels ad4x1 is 1024x256 pixels Format: Standard JPEG

Feel free to make ad8x1 as well however I cannot recall any map that banner is being used on. Most common banner is ad2x1.

TIP: Stick to the size of those stock images. Keep the size down. A client will download your content upon connect and we want it to happen as quick as possible!

IMPORTANT!
Originally posted by ShiN0:
.jpg files: make sure to save jpgs in a compatible format for QL. QL does not support progressive encoding for jpgs. If you store them in the wrong format, clients connecting to your server will crash because of it.
Here are some examples of jpg options in GIMP and Photoshop that work when exporting the files to jpg:
Creating .pk3 with your new files
Once you've created your banners you need to pack them correctly.
.pk3 is just a .zip with a different extension so quake can read it.
If you are unsure, take any existing custom .pk3 (it can be anything downloaded from the workshop for example) and remove everything from it except these folders: textures and scripts. If these folders are missing - create them.
These folders should be in the root directory and they should be empty.
Please see example below (here these folders are populated already):

Then create a sub-folder in /textures and name it ad_content
Put all your new banners inside that folder.
If you remember, we are looking to replace original ad1x1, ad2x1 and ad4x1 with our own custom images. However we need to name them differently.
So name your new files like this:
ad1x1_xx.jpg ad2x1_xx.jpg ad4x1_xx.jpg
Where xx can be anything you want. Just make sure it has different file name from the original files in pak00.pk3
This is how your /textures/ad_content folder should look like:

We are done with textures! Now the most important part - .shader file which should go to /scripts folder that we prepared earlier on.

Shader files contain instructions for the engine how to render your images and all the paths to them. Without correct .shader file your images won't load and at best, you will still see the default Quake Live logo banners on your maps.
We are going to get default ad_content.shader and ad_trim.shader file and edit it for our needs.
  • Download the default ad_content.shader file here : https://gist.github.com/papamobi/dc56b430b1f9c25b452152827d8775ed
    Download the default ad_trim.shader file here:
    https://gist.github.com/papamobi/e74d993d9b3e3d1f720ff941c8f353cf
    Alternatively you can find these files in baseq3/pak00.pk3/scripts folder

  • Rename them to ad_content_xx.shader and ad_trim_xx (where xx is anything you want).

  • Open ad_content_xx.shader with text file editor. Find all the lines with ad1x1.jpg and change them to ad1x1_xx.jpg to point to your custom files instead.
    NOTE: change only the paths where it points to ad1x1.jpg file - the actual JPEG image. DO NOT CHANGE OTHER LINES.

    After editing the shader file it should look something like this:
    NOTE: In this screenshot you can only see 2 shaders, there will be more if you scroll down. You need to change all of them.

    That was just the beginning. Now do this for all other ad2x2.jpg, ad4x1.jpg and ad8x1.jpg files you will find in that .shader file. This will take some time!

  • Repeat the same procedure with ad_trim_xx.shader.
IMPORTANT!:
Double check that you've saved the files with correct extension .shader. Don't save them as .txt files or .shader.txt ! This is common mistake when editing files with text editor. I use Notepad++ but you can use other text editors. (When saving , select All file types and then manually type .shader after the file name)
WELL DONE!


Preparing and uploading content to Steam Workshop
Great, now you've correctly packed your banners into the archive.
Next step would be uploading it to Steam workshop.
If you are unfamiliar how that works, you need to read this guide:
https://steamhost.cn/steamcommunity_com/sharedfiles/filedetails/?id=539821860
Follow scrupulously the upload process as it is easy to miss something and the upload will fail.
You need to have your freshly made .pk3 file, a .vdf file and a preview image.
TIP: Use a square preview image

Once you've uploaded it, go to your steam profile, then select workshop items. Your new upload should appear in the list. I recommend that you set the visibility to "unlisted" . You can specify this in your .vdf file or change it later at any time. The reason for this is that we do not want people to subscribe to your content.

Lastly, make note of the workshop ID which can be found in your browser's address bar.
Here is an example of a different workshop id:
Configuring your QLDS
This is very straightforward. Add your workshop id to your server's workshop.txt file which is located inside baseq3.
If you run multiple servers on single machine, you will most likely have a gameport folder and a baseq3 inside each game port folder.
Restart your server(s). The content will be downloaded just like any other custom map you've probably already added to your server.

Finally open your server.cfg and add this line:
set qlx_workshopReferences "123456789"
where 123456789 is your actual workshop id.
This is a necessary step in order to push the content to the client upon connect.
If we do not do this, players won't be able to see the banners unless they are subscribed manually to your file.

NOTE:
If players manually subscribe to custom banners, they will have glitches and empty banners on all other servers except for the one with custom banners. Files will be permanently downloaded to your PC and Quake live will look for missing assets but since the server doesn't have it loaded, there will be errors and you will have a missing image. qlx_workshopReferences in that way works great, it downloads the file when you connect, keeps the file in cache and clears the cache when you close QuakeLive. That way, you will have no problems playing on other servers, however if you do not close quakelive and just connect to another server after playing on a server with custom banners loaded, you may still see glitches. To fix it - restart quakelive.


Final words
Thanks for reading. Hope this will be helpful at some point.
There are other things you can customize in quake live, for example adding your own funny country flags.

Feel free to suggest any changes/improvements to this guide.
Enjoy!


P.S. EuroQuake artwork created by oXI https://steamhost.cn/steamcommunity_com/profiles/76561198205703741

P.P.S. (!) * file naming: If you are absolutely sure that you've packed everything correctly and all files/folders are in place, yet it just doesn't work, don't give up. There is a chance that the banners do not load because of certain limitations to either the pk3 name that you choose, or the shader name that you choose.
It may have to do with loading order in Quake Live.
I don‘t recall which needs to come alphabetically before the default ql stuff, and which after it. Be aware of it, and try renaming with zzz<shader> or aaa<shader> and/or pk3 if things not work. (Thanks ShiN0)
2 Comments
mobi  [author] 23 Jun, 2024 @ 7:40am 
Added to the guide. Thanks for your input.
ShiN0 23 Jun, 2024 @ 1:55am 
Two more things I'd like to add:
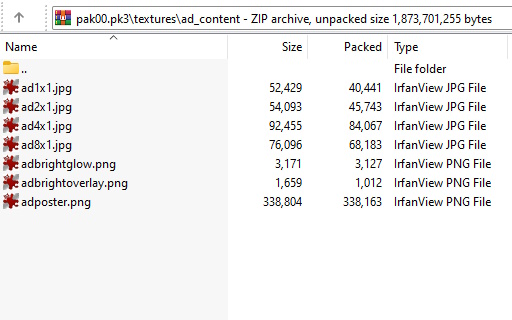
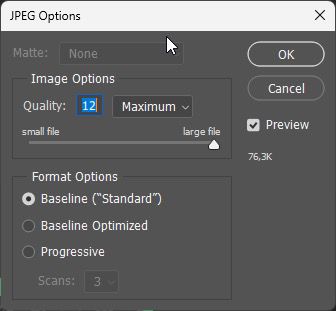
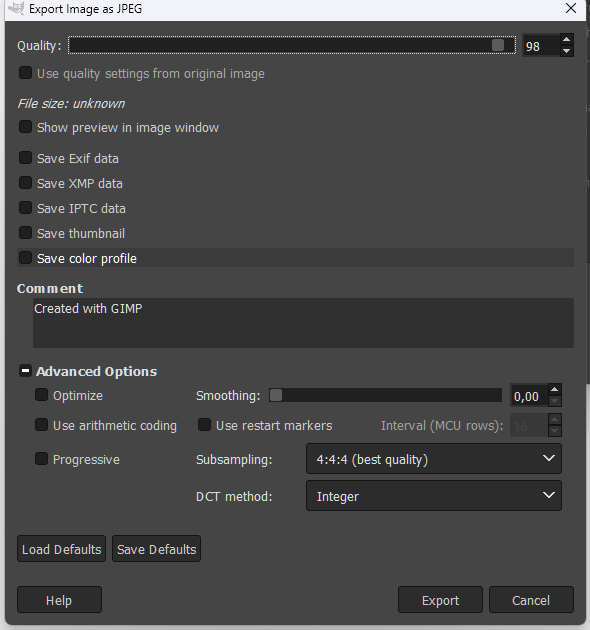
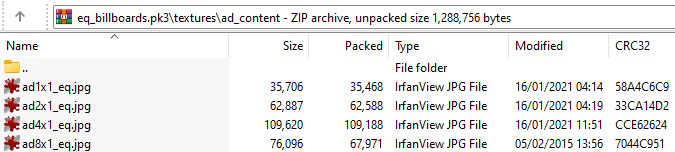
* .jpg files: make sure to save the jpgs in a compatible format for ql. ql does not support progressive encoding for jpgs. If you store them in the wrong format, clients connecting to your server will crash because of it.

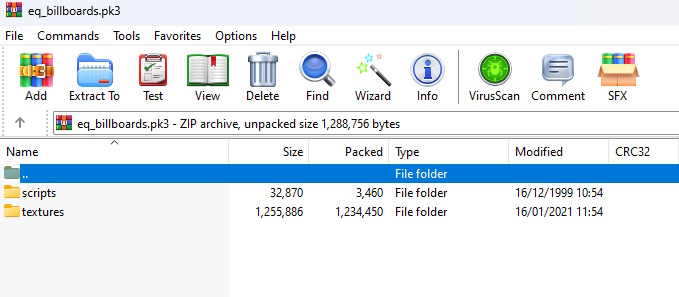
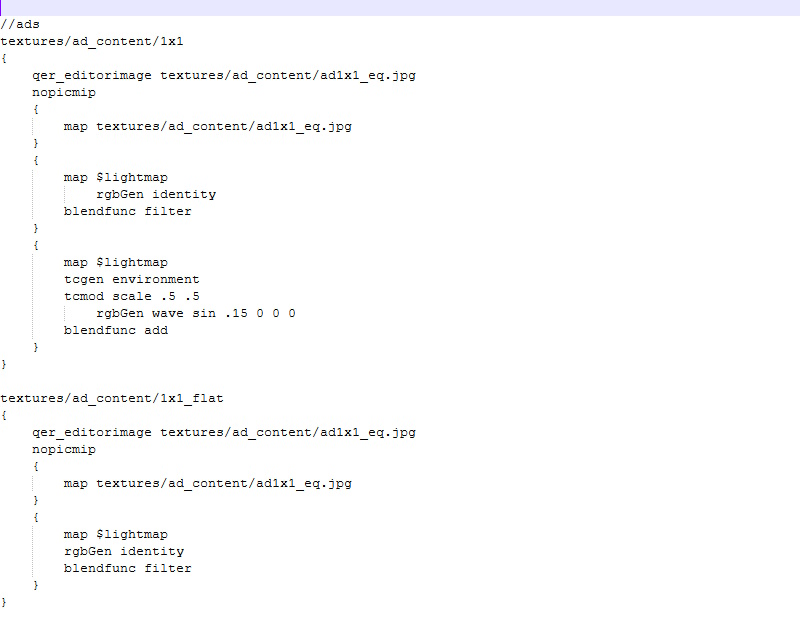
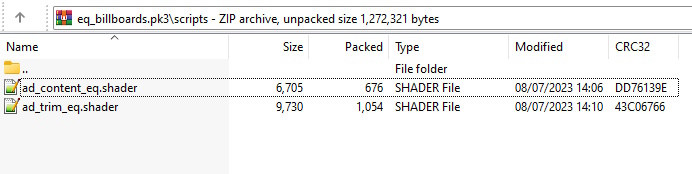
* file naming: there is some limitation to either the pk3 name that you choose, or the shader name that you choose. I don‘t recall which needs to come alphabetically before the default ql stuff, and which after it. Be aware of it, and try renaming with zzz<shader> or aaa<shader> and/or pk3 if it does not work.

relax_branding.pk3 didn‘t work, aaa_relax_branding.pk3 worked, though, thunderdome.pk3 worked as well as kitchen_branding.pk3 or station_branding.pk3. So, it‘s a bit of a mystery to me how it‘s determined. So, it's best to try to play around with the .shader name and .pk3 name, if things don't work with your initial names.