Awesomenauts

Awesomenauts

42 ratings
Full Updated Guide for the Current Online Version (3.2.8) - Return to Awesomenauts 2025
By Chupi and 2 collaborators
New players welcome! Contains starter tips, builds, character sheets but also more in-depth information. Based on niki's and diz hydron's original guides (with their permissions), greatly expanded by me, Chupi, and updated for the current version.
4
2
4
3
3
2
2
   
Award
Favorite
Favorited
Unfavorite
Introduction
The guide is still a WIP and is constantly being updated. If you have any feedback, suggestions ,corrections or want to add something, DM me.


  • Awesomenauts is a 2D platformer/brawler MOBA, there is no other game like it! The game has been updated and played constantly for over 10 years, and nowadays it has a small but loyal community. Its IP ownership has been bought by Atari, and during this transition, we are looking to revitalize the community and bring in some new players! It's free to play on Steam and you can play over 19 awesome 'nauts with unlockable items. 🚀 Check out our trailer for a peak at what the game offers.

❓How to play?

It's free to download on Steam!
Where to start as a beginner?
Do all the tutorials first. Then warm up with some bot matches until you feel familiar with the structure of the game and you learn the basics of a few characters. For more character-specific tips, check out the ⁠guides. Stay together with your team, try to cooperate and communicate. Experiment with playstyles and different builds. Start with nauts labeled with Easy or Medium difficulty on the naut select screen. Try to also learn the abilities and items of your enemies so you know what kills you. Pressing tab in a match and hovering over any player will show you their abilities and items, make sure to read these as well when you have time. Knowing an enemy or ally has a certain upgrade can make all the difference in your decisions. Also, if you want to read character abilities and items more in depth when not in a live match, check further in this guide, open a bot game or to to the https://orikaru.net/nautsbuilder website.


Custom and Bot Matches
This will allow you to play a bot match with computer-controlled players as your fellow teammates. These matches are an easy way to practice in your spare time. Custom matches allow you to invite up to five players to play against each other in several different games modes! The best difficulty to set the bots on is probably the default one. Less or more than that, the bots are artificially weakened or empowered by modifying their base attack speeds and cooldowns. This is not a good way to learn the game, since you need to hone your gamesense. There's no point learning to play against a Froggy who can dash every 2 seconds, that will throw you off in a real match, where you need to know the precise stats of nauts.


NOTE: on this version, there is a bug that prevents a custom lobby with more than 3-4 online players from starting. To solve this, the host should start the custom match by himself or with only his 2 teammates present in his team by pressing ready, and when they are in the nauts selection screen, they should invite the other players thru stream invites.
-----------------------------------------------------------------------------
Terminology
Some abbreviations and terms found in this guide, online and in-game:

GAMEPLAY TERMS
    AA
    An Awesomenaut's basic attack (Auto Attack). Example: Lonestar's Blaster:

    KB
    knockback (getting pushed around or thrown)

    HP
    Health Points (current or max)

    DoT
    Damage over Time. Represented as purple on the hp bar.


    HoT
    Heal over Time. Represented as green healing ticks.

    creep
    small NPCs found on every map in certain areas. They heal the naut who killed them by a small amount, and then respawn after a while.

    TP
    teleport (to base, to heal/shop, OR a naut using a teleport ability)

    CD
    cooldown (seconds til the ability is ready to use again)

    CC
    Crowd Control (debuffs such as Slow, Stun, Snare, Silence, Blind, Weaken, Amplify Damage, Knockback, Slowdown, Gravity, Cocoon, Tether, Displacement)

    AoE
    Area of Effect (damage/hitboxes that cover an area and/or multiple targets at once). Example: Froggy's Tornado with Explosion upgrade:

    flyers
    referring to the flying Hummingbird Droids.

    base
    Your drill core located outside the shop and the area surrounding it.
    bottom
    Bottom lane. The lowest lane.
    top
    Top Lane. The highest lane.
    mid
    Middle lane / middle of the map; the space in between lanes that often contains a jungle and/or obstacle.
    jungle
    Sometimes a part of mid, or other areas, depending on the map, it's a place where creeps respawn, and solar and HP packs can usually be found. A good place to farm HP and/or solar.
    Example of these areas on Ribbit IV:

    base ability
    an ability without any upgrades or modifiers, like how it is at the very start of the match.

    pills
    Power Pills Turbo, an universal upgrade found in the bottom (utility row). Increases max HP.
    regen
    Med-i'-can, an universal upgrade found in the bottom (utility row). Increases hp regeneration/s. One of the main and cheapest ways to gain hp back.
    boots
    Space Air Max, a semi-universal upgrade found in the bottom (utility row) for most nauts or one of the special unique boots that some nauts have (ex: Froggy G's Cobra Skin Loafers) that have unique added bonuses and are more expensive. Increases movement speed (and jump height in some cases).
    (to) piggy
    (To buy) Piggy Bank, an universal upgrade found in the bottom (utility row). Gives 100 solar instantly and for free but takes up one of your three shop slots on that row.
    BKM
    Baby Kuri Mammoth (an important upgrade in the utility row that reduces debuffs)
    THE UTILITY ROW

    buff
    to increase the power/effect of something.
    debuff
    to decrease the power/effect of something (sometimes the same thing as CC).
    DPS
    Damage per second (AttackDamage x AttackSpeed).
Terminology 2
META TERMS

comp
Team composition, also sometimes used for "competitive", meaning organized/ tournament play.
(to) draft
to pick out your comp before the game based on combos and playstyles. In competitive play /tournaments, it's a defined phase that takes place before a match in which the 2 teams take turns banning nauts and maps then picking nauts and maps. Example of a third-party drafting app:
team fight
a clash of abilities in which all members of both teams participate. aka "3v3 fight". Their outcomes usually determine which team gets to push (the winning side, who's killed at least one enemy naut) and which team needs to fall back, heal, regroup and defend lanes (the losing side, who's lost a lot of HP and at least one naut). Good players usually team up and prepare to win a team fight as soon as they're ready as their first order of action. Team fights usually start when the teams clash in the same area or when someone initiates with an initiation ability (ex: Skoll throw).
(to) wait
something usually declared in the in-match chat. It refers to a state of the match where nobody attacks/kills each other or structures, only wait around and farm droids and solar. This usually happens because someone has to go afk for a while or the match is unbalanced because somebody DC'd. It's usually a polite act, but some people prefer to get out of the game faster rather than wait.
(to) backdoor
attacking a turret or solar drill behind the enemy lines, without the aid of droids or other teammates. This is usually best accomplished by nauts with invisibility (so they can sneak by the enemy and/or evacuate quickly) or by nauts with summons (to soak up some turret shots). Backdooring can win you the game if done right and at the right moment (example: a Leon goes to backdoor a base drill that's low hp) and can avoid situations where you're close to winning but you get team-wiped instead. Done wrong, it can also lose you the game or set you back, because instead of having all your team present for a 3v3 team fight, one of your teammates is far away doing chip damage to a structure that's still healthy.
(to) reset:
to safely retreat from a team fight to refill hp, finish CDs, regroup, and/or wait for teammates to respawn.
(to) force push /naked push/ solo push
to attack a structure without droids to support you. A dangerous act, as you will quickly die if not careful, but can be beneficial when all or most enemies are dead (or very far away) to get some extra turret damage in or even destroy one. This is best done (and safest) when the entire enemy team is dead, or if you're a good pusher with a summon. (Chucho is the best naked pusher, he can attack a turret by himself almost indefinitely by constantly resetting his bike's HP to full by hopping off and on.)
(to) poke
to damage an enemy from a distance from which he cannot harm you. Nauts such as Raelynn excel at this. Poking is useful outside of teamfights to prevent the enemy team from starting a fight with full hp, and to force them to waste time healing or resetting CDs.

ONLINE TERMS
BM
bad manners


DC
to disconnect or a disconnected player.


to force (start):
to press Force Start when in a lobby that's not filled up yet. Usually not recommended and seen as BM by the other players. Players usually don't wanna play with one or more bots and would rather wait for an even 3v3 match.

SBMM
skill-based matchmaking (an algorithm that tries to pair you with evenly-skilled players). Currently missing from 3.2.8 because the SBMM servers (aka Galactron) are offline. So players are matched based on whoever enters queue first, and loosely based on ping.

afk
"away from keyboard", when the naut/player is standing still/ not responding. They will get automatically kicked for inactivity after a few minutes but they can rejoin. A rude/ bannable (if there was a ban system) offense, usually, especially if done repeatedly or on purpose.
bot
when not used as an insult, it means that naut is an AI BOT and not a real player. bots are usually seen as very weak and the presence of one or more indicates an imbalanced match.

SoloQ
"Solo Queue" - when a player plays in a ranked match by themselves, without a premade team.
premade
a group of 2-3 players playing together, usually with a predetermined plan in mind.
smurf/ alt
An alternate account of a player who already has experience with the game and/or a high ranking. Players usually create smurf accounts to bypass bans, to reset their progression, to climb the ranks again, to troll, to play without getting recognized or for other reasons.

PROGRESSION TERMS

prestige
once you reach max account level, you can reset to lvl 1 and upgrade your prestige badge by 1. Prestige badges are purely cosmetic but usually indicate that a player is more experienced.
league
Groups numbered one through nine displaying your positions on the leaderboards. 9 is lowest (bronze), 1 is highest (diamond). System currently not functional since servers and online leaderboards are offline.

Basic Concepts
GOAL OF THE GAME

Awesomenauts is a 3vs3 game. The goal is to reach the enemy's drill core and destroy it. Both teams need to fight it out and push using the available droids. You can only access the enemy's drill core after you've sieged past their defending turrets. Each solar drill has 12000 HP. Try staying together with your team and attack with your abilities at the same time or in combo.


SOLAR

Solar is the in-match currency to buy upgrades with. It is gained passively throughout the match, but also collectable across the map. There are 2 types of solar coins:
  • silver give 1 solar

  • gold give 5 solar
Grab as much as you can if its in your way, and make sure you get the gold drops from the droid waves, instead of your enemy.

Things that also earn you solar:

Creeps
3 solar
Sawblade/Hummingbird Droids
5 solar
Super Droid
10 solar
Solar Boss on Ribbit IV
20 solar for each member of the team
Killing Enemy naut
30 solar for each member of the team + 40 for the last hit
Turrets
40 solar for each member of the team + 70 for the last hit
Piggy Bank
100 solar on purchase


DROIDS


Droids are a very important part of a match. There are 3 droid-types in the game:
  • Sawblade Droids:
spawn regularly from the beginning of the round to the end. These spawn in groups of 2, a total of 4 in each spawn group, every 15s or so. They will walk forward on the ground on their respective lanes until encountering a foe or enemy turret. They will chase anything nearby and attack with their melee sawblade dealing 72 damage each hit. They have 850 HP and will drop 5 solar.
  • Hummingbird Droids:
are found on AI Station and can be spawned from the spawn box by jumping on a button. Raelynn and Genji can spawn them via upgrades. Spawn in groups of 1-3. These special droids can fly and fire homing bullets that deal 60 damage each. They will start moving forward on their lane and act like sawblades but floating. Their homing shots target nauts first! They have 600 HP and will drop 5 solar.
  • Super Droids:
powerful droids that are deployed whenever an enemy turret is destroyed. They walk forward on thee lane the turret was destroyed. Help these droids out to get an extra push on the next objective. They have 1500 HP and fire homing missiles that deal 400 damage in an AOE. These missiles will target nauts first. Destroying them will give you 10 solar.

It's always wise to clear Droids whenever you see them and even use abilities on them. They provide your team with a lot of control over the map and put on a lot of pressure on the enemy team. This is a very big part of Awesomenauts. I recommend checking the minimap very frequently to know when Droid waves are coming and clearing them on both lanes as soon as it's safe. Even experienced players often forget to clear them or use them effectively throughout the game.


CREEPS


Creeps are little critters that drop small healthpacks and solar. Each map has a different sprite for the Creep, but they all drop 3 solar and 250 health at base level. Good to farm usually, even on the enemy side, but don't steal them from a low-hp teammate. They die in 1-2 AA hits at base level.


TURRETS


Turrets are the highly damaging machinegun towers placed around each map. They are used to shield and assist with clearing droids and to stop the enemy from getting to your core. Protect them at all cost, as their health does not regenerate. There are 3-4 turrets per team, depending on the map. The back turrets on each side have significantly more HP than the front turrets, as they are accessed much later in the game, so it's smarter to siege down a front turret in the early-midgame, even if you have access to a back turret. Whenever a turret takes damage, an alarm will sound for the team who owns it and a pulsating exclamation mark (!) will appear over it on the minimap. Turrets can only be damaged while they're shooting at something, so extra-long-ranged abilities don't damage them if they're idle.


SHOP


The Zork Mega Shop. Here, you can use solar to upgrade your naut. You can buy up to 3 items in every upgrade row. The 2 main abilities and the nauts AA each have a row. The last row is called the utility row and it's mostly similar for every naut. On it you can buy hp upgrades, speed ups and general buffs. Each team has a shop built into their base. Not only does this station work as a shop, but it will also heal you rapidly! If you are low on health and there is no good way to heal around you, try going back to the shop.


HEALTH PACKS


Healthpacks are green orbs that will recover your HP. Each will heal you for 200 HP. They are marked with green dots on the minimap and respawn after two minutes of being picked up.


TEAM WALLS


Team walls are special walls of energy that only one team can pass through. If you don't match the color of the team wall, you can't pass through it. Team walls sometimes will turn off depending on what turrets have been destroyed. The more turrets down, the fewer team walls the enemy team will have to their advantage. Keep this in mind when running from an enemy or chasing one.
Basic Concepts 2
HIDDEN AREAS


Hidden areas are spots where you can stay out of sight from the enemy. As long as an enemy has no members inside a hidden area, they can't see who or what is inside. Use these to get the jump on an enemy. Team summons (bull, chucho turret etc) reveal the area while they pass thru it. Ppl usually also hide traps in here, mines etc. But most of them have an audio beep associated to them, so look out for that when approaching a hidden spot.


TELEPORTING

If you hold down the F key, you can teleport back to base! Hold it for 3 seconds to activate the teleport. Just make sure that nothing hits you while you are teleporting or the teleport will be canceled. You can teleport while falling, or having inertia from movement. Some nauts can TP while floating.


MINIMAP


The minimap is a very useful tool to spot enemy Awesomenauts, droids and health resources. It takes a while to get used to, but once mastered becomes a very vital tool to gain knowledge, surviving and killing opponents who are out of position.


MATCH XP SYSTEM


Both teams start at XP-Level 1 and the maximum is 20. If your team gathers enough XP, you gain a level. Each level up gets you +3% overall damage, +4% HP (goes for Healthpacks and Creeps aswell) and +3% HP regeneration to your base stats. Droids also increase in damage and health by 3,5% each level. To prevent a team from getting ahead too quickly, you get less XP for killing enemies that are a lower team level than yours and more XP for killing higher leveled teams. If you fall behind, don’t worry. Killing an enemy grants you more XP when behind then if you are ahead.


Ways to earn Experience Points:
  • Killing droids and creeps
  • Solar Boss
  • Enemy Awesomenauts (main XP income)
  • Turrets

VOICE COMMANDS


Using the keys 1, 2, 3 and 4 on your keyboard will send out an audio voice command spoken by your naut and will also display a relevant notification on the screen of other players and on the minimap.

1 - Taunt - Your naut will insult the whole enemy team and send them a taunt notification on their screen. It has no function other than to tilt the enemy, and can be muted along with every other form of communication of the player by muting them from the scoreboard screen.


2 - Help! - Your naut will call for help to his other 2 teammates. This displays a notification on their screen and puts a pulsating exclamation mark (!) on their minimaps on your location. Players usually use this when they need help in a teamfight, when they're low hp and being ganked or when they want the whole team to group up, preparing for a coordinated attack.


3 - Defend! - Your naut will ask his other 2 teammates to defend. This displays a notification on their screen and puts a pulsating exclamation mark (!) on their minimaps on your location. Players usually use this when they're TP-ing to shop for whatever reason, when they're low hp and falling back, or when they're dead and want to ask their team not to take any risks or attack by themselves, and instead safely defend the turrets and droid lanes until the dead player respawns.


4 - Attack! - Your naut will ask his other 2 teammates to attack. This displays a notification on their screen and puts a pulsating exclamation mark (!) on their minimaps on your location. Essentially, the opposite of the Defend command. Players use this when they want their team to be aggressive, initiate a fight or push lanes and turrets, especially when one or more enemies are dead and they can't defend themselves properly.


SCOREBOARD


By pressing TAB in a match, you open the scoreboard. Here you can see live stats for all the players in the match. Pressing the button to the rightmost of a player's row will mute their voice commands and chat messages. This persists for future matches for about a day. Hovering over a player's row will select them and will bring up their bought items and abilities on the bottom of the scoreboard. You can hover over them to read their effects, stage and solar cost. You cannot access player's steam profiles from here, but you can do so from the steam overlay by clicking on Game Overview > View players.

Maps
Currently there are 5 maps in matchmaking.

  • Ribbit IV's
    unique feature is the Solar Boss. It is a high health Creep that gives each member of your team 20 solar and heals the killer fully upon defeating. I recommend practicing dodging the spit to learn how to avoid their high damage moves, as even later in the game it can easily kill you in 3 hits. The Solar Boss spawns at the 2min mark and will spawn again 2min after each time he is killed.
  • A Skree kills the solar boss much faster than a Genji for example, so plan accordingly with your team. Characters with high dps should go fight the boss and kill him quickly. You can also "steal" the solar boss by landing the final blow on it, and all its benefits will go to your team, regardless of which side he's on or who has been fighting him up until that point.


    MINIMAP


  • Aiguillon
    has an orb located in the middle which turns the user invisible for 30s unless they attack or teleport. This is very useful for surprise attacks and catching people off guard. A tip is to give the invisibility orb to the Awesomenauts that have a lot of setup potential or the ability to burst the enemy down with 1 combo (e.g. Skolldir for throw, Clunk for explode).


    MINIMAP


  • Sorona
    has a button in the middle of the bottom lane. Pressing it with summon a worm underneath the platform, insta-killing anything that walks under it. While it can be useful to catch enemy nauts, I recommend using it as farm when droids walk under it in the early game, as tapping the button keeps the Solar from droids on the ground. Hold it too long, and the Solar will get eaten as well. Gaining control of the hidden area in the middle of this map helps gain control of the stage.


    MINIMAP


  • AI Station
    has center part is a flame machine that goes off every ~20s and has a duration of 8s. It does severe dps so pay attention to the warnings before the fire starts. There is a machine that spawns up to 3 hummingbird droids situated between the inner and outer turrets, one for each team. Only the team who owns it can press the button.


    MINIMAP


  • Starstorm Station
    features a pit below the bottom lane, below the map's hide area, where there's a waste disposal shaft that leads down to a bottomless pit. The area is filled with Solar coins, platforms, and two creeps. It also features a teleporter that spits you out from above the middle of the top lane, allowing non-flyers a way out and nauts a quick rotation path. Players that fall down the bottomless pit are instantly killed. With practice, the teleporter is useful for planning your escape or swapping lanes quickly, but also for denying paths from the enemy team. A good example for this would be placing Derpl's Snare Trap on the teleporter exit.


  • In each team's jungle area there are also 2 portals, one on each side, that exit to the same portal above mid. Any naut can jump in these, even in the one behind the enemy turret, once it's destroyed.


  • Lastly, unique to the Starstorm layout, the inner top turret is exposed to enemy attacks from the very start because the outer top turret lacks a "roof". Meaning players who are feeling bold can technically jump between both enemy top turrets and try to take out fleeing enemy nauts.


MINIMAP
Status Effects
Status effects are used to control your enemy's or ally's movement or ability to fight. There are positive status effects (buffs) and negative ones (debuffs). You will find status effects on your abilities and upgrades.

SNARE
Snare is a debuff that prevents the victim from moving, but are still able to use abilities, basic attack and teleports.
  • By default:
Scoop, Derpl
  • By upgrade:
Clunk, Skolldir

SLOW
Slow is the most used CC. Almost every character has Slow on an upgrade or on their abilities. It slows down the target's runspeed and reduces their jump height. It's also very effective against Dashes/Dives/Pounces, as it reduces their range when slowed.
  • By default:
Ayla, Coco, Rocco
  • By upgrade:
most nauts, with varying degrees of slowdown%.

SPEED UP
Speed up increases your mobility. It is incredibly useful for chasing down enemies.
  • By upgrade:
Froggy G, Rocco, Ix, Nibbs, Leon, Gnaw, Ayla, Skolldir, Vinnie, Genji, Ted, Sentry, Yoolip, Jimmy

SILENCE
Silence makes the target unable to use their abilities for the duration, but they are still able to use their basic attacks. This is great against burst characters that need their abilities to do their damage (e.g. Froggy). Small things to think about are using Silence against Ayla as an example, as she is unable to get out of Rage mode for the duration.
  • By default:
Ksenia
  • By upgrade:
Leon, Derpl, Vinnie, Penny, Sentry

STUN
Stun is a very useful tool to interrupt your opponent's movement, to initiate, and to interrupt abilities. It's widely considered the best CC as it shuts down an enemy 'naut entirely, making him unable to move or attack. The only downside to Stun compared to Snare is that it doesn't stop momentum.
  • By default:
Froggy, Leon, Swiggins, Penny, Skolldir, Yoolip
  • By upgrade:
Derpl, Coco, Ix, Rocco, Ted, Voltar

KNOCKBACK
Knockback is a very useful type of CC for many uses. The target is "knocked away" on use, making it exceptionally well against charging enemies (e.g. knocking away an exploding Clunk to avoid damage) This is a very good debuff to use against slower, bigger 'nauts, as they are more vulnerable to displacement than quick 'nauts! Most Knockbacks also have the added Stun debuff, so they cannot immediately walk out of it.
  • By default:
Coco, Deadlift, Jimmy/Amy, Lonestar, Penny, Raelynn, Skolldir, Ted
  • By upgrade:
Chucho, Derpl, Ix, Ksenia, Skree, Voltar

AMPLIFY
Amplify amplifies the target's damage taken when inflicted. This is a great tool against any character, but best used as an initiator and is more effective/easier to use on slower, bigger targets.
  • By default:
Penny
  • By upgrade:
Swiggins, Yoolip, Gnaw, Ix

BLIND
Blind is pretty self explanatory, it blinds the target, making them unable to see more than a small portion in the middle of the screen. This can be really annoying and has good use to confuse the enemy during a teamfight.


  • By default:
Vinnie
  • By upgrade:
Leon, Coco, Raelynn, Swiggins

TIME MODIFIER
Time modifers are able to speed up/slow down time. Time Slow will slow the time inside the effective area of the ability and will slow down movement, cooldowns, abilities and animations. This is limited to only 2 characters currently. Yuri is a special case of this, as his bubble also speeds up allies as the counterpart.
  • By default: Raelynn, Yuri

GRAVITY / PULL
Gravity is a very limited type of CC. It pulls the target towards the gravity field placed or in 2 cases, towards yourself.

  • By default:
Sentry
  • By upgrade:
Nibbs, Ayla

STASIS/ BANISH
The target is displaced/trapped and is unable to take damage for the duration. In Ix's case, the swap can be used to avoid incoming damage when timed correctly. Stun cancels Ix's connection.
  • By default:
Genji, Ix

WEAKEN / STRENGTHEN
Weaken makes the target deal less damage for the duration. This is very useful when the user is very vulnerable and is therefore shielded for the duration and area of Weaken. Stengthen would be the counterpart to Weaken, making the affected targets stronger if a condition is met.
  • Strengthen by upgrade:
Ix, Ksenia, Rocco, Skree, Scoop
  • Weaken by upgrade:
Ayla, Coco, Gnaw, Ix

INVINCIBILITY
Complete damage and status effect immunity. Very rare and short.
  • By default:
Froggy G during dash
  • By upgrade:
Ksenia on Vanish roll

Status Effects 2
  • Leon's Tongue - The target is displaced, pulling enemies towards him.


  • Swiggins' Anchor Drop - has a tethering ability, keeping enemies trapped in a certain area, making them unable to escape further than a small distance away from the dropped anchor.


  • Ix's Swap - Also a form of displacement, the target is swapped, unable to be damaged until he has fully swapped positions with the target.


DEBUFF IMMUNITY
Debuff immunity makes you completely unharmed by most CC. They can be useful when playing against heavy displacements, Snares and long Stuns (Yoolip). Debuff immunity does not shield you from Gravity or Stasis in most cases.


By default:
  • Nibbs (Fire breath, immune to everything but Cocoon, Time modifiers and Ix Swap, Stun doesn't interrupt it but will make her fire horizontal, for whatever reason)
  • Derpl (Siege mode, immune to everything but Cocoon and Time modifiers)
  • Ix's Swap (immunity to everything after executed), Ix's Refract (immunity to everything except Ix's Swap, Time modifiers and Cocoon)
By upgrade:
  • Raelynn, Yuri, Vinnie (still affected by Lonestar's Bull), Ksenia

BKM
Baby Kuri Mammoth is an upgrade found on the bottom (utility) row of every naut. Its effect is reducing all incoming debuff duration and percentage. This is a very situational upgrade, but one of the most game-changing upgrades against the right nauts. I recommend buying BKM against (but not only) Derpl, Skolldir, Jimmy/Amy, Sentry and Yoolip. You might not need it in every game against these characters, but if you're having trouble and get caught out by their abilities, this will help you a lot.

Despite being Crowd Control effects, Tether, Cocoon and Displacement effects are not affected by BKM in any way. The stun duration on Mighty Throw does not get reduced. The knockback does, however. Stuns applied during pulls such as Tongue Snatch and Anchor Hook to immobilize targets do not get reduced.
General Tips
SHOP/ ITEM TIPS
  • Always buy both your abilities first. Some advanced strategies don't require this but generally it's for the best.
  • Regen Med-i-Can is good most of the time on most nauts, especially early game. It helps you reset hp faster.
  • Only buy piggy bank if you're losing / you're behind on solar. Some specific advanced strategies use piggy early.
  • Everybody buys Power Pills turbo (max hp) at some point in the game. Usually after minute 8-10.
  • BKM (baby kuri mammoth) is an important tech purchase. If, for example, the enemy has a lot of snares, slowdowns, it's wise to get it, especially if you're not ranged and have to get close to the enemy or you're slow.
  • Adapt your purchases based on the match. Sometimes you need more range to poke fast enemies. Sometimes you need more DPS to chip away at a tank's hp. Sometimes you need to buy some CC (crowd control- a status effect) to help a teammate deal more damage. (slowing down enemies for Leon to stab more). Think on your feet and experiment.

    TIPS FOR NAUTS

  • Every naut regenerates 10hp/s naturally. This amount increases with your team level.
  • Using your AA slows most nauts down by a certain percentage. Keep this in mind when chasing someone who's low hp, as you might be slowing yourself down by using your AA from too far away and they will escape.
  • You can jump on jumppads in more than one way.

    FIGHTING TIPS

  • Stay with your team at most times. This is very important and probably the best advice.
  • Fights are won numerically after the first 3v3 encounter. If you're 3 teammates fighting 2 enemies, or 2 teammates fighting a single enemy, your victory is almost sure. The opposite also applies, run when outnumbered. (exception: enemy is low hp and you know you can kill him)
  • If you're trying to kill an enemy, try body-blocking them. If they try to flee to their side of the map or behind the safety of a structure, try blocking the corridor (if narrow) or simply push against their hitbox. Jump if and when they jump and don't let them pass. Especially useful if trying to keep an enemy inside a certain area that benefits you (ex: inside a Raelynn's rift).

HOW TO MAKE THE MOST OUT OF YOUR TIME

  • Farm creeps (healthpack npcs) as often as you can. Even from the enemy side, when safe. However, don't steal creeps from a low hp teammate.
  • Do as much damage to a turret when possible if enemy team is away or dead. Don't go shop when the enemy is dead, use that time to push a lane.
  • Turrets only take damage when they are actively shooting at something. This means that even if a ranged attack of yours visually makes contact with a turret, if it's not shooting it's invincible and dmg numbers won't show.
  • TP home to shop only after clearing the current wave of droids from the lanes AND you have a lot of solar (200+). Otherwise, the enemy will push in your absence. If there are no sources of healing and you're low with no regen or lifesteal, then quickly TP home and get back with full HP.
  • Try shopping from the spaceship/ before droppoding (when you're dead) to save time. Same button to open shop.

    THE BEST TIP

  • Look often at your MINIMAP. It can show you where to go (where your team is or where a lane needs clearing of droids) and where the enemy is, so you don't go alone too far into enemy territory, or to ambush an enemy who's out of place or getting chased.


    HOW TO NOT FEED

    • "Feeding" usually means you're dying a lot/ more than you're killing in a match. This usually means you're just losing the match (by being worse than the enemy team), so a normal occurrence. But sometimes your team is not dying a lot, just you, so there are certain things you can do to prevent dying excessively, even when losing a match. Such as: stay behind your droids or your turret, stay together with both your teammates, don't go too forward into enemy territory, identify the ability that kills you too often and counter it/ avoid it (example: Skolldir is walking up to you and throwing you into his team. Solution: buy BKM and don't go in his melee range).

    HOW TO CLUTCH/ COMEBACK

    • If your team's level is much lower, you are at a numerical disadvantage, and they're probably going to win. But there is a comeback mechanic you can try: if you focus all of your team efforts on killing a solar boss, a turret or a single enemy, the game will compensate your xp difference and bring you back to the high level of the enemy team. Now suddenly it's a more even playing ground, and you have a better chance to comeback. In any case, don't abandon hope or just go limp and let them steamroll you. This is still a learning opportunity, try to analyze what happened so you can prevent it in the future. Every loss makes you better and more experienced.
Special tech /movement
There are lots of small things to refine your gameplay in Awesomenauts. Using game mechanics and techniques to your advantage can give you the upper hand in many games.

NOTE: Not all of these are meant to be in the game, so note that they could be fixed in future versions of the game.

AA CANCELING

The idea of AA-canceling is that you use your basic attack right before an ability, pumping out more damage quickly in the same time.

Some of the most useful uses of this you can find on Ayla, using your basic attack right before toggling on your Rage mode and right after untoggling it. This will give you more mobility when you master it and give yourself a boost in DPS.

BOUNCEPAD TRICKS

Bouncepads launch you in the intended direction they're facing. There are tricks to alter their path, which you can use to manuever quickly around the map. Do this by changing directional keys, where you jump on the pad exactly, or by adding or subtracting your character's jump.

TP JUMPING

Teleport Jumping is a must-learn skill for anyone playing floaters (Swiggins, Voltar, Skree). It changes your mobility around the map drastically, so I recommend practicing this until perfection.

When dropping down a platform as a floater, the game will treat it as if you already jumped, and therefore you will float when trying to jump. This is the same for bouncepads and can be really annoying when trying to jump from Aiguillon's bottom lane to top lane.

Teleport Jumping is achieved by holding your Teleport key (default F) when floating after dropping down a platform or jumping up a bouncepad. While holding Teleport, also hold your jump key (default W, Space). Releasing Teleport should launch you into the air and get rid of the floating
-----------------------------------------------------------------------------
GUIDES FOR EVERY 'NAUT
The following list contains every naut currently in the game. The first few are unlocked by default. The rest are unlocked by just playing matches. Their 5th and 6th items on each row are also unlocked like this. You get account xp at the end of the match.

Only 19 nauts are currently playable for everyone, the last 8 in the list are Starstorm and Overdrive dlc-exclusive. These dlcs are currently unavailable for purchase until Atari gets the servers running back up. Unless you had the dlcs bought from before.

  • About numbers and stats: every damage point, cooldown, hp stat and other such data has been taken directly from in-game, which is the best and most reliable source for the 3.2.8 patch. As such, some numbers may differ from the ones on nautsbuilder or on the wiki. But rest assured, these numbers are the correct ones for this patch.

  • About builds: all suggested build are for general guidance and learning purposes only. Please feel free to substitute any item or change the purchase order as you see fit according to what you need during matches. Every player has their own unique play style and they should build accordingly. Also, some builds are not maxxed out, or don't indicate when to buy each item stage. This is intentional, to indicate that they're flexible and can be modified and adjusted based on the player's needs.

  • About nautsbuilder: this website is for a different version of the game so some items are different in effects and cost. Therefore, it should be used for mostly general guidance, and replace whatever you need in-game.
Froggy G
STATS
HP: 1150
Role: Assassin, Initiator, Nuker
Mobility: Swift
Jump: Single High Jump
Strongest During: Late Game
Difficulty: Easy

DESCRIPTION
His role is to be as annoying as possible, being in the enemy's face and using his high mobility and damage-immunity to avoid enemy attacks. He excels at killing ranged-DPS and low-mid HP 'nauts with some exceptions.

Tips:
  • High damage /nuke potential. Very fast and high jump, keep moving and shooting from a distance.
  • Position yourself on the other side of the enemy team and dash towards your side, so you end up in a safe spot. Dash stuns nauts out of their abilities, if it applies. Dash makes you invuln so dash thru enemy nukes.
  • Use tornado when enemy is slowed or snared. With the protective upgrades, tornado is also a powerful turret pusher.

Notable items
  • Best items: Mutant worms, turbo tape, golden watch.
  • Situational items: RightBackAtYa is great against projectiles, derpl nukes etc. Tornado shield is good for undeflectable stuff like clunk explosion.

ABILITIES

Bolt .45 Fish-Gun
Damage: 60
Attack speed: 2.2/s
Range: Short
  • A basic blaster that shoots water at enemies. Upgrading it will cause it to hit multiple targets, shoot multiple shots, and charge up after hitting enemies with special attacks. Good dps, range, poke potential.
Splash Dash
Damage: 250
Stun Duration: 0.7s
Cooldown: 7.5s
  • Dash through enemies and deal damage upon contact. This will deal burst damage, and stun enemies. Froggy G is invincible as long as he is dashing. However, debuffs can still be applied to him. The dash lasts for 0.45s unless he hits terrain or an enemy structure. This can be upgraded to slow enemies, heal Froggy G, and cause an explosion when hitting walls. (Hammer Pants description explains that you must "aim at the ground to execute". In reality, the effect will occur if you hit any kind of terrain, including walls, the ceiling and enemy structures)
  • One of the best and most versatile abilities in the game. Good for initiation, escapes, harassment, cancelling nukes, mines, etc. Angling Dash in a way that makes Froggy G stop right next to his target makes it easier to land the Tornado. Dash allows Froggy G to move through Jump Pads unaffected.
Tornado
Damage: 427/s
Duration: 1.6s
Cooldown: 11.6s
  • A tornado of water that deals damage to everyone around him. It leaves him vulnerable and slows him down, but deals massive dps. This can be upgraded to give Froggy G a shield, make him faster, explode upon tornado expiration, and reflect incoming enemy projectiles back at them. He cannot use other abilities during this. The tornado stops if stunned.
  • Turbo Tape can turn Tornado into a powerful chasing and escaping tool.
  • Both Can't Touch This and Right Back At Ya! allow Froggy G to damage turrets with little to no punishment.

ITEMS TIER LIST


Movement penalties:
  • Fish Gun: 50% slowdown while firing and walking forward. 75% slowdown while firing and walking backwards.
  • Dash: no penalty when starting or exiting dash.
  • Tornado: Massive slowdown while active.
  • All abilities can be used while jumping. Same penalties apply mid-air.

MATCHUPS
  • Very good against:
    Lonestar, Raelynn, Genji, Rocco, Ted McPain, Sentry, Skree, Nibbs, Chucho, Max Focus.
  • Good against:
    Gnaw, Jimmy/Amy
  • Bad against:
    Leon Chameleon, Scoop, Clunk, Derpl, Swiggins, Penny,
  • Good maps: all

Builds [orikaru.net]
1) Starter build, not all items unlocked:

2) General build: (creator: game is broken)

3) Jambo's tournament build:
Lonestar
STATS
HP: 1300
Role: Pusher, Fighter
Mobility: Tactical
Jump: Double Jump, boots for Triple
Strongest During: Early Game
Difficulty: Easy

DESCRIPTION
Lonestar can be played in different ways, is easy to use and is an all-round 'naut. He is great at pushing and keepin opponents away.

Tips:
  • Don't push away stuff randomly with the bull. Use it to save a low hp teammate by sending enemies to their side, or push a turret to soak dmg. Position yourself on the other side of the enemy and send them towards your team/turret with bull. Pin enemies against the wall with the bull.
  • Dynamite has low cooldown so it can be spammed often. Dynamite to clear droids, dmg turrets. If you're right inside an enemy's hitbox, use dynamite instantly, it will damage them instantly, no aiming required.
  • Lone has very good and consistent DPS, he can melt enemies. Blaster is strong with good range.
COMBO: Bovinian Postcard and Cheetah Bullets can give you a huge CD reduction on your dynamite. Doesn't get extra CD reduction if you get Boom Bullets, it's just for the first target hit. Pair this with Trinamite, Crystal and Regular Eagle Bullets and your DPS is huge. Add Transfusion grenades to add self-sustain in fights as well.

Notable Items:
  • Best items: Transfusion Grenade (for self-sustain). Most of his other items are good or have a purpose.
  • Worst items: Eagle bullets are obsolete, Crystal eagle is straight-up better. Unless you want both. Mr TNT and Rubber Sleeve are good for beginner players to help you get more hits but aren't needed if you're good with positioning and aiming your dynamite.

ABILITIES

Blaster
Damage: 65
Attack speed: 2.8/s
Range: Average
  • Can be upgraded to make bullets deal AOE dmg or make him shoot additional missiles. Good dps for nauts and structures. Boom bullets can damage structures thru walls or ceilings sometimes, tho this is seen as scummy by some players.
Dynamite Throw
Damage: 140(x3)
Cool down: 6 Seconds
Timer: 0.7s
  • Throw three sticks of dynamite at your opponents. If you hold the button down, you will throw the dynamite farther. Throwing them into a wall or ceiling will cause them to lose their momentum and fall down to the floor. These can be upgraded to bounce at enemies, explode in a larger AOE, leech life from enemies, and apply damage over time. Its low CD makes it excellent for brawling, regaining hp fast with lifesteal, clearing lanes. Incendiary upg is best bought early game, DOT dmg scales off later on.
Summon Hyper Bull
Knockback Push
Cooldown: 8s
Life Time: 2.6s
Health: 400
  • Summons a holographic bull that charges in a horizontal line for 2.6 seconds and pushes anything front of its horns back. Can be upgraded to deal damage, drop hp packs, inflict slow, and even explode upon expiration dealing 210 damage. Bull has several different upgrade paths, depending on your matchup: a low cd bull with hp packs and explosion is great for pushing lanes and supporting your team; a big KB bull with slow and DPS is great for initiating fights, pinning enemies against a wall or pushing enemies into your team or turret. Can also be used to clear mines or eat nukes.

ITEMS TIER LIST


Movement penalties:
  • Blaster: 50% slowdown while firing and walking forward. 75% slowdown while firing and walking backwards.
  • Dynamite: no penalty while throwing.
  • Bull: stops you for just a moment when summoning it.
  • All abilities can be used while jumping and between jumps. Same penalties apply mid-air.

MATCHUPS
  • Very good against:
    Clunk, Skolldir, Yuri, Derpl, Ayla, Voltar
  • Good against:
    Gnaw, Scoop, Leon
  • Bad against:
    Froggy, Coco, Vinnie, Ksenia, Swiggins, Penny, Genji, Sentry, Yoolip, Jimmy/Amy, Ix

  • Maps: Ribbit IV is best because of its small size, Sorona is too open for him.
Builds[orikaru.net]
1) Starter build, not all items unlocked - buy ribbit snail slime earlier if you need more healing in fights:

2)General build with lifesteal:

3) Team Support and pusher build:

4) Early high DPS and burst: (by game is broken)
Leon

STATS
HP: 1300
Role: Assassin, DPS, Initiator
Mobility: Swift
Jump: Single Standard Jump
Strongest During: Late Game
Difficulty: Easy

DESCRIPTION
Leon is a classic stealth focused Assassin. His tongue provides a great setup for your team, can be used to pull enemies into a tough situation, and stealth makes him unpredictable and easy to escape with. His high damage output and ability to turn invisible help him pick up kills without the enemy knowing he's approaching them.

Tips: Use tongue to bring enemies in the open or into your team's abilities. Dodge enemy abilities then start stabbing them. Best to use invis to initiate or to pick out enemies who are separated and/or low hp. This way you can win your 1v1s. Not good vs groups, keep your distance (and use tongue).

COMBO: Basic AI Chip, Extra Battery Pack and Blow up Doll gives you a good lane/turret pushing ability. This buffed clone can also be used in combat by summoning it during a teamfight and fighting along side it.

COMBO: Surprise party mask, chainsaw addon and backstab blade gives you the highest possible damage burst if attacking an enemy's back from uncloak.

Notable items:
  • Best items: silence on tongue. He can spec heavily into burst OR dps/sustain, depending on what you need.
  • Situational items: Mask and Pinot noir are critical to bursting down enemies and having sustain. Dummy explosion should be reserved for when your team has no push potential and low movement so clearing droids is a struggle.

ABILITIES
Slash
Damage: 95
Attack speed: 2.3/s
Range: Melee
  • Can be upgraded to leech health from opponents and slow enemies down. One of the highest dps melees in game, wins most 1v1s on paper. Backstab Blade cannot affect turrets or the Solar drill.

Tongue Snatch
Damage: 120 (x2)
Cooldown: 7s
  • Tongue snatch can be used to bring an enemy to the perfect range to stab them down. Any enemy naut caught by your tongue will be pulled right up next to you. This is useful for both bringing enemies into you, and for dragging them into allied attacks. Deals damage twice. This ability pierces through all Droids and Creeps, but will still deal double damage to them. Leon is completely immobile while his tongue is out.
Cloaking Skin
Invisibility Duration: 8s
Cooldown: 10s
Dummy Health: 400
Dummy Lifespan: 18s
Dummy Damage: 47%
Dummy Attack: Yes
  • Go invisible and leave a low HP dummy of himself behind. Leon will stay invisible until 8 seconds pass, or until he uses an attack. The dummy left behind will attack anything in range. You can upgrade this dummy to walk forward to hunt out targets, increase its health and even make it explode when destroyed. Taking damage will not break the invisibility effect.
  • Clones are shown as Awesomenauts on the enemy team's minimap, and as regular minions to allies. Leon can only have one clone at a time. Debuffs, DOT and damage numbers will still visibly come out of you when invisible, and you still have collision and visibly collect solar coins. You can get character upgrades in this row, greatly increasing movement speed or HP regen while invis.

ITEMS TIER LIST


Movement penalties:
  • Blade: Slight slowdown while attacking and walking forward. ~25% more slowdown while attacking and walking backwards.
  • Tongue: Total horizontal movement stop until tongue fully retracts.
  • Invis: No penalty when cloaking or uncloaking.
  • All abilities can be used while jumping. Same penalties apply.

MATCHUPS
  • Very good against:
    Froggy G, Raelynn, Yuri, Genji
  • Good against:
    Ix, Nibbs
  • Bad against: Scoop, Gnaw, Ayla, Clunk, Voltar, Coco, Skolldir, Derpl, Swiggins, Sentry, Jimmy/Amy

  • Maps: best: Aiguillon. Worst: AI Station

Builds[orikaru.net]

1) Starter build, not all items unlocked:


2) Highest burst dmg:


3) Best sustain in fight:


4) Jambo's build. Easy to play, tongue into team focused build that I like to use especially if I have a sentry or skree on my team for a deadly combo:


5) TheAwesomenauter's Leon General build. Depending on who you face and their upgrades, when you buy silence and if you get slow or lifesteal matters a lot. For ex: tanky opponents with stun abilities you should prioritize silence and then lifesteal so you can stay and brawl longer.
If you have lighter opponents or ones with speed boosts slow may be a better idea. Your role is pulling enemies into your team/not letting them escape your team abilities.


6) TheAwesomenauter's build that is if you're getting beat early and have to use piggy then snipe some kills.

Scoop

STATS
HP: 1600
Role: Tank
Mobility: Balanced/ Slow
Jump: Single Standard Jump
Strongest During: Late Game
Difficulty: Easy

DESCRIPTION
Easy tank to play and master. His kit provides him with the sustain necessary to tank some hits/nukes and keep fighting for an extra amount of time or make his escape safely. It's not fair to say that as a "tank" he should be on the front lines, eating free damage (that might also pierce thru him or with AOE, damage his teammates behind him as well). His positioning should be smart (take the front lines but only as much as you have alternate routes of escape and movement, especially vertically aka don't get cornered) and only dive into battle with his team, using hammer to snare the target enemy and kill him together. Other than a high-velocity but medium-height default jump, he's quite slow to escape and once you get some CCs, it's easy to get ganked on, if you're out of place. He is a Tank, then, thru his high dps procs and good sustain. Hammer is a very good tool to deny dashes, dives, pounces, or other approaches.

Tips:
  • His speed and jump are pretty weak by default, so take care how you position yourself. Using your aa slows you down even further. For chasing, make sure to grab Yellow Snow Cone.
  • He's classic tank who can self-heal. But his real forte is sword damage. It gets very high very fast. Stay with your team, use hammer to snare not damage. After snaring, jump the enemy. use binding after taking more than 1/3hp bar of damage.
  • Banner of the triple scoop is worse on this patch - more expensive, less dmg, less synergy. Still a decent dps/burst upgrade, but other dps upgrades should be prioritized first.
  • With Twister Lance, you can shoot your Hammer straight down into the ground or down a shaft and it will bounce for a good while. You can use this to bait enemies into it, or fight around it while it bounces up and down and get more hits.

COMBO: Team healer - with Milk of Righteousness, Penguin Squire (yes! it works with Cup) and Holy Cup. Now this combo would turn you into a team healer/ team protector, but I find it to be very situational and outclassed by just focusing on improving his own dps and sustain directly.

COMBO: Highest burst damage possible and a very high dps follow-up: Penguin Throne, Halberd of Justice, Royal Sword in the Cream, Chain Mail tunic, Idol of the Ice Queen, Banner of the Triple Scoop, Brutally Whipped Cream. How to use: go near an enemy, hammer them, start binding and slice them until dead.

Notable items:
  • Best items: Snow Shovel, Halberd of justice. Yellow snow cone (is generally useful - helps you escape, helps you chase, helps you initiate faster - but especially for matches vs. 3 fast nauts)
  • Situational items: Fruity Sprinkles combos well with other CCs from your teammates, especially time slows. Spoonman can be a great dps booster but only in specific builds and when playing with a coordinated team.
  • Worst items: the 3 healing upgrades on binding. You could get one (milk if u need burst healing against nukers, penguin squire if you need more sustain) if you feel like you need it late game. Brutally whipped cream is not useless but the weakest on its row.

ABILITIES
Sword Skrike
Attack speed: 2.4/s
Slash Damage: 100
Cleave Damage: 60
Cleave Lifesteal: 20%
Range: Melee
  • Scoop has a two hit combo. Slashing strikes (horizontal Slash) deal increased damage, but can only hit one target at a time, while cleaving strikes (vertical Cleave) deal less damage to all targets in front of him (pierces) and provides Scoop with lifestealing. This can be upgraded to increase his total damage output when near team mates and give him huge boosts in power when low on health. Great DPS and sustain.
  • AA canceling: Scoop alternates between completed Cleave and Slash sword strikes. By teleporting before the attack finishes, the animation is canceled, and the strike is reset without alternating. With Scoop, there is no first or second strike, it is not a combo. He simply constantly alternates between them when he completes one or the other. By animation canceling, you can greatly increase your DPS against turrets by using Slashes, or greatly increase your DPS against groups by using Cleaves, also increasing your lifesteal.
Frozen Hammer
Min Damage: 180
Max Damage: 230
Mini Snare Duration: 0.4s
Max Snare Duration: 0.8s
CD: 7.5s
  • A hammer he can throw that will deal damage and snare any enemies hit. The hammer flies in an arch, bounces off of terrain and enemy structures and pierces through units and glass platforms. The damage and snare that this attack will deal increases the farther the hammer travels. This can be upgraded to increase Scoop's movement speed and heal him when the hammer hits an enemy. Good for initiations or to close the gap between your team and the enemy.
Bindings of Justice
Damage: 200
Self Heal: 300
Charge Time: 1s
CD: 13.5s
  • Scoop has bindings that heal him after charging up and also deal damage to nearby enemies. He can still do every normal action during this. The damage explosion goes thru walls. It can be upgraded to heal allies and increase Scoop's sword damage, heal more or damage more.

ITEMS TIER LIST


Movement penalties:
  • Sword: ~25% slowdown while attacking. ~50% slowdown while attacking and walking backwards.
  • Hammer: Slight slowdown for a moment when he throws it.
  • Bindings: No penalty.
  • All abilities can be used while jumping. Same penalties apply.

MATCHUPS
  • Good against:
    Froggy, Leon, Gnaw, Swiggins, Rocco, Ksenia
  • Bad against:
    Skolldir, Genji, Sentry, Jimmy
  • Maps: all good.

Builds[orikaru.net]

1) My personal straightforward starter build - scoop's starter builds are significantly weaker bc his strongest upgrades are locked. But you can still amass quite a lot of damage on his AA. Get milk instead of Idol at any point if you feel like you're getting out-bursted.


2) Cormy's Scoop starter build: Despite Triple Banner being more expensive in this update, Idol still costs more for similar damage. Spoonman also scales your damage up better. You shouldn't fight alone so Spoonman should always be active with your burst. Then you get Idol. Before getting AA upgrades, you should build up your HP, and so you can safely AA longer. With that HP you can take better advantage of lifesteal. Then you can work into Royal Sword to max out your Penguin Throne burst. Cooldown reduction almost doubles your hammer's effectiveness by enabling you to use it twice per fight a lot of times, so you can use hammer as an opener and finisher.
Augmenting Twister Lance with snare upgrades makes for easy initiations for both you and your team by snaring enemies for a significant amount of time.


2) My personal, all-purpose build.


3) Jambo's Team fight build, always used in competitive but generally good in soloq and very easy to play due to easy to land bindings damage early:
Gnaw

STATS
HP: 1350
Role: Harasser, Area Control, DPS
Mobility: Balanced
Jump: Single Standard Jump
Strongest During: Early Game
Difficulty: Intermediate

DESCRIPTION
Gnaw's role is to harass the enemy and deny areas around the map. He has incredibly high mobility and good damage output, making him very annoying if played right. He has big amounts of damage over time. His acid spit and weedling army makes him a perfect choice to gain an advantage over a certain part of the map.

Tips: There are many spots on several maps that allow for Aggressive Acid to drip a long way down, covering a large area. Placing weedlings nearby creep spawning areas allows Gnaw to have a steady supply of health, but also denies the creeps to every other 'naut on the match (even his own teammates), so it's best to do this in the enemy creep area if possible.

COMBO: Big spit - Agressive acid, Split spit, feather ball makes your spit cover a huge area, especially if you use it on top lanes, on glass platforms.

COMBO: Highest possible burst dmg (over a few seconds): Overcharged metabolism, Spike slime, Wild Growth, Bag of Seeds, Diamond Teeth, Chattering teeth.

Notable items:
  • Best items: Overcharged Metabolism, Solar Krab Burger
  • Situational items: Filled Teeth (for self-sustain), Rabbit Teeth (for escaping or for fast enemy nauts)

ABILITIES
Bite
Damage: 50
Attack speed: 2.2/s
Damage Over Time: 100
Damage Duration: 5s
Range: Melee
  • Gnaw's bite will inflict enemies with poison. It will also give him parts that he can use to spawn weedlings. This bite can be upgraded to increase Gnaw's movement speed, weaken enemies, and leech health from enemies. Good DPS but short range.
Acid Spit
Damage on direct hit: 50
Damage Over Time: 300
Damage Duration: 9s
Cooldown: 8s
Time on ground: 4s
Weedling Heal: 50%/s
  • Spit 2 blobs of acid that deal DOT that fly in an arc and stay on the ground for a few seconds. They can be upgraded to split when they hit an enemy, slow enemies, drip through platforms, and inflict damage amplification. Low CD and good range. Great for constantly harassing enemies, denying areas and helping secure kills with the slow and amplify CCs.
Grow Weedling
Weedling Parts cost: 4
Max parts holding capacity: 8
Part passive regen: 1/10s
Drop Damage: 200
Turret Shot Damage: 75
Attack speed: 1.2/s
Weedling max HP: 450
Weedling Starting Health: 25%
Weedling Lifetime: 30s
  • Spawn little turrets called Weedlings. They will fall on the ground and shoot homing bullets at any nearby enemies. If a Weedling is hit with acid spit, it becomes fertilized. A fertilized weedling will deal more damage and have increased HP. Can carry 8 parts innately (2 weedlings). Parts also regenerate over time very slowly. (1 every 10s)
  • One upgrade allows gnaw to carry three weedlings at a time, and others make them stronger when fertilized.
  • They also deal damage when spawning, on a short delay, so with practice this ability can be used aggressively to increase your melee dps and burst enemies down.
  • Only 4 weedlings can exist at any given time; planting more will cause the oldest one to die immediately. All existing weedlings are destroyed at the same time shortly after Gnaw is killed.


ITEMS TIER LIST


Movement penalties:

  • Bite: No penalty while biting and walking forward. ~100% slowdown while biting and walking backwards. Biting in the opposite direction of your walking direction slows you down almost to a halt. Effect is less severe if doing so while jumping.
  • Spit: No penalty while spitting.
  • Place Weedling: Completely stops horizontal movement for ~1s while placing the weedling.
  • All abilities can be used while jumping. Same penalties apply except you can jump and walk backwards faster while biting than on the ground.

MATCHUPS
  • Good against:
    Leon, Raelynn, Skolldir, Yuri, Swiggins, Rocco, Sentry, Nibbs
  • Bad against:
    Froggy, Lonestar, Scoop, Ayla, Coco, Genji, Penny, Jimmy/Amy
  • Maps: best is Ribbit IV (creep control, easy Solar Boss kill, high mobility around small passages, good gank options).

Builds[orikaru.net]

1) Starter build, not all items unlocked - fight around your fertilized weedlings and apply dmg amplify dmg and slow with spit to ramp up some good dps - stay healed with burger, lifesteal bite and by placing turrets in creep areas:


2) Jambo's Weedling Build (Always play around your weedlings and keep them fertilised, never brawl without your weedlings near)

Raelynn

STATS
HP: 1300
Role: Harasser, Pusher, Area Control, DPS
Mobility: Tactical / Fast (with Boots)
Jump: Single Standard Jump
Difficulty: Easy

DESCRIPTION
Raelynn excels at poking the enemy and defending from a safe distance. A lot of her matchups are depending on skill and build, for example using a Snipe focused build against low HP, low sustain 'nauts and a more Rift/AA focused build against slow, high HP 'nauts. Good lane clear.

Tips: You can place your rift quickly inside the hitbox of a nearby enemy. Stay near your rift and fight around it. Don't snipe while you're in a dangerous position, but you should snipe to kill a low hp enemy before he leaves range.

COMBO: Highest possible burst damage: HC-bomb, Skull Bracelet, Lucky Cat Air Freshener, Receding Ponytail, Pump Rifle, Flashy Glasses + Gryc Lubricator. How to use: save up a charged HCbomb shot, shoot an enemy with it, place rift to get another charged shot, shoot it too, then snipe. On paper, that's 650 dmg from the 2 powershots and 730 from the snipe. That's almost 1.4k burst damage at lvl 1, over the course of ~2 seconds.

COMBO: Dangerous rift: Higgs Grenade, Retro Spaceship, 1.21 gigawatt battery. Creates a huge, long and slowing rift that enemies really don't want to get caught inside. Use it often, and try to fight inside or around it.

COMBO: The poker: Pump rifle, Cassettedesk Magazine, Gryc Lubricator, Denny's Boots. How to use: snipe enemies from off-screen as often as you can! Be annoying! :D

Notable items:
  • Best items: HC-Bomb, pump rifle, receding ponytail. Unknown alien hand is great for crowd damage. Monkey hand can win you the game in the first 5 minutes if you're good with her.
  • Situational items: T-800 Dome (if you have low team push capacity), Iron Rifle (if you're facing anyone who can interrupt your snipe often)
  • Worst items: Joe doll.

ABILITIES
Protoblaster
Damage: 75
Attack speed: 2.5/s
Range: Average
  • Get pierce on this if you're fighting grouped multiple targets (so, often). Great DPS and range for an AA.

Time Rift
Damage: 96/s
Slowing Power: 65%
Duration: 4s
CD: 9s
  • A deployable time slow. Hold the button down to fire the rift out farther. Upgrading it can double the dmg of your next Protoblaster shot or spawn a droid for extra pushing power. Upgrades like extra height, duration and slowing power make the rift stronger depending on your situation: map (open maps may benefit from tall rift), matchup (slow, big enemies get crushed by slow rift).
  • A very effective tool against sieged Derpls as it affects the unsiege animation, making it way longer. Some players may notice this and will start sieging on glass platforms so they can drop down and escape, however.
Snipe
Damage: 460
Knockback: yes
CD: 10s
Arming Time: 0.65s
Max Aiming Time: 1.8s
  • Snipe is a long-range blast that damages everything in a line. Fire by clicking once armed (beep noise). Gets interrupted by stuns or displacements.
  • Upgrading it can blind enemies before it fires, get a debuff shield, extra range and damage. Flashy glasses pair well with extra range.
  • The laser sight for Raelynn's Snipe becomes yellow when you are targetting an enemy naut. This is specially useful when using the Gryc Lubricator upgrade for offscreen kills.
  • Aiming Snipe away from your enemy or at the ground can prevent them from seeing the laser sight right away. Quickly direct it to your enemies and fire, surprising them. Alternatively, you can begin charging Snipe while Raelynn is mid-air, like after using a jump pad or right as you drop from a height. By the time you hit the ground, Snipe will likely be ready to fire, giving less reaction time to your enemies.

ITEMS TIER LIST


Movement penalties:
  • Blaster: ~25% slowdown while firing and walking forward. Extra ~25% slowdown while firing and walking backwards.
  • Rift: no slowdown while throwing it.
  • Snipe: Complete horizontal stop while firing it.
  • All abilities can be used mid-air. Same penalties apply.

MATCHUPS
  • Good against:
    Lonestar, Ayla, Scoop, Clunk, Voltar, Yuri, Derpl, Swiggins, Skolldir
  • Bad against
    Froggy, Penny, Ted McPain, Jimmy/Amy
  • Maps: all good

Builds[orikaru.net]

1) Starter build, not all items unlocked:


2) My personal general build, dps-focused:


3) Highest burst build:


4) Jambo's HC-Bomb focused build, generally considered the best rae build in soloq, can replace Skull Bracelet with Pierce early if needed:
Ayla

STATS
HP: 1350
Role: Fighter, DPS
Mobility: Balanced
Jump: Single Standard Jump, infinity fly during rage
Strongest During: Late Game
Difficulty: Hard

DESCRIPTION
A risky brawler/fighter. She might be easy to play and hard to counter for newer players. High risk, high reward damage dealer. The more targets she hits at once, the more damage she will do. She also deals more damage when she is low on HP. Good for damaging the entire enemy team.

Tips: Use a chain attack right before and after entering rage for extra dps. Use rage to fly up and escape if needed. Use eye after you fight to get more dmg out of it, or use it both before and after if you got the CD item.

Notable items:
  • Best items: Fresh scrubs, Toothbrush shank, angry drawings. Solar burger and rubberband ball are very good for healing. Fiery jawbreakers are a bit broken/inconsistent in this patch.
  • Worst items: sonic listening device.

ABILITIES
Chain Whack
Damage: 80
Attack speed: 2.5/s
Lifesteal: 20%
Range: Melee
  • Melee with lifesteal. This can be upgraded to increase the amount of health creeps will drop, weaken enemies.
Evil Eye
Damage: 300
Cooldown: 7.5s
Slow: 7.5%
Slow Duration: 2.5s
Health stages: every 25% hp missing
Extra Damage Per Stage: 84
Extra Slow Per Stage: 7.5%
  • A short range projectile that deals high damage and inflicts slow. This shot will increase in damage and slowing power dramatically depending on how low Ayla is on HP. Has a lot of dmg upgs and one range upg. Can become a nuke when upgraded. The hotbar icon glows brighter for each hp stage.

Rage
Damage: 252/s
Attack speed: 4/s
Self Damage: 132/s
Extra Enemy Damage Per Target: 15% up to x5
Shield: 15%
Extra Shield Per Target: 9% up to x4
  • A ball of energy around Ayla that deals damage to anything inside of it. The AOE goes thru terrain. It allows Ayla to freely fly, but will deal damage to her as well. Cannot jump or use other abilities during it, only fly. Using Evil Eye ends the rage. It deals more damage when more targets are inside its radius. While Rage is active, jump toggles Flight on and off.
  • It can be upgraded to fly faster, have a larger AOE, pull enemies in after landing an Evil Eye, and leave a trail of blood that will heal you.

ITEMS TIER LIST


Movement penalties:
  • Chain: No penalty while attacking and moving forward. ~25% penalty while attacking and walking backwards.
  • Evil Eye: No penalty while firing it.
  • Rage: No penalty while starting/ending it or while in rage mode.
  • All abilities can be used mid-air. Same penalties apply.

MATCHUPS
  • Good against:
    Leon, Gnaw, Clunk, Skolldir, Yuri, Vinnie, Swiggins, Sentry, Nibbs, Yoolip, Chucho
  • Bad against:
    Lonestar, Voltar, Coco, Rocco, Penny, Jimmy/Amy
  • Maps: Ribbit is best (lots of small passages where other characters slow down when platforming), AI Station is good (AoE clear, good against flyers)

Builds[orikaru.net]

1) Starter build, no items unlocked:


2) Tank build - Maximum HP, lifesteal, survivability build. Extra movement and range on eye for safer escapes - high dps and sustain on chain but lower eye and rage damage.


3) Jambo's eye burst build, focusing on eye poke/burst (very good against squishy nauts)


4) Jambo's rage aoe build. focusing on Rage (very good against slow tanks and dps nauts)
Clunk
STATS
HP: 1900
Role: Tank, Nuker
Mobility: Tactical / Slowest naut by default
Jump: Slow Rocket boost, can tap-fly for longer
Strongest During: Late Game
Difficulty: Intermediate

DESCRIPTION
Clunk is a high risk-high reward naut. His role is to punish opponents overextending with Snare bite and high damage explosion. He can nullify some of his counters by having a consistent setup such as Genji Cocoon, Ix Swap or Skolldir Throw.

Tips:
  • He's a bit underpowered on this patch, his best upgrades are way more expensive. Can get destroyed by an enemy team with a lot of ranged poke and CCs, so much so that he will never manage to get near them with full hp or he'll get pushed around helplessly by KB, slow, snare, stuns. So he is very match-up dependent. If you're facing such an unlucky match-up, build into ranged homing rockets and defensive upgrades, and try to not feed, bc you'll be an easy target.
  • He falls faster than he walks so try dropping on enemies while exploding. Clunk has a hard time attacking up or down with rockets and bite, so avoid fighting nauts who attack you vertically one-on-one, especially attacking you from up above.

COMBO: Highest single-target dmg Missile burst: Missile Barrage, Juggernaut Fat Pete, Salvo value pack. Bonus damage is you save the 4 rocket to execute this attack after a snare bite or a landed explosion.

COMBO: Max hp clunk: Power Pills turbo, Med-i-Can, Barrier Magazine, Titanium hard hat, Blueprints container, Medical pump, Multi Hose, Suckanator power 9000 cleaner. You won't be dealing a lot of damage but by god you'll be able to tank a lot of damage.

Notable items:
  • Best items: Screamer engine, Salvo value pack, Space air max.
  • Situational items: Quick'n'Cleaner is strictly worse than Suckanator power 9000 cleaner, but it has a purpose if you want to buy both. Blueprints container can help you win 1v1 fights vs other nukers like clunks or derpls.
  • Worst Items: power converter.

ABILITIES
Missiles
Damage: 120. 140. 180
Attack speed: 1/s
Range: long
  • A missile barrage that gets stronger with each shot. After shooting three missiles, the strength will reset. You can upgrade them with homing, aoe explosion, add a 4th missile to the combo, get a double attack after landing a bite/explosion on an enemy naut.
  • With Fragmenting Shells, Clunk is able to damage the Solar Drill from above.
  • You can store a powerful missile (missile #3 or the giant one from The Juggernaut "Fat Pete"), bite or explode an enemy and then shoot them for more damage. This goes double if you have Salvo Value Pack.

Vacuum Bite
Damage: 290
Lifesteal: 100%
Cooldown: 5s
  • A forward-facing slightly delayed bite that damages and steals life from one enemy, prioritizes nauts. Its low cooldown makes it a great way to keep your health up and stay on the battlefield. Upgrading it can cause it to hit multiple targets, snare enemies, and increase your maximum health.
Explode
Damage: 525
Self Damage: 315
Cooldown: 13.5s
Charge Time: 1.5s
  • Self-destruct dealing massive damage in a circle around him. Make sure you have plenty of health when using this.
  • If you're already being killed by someone, you can take them down with you. Explosion goes off instantly if Clunk dies.
  • Explosion has 2 main upgrade paths: explosion that slows enemies and shields you for slow enemies with high hp, and a fast explosion for quick enemy nauts.

ITEMS TIER LIST


Movement penalties:
  • Missile: ~25% slowdown while firing and walking forward. Extra ~25% slowdown while firing and walking backwards. Backwards penalty is reduced if jumping/floating while firing.
  • Bite: Clunk stops horizontal movement completely for a moment (~0.5s) while he bites. Less slowdown if biting while jumping/floating.
  • Explosion: No penalty at any point.
  • All abilities can be used mid-air.

MATCHUPS
  • Good against:
    Froggy, Leon, Swiggins, Gnaw, Scoop
  • Very bad against:
    Lonestar, Raelynn, Skolldir, Genji, Penny, Ix, Nibbs, Jimmy/Amy, Rocco, Ksenia

Builds[orikaru.net]
1) Starter build, not all items unlocked:

2) General build:

3) Build to do better against ranged enemies with a lot of CCs:
Voltar

STATS
HP: 1250
Role: Support, weak Pusher, Nuker Potential
Mobility: Tactical, slow inertia gain
Jump: Single jump, can hover after
Strongest During: Mid Game
Difficulty: Hard

DESCRIPTION
Voltar is a very hard to master 'naut. He relies on spacing a lot as he is very fragile due to his movement. He can be very effective when used with the right comp and with the right build. I recommend only using Voltar when having 2 tanks that can protect you, but he can excel in other comps too. He's best placed at the back of the team, shooting with range and healbotting in safety, to reset his team. He can also rush low hp or snared enemies with suicide drones.

    Tips:
  • Voltar's best build contains explosive sui drones and all aa dmg upgrades. Use drone launch for burst damage when needed, but be mindful that doing so will lower your DPS for a while.
  • Knockback healbot is also very good for saving team, yourself, cancelling enemy abilities (it stuns) or to push enemies into your turret. Also healbot melts if placed too forward, unless costly upgraded. Upgrade healbot endgame mostly, then you can place it in the middle of the action and still have it survive and work. On starstorm and ribbit, early bombshell upg on healbot is good for camping the middle section.
  • If caught out of place, he could be weak. Volt is good for resetting (healing when retreating from battle, when safe). You can heal during fights too obviously but the he doesn't have enough healing/s for that. Volt has bad movement (lot of inertia) so he should stay back, attack/heal from range.

COMBO: Burst Nuke suicide drones: Weaponised hull, drone army, Warpgate overdrive. His most powerful burst of dmg on this patch, can dish out 1k damage regularly and from range.

COMBO: Combat healbot: Energy drink, turret addon, overheal potion. This healbot will most likely survive combat encounters and enemies will be wary of hanging out around it, due to its turret addon (visibly red aura) and high hp. Finally, you can drop this heal bot anywhere you want, even in the middle of combat, to make use of its bonuses.

Notable items:
  • Best items: Weaponised hull, Drone army, Warpgate overdrive, cortex tank, psychokinetic repulsion, twisted nightmares.
  • Worst items (on this patch): Weapon Clip-On, Happy thoughts. Dark matter shots (it's best not to push enemies randomly/away from your team, and voltar isn't usually on the other side of the enemy to push them into your turret, like a jimmy charge)

ABILITIES
Techno Synaptic Wave
Damage: 40
Attack speed: 2.9/s
Heal: 20 (max 40)
Range: Long
  • Will heal allies it collides with or hurt enemies it comes into contact with. The amount of healing done depends on how far away you are from your target. You will heal more the farther away you are from an ally. Shots bounce off terrain. Chili drops gives you a burst of dmg and heal. Euphoric gives HOT. With range and/or piercing upgrades, he can bounce shots off walls in an enclosed space and create a temporary burst area of healing/dmg.
Suicide Drones
Shot Damage: 20
Auto-attack speed of each drone: 1.5/s
Explosion Damage: 150
Summon Cooldown: 4s
Max Drone Amount: 3
Launching Cooldown: 0.6s
  • Constantly summon drones that cover him and auto-attack enemies around him. They fire homing instantaneous lasers that deal damage and can be suicide shot at enemies and AOE explode on contact. They can also be upgraded to Knock enemies back and add a fourth drone. Warpgate makes them return faster after launching them.
Healbot
Heal: 330
Bot HP: 200
Cooldown: 13s
Charge Time: 2s
  • A robot that you drop on the ground in front of where you're facing that will burst-heal any ally within a round radius after 2 seconds. It heals for 330 health points but can be destroyed if it takes 200 damage. It can be upgraded to deal damage as well as heal more, drop mines, and push enemies back on deployment. Careful not to save enemies by pushing them away and denying a kill your team is setting up.
  • Voltar should prioritize healing himself with Healbot if he's low and healing sources are far away. No point in saving healbot and dying without having used it.

ITEMS TIER LIST


Movement penalties:
  • Techno Wave: ~25% penalty while firing and walking forward or backwards.
  • Suicide Drone Launch: No penalty while launching drones.
  • Healbot: No penalty while placing bot.
  • All abilities can be used mid-air. Same penalties apply.

MATCHUPS
  • Very good against:
    Gnaw, Ayla
  • Good against:
    Clunk, Swiggins, Nibbs, Chucho
  • Bad against:
    Froggy, Lonestar, Raelynn, Skolldir, Ted McPain, Sentry, Skree, Jimmy/Amy
  • Maps: Good on Ribbit and Starstorm. Bad on Sorona (too easy to gank and initiate on, Voltar is forced back even with supporting teammates)
Builds[orikaru.net]
1) Starter build, not all items unlocked:

2) General build with burst dmg and range:
Coco Nebulon

STATS
HP: 1300
Role: Fighter, Harasser, Area Control
Mobility: Swift / Very Swift (with upgs)
Jump: Single Standard Jump
Strongest During: Mid Game
Difficulty: Easy

DESCRIPTION
Coco is a harasser/initiator who has a lot of debuffs at her disposal. Her combination of knockback and slowing power makes her wonderful in team fights. Coco's role is to make as much use of Cooldown Ball and movement on Blaze as possible. It's good for poking and clearing from a safe distance. You can initiate with a quick Blaze, then use Ball in their face and get out. She doesn't have many single character counters, but is vulnerable to poke and combos such as Leon Tongue into a damaging 'naut.

Tips:
  • If you manage to launch a Ball Lightning behind your enemy, the explosion will launch him towards you. Use this tactic to throw your enemy at turrets or on your team. Thunder Striker helps with this. Try to surprise your opponents by Ball Lightning at unexpected angles or try to predict their movement and aim it accordingly. It'll probably help you compensate for the projectile's slow speed.
  • Blaze can be used to create a "barrier" to discourage enemy pursuers that may want to engage you or your allies. If you have extra speed on your Blaze Trail, make sure to save it for escapes before getting into sticky situations.

COMBO: The fastest Coco: Space Air Max, Wave Raiser, Silver Coating.

Notable items:
  • Best items: Thunder striker, Silver coating, Disruptor.

ABILITIES
Shock
Damage: 30
Attack speed: 7.1/s
Range: Short
  • Coco has a wave that deals damage near her at a high attack rate. This can be upgraded to slow enemies, get lifesteal and shoot little particles dealing damage at a distance. Good dps but bad range. It is not possible to move backwards while using this ability until the cursor is aimed behind Coco.
Ball Lightning
Damage: 400
Knock back: yes
Cooldown: 7s
  • A ball of lightning that can be shot out and detonated with a second press of the button. This will cause the ball to explode and send enemies flying away from the center of the ball. The ball goes thru all terrain and has a max range. The Ball's KB can be used to set up for allies, or push them out of the safety of their turret. It can also be upgraded to blind enemies and leave a blaze trail behind the ball. One of the most versatile abilities.
Blaze Trail
Damage Over Time: 165
Damage Duration: 2s
Slowing Power: 10%
Slow Duration: 1s
Cooldown: 8s
Particle Linger Time: 1.6s
  • Leave a trail of energy behind her that will deal damage over time and slow anything caught in it. Good for making escapes and stopping enemies from getting away. Upgrading it can increase your movement speed.

ITEMS TIER LIST


Movement penalties:
  • Shock: No penalty when firing and walking forward. Cannot move backwards while firing.
  • Ball: No penalty when firing or detonating it.
  • Blaze Trail: No penalty while walking and leaving trail.
  • All abilities can be used mid-air. Same penalties apply.

MATCHUPS
  • Good against:
    Froggy, Clunk, Voltar, Ayla, Yuri, Leon, Skolldir
  • Bad against:
    Genji, Raelynn, Derpl, Ksenia
  • Maps: Sorona is best.
Builds[orikaru.net]

1) Starter build, no items unlocked:


2) General build: (by game is broken)


3) Jambo's Standard Coco build:
Skolldir

STATS
HP: 1600
Role: Initiator, Fighter
Mobility: Balanced
Jump: Double jump
Strongest During: Mid Game
Difficulty: Intermediate

DESCRIPTION
Skølldir is a fighter that has lots of stuns to his advantage. His primary use is throwing enemies into a vulnerable position. Use Skølldir to set up great kills for your teammates! He is a very hard to master 'naut. He has one of the highest skill ceilings in the game, making him incredibly powerful if you put the time into him. He is highly complex when it comes to optimal movement, using game mechanics and making the best of his kit.

Tips: Landing the 3rd punch is a hard-to-master but very powerful skill. Most punch upgrades are for this punch only. Homeless Gnome can also be used to lob a grenade forward from afar, without throwing anyone.

COMBO: Highest dmg burst after a throw: Oily Spray on Bronze, Homeless Gnome, Power Briefs, Iridium Bricks Game, Chunk of Salted Meat, Pale Mead. Throw a naut anywhere, then quake him and start punching til he's dead. Add a snare, stun or League Seven Boots to help you keep up with the enemy and keep PUNCHING THEM :D

Notable items:
  • Best items: League seven boots, electric hammer, rubber ducky choker, perfumed white flowers, oily spray on bronze.
  • Situational items: axethrowing trophy (matchup and map dependant)

ABILITIES
Fist Bash
Damage: 100 | 126 | 225
Range: Melee
Combo Timeout: 0s | 0.2s | 0.5s
  • A three hit punch that deals massive damage towards the end of the combo. The third hit will have an area of effect. Does not pierce. This third hit can be upgraded to lifesteal, stun enemies. All punches can be upgraded to deflect enemy projectiles. (deflect means delete, it doesn't send them back like froggy's RBAY)
  • The delay between each punch can be extended by periodically clicking the attack button instead of holding it down, which can be useful for landing punches at the right time.
Mighty Throw
Damage: 100
Backwards Throw with KB
Stun Duration: 0.8s
Cooldown: 8s
  • Skølldir grabs in front of him and throws all enemies he hits backwards in an arc behind him, damaging and briefly Stunning them for the duration of the throw. This is perfect for putting an enemy into a tight spot and can be upgraded to throw an exploding gnome, slow enemies, and increase his attack speed.
Earthquake
Damage Over Time: 350
Damage Duration: 5s
Particles Duration: 1s
Cooldown: 8s
  • Skølldir stomps the ground, sending forth a wave of rocks and lava in a straight line. Any enemy that touches these will be afflicted by a Damage Over Time effect. This ability can be used while in the air (causing him to quickly drop down), and can go through ledges once. This can be upgraded to be taller, longer, send a shockwave backward, and even snare enemies.

ITEMS TIER LIST


Movement penalties:
  • Fists: No penalty while punching and walking forward. 100% slowdown while punching and walking backwards. If Skoll punches in the opposite direction of his walking one, he will completely stop horizontal movement for a moment. This penalty is almost completely negated if jumping and walking backwards while punching.
  • Throw: No penalty when throwing. If walking backwards, Skoll will stop for a moment while he throws. This penalty is almost completely negated if jumping and walking backwards while throwing.
  • Earthquake: Skoll completely stops horizontal movement for a moment (~0.5s) while he uses this. If used mid-air, it will also instantly send him to the ground.
  • All abilities can be used mid-air or between jumps.

MATCHUPS
  • Very good against:
    Leon, Clunk, Voltar, Swiggins, Ted (except on Ribbit IV), Jimmy/Amy
  • Good against:
    Froggy, Scoop, Rocco, Yoolip, Chucho
  • Bad against:
    Lonestar, Gnaw, Raelynn, Coco, Vinnie, Genji, Ksenia, Penny, Sentry, Nibbs
Maps:
Best
  • Sorona (lots of open areas for Snare Earthquake initiations, only 1 hidden area, lots of movement options with bouncers, good chase, huge map control with dropdown Earthquakes)
  • AI Station (bottom lane very easy to gank decent clear, good chase due to long map with Boots)
Bad
  • Ribbit IV (lots of platforms to dodge throws and Earthquake)

Builds[orikaru.net]

1) Starter, no items unlocked:


2) General master build: (by game is broken)


3) LOVE's non-classic build - use range on earthquake and punch against ranged characters to reach them. Bkm is a must against timerift and blackhole:


4) Jambo's Standard soloq Skolldir build:
Yuri

STATS
HP: 1350
Role: Support, Area Control
Mobility: Aerial, slow inertia gain
Movement: Infinite Flying, toggle jetpack off to fall faster.
Strongest During: Mid Game
Difficulty: Hard

DESCRIPTION
Yuri is a very fragile support character. Setting up mines in chokepoints, denying areas is key to winning with Yuri. Bubble should be used when a teammate is initiating to slow down enemies in a teamfight and to get away safely when you're in trouble. Good lane clear/control.

Tips:
  • With flash forward, he can quickly go next to an enemy and place a mine right into him, if needed. Fly up to escape many risky situations. Depending on your team, you can set up multiple traps in one area and wait for a leon or ix to pull an enemy into them for big damage.
  • The jetpack can be disabled temporarily by Knockback effects, Stuns, and Genji's Cocoon.
  • Disabling the jetpack while in the air will allow Yuri to reach the ground more quickly rather than flying downwards. While walking on the ground, Yuri has better acceleration than when traveling in the air via the jetpack.

COMBO: Max laser dps: Hubble's Lens, Flash Forward, Resonance Amplifier, Instant Charge Battery. Pairs well with Pod Pack Deluxe with Banana, as it gives you lifesteal % based on your dps.

COMBO: Most amount of mines possible: Toaster Timer, Mine constructor, Carpet Bombs. Kind of a meme combo.

COMBO: Max enemy slowdown: Time primer, Giant Monocle, Baby Yeti. Good vs fast enemy nauts.

Notable items:
  • Best items: titanium spikes, flash forward, time primer, giant monocle, hubbles lens.
  • Situational items: spacetime continuity device (if they have CCs or KBs),
  • Worst items: flyswatter, carpet bombs.

ABILITIES
Laser
Damage: 150/s
Attack speed: 5/s
Maximum Damage: 200/s
Range: long
Charge time: 0.5s
  • Yuri has a piercing laser that increases in power the longer you use it. This will also draw in any solar cubes that it touches. Upgrading can increase the range of the laser, dmg, and slow enemies down.
  • Yuri is immobile while firing. Getting hit by attacks that disable Yuri's Jet Pack will stop the laser, and it will have to be recharged.
  • If your mouse movements are fast enough and you can touch every enemy with the laser at least 5 times /s, you can spin the laser around you very quickly and hit every enemy in range around you, dealing maximum dps to each one.
Mine Deploying
Damage: 410
Cooldown: 4s
Mine Lifetime: 12s
  • Yuri can drop mines that explode AOE upon contact. They fall straight down, stopping on platforms. They explode when they expire, too. These are great for denying access to certain parts of a stage. They can be upgraded to scatter into three bombs, bounce (good on sorona, starstorm, ai station) and spawn health packs.
  • Good to hide them in hiding areas, or stack them on top of jump pads, but they still beep audibly.
Time Warp
Slowing Power: 30%
Ally Speed Up: 10%
Duration: 3.5s
Cooldown: 15s
  • Yuri has a bubble that will slow down time and increase allies movement speed, including himself. This gives your team the advantage area in a team fight. This can be upgraded to make your laser heal you, make yuri immune to debuffs or heal your teammates. Flash forward shortens the bubble a bit but its still powerful.

ITEMS TIER LIST


Movement penalties:
  • Laser: Yuri is completely immobile while firing laser, vertically and horizontally.
  • Mine: Yuri stops all horizontal movement for a moment (~0.5s) while laying a mine while walking on the ground, with his jetpack off. While laying mines mid-air with his jetpack on, there are no penalties for laying mines.
  • Bubble: No penalties at any point.
  • All abilities can be used while flying.

MATCHUPS
  • Good against:
    Clunk, Derpl, Swiggins, Sentry, Scoop, Yoolip
  • Bad against:
    Lonestar, Leon, Raelynn, Ayla, Coco, Vinnie, Genji, Ksenia, Ix, Ted, Penny
  • Maps: Best is Ribbit IV (lots of small choke points to place mines on and blocking the chimney)
Builds[orikaru.net]
1) Starter build, no items unlocked:

2) Tank, damage absorber build, if you have low hp teammates:

3) Poke/ support build to support your fighter teammates:

4) Mines build, set up an area in which you're safe and you want to kill enemies in, warp upgrades are situational:
Derpl

STATS
HP: 1800
Role: Tank, Nuker, Area Control
Mobility: Tactical / slow
Jump: Rocket boost, can tap jump for longer. Can drop down thru platforms in turret mode.
Strongest During: Mid Game
Difficulty: Hard

DESCRIPTION
Derpl is a tank who deals massive amounts of damage when holding still. He is a situational character, his strength comes from small areas he can block off to be safe and stop enemies from rotating, giving your team a lot of room to play with. This leads to him being underwhelming on Sorona and AI Stations, but very powerful on Ribbit, Starstorm and Aiguillon.

Tips:
  • Put traps ahead, in choke points, above jump pads, in hiding spaces and bait enemies in them. Stay near them to take advantage of future trapped enemies.
  • You can nuke while dropping for a surprise attack. Also drop thru jumppads to escape, booster pads wont launch you in turret mode.

Notable items:
  • Best items: Solid fist missiles, hydrocollision lava lamp, fat cat, empowered grid.
  • Situational items: lead casing (depends on the enemies, its good vs froggy for example).
  • Worst items: Pus.-Cat album.

ABILITIES
Cat Shot / Gatling Gun
Damage: 85
Attack speed: 1.7/s
Range: Average
  • Derpl fires a holo-cat, a projectile that is affected by gravity and can bounce off of surfaces (including glass platforms). If Siege Mode is toggled on, the Cat Shot is replaced by a Gatling Gun, which fires medium ranged bullets at high attack speed. They can be upgraded to split into several cats and hit several targets, longer range or add an explosive cat every few seconds.
Grid Trap/Nuke
Snare Time: 1.6s
Snare Cooldown: 6s
Snare lifetime: 11s
Nuke Damage: 500
Nuke Cooldown: 13.2s
  • While mobile, he can deploy traps that will snare enemies in place. When in siege mode, this ability turns into a nuke dealing massive damage. The snare can be upgraded to silence enemies, and the nuke can be upgraded to move faster and be bigger.
Siege Mode
Turret Damage: 45
Attack speed: 8/s
Switch Cooldown: 1s/4.5s
Debuff Immunity
  • Derpl can transform into a stationary turret. While in this mode, he can fire his nuke that flies in a straight line and shoot a Gatling gun.
  • Upgrading this offers a shield, adds heat seeking missiles and inflicts slow with the turret bullets.
  • Nuke detonates on enemy impact, on timeout or on second press. The nuke can rest on the ground for a bit. Derpl cannot manually detonate his nuke if he unsieges. If Derpl is trapped by Cocoon after the Nuke is launched, it cannot be manually detonated until the Cocoon ends.
  • When facing a Raelynn, avoid entering Siege on solid ground. She may easily trap you with her Timerift. Choose a glass platform instead, so you can drop down and escape her.

ITEMS TIER LIST


Movement penalties:
  • Cat shot: ~25% slowdown while firing and walking forward. Extra ~25% slowdown while firing and walking backwards. This penalty is almost completely reduced if you're jumping/hovering while firing backwards.
  • Snare: No penalty when laying snare.
  • Turret mode: Instantly stops your horizontal movement.
  • All abilities can be used mid-air.

MATCHUPS
  • Good against:
    Froggy, Leon, Clunk, Ksenia, Swiggins, Penny, Sentry
  • Bad against:
    Raelynn, Yuri, Genji, Rocco, Ix, Ted McPain, Skree, Nibbs, Jimmy/Amy
Maps:
Best
  • Ribbit IV (chimney in mid to drop down in turret mode, lots of small areas to block)
  • Starstorm Station (Snare Traps on Teleporter exit and bottom area)
Good
  • Aiguillon (lots of chokepoints to deny areas)
Bad
  • Sorona (open area, no chokepoints to put Snare Traps)
  • AI Station (same as Sorona + bad clear)

Builds[orikaru.net]
1) Starter build, no items unlocked:

2) General build:

3) Cat build, good when facing ranged and fast nauts that kill you very fast while stationary:

4) Competitive build: (by game is broken)
Vinnie & Spike

STATS
HP: 1250
Role: Assassin, Nuker, CC
Mobility: Aerial. Slow inertia gain.
Jump: Unlimited Float Jump, fast drop with no platform collision
Difficulty: Intermediate

DESCRIPTION
Vinnie & Spike is a very high damage character, his Spike Dive deals insane amount of damage while Cloud gives him a lot of ways to get out. Your performance will depend a lot on your gamesense, knowing when to dive in and when not to. While off the ground, Vinnie and Spike's Movement Speed is increased, so it's best to float around all the time. On this patch, he can stack a lot of dmg upgrades very fast for a big burst.

COMBO: Highest possible damage burst: Bag full of goldfish, dead seahorse head, chrome file, Yakoiza, Codfather, Al Carper.

Tips:
  • Spike Dive starts off pretty weak early game. Use it to farm Solar, poke enemies or as an escape tool. Starting with Loanshark could make you jump very far ahead in solar very fast. Solar Krab Burgers work with Loanshark, for a big heal after killing an enemy naut.
  • If you get Bag Full of Goldfish, keep above the solar amount intentionally to benefit from the huge dmg up.
  • Aiming downwards with Spike Dive while close to the ground is an effective way of landing both spike explosions from Dead Seahorse Head on the same target.

Notable items:
  • Best items: Solar burger, Red Bandana, yakoiza, bag full of goldfish, chrome file, dead seahorse head, withered president mask.
  • Situational: Sharky and remora if you need to stay far away from dangerous melee enemies. Clown mask (if enemies have CCs), Mammoth sock with holes (only good if team collaborates).
  • Worst items: Rocketeer is usually outclassed in its row. Rigged Casino Games (-40% spike dmg is too much)

ABILITIES
Bubble Gun
Damage: 35
Bullets: 3
Attack speed: 1.4/s
Range: Average
  • Shoot 3 consecutive bubbles. Innate piercing, good dps and range. Codfather is great late game (you glow when it's active).
Spike Dive
Damage: 400
Cooldown: 7s
  • Dash quickly into any direction and release a burst AOE dmg around you at the end. Huge burst dmg potential. It can be upgraded to heal you, have a larger AOE, shoot spikes at the start too, or be split into 2 weaker consecutive dives.
  • It is possible for the spikes fired to go through terrain and damage enemies Spike Dive allows you to dash through Jump Pads unaffected.
  • Vinnie can usually spike dive downwards through platforms while holding down, but due to a bug in 3.2.8, Dead Seahorse Head breaks this, making him no longer able to go through them if he buys it.
Smoke Screen
Cloud Duration: 4s
Blind Duration: 0.4s
Cooldown: 11s
  • Smoke screen is a cloud that will blind enemies. This effect will constantly be reapplied before the blind's duration ends, as long as the target is still inside the smoke screen. It's useful for escapes and for stopping droids in their paths. It can be upgraded to grant you debuff immunity (visual bubble around Vinnie), silence enemies, increase your movement speed, and turn your team invisible.
  • The debuff immunity from Clown Mask does not apply to: Genji's cocoon, Damage Amp, Yuri and Rae's time slow, gravity pulls. BKM should be bought instead if the enemy team is using these.

ITEMS TIER LIST


Movement penalties:
  • Bubble Gun: 25% slowdown while firing it and moving forward. Slight extra slowdown penalty while firing and moving backwards.
  • Spike Dive: No penalties at any point.
  • Cloud: Very slight and short slowdown when activating it.
  • All these are considered for a flying, mid-air Vinnie, as he should never be on the ground for any reason.

MATCHUPS
  • Good against:
    Froggy, Lonestar, Gnaw, Voltar, Skolldir, Swiggins, Yuri
  • Bad against:
    Ayla, Clunk, Coco, Genji, Rocco, Ksenia, Ix, Penny
Maps:
Best
  • Sorona (very open map, easy to space and initiate, not limited movement)
  • AI Station 205 (same as Sorona, Heal cloud useable on flyers and normal droids)
Bad
  • Ribbit IV (the cramped up space on Ribbit limits his movement)

Builds[orikaru.net]

1) Starter build, no items unlocked:


2) Loanshark build:


3) Jambo's Standard snowball Vinnie and Spike build (could swap range dive for Dead Seahorse Head if you need the damage as well going for range AA if needed as well).
Genji

STATS
HP: 1250
Role: Support, Initiator
Mobility: Tactical, Slow inertia gain
Jump: Initial normal jump, then can hop up (slowly) or tap float
Strongest During: Late Game
Difficulty: Intermediate

DESCRIPTION
Genji is a character who both buffs allies and give enemies debuffs. He is perfect for delivering setup for teammates and is godlike in team fights. He is one of the most powerful nauts in the game.

Tips: His AA does insane damage over long range and hits multiple targets, his Blessing support teammates in many ways (dmg reduction, speed, insta-healing) and Cocoon stops any form of initiation, making him very hard to beat if played right. Careful not to save enemies by Cocooning them while an ally is using an ability on them.

Notable items:
  • Best items: Moon nectar is good for first item (early game healing), jagra eggs, spiritual cooking (mid-game). Gettin out of the hood (Movement speed) is often the correct buff for your team.
  • Situational items: Bronco yeast mega-counters any naut that deals a lot of chip damage (like Nibbs' firebreath, rae timerift or yuri laser). The Last Pieridae Transformae is good for a team with low pushing capacity.
  • Bad items: caterpillar king statue (most occasions).

ABILITIES
Butterfly shot
Damage: 65x2
Attack speed: 1.2/s
Range: Average
  • A shot that will return to him after flying a short distance. Hits structures only once. Hits regular enemies twice and can be upgraded to deal damage over time, heal allies, and spawn an electricity cloud.
Cocoon
Cocoon Duration: 2s
Cooldown: 9s
  • Genji can fire out a cocoon that will snare and disable enemies for several seconds. The projectile is slow and flies in an arc affected by gravity. The projectile can bounce off walls, the ceiling and the edges of Platforms. It disappears as soon as it touches the ground, however. It holds them in place and nothing can affect them for a few seconds. After the cocoon wears off, the enemy is in the perfect spot to be picked off by teammates.
  • In this version, nothing can make an enemy immune to being cocooned or reduce its duration.
  • This can be upgraded to spawn healing nectar, leech HP from enemies, explode upon contact, and spawn a flying droid when a droid is snared.
Monarch Blessing
Damage Reduction: 20%
Duration: 3s
Cooldown: 14s
  • A shield that reduces incoming damage. It applies to Genji and allies around him in a radius. Can be applied thru walls. It can be upgraded to increase movement speed, heal allies, and increase maximum HP of allies.

ITEMS TIER LIST


Movement penalties:
  • Butterfly Wand:~20% slowdown while firing and walking forward. ~300% slowdown while firing and walking backwards. This penalty is almost completely negated if flying/hovering while attacking backwards. On the ground, gGenji comes to a complete horizontal stop when firing a shot backwards - this doesn't happen in mid-air.
  • Cocoon: No penalty when firing it.
  • Blessing: No penalty when using it.
  • All abilities can be used mid-air or mid-jumps.

MATCHUPS
  • Very good against:
    Clunk, Skolldir, Yuri, Derpl, Swiggins, Sentry, Jimmy/Amy
  • Good against:
    Lonestar, Scoop, Gnaw, Raelynn, Ayla, Voltar, Coco, Rocco, Ix, Ted McPain, Yoolip, Chucho
  • Bad against:
    Froggy, Leon, Ksenia, Penny, Vinnie (in the right comps)

Builds[orikaru.net]

1) Starter build, not all items unlocked:


2) General master build:


3) Jambo's Hybrid Genji build made for soloq (competitive builds generally rush blessing faster but this is a good mix of damage early for soloq)
Admiral Swiggins

STATS
HP: 1500
Role: Fighter, Initiator
Mobility: Tactical
Jump: Single Jump then Hover for 3s
Strongest During: Mid Game
Difficulty: Hard

DESCRIPTION
Admiral Swiggins is a fighter who is best at anchoring enemies down in one spot. Getting caught in an anchor drop can be a death sentence to anyone caught in his grasp. Swiggins' role is to gank onto low-HP characters, making them unable to escape with Anchor Drop. He gets countered easily by mid to high-HP characters that can sustain fights after his damage has been done. Has high burst potential.

Notable items:
  • Best items: Blue heart medal, Ancient Octant, Pneumatic Spoon, Aquarium Pump.
  • Situational items: Treasure Lottery map (to avoid snares, stuns, CC etc.). Krill Biscuits (excellent mobility item if you need some). Not seaweed is pretty troll but can keep some ganks away by being annoying.
  • Bad items: mobile periscope.

ABILITIES
Anchor Swing/Ink Spray
Damage Anchor Swing: 120
Attack Speed Anchor swing: 1.6/s
Anchor Swing Range: Melee
Damage Ink Spray: 80
Attack Speed Ink Spray: 2.2/s
Ink Spray Range: Average
  • Swiggins has an anchor that deals good damage. This anchor can also be dropped. If Swiggins doesn't have his anchor, he can shoot ink at enemies. Anchor swing pierces, ink spray does not. This ink can be upgraded to blind enemies. He can get a shield or extra movement speed upgrades while anchorless.
Anchor Hook
Naut Damage: 310
Droid damage: 100
Stun Duration: 0.2s
Cooldown: 7s
  • If holding his anchor, Swiggins can shoot his anchor out at enemies and walls like a grappling hook. He is frozen in space while shooting it. Once a naut or wall is hooked, Swiggins will dash straight for it dealing damage upon contact.
  • Anchor hook can be upgraded to deal damage in an AOE, stun enemies longer, or make you debuff immune.
  • Swiggins cannot grapple Droids or Creeps, and will deal "droid damage", which applies once on the way out, and on the way back.
Drop Anchor
Hit Damage: 80
Chain Breaking Damage: 50
Chain Duration: 3s
Hombolt Health: 350
Cooldown: 10s
  • If holding his anchor, Swiggins can shoot it at enemies. It flies in an arc affected by gravity. Homboldt can be destroyed while it is on the ground, but not while it is flying. Any naut hit by his anchor will be tethered town near his anchor and will be held in a radius for three seconds, or until they can destroy the anchor. Once the tether breaks, the enemy will take extra damage. After the tether breaks, the skill is placed on cooldown.
  • This can be upgraded to deal DOT, slow or apply dmg amplify.
  • Can also be used to soak turret damage, and even be picked back up before being destroyed by it.
  • Swiggins can recall the anchor with a second press of the button once the cooldown is finished. If Swiggins walks over the anchor, it will remove the cooldown, allowing him to recall it instantly. If the anchor is destroyed, the cooldown is raised considerably, even if Swiggins had walked over it previously.

ITEMS TIER LIST


Movement penalties:
  • Anchor swing and Ink Spray: No penalty while firing and moving forward. ~25% Slowdown while attacking and moving backwards. No penalty while attacking backwards while mid-air/floating.
  • Anchor Hook: Immobilizes you horizontally and vertically until the hook returns to you or you fly to the enemy.
  • Drop Anchor: No penalty when dropping or picking up.
  • All abilities can be used mid-air or while floating.

MATCHUPS
  • Very good against:
    Froggy, Leon, Ksenia, Penny, Chucho
  • Good against:
    Lonestar, Coco
  • Bad against:
    Scoop, Gnaw, Raelynn, Ayla, Clunk, Skolldir, Yuri, Derpl, Genji, Ix, Ted McPain, Sentry, Skree, Nibbs, Yoolip, Jimmy/Amy
Maps:
Best
  • Sorona (lots of open area to hook)
Good
  • Ribbit IV
  • Aiguillon (if you learn how to Teleport Jump)
  • AI Station (very open map)

Builds[orikaru.net]
1) Starter build, not all items unlocked:

2) General master build:

3) Competitive build: (by game is broken)
Rocco

STATS
HP: 1300
Role: Fighter, DPS, Nuker potential
Mobility: Tactical
Jump: Single High Jump
Strongest During: Mid Game
Difficulty: Easy

DESCRIPTION
Rocco is one of the few fragile ranged-DPS 'nauts. He can even fire an arrow that flies across the whole stage! If his spacing (very important) is good, he can be used very effectively against high-HP characters with his high damage, long ranged, slowing arrows. Precision Shot is used to poke during the game or finish off low-HP enemies. AA DPS build is his best most times.

COMBO: Cooldown reducer: Defused Hawk Bomb and Endless Quiver scale exponentially with: Chicken Grill, SWCA Coin, Sticky Cops Moustache. Explanation: DHB and EQ give you reduced cooldown per each ARROW hit, and rocco shoots 2-3 arrows with every attack, and this also applies to the split arrows from SWCAC. Meaning you can get ridiculously reduced prec shot CD and increased vengeance duration by combining these items.

COMBO: Max dps for single targets: Cutlet Frills Ghilly Suit, Chicken Grill, Cockfight Spurs, Quickdraw Bow, Classics, Sticky Cops Moustache. Vulpe Bow String for slowing them down to DPS them for even more time.

Tips:
  • As mentioned before, proper spacing is Rocco's most important aspect. That means keeping your enemies at an appropriate length (the length of your AA range) at all times. Rocco does not fight well in close quarters, as he gets slowed down considerably while shooting his AA, and even more when walking backwards while shooting. High dps melee nauts or slowdown CCs will melt Rocco's hp fast, and his mobility isn't suited for escapes. So always be mindful of your positioning and poke enemies from afar, only jumping in closer after enemies are on CD and lower hp.

  • How Little Johnny works:


Notable items:
  • Best items: cutlet frills ghilly suit (if you play to its strengths), chicken grill, cockfight spurs, assassin flags, vulpe bow string (situational, but extra slow can be deadly vs certain nauts like tanks).
  • Situational items: Little Johnny.
  • Bad items: magnetic police light, birdseed donut, (beginner items - learn to aim and you won't need these two :)), rocketpack.

ABILITIES
Rapid Arrows
Damage: 48
Arrows: 2
Attack speed: 2.5/s
Range: Long
Spread: 10°
  • He shoots two arrows at a time with a slight arc. Great for poking at a safe distance. They can be upgraded to gain a third arrow to the shot and split upon contact to deal more damage, or pierce and split, or reduce the cooldown of precision shot for each landed hit. Great dps and range.
Precision Shot
Damage: 330
Cooldown: 7.5s
Charge Speed: 1s
  • Precision Shot is a long range arrow that can fly across the entire map and only hits enemy nauts. You can pull back the string all the way to get infinite range on the shot, or you can fire it early to increase its movement speed and add an arch to it. Use the minimap to aim. The arrow only flies across the entire stage if fully charged.
  • This can be upgraded to increase your attack speed on hit, fly faster, charge faster, reduce its CD on hit, and explode upon contact.
  • Rocco can still walk while charging up Precise Shot, but does so at reduced movement speed. Firing Precision Shot while Vengeance is active will also slow enemy nauts hit.
Vengeance
Slowing Power: 15%
Slow Duration: 1s
Slow duration on precise shot: 3.5s
Vengeance Duration: 5s
Extra Duration Per Arrow Hit: 0.1s
Cooldown: 20s
  • Vengance activates a slowing effect to all of Rocco's arrows to help him apply CC. The more arrows he hits enemies with, the longer Vengance will last. it also removes movement penalty when walking forward while shooting his AA. Rocco and all his abilities become purple during Vengeance.
  • It can be upgraded to give Rocco extra homing arrows, stun enemies with prec. arrow, increase his movement speed, and regen his health.
  • It has the longest cooldown in the game which also starts counting down after the ability has ended, so Rocco can, on average, start Vengeance once ~25-30s. This means it should only be activated when beneficial, like during a teamfight, when fleeing, when chasing down a low hp naut or when trying to keep an enemy naut in a dangerous area for longer (for example, after an enemy naut is thrown back into a turret by Skolldir, it's best to start slowing him down)

ITEMS TIER LIST


Movement penalties:
  • Arrows: 50% slowdown when firing while walking forward. Extra 25% slowdown while firing and walking backwards. On the ground, Rocco stops horizontal movement for just a moment when shooting an arrow backwards. Therefore, this penalty is mostly reduced if jumping while moving and shooting backwards.
  • Prec. Shot: 50% slowdown when charging the shot.
  • Vengeance: no penalty to activate or deactivate. Removes the penalty for moving while firing arrows and moving forward. The normal penalty for shooting arrows backwards while moving on the ground is reduced to only 25%. Jumping while doing this reduces this penalty further.
  • All abilities can be used mid-air.

MATCHUPS
  • Good against:
    Lonestar, Raelynn, Ayla, Clunk, Voltar, Yuri, Derpl, Vinnie, Ix, Skree, Nibbs, Sentry
  • Bad against:
    Frog, Gnaw, Genji, Swiggins, Ksenia, Ix, Ted McPain

Builds[orikaru.net]
1) Starter build, not all items unlocked:

2) General build:

3) Precision shot build, makes you shoot your prec shot VERY often, good AOE from badge and gun and SWCA coin:

4) Competitive build: (by game is broken)
Ksenia

STATS
HP: 1250
Role: Assassin, DPS
Mobility: Swift
Jump: Double Jump
Strongest During: Late Game
Difficulty: Hard

DESCRIPTION
Ksenia is a high damage assassin with invisibility in her kit. Using roll makes your next attack out of invisibility apply a Silence debuff. Learning how to use the invulnerability roll to dodge burst attacks, using silence and learning the combos are essential to performing well as Ksenia. Pretty weak early game so start by farming a lot.

Tips:
  • farm creeps and droids away from fights to regen your hp and scissors. Her fast movement allows you to move quickly from lane to creep lane to lane.
  • Her silence attack is good for targeting an important naut before he gets to use an important ability. Her melee dps + consecutive scissor throws are a huge burst of damage and, with right timing and positioning, can melt the enemy in seconds. Can win most 1v1 situations if she has all scissors ready.
  • Use invincibility dash to escape any lethal situation.

Notable items:
  • Best items: Bob Cat, Deja Vu Blocker, Laser Bladed Scissors, Occam's Razor.
  • Situational items: Virtual girl (for safer escapes out of more dangerous situations). Wraith stone (since you're most likely to farm a lot of creeps).
  • Worst items: Interstellar hair trophy (only good if pushing enemies towards team, most of the time you'll be pushing enemies towards their safety and away from your own attacks). Skroggle hair gel (scissor throw is not for sniping! but might be an ok item for inexperienced players)

ABILITIES
Cut and Trim
Damage: 64. 88. 159
Attack speed: 2.7/s
Range: Melee
Combo Timeout: 2s
  • A three hit combo. Every landed hit advances your stage. Missing a hit will reset the combo. Can be upgraded to increase the damage of your scissors, give you more scissors to throw, add lifesteal and increase your movement speed. Applies silence on first attack out of Vanish. Huge dps, short range, you're usually also throwing scissors while attacking a naut with cut and trim.
Scissor Throw
Damage: 100 + 3% of enemy naut's HP
Max Scissors Held: 4
Recharge time: 3.3s
Throw Cooldown: 0.33s
Range: Medium
  • Ksenia can throw high damage scissor blades that can be used to pick enemies off. These scissors recharge over time. They fly straight and fast. If you miss and a scissor hits a wall, it will stick on the surface of the wall and can be picked up again to refill your ammunition. They also apply silence if shot out of Vanish. These scissors can be upgraded to slow targets and knock them back.
Vanish
Invisibility Duration: 4s
Silence Duration: 1s
Cooldown: 12s
  • Ksenia can initiate a straight horizontal roll (even mid-air!) with no collision that will cause her to go invisible at the end for 4 seconds. Attacking will cancel this invisibility but will silence anything she hits. This can be upgraded to leave behind a slowing debuff area, give her invulnerability while she rolls and no collision while invisible, and decrease recharge time on her scissors.

ITEMS TIER LIST


Movement penalties:
  • Cut and trim: no penalty while attacking and moving forward. A ~25% penalty while moving and attacking backwards. This is because Ksenia stops for just a moment when attacking backwards. Therefore, this penalty is mostly reduced if Ksenia is also jumping.
  • Scissor throw: Ksenia slows down for a moment when throwing a scissor and moving forward. Throwing a scissor backwards while on the ground will stop her horizontal movement completely for just a moment, but only slow her down when she's mid-air.
  • Vanish: No penalty at any point.
  • All abilities can be used mid-air.

MATCHUPS
  • Very good against:
    Froggy, Lonestar, Raelynn, Clunk, Yuri, Vinnie, Rocco, Sentry, Skree, Chucho
  • Good against:
    Coco, Skolldir Genji, Ix, Ted McPain, Yoolip, Jimmy/Amy
  • Bad against:
    Leon, Scoop, Ayla, Voltar, Derpl, Swiggins
Maps:
Best
  • Sorona (lots of open area to initiate, easy escape over bouncers)
Good
  • Ribbit IV
  • Aiguillon
  • AI Station (might struggle with clear against some comps)
  • Starstorm Station
Builds[orikaru.net]

1) Starter build, not all items unlocked, starts with good hp regen and lifesteal:


2) General master build: (by game is broken)


3) Jambo's personal ksenia build used in both soloq and tournaments:
Ix the Interloper

STATS
HP: 1250
Role: Support, Initiator, Fighter
Mobility: Swift
Jump: Initial normal jump then levitation (2s) and/or hop
Strongest During: Late Game
Difficulty: Hard

DESCRIPTION
Ix is a naut with a very special ability to swap with enemies and allies. This makes him great for saving allies in a tight spot and placing enemies in a bad position. He is another hard to master, high skill ceiling character. While some kill options are using Bond + Refract damage, he can set up a lot of kills for his team by swapping enemies into them.

Tips:
  • While linked to an enemy and attacking them, you will deal a good amount of damage, so only swap at the last possible moment before breaking if possible.
  • Healing allies is less important than having a switch ready to go (without upgrades). Displacing with them might be more useful to save them in an emergency, as it makes them invincible for a moment and puts you in danger's way.
  • Radiate bolt may be ranged, but most of Ix's damage comes from the scatter, making him most deadly in melee range.
  • Enemies are Invincible while being Displaced so be mindful not to accidentally save them by using this right as an ally uses a burst ability on them.
  • If you build him with lifesteal, dps items, attack speed increasers, he will have a good sustain and dps in 1v1 fights.

COMBO: The combination of Salt Miner and Shredded Mining Permit can turn Refract into a short burst of big dps.

Notable items:
  • Best items: Shredded mining permit, Salt miner, Prismatic moonstone dust.

ABILITIES

Radiate
Damage Radiate Bolt: 60
Scattering Crystals Amount: 3
Damage Scattering Crystals: 15
Attack speed: 2.2/s
Range: Average
  • Ix has a bolt that he can fire through enemies. The main bolt deals the most damage. There are also smaller bolts that deal damage with shorter range. Every part of the attack pierces. These can be upgraded to heal Ix, deal damage over time, and deal more damage when Psyonic Bond is active.
Psionic Bond/Displace
Initial Heal: 160
Heal Over Time: 60/s
Initial Damage: 180
Damage: 65/s
Cooldown: 8s
Cooldown After Using Displace: 12s
Max Duration: 3s
  • Ix can fire a shard in a straight line that forms a bond between him and any enemy or ally the projectile hits. The first naut hit will be selected, regardless of team. This bond with heal allies and deal damage to enemies. Hitting the button again will cause Ix and the other target to swap places. The link breaks if target is too far or if the enemy goes behind a turret or team wall. This is great for both set-up and saves.
  • While Displacing, both Ix and the target are Invincible.
  • This can be upgraded to slow enemies, speed up allies, shield allies, reduce the damage output of enemies, and increase the damage output of teammates.
Refract
Invincibility Duration: 0.8s
Cooldown: 9s
Debuff immunity: yes
  • Negate all incoming damage while hovering and gaining a lot of inertia. This can be upgraded to increase his movement speed, inflict damage amplification, heal Ix, and deal damage in an area around him.
  • Great for dashing thru nukes, mines, mines etc. Also great for getting out of enemy territory after you swap with them.

ITEMS TIER LIST


Movement penalties:
  • Radiate: 50% slowdown when walking forward and attacking. 100% slowdown when walking and attacking backwards. This is because Ix stops horizontal movement completely for just a moment when he attacks backwards. This penalty is, therefore, greatly reduced if Ix is jumping while attacking backwards.
  • Psy bond:Ix stops horizontal movement for just a moment when shooting the Psy Bond projectile. Mostly reduced penalty if he shoots it mid-air.
  • Displace: No penalty to initiate it or when coming out of it.
  • Refract: Ix slows down slightly while refracted. He moves faster if he maintains the same direction of movement he had when starting it. He moves slower if he changes direction while refracted.
  • All abilities can be used mid-air.

MATCHUPS
  • Good against:
    Skolldir, Yuri, Derpl, Vinnie, Skree, Nibbs, Chucho, Jimmy/Amy
  • Bad against:
    Leon, Ayla, Genji, Ksenia, Penny, Yoolip

Builds[orikaru.net]

1) Starter build, no items unlocked:


2) General build - add Vegan Sewer Pizza or Root Tea if you need more shielding or more dps: (by LOVE)


3) Jambo's Standard ix build:
DLC 'NAUTS
The last 8 nauts are Starstorm and Overdrive dlc-exclusive. These dlcs are currently unavailable for purchase until Atari gets the servers running back up. Unless you had the dlcs bought from before.

Other Nauts unavailable in this version:
  • Max Focus
  • Deadlift
  • Dizzy
  • Smiles
  • Commander Rocket
  • Qi'tara
  • Snork Gunk
Ted McPain

STATS
HP: 1400
Role: DPS, Fighter
Mobility: Tactical
Jump: Single Standard Jump
Strongest During: Mid Game
Difficulty: Hard

DESCRIPTION
Ted has a very high skill ceiling, a lot of combos to use, AoE, multilane clear and insane DPS, making him one of the strongest characters in the game. He excels at pushing and team fights.

Tips:
  • quickly switching between your guns makes you fire your shotgun faster (no upgrades, no stimpack). If you add tedris ville, this also gives you a lot more dps.
  • Most of his items are good and have their place in certain builds.
  • Because Airstrike hits all targets above the impact point by default, it's a good idea to spend more time in the bottom parts of the map. With good minimap awareness, it is possible to kill unsuspecting enemies and recover health from creeps that would otherwise be too far away. You can also do this from the top of the map if you have Princess Adlez Phonenumber.

Notable items:
  • Best items: Tedris Ville, TedMcPain Unicorn Dance Karting, Starstorm Statue.
  • Situational items: Princess Adlez Phonenumber (depends on map and where you want to be positioned).
  • Worst items: Can o'juice!, Ted's Power Briefs are mostly for meme juggling players in the air.

ABILITIES

Shotgun and Machine Gun
Machine Gun Damage: 42
Machine Gun Attack Speed: 5.9/s
Machine Gun Range: Medium
Shotgun Damage: 210 AOE
Shotgun Attack Speed: 0.8/s
Shotgun Range: Short
Shotgun KB: yes
Shotgun Max Shells: 4
Shotgun Reload: 1 shell/ 2s
Weapon Switch Cooldown: 0.6s
Movement with machine gun: +0.8
  • Ted has a gun that transforms into a machine gun and a shotgun. The machine gun makes him run faster, gives a constant medium range spray of bullets, while the shotgun is a close range shot that deals tons of damage to anything it hits.
  • Shotgun ammo is reloaded over time, regardless of which weapon is selected.
  • It can be upgraded to fire snipe shots from the machine gun and grenades from the shotgun. Extra range, dmg, kb and extra max shotgun shells (+2) can be upgraded.
  • The grenades from Ted McPain Unicorn Dance Karting have a brief arming time: using them at melee range will cause them to fly through the target, dealing no damage.


Airstrike
Damage: 450
Cooldown: 11s
  • Airstrike is a massive laser fired from space. When Ted's gun is in machine gun mode, he can fire out a beacon that flies in a straight line until it reaches its maximum range or collides with terrain that marks where the laser will fire in a second. This laser will shoot through the entire stage above where the beacon is fired.
  • Upgrades can give DOT, stun, spawn healthpacks, split the airstrike into 2 weaker ones, and to pierce through the stage below as well.
  • Good for stealing creeps, controlling the top lanes from below, controlling vertical lanes and jumppads. Shoot it in the middle of teamfights for maximum dmg efficiency and cc potential.
Stimpack
Attack Speed Increase: +40%
Swap Speed: +40%
Duration: 4s
Cooldown: 10s
  • At base, it only increases his attack speed on both weapons, but it can also be upgraded to kb nearby enemies, increase his movement speed, reload his shotgun, give him a shield, attack faster or last longer.
  • Stimpack's animation prevents Ted from attacking, but he can still walk around and switch to Machine Gun.
Switch Weapons
This skill is always available to use on the tertiary ability slot. Silence also disables this "Skill".


ITEMS TIER LIST


Movement penalties:
  • Shotgun: ~25% slowdown while firing and walking forward. Extra slowdown while firing and walking backwards. Penalty slightly reduced if also jumping.
  • MachineGun: ~25% slowdown while firing and walking forward. Slight penalty reduction if also jumping. Can't move backwards while firing at all.
  • Airstrike: No penalty while holding it. No penalty if firing it while walking forward. If firing it while walking backwards on the ground, ted stops for a moment. No penalty if shot while jumping.
  • Stimpack activation: no penalty.
  • Switch: no penalty.
  • All abilities can be used while jumping.

MATCHUPS
  • Very good against:
    Lonestar, Ayla, Clunk, Voltar, Yuri, Derpl, Swiggins, Yoolip
  • Good against:
    Leon, Scoop, Gnaw, Skree
  • Bad against:
    Froggy, Skolldir, Genji, Ksenia, Ix, Sentry, Nibbs, Jimmy/Amy
Maps:
    Best
  • Ribbit IV (airstriking in the middle bouncepad when enemies go up, insane map control and multi lane clear)
    Good
  • Aiguillon
  • Starstorm Station (very high map, airstrike hits a huge chunk of the map)
    Bad
  • AI Station (easy to punish because of open map)
  • Sorona

BUILDS[orikaru.net]

1) Starter build, no items unlocked:


2) Jambo's Standard Ted Build (you don't buy stimpack right away on this patch so you can piggy into tedris straight away)
Penny Fox

STATS
HP: 1250
Role: Assassin, Harasser, can branch out into other sub-roles depending on upgs and playstyle: Initiator, DPS, Nuker.
Mobility: Swift
Jump: Triple Jump, quad with boots - first jump is always the largest.
Strongest During: Late Game
Difficulty: Hard

DESCRIPTION
Her attacks cause several debuffs, making her perfect for team fights. A high damage character who can set up for teammates well. Penny is difficult at first, but very potent once you get used to her combo system. Her style is a fighter, fulfilling many roles such as good clear, harassing, burst damage, and movement options.

Tips: Pounce enemies into your team or turrets as a good initiation tactic. You're weakest when you're without charges, but you can regain them back quickly.

COMBO: Combine Death Lens with Heartshaped Net for a powerful ranged damage combo. Herring Snack Badge makes this strategy even more effective.

Notable items:
  • Best items: Starstorm Statue. Spiderbird collector badge (the shots bounce off terrain).

ABILITIES
Claw
Damage: 88
Attack speed: 2/s
Range: Melee
  • Each successful hit with her claws will charge Penny's power meter by 1. The more charges in the power meter, the more damage Penny will deal with her Special Attacks. Using special attacks will use all of her charges and she will need to gain more before she can use them again. The shop will also refill charges.
  • This can be upgraded to give her extra movement speed, give the power meter an extra charge, heal you when charges are used, and shoot ranged bullets when her power meter is at 4.
Pounce
Damage: 87
Damage Per Charge: 48
Stun Duration: 0.4s
Cooldown: 7s
Max charges consumed: 4
  • A dash in a straight line that stops in an enemy, terrain or at max range. It stuns enemies and knock them back. Distance and kb also increase per charge spent. It's a small AOE attack.
  • Requires at least one charge to use. Consumes a maximum of 4 charges on use.
  • This can be upgraded to stun for longer, retain a charge when landed, increase the range or knockback of the pounce.


Energy Pulse
Damage: 90 /Charge
Damage Amplification: 10%
Amplify Duration: 3.5s
Cooldown: 7s
Max charges consumed: 4
  • After a brief delay, Penny fires an aimable energy blast which slowly travels in a straight line, piercing everything (including terrain) on its path. It deals damage and will inflict damage amplification. The damage and size of the energy pulse increase based on how many charges Penny has. Requires at least one charge to use. Consumes a maximum of 4 charges on use. This ability cannot damage structures but still goes through them.
  • This can be upgraded to silence enemies, buff her next claw attack, or instantly reset the CD if you only spend one charge with the pulse.
  • With team coordination, you can melt an enemy once you apply dmg amp to him before your teammates use their abilities on them.


ITEMS TIER LIST


Movement penalties:
  • Claw attack: No penalty while attacking and walking forward. 25% slowdown while attacking and walking backwards. No penalty if moving backwards while jumping (the attack must be performed mid-air).
  • Spiderbird ranged AA: Same rules as for the normal melee attack apply.
  • Pounce: No penalties when initiating the pounce or coming out of it.
  • Energy Pulse: Penny stops horizontal movement completely for ~1s when used.
  • All abilities can be used while jumping.


MATCHUPS
  • Good against:
    Froggy, Lonestar, Leon, Gnaw, Raelynn, Ayla, Clunk, Skolldir, Yuri, Vinnie, Swiggins, Rocco, Sentry, Skree, Nibbs, Yoolip, Chucho, Ix
  • Bad against:
    Scoop, Derpl, Swiggins

Builds[orikaru.net]

1) Starter build, no items unlocked - good early game burst and great late game sustain DPS:


2) Jambo's personal Penny build (Penny is very versatile when it comes to builds, almost of her items are good. This build focuses on ranged AA along with AA damage so you can easily poke and push. AA damage does effect turrets on this patch which is insanely broken and having sustain really helps you beable to harass to keep map pressure)
Sentry X-58

STATS
HP: 1600
Class: Tank, Area Control, Initiator
Mobility: Tactical / Swift by good usage of TP Beacon
Jump: Slow vertical boost / tap floating
Strongest During: Late Game
Difficulty: Hard

DESCRIPTION
Sentry is a unique tank. He has a teamwide trap that is difficult to land. He will win you the game when used with the right comp. As you get better, Black Hole will get more and more predictable, so you will have to use Beacon as a setup and Black Hole them as they walk near it.

Tips:
  • If you use a launch pad to boost yourself, that momentum will continue when you teleport. Use this to ambush enemies/ initiate. Black hole is only deadly if your team is around to unload their abilities in the immobilized enemy nauts. By itself, it doesnt have that much damage. Hole also goes thru walls and turrets, so you can pull enemies into the open.
  • If your enemy has a dash-like move (such as Pounce or Splash Dash), save your Black Hole Sun and have it ready to unleash it after their abilities are on CD.
  • You can't tp to the the beacon if you've taken damage in the last 2 seconds, but you can instantly place it and tp to it near an enemy if they haven't dealt damage to you yet. This is a great way to start a fight, with a burst of damage and debuffs.

Notable items:
  • Best items: Tactical vest, ringtones for the deaf, night vision spywatch

ABILITIES
Photon Mine Launcher
Damage: 80
Attack speed: 1.5/s
Range: Average
Mine lifetime: 2s
  • Sentry shoots mines which explode on contact with an enemy or if enough time has passed, dealing damage. Mines float mid-air when they reach maximum range. You can stack these in your enemies path to deal lots of damage at once. These can be upgraded to last longer, have a larger explosion AOE, heal Sentry and home in on enemies right before detonating. Good dps and range.

Black Hole Sun
Minimum Damage: 150
Maximum Damage: 540
Shield: 20%
Shield Health: 600
Shield dmg conversion: 65%
Absorption Duration: 1.5s
Black Hole Duration: 1.2s
Collected dmg decay: starting after 10s
Cooldown: 10s
  • Sentry can raise a shield that absorbs incoming damage. The more damage he takes, the more his Black Hole Sun charges (indicated by the purple bar below his hp bar - when it is completely full, your shield will break and won't absorb anymore damage). It absorbs damage from environmental hazards (Solar Boss, Inferno Device, and Turrets) at half efficiency. He can then fire a black hole projectile, and activate the hole itself with a second button press (or once it reaches max range) that will move anything caught in its radius into the center before exploding and dealing burst damage. The hole has more powerful gravity pull near the center.
  • After 10s, absorbed shield damage will start decaying until it reaches min damage.
  • This can be upgraded to increase Sentry's movement while charging, add damage on contact with the shield, increase the shield, increase max shield absorption, or add a flat dmg buff.
  • Early game, it doesn't take a lot to charge up the shield to max, so you don't need to absorb nukes yet. Late game, especially if you got some upgs, you can absorb one or two nukes and prepare your own nuke black hole.
Teleport Beacon
Damage: 250
Cooldown: 15s
Duration: 45s
Active after out of combat for: 2s
  • Sentry can set down a beacon anywhere on the stage. Hitting the button again will teleport him back to the beacon, dealing damage around that area. This can be upgraded to heal Sentry, silence enemies, get an aa attack speed boost, make the beacon invisible to enemies and leave an exploding dummy behind. Can also be used to return from shop instantly.

ITEMS TIER LIST


Movement penalties:
  • Photon Cannon: ~50% slowdown while shooting and walking forward, backwards or while jumping.
  • Charging Shield: No penalties.
  • Black Hole: No penalties when shooting it.
  • TP Beacon: No penalties when placing it or TP-ing to it.
  • All abilities can be used while jumping.

MATCHUPS
  • Good against:
    Lonestar, Leon, Scoop, Raelynn, Clunk, Voltar, Skolldir, Swiggins, Ted McPain, Yoolip
  • Bad against:
    Froggy, Gnaw, Ayla, Yuri, Coco, Vinnie, Nibbs, Penny, Jimmy/Amy
  • Very bad against:
    Derpl, Genji, Ksenia, Ix

BUILDS[orikaru.net]

1) Starter build, no items unlocked:


2) General build:


3) Jambo's AA sentry build for soloq (very easy to play not having to focus on teleburst plays and very strong in teamfights because of the AA damage


4) LOVE's agressive damage-dealer build:


5) Game is broken's alternative build:
Skree

STATS
HP: 1350
Roles: Area Control, Harasser, DPS
Mobility: Swift
Jump: Single Jump/Permanent Float
Strongest During: Late Game
Difficulty: Intermediate

DESCRIPTION
Skree has a lot of tactical options. His methods of damage output discourage an enemy team from staying together and his totem is perfect for cover and pushing. Skree focuses on spacing his enemies, knowing his limits and backing off with Totem when needed. He can be incredibly annoying if you use his droid clear and poke to your advantage.

Tips:
  • Put the sawblade in the middle of lanes, chokepoints. When the blade returns to you, it will slash enemies that were around it while stationary AND the enemies on its return path.
  • Fight around your totem, use it as cover. Use your totem to block vertical climbing areas, like the chimney in the middle of Ribbit or put it on top of the booster pads in the middle of Aguillon.
  • You can teleport while hovering but you need to hold down the jump button while you do so.
  • Maintain good spacing from the enemies, otherwise you're very fragile and die quickly. Also he can stack up to around 70% slowdown debuff for enemy nauts if he hits all 3 abilities with the right upgs on, which is pretty good as far as cc goes.

Notable items:
  • Best items: Magic sunballs. Most of skree's items are good on paper, and great in the right situtation.

ABILITIES

Lightning Rod
Damage: 66
Fork Damage: 30
Attack speed: 1.7/s
Range: Long
Targets: 3
  • Zap an enemy you are near and will send lightning to any nearby target. This makes it perfect for dealing with large groups of enemies. Lightning bolts have no travel time, automatically home in on nearby targets and bounce off of them. Good for long-range harassment.
  • It can be upgraded to deal damage over time, slow enemies and hit more targets. Ceremonial mask makes it charge up after 2s of not firing, after which it hits every enemy in range with a full fork.
Saw Blade
Flying Damage: 210
Damage: 220/s
Stationary lifetime: 4.9s
Cooldown: 8s
  • Fire a sawblade straight horizontally. You can hit the deploy button again to stop the sawblade in mid air, or it will stop at max range or when hitting a wall. It will then stay there and deal damage to anything that touches it. Press the button again to send it back. It deals flying damage once when leaving you but also once when returning. It will go through any walls when you pick it back.
  • Upgrading it can make it fire homing bullets, give it lifesteal, make it bigger, make it slow enemies, or add a second smaller saw that flies backwards.
  • If you're inside an enemy's hitbox, you can instantly fire and stop your saw(s) to put the enemy inside them instantly for a huge burst dmg.
  • Some enemy are forced to become stationary (Nibbs firebreath, derpl turret mode, rae snipe etc) or have important stationary summons (chuchos bike, gnaws weedlings, voltar heal bot etc). This is a great opportunity to have your sawblade ready for.
Totem of Power
Health: 600
Duration: 7s
Cooldown: 14s
  • Throw a piece of metal that flies in an arc and quickly grows into a tall totem that acts as a portable wall and platform and cannot be pierced by piercing attacks. Hold button to throw further. This can be used for cover, and to catch an enemy in a tight spot.
  • It can be upgraded to be taller, healthier, slow enemies, knockback pulse when deployed, and boost your attack power when nearby.

ITEMS TIER LIST


Movement penalties:
  • Lightning rod: 25% slowdown while firing and moving forward, on the ground or mid-air. 50% slowdown while firing and moving backwards, on the ground or mid-air.
  • Sawblade: No penalties when shooting it out or recalling it.
  • Totem: No penalties.
  • All abilities can be used while jumping.

MATCHUPS
  • Good against:
    Lonestar, Leon, Scoop, Raelynn, Clunk, Voltar, Yuri, Derpl, Swiggins, Sentry, Nibbs, Yoolip
  • Bad against:
    Froggy, Gnaw, Ayla, Coco, Skolldir, Vinnie, Genji, Ksenia, Ix, Ted McPain
  • Maps: Best on AI Station
BUILDS[orikaru.net]
1) No items unlocked starter build:

2) General build - get trial elixir (kb on totem) if you need it (matchup dependent):

3) Double sawblade grinder - place both your saws right inside the enemy, then knock them back into them with the kb totem:

4) LOVE's AA build:

5) Game is broken's Ceremonial Mask build:
Nibbs

STATS
HP: 1250
Role: Assassin, Nuker, DPS
Mobility: Tactical
Jump: Double Jump
Strongest During: Late Game
Difficulty: Intermediate

DESCRIPTION
Nibbs is a dragon who has high amounts of damage on her fire breath. She is relatively slow but has a teleport that helps her get around. Nibbs is a situational character that usually only does well against slow, high-HP characters. If used with a good setup character like Skolldir or Leon, She can deal incredible damage without having to worry about counters. Teleport orb can also be thrown while using fire breath to catch up to the enemy or make your escape.

Tips:
  • If you get stunned while firebreathing, she will get stuck breathing horizontally til the end of the animation (bug?).
  • She can get very high dps very early by stacking dmg upgrades, but this build is not good every time (matchup dependent).
  • Watch out for enemy genjis with bronco yeast! They hardcounter your firebreath. Build differently or wait for them to waste their butterfly shield before you firebreath.

Notable items:
  • Best items: Most of her items are good! So she can build depending on the situation with high adaptability. Starting with eternal flame is usually the highest early game dps boost you can buy.

ABILITIES

Dragon Frenzy
Damage: 65
Attack speed: 2.2/s
Frenzy Attack Speed Boost: 12%/ stack
Range: Melee
Frenzy decay: 3s
Max frenzy stacks: 4
  • Nibbs has a 4-stage meter that fills up with 1 unit for each enemy unit hit (but not structures). Each unit increases aa attack speed. These charges will fade away within 3s of not hitting an enemy. Good dps with bad range.
  • This can be upgraded to slow enemies, heal Nibbs when the meter is full, and reduce the cooldown of her special abilities.
Orb Of Omicron
Damage: 225
Cooldown: 7s
Hold Position: 2s
  • Nibbs spits out an aimable orb which flies in a straight line, ignoring collision with all units until it reaches its max range where it'll stay in place for a short while before expiring. Pressing the button a second time while the orb is flying or standing still will cause Nibbs to teleport to it, dealing damage to enemies in the area. The orb will go on full cooldown if it expires before Nibbs teleports to it. The orb will bounce off of terrain and enemy structures.
  • This can be upgraded to slow enemies, charge your power meter, reset CD if it's not teleported to, or pull enemies to you on tp.
  • Use Orb Of Omicron to break free from tether effects.
Fire Breath
Damage: 680/s
Damage vs droids: 50%
Duration: 1.5s
Cooldown: 10.5s
  • Nibbs spits out an aimable stream of fire in a line that damages all enemy units hit. She cannot move while using this ability. If used while she is not touching the ground, she'll stop mid-air while she uses it. The flames pierce through terrain, enemy structures and enemy units. This ability cannot be interrupted by any crowd control effects with the exception of Cocoon (stuns will make her unable to aim the ability). Very high dps ability but with low range and mobility.
  • Fire Breath can be cancelled by teleporting to the Orb Of Omicron.
  • This can be upgraded to add fire orbs, deal even more dmg, increase her movement speed after finishing, and give her a shield. There's also a range upg but keep in mind the fire breath dmg particles have a quite slow movement speed, so you need to aim a bit ahead of the enemy, if you're not right inside their hitbox.

ITEMS TIER LIST


Movement penalties:
  • AA: No penalty while attacking and moving forward. 50% slowdown while attacking and walking backwards. This penalty is almost completely reduced if attacking while jumping backwards.
  • Orb: No penalties when shooting it our or TP-ing to it.
  • Fire Breath: Instantly stops all movement while firing it. (freezes her in place)
  • All abilities can be used while jumping.

MATCHUPS
  • Good against:
    Scoop, Clunk, Voltar, Skolldir, Yuri, Derpl, Swiggins, Ted McPain, Sentry
  • Bad against:
    Lonestar, Raelynn, Coco, Genji, Rocco, Ksenia, Ix, Penny, Skree

    Maps:Best
  • Ribbit IV (unpredictable ganks and initiations, punishing rotations in small passages)
    Good
  • Aiguillon
  • Starstorm Station
    Bad
  • AI Station (bad clear)
  • Sorona (too predictable)
BUILDS[orikaru.net]
1) Starter build, no items unlocked:

2) General high early dps build (good when you have a comp that can set you up easily) - also good sustain fighter, but easily nuked - stay often at 4 stacks of frenzy to regen hp, deal more dps and apply heavy slowdown:

3) Build for team comp without good setup - nibbs has dmg spread on all 3 abilities to deal dmg more reliably and uses early slow and gravity to catch enemies for longer - take shield if you're too vulnerable while firebreahing:

4) Game is broken's max frenzy stack build:
Yoolip

STATS
HP: 1500
Role: Support, Pusher, Area Control, Initiator
Mobility: Tactical
Jump: Single Standard Jump
Strongest During: Mid Game
Difficulty: Intermediate

DESCRIPTION
Professor Yoolip is a naut all about stuns and lane clearing. His stuns help teammates burst enemies down. Yoolip is a very predictable 'naut. He has high damage if he hits the combo (dinos into gaze, dinos eat thru the gazed enemy), but is easy to see coming for experienced players.

Tips: stick to teammates and support them with health packages as well as interrupting enemy initiations with Gaze. Yoolip can either play defensively, from behind the team, by spamming dinos, waiting for enemy pushes and stopping them with gaze, or be agressive with speedy dinos, boots, damage ring and jump on their most important naut, maybe even interrupt one of their big abilities (like a rae's snipe), but you better hope your team pushes with you.

Notable items:
  • Best items: Laboratory centrifuge, dino poop (healing for team support), relativity slippers, lab rats, remote controlled whisk, definitely not butter, overdrive gear.
  • Worst items: Antigravity ball (it's bugged, it has no effect), sonic wrench.

ABILITIES

Wrench Smack
Damage: 95
Attack speed: 2.2/s
Droid Heal: 10
Summons heal: 30
Range: Melee
  • Yoolip has a wrench that can (slowly) heal allied droids and summons (excluding Leon's Clones). It can be upgraded to inflict amplify damage and cause enemy droids to drop health packs upon death. Good for lane pushing and clearing.
Gripping Gaze
Damage: 225/s
Max damage: 270
Stun Duration: 1.2s
Cooldown: 9.5s
  • Yoolip fires an aimable projectile from his third (forehead) eye, which travels in a straight line until it reaches maximum range, terrain or an enemy naut. Upon hitting an enemy naut, Gripping Gaze links Yoolip to the enemy, damaging the latter over time and Stunning them both for the duration. If one of you had enough prior inertia or another naut makes Yol and the linked naut to get distanced, the gaze will break early.
  • This is one of the best ways to set up for a kill in the game. It can be upgraded in range, duration, dps, lifesteal, get an AOE dmg ring, or give you a big dino on next dino summon. You can't shoot gaze while summoning dinos.
Summon Robo Dinos
Damage: 250/s
Dino lifetime: 3.5s
Cooldown: 12s
Dinos summoned: 3
  • Yoolip can send a line of 3 piercing robot dinos that deal damage to enemies they go thru. If they reach a wall or Turret, they will turn around after a moment and continue walking. Yoolip is free to move around normally while the dinosaurs are being summoned, but cannot attack or use Gripping Gaze. You can send each dino right or left separately.
  • They can be upgraded to spawn HP, jump at enemies, get a 4th dino or move faster until they bite something.
  • If you're cornered, send the dinos into the corner and fight inside their hitbox. If the enemy chooses to fight you in that area, the dinos will deal a lot of dmg to them.

ITEMS TIER LIST


Movement penalties:
  • AA: No penalty while attacking and moving forward. Almost 100% penalty while attacking and walking backwards. This penalty is almost completely reduced if attacking while jumping backwards.
  • Gaze: No penalty if shot while walking forward. Yoolip stops horizontal movement for just a moment if shot while walking backwards. Yoolip cannot move while his Gaze is Gripping an enemy naut.
  • Dinosaurs: No penalties except for when walking backwards while summoning them. Yoolip will stop for a moment when summoning each dino. This penalty is removed if he's jumping while doing so.
  • All abilities can be used while jumping.

MATCHUPS
  • Good against:
    Lonestar, Leon, Scoop, Clunk, Swiggins, Chucho, Ix, Jimmy/Amy
  • Bad against:
    Yuri, Nibbs, Derpl, Ayla, Coco, Genji, Skolldir, Sentry, Skree, Penny, Ted McPain, Vinnie

  • Maps: Best on Aiguillon, worst on Sorona (too predictable)

BUILDS[orikaru.net]

1) Starter build, not all items unlocked (team support):


2) General build (team support):


3) Solo damage dealer build, highest dps by himself (not his strong suit but could be a better build if you soloQ with an uncooperative team, or if your team somehow doesn't have enough dps):


4) Game is broken's build - with a focus on early game gaze and survivability:


5) Pvt's "Assassin Yoolip" build. This build was naturally developed for soloq Yoolip gameplay. It is also forcing you to apply and time your abilities a bit differently, going for those solo kills (main trick is using dinos' ability to change direction when they run into a wall or enemy structure - so that they apply damage twice).
Chucho Krokk

STATS
HP: 1250
Class: Fighter, Pusher, Area control
Mobility: Aerial and Tactical, both Swift
Jump: Single/Infinite Flight on bike
Strongest During: Mid Game
Difficulty: Intermediate

DESCRIPTION
Chucho has many ways to damage the opponent: using DoT on Hyper Bike to poke, being around his idle bike, poking with sticky and knocking people into turrets. It takes some practice to get used to all these mechanics and using them effectively, but once you know how to do it, he can be a lot of fun to play.

Tips: He can deal damage from a lot of different sources, and most are worthwhile, it's just a matter of speccing into the right ones early on for the right situation and comp you're in. He ranges from a great poker/ harasser to a great sustain fighter and turret pusher and all the stages in-between.

Notable items:
Best items: BOOM gas.
Most of his items are good for certain builds and playstyles.

ABILITIES

Double Pistol / Bike Blaster
Pistol Damage: 46
Pistol Attack Speed: 4/s
Pistol Range: Short
Bike Blaster Damage: 55
Bike Blaster Attack Speed: 6/s
Bike Blaster Range: Medium
  • These double shot pistols are fast and have good dps. They can be upgraded to pierce, get damage and attack speed boosts and reduce the cooldown of Sticky Bomb.
  • While on his bike, Double Pistol becomes Bike Blaster, which is a different attack fired from the bike cannons. Bike Blaster cannot be aimed and instead fires only horizontally.
Sticky Bomb / Nitro Boost
Sticky Bomb Damage: 350
Sticky Bomb Explosion Timer: 3s
Sticky Bomb Cooldown: 9.5s
Nitro Boost Speedup: 75%
Nitro Boost Speedup Duration: 1s
Nitro Boost Cooldown: 12s
  • While on foot, Chucho Throws a sticky bomb in an aimable arc (the distance increases the longer the button is pressed). The bomb sticks to enemies and surfaces. It takes 3s to charge and hits in a circle area. Once it's stuck, it's not coming off until it explodes.
  • It can also be upgraded to slow enemies, apply DOT in its radius, spawn a 2nd smaller bomb after detonation or stick to enemies that walk over it.
  • Its easiest to land when close to an enemy, but with practice you can learn to stick it to enemies from afar consistently.
  • While on his bike, Sticky Bomb is replaced by Nitro Boost, which gives Chucho a movement speed bonus for a brief period of time. This can be upgraded to add extra speed, a DOT burst on boost start or knock back spikes on the front of the bike. These last ones are especially useful for pushing enemies where you want them to be.
Hyper Bike/ Turret
Turret Damage: 64
Turret Attack Speed: 2.5/s
Turret Health: 600
Cooldown (Self Destruct): 5s
Cooldown (Destroyed): 10s
  • Chucho has a hoverbike named Ramona that grants him the power of flight. When he dismounts his bike, it transforms into a turret that shoots anything nearby. He can then either climb back on or destroy it to reduce the amount of time it takes to respawn his bike. Mounting your Bike and re-deploying it as a turret will spawn it at full health, so be sure to get on if you see it's injured.
  • One upgrade makes his bike explode when destroyed voluntarily, or get a shield when he's near it. The other upgrades give the speed boost exhaust flames with DOT or spikes on the front end that deal KB.
  • Chucho has amazing dps when fighting near the turret, and it can soak a good amount of dmg, including from turrets. Enemies usually find it annoying/costly to fight or destroy your stationary bike. A good Chucho will place his turret often in annoying spots to gain map control or harass enemies.
  • When in danger, get back on it fast and dash to safety. Or dash at the start, to kb enemies into your team or turret from behind.
  • A skilled bike user can also, when starting the dash, quickly touch the enemy with both the back and the front of the bike (in that order) to apply the DOT from Neon Nitro Muffler and then the kb and dmg from Retracting-Spikes Fender.
  • Mounting or dismounting the turret has a 1s CD until the next dismount/mount can be performed. So Chucho can hop off and back on again pretty quickly, if he needs to.
Detonate / Mount
  • While the bike is in turret mode, Chucho can detonate it from afar, or mount back on it if he's near it. Detonating it takes holding the button down for ~1s, during which Chucho cannot shoot or throw the sticky. Mounting back on also takes ~1s, during which Chucho is immobile, unlike dismounting, which is instant and doesn't slow Chucho down at all.

ITEMS TIER LIST


Movement penalties:
  • Bike Blaster: ~20% slowdown when firing it and moving forward. Chucho can't move backwards while firing it.
  • Dual Pistols: No penalties when firing and moving forward. ~50% slowdown when firing and walking backwards. This penalty is halved if he's jumping while firing and moving backwards.
  • Sticky Bomb: No penalty while charging the throw. Chucho stops horizontal movement for a moment if he throws the bomb backwards.
  • Nitro Boost: No penalties.
  • Mount/Dismount: No penalties when dismounting. When mounting, Chucho stops for ~1s to get on his bike.
  • Detonate: Stops horizontal movement for a moment while pressing the button.
  • All abilities can be used while jumping.

MATCHUPS
  • Good against:
    Scoop, Clunk, Yuri, Sentry
  • Bad against:
    Froggy, Raelynn, Ayla, Skolldir, Coco, Genji, Swiggins, Ksenia, Ix, Ted McPain, Penny, Yoolip

  • Maps: best on Ribbit IV
BUILDS[orikaru.net]
1) Starter build, no items unlocked:

2) Single-target high dps, kb then slow build. Push a slow, dashless enemy into your turret or team with Retracting Spikes Fender, dismount your bike, stick your bomb on them and shoot them till they melt under your amazing dps. Get four-eye visor, 12th gear and matt parasite roid in any order you see fit.

3) Game is broken's Sticky bomb build:
Jimmy/Amy and the LUX5000

STATS
HP: 1500
Class: Fighter, Pusher, Initiator
Mobility: Tactical
Jump: Jet Boost / Tap Fly for longer
Strongest During: Mid Game
Difficulty: Intermediate

DESCRIPTION
Jimmy (on the Red team) and Amy (on the Blue team) have a lot of sustain during fights, easy escape, a situational initiation, good poke and excellent brawling capabilities. Their playstyle is harassing constantly and trying to gank by charging. Push enemies into your turret/team or save a teammate by pushing their attackers away.

Tips:
  • Dash is a high skill ability. If you position yourself correctly into the enemy hitbox and predict their jumps, you can stick to them perfectly and push them all the way into your territory or turret. Very powerful movement strategy that unfortunately gets hard countered by stuns, snares. Later game, dash becomes more of a positioning tool, or to separate one single enemy from his team, or to quickly escape when low hp.
  • Using Danger Pins, you can also identify low hp enemies and dash to them for a certain kill, it even works thru walls/turrets and a bit above and below jimmy's hitbox (pins have a larger aoe than it seems).

COMBO: Getting Bovinian breastmilk+ castle ice cream pacifier makes you regain 90% of the damage you dash thru back as HP (45% gets shielded and the other 45% returns to you as hp), so you can cancel nukes, mines, snipes, clunk explosions etc.

COMBO: Getting max hp, regen, Flip arms, skullplate throhpy and nano repair bots will make you the best sustain brawler, with huge dps and lifesteal in an aoe.

COMBO: For when getting close to enemies is not an option and you can't get your melee build going, go full rockets: Adventures in rocketland, the very hungry zurian and micey and the missile factory will make you shoot over 1k damage in rockets. Great for poking from a safe distance.

Notable items:
  • Best items: Danger Pins, nano repair bots, micey the mech pilot (cheap and situational, if you need that extra stun on command). BKM is often a good buy on jimmy because there's a lot of cc abilities that counter him. CD upgrades (of which he has 3 different ones) are all good.
  • Situational: Flaming stroller
  • Worst items: fresh sandpit sand, pop out cage.

ABILITIES

Rattle Smash
Damage: 105
Rattle Wave Damage: 150 + 30(x3)
Attack speed: 1.5/s
Range: Melee
  • A three hit combo that emits a shock wave around Jimmy on the third hit. The combo advances without needing to land hits, so you can prepare the rattle wave before approaching the enemy. The rattle waves go thru walls.
  • This can be upgraded to give them a shield, get lifesteal, launch a damage wave on the ground or increase attack speed when low hp.
  • High dps melee with good aoe effect. Make sure you're in the middle of multiple enemies and droids when you emit the rattle wave, so you get lifesteal proc from all of them.
LUX Charge
Damage: 40/hit
Speed Boost: 70%
Shield: 25%
Max Duration: 2s
Cooldown: 9.5s
  • Go into a charge mode that reduces incoming damage and pushes any enemy forward. He is still able to jump, but unable to change directions or stop moving until the skill runs out or is cancelled (by releasing the button).
  • This can be upgraded to leave a DOT trail behind it on the ground, send a damaging pulse at the end, dash faster, get more shield, or heal Jimmy for the absorbed dmg during the charge.
  • You can dash while jump tapping to keep juggling enemies (especially flying enemies) or pin then against a wall or a corner, and whittle them down with your contact damage.
Missile Barrage
Damage: 170
Missiles fired: 4
Barrage duration: 1.4s
Cooldown: 10s
  • Become stationary and fire a stream of 4 missiles, each missile can be shot in any direction. Cancel the ability anytime. Upgrades for these give LUX a shield, increase rocket damage, knock enemies back after use, and add smaller missiles for a wider spread.
  • Good for lane clear, turret pushing, or shooting at retreating enemies. Cancel the barrage at any time by pressing the button again. As with rae's snipe, you're a bit vulnerable while shooting, so positioning is important, but if you think you can secure a kill by starting a barrage from an unsafe spot, it's your call to go for it.
  • The missiles are not the easiest to land, as they have a delay before being shot and a medium-slow travel time, so it's a skill shot that takes time to master. Shoot ahead of the enemies, predict their movement and shoot where they are going to be in the next 0.5s instead of their current position.
  • Missile Barrage is fired from slightly above your character.

    ITEMS TIER LIST


    Movement penalties:
    • Rattle Smash: No penalty when attacking and moving forward. 50% slowdown if attacking while walking backwards. This penalty is almost completely removed if Jimmy is jumping while attacking and moving backwards.
    • Charge: No penalties.
    • Rocket Barrage: Jimmy stops all horizontal movement for the duration of the attack and falls to the ground if attack was initiated mid-air.
    • All abilities can be used while jumping.
MATCHUPS
  • Good against:
    Lonestar, Leon, Scoop, Gnaw, Ayla, Clunk, Voltar, Yuri, Swiggins, Sentry
  • Bad against:
    Froggy, Raelynn, Skolldir, Vinnie, Genji, Rocco, Ksenia, Ix, Nibbs

  • Maps: Best on Aiguillon (best map for charge to work, lots of flat ground and hidden areas)
BUILDS[orikaru.net]
1) Starter build, not all items unlocked:

2) General sustain fighter build with the castle ice cream combo to cancel enemy nukes:

3) Rockets - ranged build for when you're against a bad matchup with a lot of ccs, stuns, and you cant brawl them. Stay back and poke as much as you can. Dash is used for escapes or saving teammates. Once you get a foothold on the game, and the enemy team is not so powerful in the late game anymore, you can upgrade rattle smash to make you have some excellent late game sustain.

4) Game is broken's escape/ survivability build:
-----------------------------------------------------------------------------
Team compositions
Forming team compositions in Awesomenauts can be very confusing if you don't know what you're doing. This is to help you pick your characters in the right scenarios. Combined with the character guides to know matchups and good/bad maps for each character, this should give you a right idea on what to use.

There are no definite roles for Awesomenauts, but for the purpose of this guide I will categorize them into groups and rate them. As you will notice, a lot of characters will have multiple "roles" and are therefore easier to build around.

INITIATORS / SETUP

These are the 'nauts that should be engaging first, fishing for setups for your team/yourself to kill. A lot of characters have good initiation, but these are the most characteristic:
  • Genji
  • Ix
  • Leon
  • Sentry
  • Skolldir
  • Swiggins
  • Yoolip

BRAWLERS / FIGHTERS

Brawlers are 'nauts that are constantly in the enemy's face, dealing damage while sustaining in fights, as opposed to being vulnerable after using abilities. Most of the brawlers will have some lifestealing items, making them able to stay in fights. Not to be confused with DPS-characters.
  • Ayla
  • Coco
  • Deadlift
  • Genji
  • Gnaw
  • Ix
  • Jimmy/Amy
  • Lonestar
  • Penny
  • Skolldir

BURST

They are referred to as "burst" because they inflict high damage in short succession as a quick follow up to setups. These are incredibly useful when combined with a potent initiator.
  • Froggy
  • Clunk
  • Vinnie
  • Swiggins
  • Ksenia
  • Penny

FOLLOW-UPS

This is true for most characters. Almost every 'naut can follow up on a good initiation with success, although I am more focusing high damage dealers that don't fit well as burst, but can also provide high damage out of an initiation. Note that most of these are vulnerable without their initiator.
  • Ayla
  • Voltar
  • Coco
  • Yuri
  • Ted
  • Skree
  • Nibbs

TANKS

There aren't many true tanks in 'nauts, but some higher HP characters can easily stay in front and keep their damage dealers alive. Tanks are usually also either initiators or brawlers, giving them the role of a tank. Clunk for example is neither an initiator nor a brawler, and therefore doesn't have much success tanking for his team effectively.
  • Scoop
  • Skolldir
  • Derpl
  • Sentry
  • Jimmy/Amy

RANGED / DPS

These are the most vulnerable characters in the current state of the game. They usually don't have many ways to escape, have low HP, mostly only single jumps, and don't have insane burst in the middle of teamfights to keep enemies from ganking you. Most of the time when an initiator and/or tank aren't present, they are forced to stay far back to avoid any contact.
  • Lonestar
  • Raelynn
  • Rocco
  • Ted
  • Chucho

AREA DENIAL

As the title explains, these characters are used for area denial. As of right now, they are only viable picks on Ribbit IV, Aiguillon and Starstorm Station, as there are a lot of small passages on those maps, making cutting rotations very useable.
  • Gnaw
  • Derpl
  • Ted
  • Yuri
  • Skree
  • Voltar with mines

SUPPORTS

Supports are just referred to 'nauts, who's abilities have supporting effects such as shield, healing or speedups. Each one of these characters have secondary roles, as they would not be able to do well in the 3vs3 setting without them currently.
  • Voltar
  • Genji
  • Yuri
  • Ix
  • Yoolip

TURRET PUSHERS

Some characters have abilities that soak up turret damage by creating spawns, so they can push turrets without present droids and for no HP cost for constant chip damage every time that ability is off CD. This is by no means their main role, but a certain action they can do whenever there is time and it's safe or important to do so during a match. Some do this way better (Lonestar, Chucho, Skree) than others (Swiggins).

  • Lonestar
  • Voltar
  • Leon
  • Gnaw
  • Raelyn (with humming droid upg)
  • Genji (with humming droid upg)
  • Swiggins
  • Skree
  • Chucho

BUILD YOUR COMP

This is very hard to explain, as there are many combinations to be discovered in Awesomenauts, but there are quite a few mistakes you can make. Just as in other games, there are certain characters that simply outclass others in a role. Characters that fit multiple roles (e.g. Penny, Ted) become more viable than others in their categories, thus making them easier to build around.

Some good ways to start are making sure your ranged-DPS characters aren't vulnerable. They can all be used reliably if they are protected. Some good comps for ranged-DPS characters are:
  • Support, DPS, Tank
  • Initiator, DPS, Tank
  • Brawler, DPS, Initiator

These are by no means strict rules, since so many characters have many different roles, you can find it easy to do well as some very vulnerable comps. It also always comes down to the enemy's skill level.

The next thing you might want to avoid is to have 3 characters that aren't able to clear droids well, or properly push from a safe distance. Triple melee comps can go very bad especially on AI Station, since everybody has to get close to huge droidwaves full of flyers and are easily zoned out by ranged characters.

From what I've listed earlier, we can easily form good combinations.
Some of my favourite comps are Initiator + Area denial character + Burst/Brawler. When using initiators with Derpl or Yuri, it is recommended to pick a character that can place them into traps or mines, unlike Swiggins or Yoolip as an example.
Examples:
  • Skolldir + Derpl + Penny
  • Skolldir + Yuri + Froggy
  • Swiggins + Ted + Vinnie

Another comp-style I like to use in my tournament games are triple burst comps. These are harder to pull off as they require more synergy to perform well, and mostly don't have as much clear, push, or general poke than most other comps. This is achieved with 1-2 initiators and 1-2 burst characters. Swiggins is a nearly perfect base for these comps, as he is very consistent and easy to follow up on. Combining the anchor drop with 2 high damage 'nauts will kill anyone that Swiggins initiates on.
Examples:
  • Leon + Swiggins + Vinnie
  • Penny + Swiggins + Ksenia
  • Coco + Swiggins + Vinnie

The most potent comps are currently revolving around Genji, as he has one of the best clears in the game, has a very good setup ability, can support his team, put on pressure from a safe distance and make the enemy unable to initiate with both of his abilities. This is why teams opt to ban Genji as one of their character bans in tournament games. Genji can be used with any high damage ability out of Cocoon, but is the most viable with high-HP characters on his team.
Good comps would be:
  • Genji + Skolldir + Froggy
  • Genji + Swiggins + Coco
  • Genji + Ix + Clunk

Listing every character's synergy with others would be endless and there is many comps you can try out. This is just a general idea of what you should avoid when picking your character.
If you would like to know anything about a character's matchups or synergies, please ask on our discord.
-----------------------------------------------------------------------------
Content Creators
Awesomenauts doesn't have a huge amount of content creators at the moment, but the ones that do make videos and stream on Twitch deserve a lot more recognition in my opinion. Watching them also help you to learn the game, understand strategy and in general get involved in the community.

STREAMERS


▶️ https://www.twitch.tv/ryan2ms
▶️ https://www.twitch.tv/abbie27x
▶️ https://www.twitch.tv/hollaholladolladolla
▶️ https://www.twitch.tv/xstarsan
▶️ https://www.twitch.tv/esc_cole
▶️ https://www.twitch.tv/love_58

YOUTUBE

▶️ https://www.youtube.com/@ryan2ms
▶️ https://www.youtube.com/@ESC_Cole
▶️ https://www.youtube.com/@pleaseLOVE
▶️ BluePwnsU - https://www.youtube.com/watch?v=bfVRZZLMK_0&list=PLYpaNSGGQFRCMmTUQXgwer-KesAES7P7t
Community links
Here's some websites and discord servers to check out:
Special Thanks, Sources and Contributors
SPECIAL THANKS <3

To Diz Hydron for allowing me to use info from their guide.
To Malk, for the downgrading to nauts 3.2.8 tutorial.
To Niki, for allowing me to use their guide template.
To the official nauts wiki[awesomenauts.fandom.com], for so much info.
To love-58's discord for good build ideas.
To the creators of NautsBuilder [orikaru.net]for their amazing build planning and sharing tool.
To ThreeLetters3 for help with the Vinnie section.
To Jambo for a lot of good builds.
To Cormy1 and Niz for their Scoop expertise.
To TheAwesomenauter for their Leon expertise.
To pvt for his yoolip experise.
To ryan2ms for his item tier lists and lots of other tips and advice.
6 Comments
Chupi  [author] 17 Jul @ 5:03am 
@Skrekw Even with a cap it's still good for that purpose. I need to do further testing and I need to update the whole guide for the return of the game to its new patch. SOON TM
Skrekw 23 Jun @ 1:32pm 
important on lux: do not go for charge shield + heal combo. the charge shield disappears after certain damage threshold (around 400 damage)
hohobon 6 Feb @ 10:05am 
Good job
Luca|EzioTheDeadPoet 4 Dec, 2024 @ 1:34am 
RIP for the DLC Nauts. Really loved this game.
Curious of I can actually play the "normal" version when inviting friends.
Chupi  [author] 20 Nov, 2024 @ 11:57am 
@76561197978773817
Hello! We answer that question in the following Chapters:
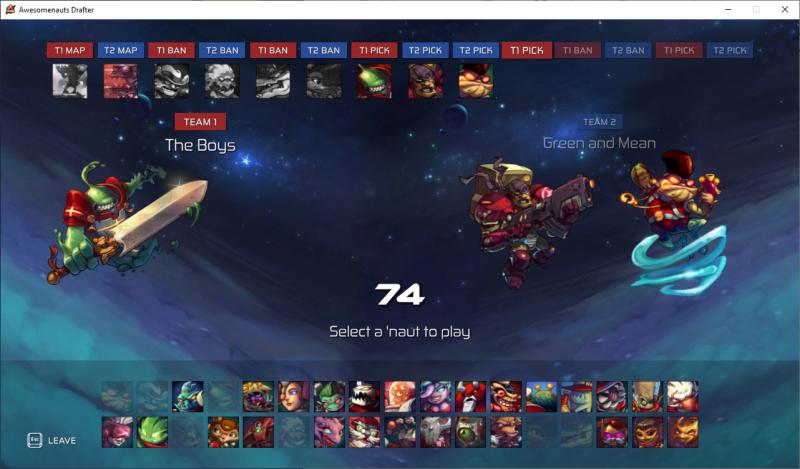
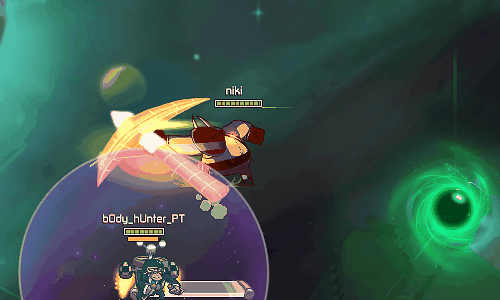
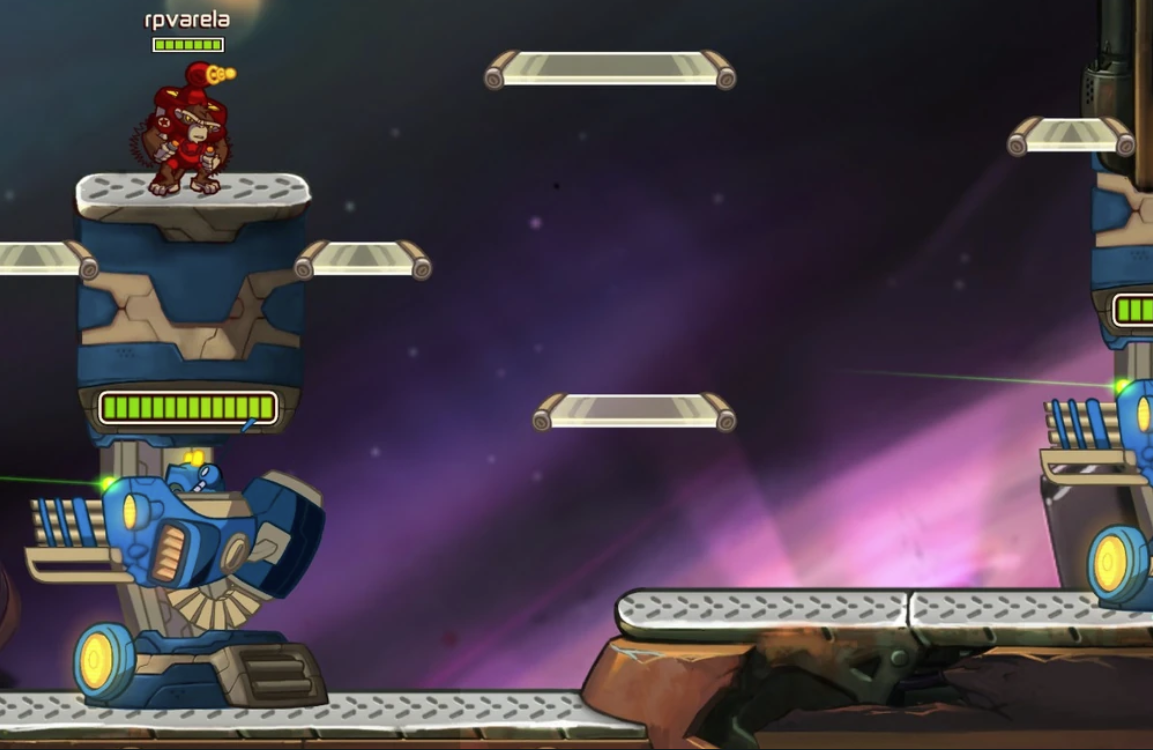
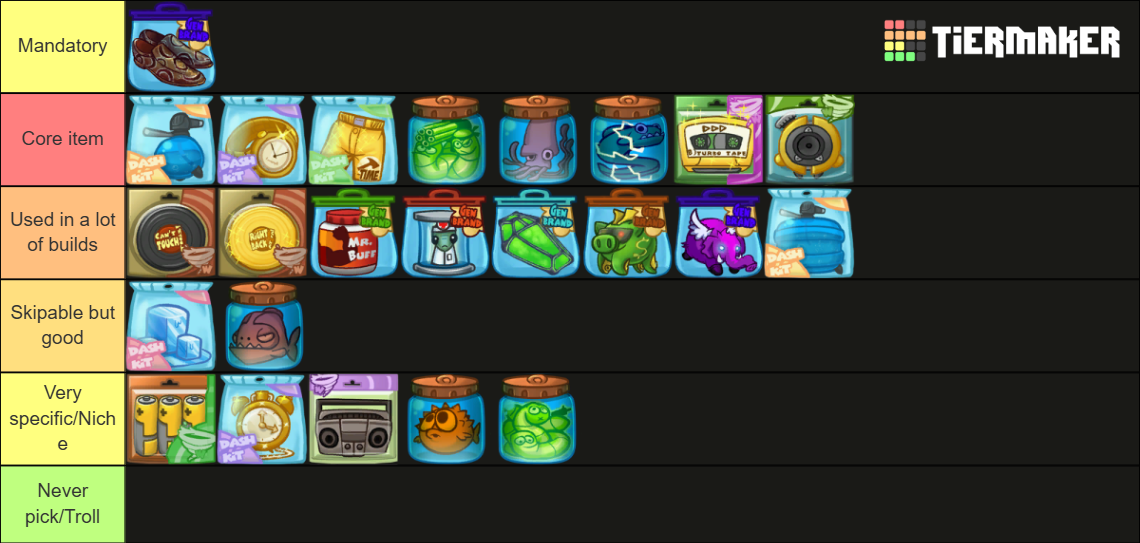
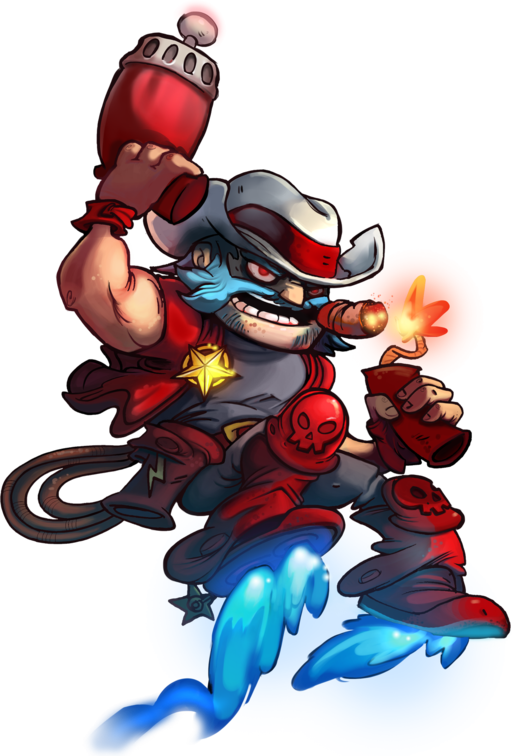
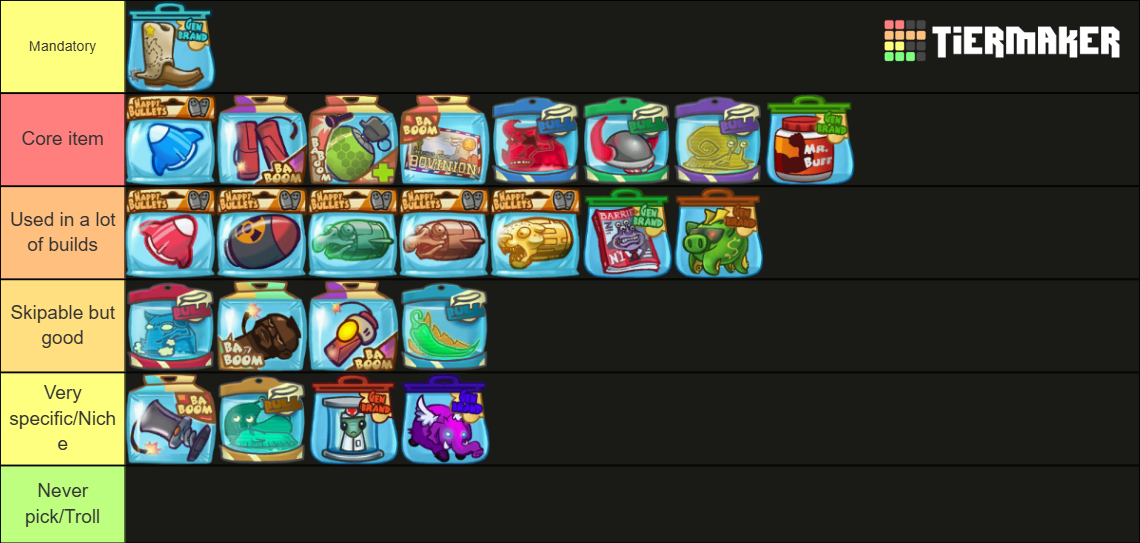
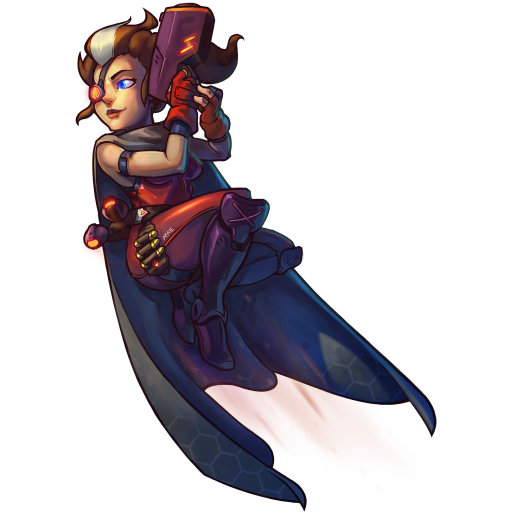
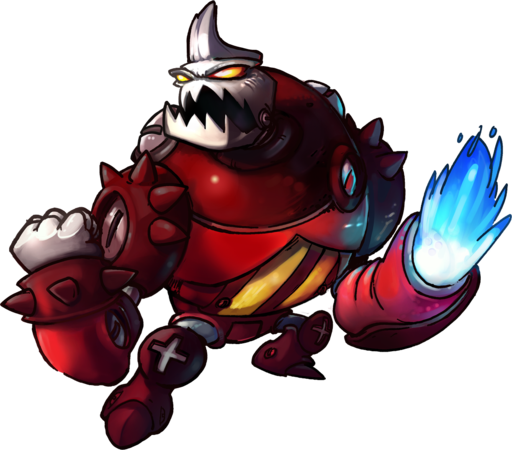
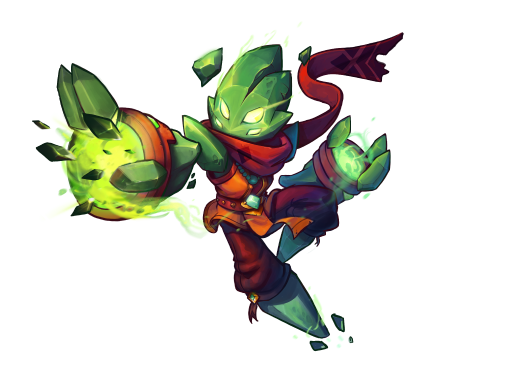
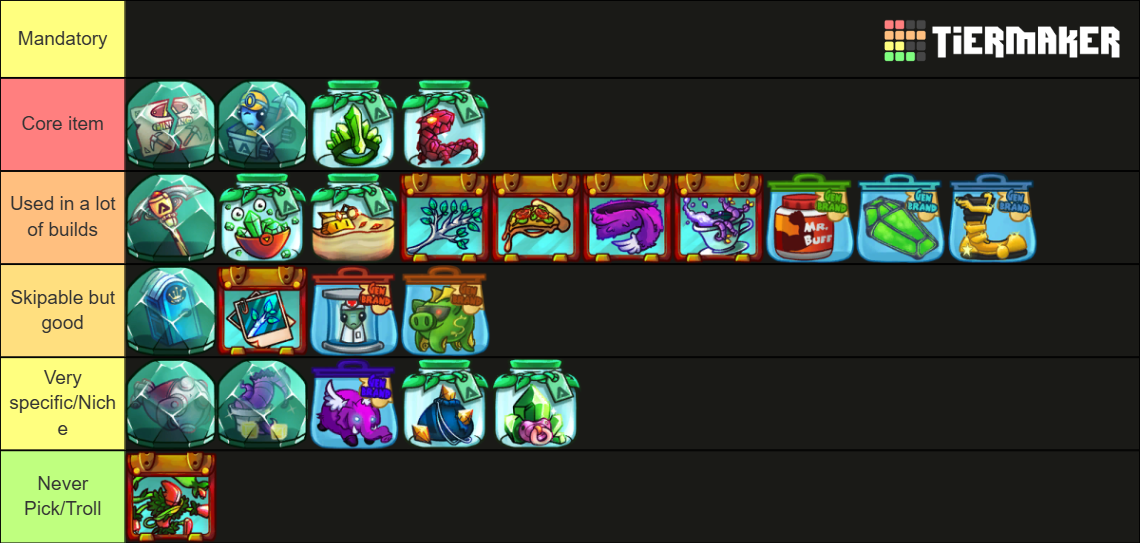
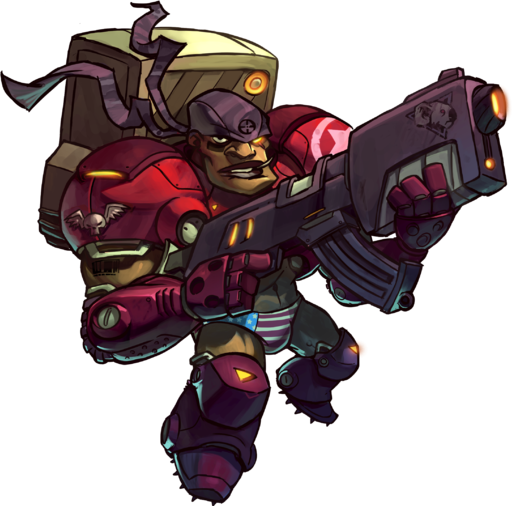
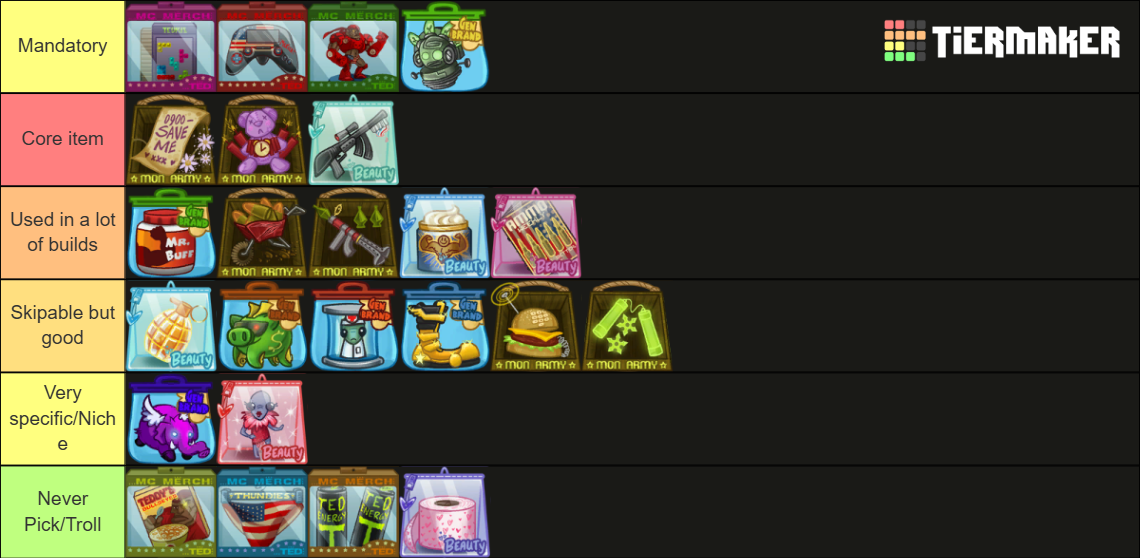
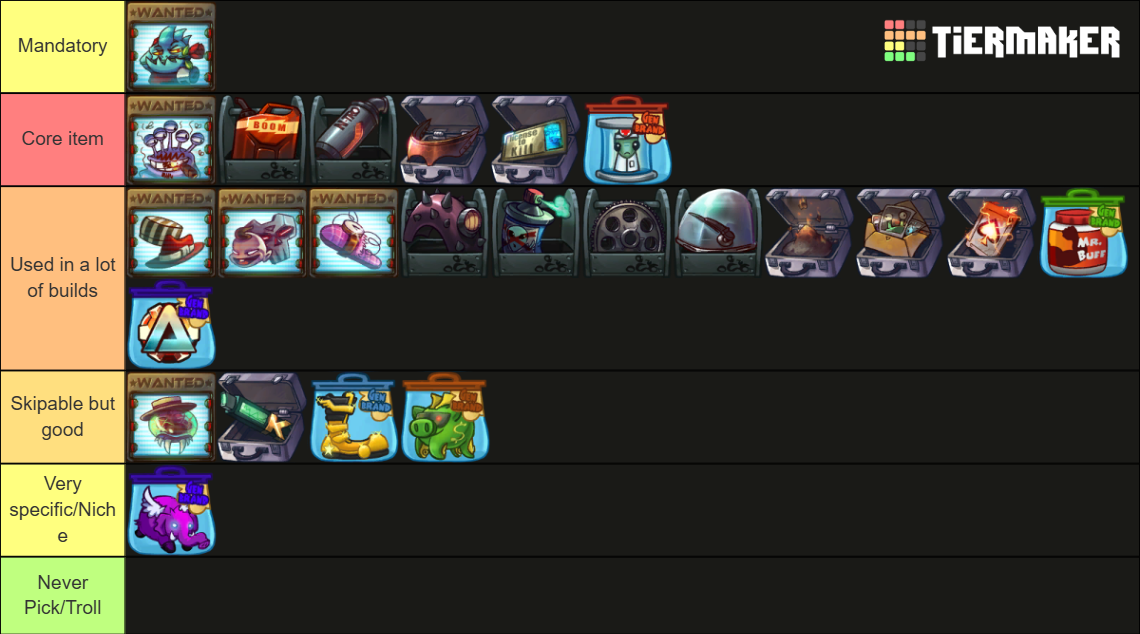
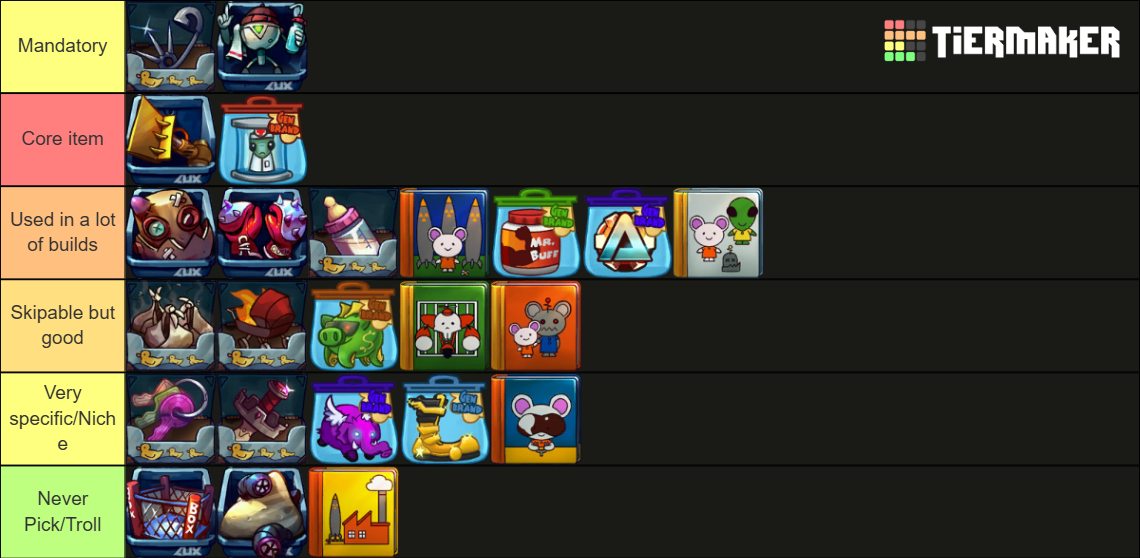
-Guides for every naut
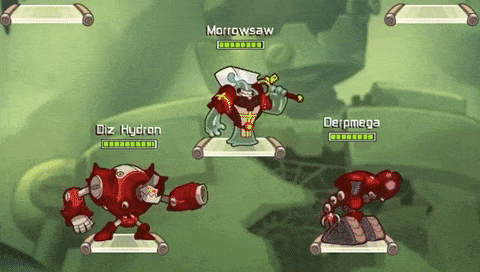
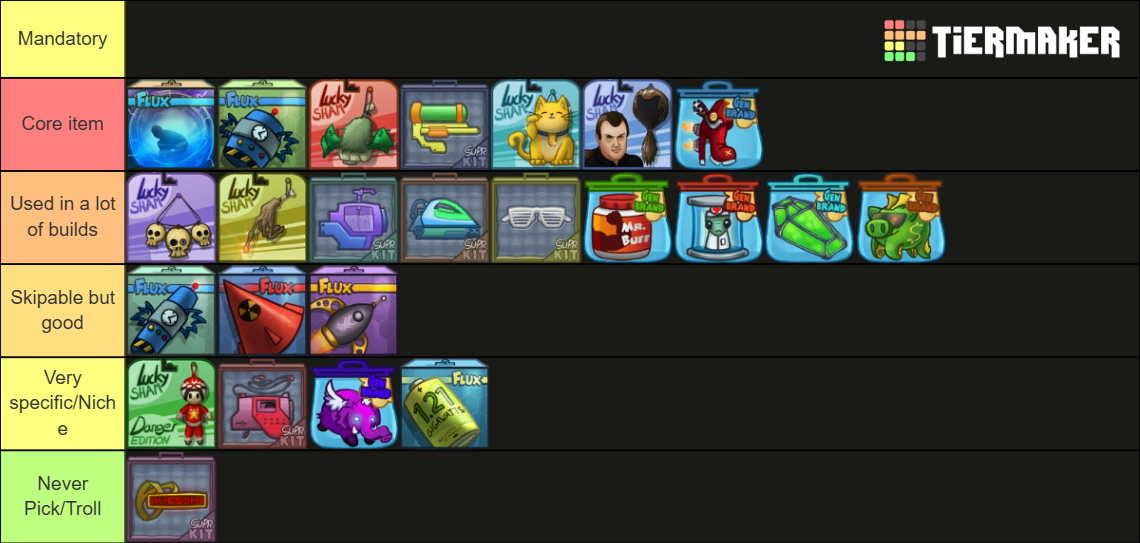
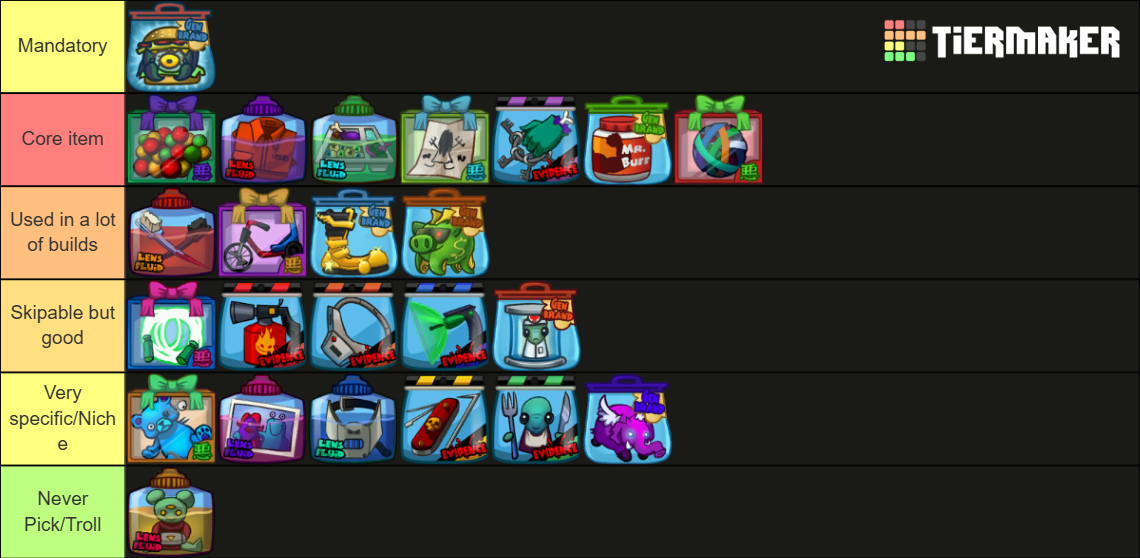
-DLC Nauts

And we also provide more details about DLC and character availability on our discord's faq. Let me know if you have any more questions!
76561197978773817 18 Nov, 2024 @ 10:02am 
Great Guide, thank you for the effort!

Is there any possibility to get all 'nauts in 3.2.8?