Phasmophobia

Phasmophobia

28 ratings
You CAN take on Apocalypse III
By utoto
I was written by someone who is absolutely bad at looping and hunts in general, clueless to the Sunny Meadows map. Here's how you can complete the challenge like they did.
2
2
2
   
Award
Favorite
Favorited
Unfavorite
Intro
NOTE: DUE TO CHRONICLE UPDATE'S OPTIONAL OBJECTIVES, I DON'T RECOMMEND ATTEMPTING THIS CHALLENGE RIGHT NOW. SEE THE OBJECTIVES AND THE EXTRA SECTIONS FOR MORE INFORMATION ABOUT IT.

At some point, I've never played, nor heard of, Phasmophobia. I discovered it through my friends, and the game was still in early access. At first, me and my friends played it as a game of haste, and left before hunts. We were more interested in the whole spooky experience and we weren't so much into risks/surviving.

We accumulated wins and climbed up to the Professional difficulty. Here, you might get more used to some ghost particularities, such as Goryo only showing up in D.O.T.S. from the video camera, and Revenant being a super fast ghost. You extend your knowledge to a practical point, and this gameplay loop continues until it starts to get boring. It did get boring for me and my friend group.

And that leads to Nightmare, or a custom difficulty. This flipped the game on itself, and now I, playing solo, was getting into wikis and going after the missing bits. But I inevitably hit some barriers that wouldn't be broken without the hunts that I was still absolutely avoiding in my contracts.

When I was comfortable with hunts in the theory, I headed into Nightmare, then Insanity and soon had reached 0 evidence + 0 sanity. With a good level of confidence in my detection skills, I hopped into the Apocalypse Challenge.

With that said, I believe it's important for you to situate yourself in how much you know about the game before getting into this part. This is a checklist I'd run to see if it's a good time to try the Apocalypse Challenge:
  • Am I leveled up enough to unlock some vital equipment to the challenge? (I'd recommend level 80 minimum)

  • Do I know difficulty settings and how each option affects the gameplay?

  • Have I played Nightmare/Insanity until I'm confident I can choose the right ghost given the options I have?

  • Have I played 0 evidence, 0 sanity until I'm familiar enough with ghost speeds, behaviors and abilities?

If it's 4/4, it's time.

Setup
How to access the challenge
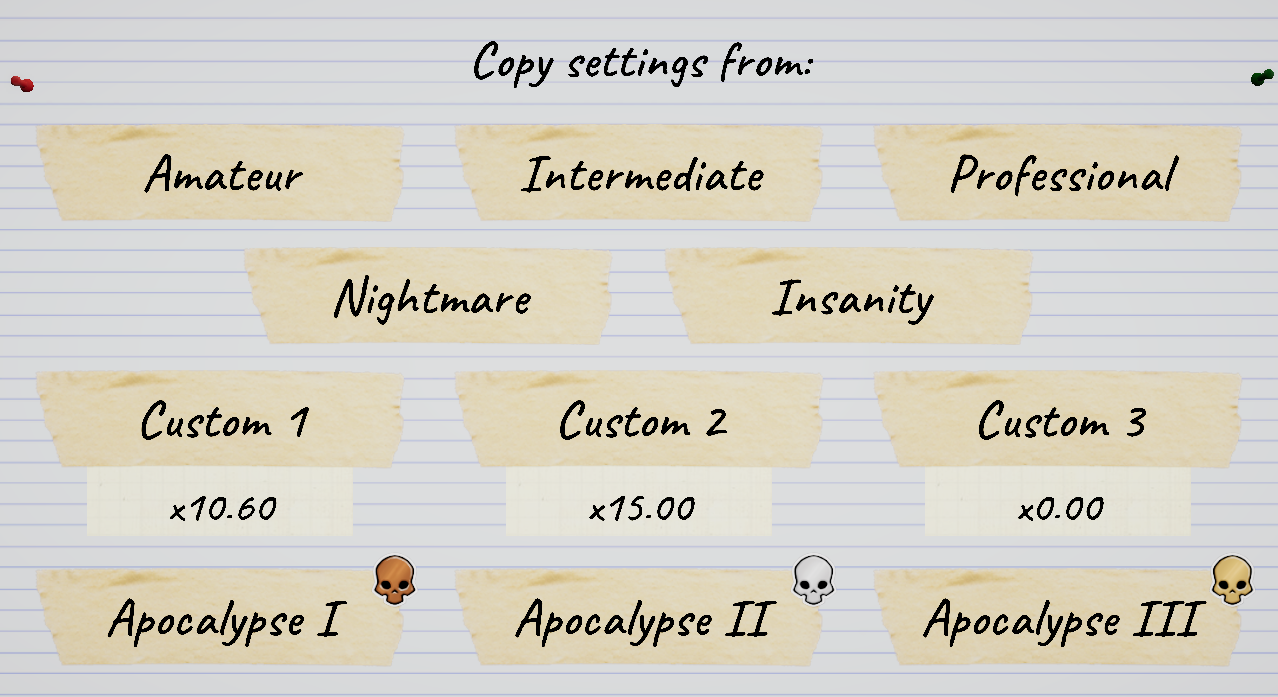
Apocalypse III is a custom difficulty[phasmophobia.fandom.com] preset. In order to have access to it, you need to have the custom difficulty unlocked (level 50).

Select a custom difficulty (Custom 1, 2 or 3) from the contracts board, press the edit button (it has the same icon to change difficulty), click on the button labeled Presets to the right of the difficulty name, and choose Apocalypse III.


You need to play singleplayer on Sunny Meadows, and to satisfy all of the following conditions in order to complete the challenge:
  • Correctly identify the ghost
  • Complete the three randomly assigned objectives
  • Take a photo of the ghost
  • Survive

Tinkering the difficulty
With 15x being the highest multiplier, there are one of two main options that may be tuned down in difficulty to make your life easier. They are:
  • Event Frequency: The Apocalypse III preset defaults it to Low, but you can set it to Medium.

  • Hunt Duration: The Apocalypse III preset defaults it to High, but you can set it to Medium.

I strongly recommend setting Event Frequency to Medium, as it is a big help with the ghost photo (and/or with the ghost event objective too). Even though a Medium Hunt Duration will take 10s from hunts (60s -> 50s), it's not that big of a deal since you can carefully plan your timing.


Loadout
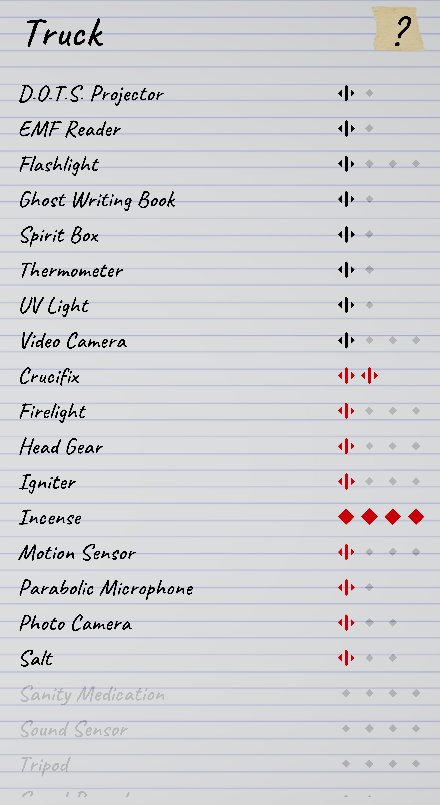
Here are the most important equipment to take into the darkness of Sunny Meadows, and their optimal quantity:
  • 1x Parabolic Microphone III (70)
  • 1x Photo Camera III (55)
  • 1x Head Gear III (80)
  • 2x Crucifix II (34) or III (80)
  • 1x Igniter II (37) or III (52)
  • 4x Incense I (14) or II (37)
  • 1x Motion Sensor II (42) or III (70)
  • 1x Salt II (39) or III (65)
  • 1x Firelight I (12), II (37) or III (75)

Any other item should be as little as possible in quantity.

Timer
In this challenge, you're strongly advised use a timer. Since your speed is a fraction of what it usually is, every second matters when you're moving around the building. If you haven't used one so far, you can use your cellphone or any wristwatch, or an overlay with a timer. As long as it's easy to start/stop and check the timer, it's a good choice. Personally, I used Google's timer (which may appear if you type timer in Google) in my second monitor, but sometimes I also used my cellphone.
Briefing

The way I handled this particular challenge was TO BE A RAT. You will never catch me trying to see if a ghost is more visible or invisible during hunts, or if it ever changes its model. That requires a safe spot and good reaction time, and with my smooth brain and the little experience I have with the Sunny Meadows map, that's a huge no for me.

And I truly believe that's OK. I mean, the only ghost you can only identify by looking at it is the Obake, for the Phantom can teleport to you and the Oni will be ADHDing all around (which is, funnily enough, the ghost I got the achievement with).

But if you want to know about good spots, there is the piano in the chapel that you can use to hide yourself while on their left side, but I must confess I went to this challenge completely blind about this subject and didn't know anything about those. This video, Every Single Gold Apocalypse Hiding Spot (that I know of) - Phasmophobia Guide, by RGR, can be a good place to start, but I wouldn't bother too much about it.

The strategy I used when the ghost spawned in a room of a hallway would be to enter an adjacent room and just wait. The moment you hear a heartbeat (meaning the ghost just entered your room), burn your incense (tier I works best, tier III won't do) and hope they go away and never come back. Surprisingly, this only failed me once, as most of the time the ghost won't even enter or return to your room anyway.

It's important to have patience when dealing with this challenge. The ghost has a huge advantage over you, and if you rush things, it might compromise the whole thing. I believe it's important to balance commitment and time. That is, I am not a fan of bringing every item I can to the front door because it can be a really hard ghost to identify, but I also don't think you should proceed without the right tools.

Now we move on to the core concepts of this challenge.

Objectives

You might think I'm crazy, but I don't mind objectives in this challenge at all. The run that awarded me with the achievement had two of the most unwanted objectives to have, according to many guides and videos, that are to witness a ghost event and to prevent a hunt with a crucifix. Mind your rerolls, because you can be rerolling a totally doable run. But also maybe you're not, so don't avoid it religiously.

Also, callback to the RAT playstyle. I avoid any contact with the ghost at all costs.

... But that was before the Chronicle update. Now I believe a reroll is justified if you get any of the media related objectives.

Safe objectives
If you get any of these objectives, consider yourself lucky, and you don't need to sweat over them at all.
  • Capture a photo of the ghost: In order to complete the challenge, you need a photo of the ghost. Free objective!

  • Detect a paranormal sound with a Parabolic Microphone: Since the Paramic is a tool you want to have with you nearly all times, this objective is really easy to complete.

  • Detect a ghost presence with a Motion Sensor: This sounds pretty risky, but you can put one in the ghost's hallway right after a hunt and flee to safety. Also, it can also help you to safely identify a Raiju, or any stalking ghost (Banshee, Phantom or Wraith).

Risky objectives
These objectives can, and probably will, involve some dangers.
  • Any incense related objective + escape the ghost during a hunt: They are really good if they come together, but they will still require for you to be vulnerable for a little while to get them done.

  • Get a ghost to blow out a Firelight: It's not hard to do it, considering ghosts can blow them out during hunts. But since they don't offer too much help, firelights are more of a -1 equipment slot.

  • Prevent the ghost from hunting with a Crucifix: I don't think this is as bad as people make it. If you get close to the ghost room and wait for a hunt to end, just do a quick jog over there, toss the crucifix by the entrance of the room the ghost seemed to spawn, and get out. Also, if you get lucky to witness an event, the crucifix in your hand will save you if the ghost decides to hunt immediately after the event. This is very bad to do with a Deogen, but hey you'd reroll this the second you'd seen it anyway, so it doesn't really matter if you get a Deogen.

Hard objectives
Avoid this objective, even though it's still very doable.
  • Have a member of your team witness a ghost event: On top of needing you to be 15 meters near the ghost[phasmophobia.fandom.com], it also depends on luck and general ghost behavior. A ghost event is very much desired for a photo of the ghost, but no one should expect consistency for this.

"Are you kidding me?" objectives
Phasmophobia's new update just introduced some additional optional objectives. And they all suck for this challenge.
  • Capture a Photo of any successful reading on an EMF Reader: I classified this objective as hard before, but this is another level of a bad objective. On top of wasting an inventory slot, you need to capture a photo of it, which will attract the ghost with the tier II or III photo camera.

  • Capture 3 unique photos with a Photo Camera: You can take a photo of a burned crucifix (which would also help with the crucifix objective), the photo of the ghost (which is mandatory), but good luck with the last one (EMF or bone). Really sad objective.

  • Capture 3 unique videos with a Video Camera: On top of needing to record three different things (good luck finding them), you will waste an inventory slot. I have no words on how bad this is.

  • Capture 2 unique paranormal sounds with a Sound Recorder: As bad as the video camera one.
Ghost types
From easiest to hardest, here are the ghosts of Sunny Meadows that are waiting for your arrival, and your chance of getting one of the following sets.


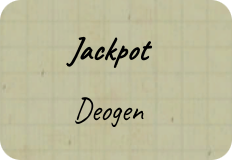
Jackpot (4%)


Deogen might be the safest and easiest ghost to have in this challenge. Just walk around, don't get cornered, and you're good!


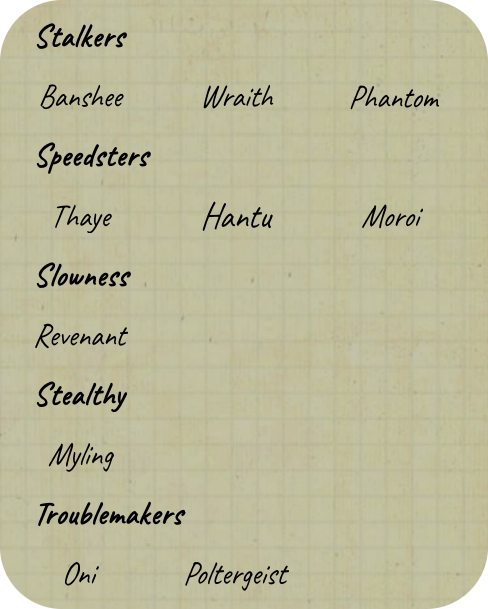
Easy ghosts (42%)
These ghosts can be easily deducted from a safe spot.


Stalkers
Some ghosts will come directly to your location and ask you if you got any games in your phone.
  • Banshee (as long as their room is in the same floor as you)
  • Phantom
  • Wraith
Speedsters
Some ghosts will hear Running in the 90's in their head while they run around, and you can hear their fast steps from afar. It might be a good idea to hear their footstep sounds somewhere online[tybayn.github.io] while outside of the building after they're done hunting.
  • Thaye (fastest)
  • Hantu (fast, about as fast as a Thaye in their freezing room)
  • Moroi (just fast)
Slowness
This ghost is more about the journey and less about their destination, as long as it doesn't know your whereabouts.
  • Revenant
Stealthy
This ghost thinks that the sound of their footsteps would bother you. You can't hear their footsteps while they're not very close to you.
  • Myling
Troublemakers
Some ghosts will play with objects, doors and anything in their reach more than others. But be careful, with 150% speed every ghost will throw a lot of items around while hunting.
  • Poltergeist
  • Oni


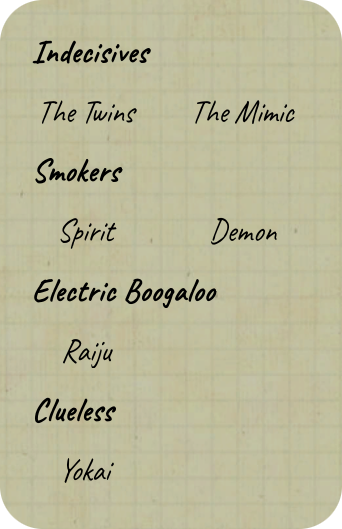
Medium ghosts (25%)
These ghosts will be marginally harder to deduct, and can involve some risk to it.


Indecisives
Some ghosts will change their speed or their behavior over time. Be patient with them. They might fool you.
  • The Twins
  • The Mimic
Smokers
Some ghosts will react differently to incenses. A Spirit will act as if they got shot and a Demon can shrug it off.
  • Spirit (3 minutes before it can hunt again)
  • Demon (1 minute before it can hunt again)
Electric Boogaloo
This ghost will speed up near electronics, and you might need to put them close to the ghost.
  • Raiju
Clueless
This ghost can't detect your electronics, but you'll be in danger if this is not the ghost you're facing.
  • Yokai


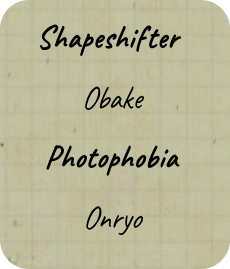
Hard ghosts (8%)
These ghosts will be hard to deduct without a solid method of surviving, which includes a great understanding of the safe spots of Sunny Meadows.


Shapeshifter
This ghost will change its model while it's hunting. Good luck trying to observe this phenomenon while it runs towards you with murder intent.
  • Obake
Photophobia
This ghost will treat a firelight the same way it treats a crucifix. However, placing a crucifix in this difficulty is already a nightmare.
  • Onryo


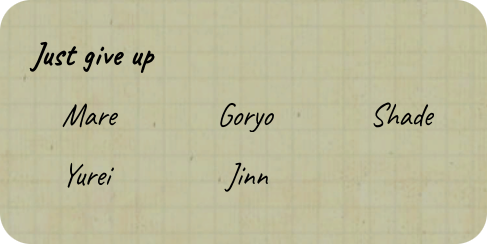
Just give up (21%)
These ghosts are so boring they might not be worth of your time, and be near impossible to figure out.


  • Mare
  • Goryo
  • Shade
  • Yurei
  • Jinn


And with the ghosts in mind, we enter the practical stage of this guide, that is, to finally enter Sunny Meadows.

The execution

This was the step-by-step I followed:
  1. Detect and identify easy ghosts.

  2. Find the ghost's favorite room.

  3. Move a crucifix and a photo camera close to the ghost's favorite room.

  4. Detect and identify medium ghosts.

  5. Get easy objectives done.

  6. Detect and identify hard ghosts, or retry at this point.

  7. Get risky objectives and hard objectives done.

  8. If you haven't had any ghost event so far, go for the photo of the ghost via a hunt.

  9. Retry or succeed.

This is the base of what goes on my mind with my every attempt at this challenge. Some steps might not be needed depending on the ghost type, but they provide a general structure of operations.

Also, some guides will advocate for bringing all the important items from the van to the front door. However, I think that's a lot of commitment when Jinn is a possibility.

Initial items
Equip your Head Gear III and Igniter, they don't take an inventory slot. Then only bring three inventory items:
  • Parabolic Mic III
  • Crucifix
  • Incense
For the rest of the items, I'd only bring them once I located the ghost's favorite room, or needed them.

The first hunts
Have your crucifix in hand when you enter through the door. Then, throw it right in front of you and wait for the door you just entered to shut. Equip your Paramic and listen to the ghost. If you don't hear anything, try exploring the building until you do. You might want to listen to 1 ~ 3 hunts.


  • If the ghost is a stalker, it might trigger your crucifix, start a hunt in a location close to yours, interact with stuff near you, or give you an event. You should be able to complete objectives without needing to go to their favorite room.

  • You will know if it's a Deogen. It's really fast and it goes directly towards your location.

  • If it's a speedster, you will hear abnormally fast footstep sounds and they won't go directly to your location.

  • If it's the personification of slowness, it's a Revenant.

  • If it's stealthy, you won't hear it at all without the Paramic, it's a Myling.

  • If it's a troublemaker, you might need to get closer. Once you're close enough, they should be very active. A Poltergeist might throw many items simultaneously at all times, including hunts.

  • Bonus: If it's one of the indecisives, you might notice a difference in their speed when they're hunting. But since they're hard to notice and The Mimic can turn into a streak of normal speed ghosts, they're not as easy to detect, but still possible in this stage.

The next step
If it's a normal speed ghost, you will need to get closer to the ghost's favorite room. Take your time, because you only got a total of 4 incenses.
  • If the ghost is anywhere in the central area, advance with caution. Track the ghost with the Paramic, then make a run towards its area. You can drop your Paramic anywhere in the way. If you can hear the ghost's vocalizations without the Paramic when it initiates a hunt, it's a good spot. Drop your crucifix there and then go to the next step or head back for more items, as soon as the ghost finishes a hunt.

  • If the ghost is in a hallway (even downstairs), drop your items by the entrance of the hallway (which should be locked if the ghost is hunting) and go back for more items, including a photo camera. Once you're ready, take a crucifix, an incense and the Paramic/photo camera. You can drop your Paramic anywhere in the way. Advance to a room you can hear the ghost's vocalizations when it initiates a hunt, then drop your crucifix, and go to the next step or head back for more items, as soon as the ghost finishes a hunt.

Where things get spicy
In this stage, you should be close to the ghost's favorite room, but also in some danger. However, you should have at least a crucifix, a camera and an incense with you.
  • An airball event does not teleport the ghost to your location, but any other event does. The crucifix might save you here.

  • You may try to identify medium ghosts now. If the ghost ever come to your room, incense it as soon as possible and pray it goes away and never comes back, then time the start of the next hunt for a Demon or a Spirit test.

  • If you have a motion sensor, put it near the ghost room. A Raiju should speed up near it.

  • If all else fails, test for an Onryo or a Yokai.

  • If at any point you're out of incenses, go back and get more, if you can.

Signs you should retry
I prefer retrying over rerolling. From highest priority to lowest priority, this is when I retry:
  1. The ghost falls into the category of Just give up.

  2. The ghost's favorite room is too far from the entrance.

  3. The objectives are too hard to complete.

  4. I'm out of incenses.

I prefer hard objectives over boring ahh ghosts any time. Imagine getting 3 easy objectives and getting a Jinn.

When you die
If you quit right after you die, you don't lose your items and won't need to buy them again. However, if you haven't figured out the ghost by then, you should stay and see the type of ghost you were going against. This challenge has a lot of modifiers that stray from the normal game, so it's gotta take some training to get used to it. You should quit out only if you're low on money (which is unlikely), or if you're 100% sure about the type of the ghost.
The analysis
I can tell this guide is pretty different from the majority of the other guides I've came across after I completed the challenge. But I can't say if this is for the better or worse. For that, let me show some data that might (or might not) align with your interests.
  • I completed this challenge with 300h of playtime, with level 110 of Prestige I. I wanted to attempt/complete the challenge before going to Prestige II and losing all my items.

  • It took me about 8 serious attempts. One time I had the right ghost type and two objectives, but couldn't get the photo and the event objective. Then another I had a Deogen, but as I was going to smudge it, I realized I forgot the igniter and died (I hated myself so much in that moment).

  • I completed the challenge with an Oni roaming around the chapel. I never entered the chapel, though, and instead decided to camp behind the Manager's Office[phasmophobia.fandom.com] big table.

  • Most of the attempts had about 20 to 40 minutes of playtime.

  • To this day, I'm still pretty bad at looping/handling hunts. I kinda like it. Once you lose your fear of the ghost, are you really still playing a horror game?

  • I had a lot of fun with this challenge. I love how much you need to respect how big of a threat the ghost is, given how impaired you are. I just don't like the slow process of getting items around, but it's not that bad[spelunky.fandom.com].

  • I still have a lot of achievements to get, so I wasn't forcing myself too hard to complete this one.

  • If there's something that games like Getting Over It, Jump King and Dark Souls taught me is: Having to start over doesn't mean losing progress.
Closing tip
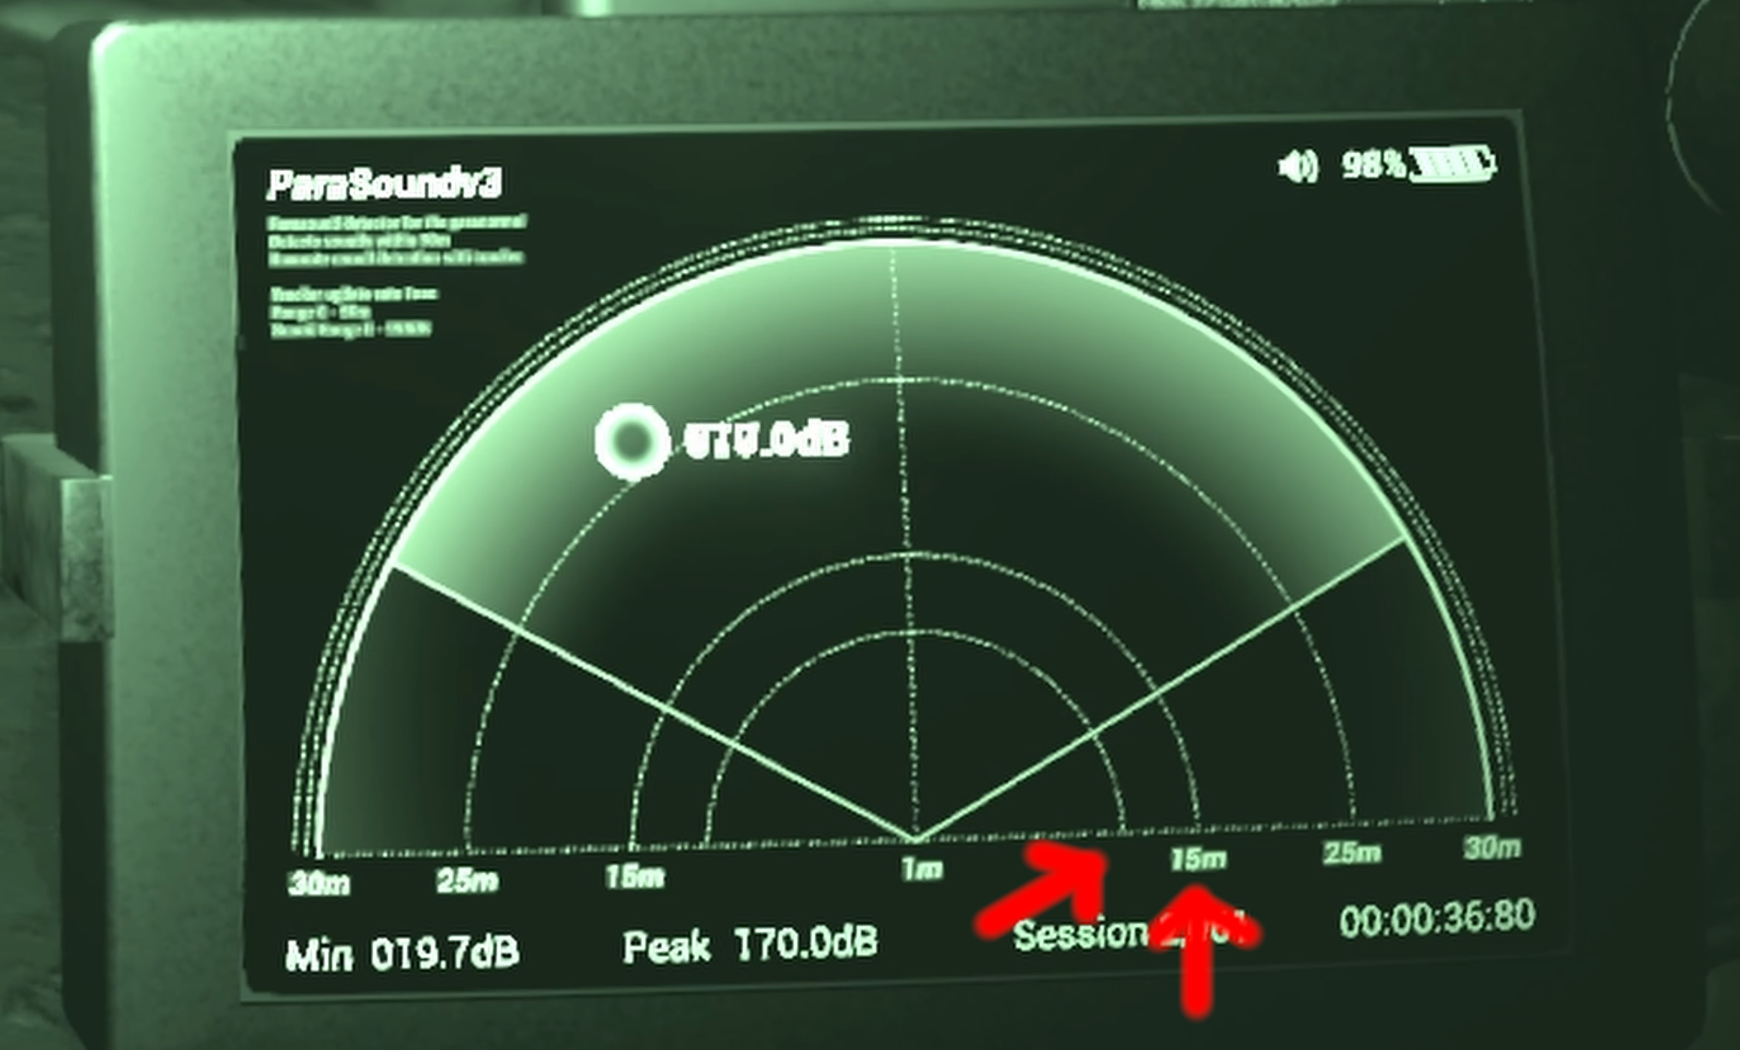
Did you know that a ghost can only detect your electronic devices when they're within 10 meters away from you?
Also, did you know that you can measure exactly 10 meters away from you with the Paramic?

Image source: I Completed the HARDEST Challenge in Phasmophobia, by Warped on YouTube

If you look at the hud, there are circles close to your location. The second one is 15 meters, and the first one should be 10 meters. This means that a ghost will only start to detect you if it's inside the first circle of a Parabolic Microphone tier III.

PS: I did prestige after the challenge, so I don't have a Paramic III myself to screenshot. Yet. Ops!
Summary
In a few words, this is the recipe this guide gives:
  1. Be at least level 82 for the Parabolic Microphone and the Head Gear III

  2. Be mindful of your objective rerolls. An easy/medium ghost can make up for them

  3. Try to identify the ghosts in order, from easy to hard.

  4. Enter the building, stay with your crucifix and listen for the ghost a few times to get to know what you're going against

  5. Venture further, closer to the ghost's room, with a crucifix and an incense in hands

  6. Try to identify the ghost and complete objectives

  7. Go back anytime a hunt ends to get more items if you need them

  8. If the ghost is too hard to identify and/or the room is too far away from the entrance, retry

  9. If you die without identifying the ghost, don't quit out and wait to see what the ghost was (except if you're low on money)

And, of course, be patient.
Closure
In this guide, I aimed to bring a broader approach to the Apocalypse III challenge, without much focus on the map or hiding spots (that might get removed in the future). My goal is to provide another perspective to a very difficult and frustrating challenge, which may give you some joy in the process and help you conquer it. I'm aware that this guide might give less consistency than the ones from people who are experienced enough to completely dissect this game, but you only need to get it done once. If you've been trying it for a while and had no success, I'd say to give it a break. A trophy is not worth it if you're not having fun. You can do it, eventually!

A huge thanks to my friends that introduced me to the game and still (occasionally) play with me; to hydrasung who made the videos of Phasmophobia Ghosts Explained QUICK, which was a huge boost to my knowledge about the game; and to you, for reading. Best wishes!

Extra
The Chronicle update introduced some extra objectives that will make this challenge way harder and way less enjoyable. Whatever was in the developers' minds when releasing this update, the Apocalypse III challenge wasn't in there.

As of right now, I actually recommend not doing this challenge. With the new media related objectives, you're better off rerolling them, which won't be anywhere as fun as how it was before this update. And if it's not fun to do this challenge, it's not worth it.
10 Comments
Doom Sentinel 18 May @ 9:19pm 
I wish there was a guide as good as this when I first got my challenge done 😭
Had Yurei when I completed it and that shit took me an hour and a half for the winning attempt
Amazing guide tho 👍
Ribs McPizza 17 May @ 10:01pm 
good info!
VTho 16 May @ 3:42pm 
Great read! I just got my apocalypse 3 challenge done today too with a wraith (escape the hunt, cleanse the area, paramic), so I stayed in the entrance way the entire time. At the time I was prestige 3 with 283.8 hours under my belt, and after the challenge, it leveled me up to 100 for prestige 4. In my experience, a ton of professional difficulty, challenge modes, and YouTube videos helped me get ready for the challenge. I, too, had a deogen a few attempts ago and got cornered even after smudging it :steamthumbsup:.
utoto  [author] 15 May @ 3:29pm 
Thank you all for your kind comments! It makes me very happy to read what you write over here. Wishing you all good luck, for the challenge and for anything else! :necroheart:
sweetcrystalzz 13 May @ 9:06pm 
I'll be saving this thank you!
JamOne 10 May @ 5:37am 
ok
thekronn0s 8 May @ 6:24am 
i lost
thekronn0s 8 May @ 6:24am 
the is the best guide ive seen but what do i do if im scared of playing the game :winter2019sadgingerbread:
borxstin 7 May @ 7:27am 
i dont have this game, reading the title is encouraging thanks
xrangerx777x 6 May @ 11:20pm 
Thanks for the guide, I've got a while until I'm ready!