Blue Prince

Blue Prince

124 ratings
Post-Game Puzzle Hints & Solutions
By Tetracube
Stuck on a puzzle? This will get you unstuck with minimal nudging.
16
6
6
2
2
   
Award
Favorite
Favorited
Unfavorite
Intro
Many thanks to people in the comments section for finding things I didn't.

After reaching room 46 for the first time and seeing the credits sequence, there's a very long "post-game" with increasingly difficult puzzles. Some you can solve yourself, a few you've probably already solved before reaching room 46, and others you're not going to solve without a few nudges unless you're a puzzle supergenius.

Most of these aren't technically post-game, but you're likely to find room 46 before finishing them. This guide assumes you've reached room 46, unlocked the four permanent additions (west path, orchard, cavern, and grotto), and understand some of the simpler puzzles like how to turn on the power in the boiler room.


Two next steps after you reach room 46: One is to reach it a second time so you can actually see what's in it, and the other is to solve the paintings puzzle if you haven't already. The post-game is going to take significantly more time than reaching room 46 did.

Due to the randomness involved in the game, you'll want to always be working on multiple things if possible. Play the game normally and if you luck into one of those things (and you usually will), go for that. Otherwise you're going to spend a lot of runs accomplishing nothing due to poor RNG.
Blessing of the Monk
Before we delve into puzzles, it's going to help immensely to know about this, in ways that may not be immediately obvious.

Blessing of the Monk is a shrine blessing. While active, when you call it a day in any room that appears in the directory, you can then draft that room in the outer room the following day (even if the blessing expires overnight), and it's guaranteed to show up in the first 3 rooms drawn for the outer room. It will generally not be draftable within the house itself for that day, even if you haven't drafted it in the outer room yet. Calling it a day within this outer room (and while the blessing is still active) will again allow you to draft it as the outer room the following day.

If you don't feel like trial-and-erroring your way into the correct gold amounts, here they are:
  • 3-day blessing: 13 gold
  • 4-day blessing: 29 gold
  • 5-day blessing: 45 gold
  • 6-day blessing: 61 gold
  • 7-day blessing: 77 gold
Eight Workshop Contraptions
The only hint I can really give for these is to keep checking the workshop whenever you have any significant amount of items and you'll find all eight combinations eventually, especially later in the game when your inventory is overflowing with items. Of all the contraptions, only the power hammer and the burning glass are needed to accomplish certain tasks, and you'll eventually unlock a much easier to find alternative to the latter. The other 6 are convenient but not needed for anything except unlocking the trophy.

Item Combinations:
  • Burning Glass: Magnifying Glass + Metal Detector.
  • Detector Shovel: Metal Detector + Shovel.
  • Dowsing Rod: Compass + Shovel.
  • Electro Magnet: Battery Pack + Compass.
  • Jack Hammer: Battery Pack + Broken Lever + Shovel.
  • Lucky Purse: Coin Purse + Rabbit's Foot.
  • Pick Sound Amplifier: Lock Pick + Metal Detector.
  • Power Hammer: Battery Pack + Broken Lever + Sledge Hammer.
The Gallery and Room 8
Someone already wrote a guide on the gallery, just read that.

What to do with your reward, the 8 key? Use it to unlock a door leading to a room on rank 8.

The puzzle in room 8 is much easier than the gallery puzzle, and you should be able to solve it yourself. Nonetheless, the solution:
Hubris: Monkey
Envy: Lion
Lust: Swan
Wrath: Elephant
Gluttony: Penguin
Sloth: Bear
Avarice: Rabbit
Mundanity: Dog
The Tomb
  • Hint: You'll need information from a certain non-outer room.
  • Hint: An ordering of something in particular that appears in the tomb.
  • Solution: Lower the tools the angel statues are holding in the order of the stained glass windows in the chapel:
    • The garden hoe
    • The pizza peel (the thing the chef one is holding)
    • The pitchfork
    • The chimney brush (the thing the one in a top hat is holding)
    • The broom
    • The jockey whip
    • The scepter
    • If you've done all that, a secret passage will open, leading to the 8th angel whose scythe you can then lower to reveal a secret exit to the abandoned mine. The secret passage to the catacombs is permanent, but unfortunately the secret exit to the mine is not.

There may or may not be another puzzle in here... you'll have to see a later section for that.
The Chessboard

If you haven't found this place yet, try lighting the four braziers outside the house. You can find two in places locked behind combination locks, and two in outer rooms. Specifically: the orchard, the gemstone cavern, the schoolhouse, and the hovel.

As for the puzzle itself notice how it looks just like the map of the estate? Just put the pieces on the locations of rooms you've drafted that have those pieces. Color does not matter.

If you weren't taking notes on chess piece locations, here they are:
  • King: Office, Throne Room
  • Queen: Her Ladyship's Chamber, Study
  • Bishop: Attic, Bookshop, Chapel, Rumpus Room
  • Knight: Observatory, Security, Treasure Trove, Armory (which you can't access without having first solved this puzzle anyway)
  • Rook: Nook, Vault, Clock Tower, Conservatory
  • Pawn: Bedroom, Bunk Room, Den, Dining Room, Drafting Studio, Drawing Room, Freezer, Guest Bedroom, Parlor, Secret Passage, Storeroom, Nursery, Walk-in Closet, Dormitory, Lost & Found, Solarium
The Paintings Puzzle
An unmissable puzzle, and the beginning of this massive rabbit hole. Most rooms in the game contain two sketch-like paintings. If you've reached room 46 and haven't figured out what to do with them yet, there are hints in various rooms, and the study spells it out for you. Putting it together is another matter, as you're going to have to visit every room in the house.

The solution: IF WE COUNT SMALL GATES, EIGHT DATES CRACK EIGHT SAFES

What to do with it? Well, refer to the next section.
Eight Combination Locks & Eight Red Letters

There's eight combination locks in the game and to solve them you're first going to have to solve the paintings puzzle. All but one contain one of the eight red letters.

So, what does the solution to that puzzle mean? First, it means there's eight combination locks in the game, most of them on safes. The codes for all of them are valid dates, all in MM/DD format (except the one that's got letters on it). Second, that 44-letter message contains several double meanings that will help you on the more difficult locks. You can also find a note in the freezer (after melting the ice) that explains none of the dates are found in writing on the estate, and none of them are of any particular significance to the story. Dates from newspaper clippings won't help you. Most of the puzzles can only be solved by referring to the solution of the paintings puzzle and relevant clues within the same room.

In order of the red letters contained within:

Lock/Letter #1: Underground Gear Room, before the Underpass.
  • Location Hint: Significantly more difficult to find than it is to solve. Try checking all eight alcoves in the underground room with the giant gear. Including the one that looks empty.
  • Location Hint: You've probably figured out how to raise the gear, but how to get up there? Try searching the underpass.
  • Location Hint: There's a red gate in the way! The box it's connected to may look familiar, but if that doesn't ring a bell, you can find instructions to open it in the basement.
  • Location Solution: Draft the boiler room and turn on the red box, then go to the gear room. Use the control clockwise from the underpass entrance to raise the gear, then go through the semi-hidden tunnel in the underpass, through the red gate, and across the raised gear.
  • Puzzle Hint: Once past the red gate, you can actually find the lock. This one's got letters on it, but all you need to remember is that the combinations to these locks are all dates.
  • Puzzle Hint: There's no numbers on this lock, except on the fourth segment, which has an 8.
  • Puzzle Solution: MAY8. It's the only valid date you can make with this particular lock. Also, "small gate" is "mayait" in Erajan.

Lock/Letter #2: Study.
  • Hint: All you need to know is the bit about all combinations being dates, and the clues in the room itself.
  • Hint: The chessboard. The queen is on D8. While you can read this as a clue that the puzzle solutions are all dates (D8="date"), there's a bit more to it.
  • Solution: 12/08. D8=December 8th.

Lock/Letter #3: Campsite, in the Grounds. The gate to the Orchard. I know I said I assume you have this one earlier but I'll put it here anyway for completeness.
  • Hint: You'll need to find the solution to this one somewhere in the house. It requires a magnifying glass and will be obvious once you find it.
  • Hint: It's not in the utility closet, but you will (probably) need to draft that in order to find it.
  • Solution: 11/28, the date on the tree next to the gate in a darkroom photograph.
  • The Red Letter: Remember how Alzara told you that you weren't going to find one of the letters? He's usually full of ♥♥♥♥, but not this time. The letter is unobtainable, and not even in the game files as far as I'm aware. You can find the little stand that once held the ruby in the shack, though. The waist-high fence was perhaps not as insurmountable as the Baron thought.

Lock/Letter #4: Boudoir.
  • Hint: The easiest safe, there's a very obvious hint within the room.
  • Solution: 12/25, Christmas Day.

Lock/Letter #5: Drafting Studio.
  • Location Hint: You may have missed this in previous visits to this room, but once you know it's in there you can eventually find it by searching the room.
  • Location Hint: Bring a magnifying glass.
  • Location Solution: It's the tiny paper safe on the table.
  • Puzzle Hint: As you probably already expected, the nearby calendar holds the key. Combine that with the painting puzzle solution.
  • Puzzle Hint: While the solution is not the most intuitive thing in the world, don't overthink it. I thought the red fruits might be dates at first, which would've fit with the clever wordplay, but no, dates grow from a type of palm tree. Those are just apples, and they don't matter to the solution.
  • Puzzle Hint: "If we count small gates..."
  • Puzzle Solution: 11/08. The month of November, and the 8 small gates in the illustration. Like I said, not entirely intuitive that the calendar, which marks a specific month and day, tells us the month but not the day.

Lock/Letter #6: Drawing Room.
  • Hint: The way to reveal this safe is hidden in the painting in the middle.
  • Hint: You will again need to refer to the painting puzzle solution.
  • Hint: If that's not enough, an important hint to solve this is hidden in the book A New Clue.
  • Hint: "If we count small gaits..."
  • Solution: 04/15. The man with the umbrella and the woman with the dress are the two who have small gaits. There are 4 drawings of the woman and 15 drawings of the man, and 15/04 is of course not a valid date.

Lock/Letter #7: Shelter..
  • Hint: Shelter is an outer room, so you'll want to approach the outer room door with at least two rerolls, which guarantees you'll roll it. Once inside, the computer in the shelter just tells you what to do, so do that.
  • Solution: You'll need to know the current date, which you can get by counting upwards from day 1 (November 7th) to the current day, or by checking the vault. You'll also need the current time, and the easiest way to find that is simply looking at the clocktower from the grounds. Set the unlock date to the current date and the unlock time to at least an hour in the future. Note that an hour in this game is approximately 7.5 real life minutes.

Lock/Letter #8: Office..
  • Hint: Once again, think about double meanings in the painting puzzle solution. Another crucial clue you need to solve this is in a different room, and you'll also need to refer to the note in the desk drawer.
  • Hint: The month is on the desk drawer note.
  • Hint: The room containing the other clue is a hallway.
  • Hint: Specifically, the foyer.
  • Hint: "Count Isaac Gates". Ignore the fact that his title is Count, which is only going to throw you off here.
  • Solution: 03/03. The month comes from the note: "March of the Count". As it hints, the other titles on the note are red herrings. The day comes from counting small gates— the smaller busts of Count Isaac Gates in the room, of which there are three.
Eight Found Floorplans
Eight secret floorplans found around the estate. Not to be confused with the eight studio additions, which you can pick one of whenever you draft the drafting studio.

Floorplan #1: (blueprint) Planetarium
  • Hint: Just knowing the name of this one is a huge hint to its location.
  • Hint: Try doing laboratory experiments that result in letters being sent to the mailroom. One such letter reveals how to obtain this floorplan.
  • Hint: It's in the observatory.
  • Solution: In the observatory, rotate the telescope clockwise until it's past the upper platform, then use the wheel on that platform to lower it until the lens compartment is within reach. Open it to receive your floorplan.

Floorplan #2: (blueprint) Mechanarium
  • Hint: You likely found this one on the way to room 46, but if not: retrace your steps.
  • Hint: It's not in a place you can draft.
  • Hint: Know any especially mechanical places?
  • Solution: One of the lower alcoves in the underground gear room before the underpass, right next to a very useful map of the underground.

Floorplan #3: (blackprint) Treasure Trove
  • Hint: Found via the solution to another puzzle.
  • Solution: See lock #1.

Floorplan #4: (blackprint) Throne Room
  • Hint: Found via the solution to another puzzle.
  • Solution: See the three microchips.

Floorplan #5: (hallway) Tunnel
  • Hint: Again, the name of this one is a hint to its location.
  • Hint: In a very dark place. You're going to need a means of making it less dark.
  • Solution: Bring a burning glass or self-igniting torch to the tunnel connected to the grounds. Lighting the two torches inside will reveal the floorplan and allow you to pick it up.

Floorplan #6: (green room) Conservatory
  • Hint: Seen all the music sheets?
  • Hint: You can find them in the music room, greenhouse, ballroom, and workshop.
  • Hint: Once you've put that together, it's just a matter of finding the location specified. It's not in a draftable location.
  • Solution: The bold words on the music sheets read "first words on the sheets are true message", and the first words read "find among the white trees under two stones". The spot you're looking for is in the campsite, right behind your tent. Use a shovel to dig between the two rocks there and find the floorplan.

Floorplan #7: (red room) Lost & Found
  • Hint: The only clue to this one's location is on a certain map, and you've likely already seen said map.
  • Hint: You've found the map if you've found one of the previous floorplans in this list. You'll need a magnifying glass.
  • Solution: The underground map has the answer. View it with a magnifying glass and you'll see spot #10, "buried floorplan", hidden in the emptier part of the basement. Go there and dig it up with a shovel.

Floorplan #8: (red room) Closed Exhibit
  • Hint: Found via the solution to another puzzle.
  • Solution: See lock #2.
Three Microchips

Finding all three of these will do something in Blackbridge grotto... and may be useful for other things, too. The smallest of them is already in the grotto for you, so it's just a matter of finding the other two.

To find either:
  • Hint: You're going to need a clue from a specific book to find both of these.
  • Hint: It's a book you're going to need to buy from the bookstore, which can only be drafted from the library. Bring some rerolls and a lot of money.
  • Hint: A New Clue is the book you want.

To find the mid-sized chip:
  • Hint: The book in question is full of clues for all sorts of puzzles, but the one you want to be looking at is page 15, the one with the empty estate floorplans on the ground. You don't need a magnifying glass for this one.
  • Solution: Smash the vases in the entrance hall with a sledgehammer. The microchip is in one of them.

To find the large chip:
  • Hint: Same book, but this time you will need a magnifying glass.
  • Hint: Check page 6, the one left of the illustration with a giant rook/miniature castle tower in it.
  • Hint: Using the magnifying glass and ordering the words, you get "all checked corner case rooms had a low case clue found in the rooms".
  • Hint: Said "checked corner case rooms" can be found on the previous page. All four of them have notes with a single word in lowercase.
  • Solution: Combining the lowercase words on the notes in patio, nook, office, and pantry, you get "buried beside west bridge". Bring a shovel to the bridge on the west path. The microchip is buried to the immediate right of the bridge, before crossing it.
Eight Sanctum Keys
Upon your second visit to room 46, after a cutscene doesn't rudely send you to the next day, you can find a slip of paper containing hints to the eight keys that unlock the eight doors in the inner sanctum. Once used (on any sanctum door), the door remains permanently open and the key becomes no longer obtainable. For information on what to actually do beyond those doors, see the realm sigils section.

Key #1: The first key found here on the furthest rank,
  • Solution: Right next to the paper with the hints!

Key #2: The second locked tight in the vault of a bank,
  • Hint: Obviously, in the vault. This isn't really a puzzle, but it can be difficult to get it.
  • Tip: There are four keys to four deposit boxes: 149, 233, 304, and 370. All four can be found, randomly, wherever special keys are found, and it doesn't seem like you can get more than one per run (maybe with coat check...?). Once you open a deposit box, it stays open permanently and the corresponding key stops spawning, making it easier to find the others. If you're having trouble finding these, try the trading post, or the lost & found found floorplan. The key is only in one, but you'll want to unlock all four.

Key #3: The third is high up, among all the clocks,
  • Location Hint: The location is obviously the clocktower, but where in the clocktower? The note at the top won't help you.
  • Location Hint: Notice how one of the clock faces is stuck on a particular time, and the floor at the bottom is showing that same time.
  • Location Solution: In the clocktower, wait until 1:30 in-game time. An hour in-game is 7.5 minutes real-time, so it could take a while. Once the clock strikes 1:30, a cutscene will play, and a secret passage will open at the bottom of the tower.
  • Puzzle Hint: This puzzle isn't as hard as it seems, and it may be easier to do some guesswork and then correct it than to puzzle out the correct answers before setting any times. Also, remember that handwritten red memos are true.
  • Puzzle Solution: From left to right: 5:00, 5:08, 5:57, 6:00, 7:00, 8:00, 8:05, 9:00

Key #4: And the fourth down below, beneath all the docks.
  • Location Hint: You can't draft any rooms that go very far down, so this isn't in a draftable room, and there's really only one watery place that fits that description.
  • Location Hint: This requires moving water around in the pump room, and you will need it to be powered by the boiler room so you can drain water into the spare tank (unless you have the later-game ability to lower water levels with experiments).
  • Location Solution: Reservoir, after draining all the water.
  • Puzzle Hint: You're going to have to start by picking a box at random. All the boxes that don't contain the prizes contain clues to their locations. Boxes unlocked down here will remain unlocked forever, so if you're like me you might just ignore the puzzle entirely and unlock every single box. There's only prizes in two of them, though.
  • Puzzle Hint: If you have the treasure trove found floorplan, the hints in there will be useful here, but aren't necessary.
  • Puzzle Solution: It's in the black moon box behind the big stone pillar. There's also three allowance tokens in the leftmost (from the stairs) white sun box in the water.

Key #5: The fifth key is held by a king on his throne,
  • Hint: Found via the solution to another puzzle.
  • Solution: See the three microchips.

Key #6: The sixth in a station, left by one of your own,
  • Hint: The given clue can't really help you find this one, unless you've already been there and missed it. It's the location itself that's hidden, not the key within it.
  • Hint: There's a clue very close to one of the combination locks, though it's not obvious that it leads to where the key is.
  • Hint: Near lock #1, specifically.
  • Solution: Make sure the boat is on the side of the reservoir next to the underground gear room. If it's not, use the pump room to set the reservoir water level to 13 (one level short of full), then go down and ride it to the other side. Once that's done, again use the pump room to lower the reservoir water level to 6. Return to the reservoir on the gear room side and descend the stairs, then ride the boat. This will take you to the area with the key in it, atop a crate.

Key #7:The seventh is major if you draft it quite late,
  • Hint: So here's the thing: we know where it is, but nobody seems to know what "quite late" means. Some think it's related to the in-game time, some think you have to draft most of the house first, some think you have to draft the room in question on the higher ranks, and some think it's a matter of exhausting the random special key pool. There's probably some randomness involved. Just draft it late into a run and you'll probably get it eventually. If you're struggling, Blessing of the Monk may help, which can guarantee you the ability to draft it.
  • Solution: It spawns as the "major key" in the music room.
Eight Sanctum Keys (Continued)
Key #8: And the last key is waiting, behind the last door of eight.
  • Location Hint: The note with the clues on it implies the eighth sanctum door, but that's not it. Where else are there eight doors?
  • Location Hint: It's in a room that isn't part of the initial draft pool.
  • Location Solution: In the mechanarium.
  • Puzzle Hint: There's only seven mechanical rooms in the game, including the mechanarium itself. How do you draft eight of them? Or alternatively, how do you make some of those doors disappear so you have to draft fewer? There's multiple solutions to this, but remember that mechanarium doesn't create new doors after you draft it, so you're going to have to do that last.
  • Puzzle Solution: There's a lot of ways you can do this. It may help to know the six other mechanical rooms: utility closet, boiler room, pump room, security, workshop, and laboratory.
    • First off, there's old reliable Blessing of the Monk, which can guarantee you the ability to draft mechanarium at the end of the day.
    • The north, east, south, and west of the mechanarium doors lead to other rooms. If you block off these doors with the walls of other rooms, they won't appear and other doors will open instead, reducing the number of mechanical rooms you need to draft to as low as 5 (including the mechanarium itself). You'll need to get lucky with your room placement though, or have a lot of rerolls. Unfortunately, Blessing of the Monk can't help you with this trick, so if you draft mechanarium in the outer room you're going to need to have 7 other mechanical rooms in the house first.
    • After drafting at least one mechanical room, draft the hall of mirrors (another potential use of Blessing of the Monk) to add all currently drafted rooms back into the draft pool. This can allow you to reach the 8 total rooms you need and even draft a second copy of the mechanarium.
    • You can increase the odds of mechanical rooms spawning by crafting a powered electromagnet in the workshop, and if you fail you can store it in the coat check to try again another day. Also, powered rooms, including three of the mechanical rooms, have a greater chance of appearing if you draft from a door that's powered by the steam ducts from the boiler room.
    • The gear wrench is a rare item that allows you to adjust the rarity of mechanical rooms when you draft them, which you can use to set them all to common. It might spawn in the lost & found, but a more reliable way to get it is through the trading post. You can store this item in the coat check, too.
    • Using an upgrade disk, you can upgrade the aquarium into the electric eel aquarium, making it into an 8th mechanical room. I don't recommend this, because it might take quite a while for the aquarium to show up as an upgrade plan, and by doing it you're losing access to a better aquarium upgrade. If you do choose to go this route, and, you have the data packet from the satellite dish, you can then set up an experiment that adds 3 aquariums to the draft pool every time you fulfill a certain condition— several of which can be fulfilled by drafting an aquarium. This lets you effectively fill your house with aquariums, although it may dilute the drafting pool and make the mechanarium harder to find.
A New Clue in A New Clue
This book has many clues in it and this guide has only used some thus far, but there's a big one that's going to prove very useful before you proceed any further. Bring a magnifying glass (or better yet just have the whole book screenshot or written down from before). And note that there are some red herrings and duplicate clues in the book.

  • Hint: Seen all the signs? They're hard to miss.
  • Hint: Check page 19, the one with the king and the stop sign.
  • Hint: Have you gotten all the sanctum keys? One of them is very close to the clue you need to put this all together.
  • Hint: There's four relevant books, and you can figure out what they are from the hints elsewhere in A New Clue.
  • Hint: Check the train map in the safehouse.
  • Solution: Putting all the signs together gives: "ROUTE 8. DEPART. KEEP LEFT. TO TANNER FORK. (sign indicating "turn right"). DEAD END. RECORD EACH STOP." This is a specific route to follow on the train map in the safehouse:
    • 8: Royal Station
    • 7: Angel Tower
    • 3: Aries Crossing
    • 10: Tanner Fork
    • 1: Oris Train Hall
    • 13: Dead End
  • A note on page 19 gives X->Y->Z->A->B->C. Combining that with the train routes, you get X = 8, Y = 7, Z = 3, A = 10, B = 1, C = 13.
  • The four books in A New Clue are "Tender Cipher" (red), "Lunar Renamed" (green), "Uncle Awe" (violet), and "Draft the Sixes" (blue). Solving these anagrams gives results in:
    • Red: The Red Prince
    • Green: Realm and Rune
    • Violet: A New Clue
    • Blue: The Fixed Stars
  • Another note on the same page:
    • RED: PAGE A WORD X
    • GREEN: PAGE C WORD A
    • VIOLET: PAGE B WORD Y
    • BLUE: PAGE Z WORD X
    • As well as "Assume page count starts on title pages"
  • Consulting the book on page 19 once again and combining that with the information above:
    • The Red Prince: page 10, word 8
    • Realm and Rune: page 13, word 10
    • A New Clue: page 1, word 7
    • The Fixed Stars: page 3, word 8
  • Putting all of that together, you finally arrive at an answer: "Turn scorched sundial base".

Now, what to actually do with that solution?
  • Hint: Ignoring "scorched" for now, where do you know that has a sundial? You've likely already seen it, but may have forgotten.
  • Hint: A sundial has to be outside, or else it's not very useful.
  • Hint: It's not in the house.
  • Hint: The sundial base in question isn't scorched. You're going to have to do that part yourself.
  • Solution: The sundial is in the orchard. Bring a burning glass or self-igniting torch. You can then scorch the base (it doesn't matter where), allowing you to rotate it. Rotate two of the rings so that the extra line segment on all three faces the same direction. It'll pop open, revealing three slots for microchips, so go nab those from the grotto (or finish that puzzle if you haven't already— the sundial will remain open) and stick them in the sundial.
Eight Realm Sigils
The sanctum keys lead you to 8 rooms in which you're going to have to input realm sigils corresponding to each of the eight countries of the world.

General hints:
  • If you have most of an answer, don't be afraid to brute force the remaining bit. The game actually seems to expect you to do this.
  • The sigils for the first two rooms can be found wholesale around the estate, but the remaining six you're going to have to piece together from information you've found.
  • You're going to need to consult the book Realm and Rune. A heavily damaged copy can be found in the precipice, but you need the complete version, which can be purchased from the bookshop and then requested from the library.
  • The classrooms, all 9 of them. Draft them by drafting the schoolhouse in the outer room, and bring a magnifying glass. If, somehow, you already have the blue tents, those will hide some helpful notes in each of the classrooms as well.
  • The postage stamps on letters are incredibly useful (you will again need a magnifying glass). Some are harder to find than others, but all of them can be found on Randolph's mail room letters. Though be aware that the colors on the stamps are not always correct. Examining them with the magnifying glass adds them to one of the books in the library.
  • The broken shards of sigils in the clocktower and lost & found, and a similar newspaper clipping you can find from a puzzle starting in the aquarium.

If you're stuck on a particular sigil, this reddit post has the hints and answers written out better than I could, so I'm just going to redirect you to that. (message me if it goes down, as reddit posts are wont to do)
Eight Realms in Eight Months

Remember this thing from room 46? If you've completed the 8 realm sigils and read the letters from each, you have the information needed to solve this puzzle, though you may have to do a little bit of guesswork.

Solution:
1. Orinda Aries (same place as Fenn Aries). The central of the three easternmost realms.
2. Eraja. South of Orinda/Fenn Aries.
3. Arch Aries. North of Orinda/Fenn Aries.
4. Mora Jai. Northernmost of the western realms.
5. Verra. Southernmost of the western realms.
6. Corarica. Westernmost realm.
7. Nuance. The remaining eastern realm, next to Eraja.
8. Fenn Aries. See #1.
The Will
So you've solved the previous puzzle and uncovered Sinclair's will. And there's another clue in there, regarding the eight angels, in a specific order. What to do with it? Remember anywhere where you had to put the angels in order? If you don't, try one of the outer rooms.

Into the tomb again. To solve the first puzzle in here, you just had to match the statues visually with the stained glass in the chapel. This time, you also have to know their names, and many of those names can be found in places related to the occupation they represent.

You can also find this information when upgrading the cloister, but that can only get you three random names.

(I could be missing some information on this one)

The groundskeeper with the gardening hoe
  • Hint: Sketched in a very groundskeeper-related place.
  • Solution: Rynna, in the gardener's logbook in the orchard.

The chef with the pizza peel
  • Hint: A certain shop (and item that can be purchased from it) makes the identity of this angel very clear.
  • Solution: Joya, in the gift shop and the lunch box item that can be purchased from it.

The farmer with the pitchfork
  • Hint: In a certain book depicting the chapel.
  • Solution: Dauja, as seen in Drafting Strategy vol. 1.

The chimney sweep with the chimney brush
  • Hint: Featured in a book you can buy from the bookstore.
  • Solution: Veia, from Drafting Strategy vol. 5.

The maid with the broom
  • Hint: A figurine in a very maid-related place. Or in one of the found floorplans.
  • Solution: Mila, in the maid's chamber or lost & found.

The jockey with the jockey whip
  • Hint: In a certain book depicting the chapel.
  • Solution: Lydia, as seen in Drafting Strategy vol. 1.

The queen with the scepter
  • Hint: Classroom final exam. You can probably also pick this one out from the list of names if you know the history or geography of the game world.
  • Solution: Orinda

The reaper with the scythe
  • Hint: Oh come on, this is obviously Draxus.
  • Solution: Draxus

If you get it right, a room will quietly open behind the statue of Draxus.
CASTLE
Now the hard part. I recommend you complete everything above before continuing.

If you don't know what "CASTLE" is referring to, there's a hint to the location of that particular information in the safehouse. More specifically, you need to use the power hammer to smash the cracked wall in the room with the chessboard.

So now you have:
C _ _
A _ _
S _ _
T _ _
L _ _
E _ _
Which is a hint to something, but what? Ignore the blank spaces for now.

With this puzzle, it's not that difficult to figure out what's being hinted at, but it's also not entirely intuitive how you're meant to apply that and the game offers little help on that front. So if you've already figured out the former, just skip to the solution.


  • Hint: Got the blue memos from buying blue tents? A few of them can point you in the right direction.
  • Hint: There's also memo clues in the treasure trove, but be warned that you're going to draft it more than 30 times before the first one will appear.
  • Hint: This obviously has something to do with the rook, so try finding the blue tent memos in blue rooms with rooks in them.
  • Hint: "Castling" is a move in chess.
  • Solution: Solve the chessboard and choose the king or rook's power, then come back another day and switch to the other piece's power. This will open up a secret passage (and permanently erase the bishop... its power wasn't very good anyway). Hope you didn't spend a ridiculous amount of time trying to swap the king and rook on the actual chessboard like I did.

But there's more! Going down the secret passage leads to a room with 8 figures holding Mora Jai boxes. Solving them and putting together the message inside will tell you what to do next. The passage remains open permanently, so don't worry about solving the chessboard yet again.

Solution: You're going to have to draft the observatory, spot the southern cross in the sky (the constellation made of 5 stars), and then return to this room without any coins, gems, keys, dice (probably), or items. You'll have to use up your starting gems drafting. Once that's done, return to this room and wait until 1:30 in-game time (which could be a while). If done correctly, a stone box will rise from the floor. It's got another puzzle on it but fear not, it will remain risen permanently.

And now, the real puzzle. Be warned, this is the hardest puzzle in the game and contains a fair amount of BS.
  • Message Hint: The sides of the box contain a clue!
  • Message Hint: A 3x6 grid, quite similar to the CASTLE clue found outside. You're going to have to fill that out.
  • Message Hint: If you've been keeping track of clues you've found up to this point, you've likely found most of the message already— just think back to the mysterious vertical letters you've found in various places. There is however one clue that's hard to see, which you may have passed over several times without realizing it. That one is in the cloister.
  • Message Hint: Try checking the first draft of A New Clue, using a magnifying glass. In addition to an obvious part of the message, it contains a clue to help find another. If you haven't found this book, go solve the puzzle with the will.
  • Message Hint: The first draft of A New Clue indicates that there's a part of the message in the secret passage, but where? There's no additional secret passage within the secret passage, but perhaps there's some part of it you haven't seen before.
  • Message Hint: One part is locked in a box somewhere, one part is locked in something that's kind of a box, one part is in a place with animals, and one part is in a place with computers.
  • Message Hint: Locations are as follows, in order of the first missing letter they contain:
    • Chessboard room, obviously
    • Blackbridge Grotto
    • Cloister
    • Vault
    • Secret passage, if you approach from the opposite entrance before clicking any of the books and opening the passage
    • Locker room
    • The catacombs (first draft of A New Clue)
    • The kennel
  • Message Solution: CIX ADD SIX TOR LOR ETT
  • Puzzle Hint: So you've got a clock on this big stone box. And it's got a button on it. There's no indication of this as far as I know, so I'll just tell you in the first hint: you have to press that button with the clock set to several different times, in the correct order. There's no brute forcing this one.
  • Puzzle Hint: So what does that message actually mean? Let's start with TOR, because this one's BS. A certain diagram in the grade 4 classroom can tell you the answer. Notice how the word TOR is encircling the number 46, as if to blatantly say TOR=46? A number of significance in the game? Well, it's not 46, or even a number at all, but that diagram does hold the clue to figuring it out.
  • Puzzle Hint: You're going to have to hit the button at three different times. The first line of the message indicates the first time, the second and third lines indicate the second time, and the remaining three lines indicate the third time.
  • Puzzle Hint: As for LOR ETT, those are Erajan words. You can find them in the grade 8 classroom and the classroom final exam.
  • Puzzle Hint:
    • CIX: a Roman numeral, meaning 109.
    • ADD SIX: This part's pretty straightforward!
    • TOR LOR ETT: ROT indicates clockwise rotation, so naturally the reverse of ROT means counterclockwise. LOR ETT means "the word east"
  • Puzzle Solution:
    • 1:09. CIX = 109.
    • 1:15. Just add six to 1:09.
    • 12:26. From 1:15, go counterclockwise until the hand is over the word EAST.

Do all that and you'll get your hands on the prize. But where to use it?
The Trove
If you've been in here a few times, this mysterious room hints at a "true treasure". Reading the notes (and understanding their truthiness) only provides a few hints: the true treasure is in the room but not in the house. Don't waste time hunting for secret things to click on in here— there aren't any.

Hint: The things you need to do to obtain this are already mentioned in this guide.
Solution: Draft it outside with the Blessing of the Monk, then use the Aries key from the CASTLE puzzle.

On subsequent days after obtaining the treasure, it will spawn on the table in the treasure trove (unless you already have it in your inventory).
The Throne
The throne room floorplan says to "reclaim the throne", but how?

You're going to need three specific items. Which items? If you haven't found that particular clue yet, try experimenting with Blessing of the Monk. More specifically, draft the garage or the antechamber in the outer room, then power on the garage door or open the "north" exit. Alternatively you can find a clue to the items in the first draft of the Red Prince, but that one is a bit misleading.

Item #1: STEADY IS THE SCEPTER
  • Hint: Find the true treasure of the trove, if you haven't already. You're going to have to set it to a specific color, but which? Well, the one matching the crown of course.
  • Solution: Get the scepter from the treasure trove and set it to blue.

Item #2: DEADLY IS THE STONE
  • Hint: If you've found this item already, you know what it is. If not... try a specific book from the bookshop. And when you've read that, try a specific other shop.
  • Solution: Buy the Curse of Black Bridge from the bookshop, flip through it, and then draft the gift shop. You should be able to buy the cursed coffers, so get those and then head over to the shrine. Smash the box open with a sledge hammer or morning star. Be warned, you're going to get cursed by picking up the effigy inside. Among other things, this will set your steps to 13, and it will override the active shrine blessing, so maybe save the effigy for last. You can also store it in the coat check, but you'll get cursed again if you retrieve it from there.

Item #3: HEAVY IS THE CROWN
  • Hint/Solution: There's two crowns in this game. The throne room floorplan, and the clue in the first draft of the Red Prince, kind of make it look like you want the red paper crown from the closed exhibit, and while there is a way to get that, what you actually want is the crown of the blueprints.

Enter the room with your three items to trigger a cutscene and claim your prize.
The Tunnel
Not the floorplan, but the actual tunnel beneath the manor. If it's still blocked off by boxes, make sure you've downloaded the experimental data packet, and use packet management in the laboratory to enable experiments that remove boxes from the tunnel.

Done everything above? Then you'll have no problem solving this one. It's not really a puzzle, just a sort of final exam of everything you've accomplished thus far. When you get to the end, two of the boxes contain a "prize", the other is empty.

This may seem like a "true ending" of sorts... but you're not done yet.
The Family Core
So, what exactly is the family core? You may not have even heard of it at this point. The secret is hidden in some of the elusive the blue tents memos.

  • Hint: First off, which room is it in? There's a certain very special blue room you might want to look into.
  • Hint: Just solved the tunnel? Then you've been in this room recently.
  • Hint: Throne of the blue prince. The blue tent memo in there will tell you what room the family core is in.
  • Hint: And the blue tent memo in that room: "The family core is unlocked only by the sum of its digits."
  • Hint: It's a clue you've definitely found by this point, but probably didn't know what to do with. And, naturally, it has to do with the family.
  • Hint: It's written in Roman numerals.
  • Hint: The coat of arms found in the wine cellar and master bedroom. MCCXIII.
  • Hint: Hold on a second, though. MCCXIII is 1213, but there's no vault box or any other locked thing in the house with the number 1213. Something is missing.
  • Hint: What else is described as a "core"? Realm sigils have cores, but it's not those.
  • Hint: Found a certain item in the tunnel? The underground one, not the floorplan.
  • Hint: Where have you seen file cabinets? Well, all over the place really. But this one isn't in the house.
  • Hint: It's in a hidden place. It's not in an outer room, either.
  • Hint: Specifically, it's the file cabinet in the secret room connected to the underground gear room. This will reveal an old letter to Baroness Auravei describing "numeric cores".
  • Hint: So you know what a "numeric core" is, and you can apply it to 1213, which produces... no whole numbers (ie. non-negative integers), and therefore no valid numeric core. So that isn't it.
  • Hint: Time to consult the blue tent memos again!
  • Hint: The wine cellar, which has the coat of arms in it, gives "the numerals below the coat of arms are four different numbers, not one." That's a start, but we really have no idea how to split MCCXIII into four numbers in a way that doesn't result in 1, 2, 1, 3. Perhaps there's another blue tent memo somewhere.
  • Hint: The coat of arms also appears in the master bedroom, but that's not a blue room and doesn't have a blue tent memo. No, the one you're looking for this time is in a room that has... no real relation to the coat of arms or family core. It's a room that was not in the day one draft pool.
  • Hint: Mechanarium. Yeah, you're doing this again, and this time you have to draft it on rank 8, but by now you probably have a lot of resources at your disposal which makes it significantly easier. I don't know the specific number of doors you need to open to find it, but I believe it's fewer than all 8? Alternatively you can just read the next hint.
  • Hint: "On the coat of arms, the first number is one numeral. The rest are each two numerals." M = 1000, CC = 200, XI = 11, II = 2. Fortunately you don't have to find the numeric core of 1000200112. You just have to put -, *, and / between those four numbers. There's only six ways to do that, you just have to find the one that produces the smallest non-negative integer.
  • Hint: Surely you were able to do that. If you really must skip this part, the answer is 53.
  • Hint: Remember, it's "unlocked by the sum of its digits". In other words, it's unlocked by the number 8. That should ring a bell.
  • Solution: After all that, the solution is fairly simple. Take the room 8 key from the gallery and use it to unlock vault box 053.

Solving this will of course produce another puzzle. Herbert waxes poetic about how not all of life's mysteries need to be solved... but this one is getting solved.

  • Hint: Look at the Baroness's request. Ring any bells?
  • Hint: The very letter used to solve the previous puzzle was addressed to the Baroness.
  • Hint: What you're actually intended to do here is going to be incredibly tedious. I just wrote a program to solve it for me. If you're not possessed of that ability... it may be better to just look at the solution once you've figured out what you're supposed to do, honestly.
  • Solution: You have to take the numeric value of every letter in each word (A = 1, B = 2, etc) and figure out their numeric core, then convert the resulting number back into a letter. Fortunately the words are already split into four different numbers, so you don't have to figure out where to split any numbers longer than 4 digits. Solving it of course just results in another cryptic clue: STILL WATER TINTS BLANK BOOKS.

Now what? This is going somewhere interesting, I promise.

  • Hint: Thankfully, you're done with numeric cores. You've definitely noticed blank books, though for me it was so long ago that I'd forgotten they were there in plain sight. They're in the library.
  • Hint: What's "still water"? It sounds like "water that isn't moving", but that doesn't tell you anything. The word "still" has a certain other definition.
  • Hint: You're going to need something that can carry water, and there's only one item in the game that fits that description. Make sure to empty it first.
  • Hint: "Still water" can be found in one of the outer rooms.
  • Solution: Still water, as in, water from a still. Grab a watering can from the greenhouse (sometimes it doesn't spawn... good luck), empty it by watering three green rooms, then draft the trading post. Use the burning glass or self-igniting torch to light the dynamite if you haven't already, then refill your watering can with the water from the still. It can take a second or two for the prompt to show up. Then go to the library and pour it on those two blank books on the pedestals. Coat check is your friend here, the still water in the watering can remains still water when you check it back out on another day. When you're done, check it in with still water in it... for reasons.

On to the next one!

  • Hint: There's several new cryptic clues here, but the one you want to be looking at is Auravei's letter.
  • Hint: "The waters of the west spring shall yet reveal more secrets than these mere passages". is the only information you need, though as is often the case, it's a bit obtuse.
  • Hint: It's getting at the name of a certain room.
  • Hint: Surely you remember your good friend Blessing of the Monk?
  • Hint: If you've figured that out, there's something in this room that isn't normally here... a blank book!
  • Solution: Hope you checked in that watering can with the still water in it. Use Blessing of the Monk to draft the secret passage in the outer room, then retrieve the watering can and use it to water the blank book. Click it to open the secret passage and reveal the final area.
The Blueprints
The final area of the game, the atelier. Take note of the clues in here, as you hopefully know to do by now, then open the door.

Holy crap! This place is huge, and there's a lot of information to take in. You're going to want to take note of everything. If you run low on steps, make sure to call it a day in the secret passage so you can get back here the next day. The running shoes also seem to activate very frequently in this area.

There's a second paintings puzzle in here, and another message hidden in the Mora Jai boxes in every room. Unlike the real house, everything in here is always the same; it won't change if you come back another day. Though you will have to draft the secret passage in the outer room again (the book remains watered).


And so, the final puzzle.
  • Hint: Get every letter and every word from every room. Map out the whole area, including the hallways. You're going to be here a while.
  • Hint: Recall the other watered book from the library.
  • Hint: If you've mapped the place in detail, you should easily be able to find three paths to the vestibule (the former antechamber) that only pass a specific color of lantern. Follow those, and see what happens.
  • Hint: Okay, so none of those worked, and you can't reach the end by following any of the other colors. Still, you have a pretty good idea of what to do now, it's just a matter of finding the correct path. There are multiple ways of doing that.

From this point on, there's actually a few alternative ways to find the solution. The first is the easiest and most common.

Method #1: the words in the Mora Jai boxes
  • Hint: This threw me off when I was doing this puzzle, so: you can probably tell where the starting point is, but the words don't tell you what direction to go from there. There's only two directions, though.
  • Hint: Read over the words again. There's colors, and there's directions.
  • Hint: You should know the color of truth, and the color of lies. But what are the colors of rain and wisdom?
  • Hint: Think back to the realm sigils.
  • Solution: Truth is blue (from the memos), lies are red (also from the memos), rain is violet (the color of Eraja, the rainy realm), and wisdom is orange (the color of Corarica, the academic realm). Beginning from the blue lantern, turn left and go through the pantry. From there, turn left at every red lantern, turn right at every orange lantern, and continue straight at every violet lantern.

Method #2: the letters of the new paintings puzzle
  • Hint: The three false paths have a hint for this one.
  • Hint: The letters of each room you pass through on the three paths are anagrams.
  • Hint: Check the gallery.
  • Hint: You can fill out three of the words in here, which just leaves the remaining word.
  • Hint: It's a word of significance in the game. And also not an anagram like the other three.
  • Solution: Starting from the blue lantern, follow the 8-room path that spells out SWANSONG. You'll have to enter the final room from the back, where a new door should appear if you did it correctly (I don't know how you'd know to do this without already knowing method #1?).

Method #3: the words in the Mora Jai boxes but like, different from Method #1
  • Hint: This one hearkens way back to a certain cryptic phrase that you've probably seen but haven't used before.
  • Hint: You may be able to recall the phrase by checking the words in the boxes.
  • Hint: WE SEEK WHAT'S IN THE SHADE OF TRUTH
  • Solution: Starting from the blue lantern, follow the 8-room path that forms this particular sentence. You'll have to enter the final room from the back, where a new door should appear if you did it correctly (I don't know how you'd know to do this without already knowing method #1?).

Method #4: the Mora Jai boxes again
  • Hint: This is more of a way to verify that you got the path correct, because it doesn't tell you the actual order and gives you a few extra rooms that aren't part of the path. Check the symbols on the Mora Jai boxes.
  • Solution: The path only goes through rooms where the Mora Jai boxes have the blue Mount Holly symbol on all four corners.

Your prize is The Blue Testament of Auravei. It doesn't do anything, but at this point in the game, does it need to?

And that is, at long last, the end... maybe. If there's more, I certainly don't know about it.
Miscellaneous Puzzles
Radiation Monitor:
This is hardly a puzzle. On the shelter computer, there's a "radiation monitor" which will unlock all the doors in the house if radiation readings get above a certain threshold. To increase radiation levels, you have to trigger the active experiment about 3-4 times, then check the radiation monitor again. Hopefully Simon won't develop any health problems from daily exposure to an extremely high amount of radiation.

Security Footage:
You can find two notes pertaining to the security monitors: one in the attic, and one in the safehouse. That's enough to figure out this puzzle. Solution: the first letter of the names of the rooms in the middle 11 monitors in the center spell out SWANSONGHSS, which can be used as the terminal password.

The Aquarium Puzzle
Surely there must be some secret in this room?
  • Hint: Drain the aquarium water. Don't worry about the fish, they'll be fine, probably.
  • Hint: Now that the water's gone, there's three specific marks you can find in the tanks.
  • Hint: Bring a shovel. The spots can be a bit hard to find, you'll have to search the general areas
  • Solution: Dig in the patio and laundry room to find two keys to the drawers of a file cabinet in the archive.

The Paper Crown
You know that red paper crown you can see in the closed exhibit? You can get your hands on it, though it won't help with any further puzzles.
  • Hint: The room exists for Mary & Co. to rehearse stealing the real crown. That may give you a clue as to where the answer can be found.
  • Hint: You can find the clue in the safehouse. Bring a magnifying glass.
  • Solution: Like the foundation puzzle, you have to draft a room leading to the wall of the closed exhibit, which reveals the security controls. Once you get to that, you can deactivate the security system for ten seconds. That's not very long, and you can't actually enter the exhibit from the controls, so you're going to need to draft this so that there's only two rooms in your path between here and the closed exhibit. Press the button and run, and you should be able to reach the crown with about two seconds left.

Baron Bafflers:
These are mentioned in the game a couple times, and you can actually find a few of them. If you don't look this up, you're probably only going to find it by accident.

You don't get anything by solving them. You're here for the thrill of puzzle-solving, I assume, but you're not getting that either. I don't respect this puzzle.
  • Location Hint: You need a treasure map. Draft a certain room in the location of the treasure.
  • Location Hint: Something in the room is already pointing to the ground where the "treasure" is.
  • Location Solution: Draft the bedroom in the location the treasure map is pointing you towards, then dig near the big hand pointing down.
  • Puzzle Hint: Most of these you're not going solve on account of how the answers are incredibly obtuse. You can get #2 and maybe #6.
  • Puzzle Solution:
    • IN(MAT)E
    • M(ART)INI
    • (NOT)ARY
    • MOL(TEN)
    • NOT(ICE)
    • IN(SECT)
    • Final Solution: MANTIS
Red Herrings & Unsolved Mysteries
Don't read this until you're finished with everything else.


The Spiral: Four notes can be found around the house, all anagrams of each other and all depicting a sort of spiral:
  • "Does it never end" in her ladyship's chamber
  • "Denoted in verse" in the music room
  • "Investor needed" in the lost & found (this one only spawns sometimes, and I don't know what triggers it)
  • "Tended rose vine" in the library (after solving a certain late-game puzzle)

In alphabetical order: DDEEEEINNORSTV

The hidden message in the library from Baroness Auravei mentions that "the end of the spiral is near". This kind-of implies that the room 46 blueprint is the end of the spiral, but there's not really anything spiral-related in that room or in the methods of getting there. There's the spiral of stars, but good luck extracting any sort of meaning from that. There's also the cutscene of Simon seeing a spiral in the wood of one of the parlor boxes at the end of the tunnel.

The only thing I've noticed that seems to have any relevance is that all depictions of the spiral are clockwise (starting from the center), and the letters contain ROT, the Erajan word for clockwise.

Could very well be unsolvable on purpose, as a sort of statement about how you can't have all the answers, or something. Especially since it's associated with things that are never-ending.

Rosewary: In the hidden library message, Auravei says to "Stay vigilant and rosewary, for the thorns we discover are twice as sharp at the conclusion of each of our journeys."

"Rosewary" is a made up word. If you take the letters from the painting puzzles in the rooms on the atelier door, it spells out YRORESAW, an anagram of ROSEWARY. The corresponding words from the Mora Jai boxes give nonsense: "TO SHADE THE PASS SEEK THROUGH A A" or "A SHADE THE PASS SEEK TO A". Any path through the blueprints you can make with those rooms will involve a lot of backtracking, which none of the actual paths do.

Red Letter #3: Last I heard, it was confirmed to not be in the game at all, though maybe it'll be added in a future update or something. Alzara says you won't find it, but he also says you won't find room 46, so who knows. Here's what we know about it:
  • It was originally in the shed in the orchard, along with a ruby. You can find the gem stand the ruby was on in there. Little surprise that a precious gemstone got robbed from a shack protected only by a waist-high fence.
  • It was addressed to Herbert. The blue tents memo in the mail room reads "Only six of the notorious "red letters" were addressed to Herbert S. Sinclair." We've got five red letters addressed to him and two red letters not addressed to him.
  • Two of the rubies have since "resurfaced", namely this one and the drafting studio one, according to letter #7.

The Suspect in A New Clue: This is a known red herring. In A New Clue, the suspect is "major" (ma-jor, meaning "small name" in Erajan.), "minor" (I guess just meaning younger than 18?), and "A. Key" (short for admin key). Putting all this together (well, really just from the "major clue"), you can determine that the suspect is Bo Lee. If you then use the admin key LeeB in Blackbridge grotto, you get access to those deleted logs.

They're saying a lot of things that don't make sense. If you use the admin key RibbJ (from Mary's uncompromised alias in the vault, Jean Ribbon, and in the pump manual), or WithP (Paul Withers, alias of Philip White, also from the pump manual) you can find additional logs where they discuss leaving red herrings for the red guard to find in the form of "Bo Lee" and his accomplices.

Sure, the whole house is full of clues screaming "MARY WAS BEHIND THE CROWN HEIST", but maybe they won't look there.

The "-arium" Rooms: There's four rooms ending in -arium, they each have hidden letters in them.
  • Mechanarium: N (on the ceiling)
  • Planetarium: e (on the base of the projector)
  • Aquarium: x (marking the treasure locations, when drained)
  • Solarium: T (in the glass panels)

Obviously these spell out "next", but what does that mean? "-arium" is a latin suffix meaning "a place associated with a specific thing". Gymnasium is the only other room that ends in "-ium" (which means something similar) but has no hidden letter in it.

Missing Letters: "There is a letter missing" is a bit of a recurring phrase, usually relating to the paintings puzzle. One place it appears is on the blue tent memo in the pantry, and nearby is the word "COFFE" ie. missing an E. Also:
  • Keyboards in the estate are missing the letter I.
  • In the grotto cutscene, the binary spells out "ARIE", missing the letter S.
  • When Alzara says "there is a letter missing", the camera shows the paintings crown/crow (so N). Could easily be nothing though.

Boiler Room Grids: Remember those strange 4x4 panels in the boiler room? They have a consistent sequence but no known purpose. There's also the sequence of lights on the spinning bits after you turn on the boiler, and the 4x4 candle holders in the tomb, neither of which has a known purpose either.

The Great Alzara: You can watch Alzara's predictions again using the password SWANSONGHSS in security. Almost nothing in them came to pass (though several are predictions of Simon's future after the events of the game). Odd that one of the most memorable parts of the game is mostly a massive red herring. The blue tents memo in the Rumpus Room does mention that the real Alzara was banished for a prophecy that did not come to pass.

Lost Items: Certain objects can be "lost" and will eventually turn up in the lost & found. They can disappear before you find the lost & found floorplan. As of writing it doesn't look like anyone's really delved into this. Known items include:
  • The picture of Mary next to the office computer.
  • The statuette of Mila from the maid's chamber.
  • The model plane from the attic.
Red Herrings & Unsolved Mysteries (Continued)
Clocktower Poem:


The clock tower blue tent memo, which is found right next to this, reads "Inneclipses only appear in the north sky."

  • Southward I see a swan: The weathervane in the secret garden has a swan pointed south, and you can turn the other arrows to west, north, and east.
  • Ashen like sands of the shore: The Children of Black Water often mention shores of white sand. Swans are already white. Or maybe it has something to do with Veia, "paragon of ash"?
  • Carried by westwardly winds: The only significance of wind I can think of is Nuance being the windy realm, and the symbol on the colored memo boxes in the reservoir and treasure trove that looks kind of like wind.
  • Rogue like the moon of the north: By pointing all weathervane arrows to the north, you can make the rotating thing show the rogue moon symbol (which it is set to by default).
  • Eastward I see a crow: The draft copy of the Red Prince associates crows with Orinda/Orindia, as well as swans with Mora Jai and canaries with Arch Aries (corresponding to the colors of those realms).
  • Dark are the days coming fourth: Notably the last word is "fourth", not "forth".
  • The first letter of each word spells SACRED. Likely a reference to the sacred hour, especially since it's in the clocktower, but may also be referring to the "sacred circle":


Miscellaneous things: These are all probably nothing, honestly.
  • The Blue Prince: a draft of the sequel to the Red Prince, found in the underground tunnel. Kind of feels like it leads to more clues.
  • The counter of blue rooms drafted after drafting the throne of the blue prince keeps going up, for some reason. People have tried drafting all-blue houses, so don't torture yourself with that.
  • The paintings puzzle in the atelier, "THESE VYING PLANS FORGE BARON CREST AMONG HEWAM (Erajan for "large house") BLEST". You can use some individual letters to solve the blueprints puzzle, but what does the whole phrase mean? No idea.
  • Castle Court Cloak (and "ARIE") in the grotto cutscene.
  • The solution to the Baron Bafflers, MANTIS, has no known use.
  • SWNSNG, the license plate of the car in the garage. Why's this a mystery? Because the blue tent memo in the garage says it's an acronym.
  • The family tree in the root cellar, if you take a magnifying glass to it, describes Simon as "the besoiled child". It could just be a joke, since you have to enter this incredibly dirty room to read it. Some speculate that there's a missing family member on the torn off part, but personally I don't see it.
  • I didn't realize this until looking it up just now, but the stone letter in the workshop is just the paintings puzzle letter for that room. Mystery solved, I guess.
  • The message "hanging out here once again really reminds me of the good old days at 'The Mice will Play'" can be found in the upgraded billiard room. From what I can find online, this seems to have been the name of the speakeasy Christoph and Danny were running in secret.
  • Probably a hundred other things I don't remember.
47 Comments
Megalith 19 Jul @ 2:52pm 
This guide was absolutely invaluable to me finishing everything in the game while still being sane and enjoying the ride, thank you SO so much <3
Valar 9 Jul @ 6:21pm 
I used method 4 for the blueprints and there are boxes not mentioned here that spell the word "gems" as well
Valar 9 Jul @ 11:53am 
I don't know if this helps with the clock puzzle, but there are birds EVERYWHERE in this game--bluebirds, crows, doves, swans, geese, blackbirds, and ravens are all mentioned at some point
Valar 9 Jul @ 11:37am 
Something strange happened when I picked up the running shoes while the castle blue room counter was active--the counter flashed turquoise for a brief moment. I have no frickin idea why
TrenteR_TR - Amy 6 Jul @ 4:10pm 
For the Tunnel
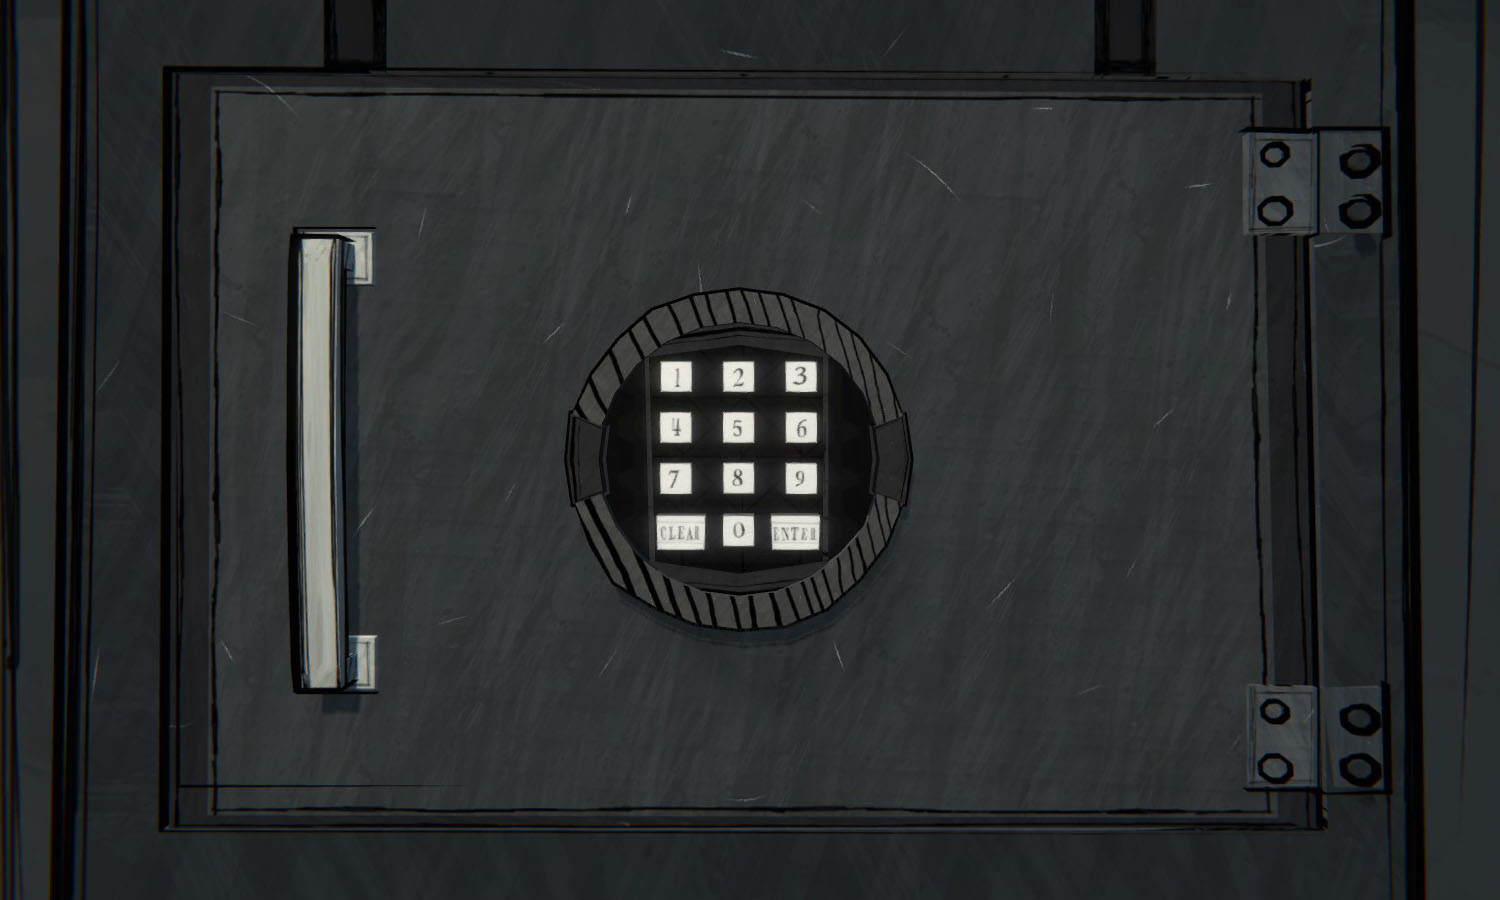
Why is the Chest in the Tunnel different? Like why does it give you a cutscene and have a pattern inside?
Nyrt 2 Jul @ 1:38pm 
I believe the clocktower puzzle is a clue for the 8 realms in 8 months puzzle, specifically that Mora Jai is fourth in order.
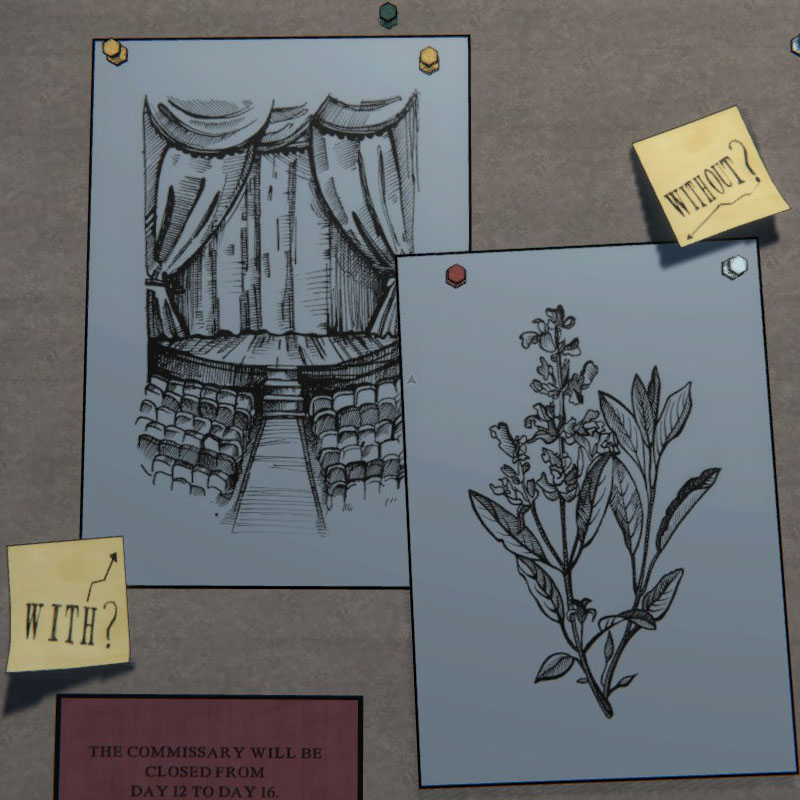
"To the south I see a swan" -- this is the white flag of Mora Vai.
"Carried by westwardly winds" -- Traveled west from Arch Aires
"to the east I see a crow" -- The black flags of Orinda Aires to the east (more sign that this is in Mora Vai)
"Dark are the days coming Fourth" -- visited Mora Vai 4th.


It's a bit of a stretch but it's the best I could come up with. But let me tell you, the letters SACRED really threw me off on the CASTLE puzzle.
ArielPurple 1 Jul @ 8:08pm 
Thank you for writing such amazing guide. :steamhappy:
Cmpman7778 24 Jun @ 11:29am 
Cmpman7778
I heard somewhere that the "quite late" part for the 7th key means music room has to be drafted after 37 rooms have been drafted, and while I haven't tested this yet, anytime I've seen anyone get it has been within one of their last few spaces.
Stereotomy 24 Jun @ 3:57am 
Regarding what TOR means, there's a hint in the directory description for the Rotunda . Combined with the classroom 4 poster and the general rules for negatives in Erajan I think this makes it pretty clear
aceynk 19 Jun @ 2:31am 
ok another thing. I'm being careful to not read too much into the red herrings & unsolved mysteries bit but:

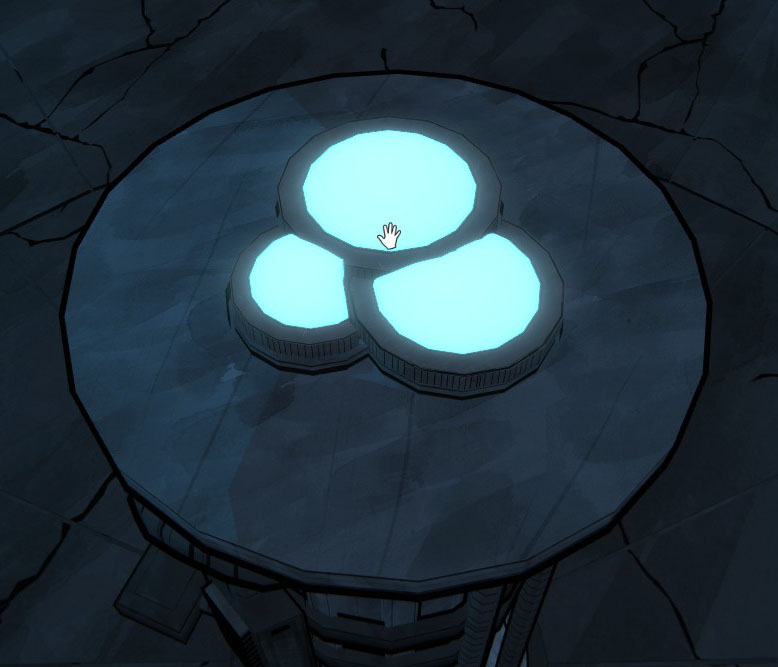
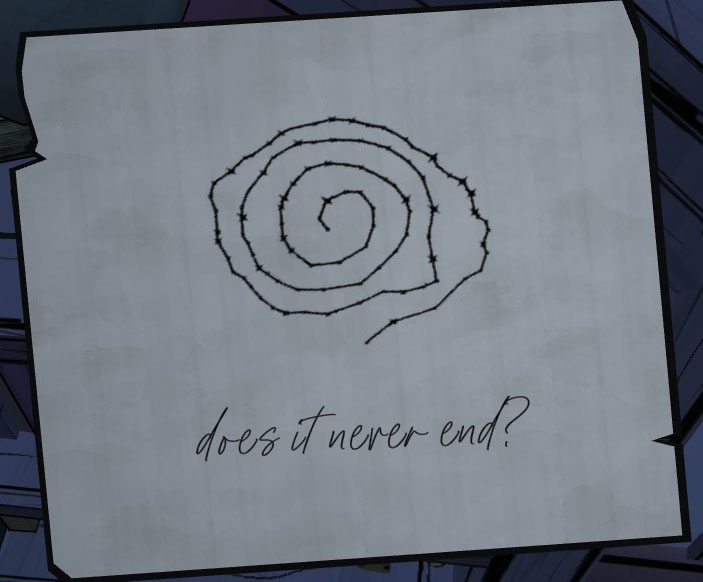
The spiral from the note in Her Ladyship's Chamber & etc. looks very similar to a diagram of planets in the grade 4 classroom. I don't know if it's exactly the same or is relevant, though.