Age of Wonders III

Age of Wonders III

713 ratings
Beginner’s Strategy Guide
By sikbok
This guide has been created for those who are new to the series or want more information about the game and how to play it well. Its goal is to teach you the core mechanics of the game, and give you some tips to help you get off to a strong start building up your first empire!
2
6
   
Award
Favorite
Favorited
Unfavorite
Introduction
Welcome to the Beginner’s Strategy Guide for Age of Wonders 3. This guide has been created for those who are new to the series or want more information about the game and how to play it well. Its goal is to teach you the core mechanics of the game, and give you some tips to help you get off to a strong start building up your first empire!

Something you need to know about Age of Wonders 3 is that it is a more combat focused game than most other 4X games, such as the Civilization series. Although there are peaceful ways to develop your empire, you should always ensure you have armies on the map to explore, defend yourself and most importantly, to clear independent sites for rewards. If you are unsure what to do next, building more forces in order to conquer and expand is almost always the best idea!
Clearing the starting area with your Leader’s Army
In a typical randomly generated map (RMG) you start with your Leader and about 5 Tier I and II units. A hero will also offer to join you, and unless you have a good reason not to, you should always accept this offer. Although they start off weak, Heroes will quickly develop into your most powerful units.
Your first moves in the game should be to send this army, led by your leader and hero, to clear nearby treasure sites and camps. It’s a good idea to not split this group up yet, so you can use overwhelming force to clear sites and nearby settlements with minimal losses. Units get more powerful as they gain XP, so you should try and keep them alive as long as possible!

Plan a (semi-)circular route around your capital, so you are never too far away from your throne when a threat emerges.


This looks like a good army to start with.


Some defenders might flee their position when confronted with an overwhelming force. You can choose to let them go to avoid losing hit points or fight them for XP. Either choice has an alignment choice attached.


They cower before our mighty army. We can spare them and preserve our units, or fight them anyway to gain some extra experience.


Never leave your leader in the Throne City at the beginning of the game. Your leader is one of your strongest units in the early game, and can become even stronger by gathering XP. Also your leader will re-spawn in the throne city if he falls during battle.

Spoils of War:
  • Resource: Note that basic resource sites such as Mana Nodes and Gold Mines provide some nice rewards when conquered (~50 Gold or Mana), but they are only worth grabbing if you get them without losing a unit. They will only start to produce income each turn when you have a city or fort close enough to them to claim them.
  • Units: Great Farms and Brigand Camps usually provide units as reward. Getting units from these sources allow you to concentrate on city upgrades instead of unit production in the early game, while keeping your army strong.
  • Items: Other valid early game targets are Ancient Ruins (provides magical item) and the Eternal Lord’s Lost Library (provides free skills). Other exploration sites that need to be entered might be too strong for you to clear in the early game.


A Boar has joined our side! And we got some gold as well.
Scout for treasure, threats and opportunities
All classes have a highly mobile scout unit available as their first class unit (Spy Drone, Crows, Cherubs, Lost Souls, etc). You might start with one already unlocked, ready to be summoned or produced (the Warlord’s Scout is the only scout produced in cities). If not, it’s a good idea to research one in turn 1, and use one of your regular units to do the scouting.

  • Treasure Hunting: Starting locations are surrounded by undefended pickups such as gold and mana stashes which can be easily picked up with scouts. Some pickups are defended by small armies, these can be very useful to grab early as well.
  • Meeting Neighbors. Seek out independent settlements. You can immediately start to parley with them, to welcome them into your empire, or scout out the strength of their defenders, so you can plan an invasion. The sooner a city joins you, the sooner it’s resources can be added to your own.
  • Identify Threats. Take note of spawners, structures that spawn hostile independent stacks such as Brigand Camps, as they might become a threat to your domain later in the game. These structures usually glow red, and have a skull with an 8 pointed star icon on the overview map.
  • Keeping your Scout safe: If possible, park floating or swimming scouts over water and mountains hexes, so they are less likely to be attacked by wandering units.
  • Mark out a path for your main Army. Find an efficient route for your main army so there is something to gain every turn.


The image above is from turn 5 of an example game. [Click for Larger Image]

After scouting ahead with a Crow, I took my main party to clear some resource sites north of my Starting Town. Although these sites don’t give me a per turn income until my cities grow to cover them, I get a useful instant clearing reward.

I left the Ancient Ruins and Tomb to be raided later and went straight for the independent town as I didn’t want to loose any precious units on these more heavily defended sites. After taking over the town, I go east to take out Brigand Camps, as they will start to spawn city raiders after turn 10. When cleared, these camps give me a freed captive unit each to replenish my ranks. I find another cluster of resource sites, which would make a good spot to settle later. The List Library is especially interesting as it provides a free skill unlock. Then I head for the Production Resources to complete my first loop.
Combat
(Tactical) combat is an important part of the game, almost every structure, pickup and settlement you come across in the world will be guarded by something, and chances are you’ll need to fight to get your hands on it!
To start a battle, simply move one of your armies onto the same hex as an enemy army. You will be asked whether you want to carry out the battle yourself (Manual Combat) or let the game’s AI fight the battle for you (Auto Combat). If you have a much bigger force, then auto combat can be a good idea to save you time. If you want, you can even watch a replay of an auto combat battle to see what took place!
Usually though, you will want to take control of the battle yourself. Once you get the hang of it you will be able to fight battles much more effectively than the AI can! The following tips explain the basics of tactical, as well as some tactics to get you started.

Fighting with Multiple Armies and Allies
You can engage enemy forces with multiple armies by placing them on hexes next to the enemy army on the world map. The position of your armies on the world map determines their starting location in the Tactical Combat map, so when the armies stand on opposite locations to each other on the world map, they will start in opposite locations of each other in the tactical combat map.
First we have to move our armies adjacent to the enemy.


Once we are satisfied with our positions we can move one of the armies onto the enemy and engage them in battle. Before the combat starts you will see the positions of all participating forces.


Your units are now positioned in the map according to their position on the world map. Make sure to check your positions since positioning is important during Combat.


If an army belonging to one of your allies is next to the army you’re attacking, then that army will join in the fight as well. The other player’s army cannot be controlled by you, but will fight alongside you during battle and will be controlled by the other player, human or AI. Note that your allies will only join you in battles against independents and players your ally is also at war with.

Action Points
When you select a unit in tactical combat, important information about the unit is displayed at the top of the screen. If you want more detailed information on a unit, you can click on its icon on the left of the panel. One of the most important displays is the Action Point display, 3 colored pills that represent how many actions the unit can carry out on its turn.


The colored hexes on the ground show how many action points the unit would have left when it moves to stand on that hex. We can see that the cavalry will be able to hit the archers twice in the screen shot, since it will be standing on a yellow hex when it uses its melee attack. If the cavalry were to attack the halberdier directly behind itself, it would hit 3 times, since it would be standing on a green hex.

Units use up action points for all attacks that they do, including retaliation and opportunity attacks (unless they have the Tireless ability), and a unit’s action points recharge at the end of their turn. In the screenshot, the cavalry would hit the archer twice, and the archer would hit the cavalry twice back in retaliation. Since the archer’s action points recharge at the end of its own turn, that would leave it with only 1 action point left when in its own turn starts. If we could make the archer retaliate a 3rd time, it would have no action points left at all, and won’t be able to do anything at all on its own turn! If you are worried a powerful creature will attack a unit you want to keep safe, you can attack it with stronger units, forcing it to waste all its action points with retaliation attacks on tough targets, and leaving it unable to attack on its own turn.

Damage Previews
When choosing who to attack with, it is important to pay attention to the tooltips to see what special abilities are affecting your choice. Abilities and modifiers that swing the attack in your favor are always marked in green, while those that put you at disadvantage are marked in Red.


On the left we can see that attacking the Halberdier with the Cavalry unit is a bad idea. The Halberdier will get the first attack due to its First Strike ability, and their Pike Square ability is reducing our damage. In the popup for the halberdier retaliating, we can see that the Polearm ability means the Halberdier does extra damage back to cavalry. On the right, we see the same unit attacked by our Halberdier. Now we get a damage bonus from our Overwhelm ability (the target also gets that bonus when it strike us back), and since our Halberdier also has the First Strike ability, the target’s First Strike has been nullified.

Guarding
Instead of attacking, a unit can choose to guard to get a defensive bonus. This can make a big difference to how much damage a unit will take.


Even though both units are the same, when I attack the right unit with the left unit, it does on average 3 more damage to me than I do to it, since it is guarding. In the opening turns it’s often a better idea to let enemy units come to you and attack your guarding units, than it is to go out and attack them.

Flanking
Once the enemy has attacked you, they may have left themselves vulnerable to being flanked.


Even though the target cannot retaliate against the archer, he will still turn to face them, exposing his flank to our swordsman, letting us get another flanking attack in. This idea of constantly flanking a unit allows us to do a lot of damage to it while severely limiting its ability to retaliate. In this way, even weak tier 1 units can take down powerful tier 3 monsters while taking minimal damage in return. Be wary though, units that are guarding cannot be flanked!

Engaging Units and Opportunity Attacks
Ranged units are very useful, but need to be protected. If ranged unit has an enemy in an adjacent hex facing towards it, then that ranged unit will be “Engaged” and will not be able to use its ranged attacks.


On the left, our archer is engaged by the halberdier and cannot fire. To make it worse, the red arrow on the ground indicates that if we were to move our archer away, he would get hit by an opportunity attack from the halberdier. By flanking the halberdier with our cavalry, we turn him around, since the halberdier cannot use opportunity attacks on hexes behind it, our archer can escape. The archer could also shoot without moving, but the halberdier would turn around after the first shot, engaging the archer and stopping him from firing again.

Watch out though, guarding units can engage and use opportunity attacks on ALL adjacent hexes, not just the ones in front of them!
Spell Casting in the Early Game
When you cast spells during tactical combat, you use up a resource (casting points) which are also used to cast spells on the world map. Therefore, you should avoid spell casting in combat, except in case of emergencies.

  • Cast Summons and world enchantments at the end of your turn. Spending all your casting points early on will mean you have none left for use in battles later in your turn.
  • Spells in battles without your leader. Your leader is responsible for casting most of your spells, they can even cast spells in battles where they themselves are not present, but this costs twice as much!


  • Hero spell casting. Your heroes have their own supply of casting points, separate to those of your leader. When they cast spells, you won’t interfere with the spells you are casting on the world map.
  • Be careful where you cast in combat. When you cast a spell with a hero or leader in combat, the unit will use up all their action points and will not enter guard mode. You shouldn’t cast spells with a hero who is close to the enemy, since they will be almost defenseless.
Research in the Early Game
Before selecting what to research, check which starting skills have been pre-assigned to your leader in the skill book.

Skills are divided into three categories, Empire Upgrades, Strategic Spells and Combat Spells. The border around the skill shows you to which category the specific skill belongs.
  • Strategic Spells (blue) can only be cast on the Strategic Map
  • Combat Spells (red) can only be used during battles
  • Empire Upgrades (brown) add passive bonuses to your empire


Here you see the three categories next to each other. From left to right: Strategic Spell, Empire Upgrade, and Combat Spell.


Your skill book has a separate tab for each type of skill, so you can keep track of what you have already researched.


Here are the different tabs in which the skills can be found. From left to right: Researchable spells, Strategic Spells, Combat Spells, Empire Upgrades.


Generally speaking, you should try to get at least one of the following:
  • An offensive direct damage Combat Spell (Fireball, Rain of Poison Blades, etc) – to help you get out of tight spots
  • A Scout Summon – to scout areas. For example Spy Drones for the Dreadnought or Grimbeak Crows for the Rogue.

After that, you will want to research
  • The first Class units (which are unlocked by researching the scout unit), they are often strong and supplement the strengths of your class.
  • If you’re going to rely heavily on spell casting, research the first casting point upgrade skills (the ones named after your class). This is especially important if your class has a lot of summonable units, such as the Sorcerer, Arch-Druid and Necromancer.
  • On Island maps you might want to prioritize Seafaring. On land maps obviously this can wait!
Managing your Throne City
In most typical scenarios your starting city is not under threat for the first 5 to 10 turns, as rival players are too far away and spawners, like Brigand Camps or Monster Dens, only become active after a 5 turn grace period. This means you can leave your throne unprotected for a brief period, and defeat them before they become a threat.


An example of the Brigand Hideout, a hostile camp.


The first few turns you can concentrate your main force to attack and clear resource nodes and upgrade your city. Early upgrades will have benefits that can last the entire duration of the game.

What to produce really depends on the lay of the land and your overall strategy. It is convenient to build a Builders Hall first because it allows for more and therefore faster production.
  • Mana Users – Build a Shrine and Temple to generate more mana per turn.
  • Warmongers – build the Barracks or the War Hall for unit production.
  • Peaceful Expanders – Unless you are playing a Necromancer, build a Store House, followed by Public Baths and a Hospital to increase city growth and Happiness and see that city develop into a Metropolis!
  • Necromancers – The Harvesters Guild is vital to allow your cities to grow, it unlocks the Embalmer’s guild, which boosts the strength of the units the city produces.
The importance of Happiness : D>
Happiness is often overlooked. At the highest level, a cheerful city gives a whopping +50% bonus on all key resource income, including production and population growth. In happy cities there is also a chance that the population will organizing a festival, providing an instant boon, like a research breakthrough granting free knowledge.

It is possible to sacrifice some of a cities happiness to produce something in the city faster, this should be used sparingly however, since the loss of happiness can be costly in the long run.


A Happy City suddenly has a Research Breakthrough. That extra knowledge can come in handy.


A city’s happiness is determined by:
  • Local city modifiers - city upgrades can increase happiness, while hurrying production decreases city happiness.
  • Race Happiness - have you been nasty to people of the same race.
  • And global empire modifiers - have you lost battles, hired a hero, etc.

Note that Necromancer cities are populated by ghouls, and have no city happiness. They gain a fixed bonus to all income instead.

Even during Combat we cannot neglect happiness. Unit morale represents how willing a particular unit is to fight for your cause. Units with a high morale have a much higher chance of doing critical damage, while units with low morale will fumble, doing far less damage.

Here are a couple of easy to get Happiness Modifiers in the early game:
  • Certain City Upgrades can improve happiness. Some examples are; Public Baths (+100 : D>) and Hospital (+100 : D> and +100 population growth).
  • Winning three battles in a row gives a nice +150 : D> bonus to the units involved in the fighting.
  • Early Game Happiness improving spells such as the Rogue’s Iron Grip spell (+300 : D>) or the Theocrats Sanctifies Sites (+40 : D> per treasure site inside your domain).
Expanding your Domain
Your empire has to expand. Expanding means that you gain control over more land, and therefore more resources. There are multiple ways to expand your domain and gain power.

Natural City Growth
  • A city’s domain grows as its population grows.
  • Happiness effects population growth.
  • City Upgrades such as the Stone wall, Observatory and Grand Palace also extend a city’s domain.
Settle
  • Construct a settler in your cities to build a new settlement near a cluster of resources.
  • Check the type of terrain near the city site, since different races like different climates. Draconians, for example, will be unhappy if you place them in arctic terrain.
  • Don’t settle too far from your main empire, so you can defend your new settlement when necessary.
  • Settlers are expensive; luckily the first Settler you make is always half price.
Build Forts
  • Forts are a quick way to claim resources. They are built by Builders, which are much cheaper than settlers.
  • Forts can be converted to towns by settling on them later – you’ll even inherit the wall from the fort!
Peacekeeper
  • You can expand in a non-hostile way by buying peace treaties with Independent Cities, and then making them your vassals.
  • Vassals give you some income, but are not directly under your control. They have their own armies which they maintain to defend themselves.
  • You can also release your own cities as Vassals, for extra good alignment points and race happiness.
  • By paying a large fee, you can take control of a vassal city directly.
  • By treating an independent city fairly, you increase your relationship both with it and with the city’s race.
  • Having a good relationship with a race means units and cities of that race will be happier under your command.
  • Peace Keepers want to stick to good alignment actions and specializations. Having a good alignment helps with all interactions with independent cities!
Warmonger
  • As a Warmonger you want to expand quickly, taking independent settlements by force.
  • Focus on quick expansion, and migrate cities of other races to your own race. This lowers the relations with the other races, but increases your relation with your own.
  • Make sure the city is in terrain your race likes before you migrate it though! Migrating Frostlings into the middle of a desert will lead to a very unhappy city.
  • Focus on strengthening and building your army and developing synergies between your main race, your class and specializations.
  • Declaring war and migrating cities are all evil alignment actions, being evil makes independent cities less likely to trust you, but their trust isn’t needed if you’re just going to invade them anyways!
  • Avoid units that are dedicated to Good or Neutral. These units will not be happy with your Alignment. Therefore their morale will be low and they will perform poorly in battle.
Developing Strategies
As you learn the core concepts of the game you will learn to spot synergies between the units and skills of the different races and classes. Here are some examples of race class synergies:

Orc - Warlord
  • Orcs have a racial +1 melee strength bonus.
  • Warlords relay on strong melee units and can boost the melee strength even further, for example, with Lion’s Courage, which gives every friendly unit +5 melee strength, Overwhelm and Strong Will.
Human - Dreadnought
  • Dreadnoughts can buff armored units.
  • Five of the nine human racial units are armored, and can take advantage of Dreadnought skills like Solid Engineering (+1 defense to armored and machine units)
  • Human Knights are strong cavalry, that can make good advantage of the Sidearms skill (all cavalry gain the Shoot Pistol ability)
Tigrans - Rogues
  • A rogue works well with irregular type units, which the Tigrans have 2 of instead of 1 like the other races.
  • Rogues also have different spells to buff these units. For example: Irregular Training, an Empire Upgrade which gives every produced Irregular unit an extra medal.
  • Rogues use fast class-units. Having a race that is already fast of itself only comes in handy, since Tigrans have a movement boost in tactical combat.
  • Using the Explorer Specialization you can also buff your irregular units to make them even faster. For example: Off the Beaten Path gives all irregular units Mountaineering, Forestry, and Wetlands Walking, while Scout Training, which gives all Irregular units +1 vision Range.
Goblins and the Destruction Specialization
  • The destruction spell, Blight Empire slowly spreads blight terrain around the world. Since goblins are the only race that likes Blighted terrain, you can use this magic to create an environment where only your own cities and units will thrive.
  • Wreck is a powerful destruction spell that completely removes Blight immunity from Undead and Machine units, since Goblins make heavy use of Blight damage, this spell can be vital in battles against necromancers and dreadnoughts.

You can also look at the Map you are playing. Different Map layouts require different strategies.

Underground Map
  • Most races dislike the underground; pick Dwarves or Goblins if you want to make an underground empire.
  • Units with Night Vision will have better vision range underground, while units with Cave Crawling will be able to move faster.
  • Use the Earth Adept Specialization. Domain of Earth makes the targeted city like subterranean terrain.
Island Maps
  • When you have researched Ship Building you will be able to move land units over the water in Transports.
  • Units in transports have heavy penalties to defense and resistance, making them vulnerable. Human units have the Mariner trait, allowing them to ignore these penalties.
  • Build harbors in cities next to the water, and use those cities to produce warships. Warships are fast and powerful, and vital to protect vulnerable transports.
  • Use the Water Specializations. You can freeze water and walk over it, or summon Krakens, water only units that have attack bonuses against ships and units in transports.
Wrapping Up
I hope this guide has been helpful to people new to AoW or even new to the genre. There's plenty more to learn and discover, so why not start the game and have a go.

If you have any questions be sure to post on the forum. There's bound to be a community member or even a dev to help you out.

GL HF : D>
57 Comments
PoPPaPork 23 Oct, 2021 @ 8:44am 
TREASURE SITE RATING this could be frustrating- whats the difference between legendary and mythical etc so you know what you're getting into:
1.STRONG
2.EPIC
3.LEGENDARY
4.MYTHICAL


Lucas2018 19 Jul, 2021 @ 3:01am 
Thank you, very nice guid!
Viking` 3 Feb, 2020 @ 6:13am 
A very useful guide, thank you!
Pimpin Pippin 21 Aug, 2019 @ 2:23am 
Thanks for the guide.
Iguana-on-a-stick 13 Jul, 2019 @ 2:13am 
@ovd_masterkey

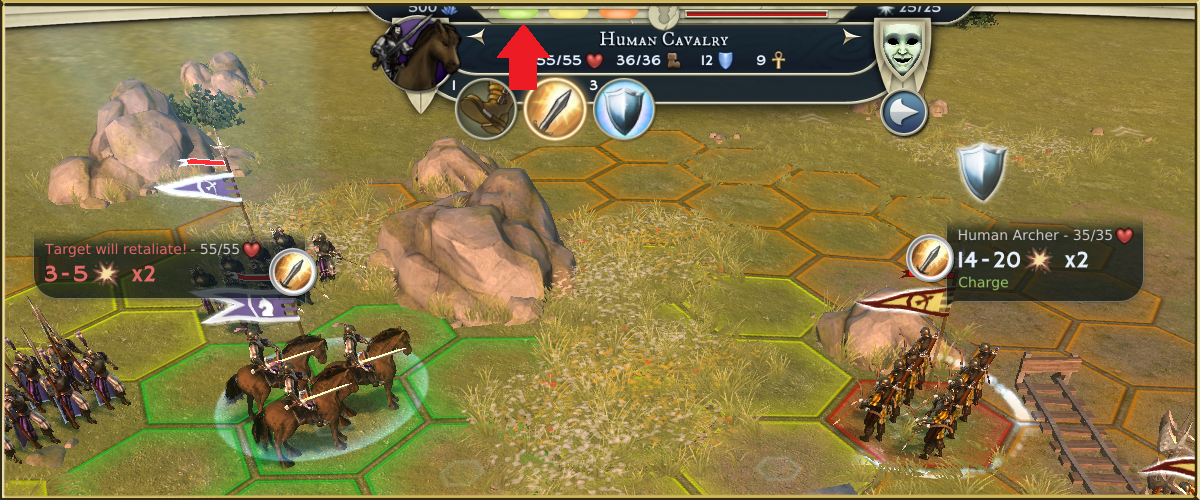
Simultaneous turns means you won't have to wait long between turns, though at the start of a turn when all AI players try to move at once, it means you can't act very quickly. (Only one unit can move on the strategy map at the same time, because it's a turn-based game.)

To speed this up, turn off movement animations in the options screen.

If your PC is slow, smaller maps are a great idea.

If you play on classical turns, you can just alt-tab after ending a turn and do something else. Again, turning animations off will improve turn speed a bit.
ovd_masterkey 12 Jul, 2019 @ 3:39am 
What can be done to minimize wait time / move time later in game?

- small Maps......?
- simultaneous turns off or on?
Akfiz 11 Jul, 2019 @ 4:49pm 
Thank you for making this guide!
Canada 15 May, 2019 @ 9:32am 
Thanks for the guide. I wish you gave more examples of good synergies, but the guide will still very very good.
fatmoocow 14 May, 2019 @ 12:49am 
Love the game's detailed concepts, and this guide is the best to describe how to actually play the game, thanks Sikbok!
Nagumo 1 May, 2019 @ 12:50pm 
Thx, really well written guide.