The Red Solstice

The Red Solstice

Not enough ratings
Everything Heavy
By Lapland
Everything and anything in regards to the Heavy Support.
   
Award
Favorite
Favorited
Unfavorite
Synopis
The Minigun is the bread and butter of the Heavy Support, but its true potential in the hands of a HS is often overlooked. You as a Heavy Support with Minigun are not there to provide the same kind of raw DPS that an Assault can bring. Instead, you're there to do what part of your name implies and that is to support. How you may ask, very simple, just keep reading.

Game has finally been released and I've been dilly-dallying way too much, so I'm forcing myself in publishing the guide despite its unfinished nature. Will be updating this over time. Feel free to leave some criticisms and input.
Primary Components & Skills
The primary components are what make or break a Heavy Support Minigunner's ability to both suppress and deal damage to targets.

Suppress Target Device -
Slows down enemies at cost of damage. Each level increases cone angle 1%. High level enables Mark Alley. Requires Specialist Sergeant (4)
  1. -20% weapon damage, -30% enemy movement, increases cone area with minigun by 1
  2. -19% weapon damage, -35% enemy movement, increases cone area with minigun by 2
  3. -18% weapon damage, -40% enemy movement, increases cone area with minigun by 3
  4. -17% weapon damage, -45% enemy movement, increases cone area with minigun by 4, enables Mark Alley skill
  5. -15% weapon damage, -50% enemy movement, increases cone area with minigun by 5
Far by one of the most useful Components you can equip as a Minigun-using Heavy Support. Suppress Target is an active skill that is toggled off and on with a 3~4 second delay to turn back on. The skill itself while not imperative for early waves, becomes a life saver by significantly slowing down fast moving enemies such as Dogs, the monkey, or anything looking to rekt your team. Mark Alley deploys a ~20m circle of red flares, anything within that circle is slowed down by 40% when hit by any sort of fire.

Targeting Systems -
Transmits targeting data to other suits, increasing their damage output. Default skill.
  1. +12% damage, 17m radius
  2. +18% damage, 19m radius
  3. +24% damage, 21m radius
  4. +30% damage, 23m radius
  5. +36% damage, 25m radius
Everyone loves a damage buff increase and the Heavy Support provides that very well through Targeting Systems. Very straight forward component that is passive. It alsp gives the HS a sweet helmet for you to look cool in. As it currently stands, 2 Heavy Supports both with Targeting Systems will not stack. This also means that the Heavy Support with less or no points in Targeting Systems will not receive the buff from the Heavy Support with more points.

Ammo Link System -
An ammunition storage container with a chain link, enables Swap Ammo Skill at level 3 that enables switching between FMJ and Hollow-Point. Weapons affected : GAR, Minigun, Autocannon. GAR receives 20 ammo per level. Default skill.
  1. +100 ammo capacity
  2. +200 ammo capacity
  3. +300 ammo capacity, enables Swap Ammo
  4. +400 ammo capacity
  5. +500 ammo capacity
Though Ammo Link System does not provide direct benefits like the previous two skills, it still plays a vital part in a Minigun Heavy Support. It alleviates the need to constantly reload, allows the Heavy Support to engage Hollow Point or FMJ weak targets whenever necessary, and most importantly, shoot things dead without worrying about reload until the next century. Safeguard System, Reload Boosters, and Armory do look lucrative with their reload boosts, but being able to shoot at a high threat target and still have ammo in the magazine trumps a fast reload. Three points into ALS is sufficient as that allows usage of the Swap Ammo skill. Points cannot be taken out of Ammo Link System.
Secondary Components and Skills
You've picked out three components, so that leaves one last component slot to fill. Consider this a freebie but still take into consideration what your team wants from you as a Heavy Support with Minigun.

Critical Shot System -
Allows Marine to hit vital areas. Default Skill
  1. +15% critical chance and 200% critical damage
  2. +15% critical chance and 250% critical damage
  3. +15% critical chance and 300% critical damage
  4. +15% critical chance and 350% critical damage
  5. +15% critical chance and 400% critical damage

Don't know what to exactly take as the fourth component? Just take Critical Shot System, you honestly cannot go wrong with choosing it. Despite it only being +15% chance to do X amount of critical damage, the Minigun's sheer rate of fire and magazine size makes up for it and pump out decent amounts of damage. In my opinion, I'd prioritize this over any other skill, especially in anything pass Soldier mode.

Armory Device -
Places armory that generates ammuntion over time, and reduces reload times for all marines located within the armory's radius.
  1. Generates 1 bullet per 2s and maximum ammo stashed 300. Reduces weapon reload by 25%
  2. Generates 1 bullet per 1.5s and maximum ammo stashed 375. Reduces weapon reload by 45%
  3. Generates 1 bullet per 1s and maximum ammo stashed 450. Reduces weapon reload by 45%.
  4. Generates 1 bullet per 0.5s and maximum ammo stashed 525. Reduces weapon reload by 55%.
  5. Generates 1 bullet per 0.25s and maximum ammo stashed 600. Reduces weapon reload by 65%.

Generating large amounts of ammo is by all means a great asset to the team, especially in large spacious maps such as Military Sector. Place armories in very easy to access areas and places you feel your team will backtrack to eventually. Take note that armories need a minimum of 250m between each other in order to be placed. Again while generating ammo is great, Armory Device is very much lackluster if not enough points are put into it. If you feel that your team can help make up the damage for you not taking Critical Shot System, by all means, invest two points into Armory Device. Points cannot be taken out of armory.

Beta-IV Frequency -
Gives bonus bullets per reload for nearby marines and increases minimal damage threshold that adds true damage on top of damage dealt. Initial minimal damage threshold for every class is set to 12 at level 1 while inside the aura, except for Heavy Support, which is set to 17.
  1. 4 bonus bullets per reload within radius of 17m. Minimal damage threshold +2 that adds +1 true damage that ignores armor.
  2. 8 bonus bullets per reload within radius of 19m. Minimal damage threshold +4 that adds +2 true damage that ignores armor.
  3. 12 bonus bullets per reload within radius of 21m. Minimal damage threshold +6 that adds +3 true damage that ignores armor.
  4. 16 bonus bullets per reload within radius of 23m. Minimal damage threshold +8 that adds +4 true damage that ignores armor.
  5. 20 bonus bullets per reload within radius of 25m. Minimal damage threshold +10 that adds +6 true damage that ignores armor.

Beta-IV Frequency is a bit of a woozy as it adds a plethora of benefits but is rather vague in terms of the actual effects. Let's just get things out of the way as Beta-IV does not actually give bonus bullets per reload. It simply increases the magazine capacity of marines within its aura of effect.

This is where things get a bit confusing as I'm not too certain of it myself at the end of the day. For the other advertised effect, Beta-IV ensures that a certain amount of damage actually ignores a target's resistance, not actually increase a weapon's raw damage the same way Targeting Systems does. For example, using Hollow Point rounds at 50 damage per shot against a mob with 80 HP resistance will reduce that damage to 10 damage with Resist in bold red letters popping up above the character's head to indicate this. Beta-IV Frequency at lvl 1 increase this minimal damage threshold to 12 as well as true damage. In theory, a mob could have 100 resistance against HP or FMJ, but Beta-IV Frequency would allow rounds to by pass this resistance to an extent.

There is also an unlisted benefit of taking Beta-IV Frequency in that it lowers ammunition requirement for Vindicator users within its aura. It reduces ammo usage by 2 per level, reducing Vindicator ammo usage from 35 to 25 at level 5. This stacks with the Terminator's Vindicator Energy System.
Point Component Skill Distribution


Component
Point
Suppress Target Device
5
Ammo Link System
3
Targeting Systems
5
Critical Shot System
2

For the sake of this guide, I picked Critical Shot System. Ammo Link System should have a minimum of 3 points at wave 5-6 as to allow switching from HP to FMJ when significant numbers of dogs and borrowing enemies start to spawn. It's a bit of a mix up between which should be maxed out first, Targeting System or Suppress Target Device. For Soldier and below, Targeting System should be maxed out in order to offset Suppress Target Device's damage reduction. For Veteran and above though, Suppress Target Device should be given higher priority as its enemy speed reducing effect will be a boon to your DPS teammates. As for Critical Shot Sysem, do as you see fit, but consider investing your first point into it for early waves 0-3 so you may deal effectively with trash mobs.
Power Ups
While I did previously state that the Heavy Support isn't a true DPS class like the Assault, that doesn't mean you shouldn't still be raining pain yourself. The only power up that truly belongs on a Minigun Heavy Support is the Ammuntion Booster. The benefits of Reload Booster is pointless when taking Ammo Link System. Attack Speed Booster defeats the purpose of having Suppress Target Device as well as eat ammo faster at the expense of damage. It just hurts to think of the other Power Ups, so just do yourself the favor and only take triple Ammunition Booster.
Secondary Weapons
What kind of secondary weapon you take is ultimately up to you. My recommendations are the Pistol, FAS-18, or GAR.
Tip, Tricks, Tactics, and other words that start with the letter T.
Manual Fire is a must
This should be your bread and butter when it comes to attacking just about anything you come across. Simply hold down Left Shift and hold down MB1 in the direction of your intended target. This allows you to concentrate your efforts on high-threat targets as well as anything else caught within your Minigun's cone damage.

Though, the biggest boon to using Manual Fire is that the Heavy Support's cone of effect is capable of completely ignoring obstacles in regards to damaging enemies, regardless of what ammo type you are using. The affects of Suppress Target Device will apply. You can save teammates that are behind walls and buildings.

Attach to Team players
A significant disadvantage to Manual Fire is that it puts you into a tunnel vision and makes it harder to move while firing. You can alleviate this by attaching yourself to teammates that largely stay with the group, IE Medics, Marksmen, and Assaults. This allows you to scan for fast movers, manual fire, and stick with teammates that need your suppressing ability. Don't attach yourself to teammates such as Terminators, Recons, Demolitions, and Hellfires due to the nature of how they play. You may end up getting swarmed, left behind, or hit with some sort of Terminator blast.

Coordinate Your Fire
The Heavy Support's Suppress Target Device isn't all that if no one in your team is taking advantage of it. Be sure to communicate with your teammates such as the Assaults and Marksman so that you can quickly slow down targets and allow them to gun them down all the more quicker.

Avoid Prolonged Firing
This is very obvious as your Minigun will chew through ammo like it's nothing and you want a large enough magazine when engaging high threat targets. That and quick bursts works best when suppressing a target. The way to do this is again, Manual Fire. By using Manual Fire to control your burst, you can continously slow down targets while expending less of your ammo.

Ask for Ammo
Be vocal when you ask. You're slow, you eat ammo like nothing, and you can't really generate ammo all that easily. Everyone else and their mother except maybe the Marksman with Stinger will beat you out to ammo sources. Be sure to ask non-DPS classes or Assaults for some boxes. Oh, and try not to keep more than 500 rounds of ammo in your actual ammo pool.
Dual Heavy Support
Placeholder.
3 Comments
Lord Poodle Moth 20 Jan, 2018 @ 6:10am 
Guide outdated, many numbers are wrong
Triedra 11 Oct, 2017 @ 8:11am 
Good manual.
Bonzai101 20 Oct, 2015 @ 3:57pm 
Nice synopsis, exactly how I used to play the HS.

Linked it into the everything guide, hope thats alright

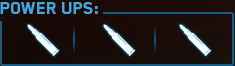
One thing you could mention is that with being able to change your ammo type you can drop in with hollow points allowing you to take down squishy early game targets very quickly and use less ammo