METAL GEAR SOLID V: THE PHANTOM PAIN

METAL GEAR SOLID V: THE PHANTOM PAIN

579 ratings
[2016]Security Zones and Advanced FOB Defense
By Styke
Hidden platform effects, mine placement and the ins-and-outs of defensive PVP.
2
4
2
   
Award
Favorite
Favorited
Unfavorite
Intro: "Ah, Mr. Bond. Welcome to my island."
Latest Update: Jan 5th
This guide will not cover the basics of FOB management or basic PVP tactics.
It will attempt to explain all the unexplained or downright unknown aspects of FOB management and has grown to include advanced PVP tactics.


This is a labor of love, so please vote on this guide if you find it useful. Thank you.
-Styke


Change list
  • New year, new list.
    1/05/16
    Minor updates with some new images attached.
    Security Challenge mode is bugged for me currently so researching mine placement isn't turning out so well, and the new development projects are 10+ days. Fun stuff, Konami.

This guide is wordy because it covers complex concepts that aren't clearly explained, and often involves math that I've tried to simplify into subjects for discussion. Most chapters have run into the text limit and there will be grammar and formatting errors, you may notice some sentences seem out of place or poorly constructed as well.
It's best to just scroll through all of it until you find the section that interests you, or skip to the comments and ask your question / find your answers.

[Caihead's Comprehensive Staff Guide] is wonderful if you're looking for information on how to fill your base and min-maxing staff stats. It's not entirely accurate anymore, but it does have the exact math and datamined assets that some people are looking for.
Chapter 1: Hidden Platform Effects
USELESS INFO DOT PNGNotice how the development platform lists weather notification for some reason, most of what Konami tells you is wrong because of poor translations or simply lack of caring.

Each FOB platform has an effect on FOB defenses, with major changes happening every 5-10 staff levels. Konami has made it increasingly difficult (Outright impossible, really) to reap the benefits of your base without buying water-space and developing both three four all platforms.

Critical Platforms (Build These First)
Command Platform
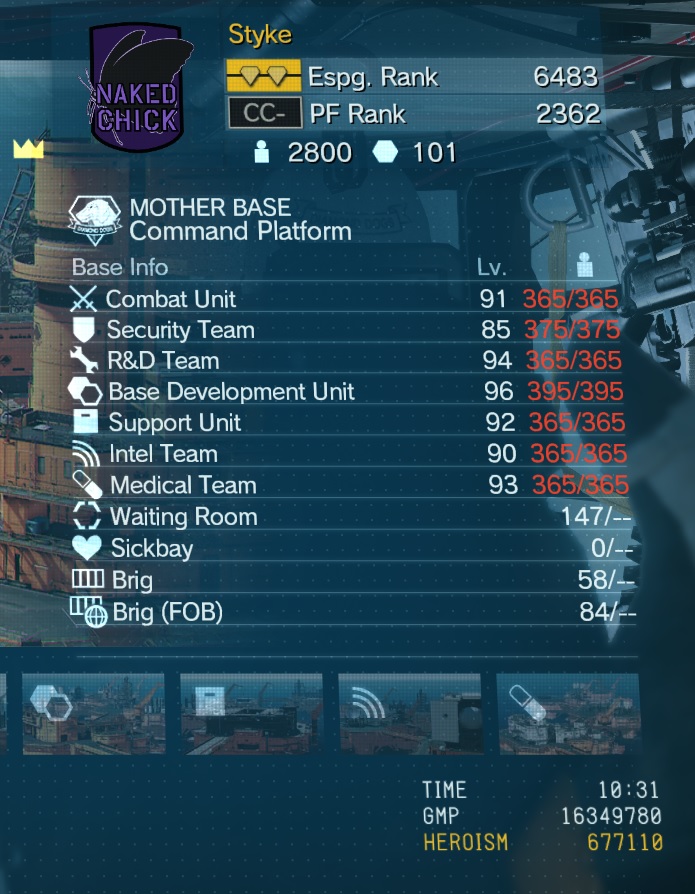
The Command Platform is the central nexus of your entire operations and as such it is the most important. You should always be upgrading it first, but Konami realized this and has made them build three times slower than every other platform. The benefits are clearly explained in game, but there are a few it doesn't tell you. Upgrading the command platform is the only way to increase your security staff, and thus increasing it's level.

Attacking the command platform gives you (Or your attacker) a random assortment of goons, and quite a lot of them. It is the most difficult platform to stealth (Intel being the other) and has a claymore spawn that can't be avoided, It also leaves the rival exposed for most of his trip zig-zagging up the outside of the CC so Lethal Long Range is a consideration which makes it even more difficult.

If you leave your command platform 1/4 or even 2/4, a rival can waltz right by everyone or blow them all away without any difficulty. Yes, smaller platforms yield less rewards for the attacker but keep in mind that they most often attack the smallest to retake their staff (which gives them a service medal and boosts their stats, see Mindgames section for more on this method.)

Development Platform
If you're reading this guide, I'm pretty sure you're aware of how important resources are and what a joy it is to clean out someone's base while they're sleeping. If you don't want this to happen to you, the best bet is to max out the development platform with any resources not spent on the command platform.

The larger the platform is, the more resources you convert (More staff = Higher level = Greater function) which you can read about in game. The real reason we're maxing out development is to allow for more guards to defend your precious resources. A 1/4 development platform is just asking to be looted without retaliation and with a rifle you can take a single platform with only a few clicks. A 4/4 rig with a 10-15 minute attack timer becomes one hell of a challenge and I'm sure you've noticed they are as costly to attack as they are to build.

PVP Critical (Build These Second)
Combat Platform
The Combat platform unfortunately takes a back seat to the development and command platform but it is important in a lot of ways It even has it's own section, so scroll down and check that out when you get a chance. When an intruder is detected on your FOB, the call for reinforcements goes out and the game will spawn balaclava-clad troops which represent Combat unit staff. Whenever a rival kills* (Depending on medical level, Level 93+ seems to rarely let any security die) or extracts one of these troops, you will lose staff from your combat unit and not the security team. When the combat unit runs out of soldiers, CP will announce they have none to spare, so a full-blown raid on your FOB can leave both combat and security in shambles.

Each patch, Konami has added more and more combat ops that you can deploy staff on. This wouldn't be an issue, but since this is advanced PVP be aware that deploying 80 S-rank troops on a 7 day mission means you can easily deplete your entire combat unit before a rival even clicks on your FOB, leaving absolutely zero reinforcements for your loaded-to-the-brim development platform. Selecting these missions reap crazy rewards (7 day missions are S+ troops.) But for those seven days, your defenses will be considerably weaker.

Intel Platform
The Intel platform actually has a wide array of PVP benefits which are covered in detail in the next chapter. I cannot understate how important the Intel platform is, and by expanding it you increase your team size (and level) making your defenses much, much better. Until Konami changes it, the intel team will put a red circle around the location of the invading rival which makes the entire act of defense a joke. Maxing out your intel platforms allows for more security zones to be assigned, and with it more devices to defend with, that alone should be more than enough reason to make this a priority.

Non-critical platforms for FOB-focused gameplay.
R&D Platform
Debatable in it's utility, making the R&D platform on FOB1+ doesn't do much besides reduce prices of your equipment and allow for some crazy week-long projects that may or may not kill your drive to even log on the game anymore. It will cost literally millions of fuel and metal, and leave another way to attack your base, but if you want the crazy high-end gizmos you're going to need to build this platform. For actual pvp it does nothing.
I haven't tested it myself, but I've been told you're able to research everything besides the new week-long junk with just Motherbase's platforms, meaning FOB1's research team is useless.

Medical Platform [Patched to be stronger]
Reduces the amount of staff killed by rivals after an invasion is successful, sending them instead to the sick bay as Injured instead of KIA. Though staff are easy to replace and plentiful, and upgrading this platform will literally cost you several million gmp as well as a whole lot of fuel. On a personal note, I consider the medical platform the easiest to take, so be sure to defend it heavily if you do choose to develop it.

Mandatory classes on how to identify Neo when he attacks your oil rig.
With the update, the medical team now contains "Anti-Reflex" tech which will reduce the enemy's reflex time considerably, but even without this the reflex time is already greatly reduced in FOB invasions. It's a good bonus for investing in the platform, but it's not exactly critical.

Support Platform
Does nothing for FOBs, and if you have portals, it doesn't do much for offline mode either. The single ramp into the basement makes taking it either a breeze, or insanely difficult depending on how much of a disturbance you've caused on the way there. Most guards are on the roof and scaffolding, making it possible to simply walk from the bridge to the CC. This platform has no known PVP benefits, as it appears Intel's level is what actually allows for more security.
You should dismiss your low ranking translators assigned to this platform, especially since they tend to be on direct contact and way, way below the rest of your staff. The Kojima Logic™ is that your translators have trained other troops the language, so dismissing Ivan from the first mission isn't that big of a deal 300+ hours later.

The only benefit of maxing out a support platform on a FOB is to unlock the maximum-level Battle Dress for you/your staff. Otherwise, it's a very easy way for a rival to grab 8000-ish Fuel (The support platform's default award)

It really is that useless.
Chapter 2: Combat & Intel in Depth
The Importance of the Combat Platforms.


Staff assigned to the Combat Platform will be put in a pool of possible reinforcements when your FOB is attacked, and as such you should keep your combat division full with roughly the same tier troops. In my case, I try to keep it S only for easy deployment and defense costs. If you're just starting out with advanced PVP tactics, you'll probably be mostly A++ which is also fine and in some ways better. You won't be raided ("as often") just for your troops if they aren't S rank or higher.


Konami again provides incorrect information in-game on these benefits. Surprise surprise.

The actual level number has these benefits.
  • Decreases reinforcement delay.
  • Increases the amount of defenders spawned per wave.
  • Increases the amount of waves available to be called in.
  • Decreases respawn time when you defend.

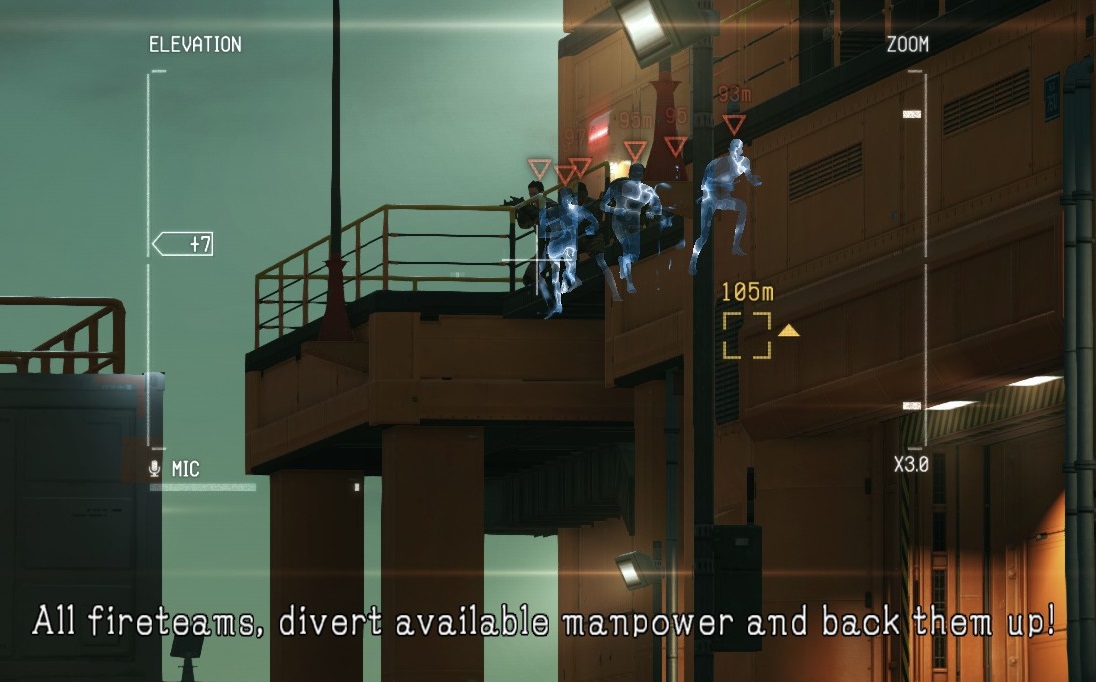
Reinforcement spawns are the center of bridges (Can be behind you on an already clear platform) and the core's door. When the Defender joins, it will also spawn a wave of reinforcements.

Guards spawning right on time.
Soldiers assigned to your combat division can be killed by rivals, so be warned that your S++ troops sitting in Combat may not be there the next day. Direct Contact troops will never die for any reason.

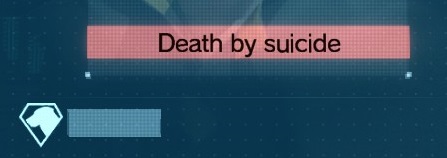
Your Security Staff will be defending your FOB while you're away, and you can actually visit them and boost morale. This is covered in chapter seven in more detail. Irrelevant now, as Konami has patched out FOB morale completely and replaced them with generic "DD Soldier" on your FOB (in Visit mode) Though guards will commit suicide if you are innactive or ignore Mother Base for too long.

Your Combat Staff will be defending the platform via reinforcements after an intruder has already been spotted and a Combat Alert has been triggered. The amount of reinforcements is tied to your actual Combat Staff number, and when you have no Combat Staff left CP will announce they have none left to spare.

Combat staff wear balaclavas, even at tech level 0.

When it spawns reinforcements, they will be from the defender's Combat Team and not the Security Team. They'll wear balaclavas based on the defender's PF level as well, so if his PF level is D they won't even get the forehead plate.


Anyone assigned to the security division will be eventually killed, kill themselves, or be kidnapped. Locking members to your security team only artificially boosts the security level, which is only really good if you want to decrease the blockade timer. S+ staff should generally be assigned to combat duty instead, but letting Miller handle the lists seems to work well enough if you don't care to micromanage.

I'm not joking about them all dying. With the addition of 20 round full auto grenade launchers and 75 drum mag 50cals, you will see a lot more Rambo attacks and log in some days to 50+ staff missing. You can also now mount sleep and stun grenade launchers to sniper rifles, making it possible to knock out more troops than you can actually carry fultons for.

Your Security Staff's level directly effects the following.
  • Decreases the amount of time the attacker has to reach your CC ("Blockade Time Reduction")
  • Increases the amount of guards you may assign to each platform.

At security level 100, the attacker has a mere 10 minutes to breach your core, which cuts down the shoot & loot time considerably for Development Platform raids. At 80 staff level, a more reasonable 17 minutes is allowed.

Intel: Knowing is Half the Battle.™

The intel platform is actually critical to FOB defense, and almost universally overlooked by people in multiplayer MGSV simply because it is never actually explained what it does for you unless you go digging.

These benefits will actually be reduced soon in a future patch* (Konami said in a japense interview) so be aware that investing heavily in Intel may not always reap these awesome rewards.


Intel Staff level has the following effects on FOB defenses.
  • Faster and more accurate "estimated area" where The Rival is when you deploy to defend.
  • Earlier weather warnings for mist and rain, which helps plan routes past guards and UAVs.
  • Decreases the time it takes for cameras and UAVs to spot an attacker.
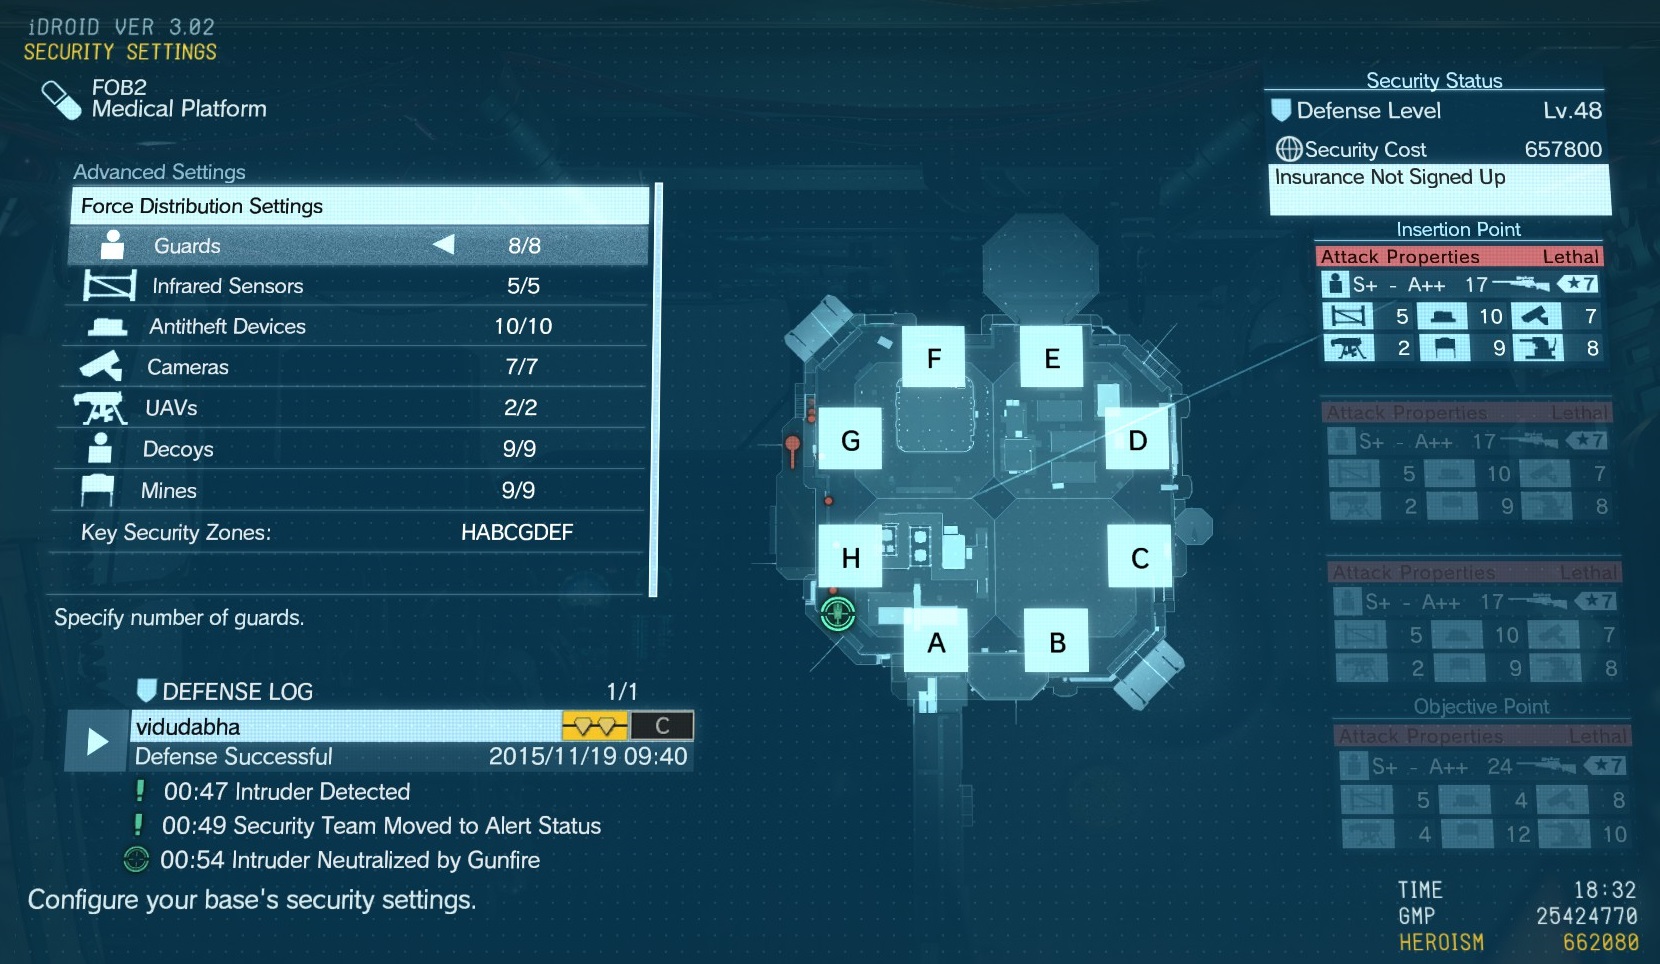
  • Increases the amount of Security Zones you can deploy around your platforms, adding overall difficulty for the attacker.
  • Decreases the time required for CP to declare a Special Alert.

Special Alerts and Why They Happen.

[Updated] Intel level 90+ will reduce the Special Alert timer to 0
The Special Alert patrol pattern is no longer random. Guards will spread out to the Security Zones based on priority.


A "Special Alert" will be issued by CP a few minutes after The Rival has violated the No Traces ruleset (Clicking/firing/using items at all) and the timer itself is based on The Defender's Intel Staff level. When this alert happens, The Defender will be informed and offered a chance to defend the FOB even if The Rival hasn't been officially spotted yet. The Special Alert will make all guards currently stationed on the rig to enter a general Alert Mode and enter their patrol patterns. Guards will buddy up if someone is nearby and S+ guards will inspect corners with flashlights. (Including the rafters in the supply hangar) S++ guards will inspect under objects. Be aware that even though A++ and S guards do not check under objects, they still have excellent vision and can spot you if the angle allows it. This alert is never dismissed

Certain things will take time off the Special Alert timer, which is refered to as an invisible "tension level" though the details I've found are quite sketchy. Instead, I'll go over the things I can personally confirm will reduce the Special Alert timer.

  • Firing a weapon, supressed or not.
  • A guard sees something strange
  • Broken defense equipment.
  • Crossing the invisible Checkpoint markers on the bridges between platforms.
  • Clacking your wrist violates No Traces and starts the timer.
  • Pressing the button on the generator will start the timer if it is a one or two platform facility.
  • Fultoning out anything, even undetected.
  • interacting with guards in any way starts the timer, and throwing them off the platform will shorten the delay considerably. Kojima Logic™ is that the guard isn't responding to radio calls, so CP knows something is up.

Crossing two platforms will almost always create a Special Alert if you've done anything that isn't No Traces.

With the patch, it's possible to start a Special Alert without even doing anything. This is Konami Logic™ to stop the hackers "Total Stealthing" platforms without even giving the owner a notification he's been robbed.

Things that cause a Special Alert as soon as you spawn.
  • The defender has an intel staff level of 90 or higher.
  • Invading a "Nuclear-equipped rival." (Has a nuke/Had a nuke within the last 24 hours)

Generally, an intel staff of 90 or higher requires at least FOB2 unlocked - which costs real money. Stay classy Konami.
Chapter 4: Security Zones

Konami moved the Security Zones around in the Dec22nd update and gave no notes at all. Now the one I used to sing praises for, is near useless as the guards will climb the ladder to the one spot on a FOB an invader will never ever go.


Old info:

Basically understand that the guards are facing the zones you specify, meaning the higher priority is the more guards facing or paying attention to that area at any given time. 1-3 recieving the most, 4+ recieving less.

If you do not assign Security Zones, Miller (The AI) will instead randomly scatter guards around the platform, I have not noticed a pattern. There are only a few slots for cameras to spawn in, so those are often in the same places regardless of where you place security zones. It all depends on the platform.

Security Zones have nothing to do with claymore placement or Lift Alarms, which use "slot" systems for spawn placement like cameras.

Clever placement of security zones can stop people from crawling the entire way, and allow for guards to cover eachother if you use platform layouts to your advantage (such as two open areas next to each other recieving high attention, so if a guard goes down all four of them will notice.) Two security zones next to eachother at similiar priority cause the guards rarely turn around, which may make them easier to ambush or crawl past. It's best to place security zones across from eachother for more movement and patrolling, creating far more "Oh sh-" moments for the attacker.

Be aware that some security zones will send a guard down to the actual portal as a way of "covering" that zone if it's high enough priority. The AI simply wants to cover the most ground, since you've said that slice of the platform is important. I'm currently documenting which ones do this, and at what level, but it's a lot of information* and often based on random variables. There is no way to know ahead of time, but if you use the Train option and notice your guard sitting on the portal waiting to be invis-grabbed, move the security zone to a lower priority.

*Because the platforms face random directions, there are no such things as "bad security zones you should avoid" and you should map them out according to whatever way the platform is angled. On my platforms, H is often the big useless hangar bay, but not for my rivals.

Having my guards focus on the bridge itself and outside rim of the platform makes sneaking a nightmare unless they put the time and effort into going around.

Always assume an attacker will take the closest spawn to the bridge, because the insertion platform never carries red containers and no one wants to sneak around eight guards. Attackers will almost always try to sprint to the first bridge, and if not then they'll try to crawl it. Both of these things are much more difficult if your guards are actually watching the area like hawks.

I've read a lot of guides (and read a lot of forums) that have top posts saying to put your security zones on the outside ring of the platform "near the wormholes" but I've never seen this actually work in my own tests* (*Real people attacking me) and I've concluded that they have no idea what they're talking about, because my methods of covering the bridge zone has worked nearly every time.
Chapter 5: Security Level Grades
Quick notes:
Sneaking Suit for Non-lethal starts at 2.
Battle Dress starts at 3.
Helmets start at 5.

Close Range Lethal is the only equipment set that scales into grade 8 currently.
All soldiers carry the AM D114 as their standard sidearm.


Key:
G = Grade (Level)

Lethal Loadouts in Depth

  • Short Range
    Grade 2 only:
    [SHOTGUN] S1000
    [PISTOL] AM D114 [With Shield]
    Grade 3+
    [SMG] ZE'EV (G3-7) [With Shield]
    [SHOTGUN] KABARGA-83 (G3-8)

  • Medium Range
    [LMG] ALM 48 (G2-7)
    [SMG] ZE'EV (G3-6+ with Killer Bee RPG of identical level)

  • Long Range
    Grade 2 Only:
    [AR] AM MRS-4 (G2)
    [SNIPER]M2000-D (G2)

    Grade 3+
    [AR] AM MRS-4R (G3-7)
    [SNIPER]]AM MRS-71 (G3-7)

Non-Lethal Loadouts in Depth

  • Short Range
    [SMG] Riot SMG (G2-5+) [With Shield]
    [SHOTGUN] S1000 AIR-S (G3-7)

  • Medium Range
    [AR] UN-ARC-NL (G2-7)
    *Now has a damn rocket launcher that fires sleeping grenades. Wow.

  • Long Range
    [SNIPER] RENOV-ICKX TP (G2-4)
    [SNIPER] AM MRS-73 NL (G5-7)
    [AR] UN-ARC-NL (G2-7)
Chapter 6: PF Level and Matchmaking
Placeholder for next week.
[NEW] Chapter 7: Strong Defenses

Fortress of Solitude

Some of the top players and their defensive strategies for you to copy, discuss, or build upon.

GET DOWN! THE ENEMY SNIPER! Eagle-Eyed Horde
The classic A++ fodder with sniper rifle combo.
Absurdly strong, and using only A++ troops means you'll never need to worry about stealing your staff back. They have smaller cones of vision, reaction time HP and teamwork than S troops but they are completely expendable.

With the update, Long Range has fallen out of favor with some top players because the damage isn't reliable (and sniper/spotters are easily picked off by the new sniper rifles available for research) An enemy who is spotted by the snipers can easily shoot his way out of trouble by using cover and abusing the fast regen of the new sneaking suit upgrades, or just tank the damage with battle dress.

Long Range's biggest flaw in the current meta is that invaders have an endless source of ammo from your defenders, since almost every single attacker will be carrying an absurdly overpowered sniper rifle on their back with a 75-round mag.

Michael Bay's Base
With the recent updates, this build has been increasing in popularity but still has some draw backs. Medium range does indeed suck at certain things, but now the previously-useless Honeybee trooper will actually fire rockets at the area he last had a clear shot at you, effectively blocking off an area with explosions.

The reason some top players pick Medium Range for their troops is because of the increasing use of [Defense Up 2] sneaking suits, and the super beef [Defense Up 4] battle dress. Medium range troops are the only ones capable of delivering reliable and in-your-face damage to put down attackers. They'll still blindly charge the enemy, but now with near-endless mags and insane firing speeds they can easily flatten a fully geared attacker if caught at a bad moment (Like reloading or trying to throw a grenade.)

The biggest strength of Medium Range setting in the current meta is the lack of shared ammo, unless the attacker is using a LMG or an SMG he's not going to have any chance to reload his sniper rifle from fallen defenders making each shootout a battle of attrition.

No Nonsense
The typical take-no-chances build that is pretty standard these days. The recent update made it so Long Range's standard troopers (No sniper rifle) carry drum-fed assault rifles which provides some of the benefits that Medium currently enjoy, but without the reckless charging forward and explosive spam. Luckily, S and higher are very good snipers and will land their shots pretty often, they'll also spot an attacker across the map if he does something silly like standing on the bridge or shooting a drone. Only drawback is people spamming sleeping grenades and taking all your good troops, there's only a 30% chance of finding S-troops in the standard game but you can steal 50 of them from an enemy without much effort.

Non-Lethal Options

Some top players use Non-lethal short range because of the shotgun's ability to KO a full HP defender in a single shot and quickly fulton them out without any chance of recovery, making this a viable strategy if they're not sitting on a pipe or container somewhere.

The players using short range non-lethal are often sporting a whole lot of s+ and s++ defenders and really, really don't want to be vulnerable to sleeping gas and stun grenades. Non-lethal gives them gas masks to prevent easy extraction and troop-farming.

The big draw of Non-lethal currently is the ability to actually "kill" hacking players. What people do is give their staff member or snake S++(99999999999999) Combat Rating which boosts their HP to near infinity. Non-lethal doesn't do damage to your HP, so by knocking out the invincible hacker and then fultoning him out, you can actually win. This isn't a concern for 99.9% of players, but it's worth mentioning.
Chapter 8: Advanced PvP
The update has added Security Challenge mode which will make you constantly under attack by FOB invaders, thus rendering this entire section out of date.

Inviting Disaster

When you boot up the game, I highly recommend lowering your security level considerably, up to half if you're comfortable with it, while keeping gear levels above five.

Command and Development platforms should always be maxed security, but your other platforms make for wonderful bait. The goal here is to lure someone into attacking what they assume to be a poorly defended fob, but in reality you're alerted almost instantly since the attacker is most likely fultoning worthless white containers and carelessly shooting security

Keep in mind that a lightly defended non-command fob will not net the invader many staff or sometimes no staff at all if he just dashes/crawls/rolls to the cc, so almost every time they will get caught lifting containers on the insertion platform, or at least a guard will say there is a likely intruder.

Once you actually join to defend your fob, there is a 98% chance of you actually winning since at that point the attacker is more afraid of you than guards. In fact, I've never actually lost a defense this way though I have been blown up and lost characters hoping for the defense merit.

These sorts of losses happen, and are the standard cost when dealing with unpredictable human players instead of bots that walk back and forth between two set points.

When wrapping up your MGSV game time, remember to boost your security settings back to max.

Using and losing Blockades

If you use the above trick, you will most likely be invaded within the first hour of gameplay. This means you will receive a blockade keeping future invaders out for an amount of time relative to the damage done to your fob, usually enough to get some missions done or farm Code Talker for staff.


You can manually dismiss your blockade safety by invading someone, if you want to get back to the action.

Don't heist if you have empty platforms.

One of the biggest mistakes I see people make is raiding my S-guard filled platforms and fultoning out 30+ guards while they have a platform in development. Their command platform may be 4/4 but their medical is a wimpy 1/4 and has 8 guards on it (Or even 8 decoys and 0 guards) or even a 2/4 with 16 or so.
People don't seem to understand that you will retake all your lost troops if any CC on any platform is breached meaning you can just walk right up to the CC on his undefended platform and snag all your troops back in an instant, scoring all 30 of your comrades stat boosting medals.

Be aware of your minor platforms and their defenses, because even a max security 1/4 combat platform can easily be done No Traces simply because your eight guards aren't enough. (Not to mention they're easy to click on if spotted.)

NVG Isn't Actually Scary
It's just expensive, and only active players with a heaping helping of resources will have tier seven equipment unlocked. If you can afford it, it is definitely good to have and no one really uses the flare or flashlight stun trick on them from what I've seen.

It's capabilities are vastly overrated, mostly because the average player incorrectly assumes the sneaking suit is the only way to play. The sneaking suit actually gets you spotted twice as fast, but makes your crouch running quiet to compensate. It is best used with corners or anywhere there is no direct line of sight. I personally swear by digital camo ("Squares" in-game) unless it's a 45+ base, since I can literally just walk by snipers and guards without alerts.

Always bring the heavy stuff if you expect a shoot out, but most fobs I raid will have endless reinforcements so avoidance is key for me.

The digi camo box (CTY or "City" camo in-game) is also excellent for sitting by cc doors when waiting for an alarm to end. Guards will only investigate if they're not leading a "Form up! On me!" patrol, or if they see it moving.


With the recent update, there is now tanky version of the sneaking suit available that is actually geared towards FOB raiders (Caps missions at A offline)
This is a viable option, and in a lot of cases a lot better than the square camo I suggested earlier. The meta is always changing so try to be on top of it.

Mindgames
Basically this section was intended to one day be a detailed guide about the back-and-forth trading of staff with attackers merely for the service medal, but most of that is discussed earlier in Inviting Disaster, and is now obsolete.

Random Findings

Throwing a guard off a platform (into the water or from a high fall) does not open a revenge wormhole nor ruin a No Kill run. It does violate the No Traces ruleset, but that's not a concern anymore as Konami has patched that mode out completely.

The guard thrown over the ledge and into the water will be Injured (Not killed) on the defender's screen regardless of their medical staff's level and will eventually recover.
Chapter 9: Non-Lethal vs Lethal
The Importance of Using Both

Lethal is the default and strongest in almost every regard, and does exactly as the name implies - Your troops will shoot to kill and shoot quite often, but leaves them vulnerable to sleep grenade spam.

A clever attacker will pack 24+ sleep grenades by placing noobtubes on their assault and sniper rifles. This means that at least half of your staff can be fultoned out completely effortlessly.

This can be avoided by switching your staff to Non-lethal, but the trade off is the guards have to actually reach the Rival once they have gassed or knocked him down with rubber. The issues with this should be obvious, and yes you can sit on a pipe or on top of a container and just kill everyone while waking yourself up between gas attacks since the guards can't reach you.

That said, I personally use non-lethal for my R&D platform, sometimes for my intel platform, and almost always for my support platform.

  • R&D Platform
    Very tight corners, lots of ladders and enclosed space with zero clear lines of sight mean your troops will often grenade themselves or charge down ramps into danger. Switching your R&D defense team to Short Range, Non-Lethal means they will spam grenades that are harmless to themselves, but literally force The Rival to move from the gas cloud or die. Tech 7 shotguns are a one-hit knock out, and since the guard needs to get close to fulton, this happens almost instantly together making for many profanity-laced moments.

    For tight spaces, guards with shields are a nightmare since you can't get around them and you can't melee or dodge around them. You have to use explosives, which in tight spaces, well I'm sure you can figure it out.

  • Intel Platform
    Open, but no clear lines of fire leaving Long Range troops completely useless while they shoot worthlessly at the metal gratings, or watching the ocean while waiting to die. Short range, Lethal or non lethal, is wonderful for Intel but you should experiment with your own Trial Mode to see what works for you. Sometimes I watch my Short Range guards all pile down on a ladder to just die to pointless things or blown up together, since Short Range AI is always trying to move into melee range of The Target, usually getting themselves killed in the process. Medium means they'll sit on their ass with 500000 round machine guns, but as mentioned earlier they might waste it all on the metal ramps and floor since they can see the target but can't reach them.

    Knock out gas mines (instead of claymores) on the Intel ramps and ladders leave the Rival very few options but to fight back. Most people will just run through claymores, you can't run through knock out gas without getting your ass whooped.

  • Support Platform

    I'm sure you've noticed by now, the majority of combat on the support platform comes down to laying prone in the plants downstairs waiting for the alarm to end. I personally have seen this over a dozen times, the guards just throw grenades at themselves, chuck mortars straight down the hole in the roof onto their own guys, or otherwise charge down the single stairwell right into their own fire. All of this is fixed by switching to Non-lethal, as the guards can't gas themselves and they won't mortar their own base into pulp. As a bonus, they also avoid the AA guns unless they've got a good line of sight, meaning your guards will actually be inside fighting and smoking out the attacker instead of running in circles outside looking for explosive alternatives.

    Short range option equips your guards with shields, which helps for charging down the stairs unless the rival has the previously-mentioned 21 round frag nade hell-cannon.

Non-lethal sure sounds great, why doesn't everyone use it? What a good question! Non-lethal actually isn't that good at defending, since your guards aren't wearing beefy armor they're often easily gunned down by the 75-mag sniper rifle or 200 round HMGs, and like I said before if your attacker is laying on a pipe or somewhere guards can't reach, he's effectively invincible. I personally use it because it amps up the difficulty for the attacker, and gives them one hell of a nightmare-mode death run for platforms that have next to no reward (Intel, Support, R&D) while my fully-geared Lethal Death Machine squads are stationed on Command and Development. These are key platforms, and have a LOT of containers for Rivals to climb on and just snipe away until there's nothing left.

You will almost never see someone wearing anything less than full beef defense gear while attacking Command or Development, because they fully intend to shoot their way to the CC and take all the containers along the way. Meanwhile, the majority of people attacking Support, Intel, etc, will all be wearing Sneaking Suit or Squares camo, because they're trying to sneak it. Non-lethal is perfect for this, and even Long Range Non-Lethal will ruin a sneaking suit-clad rival's day, leaving him scrambling for new cover since every grenade creates an unpassable knock out gas cloud that even pierces walls. You know all those grenade icons that you just ignore because you're behind cover? That doesn't work against Non-lethal, those grenades create a bubble that forces you to move.

Key Differences between Range settings for your guards
AKA: Medium Range is Awful

One of the most important things to note about Medium range vs Short Range is that Medium Range troops are loaded with LMGs and Honeybees, both of which require a clear line of sight. Medium Range guards have two settings, the first of which involves taking cover behind something and just being worthless since they spray your last known position but only the exact area you where last seen - not the actual hill or area. This means the rival can crawl under something and your troops will spent 9000000 rounds on the area he pressed crouch, doing literally nothing. [Patched, troops will now at least try to shoot you under objects now]

The second setting guards have is what I call "Adjusting fire" and it's where they blindly run towards the target, or where they last saw the target, in order to obtain a clear line of fire. Nine times out of ten, this is what happens when you see "Neutralized by CQC" over and over in your security settings, because Medium Range troops won't do jack until they're point blank, basically.

Both of these settings cause extreme issues, especially when your jackass on the mortar is spamming the entire area with mortars, killing both your troops in cover and the clowns marching towards the guy they last spotted somewhere silly. I advise people accordingly to almost never use medium range setting on your troops.

I'm not sure if anyone has ever been killed by a honeybee troop, I know I haven't, which means that guy with a clear shot would have done better as a sniper than a rpg troop.

I use Lethal for Long Range and Non-lethal for Close Range, as the shotgun at tier 7 will KO an invader in one hit and he will be fultoned out before he can even stand. Mortars and grenades aren't an issue in Non-lethal, as the guards are wearing gas masks. This cuts down on team killing consistently, and makes platform defense a whole lot easier.

Basically, Medium Range troops walk right up to the target and get splattered while Close Range troops have shields and shotguns to make walking right up to the target far more effective. Medium Range troops carry a useless rocket launcher that requires a lock on.

The recent update stealth-buffed Medium Range and changed the meta to make them stronger.

Review Chapter 7: Strong Defenses for more information on this. Medium Range delivers reliable damage but gets your guards killed, but reliable damage is what you need to kill these high-hp attackers and having a 90+ medical staff level means your troops don't actually die.
Chapter 10: FAQ
Send me your questions.
Due to Steam limiting the size of guides, I cannot expand this section further and I ask you to scan the comments at the bottom for questions and answers. Anyone is welcome to answer these with their own experiences or sources.

Q) How do I get more Support Requests? (The alert to defend someone else's FOB)

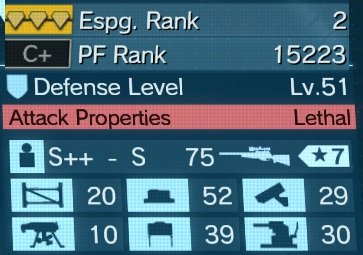
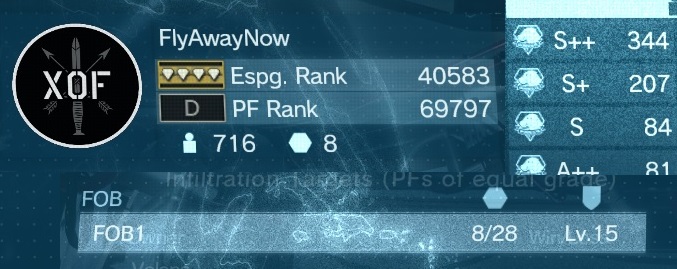
When selecting allies from the random list, you should look for nukes first and Espionage Level second.
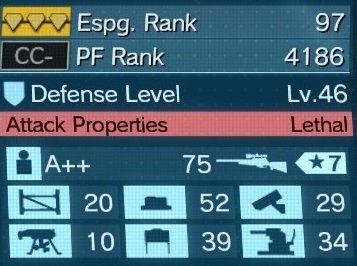
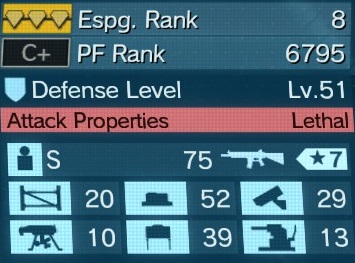
A high Esp Level implies the player is raiding other FOBs often, and most likely getting a revenge wormhole opened after each one. Since your rank decays often, this is a pretty reliable number when looking for active pvpers.
A support request will only be issued if the player under attack is not actually online, but by using this method I have at least three support requests a day from people getting revenge-raided.
Players with nukes are almost constantly raided and blockaded, so you should have a decent amount of PVP by selecting them. Keep in mind a high amount of nukes also implies someone is hacking, and you shouldn't be involved with them.

By helping people defend their nukes, you're also hindering the hidden Peace ending, but I honestly have my doubts that will ever happen anyway.

Supporting a player with a high Esp rank (Under 1k especially) means they can't attack you, which is excellent for your own safety.

Q) Security Zones don't seem to change in Visit mode.

I should have mentioned "visiting" is buggy as all hell, and half the times I've done it my non-lethal platform is suddenly full lethal gear. To note changes in security layouts, you have to do the Train option, but be aware that if you set a zone to "None" when you have zones available to be assigned, then Miller will just assign it for you, so it's difficult actually see what the differences are unless you swap all of the high priority to one side.

The best way to notice how guards pay attention to things is the north facing area of the command FOB, you'll see there's a guard that pretty much never turns around from the upper viewing area if you assign the empty area in front of him to be important.

The intent of security zones was most likely to convey that the attacker could peek over the railings or ladders and spot a lightly defended area, then move around the scaffolding of the sides to exploit it safely. I base this on the fact the guards are mostly facing the outside ladders and not the inside ramps.

Q) How do you beat a level 59 platform?
[NEW]Chapter 11: Camera/Mine Placement
Dec Update - Mine/Camera Placement

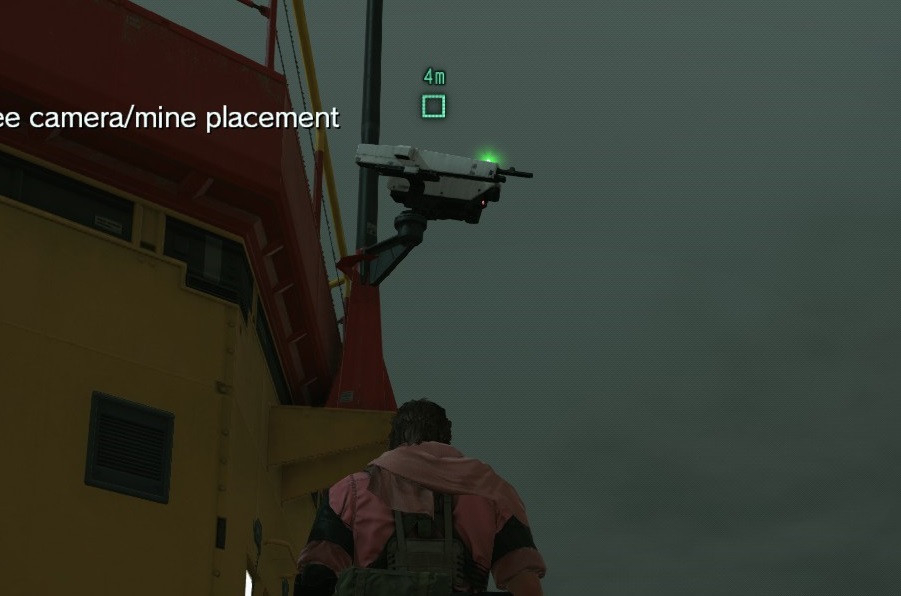
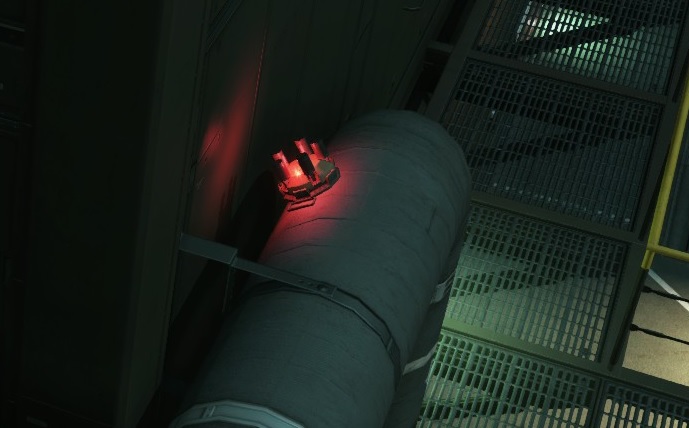
[Mine Placeholder, currently testing placement/locations]


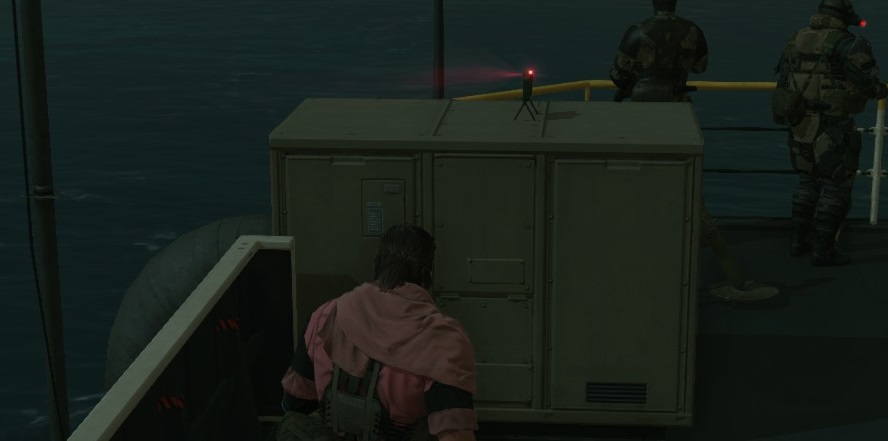
My favorite camera spot so far.

I'm having way too much fun with placing mines in places people can't reach but every time I find a sweet spot and go to update the guide, I find and even better one.


Top floor med platform, this has ruined many people's days.

New Defense Equipment

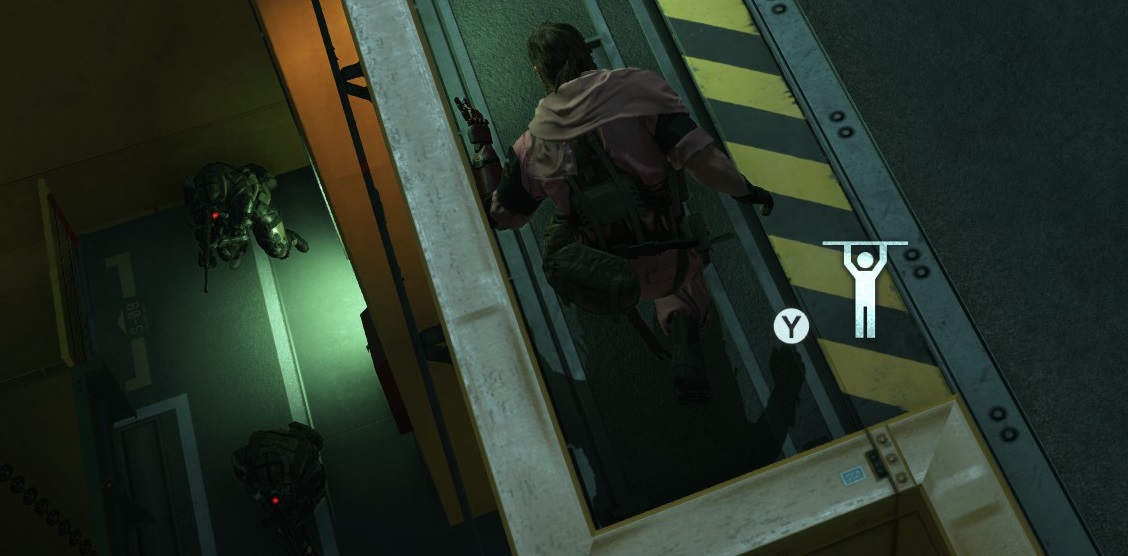
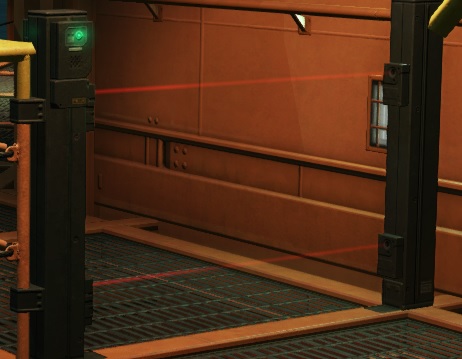
Infared Sensor with crawl-blocking beam (Press B to dive through it)
Tier 3 blocks diving, but you can still hang and shimmy past it.

Rank 2

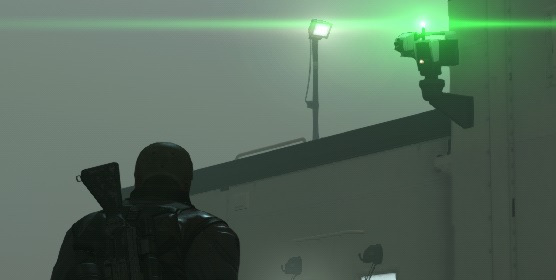
Guncam (Lethal only)
Now attacks intruders in it's cone of vision, very useful for finishing off weakened foes ducking behind cover thinking it's safe.


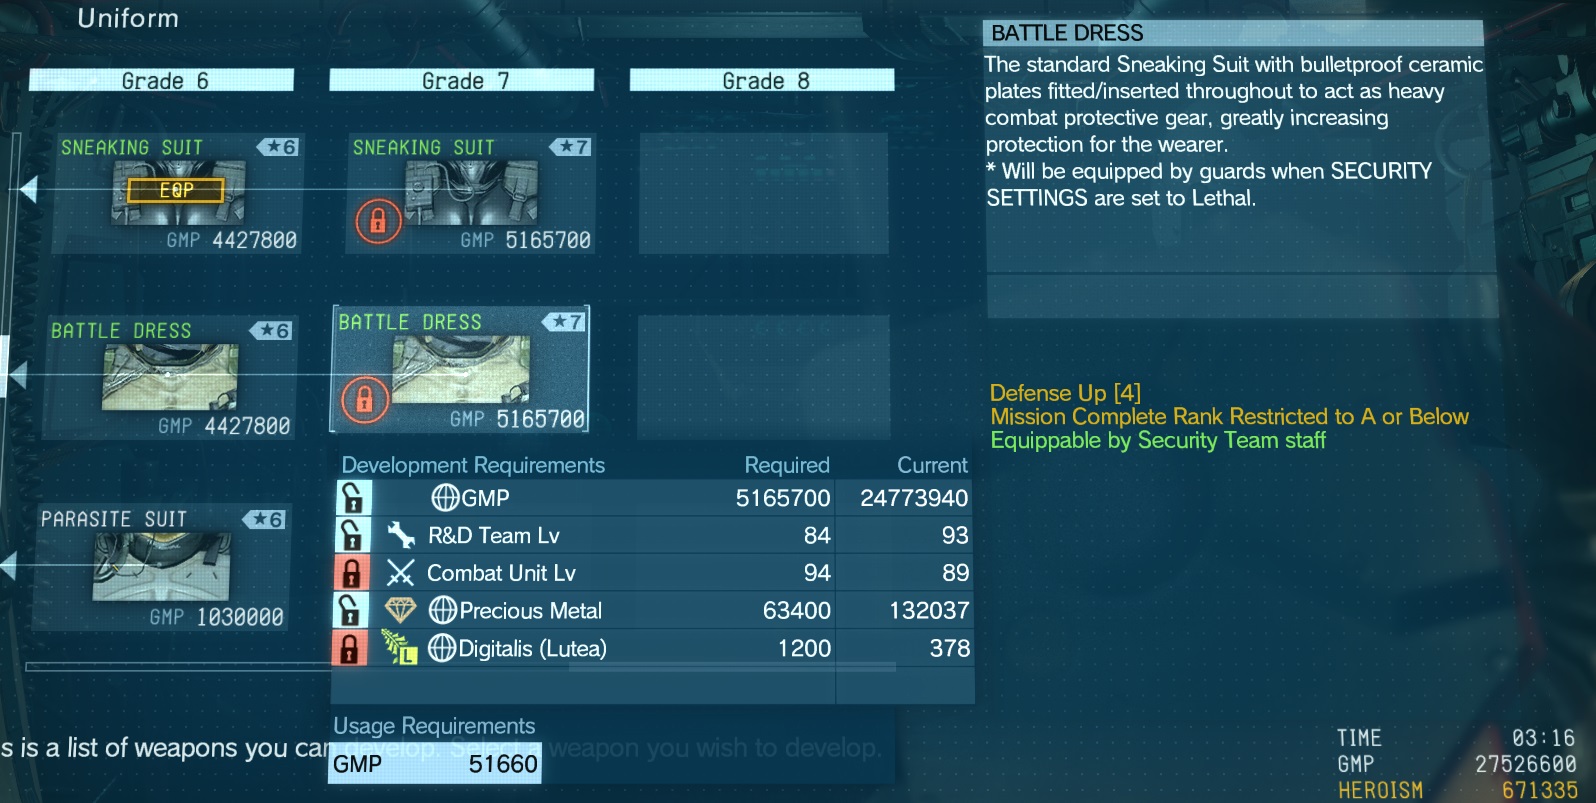
Guard Uniforms scale into grades six and seven now, both with increasingly large and nonsensical costs but universally increase the health of your defenders. Well worth it, I'd say.

Glad we don't have a monthly fee to pay.
Chapter 12: Spotting Hackers
This is always changing, and I update it with every patch.


Quick notes of who to avoid:
  • Anyone with over 50 S++ troops, as the top 100 players in the world rarely have more than 30-50 from my own observations.
  • Over 5 nukes and no blockades.
  • Steam profiles with VAC bans. Even private profiles will show VAC status.
  • Low Esp level, High PF rank.
  • CCC and CC+ PF levels are nearly 100% hackers on the PC version.


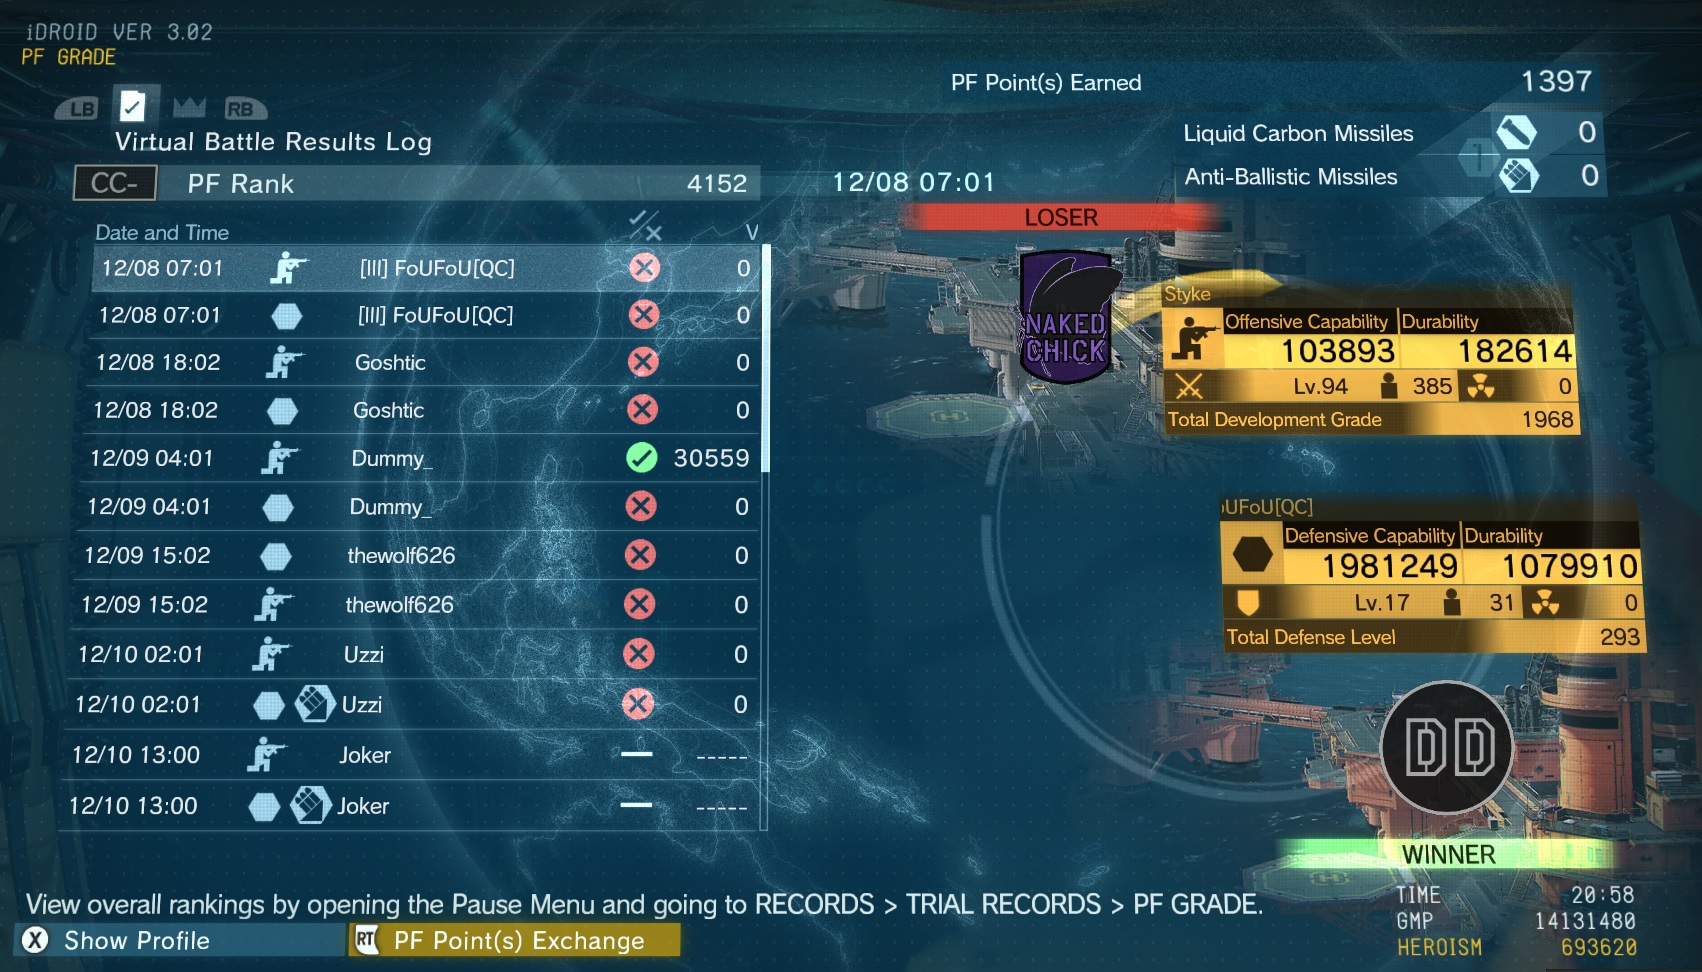
As of Dec 1st, it is now possible to obtain CC rank if you have nearly maxed out everything available in the game. Previously, this was only obtainable by hackers who unlocked everything. Still true, almost every CC and higher has used tools to unlock everything.


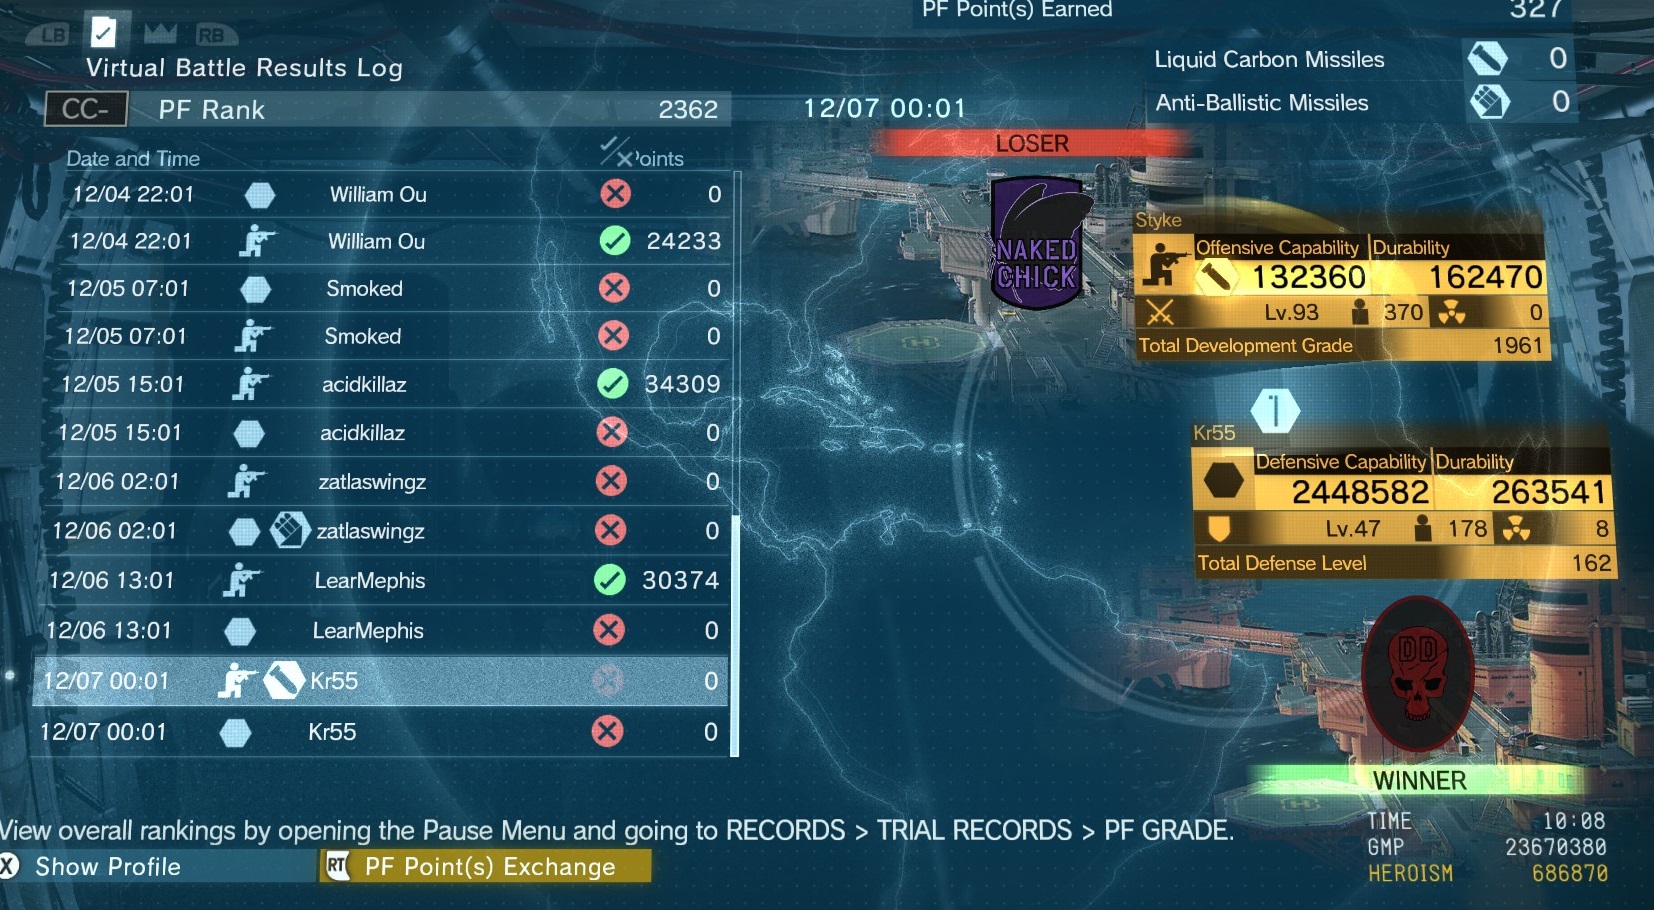
As a very active player with nearly everything in the game unlocked (Some 12-day development projects etc) I've been sitting at CC- for two weeks now, but the majority of the people my virtual PF fight against are chinese and russian players who haven't been online in over a month. Typically, they used cheat engine to give themselves everything as well as max our their soldier's stats when the game first came out and never bothered playing since. Their phantoms still lurk the multiplayer making trouble for active players like me.


One soldier fights off my army of tanks, missiles and 2800+ heavy troopers in this virtual matchup. The player is chinese and was last online in late September.

Occasionally you'll get a hacker who simply sleeps the entire platform and walks to the CP.
If you have an intel staff level of 90 or above you'll always be informed of an attack. The only exception to this is when people cheat, when they first spawn they will press a hotkey to sleep the entire platform which creates a Outpost Taken "ding" sound in-game, disabling all future alarms. By doing this the first few seconds after entering the fob, he avoids the special alert and defender popups completely and can just walk to the CC.


Unfortunately, there is no way to prevent this, but it is good to know what is and isn't your fault when a defense goes sour. You can also report them on the Konami website.


415 Comments
Mingthemerciless 2 Mar, 2024 @ 2:14am 
nice, as a new player this will come in handy.
NarkoTri1er 15 Aug, 2021 @ 9:42am 
Can confirm that "Special alert" info this guide contains is false. Special alert means nothing but the fact that platform you are infiltrating has the security zones set up.
serigala-x 28 Apr, 2021 @ 11:44pm 
I'm still playing FOBs in 2021!
1 GRANDE MACACO 11 Jan, 2021 @ 6:01pm 
This game is completely DEAD !! So much potential goes right to the garbage !! FUCK KONAMI !
DeeEcks 3 Nov, 2020 @ 2:39am 
I put a single S++ soldier on my security team to make my FOB look really intimidating from the menus
Dawri 2 Oct, 2020 @ 9:17pm 
@Punished Miller
Those are the exact excuses that a hacker would say :bandit:
Punished Miller 23 Jan, 2019 @ 9:17am 
Unless you count nexus mods with thousands of downloads as "hackers" then then your "50+ S++ = hacker" method is wrong. Many people just use the S++ mod to avoid Konami's abysmal grind. Also, high PF rank and low ESP doesn't mean he's a hacker.

There are many custom side ops mods on nexus with missions revolved around capturing tanks and walker gears. There's also a side-ops mission in the game that allows you to farm 2 tanks in 10 seconds, reload a checkpoint and do it again until you get bored. This way people can quickly get 1000+ tanks and walker gears which will boost their PF rank up to B+, but they're not "hackers".
Vinier McNuggNugg 1 Apr, 2018 @ 1:38am 
Haha, Good and hilarious guide.
Myst Leissa 2 May, 2017 @ 10:08pm 
So it really isn't answered in this guide from what I can tell but....I know Direct Contract Can't DIE - but can they be kidnapped? I mean when off the security team? Personally if you can't atleast lock a few selected characters there's no point in /ever/ going online.
Unfriendly Pyro 2 Oct, 2016 @ 6:47am 
The article is really outdated. Most of the information should be changed.