The Witness

The Witness

1,224 ratings
Puzzle Rules Guide (No Solutions)
By vernanonix
Be warned: This guide may ruin some of your experience of this game. Sometimes it's hard to figure out how the mechanics in this game work. So here's some help. This guide features no solutions and only explains certain puzzle mechanics and where to find the tutorial areas for a type of puzzle.
7
7
5
30
2
3
3
3
2
3
2
2
2
   
Award
Favorite
Favorited
Unfavorite
Introduction/Warning
This guide is here to help those who have trouble understanding the specific mechanics of a type of puzzle. Since most guides gloss over the details of how a puzzle is solved, this guide will explain how each type of puzzle works. Do note that this is merely to help with the logic and will go over no actual answers to puzzles. Just a quick warning: The heart of this game is exploration and discovering things for yourself. There are plenty of clues around the island to help you solve any puzzle you may encounter. So please, only use this guide if you are absolutely stuck on something or you don't quite understand how a mechanic works.
Icon Puzzle Overview
Many of the puzzles in The Witness have icons in their grids. These icons indicate various rules that need to be satisfied in order to complete the puzzle. All icons must be satisfied in order to progress, with the excpetion of puzzles with Correctors, which will take care of an unsatisfied icon. For each type of icon, a tutorial exists somewhere on the island, usually near or in the area that utilizes it the most. These tutorial puzzles are easy enough to brute force an answer so as to allow the player to learn the rules of the utilized icons. If you are having trouble in an area due to not knowing how an icon works, please go look for the tutorial before moving on with this guide. Each section here will list both the tutorial location as well as the rules for which each icon abides.
Squares


Tutorial Area: Farming area near the starting Castle

Description: Puzzles with colored squares must be solved such that any group of colored squares is segregated from all other colors of squares. Squares will ignore other icons, regardless of color. Also, it is allowed to divide groups of the same color so long as they are also divided off from groups of another color.
Dots


Tutorial Area: Farming area near the starting Castle

Description: A puzzle with dots must be completed in such a way they every dot is crossed. On occasion, such as with puzzles on Symmetry Island, colored dots may be introduced. When this occurs, there is also another line being drawn symmetrically to what the player is drawing, usually of a different color. Lines must collect dots of the matching color in this case.
Straight Shapes


Tutorial Area: Entrance to the Swamp

Description: The Tetris-like shapes must have an area enclosed around them in the same shape and orientation as the icon, no more and no less. If multiple shape icons are enclosed in the same region, their regions can be combined such that it matches any placement of the shapes. Specifically, shapes may be moved freely around in the region which they are enclosed so long as the final outcome follows the above rules.
Slanted Shapes


Tutorial Area: Swamp, past the first gate

Description: Slanted shapes work exactly like straight shapes with the exception that they can be rotated. Keep in mind that they must keep rotational symmetry and cannot have reflective symmetry when considering their placement. This can be a particular issue with L-shaped and Z-shaped blocks, so keep that in mind.
Outlined Shapes


Tutorial Area: Swamp > Red Area > Underwater

Description: Some puzzles with shapes (both straight or slanted), may also be paired with outlined shapes. To deal with outlined shapes, the puzzle must be solved the same way a normal shape puzzle would, but with the added twist of removing the shape indicated by the outlined shape from the solution, so long as they are grouped appropriately. Also, should outline shapes reduce the number of blocks in the shape to zero, then the region is free of the shape rules so long as the icons remain grouped appropriately. Outlined shapes also come in straight and slanted varieties, which follow similar rules as normal shapes in regards to rotation.
Stars


Tutorial Area: Entrance to the Treehouse area

Description: Stars are only happy when paired with exactly one other icon of the same color in the same region, regardless of the type of icon it is. Stars will ignore anything of another color. For example, two green stars, a purple star, and a purple square may be in the same region and pass. However, A green star, a purple star, a green square, and a purple square cannot being in the same region as the two squares conflict with their rules.
Correctors


Tutorial Area: Quarry Factory

Description: Correctors are a different kind of icon in that they fix a mistake on the grid by removing one random icon that causes an issue. However, to solve a puzzle with correctors, every corrector must be used. Correctors will also only remove icons that are grouped within the same region as itself.
Triangles


Tutorial Area: The Island

Description: Triangles are notorious throughout the game as there are rarely more than one in a single spot, making working out the exact mechanics difficult. There is no tutorial area for them- rather the whole island contains the tutorial- so the player must rely on finding the random panels scattered throughout the island and hope it is enough to figure out how to deal with them. Or you can use this guide. The key to triangle-based puzzles is the number of triangles in a given square. From there, the player must draw their line such that exactly that many sides of the associated square are filled in. In the case of two triangles, no the two sides do not have to be touching.
Environmental Puzzle Area Overview
Various areas within the The Witness will rely on environmental hints and cues for the sake of solving puzzles. Each area that is based on non-icon puzzles will be listed here. That said, please take the time to look around and carefully observe the area. Running into the hint accidentally and recognizing it can be one of the best feelings in this game. If you truly are stumped though, read on.
Cherry Blossom Grove


Not far from the path leading out of the Beginner's Castle lies a sea of pink petals with green panels scattered here and there. In the Cherry Blossom Grove, the puzzles are comprised of, for those familiar with graph theory, rooted binary trees. This should clue in savvy players to the real nature of the puzzle: the nature around them. The hints here are given by a nearby green tree that stands out among all the pink with an apple hanging from one of its branches. So in the same way as the puzzle starts at the root of its tree, so too should the player look up the tree from its root to find the apple and follow that path accordingly.
Desert Ruins


With the scorching sun above, in the heat of the desert, there sits the ruins of a temple adorned at the top with a sun shining down its steps and into the sand. Use this as a clue that the sun is your friend. Here, to ascertain the correct paths, the player must find a way to catch the sun's glare on a panel, which will reveal imperfections showing the proper path for solving the puzzle. Once inside, however, the sun will be useless, so it's up to the player to be creative on how they find the solutions.
Autumn Woods


There is a massive amount of puzzles tucked away among the golden leaves of the Autumn Woods. However, none of them have markings to indicate what exactly to do with the blank grids presented. But a keen-eyed player might notice that the shadows cast by the trees reveal a path. Shadows are key here, though that hint is only at a base level, as shadow rules vary depending on the puzzle set, which I will leave up to players to figure out for themselves.
Maze Castle


With a shameless Yu Yu Hakusho reference, I have dubbed this area Maze Castle. There isn't much to say about this area as it is one half pressure plate puzzles and one half hedge mazes with four puzzles per half. While the pressure plates focus more on icon-based puzzles, the hedge mazes are environmental. The key to each panel is the hedge maze leading up to it. Exactly how it's the key, I'll leave up to the player. Just be aware of everything as you traverse the maze as there are many paths through, but only one solution to each.
Overgrown Monastery


No flavor text here. All I can really say is that solving the puzzles here involve lining up the puzzles with various features around the room that can be found right in front of the puzzle. They will either show the path or block the path. There isn't much more to the area than that. That said, the place is old and overgrown, so it is entirely possible some things around here are broken. So get creative!
Tropic Jungle


A set of mildly dubious puzzles sits in the humid shade of the jungle. The chirping of nearby birds would drive a person insane if it weren't for the fact that they only chirp when standing in front of particular puzzles. In fact, they seem to be chipring from the speakers set up around the area. Yes, the bird is telling you what to do with these puzzles with a series of chirps in high, middle, and low tones. Let this guide your way. But the rules might change here and there so be on your toes. The concept will remain the same regardless. Just keep building on what you know and don't let it make a monkey out of you.
Rainbow Greenhouse


Nestled up against the mountain is a greenhouse with some of the most intriguing color-based puzzles in the game. While the first set of puzzles play by the standard rules for colored squares, the sets beyond that seem illogical. No matter how you try to draw the line to fit the rules, something doesn't seem right. Almost as if the colors aren't the colors you actually see. And of course, you'd be right. With tinted windows and lights all over this place, the colors will change every way imaginable and it's up to the player to figure out how to manipulate those colors to solve the puzzles.

As a slightly bigger hint for one of the final puzzles in the area, take a look into Subtractive Color Theory. Why should you look into that? Let's just say that sometimes you can't see the colors you need to see to solve a puzzle.
Ruined Town


Next to the harbor, near the Beginner's Castle, lies a town filled not only with crumbling buildings, but a large set of puzzles. But what kind of puzzles? All of them. With every mechanic taught to the player in their arsonal from every other area on the island, the Ruined Town brings everything icon-based and environmental-based to the table for one final laser to unlock. Good luck.
Conclusion
Ok, so I think I have covered just about everything I can here in a vague enough sense that you can understand the logic behind the puzzles without spoiling too much. (Even with some of these hints, the game will still throw you some doozies.) If you've looked through this guide expecting hints for Symmetry Island or The Mountain, you've come to the wrong place. Honestly, there isn't much to say on any of them. Symmetry Island is pretty obvious on what's happening and if you're looking for hints on The Mountain, then you have failed to appreciate this game for what it is and haven't learned the mechanics. I hope this guide has otherwise been helpful. Have fun exploring.
101 Comments
G_Zimmer 27 Jan @ 9:48pm 
I couldn't deal and looked at solutions and I didn't realize the sounds was still part of it.
G_Zimmer 27 Jan @ 9:42pm 
unclear about the different sized dots, as are introduced during the bamboo forest.
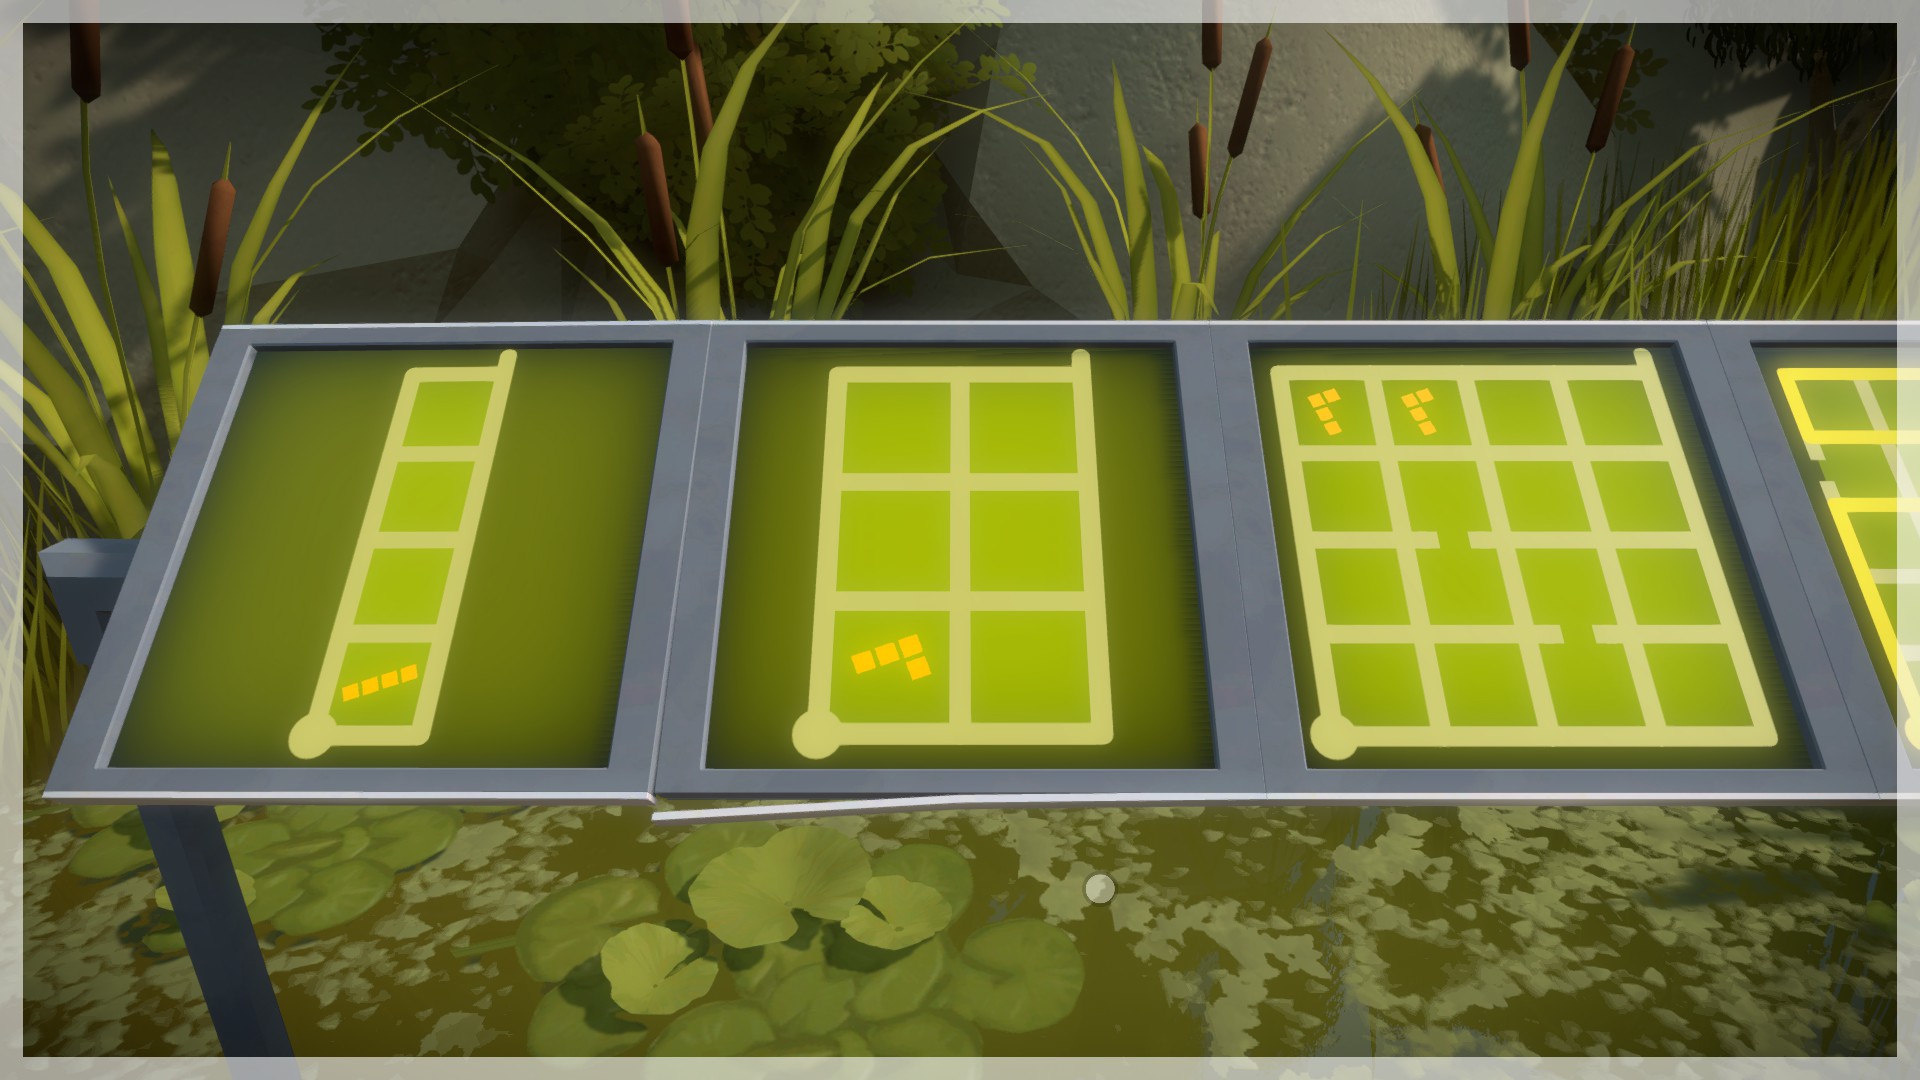
I just flipped up the panel in the ground that has the set of six of them on it.
It's late, but I'm struggling with the third puzzle, where it seems like it should be impossible to collect the smallest piece first and still get all the other pieces.
rogueKlyntar 10 Jul, 2023 @ 9:08pm 
Everything is pretty clear except for the outline shapes. I may just need the tutorial, but atm I am stuck in that area, so I'm at the treehouse area with the stars, but at least one of the puzzles there has an outlined shape. As far as that particular puzzle is concerned, it's not very clear what you mean by "remove from the solution".
rogueKlyntar 3 Jul, 2023 @ 10:39pm 
lol those hedge mazes. I finally gave up trying to figure the third and fourth ones out and set out systematically trying every possible path. Thank god they weren't like the tree ones where if you get it wrong you have to do the last one over again!
Misuu 26 Apr, 2023 @ 1:10am 
i still dont understand the straight shapes, cuz some puzzles needed to be done when the shape was horizontal, but the final outcome was on vertical
caboosket 24 Dec, 2022 @ 7:02pm 
lol
Elkian Lionblood 3 Sep, 2022 @ 9:50pm 
Thank you so much!! I kept solving puzzles without thinking about them or via brute force or accident, and it's so frustrating being given something even tougher to do without understanding how I did it the first time lmao. I know they were going for a specific game experience here, but a little more feedback would have been very helpful xD
jacksonbestbiz 19 Jul, 2022 @ 2:24pm 
sorry i forgot i already thanked you.
jacksonbestbiz 19 Jul, 2022 @ 2:24pm 
thank you so much for making this ill look back at this if i forget or dont know some of the puzzle rules
vernanonix  [author] 10 Jul, 2022 @ 2:34pm 
@UwU Runmp “The Island” refers to the entire island. The triangle puzzles are scatters across the whole island. The one in the screenshot is on the pressure plate side of Maze Castle. It’s not until end/post game that you start seeing them more frequently.