Voidspire Tactics

Voidspire Tactics

41 ratings
Voidspire Tactics Walkthrough
By Ramos and 1 collaborators
A guide to help you out with your journey through the Voidspire. If you're stuck, look no further.
   
Award
Favorite
Favorited
Unfavorite
Introduction
Voidspire Tactics is a tactics RPG game by Rad Codex that focuses on exploration, strategic combat, character developing, crafting and using your own spells and abilities to solve puzzles and clear obstacles. The game is really fun to play on your own, exploring and building your characters as you see fit. Therefore, I advise you to use this guide only if you are stuck or want to know more about the game, using it as a step-by-step walkthrough will probably spoil the fun. If yu find anything amiss in this guide, feel free to message me.
The game has very deep character customization, so before anything else, I'll go over the races and classes and then some general tips.

Races
There are six races in Voidspire Tactics, and while every one of them is good at any given class, some might get a slight advantage depending on their racial bonuses. The following races are available to the player:
Human
You know humans, right? Humans get a flat 10% experience bonus. This might not seem like much but along an entire playthrough it really adds up. As such, they can multiclass with much more freedom than other races.
Scurio
Scurio are beast people. They get a -2 time to act bonus, meaning they act before most allies and enemies in a fight. You might want to build your Scurio around alot of damage or status effects, as they will almost certainly be the first to act in any fight, or you might prefer to give them a support role so you can buff up before anyone acts.
Rasmen
Rasmen are humanoids without a face. Because of that, they are immune to blindness and retain more of their evasion when flanked than other races, so they'll do well as physical damage dishers, as they'll be more protected and will be immune to the status effect that is most detrimental to them.
Fareem
Fareem are snake people. Their tails allow them to move further 1 square further than other races. This bonus is useful for basically every class, so take your pick. You might use them as ranged damage dealers that can reach almost every spot in the battlefield, or as a mage with more effective range than usual.
Buralk (Only after clearing the game)
Buralks are bugs. They're pretty neat and even have a unique death sound effect. They get +1 defense and magic defense so they might make for a neat tank or anything really, extra defense is useful for everyone.
Diecast (Only after clearing the game)
Stonemen. Diecast get a massive 10HP bonus in exchange for a permanent weakness to ice. In my opinion, ice is not used very much by enemies that this becomes a problem. Much like the Buralk, extra tankiness is useful no matter the character so make them whatever.
Classes (part 1)
Next up, we have the classes. There are 18 classes available to you in Voidspire Tactics. In my experience, if you are playing on normal difficulty at least, every class is useful and viable, so I won't advise which ones to use or not to use, I'll only provide a brief description of each. Your characters can also mix and match two different classes as they see fit, and equip passives from any class. Just make sure you have the appropriate weapon for the skills you want to use!
These are the classes:

Warrior
Requirements: none
Warriors are your basic physical tank and damage disher. While their tankiness and damage aren't as impressive as other, more advanced classes', I feel that they strike a nice balance. They also have acess to some very useful buffs, the invaluable Counter passive, and bit of mobility if you upgrade Charge.
Required for: Brawler, Guardian, Enchanter, Blade, Breaker.

Scout
Scouts are really useful, specially in the early game. Their skillset consists of healing, ranged attacks, mobility, healing, and even fire elemental damage in Firestarter, very useful to wear down an enemy with a large HP pool due to the damage over time, and also to light up torches and furnaces. Quick Hands is very nice if you need to change your gear on the fly.
Requirements: none
Required for: Rogue, Blade, Sharpshooter, Mechanist.

Scholar
Scholars are utility mages first and foremost. They have alot of basic, instant and single target elemental spells, invaluable for freezing water or burning down trees while travelling, Focus Energy to heal or harm a target, and also have Prayer: an infinite source of MP. Their passive Teacher can also come in handy if you keep your spellcasters next to each other. Don't be surprised if late in the game you still have Scholar as a subclass, as it's specially effective in a healer type of character.
Requirements: none
Required for: Sage, Sorcerer, Enchanter, Gatekeeper.

Brawler
A bare fisted fighter. Brawlers can reach surprising amounts of damage, and are incredibly mobile and adptable. They can deal more damage when low on HP, gain a massive one-turn buff, and even throw their weapons and deal aoe damage. Their passive Thousand Fists allows for some high numbers when attacking with a fist in the off-hand and Reckless turns them into a physical glass cannon.
Requirements: 300 Warrior
Required for: Breaker

Guardian
Guardians are the game's most durable classes. They possess some great support skills (even a revive and a status heal) and help you keep your damage dealers alive and in good health. They are also masters at pushing foes away, both with Hold the Line and with Shield Bash. With Bulwark they can become immune to alot of nasty displacement effects, mostly caused by wind magic, as well as negative morale.
Requirements: 300 Warrior XP
Required for: Breaker, Enchanter

Rogue
Rogues have alot of fun options to mess around with. They can blind and poison, both being really useful in this game. They can interrupt spellcasting. They have a mobility skill and can turn invisble and also they can set traps. Their passive Backstabber might come in handy if you want a physical damage disher, as it's free damage against a foe's back and Stealth-sense can help you avoid fights altogether. As a word of advice, if you want a ranged Rogue, it's better if you use bows so you can inflict status effects as often as you want without having to reload like with crossbows.
Requirements: 250 Scout XP
Required for: Blade, Shiftcloak, Mechanist

Sharpshooter
While a very deadly long range damage disher, the Sharpshooter can also stand it's ground up close with Contact Shot, so you might want to close in for the kill sometimes. They also come equipped with a series of multi-target skills and a passive that sacrifices mobility for more damage with ranged weapons. Focus combos extremely well with Headshot, allowing you to cause huge amounts of single target damage.
Requirements 400 Scout XP
Required for: Spell Archon

Sage
Sages are healers. If that's not enough to sell you on their usefulness, they can also cause plants to blow with Growth, which comes in handy a few times. They can buff people against magical damage and set up barriers which enable you to chokepoint foes and take them out one by one. They have a passive that makes it so that casting is almost uninterruptable, which is good for any kind of spellcaster. They can easily removes buffs, debuffs and cancel casting all with Dispel. Plus, they're healers.
Requirements 350 Scholar XP
Required for: Balancer

Sorcerer
Sorcerers are one of the main aoe elemental magic damage dishers of the game. Their active skills are nothing but elemental spells of every element except ruin. They are also very useful while traversing dungeons and the game world as they can freeze large patches of water, electrify electronic equipment, and burn wooden objects. They can achieve very high amounts of damage in one particular element if equipped with an Adept passive plus two weapons, one in each hand, that boost that element's effectiveness. Do keep them protected however, as they will take more damage while casting.
Requirements 500 Scholar XP
Required for: Spell Archon, Unmaker, Balancer

Blade
Blades are a fun class. They are built around mastery of edged weapons (daggers, swords, axes, spears) and can wield two weapons at the same time, as long as the off-hand weapon is a dagger. They have a very complete skillset, with an aoe, a ranged strikes, a dash attack, a debuff, an unmissable strike and Deathblow, which deals more damage the less HP a foe has. A very effective physical damage dealer.
Requirements 600 Warrior XP, 250 Rogue XP
Required for: Shiftcloak

Breaker
Breakers can completely cripple a foe. Disable, Immobilize, gear breaking, you name it. They can also Shatter foes with broken gear or other status impairments to really lay on the pain. Keep in mind that while monsters and animals are immune to armor and weapon break, almost nobody is immune to break arms and legs.
Requirements 400 Brawler XP, 300 Guardian XP
Required for: None

Balancer
Balancers have a very interesting combination of elemental skills that inflict status effects with elemental skills that inflict buffs. Warmth is a very nice source of MP if you don't want to carry around Scholar to use Prayer. Ice Carapace can assist frontline fighters with dispatching foes and Force can help you reposition. Preserve is a very nice revive that works preemptively. Critical Preserve is great to get on a tank, and Geomancy is cool as it can boost your elemental damage if you know what terrain bonus you are going to get.
Requirements 350 Sage XP, 350 Sorcerer XP
Required for: Gatekeeper

Unmaker
Unmakers have some very neat mechanics to them. First of all, if you want to use an Unmaker then you may want to have a container filled with bones of any kind. Bones are used in a few Unmaker spells, and although the class is good without them, you'd be missing out. Bones can be used to create walls with Bonemeld (which also decimates undead foes) and power up the Unmaker's ruin spells through Necromancy. The rest of the Unmaker's spells are mostly debuffs and status effects, making them a powerful asset. Also, if facing enemy mages, Soulburn can ruin their day.
Requirements 800 Sorcerer XP
Required for: Gatekeeper


Classes (Part 2)
Enchanter
Enchanters exist to buff themselves or alies with alot of elemental damage. Existing as a mix of fighter and mage, the Enchanter can either serve as a support role, buffing a damage dealer to new heights of power, or buffing himself and then using Discharge to purge their buffs in exchange for damage. Force Lunge is great if your Enchanter is the self-buffing kind. A pure caster with good levels on fire, ice and lighting can really make use of Antipode to wreck havock. They also have some very nice passives, with Essence Flow granting you infinite MP provided you manage to get your MP down to exactly 1.
Requirements 750 Warrior XP, 750 Scholar XP, 500 Guardian XP
Required for: None

Spell Archon
Much like Sharpshooters, Spell Archons excell in long range damage dealing. However, Spell Archons come with a whole slew of elemental attacks that inflict status effects that can be inflicted by far far away. After inflicting said status, they can be purged for additional damage and spell canceling through the use of Disrupt Lance. Multiblast is also a great nuke with no need for setup, if a bit pricey in terms of MP. Their passives in general work in many ways to make them better at longe range combat, and could be useful for a Sharpshooter as well.
Requirements 600 Sharpshooter XP, 500 Sorcerer XP
Required for: None

Shiftcloak
Shiftcloaks are masters of misdirection and confusion. Their skills are very strange but useful and fun to use. They can move around the battlefield with ease, blind, deal small amounts of aoe damage, and impair movement. You can look at them as a frontline utility/support class, that can be very effective if used creatively. All of the passives are great: Distracting Presence can leave foes open for an ally with Backstabber, Double Reload is a must if you want a Spell Archon or Sharpshooter dual wielding Crossbows (which pack a punch), and Adaptability lets you change your entire subclass or passives as an action during combat. The possibilities of this are endless.
Requirements 200 Blade XP, 600 Rogue XP
Required for: None

Gatekeeper
I had so much fun with Gatekeeper. Most of its abilities are very large elemental aoes, bigger than the Sorcerer's, which enables you to freeze entire lakes/rivers and burn almost entire rooms in one cast. But the crown jewel of this class is the Gate spell, which teleports your character to a maximum of 5 spaces away when fully upgraded. This is amazing because it sometimes will even allow you to bypass parts of a level if you're smart, or avoid danger during battle. The passives are fun and exploration based, with Realmsense being a personal favorite of mine.
Requirements 1500 Scholar XP 350 Unmaker XP 350 Balancer XP
Required for: None

Mechanist
The Mechanist is probably the most complex and interesting class in the game. Their devices can be activated both through their Activate skill (which can target multiple targets in later levels) or electrical damage. This means that a Sorcerer's electric aoe can trigger up to five blasts, each dealing damage in a two square radius. And everything stacks: all the devices and the electrical spell that set them off. Needless to say, nothing survives a well executed chain detonation, it's definitely the most damage I've seen in this game. Mechanists can also put up walls, turrets, which are powerful, but enemies avoid them like the plague so it's hard to make them hit. A way to get a guaranteed turret hit in is to set one up before a fight, pointed straight at a foe. If you do it right you can even get two turret salvos in, which usually spells a foe's death before the fight even began. It's a tough class to make work, and most of it's damage potential requires alot of setting up. But when it does work, it's beautiful.
Requirements 700 Scout, 450 Rogue
Required for: None
General Tips
Voidspire Tactics is a very unique game. Sometimes things can get a bit confusing and you might feel overwhelmed by all the game has to offer. These are some useful tips to help you out on your journey:

- Use Look (shortcut "L") on everything. Be it a foe or an ally or a weapon or an item or a landmark you just found. This will add the target to your journal providing you with crucial information. Use it even on your own characters and gear!

- Craft and recycle your materials. Crafting is very simple, all you need to do is drag an item into another one and if that's a possible recipe, you'll get the resulting item. Bandages plus Wood, for example, create Splints, a better kind of Bandage. Drag a piece of cloth (bandages count) into an Oil Can to create an Oily Rag. Drag an empty bottle into an Oil Can to fill them with oil, which you can throw at foes to lower movement and create a fire weakness, then into an oily rag to make a Firebomb. To craft weapons, you need a Weapon Crafting Kit for the appropriate weapon, drop it on an anvil, then drop a material on the Crafting Kit and it's done. Don't forget to take the Kit back with you, I forgot about it on top of the anvil many times. To recycle a material all you need to do is light up a furnace with a fire spell and drop a weapon in there. This way, that iron sword you found can be made into an iron anything, and it saves you alot of materials. Anvils and furnaces are both relatively common throughout the world.

- Keep a Trigger (or more) of each element. Triggers are small gems that, when equipped, strenghten a specific element and let you cast a small, melee range, MP-less spell of said element. This can be very useful when you need a specific element for something but you either don't have a Sorcerer/Scholar or they're reclassed into something else.

- Organize your bags. Throughout your adventures you will come across many many items. To make your life easier, you can pick up bags, small chests and other containers you find to store your loot in. As a way of making your enormous inventory simpler to manage, you should categorize your containers, so that you have one bag for weapons, a crate for materials, one for healing items and etc...

- After a certain point very early into the game, a friendly merchant will grant you a crystal for you to use when in trouble. You might notice that this crystal is nowhere to be seen in your inventories. That's because it's used by pressing the small button on the right of your quickbar. Be warned though, that you can't use it in battle or near enemies, and that it has a massive cooldown period. Using it will teleport you back to the merchant, so save it for a situation where you are somehow completly stuck.

- To reload a weapon use it when out of ammo and then click your character or press space. You won't imagine how long it took for me to find this out.

- Esc cancels movement.

- Always carry an axe and a hammer to clear away obstacles and collect wood.

- Dropped items will stay were you leave them. So you can store stuff at places you know you'll return to.
Solport (The start of the game)
Without further ado, let's begin the walkthrough:

Start by following the instructions provided to you in the bottom screen. Walk, drag the baskets away so you can pass, and collect the lantern in the top room. Of all the things here, you might want to hold on to the bottles and nothing else. Cutlery and wood debris aren't very useful. Once you reach the room with three doors, take to bottom one to collect a bottle and then head right, check the chests and go into the light to move on.

Once outside, speak to the Scurio down the plank to have him move out of the way. Push the crates to the left out of the way and feel free to explore the town! Once you are ready to move forward, head on down to the queue and speak to the guard and the person in front of you in line. Once you get sick of waiting in line like a good citizen, come back up in the town center and examine the purple light...

You're in battle now. Tell Livia you want her to tell you about fighting to get a detailed tutorial (or don't, but you should). The fight isn't hard and she's there to help you out if you need it. After your inevitable victory make sure you loot everything. Even the shopkeeper (you can get his bottles now) and then speak to Livia. After you hear all she has to say, head back into the boat where you started.

Inside the boat head past the grey structure and loot the small room. You can find ranged weapons here, which can prove useful. Climb down the rope in the center and go to the next area.

Here, make your way down the right path, and then curve to the left. When you see a rope leading down near the bottom of the screen, go down.
Cathedral of Elements
This are is pretty straightforward. You can double click braziers to make them stand and then lite em up with Firestarter if you have a scout. Head right for another simple fight. Afterwards proceed into the next area.

This area is also pretty linear. Fight the little critters on your way around the map for extra XP. The exit is to the lower right.

In this next area you'll come across an npc called Morin. Remeber him, as he manages a great shop that you might want to return to once you have more money. Near his shop (to your far left) you'll find a few useful items. Bandages can be crafted by picking up the shears and using them on any piece of cloth. The boxes also have some goodies. From this point on, you should loot any containers and pick up any objects that might come in handy for you and your team. I'll make note however of important items. The stuff Morin sells is all probably out of your price range for now. Once you grab all you need, head on south into the next screen.
Displaced Street
This town is pretty important. Remeber to come back here often to restock and craft at the blacksmith's (house with the anvil sign). Make sure to loot everything everywhere (the blacksmith has some nifty stuff like materials and Weapon Kits. Check General Tips on how to craft things with them).
The townsfolk will give you some nice advice. To the rightmost edge of the screen there is a simple pushing puzzle you can solve to gain acess to that blue bottle, Moss Malt, which increases max MP by 1. The boulders can be pushed in any direction where there isn't rubble.
If you find leaves you can also shear them and turn them into bandages. You can use an axe to break down furniture and trees to get wood, which will be useful later on. The boulders on top of the climbable wall next to the pond are not pushable form this side, but can be reached later on to make a shortcut. After you cross the bridge, check the rightmost house for a purple bag, usable as a container, and another Moss Malt hidden behind the bed.
To the left of these houses is a broken bridge. You can use the wood you found and drag the pieces into it to repair it. Here's more loot, such as an Essence Stone, which increases XP by 100, and a lockpick, essential for opening locked doors and chests. Use it (if you want) on the left house to find a few bottles, wood, iron and steel, a locked chest and some rungs, which create metal ladders in some specific spots.
Head on down past the campsite (which functions like a bed, in which you can rest to recover your Maximum hitpoints in case anyone died) and into the next zone.
Northmount
Make your way down the climbable wall to the left and face the wrath of a couple of birds. The iron mail nearby may come in handy. Also pick up the bones if you are planning on using an Unmaker anytime soon. Proceed, push the boulder or chop the sapling and move on down. Here go right and fight some more birds pecking at a weird stone. Take the pouch here and proceed to the left.
Head on down until you see a chain coiled around a piece of wood. Click it and slide on down. Repeat this process until down with items around you. I don't think I need to tell you to grab the bag and anything else that catches your eye. See those lighter parts of the wall? You can jump to them if you're a space away. Do that to the right, then down, push the boulder and at the next intersection skip your way left to some trees and down to a cave.
Machine Graveyard (Map Included)
Welcome to the Machine Graveyard! This zone is the central hub of the game, and where most of the times you'll return to after completing a section of the game. Shortcuts will open up eventually, letting you acess almost any place by going to the appropriate exit. I included a map here that you'll probably want to consult regularly.
The first thing you'll want to do is head right as soon as you can and then up into the next zone. Remeber this track? You're back in town. Push the middle boulder left and now you have a quick two-way shortcut between here and the graveyard. Do what you need to do here and then head back.
Now the second thing you'll want to do is to head on over to the spot marked Workshop on the map. Here you'll meet a friendly npc and get your goal for most of the game: to collect 4 Aerstones. These are spread around the areas surrounding the graveyard. You can do them in any order you want, with a few exceptions. I'll list these areas as normal in the guide, but don't be afraid to experiment and explore, that's what the game is all about. If you are having trouble with a particular area in terms of combat then leave and return once you're stronger. If you are having trouble because you are stuck or lost, just jump down to the appropriate section. Be advised though, both the bottom right area (Temple) and the rightmost area (Graven) eventually require you to have the means to jump 2 tiles instead of one. This can be achieved by finding an acessory in the Fort or by leveling your jump as a Rogue or Shiftcloak. The entrance to the Wine Marshes appears to be like that as well, but the water (wine) can be frozen by an ice spell, so no need for advanced jumping.

But just because the Machine Graveyard is a hub area that doesn't mean it doesn't have secrets in it to discover. The rightmost square to the left of the Graven entrance has a couple of humanoid enemies, that you can bribe or negotiate (and picking to grovel) to avoid a fight and still get the XP. The other square has a blue switch that you can activate with a thunder spell (if you have one already) that opens up a way to get to the loot. Also spread around the graveyard are a couple of stairs to underground bunkers. They hold some nice loot (including a wheel you can use to repair the broken bike you see in the map) and spiders.

Once you get a shovel however, either by finding one or by purchasing one from the Workshop, the world (Machine Yard) is your oyster (dig site). I don't know how many things are diggable in this place, but I've found a few:
- Rapier in the center of a "cross" of metal parts near the shortcut to town.
- The entrance to a whole dungeon a little bit under and to the left of the rapier, under a piece of debris (do not enter unprepared as you may get stuck and have to call for help using the button to the right of your hotbar. For more information check section "Brightfang's Lair")
- A ring on a spot where a snake ambushes you, under the ditch with the blue switch
- Some cash on the lower left corner of the map, under debris, above the marshes.
- An iron sword a little ways below the broken bike (you can see the hilt buried in the sand)
These are the ones I found, but I'm pretty sure there are more. Message me if you find any.


Dandain Mines
The mines can get a bit confusing, so make sure you keep an eye on your map. Explore this map at your leisure, killing spiders and dealing with humanoids (they have nice loot) on the way. Make sure you grab the shovel to the right of them, as well as a Moss Wine in a crate nearby. Pieces of debris usually have stuff below them if you dig there. Below the camp and to the left is a pickaxe: these are invaluable. Don't waste it hacking away at some random wall. If you find any spider silk, it can be crafted into a whip at an anvil. One you are ready to proceed head to the top right corner and use the lever.

In this section, you can ride around on a minecraft. Fun, right? But this railroad is missing a piece, so you can't proceed. The railroad on the half of the map is what will let you move on to the next part of the level, the one below and to the left is just for easier travel around this floor. To complete railroads you need to push pieces of rail to the appropriate space and then you can ride over them. There is a piece to the left of the missing part of the lower rail. The two other pieces can't be moved as far as I know. Make sure you explore everything and pick up all items that interest you. The iron ore veins can be mined with a pickaxe. While mining on the bottom left you might notice a far away platform below you. This can be acessed by placing a piton above the platform and then dragging a rope to it (both purchasable from the Workshop). This will lead you to an optional boss so be prepared.

BOSS - Gruesa
Weakness: Fire
This can be a challenge if you picked the mines as your first dungeon. Watch out for it's nasty aoes. It helps if you have a Sage with Heal. Poison and setting it on fire can be a great help, as can other status ailments. It really boils down to doing whatever it is that your party is best at doing. Never underestimate the power of buffs.
After you kill the boss, loot it to get two Spidest fangs that can be crafted into poisonous weapons. As far as I know they can make both daggers and swords but try them out on different weapon kits and you might find other possibilities. Use a lamp or other source of light to search around the room for a Whistle Stone (can be used to crafted some nice armor if you have an armor kit) and some more iron.

When you are ready to proceed, complete the top railway by pushing a piece found below the missing part all the way up while maneuvering debris and possibly dragging away spider corpses that might block you. If you mess up or don't want to push stuff around, don't worry. There is another way: when facing the gap on the top right of the map just pickaxe your way around it by using your pickaxe up from the gap and then to the right until you reach the other side.

At this next area light up the campfire and rest if you died before. Head down for a shortcut back to the mines, or right to head into the next map.
Great Wyrm Tangle (from Dandain Mines)
See those blue tails? Attack them to open up a path. Make your way to the top collecting the blue dust on the floor up a cliff, and attack the blue tail there to open up a path. Navigate your way to the top exit of the map (the lighter walls are traversable) to get to an optional boss.

BOSS - Allhunger and pals
Weakness: Ruin
This fight can be very rough on you if you are early in the game, so you can leave and come back when you're a bit stronger. Foes with long serpentine bodies like this can be hit multiple times by aoes, so through some clever positioning you can wipe them out in a single skill. Unmakers will have a ball here with all the bones and the foes' weakness to Ruin.
After the fight, loot the place (there is a nice spear here) and go back.

Now make your way to the bottom of the map (you'll need to return to the entrance or go around the right side until you reach a blue tail at the middle of the map) until you see two blue spots very near each other. The first one is easy to get but the second one requires some long range spell, as bows and crossbows will get blocked, like a Sorcerer's or a Scholar's level 2 Focus Energy. If you can't open them in any way don't despair, behind them is a shortcut back to the graveyard, a boss and some loot, all optional. Through these open paths you'll face a boss.

BOSS - Gorga and Olphae
Weakness: Ruin
Refer to Allhunger above. This boss is essentially an easier version of him.

After the boss head below for some nice loot. Afterwards follow the very thin path upwards to get some free XP and then head down for a nice shortcut to the Machine Graveyard (requires a pickaxe, about 10 uses). But we're not done with this area yet. Head to the rightmost exit of the Great Wyrm Tangle.

Mining Village Scorse
There is alot of good loot here, such as materials and Weapon Kits. If you have a lockpick you can loot the locked house. But more importantly, follow the noise upwards to find a device with an Aerstone. Once you have all you need, return to the Machine Yard, buy and sell whatever you need and head onward to a new location.
Brightfang's Lair (Optional)
This little dungeon can be acessed at any time after you find yourself a shovel. It's location is detailed in the Machine Graveyard section.
Head on over to your right and you'll reach a broken bridge. You'll need to set alot of wood here, like more than 20 pieces. If you have a Sage with Growth you can chop down the trees here until they're a stump and then regrow them with the spell only to chop them down again infinitely. On the other side you'll reach a house with some nice loot and some peaceful herbivores you can cruelly slaughter for XP if you want. Back at the previous area, go around this spiral, heading down whenever you spot climbable walls. Eventually you'll spot a white bag and when you get there you'll be ambushed by 3 snakes. Dispatch them, collect your loot. To go down the hole at the center you'll need to be able to jump 2 spaces. But be advised! If you go down you won't be able to get back up unless you either have an upgraded Gatekeeper's Gate spell or you use the crystal to the right of your hotbar. So make sure that you have a way of returning.
See those Cactii down here? The burn really nicely. Go down and when you see the cactus on the right side follow it's roots into the wall to proceed. I hope you love spiders. Afterwards head down and grab the loot (the box can be used as a container) and head left. Prepare for some nastiness.

BOSS: Brightfang
Weakness: Fire
Do you have oil bottles and firebombs or other explosives? Now would be a good time to use them. The small spiders can be a pain with their poison so try to dispatch them. The big one is just awful though. If you fought the one in the mines it's like that but on steroids. Massive aoe physical damage inbound, and devastating single strikes so be ready for that. The Warrior's Guard buff can be of use as can High Morale. Do try to kill her fast or you will be overwhelmed.

After its down, push the boulder at the top away and dig at the dead end to find a Chunk of Laser, which you can use to craft fire gear.
Now, leaving this place. You can either:
1 - use your crystal to warp back to Morin (button to the right of your hotbar)
2 - cast a Gatekeeper's level 2 Gate spell once you're back at the previous area.
3 - plant two lattice seeds in front of you as soon as you get back outside. You might need to move around for time to pass so they grow, but I think a Sage's Growth spell works too.
Towerwall
You'll get hit by a few arrows here, but it's okay. When path downwards you can take it to go underground and avoid them, or you can keep moving throw the arrow rain, your choice. Although the underground path has some foes and loot. After you leave the case head on over to the castle and enter. Here you'll face some enemies, so kill and loot. You can use bottles or mugs on the keg here to fill them with beer. Keep making your way forward until you reach an altar with an Aer Band on it. This accessory is very useful, as it allows its wearer to jump further, allowing you acess to any areas that were previously inacessable due to large gaps. Don't forget to check the two side rooms here. Afterwards, you can head left into the next zone, or upstairs to a few optional fights (including a Boss) and great loot. You can also open a shortcut there to the bottom of the wall.

BOSS: Jack
Weakness: none
This isn't a particulary hard fight, but it can get very annoying. When low on HP, Jack and his crew like to heal, walk back, and shoot. This can drag for a while so try and immobilize them in some way to make sure they don't retreat.

When you are ready to move on, head left after the room with the statue and the altar go down into the Cast Isle Forest.
Cast Isle Forest (From Towerwall)
Cut the surrounding vegetation either with a cutting weapon or the nearby machete. Do your usual round of exploration and fighting. When you want to move on, head on to the left until you see a stairway.
Down here, you can pickaxe your way up until you reach a place with two Cave Flowers. I'm sure you can fall here, hence the light, but I'm not sure how. Afterwards, go back and press the lever to your right. Now, you can either dig your way around the boulder after you hop across the small hole with a pickaxe (which you can purchase at the workshop) or you can drop down the other side by finding a very conspicous weed between two pillars upstairs and destroying it, around the center of the map. After pressing the lever on this side, head back to the surface and up and to the right is a thick pillar. Cut the vegetation in front of it to land back in the cave, where you can now jump over the hole and proceed.
After climbing back outside, head right and up the cliff to open a shortcut back to the other margin. When you are ready, go down into the next map, use the campfire if you like and then down again.
Keep heading down until you reach a dark area. Follow the visible bits, and don't wander into the dark. You won't like what happens. Eventually you'll reach the Aerstone Stabilizer. Grab what you came here to do and head back. You'll come across an NPC on your way back. You can try to kill him but you'll most definitely fail. Let me know if you do beat him. Head all the way back through the forest and the castle until you're back in the Machine Graveyard. Stock up, hit the town, and when you're ready pick a new destination.
Chunk of Graven
Smash the bubbles on your way with a hammer. You can use a pickaxe on those crystals to get a nice crafting material. Eventually you'll be in a position to push the boulder away to create a mini-shortcut.
At this side-scrolling section you'll need a way to jump 2 tiles, either by leveling jump or by Aerstone Band. Head right, climb the vines, then left and a small piece of vine again. Push the boulder and then climb more. Jump up to the vine and then right to another one. Right and another jump here. Climb down and push the boulder. Jump up, then right the slide down to the other side of the boulder and push it left. After heading down where the boulder used to be it's pretty straightforward.Remember to click the post with chains near the exit.
Here, head all the way to the left to find a very neat secret at the dead end. Can you find it yourself?
If you can't, just dig on the piece of debris, and marvel at all the stuff you'll get.
Moving on, head right this time at the entrance and maneuver your way across the paths. You'll fight a few enemies and more crystals to mine if you'd like. Make your way up to the upper central part of the map. At the top left is a campfire surrounded by an optional boss that you can use once you deal with.

BOSS: Dolsken
Weakness: ice
They really like to stack buffs on each other to become nearly impossible to kill. Even ice will barely scratch them when going through Ward. You can use a Sage's Dispel to nullify all this. Or just wait it out.

Once you've done all you want here, exit at the center/top of the map.
Mt. Jurrin (from Chunk of Graven)
Head right to find a shovel in the process of digging up a pickaxe. To your left is a small boulder puzzle.
Use a hammer to smash the columns and then:
1 - Head right at the left most column and push the boulder down.
2 - Push the boulder to the right of that one right a few times.
3 - Push the one above 1 tile up
4 - Push the one to the left of that 1 tile right.
The path is clear now.
Up here you can climb those footholds with some lattice seeds or Gate, but you can also drop down on them from above later if you have rope+piton. The bag near the birds has a couple of those in it, which will come in handy. To proceed drag the rope in the piton there and go down.
Follow the tunnel and on the other side use drop a piton and rope to get to where you'd be if you used lattice seeds before. After a brief tunnel drop yourself down again the same way.At the next landing just dump down and then climb. Here you can set up a shortcut back down. Head into this next cave to eventually reach the summit, where an Aerstone will be waiting for you beyond a really simple boulder puzzle. Head back just to get ambushed by a familiar face.

BOSS: Celia and flunkies
Weakness: none
Celia counters so watch out for that. Take her out first so you don't have to deal her shenenigans. Also, I hope you have some repair tools with you, because the enemy Breaker will tear your gear apart.

Afterwards all you have to do is head back and collect your next Aerstone (if any).
Wine Marsh
If you're having trouble navigating this place, freeze everything. It will make your life much easier. However, you can't freeze the darker parts of the water (wine). Maneuver yourself down and to the right to find a camp with npcs/foes. Using the boat here, you can explore the whole place at will. There's a locked chest upwards, and some islands at the bottom right of the map with a Mythril Rapier buried under some debris. When ready, head to the right exit either by boat or land.
In this next area you can acess the place you need to go by either entering it from the upper part of the map near all the sleeping enemies under a big tree, you can acess it by using the boat and climbing one of the small platforms in the lower right and then jumping to the big one and going down the stairs, or by landing with your ship on the leftmost platform and then down the stairs. No matter how you do it, you'll be in the Shredded Temple.
Shredded Temple (from Wine Marsh)
Explore and loot this first room to your heart's content. The go left and this next zone head down and right, then up to find yourself in the first part of the marsh. Push some blocks to create a nice shortcut. Back at the temple head up and eventually you'll come upon a boss.

BOSS: Aeshra
Weakness: none
If you've been to the Wyrm Tangle then you know you can hit foes like this with aoes multiple times. The old oil + fire combo works well here. Try and keep your party protected against spells, because the boss loves to cast enormously damaging aoes. Be advised that once it cast it will coil itself in a way that doesn't let you hit it multiple times. Try to use the first few turns to get a good couple of hits in, as it will still be uncoiled. Both setting it on fire and poisoning it can be very useful. I don't think you can interrupt it's spellcasts but you can try. Its strongest attack is lighting elemental (he also has a wind spell but it deals a little less damage) so you can try to purchase a couple of Grounding Capes from the workshop if you can spare the money.

After you're done here, head to where they were talking and go below.
Mess around with the switches all you want but they won't do much. The one you want is after all the others, in a room covered with bugs. Now, a word of advice. See those enemies underwater? I strongly advise you not to provoke them. They can "permanently" kill your characters. The only way to get them back is going back to Morin, the merchant near the town. If you're deadset on killing one, or god forbid two, I recommend poisoning them with a bow and Poison Tip (Rogue) and keeping your people the hell away from any water. So anyway, move along those thin paths until you reach a little lake with bridges afloat where you need to skip along the center to the other side. Here's your Aerstone piece, take it and zap the blue switch to open up a shortcut back. Be careful not to bump into any eldricht abominations on the way home.
Temple (of Jasce)
Whether you have collected all Aerstones or not it doesn't matter, as you'll need to pass through this place eventually. Head down and right to see a short scene at the green patch of vegetation. Head left and evetually you'll face a (mini)boss.

BOSS: R-68A
Weakness: lightning
Depending on how early in the game you are this fight can range from horrible to pretty easy. The boss can't be poisoned, but it can be set on fire. Lighting will make short work of it. Their aoe is fast and packs a mean punch, so be ready to heal.

After the fight, push the boulders away and proceed into the temple itself (requires 2-tile jumping)
Inside, loot everything like a maniac and explore. There's a room with an Armor Kit, which is pretty neat. Once you have all you need you have to cross over the water and enter that big gate. To do this, you can employ one of three methods.
1 - Gatekeeper's level 2 Gate.
2 - The ability to jump 3 squares (acessory + 1 from Rogue or Shiftcloak stat leveling)
3 - Remeber the room with the mushrooms on the corner? They can't multiply due to nearby light sources. Kill every light source on the way to the water (the lamp too) and make sure you're not holding anything shiny. Walk around for a while to pass the time until the shrooms reach the water. You can now cross. Make sure you have a lantern before you try this, because the mushrooms can corner you.
4 - There's a secret passage on the leftmost room, near the brownish wall. You'll need to head left afterwards and you'll be on the other side of the water.
5 - There's a room in the top right with a cave wall. Pickaxe your way up until you reach a tunnel leading to the other side.

Once you have all you from this side of the temple, head left to the next zone. You'll eventually come across another anti-air. It works pretty much in the same way as the previous one. Proceed into the Sealed House when done.
This area is mostly plot based. All you need to do is push stones while breaking any cracked ones with a hammer, it's very straightforward. Enter the house and after speaking to the npc leave through the other door. Here break and push some more, and go on. When you see a patch of debris, dig to find something interesting. Down here, go right to fight some awful birds. Can you something red buried under something else? Drag the top items away to get the great Firestorm Cloak. The other path leads to a shortcut back to Machine Graveyard, provided you have some Rungs on you (3 do the trick if cleverly placed). When you're done head back upstairs and left.
Trigger Refinery (from Temple)
This area's name will only be visible after you clear the first room, by either killing everyone or bribing them.
Explore to your heart's content. If you have dedicated mages, you can dual wield triggers to boost your elemental stats so keep that in mind. When you come across a bunch of blue switches, light them up with a thunder spell. Under these switches is a colapsed table that you need to burn or hack with an axe. The rest of the place is essentially an all you can eat buffet of loot, so I'll cover only the tricky parts.
To the top left is a bunch of holes in a room with a Rung on the floor. Apply two or three rungs to these holes to make a ladder and acess the loot above. Watch out for the pistons, they only move if you do.
When you come across a conveyor belt bisecting a hallway, ride it to a semi-hidden area. Beware, ending your turn on a conveyor belt moves you around. After you're done exploring and looting, exit through the left of the map. At the next intersection you can head up to rest at the campfire, but not much else (you'll need something found to the left). So head left once you are really ready (make a save just in case).
Antiair Battery (from Trigger Refinery)
Head down to meet two more of our favourite friends. Taking on two at the same time is alot like fighting one, but everything's worse. Refer back to the previous strategy if you're in trouble. Immobilizing them helps, because they'll hit themselves with their aoes trying to get at your melee fighters. They're not optional so giddy up.
When you're done, head up to find an anvil and some supplies. There is also a furnace in a house along the street below. Head left on the main street for a fight, then save your game and head left again.

BOSS: Celia
Weakness: none
THEY HAVE A HEALER. His name is Cole and he is carrying a Life Trigger (yellow sphere). Take him out asap. If you've fought Celia before you know the score. There's an archer trying to blind you, but Rasmen and goggle wearers need not worry. After she's down this becomes pretty much a regular encounter.

Once you're done, make sure to grab the map from one of the houses above where you fought Celia. It has some important stuff about an upcoming area. Head left and then down and into the cave to fight the last antiair. He works like all the previous ones, but he's alot nastier. Do whatever it was you did to kill the previous ones. His new aoe is wider but deals less damage, and he still likes to use bombardment so look forward to it.
After that you have completed all you came here to do, so head back.
Until someone crashes your party that is. This encounter can be tricky, because the guys with guns hit very hard. Try to advance carefully, healing any damage dealt. The thing about guns is that they can't fire if you're to close, so use that to your advantage. Again, status effects always help. Walls put up by Sage's or Mechanists can screw their sniping, so there's that too. The lancer has bombs with him. Definitely one of the hardest fights in the game.
After you apply some harsh gun control laws, head up (the way back was destroyed), rest and head onto the next area.

Follow the path until the intersection. Here if you head up you'll reach where you need to go, a big door. Left has some nice things. Left and down will lead you to a dead end with a minibomb buried there. If you go left climb the cliff. See that bug clinging to the wall? It may not look like much but it's one of the best things you can give to a dedicated healer. It works like a super Life Trigger and also gives out light. After the bug head left and the stone shrooms will let you through if you killed the birds bullying one of them back in the snow area. Explore the cave and then head back to the big door.
Break the column and push the boulder away. See the four switches on each side of the door? The map you picked up earlier should give you a hint. If you lost the map or can't solve it, all you need to do is press the switches in the following order, counting from the left: fourth, second, first, third. Enter the door.
Blood Quarter (from Antiair Battery)
So, the Blood Quarter can be a very simple ordeal if you read the tip on the map you picked up earlier. If you want to just get it done then head in a straight line for a while until you see some zombies with shiny eyes. Do not look them in the eye and you'll be fine. If they start shaking, face somewhere else. There is loot spread around here and there throughout this area, but I didn't find anything tremendously worthwhile, so if you're rushing through don't fret too much. Eventually you'll hit a stone wall. Head right avoiding any traps and climb. Return to the center. When you see the zombies head one step to the right and then all the way up and you're in the clear.
If you want to collect the loot and fight the zombies then that's fine too. They are damaged by Life magic and the deal XP damage. That may sound awful, but the XP they give you far overshadows what they steal.
Once you're on the other side just push the blocks away and jump back to the Machine Graveyard. If you want to return then set up a rope and piston here before you jump.
Endgame
After you've set all four Aerstones and destroyed all 5 antiair devices head on over to the workshop and speak to Liss. She'll give you yet another task. We now have to take the saw all he way back to the first portion of the game, the docks. Do you remeber the way back? You gotta head to town, then retrace your steps back up through the cathedral. Do so. In town you'll face a boss.

BOSS: Vise
Vise himself looks pretty nasty, but he likes to spam Blade skills such as Shockwave and Bladestorm that you can withstand pretty easily. If he attacks though, he'll probably kill your squishier characters in one hit. Watch out as he has Counter Break, meaning that he will break your melee weapons if you attack him directly.The rest are pretty normal, so deal with them accordingly. Beware of minibombs. Some soldiers carry lifepowder and will revive others so be on the lookout.
Afterwards just fight your way back to the docks. You can make a stop at your friend Morin for some new goods. The airship you find on the way has a locked chest. Once back at the docks head over to the ship's wheel and use the saw on it. Report back to Liss. You'll probably want to warp back to Morin. If you somehow lost your saw, Liss can give you a new one.

Now's the point of no return. Tell Liss when you're ready and you'll head out.
After a cutscene and a fight, leave the ship and move around until you reach more dialogue. Rest at the campfire and then go inside.

Spiretop:
Speak to the two leaders and they'll go over the plan. Head on over to the leftmost path. Now, every room in this dungeon has some sort of secret you need to find to open up the way. I'll list them here.

Room 1:
Burn the top part of the carpet to reveal a lever.

Room 2:
Top right bookshelf has a hidden switch. Click it.

Room 3:
See the cage on the right? It has a lever handle there. Click the rightmost lever to open the cages, fight the monsters and then use the lever handle all the way down on a broken lever a little to the left and down of a chest. Then press that lever.

Room 4:
There is a hidden switch behind the bookcase.

Room 5:
Kill the enemies then zap the power node on the top right.

Room 6:
The lowest counter has a pressure plate under it.

From here on out just advance until you see your buddies again. Speak to one of them and get ready.

BOSS: Ekrast and Aeshra
Weakness: none
You have full might of the alliance army with you so don't worry too much. You've faced Aeshra before so you know the score. Ekrast will go around spamming elemental spells and whacking people with his staff. He hits hard, so keep yourself healed. Keeping poison up on both of them will make the fight very easy. A Sage's Ward spell is a godsend here. You only need to take Ekrast down to low HP here and he'll retreat.

Follow Ekrast until you're stopped by a red wall. Turn the cannon below it by clicking it until it's facing the right directing, then zap it.
Proceed until you are face to face again.

BOSS: Ekrast
Weakness: none
Ekrast behaves similarly to the previous fight, but this time you don't have anyone to help. His spells can be interrupted if you push him. He will Chill you, destroying your movement. Fortunately he lives to move in for staff whacks and you can nail him there. Poison is always nice, as is blind (for when he attacks). Once he's low on health he will escape again.

Follow him one last time.

FINAL BOSS: Ekrast
Weakness: none
He has a few tricks up his sleave now. Gate Slam is a harsh physical aoe, much like the big spider's jump. He deals damage to everyone near him at the start of his turn, like an Unmaker. Gate Cannon is basically instant death so move away, push anyone that can't move in time, or revive anyone unfortunate enough to get stuck in the aoe. Gate Realm brings out some more enemies, but should pose much trouble to you by now. Again if you can poison/burn him, the damage over time really adds up. Gate Armory summons sword that act as enemies, but Dispel kills them. This is the end so throw everything at him.

When he's down, congratulations! You beat Voidspire Tactics, I hope you liked it as much as I did. If you have any questions, feel free to message me.

28 Comments
Cryum 6 Jul @ 12:17am 
Chunk of Graven has a LOT going on if you mine the right spots
Cryum 5 Jul @ 11:31pm 
The extra dungeon in Blood Quarter will pit you up against some serious undead threats. Bonemeld is great if you scatter a sufficient number of bones beforehand, but otherwise they slam so hard you may as well stay healing.

The boss itself will need either gate powers, lattice seeds, or some puzzle work done with a bow while juggling the actual fight.
bc56 15 Jan, 2024 @ 9:28am 
Another note:
There are 2 hidden things on a lower platform on the section of Graven in between the two parts of the Cathedral of Elements: an Essence Stone buried under a pile of debris to the east, and a cave behind a cracked section of wall you can pickaxe through in the southwest. A rope and piton can get you down to that platform. There's a boss in the cave, in the form of a giant eye fused into the wall, and a bunch of corpryst. A debris pile right in front of the boss hides a powerful weapon.
bc56 15 Jan, 2024 @ 8:18am 
Once inside, head west and use a lightning spell or the Mechanist's Activate to deploy a bridge, then go north and flip the switch. Then go east and cross the gap to the lever (I used jump 3 but I believe Level 3 Gate or Gate Hand would work) and pick the lock on the door and flip the switch behind it. This will activate a bridge in the center chamber.

Across the water the bridge will retract (trapping you there), and you'll encounter a large group of extra-powerful undead. This is as far as I can help because I haven't been able to beat them yet. I believe a party of Sages (using Heal) and Unmakers (using Bonemeld) would have the best chance.
bc56 15 Jan, 2024 @ 8:18am 
To expand on the commenter below me's information about the hidden dungeon in Blood Quarter:
You'll need a Gatekeeper's Gate spell to bypass the pressure plate. The next room has a puzzle. Look at the note for a clue. The solution to the puzzle is in the book Necromancy Revealed. IIrc, you can buy it from Morin, and there's another copy elsewhere. Once you solve the puzzle, there's another passage in the northeast of the chamber. Use Gate again to bypass the bone wall and the energy barrier, then you've reached the entrance.
bc56 14 Jan, 2024 @ 9:39pm 
Excellent guide!
I have a few additional notes:
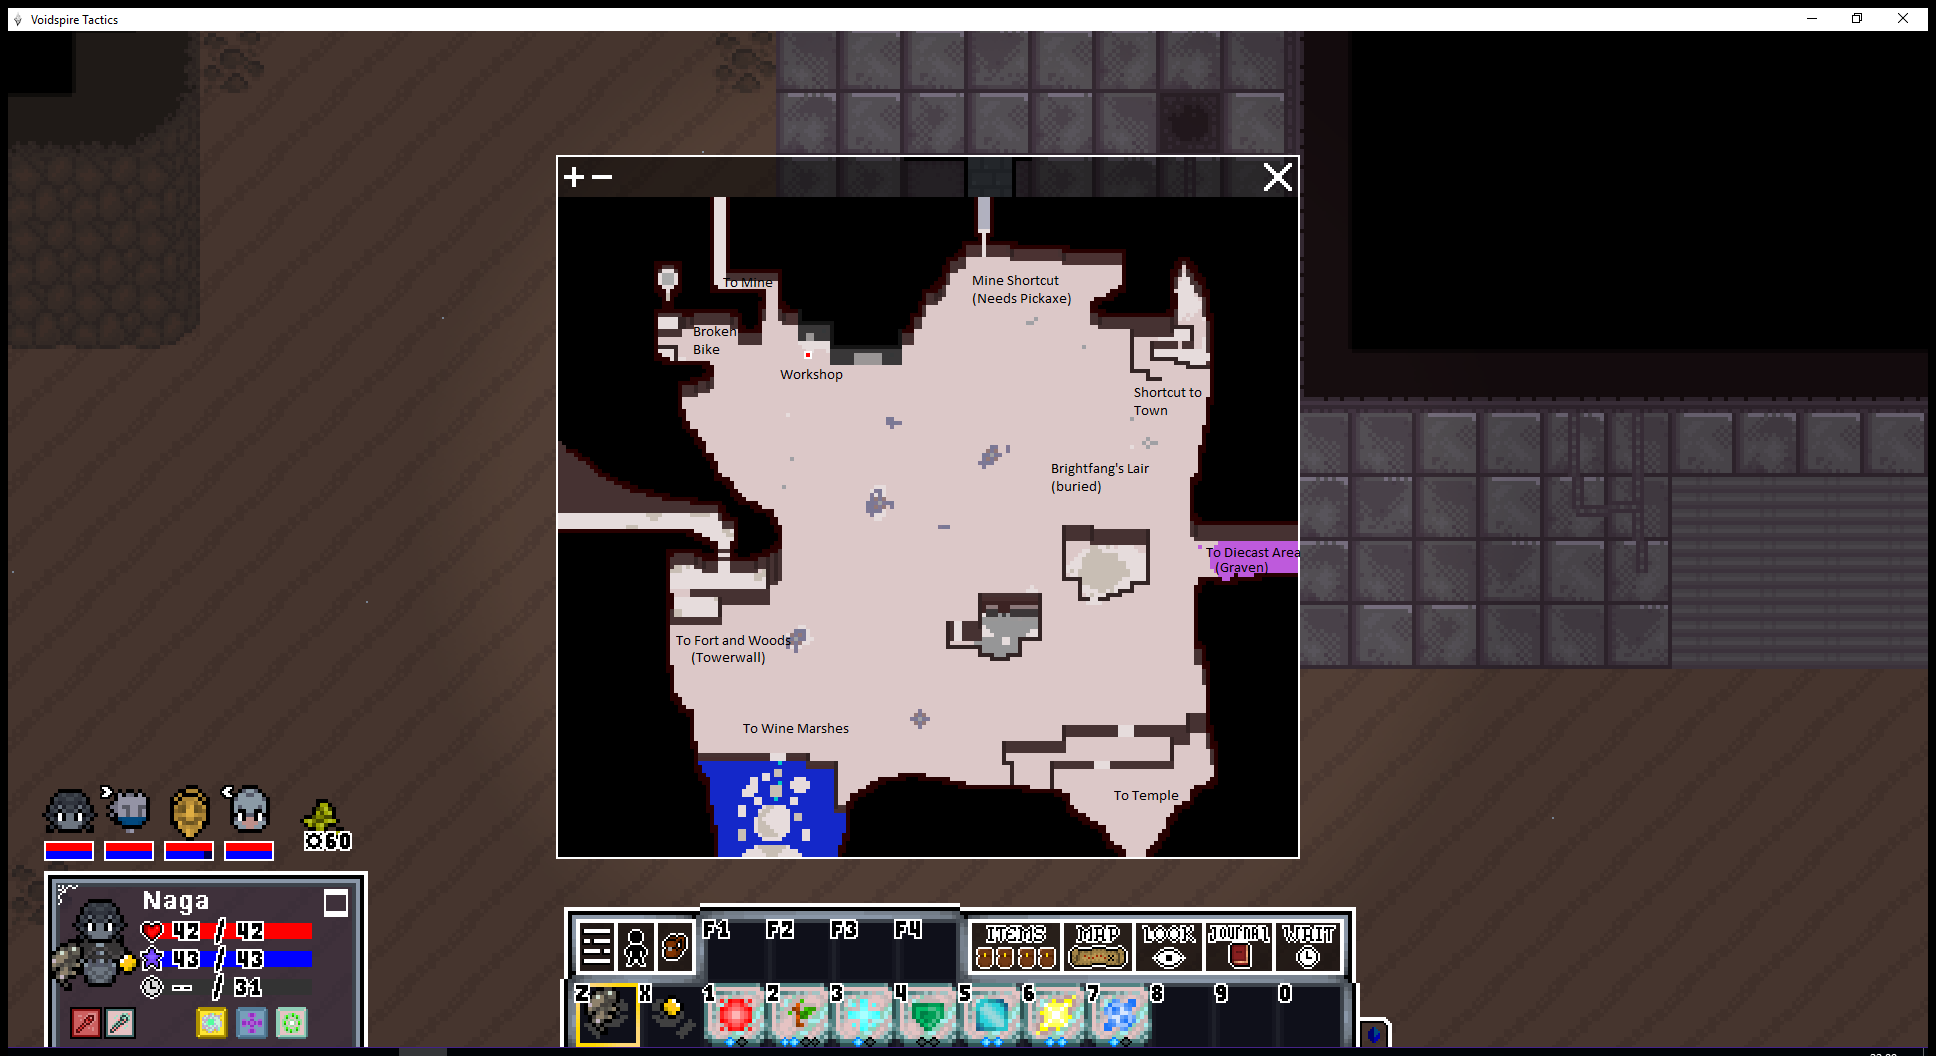
Brightfang's Lair:
You can drop a rope and piton from the upper cave to the foothold - that way you can climb back out without the teleporter

Cast Isle Forest:
The hidden hole to drop into the cave flower room is northeast of the X, under the westmost section of a bush with vines growing out from under it. It shows up as green surrounded by grey on the minimap.

I may find more things, I'll comment again if I do.
Daniel 29 Jan, 2021 @ 3:25pm 
There's an optional dungeon in Blood Quarter that this walkthrough doesn't even mention. You'll find a side passage with a narrow hallway. Half way through the hall, a pressure plate will trigger, trapping you in the corridor filled with poison gas.

If you can manage to get through this trap to the chamber on the other side, you'll find yourself at the entrance to the optional dungeon.

You'll have to figure out how to get past all of the obstacles to proceed, but you'll get some very good loot at the end. Be warned that some of the hardest fights in the game occur down there along with enemies you'll find nowhere else.
Daniel 29 Jan, 2021 @ 3:16pm 
You can choose not to side with Jin, Vise, and the Seartial Alliance at the end of the game. This causes the entire army to attack you all at once!

It took me over an hour to finish this battle. It's a war of attrition as they constantly bandage and rez each other, but it IS doable. Is it worth doing? Ehh.

When you get to the first fight with Ekrast and Aeshra, you have to fight them with no assistance. Then again, if you can kill the army, this fight is a cakewalk.

In the second confrontation, Ekrast actually does mention that you've killed all his enemies, but there's no way to side with him or talk him down. He just thinks you're a bloodthirsty marauder no matter what you say (reloaded and tried every option.) Ultimately, the events play out exactly the same but with slightly altered dialog. After defeating him for the final time atop the spire, Jin doesn't show up (obviously, being dead and all) but the ending is otherwise the same.
Daniel 28 Jan, 2021 @ 12:21am 
You can definitely beat the Aphest Mage (goat man) NPC who shows up after getting the Aerostone in Cast Isle Forest. He runs away once you get him low, but you get 550 XP and he leaves behind an Infinity Band when he flees. It's a ring that gives a +1 Light and +1 Ruin skill bonus.

I don't know about other people's strategies, but I just locked him in place with my Breaker (Leg Break immobilizes him even though he's "flying") so he couldn't get good positioning for his spells and attacks. It also prevented him from being able to dodge any of my longer casting spells. I lit him up with fire and just steadily dealt damage while making sure he was never allowed to move. My healer is a Sage/Balancer, and it was pretty easy to keep everyone alive whenever he actually did do anything to us.

I should mention that I did this around mid-game, so if you're looking to fight him reasonably, that's a good benchmark for it.

Good luck.
Unrelatedpants 28 Dec, 2020 @ 12:46pm 
Pretty nice guide so far as I play through.. while I doubt this is being updated, I should point out that the methods of getting in and out of Brightfang's Lair are pretty convoluted- you can just use a rope+piton!