Battleborn

Battleborn

Not enough ratings
The Wonderful World of ISIC!
By Sparky
A comprehensive character overview of ISIC! Possibly horribly outdated. Kitru has better guides, anyway!
   
Award
Favorite
Favorited
Unfavorite
Preface
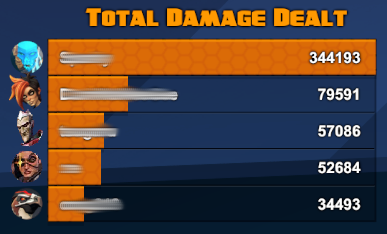
I'd like to start by saying that this is my first Guide. Thanks for stopping by! From the first time I played ISIC I took a shine to him, and I'm glad to be helping others learn how to dominate the scoreboards just as ferociously as I do. Nothing quite like being over half of your entire team's damage output!
Character Background
This section contains lore and minor story spoilers.

As far as I can tell, Magnuses were subroutines of the Magna Carta, the former governing AI of the LLC. As the Magna Carta grew in size and complexity, so too did these subroutines. ISIC was the I/O System Integration and Coordination subroutine, hence the name. He was briefly under the command of Kleese, during which time the old man was terribly unkind to his underling, so it's understandable that when the Magna Carta went dark and all of the Magnuses gained free will, he was quite miffed.

As we find out in The Algorithm, Kleese spent quite a while trying to track ISIC down and recapture him. At some point, ISIC entered into the LLC sport of professional wrestling! He'd discovered his calling; spreading the word of nihilism. "That which has no purpose ought not to exist," ISIC said, "We are the universe experiencing itself, and we, like the universe, are born only to die." He used the mass media coverage of the wrestling tournaments to spread his message of the utter pointlessness of life, and that he was going to end everything. To top it all off, he ripped El Dragón's arms right off, ending the aspiring Luchador's career.

After this, he dusted off his "little pet project" and got to work on The Algorithm, which would, in theory, unmake the very fabric of reality, destroying the entire universe with the power of pure math. This is where the Battleborn step in, thwarting his plans and "debugging" his more apocalyptic tendencies. Defeated and shamed, he joins them anyway. Might as well join the team that will have to kill more to win!
Abilities Overview
Charge Cannon: ISIC's bread and butter. This is a cannon that fires periodic orbs of energy as you hold down the fire button, but also charges up a powerful shot that can be fired by releasing the fire button. The individual orbs do little damage, but the large blast does quite a lot more and deals splash damage. It can also be upgraded to induce other effects or remove the penalties to ISIC for using it, such as the slow movement speed.

Overcharge: ISIC can empower any of his abilities by overcharging. That's charging up his cannon to produce a large blast. Releasing will fire the blast, as stated above, but continuing to hold it while activating other skills will add additional effects, as will be outlined in each skill's section. This consumes the overcharge, but another can be built up relatively quickly.


Rotating Wards: These are your main form of survivability in a fight. Activating them will produce hexagonal energy shields around your body. Each individual shield blocks an amount of damage, up to 113 each. Overcharging upgrades them to up to 131 and makes them glow with an orange border. Note: These values may be level 10 values. On all characters, your power goes up as you level. I'm taking these numbers from the profile since it's always too hectic to experiment in the middle of a mission.

Plasma Dash: A useful mobility skill, Plasma Dash allows you to dash through enemies, dealing 280 damage to all enemies in your path. Overcharging increases the damage to 325. You can upgrade this in the helix to stun enemies, deal more damage, go faster, or just affect a larger area.


Energy Aegis: A, quite frankly, underused ability. By pressing your alt-fire button, you can bring up a shield that will block up to 2000 incoming damage from the front. This does not protect you from behind or from the sides like the Rotating Wards do, but is still very valuable in the case of a charge or a retreat. It may not save your life, but it will buy you a lot of time if you're being chased. This ability cannot be overcharged, and you cannot shoot while you have your Aegis out.

Omega Strike: Ahhh, finally. The Ultimate. ISIC turns into a literal tank, his movement speed slowing to a crawl but his damage output skyrocketing. His body transforms, a large gun emerging from his back and smaller guns emerging from his sides as he pours out the hurt on his enemies. The fire button operates the main cannon with its slow-firing Overcharge blasts while the alt-fire operates the rapid-fire guns on either side. Not that it matters much, you should probably be holding down both buttons anyway!

Overcharging Omega Strike will give you an Overshield buff, so feel free to just activate it if you don't have the time and do have the health/shields.

Helix (And Personal Ratings)
The ratings of usefulness here are my personal opinion. Others may find things useful that I don't, and I encourage them to contact me so I can try it myself! To be clear, any time I refer to "shield," I mean the blue bar above your health. If I say "Aegis" I refer to the off-hand circular shield. If I say "wards" I mean the Rotating Wards. I will try to be precise with my wording to prevent confusion, as ISIC has so many ways to shelter himself from damage.


That's a big ol' picture, isn't it? These are all of the helix choices, including the mutations. Understandably, it's a lot to take in. Let's break it down.

Level 1
Watchful Wards! :)
This mutation allows ISIC's shields to recharge much faster while you have your wards up. For each ward active, your shield recharge delay (the amount of time before your shield begins refilling) is reduced by one and a half seconds. With five initial wards, this means you can reduce your Shield Recharge Delay by up to 7.5 seconds. It used to be higher, but Gearbox noted that players would pair it up with high SRD reduction gear to basically get instant shields, so they reduced it by 40%

Whoops-a-Daisy! :D
This is an unlocked mutation, and it causes you to drop your wards on the ground instead of having them follow you. They will continue rotating around whatever point you were standing at when you activated them. The wards will block ally projectiles, including Miko's spores. I don't see any use for this mutation, except perhaps with intense teamplay and communication.

Crushin' Those Shields! :D
This mutation allows your Plasma Dash damage to bypass enemy shields, dealing 60% of its damage directly to the enemy's health pool. Due to the low damage of Plasma Dash, this is usually not very useful.

Level 2
You Dropped These! ;)
This mutation causes your Rotating Wards to reflect enemy fire. It doesn't specifically reflect it back at the enemy that fired on you, but it does reflect both incoming bullets and projectiles, like rockets or grenades, protecting you from splash damage as well as direct damage. This is very useful, and I always pick it.

This Might Sting! :O
This mutation causes your rotating wards to become five charged orbs of plasma that rotate around your person. Upon contact with an enemy, the orb will pop, dealing damage to that enemy. The only way I see this being useful is either with "Whoops-a-Daisy!" to make an area denial mine or by combining it with Plasma Dash to indirectly increase the dash's damage.

Level 3
Not Dyin' Today! :)
Increases Maximum Shield Strength. Note that it highlights the Aegis, but it does not affect the Aegis. It directly increases your Shield, just like it says.

Shield Down, Charge Up! :D
This unlockable mutation causes you to be Overcharged for two seconds if your Aegis is broken by being overwhelmed by damage. Any ability you activate during those two seconds will be Overcharged and will consume the charge, just like normal. I don't use the Aegis often enough (much less break it often enough) to personally choose this over the next mutation for this level.

Charging On The Go! :D
This mutation simply removes the movement speed penalty to charging your Charge Cannon ability. I usually go for this instead of the shield increase, though both increase your survivability. One by directly increasing the amount of damage needed to put you down, and the other by making you more agile. It's up to your playstyle.

Level 4
Hold It Right There! }:O
Upgrades your Plasma Dash so that it stuns enemies hit by it. Pretty straightforward, and very good for both PvP and PvE! You can stun big enemies (I'm looking at you, MX Elite bots!) or enemy players and then take potshots at them from behind. You can also stun a swarm of enemies so that your teammates can easily plink a few hits off of their critical hit spots. The stun was reduced from 2 seconds to just 1 second on the July patch, but it's still much more useful than the other aug for this level.

Line Up, Fellas! :D
This mutation increases your Plasma Dash damage for each subsequent enemy you hit. Each enemy you hit adds 5% damage to your dash. This is more often useful in PvE, due to the many swarm-like enemies, but even then it may not be worth it, not when the alternative is stunning all of those enemies.

Level 5
I'm Concentrating! :|
This mutation causes your shields to regenerate faster while you're overcharging your Charge Cannon, to the tune of +105 Shield Recharge per Second. Until you get the unlockable mutation, this is a good choice for survivability.

Stopping Power! :)
This unlockable mutation causes Overcharged cannon shots to Wound enemies. This upgrade affects your Ultimate as well, the primary fire cannon shots will also Wound enemies if you choose this mutation. This used to be my go-to when it was still a Slow effect, but Wound is largely situational, as you only need to worry about Jennerit and a few other enemies, Probably better when playing against an organized team, as it prevents them from fully utilizing their healer.

In A Big Rush! O_O
This mutation increases your movement speed while your charge cannon is Overcharged. It's not as fast as sprinting, but it does make you more agile while attacking. Like above, you're choosing either shields or agility (at least until you unlock Stopping Power! :))

Level 6
Burlier Wards! :D
This mutation adds extra strength to your Rotating Wards, roughly doubling their strength. +113 Ward Strength. I go with this one more often, but if the enemy is tearing through my wards anyway, I opt to escape with:

Let's Hug It Out! <3
Reduces Plasma Dash cooldown by 20%. This reduces the cooldown from 22 seconds to 18. I go with this one if I know there are going to be a lot of melee enemies, so that I can stun them more often. But that's when I pick "Hold It Right There" as my Level 4 mutation.

Level 7
Bring it On! :)
This mutation beefs up your Energy Aegis, doubling its blocking power so that it can stop a whopping 4000 damage in total. As I rarely use the Aegis (though I should really use it more) I don't usually pick this one, especially since I'm more offensive and choose the Right-side mutation.

I'm Helping! O_o
Increases Charge Cannon damage by 18%. Really? This is mathematically worse than the right-side mutation.

Quick Charge! :D
Does what it says right on the tin. Your Charge Cannon reaches Overcharge 25% faster! How is that not better than 18% more damage? I suppose the damage might affect Omega Strike. MAYBE. But I always go with this one, no question. Faster overcharge means faster Wards.

Level 8
Hard-Workin' Wards! :)
Your wards last longer if you choose this mutation. They last an extra six seconds, totalling to 14 seconds of Warded goodness. Very nice. I tend to prefer this one if I'm getting shot at a lot (as I usually am)

Waste Not, Want Not! :)
This mutation causes the Rotating Wards cooldown to cool down faster depending on the number of wards still active, up to 50% faster. Good if you like to keep them up constantly despite not taking much damage, so probably good for PvP, where anything could happen at any moment.

Level 9
Can't Run From Me! O.O
Your Plasma Dash is faster and goes farther. 50% more maximum range and speed. The dash is already nearly instantaneous, but the extra range can be very useful!

Dodge This! O.O
Increases the size of your plasma corona during Plasma Dash. What does that mean? Means a 50% increase in damage radius. Good if you want to stun everything in sight, or stack up a lot of damage with Line Up.
Level 10 Mutations
Level 10
Ahh, the wonderful Ultimate Mutation. What wonders has ISIC in store for us here? Some interesting options! Not only that, but I ran out of room to finish in the last section! Apparently sections have a character limit. Who knew?

Shields Up! :D
When you go into Ultimate, it supposedly deploys your Energy Aegis in front of you. If it breaks, it will be redeployed in six seconds. However, it doesn't visually deploy it and I think that it's just flavour text for adding a 500 damage "shield" that covers your screen. If you pick this, you may notice an orange, Ward-like pattern on your screen. I believe this is the Energy Aegis this mutation is talking about.

Obviously this is a very tanky ability, but due to the difficulty I have in testing it (reaching level 10 and still having a flexible enough mission to pay attention to incoming damage) I do not know if it stacks with any Energy Aegis upgrades.


Slow Down, Fella! :D
This mutation causes your rapid-fire guns (alt-fire) to apply a 2 second Slow effect on your enemies. I see this being useful in PvP and/or if you opted for one of the other level 5 mutations, since if you chose Stopping Power your overhead cannon would already be slowing anybody it hits.

I haven't done much testing with this, as it seems pointless when I already choose the earlier slowing effect, but it couldn't hurt to experiment with it a little more.


It's Raining Death! :D
This is my favourite, but it's finnicky. Whenever your Cannon shot hits an enemy, you then deploy two seeking missiles, each doing 67 damage. That's an extra 134 damage! The only problem is that the missiles sometimes blow up in your face instead of flying out to the enemy. I'm not sure if anything can prevent this, but moving around and jumping at least feels like it helps. I would love some more data on this, if someone with better pattern-recognition were to try it out.


What does it all mean?
Well, you'll find that ISIC has great potential to either be an unkillable harasser or an unstoppable tank, depending on how you build him. He can bring enemies down to his speed and finish them off with his surprisingly powerful Charge Cannon shots. His Wards can make him untouchable and can even cause the enemies to kill themselves! His ultimate is a thing to be feared, able to dish out a lot of damage very quickly, if the ISIC player knows where to aim.
ISIC Threats
Now, with all of that firepower and stalwart defiance of incoming damage, there's got to be a downside, right? Well, yeah. He's utterly helpless if stunned. Stuns, silences, even just being knocked into the air will drop him out of his ultimate, subjecting him to the very long cooldown. He can get out of situations quickly, but if his back is turned he has no way to stop incoming damage.

In Versus, an ISIC player must remain aware of their surroundings, ensuring no stun-happy classes like Rath or other ISICs are about. Marquis and Thorn are also an issue, due to ISIC's large size and slow speed. Encounters must be planned, and few ISICs can stand against an organized assault without support. I would personally suggest Reyna or Kleese as ISIC support. In a pub, though? Use what you get. Stick around any support class you can get to, and if there are none, stick by an assassin class and be their distraction.


And, as always, focus on the objective. There is no Team Deathmatch gamemode. Not only will your team do better, but you will level up faster and get the opportunity to kill enemy players faster.


In Story Mode, just keep in mind what enemies stun and which don't. The MX.Elite bot is a good example of this. If it hunkers down, start waddling away before the blue circle appears. You can't damage it anyway and you move very slowly, so it's better safe than sorry. Again, snipers are an issue. Seek out any Varelsi Marksmen and Deadeye bots and fire charged shots at them if they're harassing you. It's surprisingly accurate and does a lot of damage to them!
Gear Options
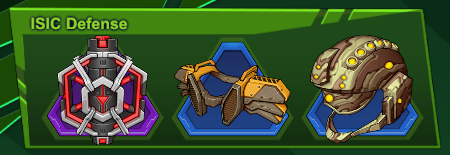
Depending on how you tend to pick out your Mutations, quite a lot of gear could be put on ISIC to great effect! Skill damage boosts how much his Ultimate dominates the battlefield, but movement speed and CC resistance are also good. If you prefer to go for a tanky build, you could easily put up all sorts of shield recharging items and bonus health and damage resistance. This is what I'm using at the time of writing:


I also have a loadout that's useful on many tank characters. I like to use it on Meltdown and Incursion. I lovingly call it "Broken Buildables" because even if I buy everything, I will still have thousands of shards. The Legendary is a huge investement, but it doubles that within minutes. The wrench and shard collector are just extra. I could comfortably replace the shoulderplate in the above loadout with this Legendary and still be happy with it. It's an amazing Legendary.


Gloating aside, stats that mean nothing to ISIC:
Reload Speed
Heal Power
CC Duration (this is actually up to you, but if you're stunned it's over and you have to pull out)

All other stats are useful. Skill damage, Crit damage, Attack Speed (maybe), Movement Speed, everything Shields, etc. It all just depends on how you want to build ISIC.
Tips, Misc.
I almost forgot to add in what the Legendary for completing all Lore challenges is:


Plasma Dash does not have to be a lateral skill. You can use it to dash up to high, inaccessible ledges, if you use it right. Think of it as a slightly different version of Phoebe's teleport.

You are a giant, hulking machine with three different ways to prevent damage being done to you. Use your body to keep your team from being shot! Along the lines of keeping your surroundings in mind, keep in mind what your body is protecting from fire.

Your off-hand melee is very, very useful. You pump your fist straight out, knocking away any enemy in front of you. This is especially useful on Meltdown if you're fighting a melee enemy. You can bodyblock (the tip above) them from attacking the minions and use your off-hand melee to knock them back and give you (and your minions) some breathing room to get to the grinders. You can also use it to knock enemies into your teammates' area-of-effect attacks! This works on all characters, not just ISIC, so try it out!

With the May 12th debuff to ISIC's defensive abilities, you'll have to use them more wisely. He has 20% less health than he originally had and his wards are at half strength. Focus more on using your Aegis to get away when Plasma Dash is on cooldown! It may be better to overcharge your wards before going into battle, instead of overcharging them while trying to get away.

More to come!
Afterword
Phew, that was quite an exciting two hours of typing and gathering pictures. Speaking of which, all pictures are taken from inside Battleborn or from the Battleborn website, and used only for demonstrative and informative purposes.

If you see any errors in this guide, let me know! I left a couple editme tags to search for later when I'm not so tired, and I'll try to get on those tomorrow. I've already edited most of them out, and I haven't even published the Guide yet!

Anyway, thank you very much for reading my guide. I hope it helps you make more informed decisions with working with ISIC, and makes you a better ISIC player.
Update Log
2016/05/13: ISIC rebalanced. Guide info edited accordingly.

Gearbox's changes:
  • Reduced ISIC’s base health by 20%
  • Reduced Rotating Wards’ block strength by 50%
  • Reduced Watchful Wards’ bonus by 40%

2016/08/28: Finally got around to playing again, and found out there was another minor rebalance.
  • Omega Strike now has a 40 second duration.
  • Reduced the duration of ISIC's level 4 Left Helix Augment, Hold it Right There! }:O stun from 2 seconds to 1 second.
  • ISIC's level 5 Mutation, Stopping Power ;) now applies a Wound debuff for 1 second instead of a slow
  • Increased the damage of Charged Cannon on Overcharged attacks from 175 to 177
  • Reduced the number of games required for ISIC's “Warning: Rogue Magnus” challenge from 5 to 3
  • Reduced the number of kills required for ISIC's “Ocoban Mining Exploration Report” challenge from 250 to 10
13 Comments
Sparky  [author] 28 Aug, 2016 @ 1:37am 
Looks like there were some new balances I didn't know about while I was away!
Feindfolio 16 May, 2016 @ 9:01pm 
Yes it does it is what I run as well as skill dmg
Sparky  [author] 15 May, 2016 @ 9:09pm 
Alright, if any ISIC players would like to corroborate with me on an experiment, I'd like to update the gear section. Can you tell if Attack Speed makes the Charge Cannon overcharge faster? I think I witnessed this when I tested it with attack speed gear, but I wasn't sure because I did a very small sample (Timed how long it took to overcharge five shots, and only did it about four times before buying the gear and doing it another four times) Get a stopwatch, set up a loadout for maximum attack speed. Time 20 shots, mark down the time, do it a few times, and then equip the gear and do it all over again.

I'd love it if you would add me and share your results. Hard-working players are what make a community work!
Pawnzer56 14 May, 2016 @ 8:40am 
nice guide though i do have some input. Helix upgrades that modify your energy aegis do infact buff your lvl 10 shield if you pick it. Also try running a skill damage increase on isic if you really love using his ult. This dmg increase combined with the lvl 10 rockets is absolutly phenomenal. As of writting this skill dmg may also help rotating wards too but i will have to test. Well GL and keep those hate furnaces active!
๖ۣۜRagnar 13 May, 2016 @ 6:23pm 
want to see how this bird will sing after a patch
Sparky  [author] 13 May, 2016 @ 3:44am 
May 12th update added.
Eyezik <3 vio.io 10 May, 2016 @ 9:11pm 
Incredibly helpful guide! Huge thanks! Made playing ISIC much more fun and easier!:steamhappy:
guardsman 10 May, 2016 @ 8:57pm 
+1 :stein::stein::stein:
Feindfolio 10 May, 2016 @ 7:41pm 
Very nice bud.. looks good
Sparky  [author] 10 May, 2016 @ 11:57am 
The update is to the Misc section, adding a couple of new tips.