Dota 2
Not enough ratings
DOTA2 Hero Shader for Blender 3.0
By TurboHusky
This shader reproduces the DOTA2 Hero shader from Valve's Material Editor in Blender. It has been developed to produce accurate renders of DOTA2 models in Blender, and allow sharing of shader input parameters.

The shader supports the following:
  • Half-Lambert and modified Phong lighting models
  • Ambient and Rim lighting
  • Colour warp
  • Diffuse warp
  • Specular warp
  • Fresnel colour warp
  • Specular cubemap
  • Detail textures
  • Support for shader masks

Note that shadows are not supported at this time.
   
Award
Favorite
Favorited
Unfavorite
Introduction
This is a complete re-write of an older shader. The aim for this version was to accurately reproduce Valve's Hero shader, using the same parameters as the Workshop Tools Material Editor. In this version Blender and Valve shader settings are interchangeable, and DOTA2 models can now be rendered accurately in Blender using the same paramaters as the Material Editor.


Please also note this is only a user guide for the Blender shader, there are plenty of other resources on extracting models, importing, exporting, asset creation etc.

Comparison
The following images show a side-by-side comparison of the shader next to the same model rendered in Valve's Material Editor.

Note: Shadows are not yet supported.

Diffuse Only

Diffuse with Fresnel Colour Warp

Specular Only

Combined Warped Diffuse and Specular

Combined Render with Detail
Shader Overview
Layout:

Inputs:
Nodes
Nodes are colour coded as follows:
  • Light setup nodes are coloured orange
  • Texture nodes are coloured light or dark grey
  • Nodes containing shader parameters are coloured light blue.
    Note: The shader has been split in half, as some features rely on warp textures that require intermediate calculations.
Textures
Textures are grouped together and colour coded based on colour mode. The following textures are available, note that not all of these are required:
  • Normal map
  • Albedo texture
  • Fresnel Masks for specular, rim lighting and colour warp effects
  • Shader masks (unused masks can be set to a fixed value)
  • Transparency mask (if required)
  • Warp textures for lighting effects (Diffuse and Specular warp, both optional)
  • Face images for cube mapped reflections (optional)
  • Colour warp textures (optional)
  • Detail textures (optional)
Getting Started
This guide assumes a basic level of knowledge of Blender. Users should be familiar with setting up materials and textures, and working with material nodes. It also assumes that a model has already been successfully imported in to Blender.
General Setup Process
  • Assign material to the model
  • Set up lighting nodes
  • Load textures
  • Set shader parameters
Assigning Materials
Each DOTA2 model may require several different materials to be applied. It is not necessary to modify any of the material nodes when creating a new material, only textures and shader parameters need to be updated.
Lamp Setup
Note: The shader has been tested with only one light. While three are available, the second and third lights should be considered experimental.

As Blender 3.0 no longer has a lamp input node, position and colour of lamps must be tracked either via drivers or entered manually. Lamps have been set up in the default .blend file, but will need to be added if the shader is imported into another project. A normalised light vector must be provided to the DOTA2 Base Shaders node, and the light colour must be provided to the DOTA2 Composite Shader. A Lamp Properties node has been provided to simplify setup.


Lamp Properties Outputs
  • Point Vector calculates the light vector based on the lamp object position and the centre of the object being lit.
  • Sun Vector calculates the light vector based on the rotation of the lamp object.
  • Lamp Colour is a combination of the Lamp Colour and Lamp Power.
Note that lamp node inputs are hidden by default, use Ctrl+H to expose them.

Texture Setup
Note: Not all textures will be required. Some textures depend on certain shader options being active.

Colour Space
Textures coloured light grey must be set to 'Non-Color' colour space for the shader to render correctly. Dark grey textures should use RGB colour space.


Load these textures as RGB:
  • Albedo
  • Detail1
  • Detail2
  • Specular Cubemap
Load these textures as Non-Colour:
  • Normal Map
  • Transparency
  • Diffuse Warp
  • Specular Warp
  • Fresnel Masks
  • Colour Warp 3D Textures
  • Fresnel Colour Warp 3D Textures
  • Shader Masks
Additional Texture Notes
  1. UV Map
    Set the UV Map node to the correct UV map (generally map1 for DOTA2 assets).


  2. Texture Remapping
    Albedo and detail textures can be remapped. Scaling, offset and rotation adjustments are available for Albedo and Detail1. Scaling and offset are available for Detail2.


  3. Normal Maps
    Set the normal texture to "extend" to avoid artifacts in cubemaps.


    Ensure normal maps are in tangent space.


    In some cases it may be necessary to disable autosmooth for correct rendering.


  4. Mask Textures
    Source1 (combined) textures use RGBA channels, the "S1 Mask Splitter" node group matches each channel to the appropriate mask and is provided for convenience.


    Source2 (individual) masks do not require separating and can be connected directly into the relevant node.

  5. Transparency Texture
    If not required can be replaced with a full white texture.
Shader Controls
Shader Input Nodes
The majority of shader parameters are found on the two main input nodes. These provide access to various parameters corresponding with those found in Valve's material editor, as well as mask and texture inputs.


Rotate World
The “Rotate World” parameter has been provided for altering the 'up' direction in Blender, as by default the shader will use the positive Y direction for “up”. There is no equivalent setting in Valve's material editor. This affects rim lighting and the specular cubemap.


Overbright
Overbright acts as a global scale factor for the shader.
Diffuse
These parameters control diffuse lighting and colour.


Colour Warp
Must be enabled by setting Colour Warp to 1.
Colour warp is applied to the entire albedo (i.e. the entire model), and is controlled by a 3D warp texture and the colour warp blend factor.
Example 3D Warp Texture
Effect of Colour Warp Blend Factor
Blending = 0
Blending = 0.3
Blending = 0.6
Blending = 1

Diffuse Warp
Note: Diffuse warp cannot be used as well as Specular Warp or Fresnel Colour Warp.

Must be enabled by setting Diffuse Warp to 1.
Diffuse warp maps diffuse lighting to a warp texture. Diffuse light in the range 0-1 is mapped to the horizontal axis of the texture.
The Diffuse mask is mapped to the vertical axis of the texture, and can be used to select different gradients.

Example Diffuse Warp Texture
Example Diffuse Warp
Effect of Diffuse Warp Mask
Diffuse Warp Disabled
Diffuse Warp Enabled
Warp Mask = 0.3
Diffuse Warp Enabled
Warp Mask = 0.8


Fresnel Colour Warp
Note: Fresnel Colour Warp cannot be used as well as Diffuse warp.

Must be enabled by setting Fresnel Colour Warp to 1.
Fresnel colour warp is applied to the albedo, and is controlled by a 3D warp texture and the fresnel warp colour texture.
Example 3D Warp Texture
Effect of Fresnel Colour Warp Texture
Combining Colour Warps
Fresnel Colour Warp can be combined with Colour Warp. Colour Warp is applied first, and Fresnel Colour Warp is applied to the result.


Ambient
Ambient controls how lighting is applied in shadowed areas. The colour is determined from Ambient Colour, and Ambient Scale controls the intensity. Sky blue is the default colour in the material editor.
Ambient Scale = 0
Ambient Scale = 1
Ambient Scale = 5
Ambient Scale = 10

Ambient colour is also used for rimlighting.
Specular
These parameters control specular lighting and colour.


Effect of Specular Exponent
Scale fixed at 5
Exponent=5
Exponent=10
Exponent=20
Exponent=50

Effect of Specular Scale
Exponent fixed at 5
Scale=1
Scale=5
Scale=10
Scale=20

Effect of Specular Tint
0xFFFFFF
0x96D4FF
FFDE98

Specular Warp
Note: Specular Warp cannot be used as well as Diffuse Warp.

Must be enabled by setting Specular Warp to 1.
Specular warp is controlled by a warp texture and the specular exponent mask. The specular exponent parameter is not used. Specular reflections in the range 0-1 are mapped to the horizontal axis of the texture.
The specular exponent mask is mapped to the vertical axis of the texture, and can be used to select different gradients.

Example Specular Warp Texture

Effect of Specular Exponent Mask on Specular Warp
Exponent Mask=0
Exponent Mask=0.3
Exponent Mask=0.6
Exponent Mask=1
Cubemap
By default, the cubemap is added to the specular component and is affected by specular colour as well as fresnel and specular masks.


Layout
Cubemaps can be loaded as individual images or as a single combined image. Orientation for cubemap faces follows Valve's layout as shown below:


The CubemapUVMapping node is provided for convenience. It modifies the cubemap UVs to select the correct regions from a combined cubemap. If cubemap faces are loaded individually, this node is not required.


Effect of Cube Map Scalar
Scale=1
Scale=2
Scale=5
Mask By Metalness
If Mask By Metalness is used, the cubemap is no longer affected by specular colour or masks. Intensity is controlled by the metalness mask, and the result is combined with diffuse and specular as a separate component.

Mask By Metalness = 0
Mask By Metalness = 1
Rim Lighting
Rim lighting is based on the ambient colour, and is controlled by the Rim Light Colour and Scale parameters and the Rim Light and Fresnel Rim masks.


Effect of Fresnel Rim Texture
Effect of Rim Light Scale
Scale=1
Scale=5
Scale=10
Scale=20
Effect of Rim Light Colour
0xFFFFFF
0x34FF68
0xFF344A
Note: Rim light colour is multiplied with the ambient colour, this will affect the overall hue.
Detail Textures
Application of detail textures is controlled by Detail Tint, Mode and Blend Factor.


Example Detail Texture

Detail Blending Modes
Blend Mode = 0
Blend Mode = 1
(Add)
Blend Mode = 2
(Add Self Illum)
Blend Mode = 3
(Mod2x)
Note:Mod2x is only available for Detail 1.
Effect of Detail Blend Factor
0
0.3
0.6
1.0
Effect of Detail Tint
No tint
00FF00
FF00D8
3878FF
Effect of Alpha Channel on Self Illumination (Mode 2)
Alpha = 1
Example Alpha Mask
With Alpha Mask
Effect of Detail Mask (Detail 1 Only)
Mask = 1
Example Detail Mask
With Detail Mask
Download
The shader can be downloaded here[www.blendswap.com]
9 Comments
TurboHusky  [author] 19 Feb, 2022 @ 5:58pm 
Version 3.0 is out now, everything has been re-built from scratch.

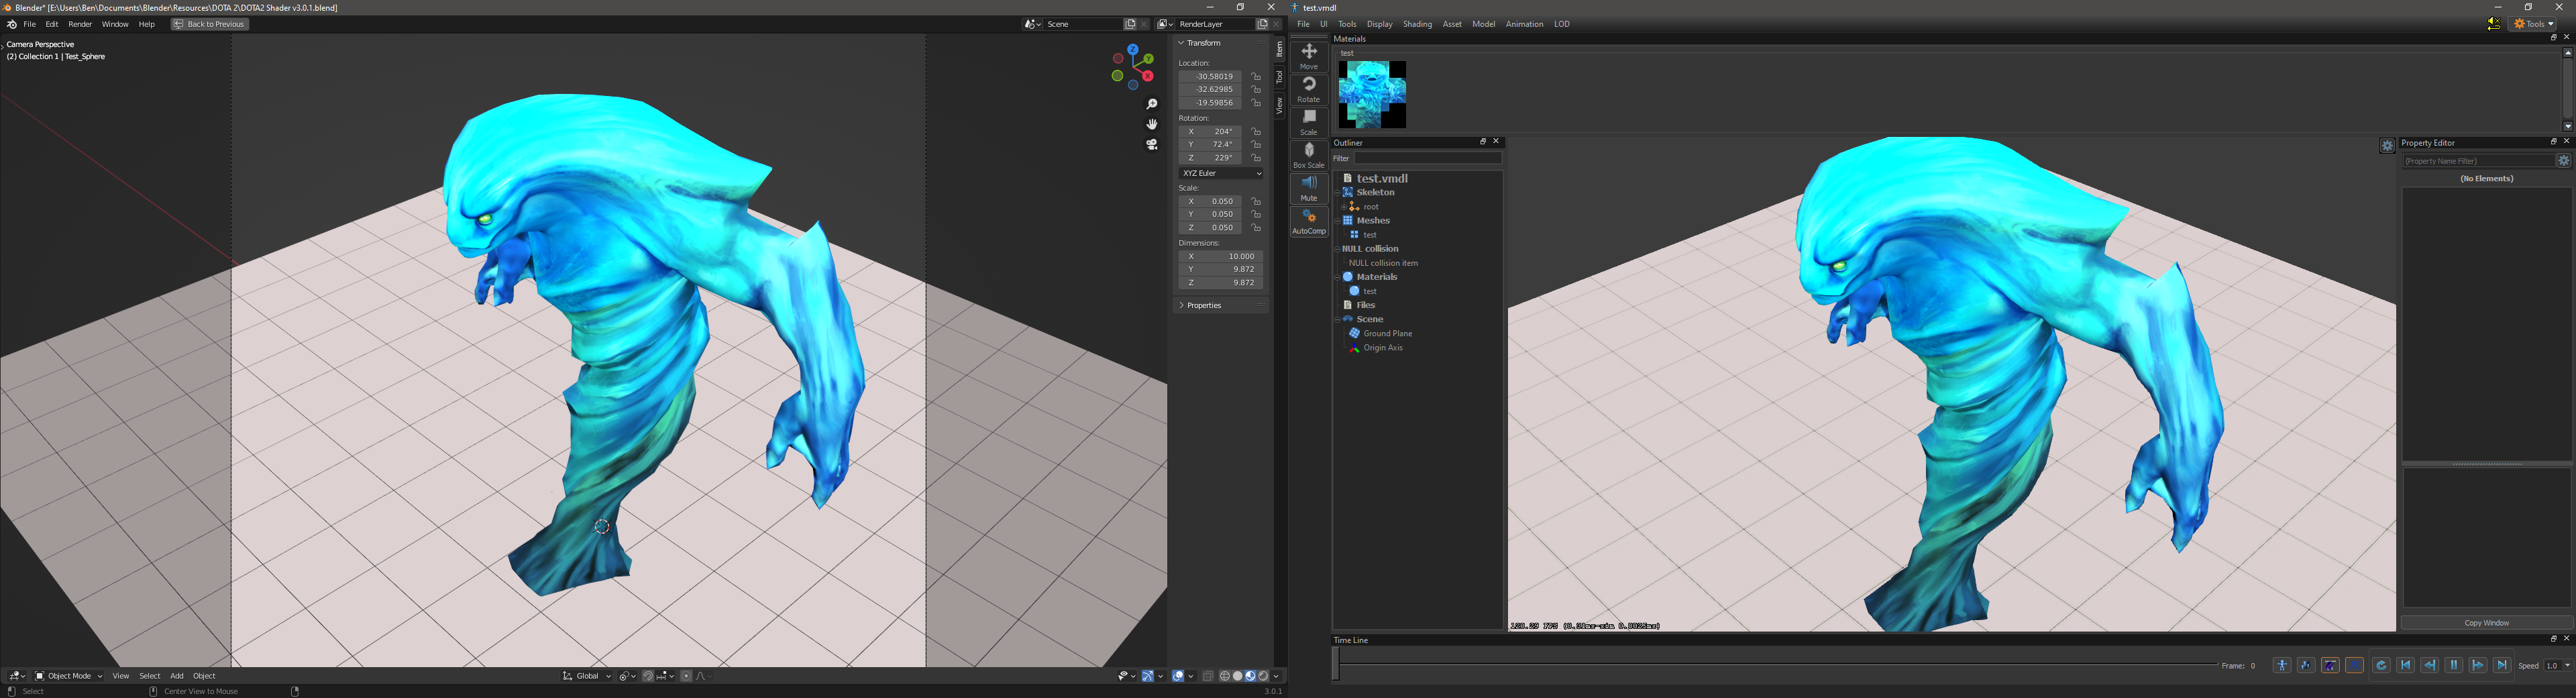
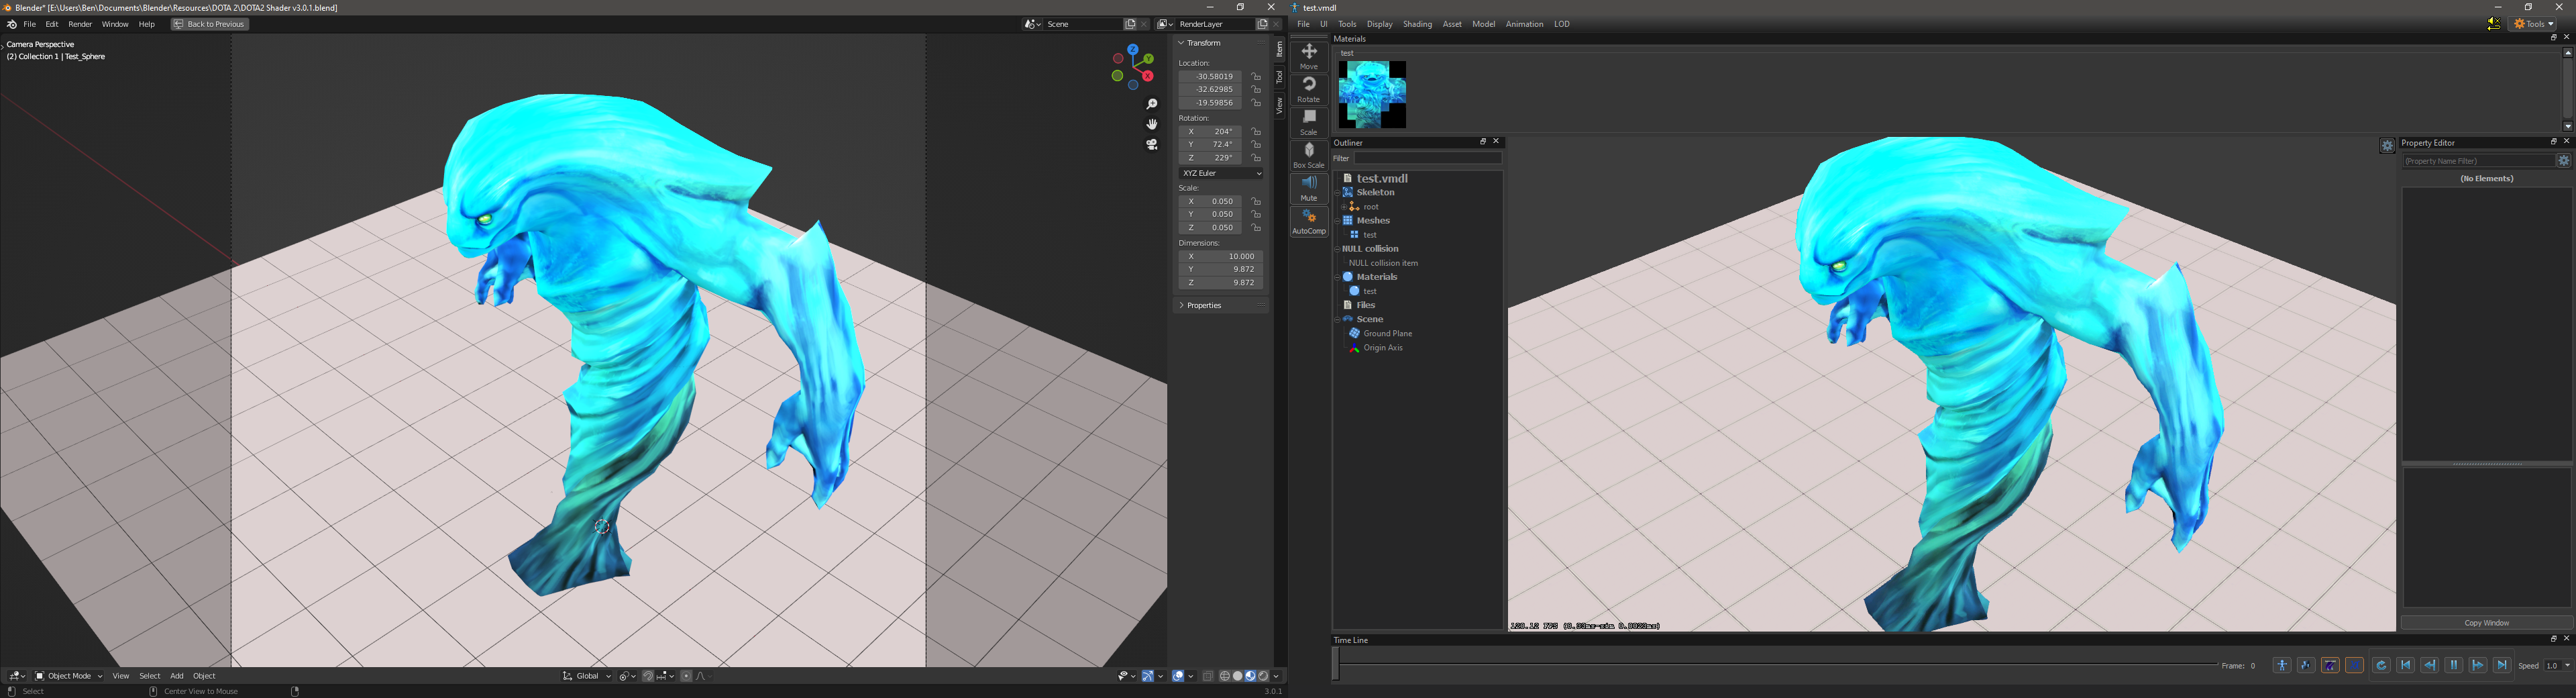
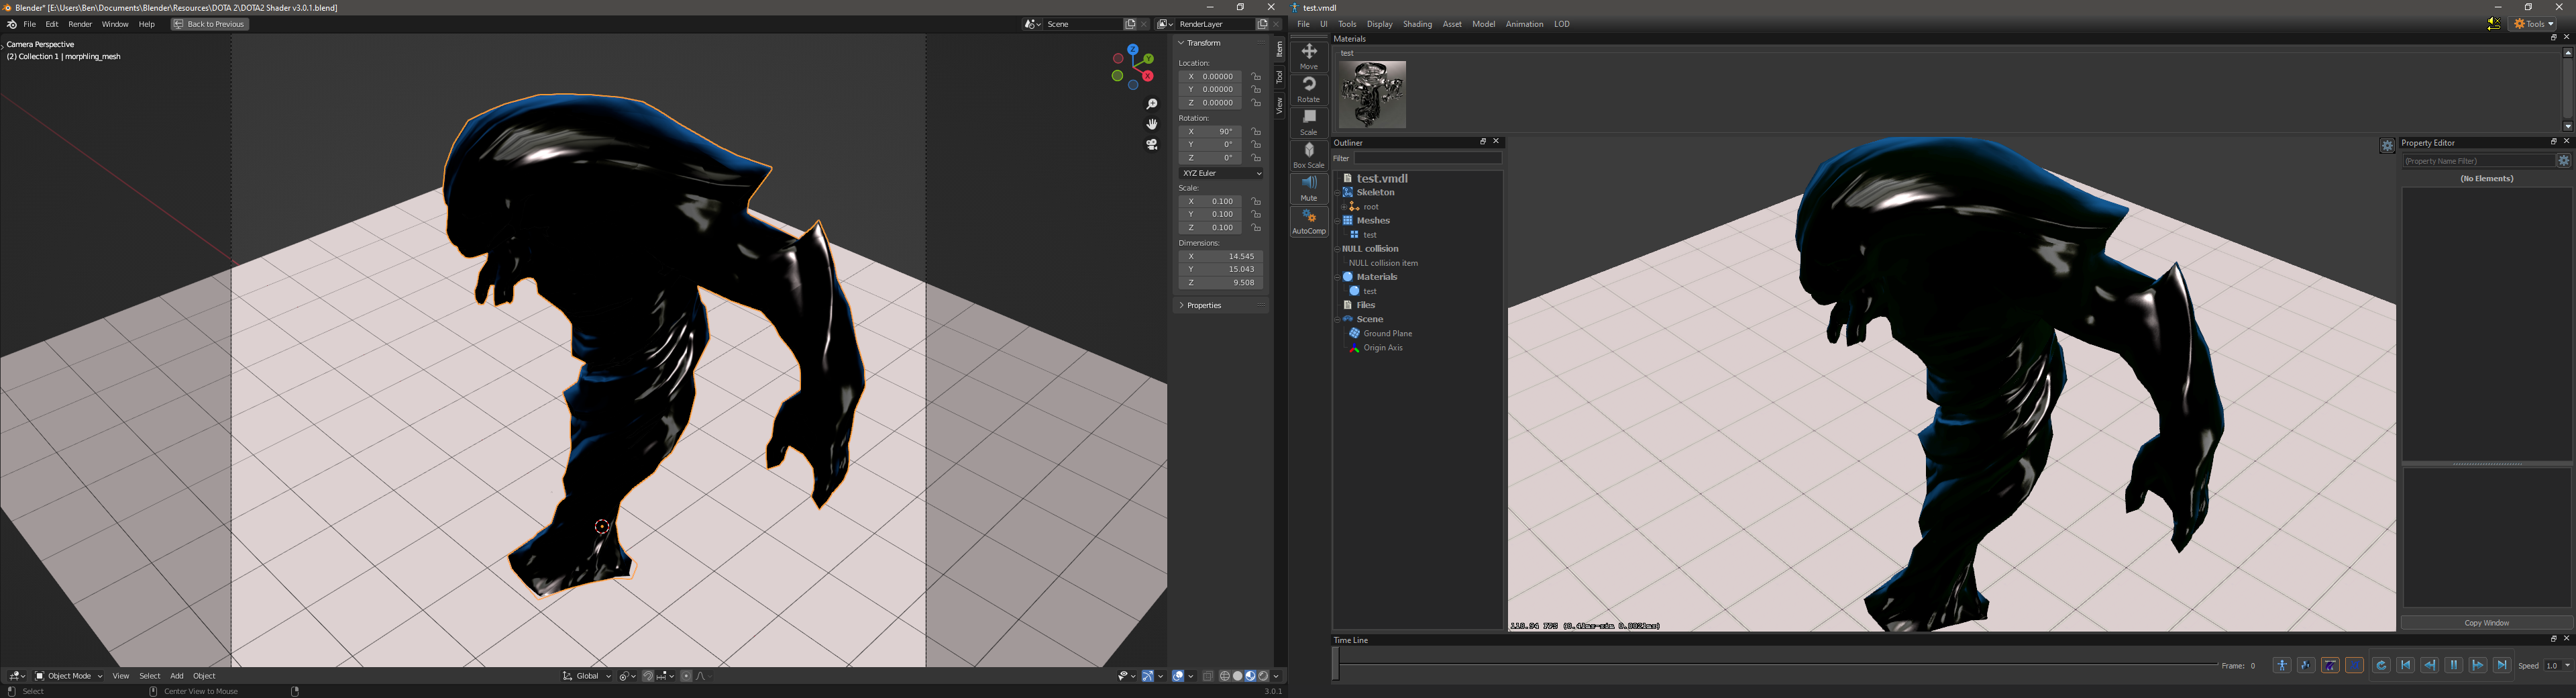
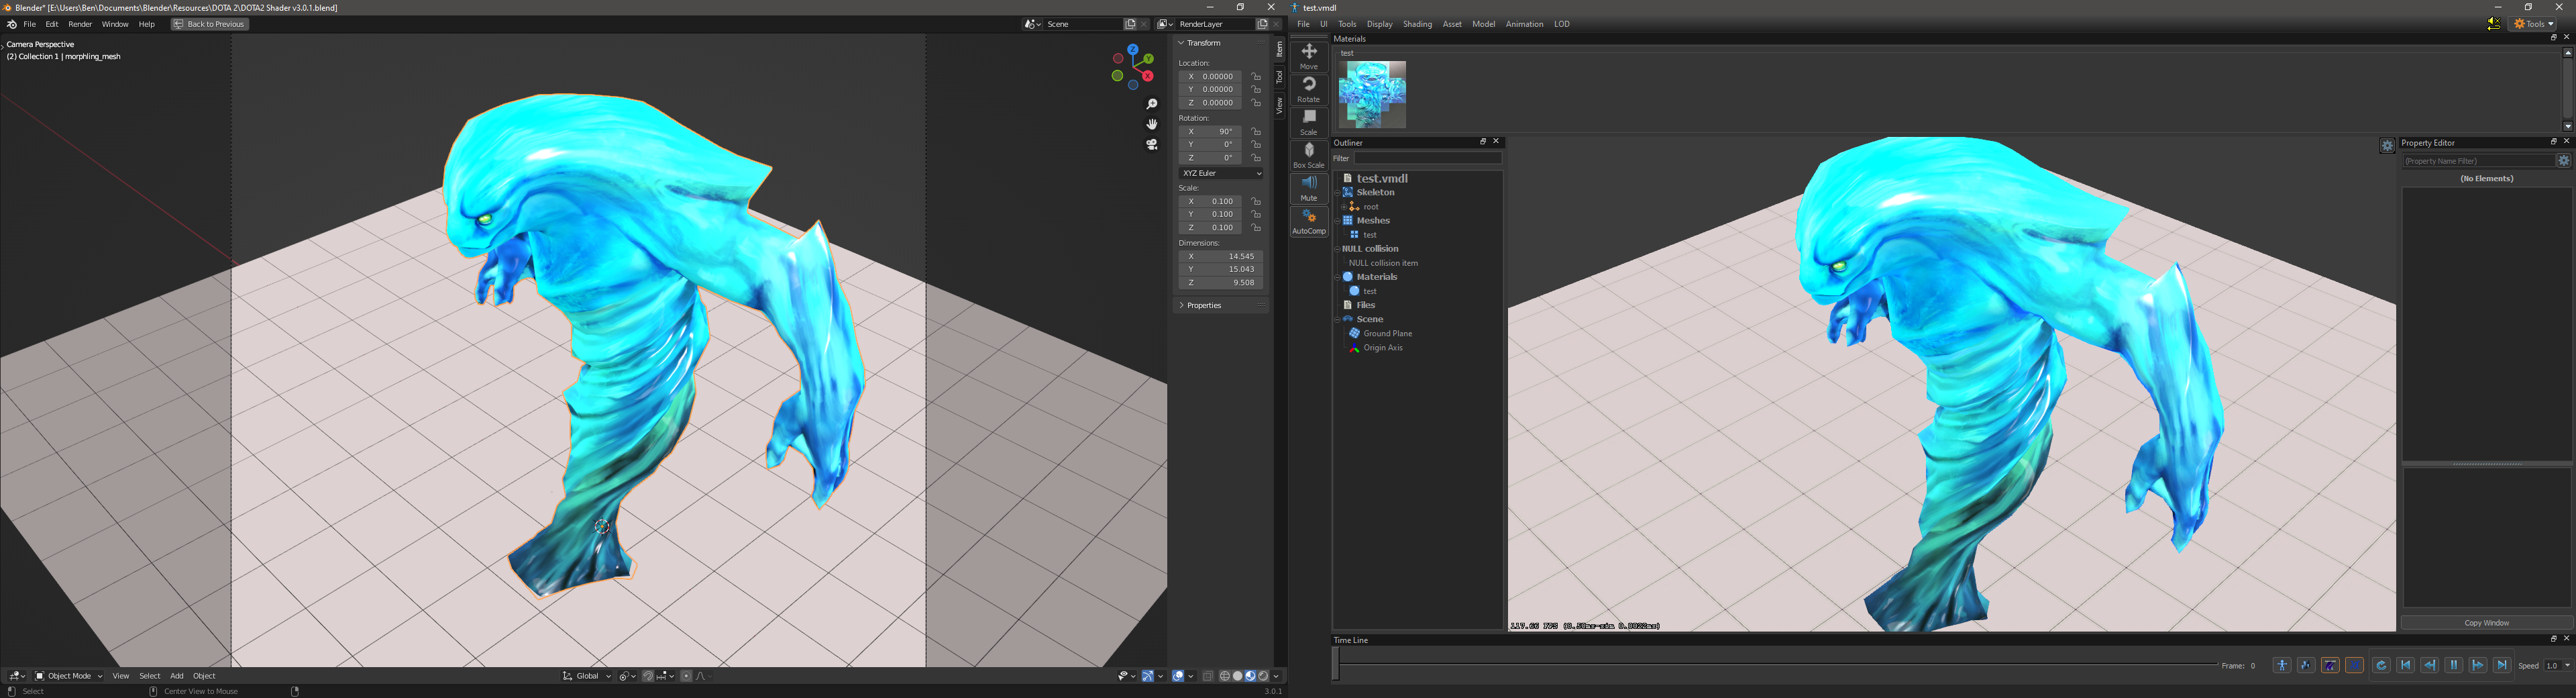
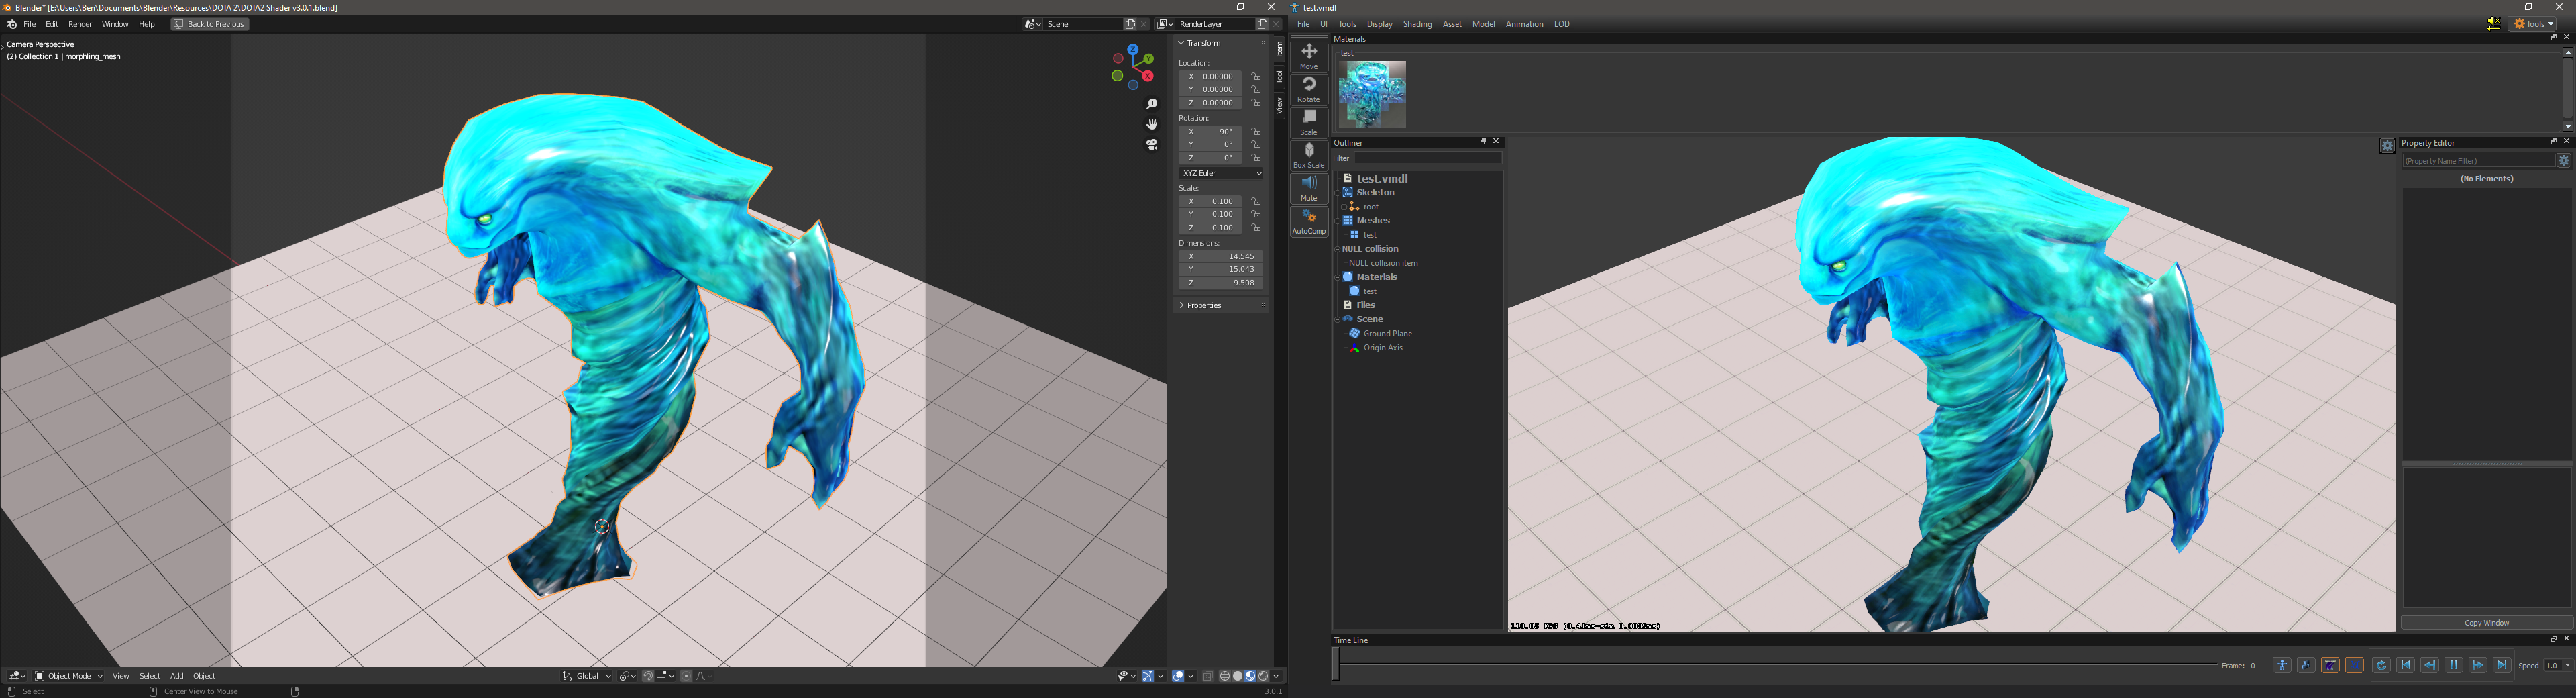
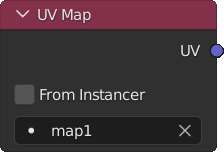
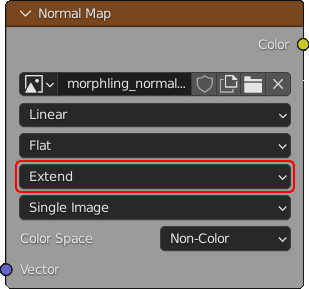
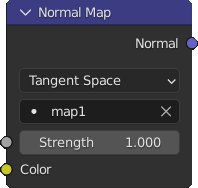
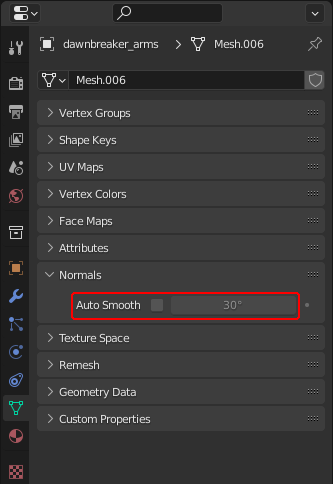
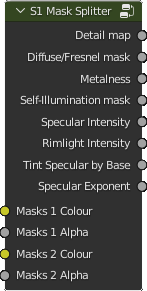
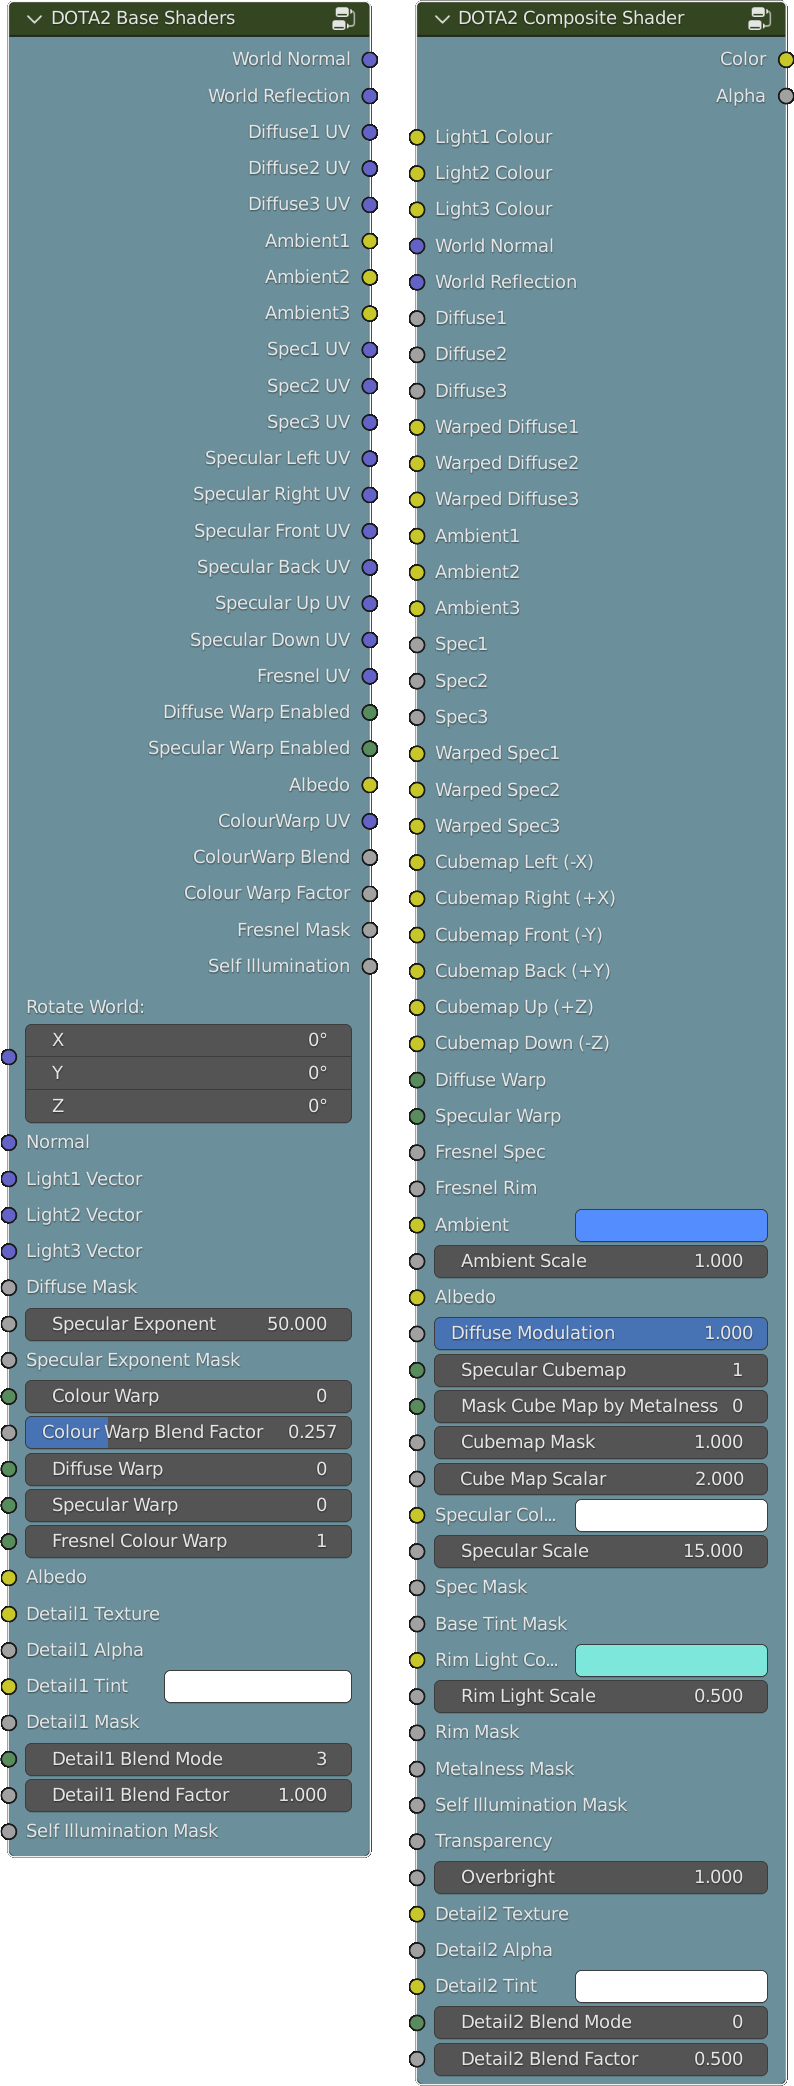
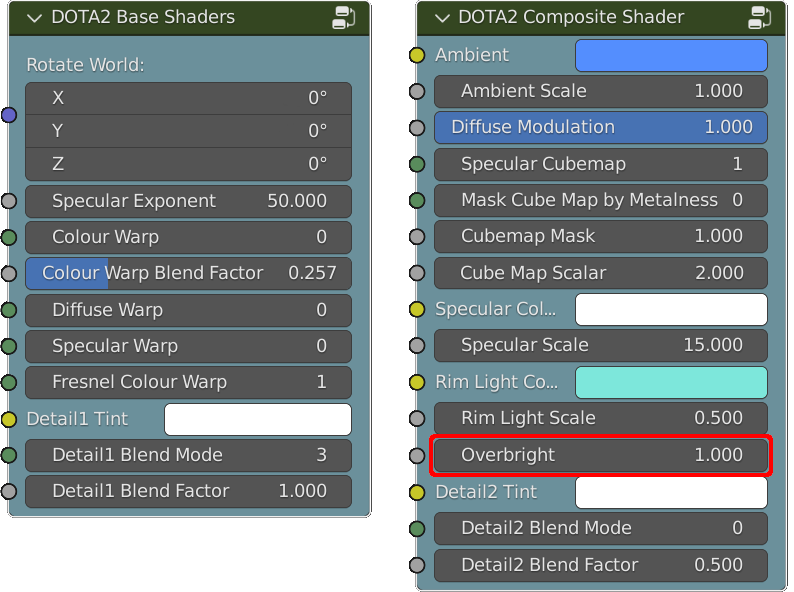
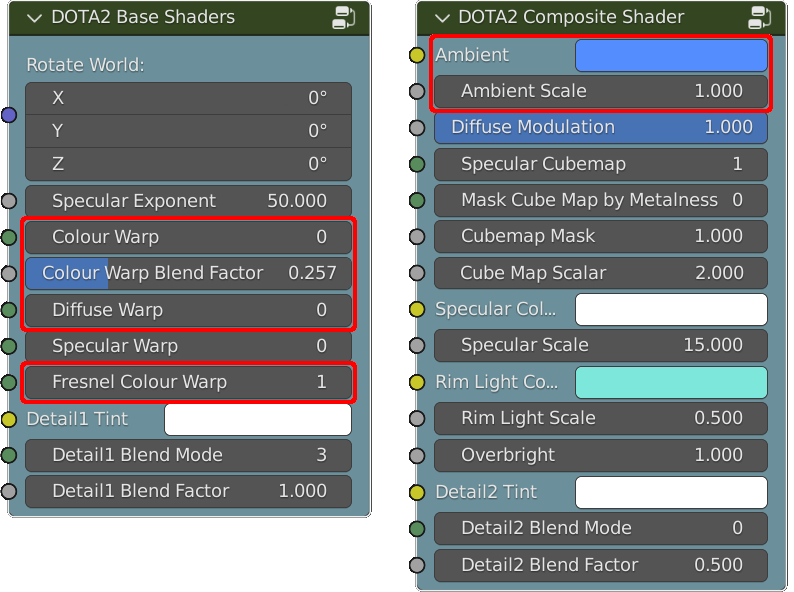
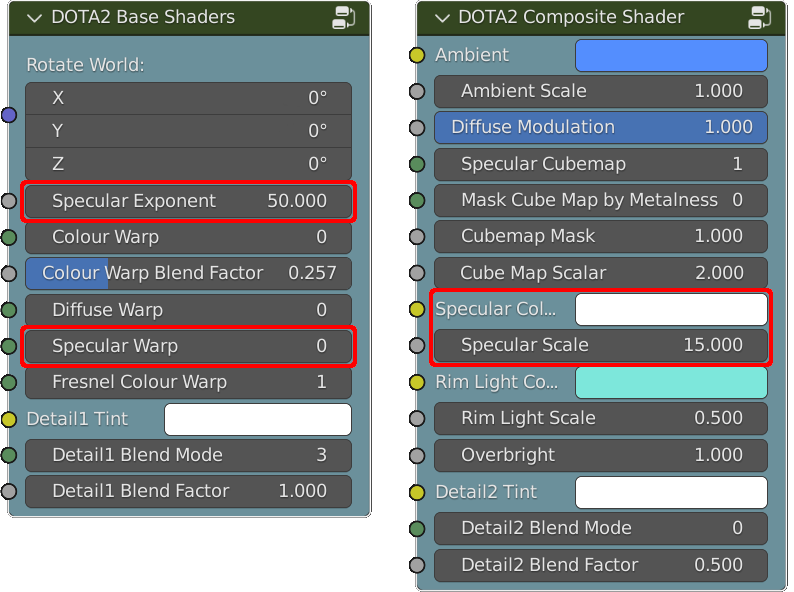
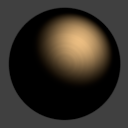
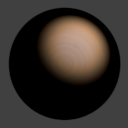
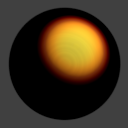
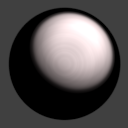
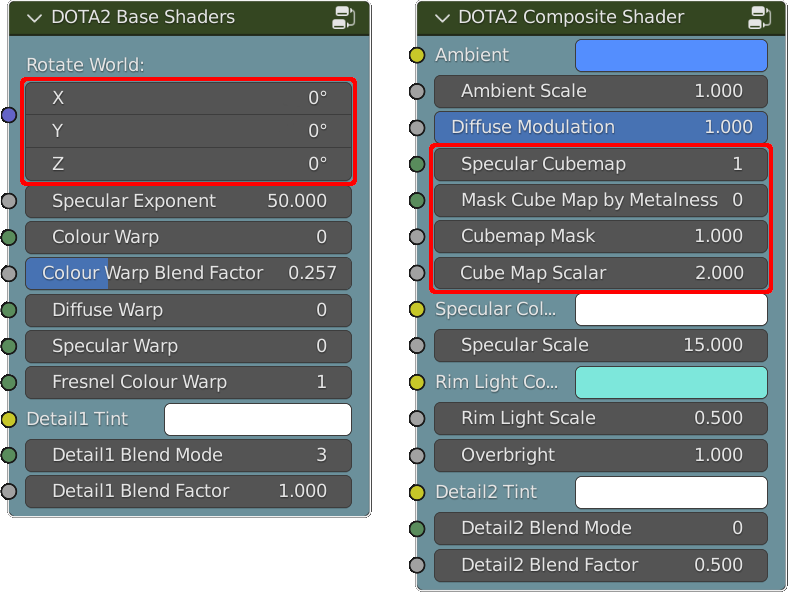
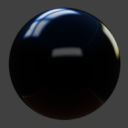
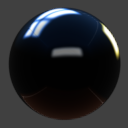
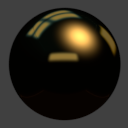
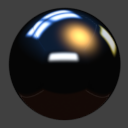
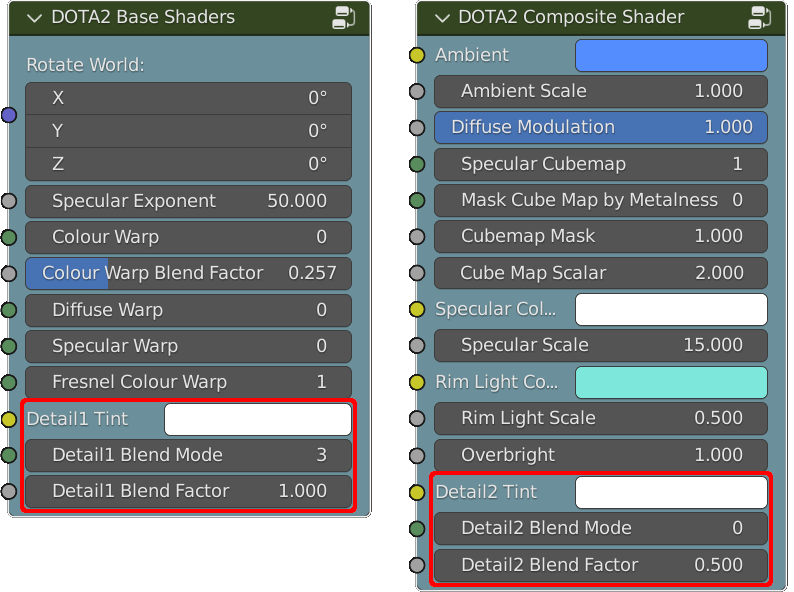
The original shader had too many inaccuracies to fix up, so it was better to start over. This version can now match the output from Valve's Workshop Tools, and uses the same input parameters (See the Morphling example above). The layout has also been changed to remove the need to edit node groups.
QHANP 17 Dec, 2021 @ 7:25am 
oh man how i would love to have this for blender 3.0, super glad to hear that this is not completely dead yet!
TurboHusky  [author] 24 Oct, 2021 @ 2:47am 
Man, I've not touched this for about 5 years...

The shader is for Blender 2.79 which is why you're getting undefined node errors. 2.8 broke a lot of them and there weren't any workarounds at the time. The project was always something of a hack, as it's implementing a shader using material nodes, which isn't particularly efficient.

There are suitable replacements for everything in 2.92, if you can hold on for a week or two I'll try and update it if I can find some time.
Xolamee 20 Oct, 2021 @ 12:04pm 
Is there any chance you'd be willing and able to update this? I've been trying to get half-way decent shading on the Dota 2 Hero models in Blender for days and have had no luck. I'm on the latest version of blender trying to use this shader and most of the nodes are showing up with the title "Undefined" and they have a red background color. I've tried replacing the undefined nodes with the textures from the valve-provided workshop models (all the .tga files that come in the materials folder) and wiring things up, but some of the nodes I can't find an equivalent in blender's nodes (e.g. there is no output node I can find that has Color/Alpha inputs). Anyways, it would be greatly appreciated. Ideally it would just have any Dota 2 hero model with a proper shader hooked up. Thanks in advance!
3d0>? 30 Mar, 2019 @ 2:55pm 
that feeling when u see no difference between pictures.......mmmm.....just perfect
TurboHusky  [author] 25 Feb, 2017 @ 2:33pm 
Thank you, and no, I have not been following blend4web developments at all. This shader isn't suitable for gaming applications, it's really just for those wanting to create DOTA2 mods. It's "real time" in terms of the Blender viewport, but completely unsuitable for use within the BGE. The node network is far too cumbersome.

It would be better to write a dedicated GLSL shader for those sorts of things, which unfortunately I don't have the time to do! Maybe if someone else is feeling particularly motivated?
BluePrintRandom 24 Feb, 2017 @ 11:00pm 
This is great - have you seen blend4web contributed a Fresnel node for realtime GLSL recently ?

UPBGE has realtime reflection probes as well in game in BGE.
TurboHusky  [author] 6 Aug, 2016 @ 6:28am 
You're welcome! Hope it's of use to you.
2OP | MadScientist 26 Jul, 2016 @ 3:13am 
Thanks for the shader. I did create one shader but its nothing that resembles the Source shader. This would help a lot.