Interstellar Rift

Interstellar Rift

85 ratings
SURVIVAL GUIDE: Getting Started
By Chip Patton
From the "Survival Guide" series, I give you my next, "Getting Started".

Many players have been struggling at the beginning of the game and I hope and aim that a quick read of this guide will get you off to a cozy start!
2
   
Award
Favorite
Favorited
Unfavorite
INTRODUCTION
As you have likely noticed this game is very oriented to multiplayer. In order to play in singleplayer you are still playing on a server, just your local server that blocks outside connection attempts.

Because of this, it is my deepest suggestion at this point to recommend MULTIPLAYER (see also "Survival Guide: Multiplayer"). I will begin this guide on the topic of starting out in multiplayer. I, myself, have little to no experience in singleplayer as it is almost impossible to get anything done in anything but a dingy in singleplayer.

Make sure you read this guide in-detail before getting started on a server!
https://steamhost.cn/steamcommunity_com/sharedfiles/filedetails/?id=691272213
IDENTIFYING SYSTEMS
There are some things in the game you're going to need to know what they are in order to be able to get your stuff you start with and purchase your ship.

Lets begin!

THE VAULT


The Vault is where all of your components and resources are stored. You have 3 vaults, one for yourself, one for your crew, and one for your fleet.

You can put things in your vault by holding it in your hand and pressing E on the depository area (the square hole). You can withdraw by simply clicking the resource you want.

THE STORE-O-TRON


The Store-O-Tron is an omni-terminal/kiosk for storing your ship, purchasing new ships, and repairing your ship.

GALACTIC TRADE TERMINAL


The galactic trade terminal is an area where the "GT" will sell you resources on that station.

There are two methods of buying and selling -- Personal Inventory and Ship Inventory. You can purchase items from the GT Terminal and have it automatically sent to your ship while purchasing in Ship Inventory Mode. You can also sell resources directly from your ship in this manner allowing you to perform much larger transactions than what you can hold in your personal inventory.

CARGO STORAGE & TRANSPORT


Cargo is handled by both cargo pads and cargo transporters. The above image is a cargo transporter but cargo pads look very similar (without all the transporter like stuff around it!).

You will be able to place any item in your inventory on these pads by selecting that item with your mouse wheel and pressing "E" while targeting the transporter or cargo pad.

If you are using the transporter you can then select the destination ship, and select a cargo pad (or if you are transporting hydrogen, the hydrogen tank) and transport your cargo directly there.

WARNING! If the cargo pad or hydrogen tank is full when you transport a "Load" of 8 items, you will only get 4 items back. This is a known bug, but just check capacities before sending your loads through.

THE EXTRACTOR


On HSC and The Drifter stations, there are generally Resource Extractors like shown in this image. These stations are in asteroid fields so operating these are very easy feats. Simply go up to the terminal, select an asteroid, click "Mine", and profit.

It is wise to learn the icons and what other devices do such as the Assembling Machine, The Refinery, and the 3-D Printer.

For more information on any of these devices or the devices that I have not mentioned, travel over to the Official Wiki[www.interstellarrift.com] and have a read!
IDENTIFYING RESOURCES
I'm providing this section of the guide because the game only displays these resources to you in icon form and there is no tooltip in-game that gives you any reference what each resource is except for the welcome consoles on the starter stations.

RAW RESOURCES
Icon
Name
Origin
Iron Ore
Found in asteroids at starter stations, very common
Copper Ore
Found in asteroids at starter stations, very common
Silicon Ore
Found in asteroids, semi-rare
Zinc Ore
Found in asteroids, semi-rare
Water
Found in asteroids at starter stations, very common
Nitrogen
Found in asteroids, semi-rare
Carbon
Found in asteroids commonly and is a waste product of Life Support systems.
Gold
Found in asteroids and stations, very rare resource
Iridium
Found in asteroids, rare resource
Osmium
Found in asteroids, rare resource
Silver
Found in asteroids, extremely rare resource
Murcury
Found in asteroids, extremely rare resource
Platinum
Found in asteroids, extremely rare resource
Deuterium
Found in asteroids, extremely rare resource, can be refined from water
Beryllium
Found in asteroids, extremely rare resource

PROCESSED RESOURCES
Icon
Name
Ingredients
Processing Device
Uses
Iron Ingot
Iron Ore
Refinery
Ship building, Gun & Charge manufacturing, Repair Drone Ammo
Steel Ingot
2x Iron Ingot + 1x Carbon
Refinery
Ship building, Gun & Charge manufacturing, Drone & Missle Manufacturing
Copper Ingot
Copper Ore
Refinery
Ship building and Drone manufacturing
Hydrogen
Water
Refinery
Primary Fuel for Energy Generation
Oxygen
Water
Refinery
Lifesupport & Nitros Oxide
Nitros Oxide
1x Nitrogen + 2x Oxygen
Refinery
Ammo manufufacturing, missle manufacturing
Silicon Ingot
Silicon Ore
Refinery
Ship building and manufacuring electroncis (data cartradges & chipsets)
Brass Ingot
1x Copper O R E + 2x Zinc O R E
Refinery
Manufacturing Bullet Casings
Xanthium
100 Nitrogen + 1 Beryllium + 1 Deuterium
Refinery
Low-Grade Rift Fuel
Di-Xanthium
100x Nitrogen + 1x Murcury + 100x Xanthium
Refinery
Mid-Grade Rift Fuel
Tetra-Xanthium
100x Nitrogen + 1x Osmium + 100x Di-Xanthium
Refinery
High-Grade Rift Fuel
SERVER SELECTION
I've seen many complaints over the months, and over the years in other games where servers come up and servers go down while players dump vast swaths of their entertainment time into these servers only to be very disappointed that they have to start over on another server.

You should take a trip to the forums and have a look at the server advertisements there. Look for servers that are current (the OP should show a recent "last edited") but also pay attention to the date it was created. Finding a server that was created yesterday, last week, or even last month may not be a persistent server you can rely on. So it is a great idea to keep looking for older and more current servers.

You'll also want to find a server that updates when the game updates. This is very important because you don't want to have to stall your own updates because your server won't update until a few weeks later.

Lastly, ensure your server admin is active and fair and always report admin abuse on the forums (remember not to name and shame) because the server owner may not be aware of it.

So far, my community's server is the longest-running Unofficial Server that is supported by some of the latest hardware technologies.

The choice between official and unofficial is dubious, and I'm not sure that anyone can make that decision for you or state definitively one is better than the other, but do keep in mind that the official servers generally are monitored only by the developers who are bound to a very specific geographical region where they sleep during specific times which leaves the server unattended, while an unofficial server like ours has admins from the US, Netherlands, and Austrailia to cover most of our time zones. This not to say every official server will have this luxury or this will be a permeant condition of the Official Server; it likely will change at some point in the future.

You should now have enough information to hit the ground running with an informed decision about your choice of server.
FACTION SELECTION
Once you make your server selection and join for the first time, you will be prompted to join one of a few factions. This choice is something you shouldn't make lightly while joining by yourself, however, if you are joining a team, it won't matter as much so long as you all join the same faction so you can hook-up and begin working together sooner.
HURLES CO (HSC)
Hurles Co (or HSC as abbreviated in-game), named after the Split Polygon developer, Hurles, is an industrial faction of miners and refiners. While you don't necessarily have to be a miner or refiner to join this faction, it is more tuned for players who want to play in this playstyle. While the description seems to describe a faction of mineral haulers, this is not the case.

STARTING RESOURCES


  • Credits: 750,000
  • Water: 10,000 **
  • Oxygen: 1,000 ***

** Denotes the components necessary to process into hydrogen***.
*** Denotes a component that will be required to operate your ship.

STARTING SHIP


HSC Escavator Mk I
-Mining Ship

WORDS OF WISDOM

While it may not seem very enticing, this is the faction recommended for solo players. You will start inside of a station in which is surrounded by resource-rich asteroids and there will be resource extractors onboard the station so you can begin to farm resources for your ship and for credits much earlier than any other faction.
GALACTIC TRADE (GT)
Galactic Trade (or GT as abbreviated in-game) is a transport faction. While you don't necessarily have to be a hauler or transporter to join this faction, it is more tuned for players who want to play in this playstyle. The description states that they offer the lowest prices in the galaxy "guaranteed" one should ask them what the terms of that guarantee are because I've seen the prices be exponentially higher on commodities that aren't native to the faction such as bullets.

STARTING RESOURCES


  • Credits: 750,000
  • Water: 10,000 **
  • Oxygen: 1,000 ***

** Denotes the components necessary to process into hydrogen***.
*** Denotes a component that will be required to operate your ship.

STARTING SHIP


GT Mk IV Hauler
-Cargo Ship

WORDS OF WISDOM

This faction really should start the player with a little more funds, because you can't really do anything but buy and sell goods and commodities to other stations. This really requires a little more starting funds than you get, but you can make do if you know what you're doing of course. Because of this, I highly advise against starting in this faction if you are new to the game.
SENTINEL SECURITY SYSTEMS (S3)
Sentinel Security Systems (or S3 as abbreviated in-game), named after the Split Polygon level designer and director, Sentinal, is a bounty hunting and mercenary faction who enforces galactic laws. While you don't necessarily have to be a fighter or bounty hunter to join this faction, it is more tuned for players who want to play in this playstyle. The description seems to also indicate that S3 may now be also focused on salvaging (likely wrecks they caused).

UNTOLD KNOWLEDGE

The S3 Starter Station is called Ft Bragg. One may believe that this is named out of the Famous US Army Military Base in North Carolina, but the name actually comes from Sentinal's tendency to "brag" about or show off his creations. Thus Hurles sparked the idea that named the S3 Headquarters, "Ft Bragg".

STARTING RESOURCES


  • Credits: 750,000
  • Water: 10,000 **
  • Oxygen: 1,000 ***
  • Bullets: 1,200 *

* Denotes an optional component for your ship.
** Denotes the components necessary to process into hydrogen***.
*** Denotes a component that will be required to operate your ship.

STARTING SHIP


S3 Peregrine Mk I
-Combat Ship (Frigate)

WORDS OF WISDOM

While this faction is not recommended for solo players to start with, it is recommended that you increase your faction with S3 early on as this is the only faction in which allows you to loot stations owned by S3 without having to hack the station.

MAKING IT WORK

So you picked this faction on your server and "can't go back". No problem. You can either use your ship to jump over to the HSC station or you can simply begin running missions. Pick up a mission from the mission board on the station and take your ship out for a spin!
DRIFTERS (?)
The Drifters (unsure if any in-game abbreviations), is an aimless faction that many players choose to use as pirates. While it is conclusive that the Drifters do operate outside the law, especially in their mining operations, it is unclear if they endorse and subscribe to maritime piracy.

STARTING RESOURCES


  • Credits: 250,000
  • Iron: 5,000 ****
  • Steel: 5,000 ****
  • Copper: 5,000 ****

**** Denotes a resource critical in the creation of your starting ship

STARTING SHIP

= = > N O N E < = =

WORDS OF WISDOM
WARNING: THIS FACTION PROVIDES NO STARTING SHIP! While it does provide starting resources to build a ship, this is NOT recommended for NEW PLAYERS.
FACTION SUMMARY
Overall, there are 4 factions to choose from. Each faction is very different, and some factions will start you with different starting ships and different starting resources.

It is my recommendation, that if you are a new player, begin with Hurles Co. You'll thank me later.

One a final note, remember not to blow all your money when you start, you'll need that for Oxygen and Hydrogen when you're starting out.
YOUR SHIP - GET TO THE CHOPPA
Once you have selected your faction (assuming you picked Hurles Co) your next task is ensuring your ship is ready to go and "survivable".

There are TWO resources you need IN YOUR HANDS when you teleport to your ship for the first time:

  • Hydrogen (at least 10,000)
  • Oxygen (at least 4,000)
LIFE SUPPORT - DO NOT PASS GO
Upon teleporting to your ship, your first task before even looking around is FIND YOUR LIFE SUPPORT SYSTEM. It looks like this:


Once you find it, use your mouse scroll wheel to select your oxygen (white triangle), and press "E" while looking at the left side of the life support system.

WAIT! DO NOT WALK AWAY!

You now have to press the button on the console for "Oxygen" to load it into the life support system. Without this step, you have done nothing but used your life support system as storage!

Once you have properly loaded your Oxygen, you will be able to press "TAB" to look at your omni-tool or "GRIP" and see that your room oxygen is now back at maximum. Without this Oxygen in the system, you will notice the "preloaded" air in your ship's rooms slowly fall while you are in them.

WAIT! DO NOT GO ANYWHERE YET!

There are 2 VERY important notes to add here.

  • THE CARBON PROBLEM - Carbon cannot stack as high as oxygen so your life support system will become saturated with carbon (and stop working) well before the meters on the ship tells you the ship needs Oxygen. Generally speaking, when you have about half of your oxygen left, you need to make a trip to the Life Support module and REMOVE the carbon. Don't throw it away! It is a critical component in making STEEL.

  • You will need to periodically feed Oxygen to this system but you'll also have to be careful on hostile hacking, enemies can turn your life-support systems (all) off.

Now, you're good, we can move on :)
BASIC POWER MANAGEMENT - I'M GIVING 'ER ALL SHE'S GOT!
Hydrogen will go inside of a rounded cylindrical tank that should be labeled "Fuel". Once you find this tank, you'll need to spend a few minutes watching it. Here is why:

While your ship is running on solar for the first time:

  1. There is not enough power to charge your batteries
  2. There is not enough power to run your shields, so they are offline

So, when you place hydrogen in your tanks and your hydrogen generator comes online, there will be enough power on your ship to do both, and as a result, immediately, that hydrogen will get "sucked" out of that tank very rapidly.

I recommend that while your ship is charging that you find your shields and turn down the output level to about the first tick. It is dangerous having them that low, because they will NOT recharge at that level, but it also cuts down the power consumption by about 90%.

Once your batteries have charged you will then have both "backup power" and "burst power" (meaning if your thrusters over-use your reactor's power capabilities, the batteries will kick in and supplement that power deficit).
ADVANCED POWER MANAGEMENT
Power is one of the most crucial things in this game beyond basic ship design and systems.

Managing your power or trying to figure out what each power system does can be a headache so I'll attempt to help you out by explaining what, exactly each device does. I'll leave it to you to run off and do your own research to see how much power each device holds and requires, but at the end of this segment, you'll have a more advanced understanding of how your power systems work.

SOLAR PANELS (PWR PRI: #1)
Solar panels are infinite power generation but each panel doesn't generate much power. As of right now (and of the December patch), solar panels do not require sunlight to provide power, so you can have them hidden or turned backward to take the appearance of armor anywhere on your ship and they will all evenly output power to your ship.

Solar panels provide VERY little armor to your ship, so don't go nuts, you need to find that delicate balance of infinite power versus armor.

Solar panels are always used as a top priority power source. In other words, your ship will automatically try and use all available solar power before trying to use any other power source.

BATTERIES (PWR PRI: #2)
Batteries do exactly what you think they do, they store power. When your ship has a surplus of power they will automatically set to charge mode. When your ship requires more power than what is available in the first power priority, your batteries will set to discharge as needed.

The operative term here is "as needed", which means your ship will not attempt to discharge all batteries at once if only one battery is needed. Your ship will cycle through the batteries as well, once one is depleted, it will automatically switch to the next battery without interrupting the power on your ship.

Batteries will also charge in the same manner. Your ship will attempt to charge batteries before any other device.

Veterans, listen up ( :P ) : This is how it is, no need to argue that, read the next line to understand why (Yes new folks, this can get confusing quick)

HYDROGEN GENERATORS (PWR PRI: #3)
Hydrogen generators generate your power, and a LOT of it, at the expense of a LOT of hydrogen. Yes, there are plans for nuclear power, but that is still far off (likely in Q1 2017).

Large Hydrogen Generators can be stylishly overlapped with each other to cram more than 3 generators in a 5x2 room.

Large Hydrogen Generators are also priority 3 in the ship's power grid, which means if your ship requires power and there is no solar power available or battery available, it will attempt to draw the power from your hydrogen generators.

Here is where it gets confusing. Because batteries have a higher priority than Generators, so do they have a higher charge priority. This means if your generator is on and has fuel, they will charge your batteries if there is excess power from the generators. Once the batteries charge, the generators idle back down (consuming less hydrogen).

Your battery to generator relationship is like an always on UPS system, not the "interactive" UPS systems we know and have on our computers, but the professional grade UPS systems that constantly feed the computers with power while the power source constantly charges that battery.

What that means, is, for every 1 power that is needed from the batteries, the generators will immediately try and kick in and charge that 1 power. When the generators are maxed out, it will just simply try and charge. This is why you'll notice when you move your ship having a hybrid generator/solar/battery setup, the device drain skyrockets, even after the batteries are charged, because while batteries are in their "charge modes" they inherently consume more power than in discharge mode. It is strange but I've personally seen this in many ship's power systems: an expected 1,000 power drain will turn to a 1,200 drain while the batteries are completely charged.

BATTERIES (PWR PRI: #3)
Batteries do exactly what you think they do, they store power. When your ship has a surplus of power they will automatically set to charge mode. When your ship requires more power than what is available in the first 2 power priorities, your batteries will set to discharge as needed.

The operative term here is "as needed", which means your ship will not attempt to discharge all batteries at once if only one battery is needed. Your ship will cycle through the batteries as well, once one is depleted, it will automatically switch to the next battery without interrupting the power on your ship.

Batteries will also charge in the same manner. Your ship will attempt to charge batteries before any other device.

POWER CELLS (PWR PRI: #4)
Power cells are surprising easy to explain. They are "instant power" such as a capacitor would be in real life. They charge and store energy and when the ship needs the power, they will instantly discharge all of its power if needed.

Most ships shouldn't need many of these. You should only ever require more than one small power cell if you are running devices such as large teleporters, cargo teleporters, and Rift Generators. For anything else you need to ensure you have the battery capacity on your ship to run them.

Power cells also discharge as a last priority and charge as the last priority.
INSTURMENTATION AND PANELS
The game gives you a lot of readouts in different forms in the game. This can become overwhelming to a new player so I'm going to step you through the most vital screens and give you a few tips on how to streamline these screens so you can use them to your advantage.

Remember that you can always bring up your GRIP device (Omni-tool mounted to your wrist) by pressing TAB. This is a dynamic menu that adapts to the ship you are CURRENTLY on.

COCKPIT CONTROLS
First thing to notate here is this game does NOT use aerospace flight controls, which means that the pitch up and pitch down are in reverse on aerospace simulations to simulate a real flight yolk pilots use in commercial aircraft by pulling back on the yolk or "steering wheel" the aircraft pitches up, and pushing forward on this "steering wheel" pitches the nose down. I do believe you can invert the control of your axis, though I'm not sure if this is implemented yet.

You have two flight modes, a mouse yolk and a "fly-by-button" mode.

UNIVERSAL KEYS
Q - Roll Left
E - Roll Right
R - Thrust UP
F - Thrust DOWN
A - Thrust Left
D - Thrust Right
W - Throttle Up (Warp Shift-Up)
S - Throttle Down (Warp Shift-Down)
X- All stop (Drops warp as well)

MOUSE YOLK
You can enter this mode by pressing tab while inside the cockpit. Moving your mouse will allow you to control your pitch and yaw.

"FLY BY BUTTON"
ARROW UP - Pitch Up
ARROW DOWN - Pitch Down
ARROW LEFT - Pitch Left
ARROW RIGHT - Pitch Right

ADDITIONALLY: In this mode you can use left click -and- hold on your mouse to also use the mouse as a temporary yolk.

COCKPIT INSTURMENATION PANELS
When seated in the cockpit you'll notice that you have some very interesting readouts on various areas of the cockpit. Each cockpit has 3 LCD screens that display separate information. Let's locate them here:


Depending on what side of the cockpit you enter, will determine what side the SYSTEMS panel is on. It will always be on the "WALL", so if you are in the left seat, it will be on your left, and if you are in the right seat, it will be on the right.

We'll start with the FLIGHT panel. The flight panel, like many panels, serves many uses and has a few modes. We'll start by going over what you see on this panel and then progress into the different modes.


Holy mother of... I bet you just said. This one screen takes some getting used to but, once you figure out where everything is, feel free to use this as a reference, you'll be able to just glance at this screen and get a good idea of how your ship is doing.

For the scanner or sensors mode, once you press that button you will be taken to a screen like this:


This is a very straight-forward and easy to understand mode. Each resource that you can mine is listed as an icon at the bottom of the screen (remember to check the IDENTIFYING RESOURCES section of this guide). On each side, the screen is "filters". You can click an icon to add or remove it from the scanner.

When you see resources gain strength on the scanner screen, you know that your crosshairs of the ship is very close to where that resource is. I'll leave you to figure out the patterns you need to employ to ensure your crosshair is centered on the resource before you take off after it, but it should be obvious from my example that in my crosshairs is water, nitrogen, and gold.

WEAPONS

To the weapons screen, you'll notice there are three lines of interest here. It is pretty obvious what each line is telling you.

The very top line, wherein the example you see "Default Group" these are your pilot controllable weapons group as you have set them in the Ship Editor. Don't worry, starting out you shouldn't need to know much about this line, only that if you notice it doesn't say "Default Group" press 1, to ensure it says that so you can fire your weapons.

Also, seeing the next line you'll notice that the line is red. This is your weapon and ammo indicator. Red means the ship's safety is enabled. To disable the ship's safety, press H and you'll notice that the font turns white and the red X beside it turns green with a checkmark, this means your weapons are hot and pressing spacebar will fire your forward-facing guns.

The next line, however, looks similar but is different. That line is for missiles. And if you have missiles in your primary group, when you press H (as in the ship's safety button) every missile in that group will fire (so put your missiles in separate weapon groups). This line will never turn red.

The last line simply displays what system you are currently in. When an admin or developer asks for a system ID (if they should need to try and retrieve your ship) they are looking for the alphanumerics that are in the brackets [].

SYSTEMS
The systems screen is likely the most labeled and should be very evident to what you are looking at and how to access a mode or sub-menu.

Addendum: SHIELDS

The numbers for the shields can be quite confusing so I hope to disambiguate that here.

Shield Strength numbers always look like so: XXXXX/XXXXX/XXXXX

For the sake of explanation, we'll call these groups of numbers between the slashes, groups 1, 2 and 3 respectively.

The first group is the current shield strength. The Second group is the power strength of those shields, for instance, if you have lowered the output of any shield generators, that will be reflected in the second group of numbers. And the last group is the overall capability of your ship to produce shielding.

Assuming you have 2 large shield generators (which output 5,000 shields each), and you set each to 100% power, it will look like this:

10000/10000/10000

If you are hit in combat, it might look like this:

4271/10000/10000

If you set the shields to half power, it will look like this:

5000/5000/10000

However, if you turn one generator off while they are all set to full power, it will look like this:

5000/10000/10000

Oddly, the second number doesn't care if your shield generator is offline or not, and by turning a shield generator offline your shield percentage bar will indicate 100%. So, for ease of reading purposes, it is likely better to turn a generator or two off rather than power them all down to say 10%.

I'll give a quick rundown of the modes (I'm running short of text in this section :P).

POWER MODE
First, you will notice advanced statistics. This is mainly your power statistics. This is very, very helpful in knowing how your ship's power is performing. This screen is the same on your GRIP device (TAB) as well as all consoles across your ship.


As you can see, you get a nice little line graph that shows an up-to-date read-out of your ship's power activities. Pressing the button in the lower right part of that menu (where my example is highlighted with a yellow box) you can change the mode of the right side between Power Group Selection and the Power Group Details. The Power Group Details will allow you to customize the lines that are shown in the line graph as well as gives you a detailed numerical readout of active power statistics of your ship.

This screen is invaluable for knowing what your battery capacity is, how much batteries you have left, and what your overall output vs your power deficit is.

SENSORS
Your ship's sensor screen (not scanner screen) can only be accessed from consoles throughout your ship and the new Engineering Console.

This allows you to view the statuses of various objects within sensor range of your ship, such as asteroids, ships, beacons, drones, and stations.

The most useful part here is ships. This feature allows you to click on a ship in your area and see what their shields are running at, what their armor is, what the life support looks like (so you can tell if there are players actively on board) and what cargo the ship is carrying >:-).

SURVIVAL (Most Important Section)
As a server administrator and server owner, I see a LOT of mistakes that just takes the wind out of my sails. I would like to one day see this game become very popular with massive amounts of players online concurrently, but from very simple mistakes I see players get disheartened that they lost their ship and died and ultimately quit the game.

Allow me to cover some basics here and give you a few tips on how to stay alive both in PVE and PVP.

START IN STARTER SHIPS
Sounds bad, you might want a custom ship, but the simple answer here is, the starter ship is cheap, and means nothing if you lose it.

So, use the starter ship until you get a great feel of the game and flight mechanics, then try and venture out with a custom design.

DO NOT UNDOCK IN WHAT YOU CAN'T AFFORD TO LOSE
After you upgrade from the starter ship, never, ever spawn the ship from the store-o-tron unless you can afford to lose that ship. Because the chances are very high you WILL lose that ship and those chances exponentially increase the longer you remain in space.

AVOID HIGH SPEEDS WITH SMALL SHIPS & LOW SHIELDS
If you can't sustain a full shield (at least 5,000 shields) DO NOT EVER go any faster than about 100m/s. When you travel through rifts, NEVER exceed 10m/s just before you enter the bubble, because your ship will start out on the other side at whatever speed you entered, so if you lag for a few seconds to load the new system while booking 800m/s, the chances of an asteroid-finding your ship and splattering its contents all over the new system is about 100%. Warp is very similar, if you enter warp for whatever reason at a speed faster than 10m/s ensure when you exit warp you use the X key for "all stop" because if you exit warp and lag for a moment traveling 800m/s, see my previous statement.

It boils down to this: if you hit an asteroid, ship, station, or rock, you will die. And if you didn't heed the advice of the tip above this one, sorry to say, but you start all over again. FLY CAREFULLY, ALWAYS.

AVOID PLANETS AND HIGH SPEEDS AROUND PLANETS
Just tonight, 3 players rage quitted because the pilot experienced a minuscule bit of lag as the server saved while he was approaching a base near a planet. He overshot the base during this lag and his crew of 3, and their only ship (cough 2nd tip) was lost.

HANDS OFF THE HACKING CONSOLE
Randomly connecting to ships with the hacking console will get you hacked. Most seasoned players will not think twice to disable your ship if not destroy it via hacks as a defense to an incoming connection. Just leave it alone until you need it or you're ready to take someone out.

CONSTANTLY MONITOR YOUR OXYGEN
Because you die without it.

DO NOT UNDOCK WITHOUT A TRANSPONDER
Transponders on a ship will broadcast your ship's name across the system. So if you do die, for any reason, you can make your way back to your ship (as it will be marked on the hud for you) and salvage an otherwise bad situation of having all your resources stranded in deep space with no way of knowing where it is.

WANT PVE? LEAVE HADRON
If you don't like PVP or want to entirely avoid it, just jump a few systems away from Hadron and you'll never see another player again.

IN EMERGENCIES, THE EXITS ARE HERE, HERE AND HERE
When all else fails, and you're about to die, press J.
GRAND SUMMARY
You should now be armed with enough information to get you ahead of the game and started without much of a headache or tutorial.

If you ever have any questions, feel free to add me as a friend and ask or jump on my server and ask:

[US-E] Divine Reapers [etc etc]
TIPS & SUGGESTIONS
Many "getting started" guides only show you how to... "get started". I hope this section will go above and beyond and help you make some great choices to set you up for success in the logevity of your gameplay.

HACKING DO NOT'S
You first need to understand what hacking in this game is. It is not a means of going out and getting third party software and cheating -- it is actually a built-in game system that allows you to breakin to a foes ship and wreck havoc including giving you unauthorized access to that ship and systems.

Some ships you will get will come with a hacking console or Electronic Warfare Suite. Simply clicking on any ship in that list will "ESTABLISH A CONNECTION" to that ship.

Many seasoned players like myself will automatically view these connections as hostile because of all the bad things that can be done once the connection establishes and therefor we will queue up a volly of life support hacks as well as weapon system hacks (to disable your ship and cause you to run toward a station) as well as buff our own firewalls to prevent an attack.

So, when you're first starting out, leave that console alone unless you're ready to pull that trigger.

THE NEXT SHIP
The starter ship isn't going to last long before the appeal wears off and you realize it is incredibly limited in what it can do. When that happens you'll be looking for another ship. If you are a builder/engineer by nature, feel free to head over to the ship editor and fiddle with that and build yourself a ship, or you can head over to the workshop and subscribe to a ship there to have it appear in your spawnable blueprints.

One ship I made myself for my own faction mates to get started on and learn the game with is called the DR Rocky:

https://steamhost.cn/steamcommunity_com/sharedfiles/filedetails/?id=693904143

It really doesn't look like much, it is not very fancy, but it is cozy, highly armored, and capable of pulling and processing resources and building components with its assemblers and 3-D Printers.

Once you get more established and are looking for a great crew-oriented mining ship, have a look at the DR Fedora:

https://steamhost.cn/steamcommunity_com/sharedfiles/filedetails/?id=703514489

Again it is not very fancy but the sheer amount of extractors and refineries on board puts this ship in a class of its own. Oh, and there are some armorments equipped that would give any would-be pirates a moment of pause.

JOINING A FLEET
When you join a fleet for the first time, don't get discouraged. Many established fleets will only allow you to do "grunt work" as a deck-hand. This is because someone with unfettered access to their ships that took many weeks of farming can undo that by simply getting in the cockpit and running the ship into an asteroid or by ejecting all their materials into space. So it is not uncommon to start out sitting in a room by yourself watching space fly by until someone finds a use for you.

STARTING A FLEET
I have just the Survival Guide for you!

https://steamhost.cn/steamcommunity_com/sharedfiles/filedetails/?id=691296039
CREDITS
Icons for resources were pulled from the Interstellar Rift wiki, which my wife (Breea) and I cleaned up for the developers as part of an effort to update and revamp the wiki.

The rest of the graphics were taken by myself from in-game footage.
13 Comments
Citrusblut 29 May, 2024 @ 1:19pm 
Hey, i have a question on the rep systeam. My buddy and I play the game for some days and we noticed the reputation is stuck aboud 1k points. Are we doing somthing wrong or what is going on? pls help.
Chip Patton  [author] 21 Apr, 2022 @ 7:46pm 
@lasserRAYgun - This guide has is some 7 years old and grossly out of date (I'll be working soon on updating it). My point isn't that it was here (but it was) rather than if you give it another shot, remember to also bring coolant with you as well. It's not good enough to have oxygen now, you have to have coolant for your climate control devices to keep your ship cool/warm.

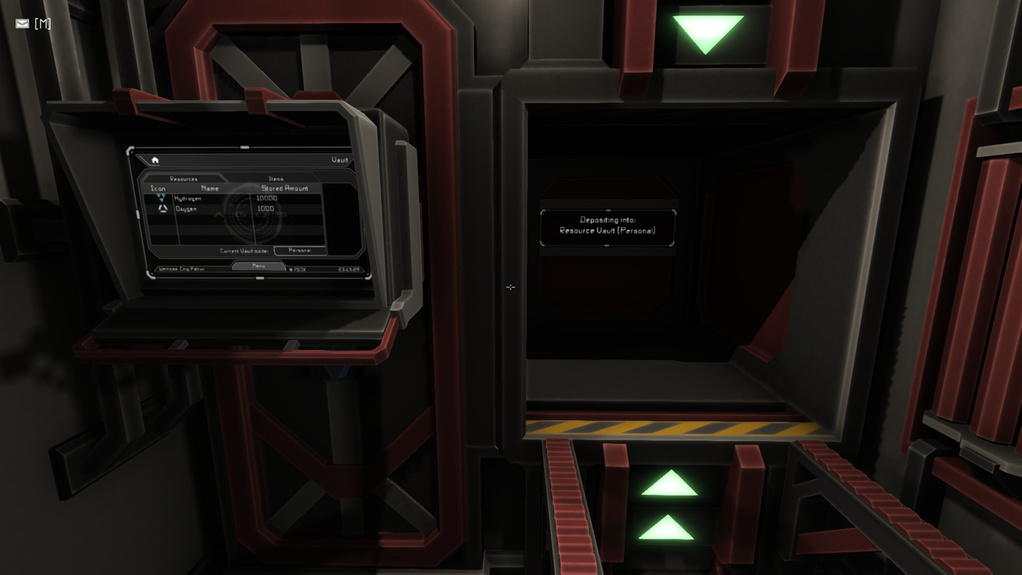
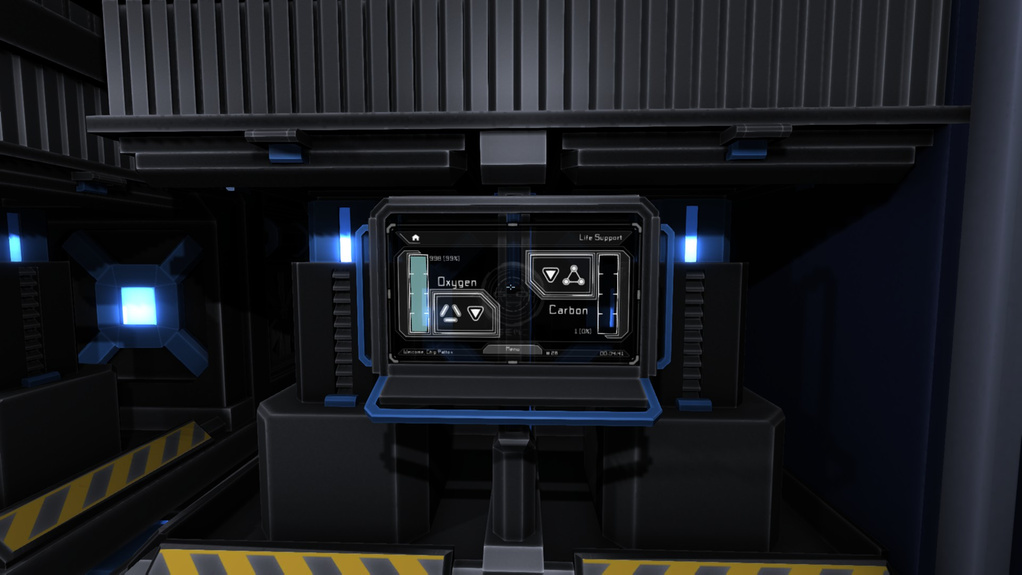
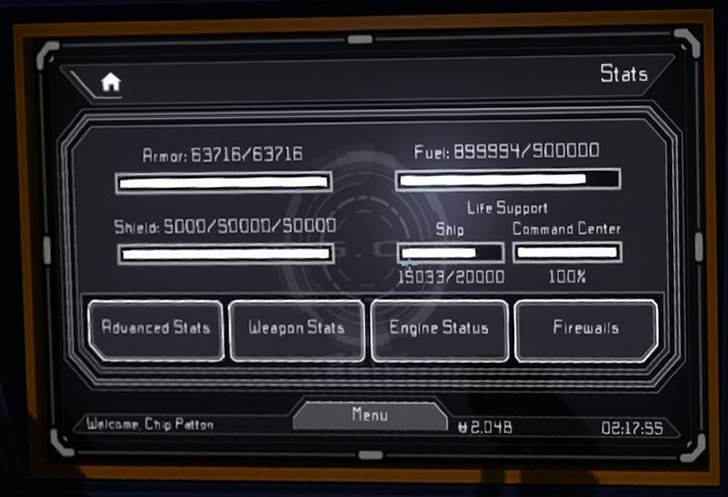
It's to a point that most systems for life support have to be micromanaged now. You found out the hard way about the oxygen... But now you have coolant and heat syncs with heat built up on them that you have to take with you - you'll need the coolant when you're close to a star and the heat syncs to create heated coolant to heat the ship when you're far from the star.

Yeah, that added a whole new way of micromanaging your ship lol
laserRAYgun 21 Apr, 2022 @ 2:15pm 
I got this game a few years back. I don't think there was a tutorial or if there was I didn't see it. I had no clue what I was doing. I managed to build a ship from the workshop (5k hours on Space Engineers gave me some idea of how to fake it). Boarded my new beautiful ship and died :( No oxygen. So I quit. Thank you for this instructional guide.
JC 9 May, 2021 @ 2:54am 
Thanks a lot
Crecka 1 May, 2020 @ 11:55pm 
The developers should hire you. This game has so much potential but is wasted by a lack of effort to explain the game to new players. How hard could it be to construct a good in-game tutorial? Might even help to sell more copies.
richard.e.jenkins 13 Feb, 2019 @ 6:18pm 
Thanks!
Tomcat 6 Jan, 2019 @ 4:53pm 
still helpful even in 2019
mardon40dc 6 Jan, 2019 @ 1:03am 
Thank you. New player, decided to finaly (purchased the game last summer) get into the details about the game .....the control panel (as a pilot) was almost straight forward.....some detail system info had me stumped...Thanks again.
clone6 21 Aug, 2017 @ 8:17pm 
cheers bro
Solarflare 9 Jul, 2017 @ 8:55am 
Thank you very much. This was very informative.