ENSLAVED™: Odyssey to the West™ Premium Edition

ENSLAVED™: Odyssey to the West™ Premium Edition

299 ratings
ENSLAVED™: Odyssey to the West™ Premium Edition - 100% Complete Achievement Guide
By FelixDracul
Welcome to my first achievement guide! This is for all you completists out there to help you give this game that finishing touch!
4
2
   
Award
Favorite
Favorited
Unfavorite
Introduction


Hello and Welcome to my ENSLAVED™: Odyssey to the West™ Premium Edition Complete Achievement Guide. Here I will be writing my views and general information regarding this game. If there are any errors or mistakes in this guide please inform me so that I can correct them and improve the guide.

Enslaved is a fantastic game with a very unique, biopunk theme. But the game suffers from various bugs which make progressing through the game and obtaining achievements (One in particular) a bit hard. However, I found that the key to most of the bugs is playing the game with your overall graphic setting set to "Low". So playing the game with "Medium" or "High" settings should keep you away from most of the bugs.

I have created this guide to earn all achievements in the main game through two playthroughs. First playthrough should be done in Easy difficulty. You can earn all except 4 achievements in the first playthrough. Second playthrough should be done in Hard difficulty. You can earn the other 3 achievements in the second playthrough.

Please note that I have not included a guide to find all the Tech Orbs and Masks. Since there are many other detailed guides for this on Steam, I did not include a guide for this. But I have included my personal Save file in which I have collected all the Tech Orbs and Masks except 1 Orb and Mask in the final Chapter. This will allow you to gain both the achievements. The Save file and the location of the final Orb and Mask in the Save file can be found under their specific Achievement titles.

This is the default save file location of ENSLAVED™: Odyssey to the West™ Premium Edition.
C:\Program Files (x86)\Steam\userdata\[Your unique id]\245280\remote

Please post your feedback in the comments and don't forget to rate! =D
Story-Related Achievements

Free!
Complete Chapter 1.


Sightseeing
Complete Chapter 2.


Up on the Roof
Complete Chapter 3.


Caught a Show on Broadway
Complete Chapter 4.


Escaped New York
Complete Chapter 5.


A Bridge Too Far
Complete Chapter 6.


There You Are!
Complete Chapter 7.


Windy Passage
Complete Chapter 8.


To Meet a Pig
Complete Chapter 9.


What a Pig
Complete Chapter 10.


Swine Flew
Complete Chapter 11.


Sub-way
Complete Chapter 12.


Anchors Away!
Complete Chapter 13.


Smoky Bacon
Complete Chapter 14.


Freed The Slaves
Free the slaves.

Mission-Related Achievements
Got Your Back
Rescue Trip 3 times after she has performed an EMP.


Trip will use an EMP when a mech picks her up and tries to kill her. Some of these trigger automatically so you will get this achievement automatically while playing the game. The EMP needs time to recharge so don’t try to use this in a row to get this achievement. Here are the few instances she uses the EMP,

  • Early in Chapter 2 (Automatically triggered).
  • After you disable the turret let the incoming mechs go to her (Chapter 2).
  • Late in Chapter 2.

There are some other instances as well, but you can get this very easily. Simply restart the Checkpoint after she introduces the EMP midway through Chapter 2. Do this till you get the achievement.


Bad Doggy
Rescue Trip from the Dog in less than 36 seconds.


This achievement can be earned in Chapter 9. This is a bit of a hard achievement. Especially if you’re planning on collecting all the Tech Orbs in this Chapter. First, instead of collecting orbs and getting the achievement, familiarize yourself with the track. You will have to go through every speed boost if you want to get this achievement. Since you may have to replay this part a couple of times, I suggest creating a backup save right at the moment you start the chase. This way, if you fail to get the achievement, you won’t have to play the whole chapter again. The achievement should pop up just when the end cutscene starts. If it doesn’t, load your backed-up save file and start from the chase again. Playing the Chapter on easy mode helps a lot to get this achievement.

For those who are planning to collect all the Tech Orbs in this Chapter, you may have to play this 3 times. First time is to get this achievement. After you got that, load up your backed-up save and start at the chase again. This second time is to collect the most common orbs you can find. After you got that, you will have to start the whole chapter again (Do not load the backed-up save this time since it will wipe out the common Orbs you found while you played for the second time.). This third and final time is to find all the uncommon or hard-to-reach Orbs you couldn’t get the previous time.


You Swine
Beat Pigsy to the top of the Decaying Titan.


This race happens early in the Chapter 10. This might be bit of a close call and you may have to try this multiple times. Familiarizing yourself with the environment during this race really helps.
If you’re planning to collect all the tech orbs, you will have to play this race two times. First, get the achievement. Then restart from the checkpoint and collect all the Orbs.


Matador
Kill the Rhino without getting hit by his Charge Attack.


You will face the Rhino at the end of Chapter 11. You simply have to roll sideways when the Rhino is charging at you. Keep running in circles to easily avoid its Charge attack. You can utilize your Cloud during this sequence too. If it hits you with its Charge attack, restart from the last checkpoint and you will still get this achievement. You will still get the achievement if you get hit by its Stomp attack. Just be mindful of its Charge while you’re aiming your staff to shoot the bombs and fuel cells.


Got the Horn
Rescue Trip from the Rhino in less than 35 seconds.


This is another chase sequence like in Chapter 9. Again, familiarize yourself with the track. You will have to go through every speed boost and do not stray away from the track. Even for a little bit. Much like in the “Bad Doggy” achievement, I suggest creating a backup save when the chase starts since you won’t have to play the whole Chapter if you fail. The achievement should pop up just when the end cutscene starts. If it doesn’t, load your backed-up save file and start from the chase again. Just like before, playing the Chapter on easy mode help a lot to get this achievement.

If you’re planning to collect all the Tech Orbs in this Chapter, you may have to play this 3 times. Exactly like I have described in the “Bad Doggy” achievement.

Combat-Related Achievements
Lover, Not a Fighter
Sneak past a group of enemies without alerting them.


You can do this to enemies who are in sleep mode. Be careful not to step into their circles because this will activate them. Great places to do this achievement are Chapter 2 and in the beginning of Chapter 3. You will see enemies in sleep mode. In Chapter 2, simply follow the path without stepping into their circles. In Chapter 3, you can go over the sleeping mechs using the climbable path.


Mined the Gap
Knock an enemy back into a mine.


You can easily do this in Chapter 2. You will come across a large area with a broken bridge and a lot of mines. While progressing through that area, a single mech will be activated and start attacking you. Stun attack (Charge attack) can be used to knock the mech to a direction of a mine.


Over Here!
Distract 20 different enemies.


Press “Q” to perform a distraction. You must do this to enemies who are not currently targeting you. Simply distract ranged and melee enemies unaware of you when you go to a new area. You can’t distract the same enemy to get this achievement.


Stunning
Stun 75 different enemies.


You can stun enemies in two different ways. You can use the stun attack (Charge attack) or you can use the staff and shoot them with stun ammo. “Stun Effect” staff upgrade can help you very much with this achievement as it will stun multiple enemies near where you fired the shot. You can’t stun the same enemy to get this achievement so stun every enemy you meet before killing them till you get this achievement.


Out Cold
Stun 3 enemies at once with a Radial Stun Blast.


To get this achievement, you must acquire the “Stun Effect” staff upgrade from the upgrades menu. You can easily use this to stun 3 enemies who are melee attacking you. Just aim at the middle and shoot.


Kebabed
Kill 3 enemies with a penetrating Plasma Blast.


You have to acquire the “Punch Through” staff upgrade from the upgrades menu to give your plasma blast the ability to punch through enemies. You can combine this achievement with the “Out Cold” achievement. Stun 3 enemies using the Radial Stun Blast and shoot through 3 stunned enemies. You may have to try a few times to get 3 of them to line up.


Close Call
Kill a Broadcaster with 1 second on the clock


You may encounter mechs with a countdown on their head. These are broadcaster mechs and they will call for reinforcements after the countdown reaches 0. So to get this achievement kill all the mechs around the broadcaster mech and stun the broadcaster with Radial Stun Blast around 3 seconds on its counter. Then move away from the mech and after it’s activated shoot it with a plasma blast right when it hits 1 second. Or simply stun the broadcaster mech at 1 second (Using Radial Stun Blast) and kill it.


Boom!
Use the Bomb Takedown to kill 2 enemies.


You will be introduced to the Bomb Takedown in Chapter 5. You will get to use it with a group of mechs who are in sleep mode. Before activating the mech group with the bomb takedown, go to your left and you will see 2 more mechs (1 is an EMP resistant mech). Activate them, but don’t kill them. You have to let them follow you to the other sleeping mechs (The ones with the bomb takedown mech in them). Use distract (“Q”) if you see any mech going towards Trip. After activating all mechs, you will be swarmed by 5 mechs. Attack the bomb type mech first and use takedown on him. After the screen prompting you to use the bomb using “Space” throw the bomb to the swarm of mechs. Since there are 4 mechs, you will easily kill at least 2 enemies this way.


Role Reversal
Use the Gun Scout Hijack to kill 10 enemies.


Some of the shooting mechs will have a crosshair icon above them. Attack them till you get the takedown option and use takedown. Now you will have their gun. Use this gun to kill ten enemies. Note that you will you will drop the gun if you get hit by a melee attack. You can get this achievement through repeating the same checkpoint. Turret kills don’t count towards this achievement.


Double Punch
Kill 25 shielded enemies with a Stun Blast then Plasma Blast combo.


The mechs with blue shield are your targets for this achievement. Shoot them with Stun Blast and then kill them with Plasma Blast. They spawn heavily in end missions.


Mech Murderer
Kill 200 enemies.


You will naturally obtain this achievement through your progression of the game. All types of mechs count towards this achievement.


Counterintuitive
Perform 20 Counter Attacks.


You will have to purchase “Counter Attack” (45,000 Tech Points) from the upgrade menu first. It will greatly help to have “Combat Awareness” (5,000 TP) upgrade too. Simply keep blocking till an enemy start to attack you (Enemy will turn red with Combat Awareness). Press use (Default 'E'. Thanks "Fallen Kal") right before it hits your shield. You will perform a Counter Attack then. Counter Attacks done to the same enemy will count towards the achievement.


Attacks Evasion
Perform 20 Evade Attacks that hit an enemy.


You will need to purchase “Evade Attack” (50,000 TP) first. Press “Space” to roll towards an enemy and follow it up by an attack (LMB). You will perform an Evade Attack. Evade Attacks done to the same enemy will count towards the achievement.


Headcase
Headshot a Demolition mech 20 times.


You can find Demolition mechs only in Chapters 2, 3, and 10. Chapter 10 will be the easiest to do this since by then you will have a good ammo capacity on your staff. You can use both types of ammo for this achievement. Use EMP ammo to stun it first and then headshot it by Plasma ammo. If you run out of ammo let yourself die and repeat. The counter does not reset when you die.

Miscellaneous Achievements
Invincible
Complete a Chapter without dying (Except Chapter 1).


You will probably get this achievement while normally playing through the game. Chapter 6 is an easy place to do this since it’s a pretty short level and there are no places you can fall off, no shooting mechs and bosses.


Untouchable
Complete a Chapter without losing any health.


The easiest Chapter to do this is Chapter 1. There isn’t a HUD but you screen will flash red if you lose your health. Play this chapter on easy with the Combat Awareness upgrade. It’s okay to get you shield damaged, but don’t let your health drop even a bit. Melee attacks and fire directly damages your health. Be careful around the shooting mech and with the melee mechs, block with your shield when they attack. You’re going to have to time your jump at the last part where there is a huge fire. If you lose your health you don’t need to restart the Chapter. Just restart from the last checkpoint and play again. You will still get the achievement. I suggest playing throught the game for a while to get familiarize with the controls and mechanics and then revisiting the Chapter 1 to get this achievement.


Trainee Monkey
Complete all chapters on Easy.


Monkey Magic
Complete all chapters on Normal.


Great Sage Equal of Heaven
Complete all chapters on Hard.


Enslaved Odyssey to the West is a pretty easy game. So you wouldn’t have much trouble completing this even on hard difficulty. Especially if you have already completed the game on Easy. You can also play the game in Hard difficulty through Chapter Select and still get the achievement. I suggest this method because you unlock cheats after completing the game once and they will make the second playthrough a lot easier (You can only activate one cheat and activating a cheat doesn't affect your achievement progress). If you haven't gotten them before, completing the game on Hard difficulty unlocks Easy and Normal difficulty achievements as well.

Miscellaneous Achievements (Continued)

Check My Weapon!
Purchase all Staff Upgrades.


There are a total of 12 upgrades in this category. You will need a total of 337,500 Tech Points to buy them all.


Fighting Fit
Purchase all Combat Upgrades.


There are a total of 6 upgrades in this category. You will need a total of 247,500 Tech Points to buy them all.


Shielded from Harm
Purchase all Shield Upgrades.


There are a total of 8 upgrades in this category. You will need a total of 237,500 Tech Points to buy them all.


Tough as They Come
Purchase all Health Upgrades.


There are a total of 7 upgrades in this category. You will need a total of 390,000 Tech Points to buy them all.


Fully Loaded
Purchase all Upgrades.


There are a total of 33 upgrades in the game. You will need a total of 1,212,500 Tech Points to buy them all. Even if you have collected all the Tech Orbs in you first playthrough, it would not be possible for you to get this amount of Tech Orbs. You can either do a second playthrough or beat Chapters with high amount of enemies (i.e.: Chapters 6 and 11) repeatedly to get Tech Orbs dropped from defeating mechs.

Tech Orbs and Masks Related Achievements + Save File
Tech Collector
Collect half of the Tech Orbs.


If you have been collecting every Tech Orb since the beginning, you will get this achievement in Chapter 7.


Tech Curator
Collect all Tech Orbs.


This is undoubtedly the hardest achievement in the game. For me personally, few of the Orbs were bugged which caused me to replay some Chapters many times to get those Orbs. So this may cause you to replay Chapters few times. You can see your Orb progression in Chapter Select. Since there are a lot of very detailed guides on Steam (And on the Internet) for Tech Orbs and Masks collecting, I did not include a specific guide for this.
However I have included a save file of my playthrough in which I have collected all the Tech Orbs and Masks except a single one of each in the final Chapter (Chapter 14). Here is the Google Drive link to the save file[drive.google.com]. For those who are having issues with the Drive link, below is a Dropbox link to the save file. Steam seems to break the Dropbox link's query parameters when masking the link when you directly click on it. So highlight the link below with your mouse, copy, and paste the link on a browser to correctly access the save file.


I have uploaded pictures of the location of final Mask in "Mask Curator" achievement below. And the picture below show you the location of the final Orb.


You can find this orb in the starting area of Chapter 14.


Mask Collector
Collect half of the Masks.


You must collect 13 of the total of 26 masks. If you have been collecting every mask from the beginning, you will get this achievement in Chapter 7.


Mask Curator
Collect all Masks.


Collect all the 26 masks. Since there are a lot of guides on Steam for Masks and Tech Orbs collecting, I did not include a specific guide for this. However, check out the "Tech Curator" achievement above for my save file to get the last Mask and Tech Orb.
If you did use my save file, the set of pictures below show you where you can find the last mask.


The last mask is on the left side of the platform entrance you reach after Pigsy fires the main cannon for the second time.


Pigsy's Perfect 10 Achievements
A Moment to Savor
Pigsy's Perfect 10: Reach the top of Dead Man's Peak.


Story related and cannot be missed


Build a New Friend!
Pigsy's Perfect 10: Find all the parts to build Perfect 10.


Story related and cannot be missed


What can possibly go wrong?
Pigsy's Perfect 10: Complete all chapters.


Story related and cannot be missed


Perfect 10
Pigsy's Perfect 10: Finish the Shooting Gallery under 40 seconds without shooting any pin-ups.


This is one of the very first things you have to do when you start the Chapter 1. Familiarize yourself with the aiming of the gun and target rotations/locations. Do not shoot the female targets. You can always replay this Chapter after having more practice with the gun while progressing through the game.


Best Best Friend
Pigsy's Perfect 10: Ally a single Mech 2 times.


You will get the Ally device in the Chapter “Organized Chaos”. After using it you will be able to Ally enemies in range of the device for a short period of time. At the start of the Chapter there is a turret to your left. Simply crawl your way to the turret while hiding behind covers and use the Ally device near it. Just use the Ally device on the turret twice. It’s worth noting that the device’s effect bypasses covers. You can use this to your advantage.


Ultimate Pork Roast Recipe
Pigsy's Perfect 10: Use all 4 devices on one enemy.


This can be done after you unlock all 4 types of devices. There is no specific Chapter to use this. It will be easier to use try on an area with a single melee mech. You just have to lure the melee mech near you using a Distract device (Preferably while you’re hiding behind a cover). Then use an EMP device to stun it. Then use an Ally device on it followed by an Explosive device. Use the Pigsy’s Stun Prod to stun it if it wakes up before you finish this.


Quadruplets
Pigsy's Perfect 10: Ally 4 enemies using one single Ally device.


This can be done in the Chapter “Under Attack”. After you killed all the enemies in the platforms, climb it. After climbing to the 2nd platform, a cutscene will be played. After that, 4 melee mechs will spawn and start running towards you. Hide behind the cover on the edge of the 2nd platform and plant an Ally device there (Images below). After the first mech climbed the 1st platform, throw a Distract device near yourself on the 2nd platform. You can use the Stun Prod to stun the first enemy near you if you want. After all the 4 enemies are in range trigger the device. Do not fret if you got this wrong the first time. Simply let yourself die (Do not use “restart from the last checkpoint” as it will restart the whole Chapter) and you will start again in the cutscene.


Place the Ally device around here.


Throw a Distract device here when the first mech climbs the 1st platform (Timing is everything).


Detonate FTW!


You can also use the same method I have used in the “Four Birds, One Stone” below. However, I do not recommend trying the both achievements at the same time.


Four Birds, One Stone
Pigsy's Perfect 10: Kill 4 Mechs with 1 Bomb device.


This can be done in the Chapter “Under Attack”. I have seen a popular method of getting this achievement by using a Distract device to get the 4 melee mechs (The ones that spawn after you reach the 2nd platform. If you’re trying this method, do not pull the lever up there as the turret will kill all the incoming mechs) to a single place and then using an EMP device followed by bombing the now huddled up and disabled mechs. But for me, a possible bug in the game caused all the mechs in my playthorough to walk around the Distract device and not go near it. So I have created another way to get this achievement as show below.

After you started the Chapter “Under Attack”, eliminate all the melee mechs using your devices (Distract, EMP and Ally are the best ones). After that you’ll be left with the ranged mechs on the platform. Kill all the ranged mechs on the 1st platform. After killing all the mechs in the ground and 1st platform, 2 mechs on the 2nd platform will remain. Kill only one of the 2 mechs on there. Then more mechs will spawn. Keep killing the spawning mechs on the ground and 1st platform, but do not harm the mechs on the 2nd platform. After killing all the other mechs you will be left with 4 shooting mechs on the 2nd platform. Now go and hide under the 1st platform (Images below). And keep using Distract devices on the 2nd platform to herd the mechs near each other. You have to be careful not to let mechs shoot each other or let them drop down to the 1st platform while using the distract device. As soon as you see all of them huddle up to each other, use an EMP device on them. However, be careful not to let your EMP affect the turret above since using an EMP on that turret activated it and killed all the mechs on that platform in my playthrough (Possible bug). After they are disabled, quickly go near them and use a Bomb device and detonate it.


The isolated 4 enemies.


After that, hide under the 1st platform.


Throw an EMP device when all 4 of them are huddled like this, but be careful not to stun the turret.


Voilà!


You can also use an Ally device to get the “Quadruplets” achievement with the above method, but I don’t recommend trying to get the both achievement the same time since the stun duration might run out and they would attack you.


Stunning!
Pigsy's Perfect 10: Stun 5 enemies using one single EMP device.


This can also be done in the “Under Attack” Chapter. The deactivated turret on the 2nd platform counts as an enemy. So isolate 4 shooting mechs as described in the above “Four Birds, One Stone” achievement. Then throw an EMP device to cover the 4 mechs and the turret.
Or you can use a Distract device to lure the 4 melee mechs near the turret (Don’t pull the turret lever) and then throw and EMP device to cover the 4 mechs and the turret.

Pigsy's Perfect 10 Achievements (Continued)
Dinner Date
Pigsy's Perfect 10: Collect all hidden food and pin-up girls.


Use your Green Lens excessively in every area. Most of them can be found this way. Food and Pin-ups are show in a much darker shade when you use the Lens. There are a few Food and Pin-ups in certain Chapters that you may have go back to collect again if you die. You can see your Pin-up and Food progress in the Chapter Select.


Below here is the guide to find all the hidden Food and Pin-up Girls.


A Man of Action:

Pin-up: After using the grapple for the first time, turn around and the Pin-up is to the left of the gap you climbed up. (This is just after the sniper rifle training).
Food: Soon after you get the Pin-up, you will learn how to drop down. The camera will shift to look at a grapple to the far left; the Food is at the end of the platform that you are on when the camera shifts, before you grapple across.

Dead Man’s Peak:

Food: You should reach a platform when Pigsy says something like “This used to be the biggest mech in town”. Behind a wall on the right side is a Food.
Food: As you climb the mech you should fight a single enemy then a group of two. Use three more grapple points and then the camera suddenly shifts behind the platform. The Food blends well with the scenery and is easy to miss.

Going Down:

Food: After the cutscene showing you get the first piece (an achievement should pop) go down twice and descend using the grapple. The Food is just behind you.
Pin-up: After the previous Food, grapple down once more and it is in the corner opposite the exit. (Just before the Pigsy Prod tutorial).

Old Roads:

Food: Once you get past the turret and grapple down, look behind you for a grapple point. The Food is on that platform.
Food: You will get to an area with 2 shooting mechs and 3 melee mechs. If you climb up to the vantage point like the game says, you will have to grapple down a wall to a platform below the mechs. It is on the platform next to where you land.
Food: Once you have defeated all the 2 shooting mechs and three melee mechs in the next area, before you leave through the red-leaved pathway there is a grapple point behind you.
Food: There will be a grapple point that you have to shoot to be able to use. Shoot it three times then grapple down on it, and the Food is just off to the left.
Pin-up: Drop down from the platform with the Food on above and move towards the camera to find a little secret area with a Pin-up.

A Welcome Distraction:

Pin-up: Sneak past the turret, then past the next 4 mechs to a grapple point. Sneak past the two shooting mechs here, enter the building and look to your right for the Pin-up.
Food: Drop down the grapple point in this same room and look behind you, it’s in the corner.

Jaws of Death:

None.

Bare Bones:

Food: As soon as you start, kill the mechs and go along the path behind you, it is at the end of it.
Food: After killing the mechs in the area you will come to the entrance of a pipe. Before entering, look to the right hand side of the pipe entrance.
Food: Enter the pipe and go to the right.
Pin-up: Kill the mechs after exiting the pipe and grapple to the top of that building. Climb down a level and go to the right instead of continuing left to find this Pin-up.
Food: Keep going until Pigsy says that the scrap processing plant is around the corner. There is a little wall on the left that the Food is behind.

Spring Up the Pipe:

Pin-up: After passing the turret and grappling up a few levels you will see more mechs. To the left of the first group is a Pin-up. It is difficult to get to so I would suggest using an EMP or Distract device on them.

Organized Chaos:

Food: Again, there is a path behind you that leads to another Food package.
Food: Drop down from the first area after you used Ally device on the turret and in a pipe behind you is another Food package.
Food: Go over the bridge that is just beyond the turret's reach and the package is around the corner on the left.
Food: Continue on for a while and you will reach a large group if enemies with one Electric mech. Kill all of the mechs in this area, pull a lever and drop down. Got towards the camera at the end of the walkway instead of continuing forward.

Important: If you start the level refinery and die you need to go back to collect the last Food in Organized Chaos.

The Refinery:

Pin-up: Kill the mechs in the starting area and grapple up to the walkway on the left. Follow it around to find the Pin-up.

Old School Mayhem:

Pin-up: This Pin-up is just beyond the column that you have to destroy that is just in front of you at the start. You need to destroy the turret first to make things easier.
Food: Destroy the turret, grapple to the island it was on and then climb up the pipe walkway. Few mechs will appear. Kill them, and just beyond the first semi-circle of cover is the Food.

The Furnace:

None.

Under Attack:

None.

Out On the Trail:

Food: As soon as you see the Chapter name pop up (mid-gameplay) look to your right to see a metal grate that you can blast through using a Bomb device.
Food: Back on the main path and just around the corner is the next Food. It is in the bushes next to the slimy water.
Food: Keep following the main path and it should branch off to the right on platforms across the slimy water. Before you cross the river, carry straight on and jump over a metal bar to find a Food.
Food: After climbing and descending on the main path for a while, you should come to a metal platform in the middle of a swampy area. The main path branches to the right, but the Food is straight ahead. Difficult to miss.
Pin-up: After the previous platform you will jump across sinking platforms and grapple through a window. The Pin-up is on the left, behind the camera.

Important: If you die at the turret just ahead you will need to go back and collect the Pin-up again.

Hounded:

Pin-up: When the chapter starts look behind you. It’s on the side of the small square container.
Food: After opening the door to escape the dog mech, the Food is just in the corner, easily visible on the main path.

Leaving Home:

Food: After grappling off the raft, the platform will start to collapse, but don't grapple onwards, instead go backwards on the path. It blends into the scenery, even while using the Green Lens.
Food: After you kill two shooting mechs in the main path, go away from the camera behind the wall and drop down to find some Food.
Food: Follow the path round a bit further and there will be a wall of rubble to your left. Go around it and its just on the floor (the platform this is on has small blue strips on it).

Down the Tubes:

Pin-up: Drop down two levels until you are on a ledge with a lever and door on it. Follow it around all the way to find a Pin-up on the wall.
Food: When you see a container and a fan (after the lift area) you will see a turret ahead. Stun it, and then blow it up. Blow up the fan behind it and there's a Food round the corner.

The Depths:

Pin-up: Shoot the box to disable the electricity, kill the mech and then the shooting mech in the distance. There is then a T-junction in the path. Follow it left to find the Pin-up.

End Notes
[8th of December, 2016] Guide created; thumbnails, sections, and content added
[9th of December, 2016] Minor fixes
[10th of December, 2016] Save file added
[20th of December, 2016] Pigsy's Perfect 10 achievement details/walkthrough added
[15th of January, 2017] Minor fixes
[14th of September, 2019] Minor fixes
[20th of October, 2021] Updated the broken Google Drive link for the save file.
[16th of January, 2025] Updated the broken Dropbox link for the save file.
53 Comments
FelixDracul  [author] 19 Jun @ 2:51pm 
Very happy to hear that it worked!

No worries at all. I'll always keep my guides up to date as long as I'm able.
Neptunus 16 Jun @ 9:20am 
Followed your instructions and got the file!

It's amazing that after all those years, you still keep track of the guide and gave such a quick response.

Hats off to you!!
FelixDracul  [author] 16 Jun @ 6:24am 
Hey, thank you for the kind words. Hope this helped for your achievement hunting.

I updated both the Google Drive and Dropbox links again. But it seems like Google Drive blocks sharing when the uploader and viewers' regions are different, so Dropbox is the one that should work. And make sure to highlight the full link with your mouse, then copy and paste the link to your browser. Cause the Dropbox link's query parameters seem to break when Steam masks all external links, so directly clicking on the link gives a broken link.
Neptunus 16 Jun @ 5:56am 
Hellon thank you for your amazing guide!

I'm possibly late to the party and both links for the save file don't work, as google drive is asking for permission and dropbox has this "can’t load without file extension" message. Is there any way to re-upload?
Alanther 5 Jan @ 7:43am 
In games with mods to improve graphics or translations, do achievements still work? I did chapter 1 without taking damage (the screen didn't turn red at any point) just skipping the cutscenes and I didn't get the achievement
staticsnake 4 Jan @ 6:35am 
For "Out Cold" and "Kebabed" I got them fairly easily after having fully upgraded everything, on easy, at the end of Chapter 3. You come across 4 sleeping mech's. You can round them up in a corner and blast them with the Stun to stun them all for Out Cold.

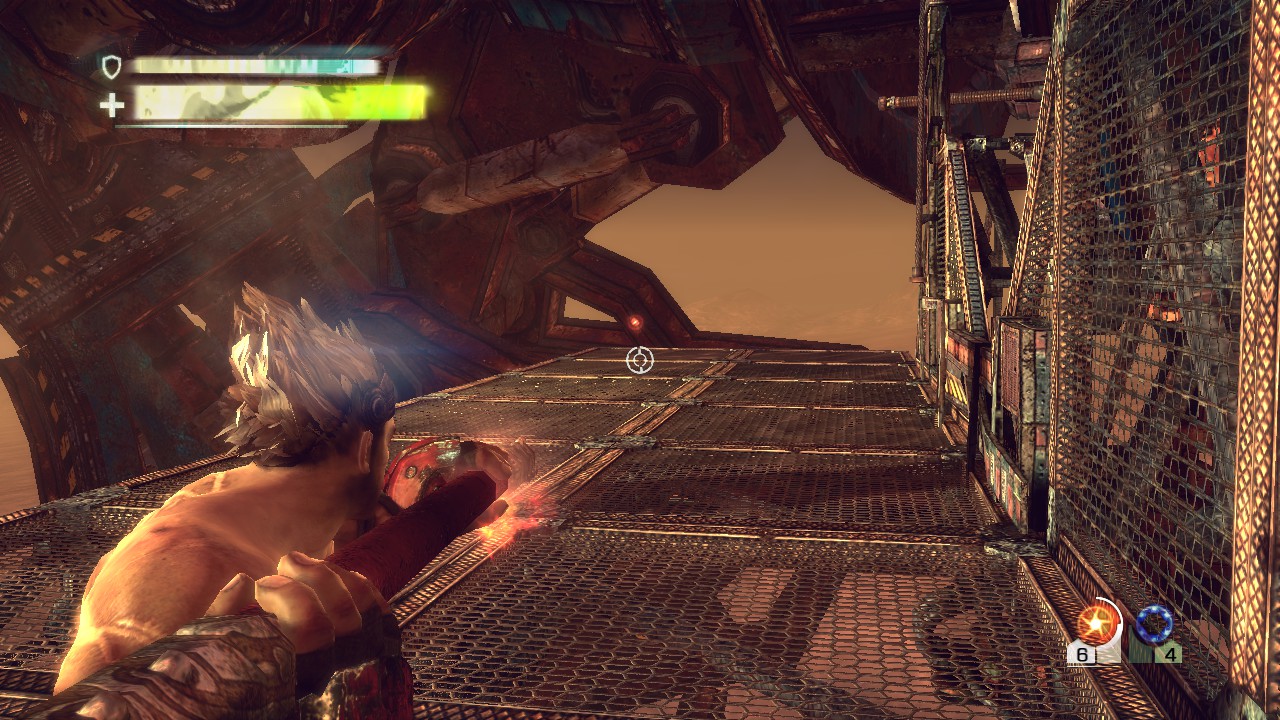
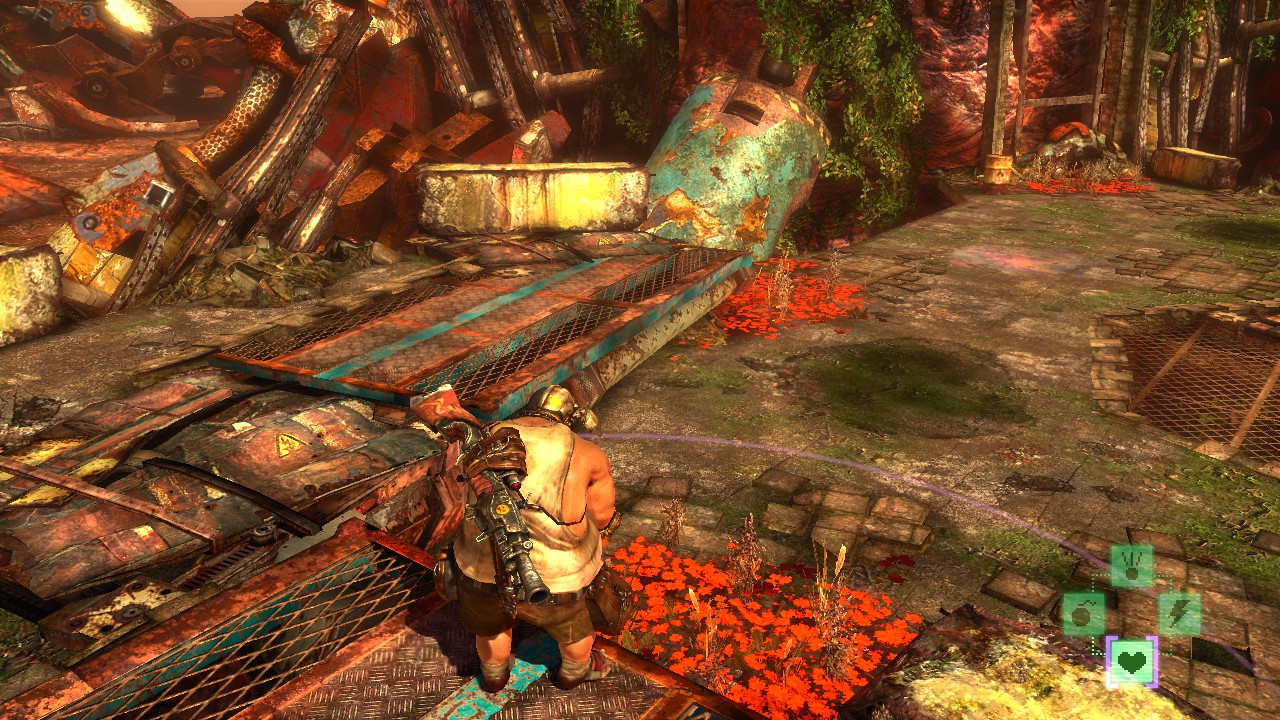
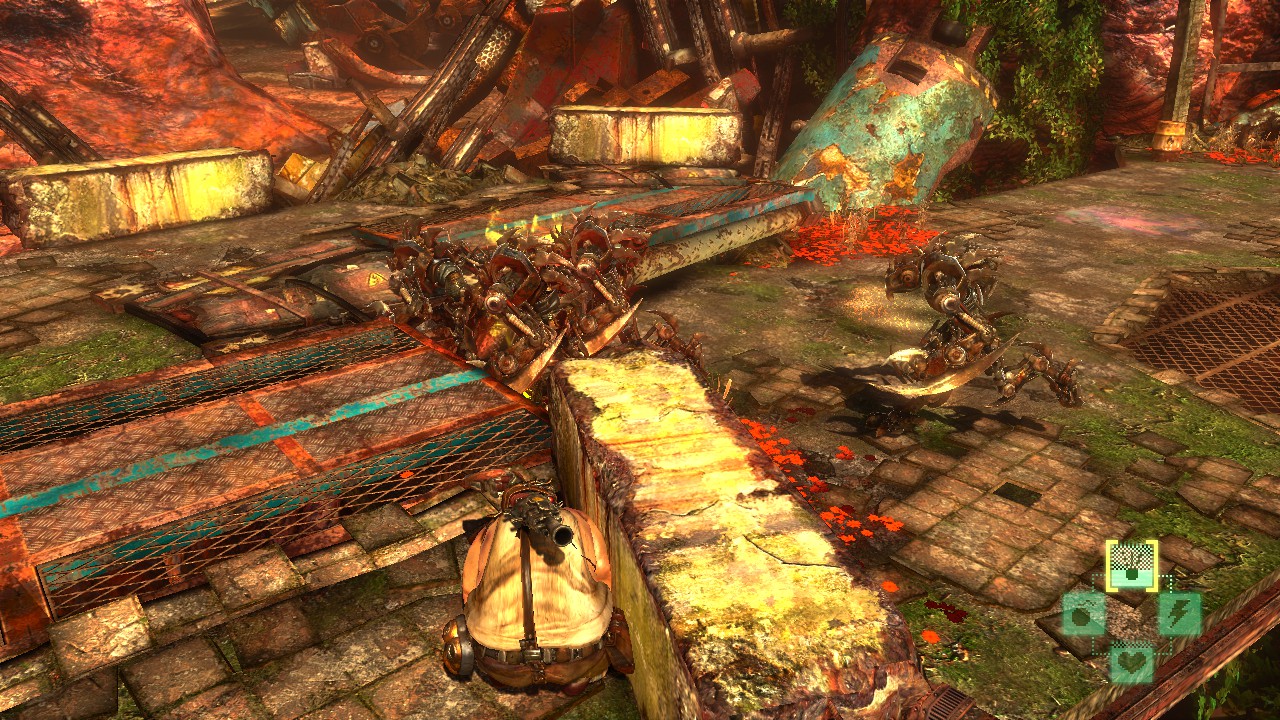
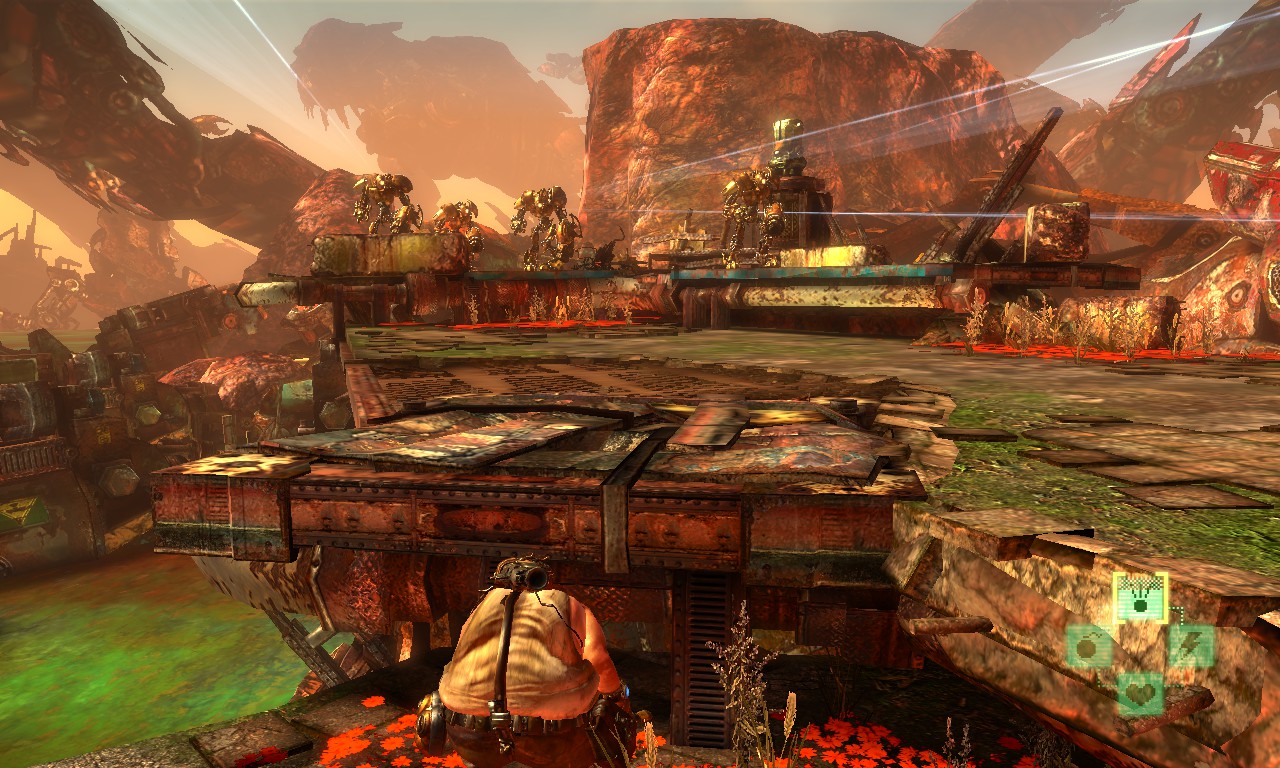
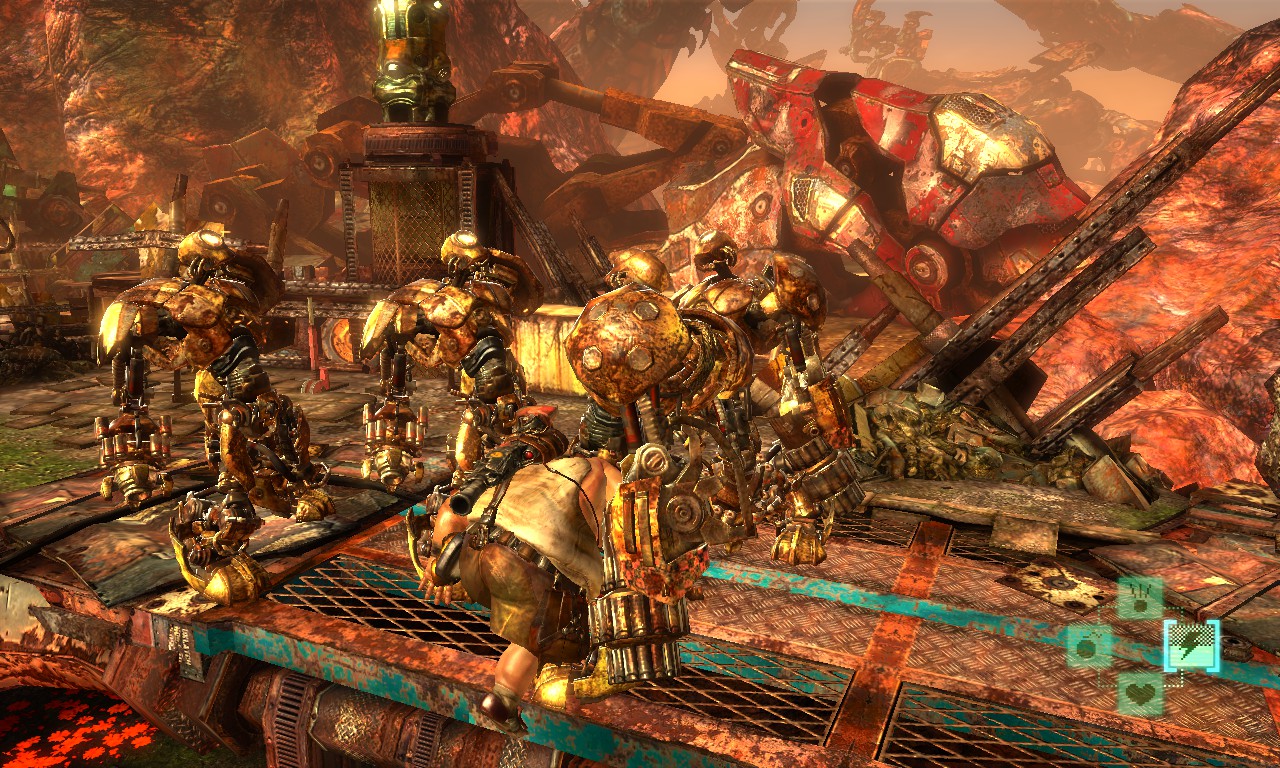
They should stay stunned for a long time, and it is possible to use Monkey to run into one and slowly push it to move it while stunned. I pushed one a bit to line up 3 of them while stunned, and then blasted them all with the plasma blast for Kebabed.

One of them will also call for reinforcements eventually here, so you can wind up with more if you need it.
FelixDracul  [author] 26 Feb, 2024 @ 11:03am 
Ah, I see now. The tech orbs dropped from enemies don't count for the achievements. Only the ones spread throughout the map do. However, you will need to farm enemies for their orbs since you need a big number of tech points to unlock all upgrades.

And I have enabled link sharing in my Google Drive file, and it does allow me to download it even when I try it from using different devices (tested with different accounts and incognito mode too). I guess it maybe blocks sharing through different regions? Either way, I added a Dropbox link for the save file as well. Please check and let me know if the Dropbox link gives you any issues.
Ragenarok 25 Feb, 2024 @ 9:09pm 
Thanksd Fluffy & felix
I'm just noting in myplaythrough that the mechs drop tech orbs when killed.

Thinking these tech orbs counted to the level total, I was letting the broadcasters summon their reinforcements.

I guess this is just a way to squeeze extra tech orbs out of a level, which I'll probably still honestly do to help me afford my upgrades as soon as possible.

Also, I have maybe gotten all the tech orbs out of one chapter so far.


I tried accessing that save file, Thinking it'd save a lot of running back through levels and cleaning up and following guides looking for "just one more orb, that's 1% of the orbs in the level, right?"
But it required manual approval?
I don't need access to it just yet, Gonna give it a red hot crack myself. But the game doesn't really provide enough information regarding precise number of collectibles for me to find finding them all fun
FelixDracul  [author] 25 Feb, 2024 @ 8:49pm 
Thank you very much for the confirmation!
ʀʏᴜ 25 Feb, 2024 @ 3:18am 
@Felix you remember correctly, there is a set number of orbs for every Chapter. You can check the number of orbs you have collected/to be collected on Chapter Select Menu. Happy Hunting @ Ragenarok.