HELLION

HELLION

109 ratings
Pathfinders guide to Hellion
By Severaice and 1 collaborators
The Pathfinders guide to Hellion. Showing you every Item, every ship, every.... well you get the Picture. This guide is meant to help people on how to get started, and help people who need information on the go, so don't have to minimize the game to search something up. As new things get added to the game this guide will be updated.
2
   
Award
Favorite
Favorited
Unfavorite
Update News
As final year university is consuming my life, I have decided to leave this be until uni finishes or I have some more time T.T so this guide will remain outdated until June next year :( Sorry guys, but watch out in June where it will receive a massive epic overhaul!!!!!

V.1.0 Basic Information and Layout
V.1.1 Basic Controls, Ships, Suit Equipment, Tools, Weapons, Station Equipment, Resources, Features added
V.1.2 Faster Than Light and Modules added.
V.1.3 First Steps added.
V.1.4 First Steps updates (Pictures and minor details).
V.1.5 FTL updates (Pictures and minor details), New section "Recent Patch Updates!" added, EVA mouse movement deatils added.
V.1.6 Recent Patch Updates updated
V.1.7 Components section updated (details on what each component affects)
V.1.8 Added SolarTara as Contributor (check out his guide) and added "Known Bugs/Glitches"
V.2.0 Updates Recent Patch Updates
V.2.1 Major updates to entire guide and addition of the Loot Distribution section!

More Large Scale updates coming soon.
Any Comments, Suggestion or Concerns please shout out :D
Be sure to check out SolarTaras guide as well!
(and psssst, dont forget to rate if you found this useful ;D)

If you want to immerse yourself fully into the game, have the Prometheus soundtrack running in the background. Makes things epic!
Recent Patch Updates!

Greetings Hellion survivors!

As we promised a new patch for Hellion is ready to be uploaded tomorrow, a month after the previous one. We had more time to fix some of the bigger issues and make the game more enjoyable. You can check out the list of changes and additional information below.

Patch 0.2.4 will be deployed on Thursday, September 7. Servers will be down from 10AM UTC until 11AM UTC. Servers will be wiped to ensure proper patch deployment.

For private servers:
- Update your server and game client.
- Delete server save files.

NavMap Improvements

- NavMap optimisation.
- NavMap now properly groups overlapping nearby objects. Players can click the group icon to display a list of all nearby objects.
- Ship icon should now always be visible on the NavMap.
- Scanning optimisation.
- Remove warp line when warp finished or failed.
- Removed obsolete NavMap filter options from the interface.

Ship Engine Tweaks

- Ship engine controls reworked. When ship engines are activated (default key ENTER) players can use standard forward/backward controls (default keys W,S) to accelerate/decelerate using engines instead of RCS. Players also have the option to set constant engine thrust values for longer journeys (default keys NUMPAD +,-).
- Engine power consumption tweaked. Power supply screen should now display proper values when the engines are operational.

General Improvements

- Players can now check blog news in-game. In-game home screen changed to fit Blog news.
- Disabled all docking ports on premade stations. Players can no longer dock a Command Module to take ownership of premade stations.
- Removed "Call Ship" and "Distress call" buttons from premade stations.
- Added confirmation before applying video settings.
- Texture quality slider can only be adjusted when in menu (out of game). It is disabled by default when in-game.
- Implemented automatic server restart after a predefined amount of time.
- Added automatic server restart configuration to GameServer.ini file.
- Server info added to server browser list.
- Server info configuration added to the GameServer.ini file.
- Added report server option in server list and server menu.
- Added tooltip information when trying to loot dead bodies (default key F).
- Added missing glossary descriptions for several objects and added Hellion System Zone map to the glossary located under Lore and History tab.
- Loading screen concept art added.
- Server browser visual changes for added server information.

Security Improvements

- All lockable doors linked to the security system. Players who are on the "authorized personnel list" on the ship/command module security panel can now open/close locked doors.
- Ships no longer transfer their security authorization to docked/grappled modules. As a result, turrets that spawn in various modules remain hostile even when module is docked/grappled to the ship.
- Command Modules now properly transfer authorization to all docked modules and turrets.

Optimisation and module improvements

- Double checked optimisation for multiple modules and reworked as necessary.
- Turrets can no longer shoot through walls and closed doors.
- All items can now correctly be picked up from LS nodes in all modules.
- Changed RCS fuel from Nitrogen to Nitro for all modules.
- AltCorp_LifeSupport_Module optimisation.
- AltCorp_Airlock Module optimisation.
- AltCorp_Cargo Module optimisation.
- AltCorp_Crew Quarters Module optimisation.
- Reflection Probe Rework.

Bug fixes

- Not able to pick up battery from ship cargo.
- Ship grappling hook missing collider.
- Cannot pickup slotted ammo from gun magazine attache points.
- Server client communication when matching velocity - results in position change on client.
- Starting module lights not working when low pressure.
- Server errors and crash due to Unhandled Exception.
- Docking ports not showing in the target list after warp and undocking grappled module.
- CQM Med-pack fridge placing med-packs on wrong place when putted in.
- Stuck on connecting to game server no response from server.
- Cannot use SHIFT to grab onto the hull of some modules.
- Life Support Module not working when docked to base.
- Power Consumption Bug. Capacitor draining when Output > Consumption.
- Dockable Container Ports don't work.
- Loot respawns in modules that have been taken by players and attached to their stations.
- Turrets get detached from attach points because of distance optimisation.
- Ship casts lights on planets.
- When default video settings are clicked they should be saved immediately.
- Despawn timer restarts after server reset.
- Airlock Module doors not connected to the security system.
- Sun is bigger on nav map.
- In-game loading icon stays on screen results in unable to get back to the server.
- Power supply panel in PS module inactive.
- After server restart Turrets lose tracers or fire blank shots.
- Cannot pick up items in CM.
- Refined resource Canister has only nitro in it.
- Infinite loading icon and invisible module(s).
- Systems interconnection issue across docked modules.
- Persistence - systems auto reactivate after server restart.
- Spamming call rescue ship button results in multiple ships spawning at outpost.
- Canisters don´t go empty it shows 0 but not empty.
- Unload button on Cargo Panel not working with refined canisters.
- NavMap doesn't update home station button after cryopod change.
Controls
Designation: Character Movement
Normal Gravity/Zero Gravity
W/A/S/D
Basic Movement
E/Q
Rotate Left/Rotate Right
Space
Jump / Strafe Up
Left Control
Crouch / Strafe Down
Left Shift
Sprint / Stabilize / Grab
F
Interact / Pick Up
G
Drop / Hold to Throw
Left Alt
Free Look
RMB
Zoom In
L
Loot Dead Body
tab
Inventory / exit panel
In zero gravity your mouse controls will behave as if you were piloting the MULE or Docking. Any movement to a direction, will not end unless a movement in the opposite direction is made. Mouse motions become very sensitive! When moving the mouse in two directions this will also alter the angle of your character. For example, if the character starts moving the mouse to the left and the bottom, the character will start tilting to the left as if pressing 'Q'.
Personally when in an EVA environment I only use the mouse to look left, right, up or down one at a time, and controll roatation using the 'Q' and 'E' keys.

Weapon Tool
RMB
Aim Down Sight / Zoom In
LMB
Use Item
R
Reload
Z
Draw / Holster
V
Melee

Suit Control
H
Toggle Visor
J
Toggle Jetpack
X
Radar Contact List
L
Toggle Light
TAB
Inventory
X
Helmet Radar

Contact List Control
Left Arrow / Right Arrow
Filter List
Up Arrow / Down Arrow
Target Selection

Social
Y
Chat
Capslock
Voice Chat
Backquote
Radio

Designation: Ship Controls
Module Movement
W/A/S/D
Basic Movement
E/Q
Rotate Left/Rotate Right
Space
Up
Left Control
Down
Left Shift
Stabilize

Interface Controls
R
Change Docking Port
Left Arrow / Right Arrow
Select Module To Dock
Up Arrow / Down Arrow
Change Port To Dock
M
Match Target Velocity
Ships
Designation: AC-ARG Also called Argo, Mule or Sara


The MULE is a basic shuttle capable of life support, Faster-Than-Light travel and towing one station module at a time.

This is your main means of transportation around the Hellion system. You use it to find new modules for your base, find asteroids to mine, find derelict stations to explore and loot, or to find many other things around Hellion.

Engines: RCS (Reaction Control System), FTL (Faster Than Light) and Engines

RCS is used to rotate and manouver your ship for docking purposes, or getting closer to an Asteroid. You can also use it to give your ship a push to start moving in one direction when trying to get closer to other objects in your area. You can also hold 'shift' to stabilize any rotation your ship is currently undergoing. This become especially usefull when trying to dock to other modules, more on this in the Docking section. RCS runs on Nitro, more on this in the Resource section.

FTL is used for long distance travel between planets, asteroids, or anything else you may find around Hellion. FTL also has the most Technical Requirements and Resource Requirements. More on this in the Faster Than Light section.

Engines I currently strongly advise against using. I recommend to avoid these until later patches come out, they are extremely buggy. For example if you use them at 100% thrust you end up being faster than FTL and you will launch yourself out of the system! The engines run on Hydrogen, more on this in the Resource section.

Designation: Lifeboat


The Lifeboat is what every player starts in when choosing a Fresh Start in Hellion.

This is the start for your base, it contains the basic needs to survive: Energy, Life Support and your Cryo Chamber. More on this in the Base Building Section.

Engines: RCS (Reaction Control System)

Just like the 'AC-MPIS MULE' it has RCS to manouver the Lifeboat for docking purposes. This also runs on Nitro, more on this in the Resource section.
Suits / Equipment
Designation: AltCorp Proteus EVA Suit


This suits helmet can not be opened, only the HUD can be activated or deactivated using the 'H' key. The suit will continue using Oxygen if the helmet is not removed whilest in a breathable environment! It is recommended the helmet is removed and put into the bottom inventory space (the one opposite to drill or rifle) The main suit has the following inventory space:
  • 2 Ammunition
  • 4 Medpacks
  • 6 Components
It has space for 20 units of Oxygen and 10 units of Nitro. It has the same capacity of energy as the 'Altera Pressure Suit' (to be confirmed). This makes this suit ideal for exploration, however less suitable for combat.

Designation: Altera Pressure Suit


This suits helmet can be opened in order to stop using the suits oxygen supply, but rather the environments supply. This is an important factor as the suit will continue using oxygen if left unoppened in a breathable environment. The main suit has the following inverntory space:
  • 4 Ammunition
  • 2 Medpacks
  • 6 Components
It has space for 5 units of Oxygen and 1 unit of Nitro. It has the same capacity of energy as the 'AltCorp Proteus EVA Suit' (to be confirmed). This makes this suit ideal for combat, however less ideal for exploration.
Tools
Designation: Drill
Rarity: Uncommon


The Drill is used to harvest resources from Asteroids. To use the drill it has to first be equiped by draging it into the center in your inventory. Then once equiped it has to be fitted with a Battery and a Resource Canister by interacting with one of each. The drill is then used by holding the LMB. There is a display on the right side of the Drill showing the charge of the Battery, and the amount of resources in the Canister attached. To detach either the Canister or the Battery hold the RMB and then scroll to the desired option using the mouse wheel. Releasing 'R' will execute the chosen action. Alternatively to swap Batterys or Canisters, press 'R' when looking at the respective item. So far the only way to aquire one is by finding them in an AC-ARG.

Designation: Resource Canister
Rarity: Common


The Resource Canister is used to store raw minerals obtained from Asteroids using the Drill. The Canister gets attached to the Drill, and once full needs to then be attached to the Cargo Interface. Then when opening the Cargo Panel, select 'Slot 01' on the right hand side to select the Canister. Then press 'Unload' to transfer all the raw materials to the ships Cargo Hold. It has space to hold 50 units of raw minerals. So far the only way to aquire one is by finding them in an AC-ARG or Lifeboats.

Designation: Small Resource Canister
Rarity: Common


The Small Resource Canister is basically an identical copy of its bigger brother with the major differences being that it can only store 5 units, however it can be used at any time to refill your JetPack. It has also been dubbed the soda can.

Designation: Medpack
Rarity: Rare
Small Medpack
Large Medpack

The Medpack is a straight forward tool that can be equiped and then used by clicking the LMB, which will then heal the character a certain amount. This amount is determined by which Medpack is used. There are two types of Medpacks, one named the Small Medpack and one the Large Medpack each restoring respective amounts of health. Currently there is no healthbar, the only way to tell if you are in need of healing is the scree. When your health is low you will start to see veins creeping up on the outside of your screen becoming stronger and stronger. So far the only way to aquire one is by finding them in Derelict Stations or Lifeboats.

Designation: Hacking Tool
Rarity: Rare


The Hacking Tool can be used to open doors which have been locked from the otherside by either a player, or simply spawned locked. This is used by equiping it, and then interacting with the maintenance circuit at the center of the door. This tool is specifically usefull when exploring, or when looting other players ships. So far the only way to aquire one is by finding them in Derelict Stations or Arenas.

Designation: AltCorp Asteroid Scanner
Rarity: Unknown


The AltCorp Asteroid Scanner is used to scan a Asteroid for Resources. It is used by equiping and then clicking the LMB when near the Asteroid. Its current range of effect is up to 300m. This will then give you information on what Resources are present and the quantity remaining on the Asteroid. So far the only way to aquire one is unknown.
Weapons
Designation: B-45 Compound -Mod.06
Rarity: Common


The AltCorp B-45 compound Mod .05 rifle is AltCorp's standard issue assault rifle. The rifle uses standard AltCorp teflon-coated antipersonnel 5mm rifle cartridges. To use the riffle a non-empty magazine has to be loaded first, this is done by having a magazine in your inventory and then whilest the rifle is equiped, pressing 'R'. If there are multiple magazines in your inventory it will swap for the magazine with the most rounds in it. There are 3 different firing modes for the B-45 which can be switched by hollding 'R' and then using the mouse wheel to select the desired mode.
  • Single shot mode which fires a single shot with each click of the LMB.
  • Automatic shot mode which fires in rapic succession whilest holding LMB.
  • Power shot mode which fires a single shot with greater damage, however increased recoil with each click of the LMB.
So far the only way to aquire one is by finding them in an AC-MPIS MULE or Modules.

Designation: V22 'Broadsword' -8.20
Rarity: Rare


The V22 'Broadsword' -8.20 is an effective weapon against other players. The Broadsword uses standard military Railgun Magazines. To use the Broadsword a non-empty magazine has to be loaded first, this is done by having a magazine in your inventory and then whilest the rifle is equiped, pressing 'R'. If there are multiple magazines in your inventory it will swap for the magazine with the most rounds in it. The Broadsword only has one fire mode which fires in rapid succesion whilest holding the LMB. When used in space the recoil will influence your momentum. It can be found in Derelicts or Modules around other planets then Bethyr.

Designation: R15 'Lance' -12.5
Rarity: Rare


The R15 'Lance' -12.5 is an effective weapon against other players. The Lance uses standard military Sniper Railgun Magazines. To use the Lance a non-empty magazine has to be loaded first, this is done by having a magazine in your inventory and then whilest the rifle is equiped, pressing 'R'. If there are multiple magazines in your inventory it will swap for the magazine with the most rounds in it. The Lance only has one fire mode which is a powerfull single shot with each click of the LMB. When used in space the recoil will influence your momentum. It can be found in Derelicts or Modules around other planets then Bethyr.

I'll have pictures for all of them once I find them in game :D

Designation: H115 ‘Glaive’-8.15
Rarity: uncommon


more info coming

Designation: S22 ‘Rapier’ -8.15
Rarity: uncommon


more info coming

Designation: AP Grenade
Rarity: uncommon


The Anti-Personnel Grenades are designed to inflict physical damage on components and players by throwing shrapnel in every direction.

Designation: EMP Grenade
Rarity: uncommon


The EMP Grenades are designed to disable or damage electronic components.

Designation: Portable Turret
Rarity: rare


more info coming

Designation: Crowbar
Rarity: common


Currently the crowbar is the only melee weapon in the game. It was added with the introduction of Melee Combat in Patch 0.2.1.

Cosmetics
I'll have pictures for all of them once I find them in game :D

Designation: Hoop
Rarity: Common


Designation: Basketball
Rarity: Unknown

Designation: Book Holder
Rarity: Unknown

Designation: Coffee Machine
Rarity: Unknown

Designation: Altcorp Cup
Rarity: Unknown

Designation: Flag
Rarity: Unknown

Designation: Lavalamp
Rarity: Unknown

Designation: Plant Canister
Rarity: Unknown

Designation: Plant Ring
Rarity: Unknown

Designation: Poster
Rarity: Unknown

Designation: Zika Leaf
Rarity: Unknown

Designation: Tesla Ball
Rarity: Unknown
Station Equipment
Designation: Cryo Pod


The Cryo (Cryogenic) Pod serves as the player's spawn point in the game. Whilest in the Cryo Pod the player is protected against any hazardous environment which makes it the safest place in the game. I suggest to always be in a Cryo Pod when exiting the game in case any systems malfunction in your absense. Cryo Pods are also used to invite friends to join your cause, this is done at the Cryo Pods interface, in a standard Lifeboat there are two pods. You can also use these to add players to your cause, when interacting with it, click the bottom left lock to unlock it, and then on the bottom right, click the man with the + button and select a player to join you. The first suggestions will be steam friends, and further down you will have people on this server. They then need to go kill themselves in order to click the join cause button on the far right when spawning.

Designation: Air Filter


The Air Filter is Part of the Life Support system, it filters oxygen and recycles air. The Carbon Filter affects the Air Filtering of Air Filter, the Servo Motor affects the Max Air Filtering of Air Filter and the Air Processing Controller affects the O2 Consumption of Air Filter and the Powerup Time of Air Filter

Designation: Air Generator


The Air Generator is Part of the Life Support system, it converts oxygen and nitrogen to breathable air. The Servo Motor affects the Max Air Output of the Air Generator, and the Resource Injector affects fuel consumption of Air Generator

Designation: Life Support Interface


The Life Support Interface is a control console for a stations Air Generator and Air Filter equipment. The interface shows the following data:
  • Life support system status (Online/Offline)
  • Status for all pieces of equipment in the modules Air Generator and Air Filter.
  • Remaining resources in the equipment Oxygen and Nitrogen tanks.

Designation: Power Supply Interface


The Power Supply Interface is a control console for a stations Fusion Reactors and Solar Panels. The interface shows the following data:
  • Power Supply system status (Online/Offline)
  • Status for all pieces of equipment in the modules Fusion Reactors and Solar Panels.
  • Remaining resources in the equipment Deuterium tanks.
  • Maximum Power output for Fusion Reactor and Solar Panel.
  • Current Sun coverage of Solar Panels.

Designation: Solar Panels


Solar Panels are a reliable source of power for your station or ship as they do not require fuel such as Deuterium. They are deployed using servo motors from the Power Supply Interface. The Solar Panels power output depends on the amount of sun coverage it is exposed to.

Designation: Fusion Reactors


The Fusion Reactor is source of power with a much higher output than the solar panels. However Deuterium is needed to fuel the Reactor when it is active. The max output of the Reactor depends on the Containment Field Generator and the Catalysts. This means it can either be very effective, or close to useless! The Reactor is controlled via the Power Supply Interface.

Designation: Capacitor


The Capacitor stores power for later use, so that in case the main source of power cuts out for any reason, power is not immediately lost in the station! The Capacitor also needs to be turned on and charged in order to be able to do a FTL jump. The Capacitor is activated and deactivated in the Power Usage Interface.

Designation: Crates


Crates are fixed storage containers found in various locations throughout Hellion's ships and stations. They are used to store the various components that are needed to operate vital ship systems, with different crates containing specific slots for the different components that are found in-game.

Designation: Cargo Interaction Panel


The Cargo Interaction Panel is the primary means of refining resources in Hellion. The UI of CIP allows users to transfer various resources to and from systems aboard ships and stations, as well as into portable containers such as jetpacks and resource canisters. To recharge your jetpack simply dock it, and then in the interface when opening Slot 01 drag oxygen from the storage of your ship on the left side, over to the jetpack. Then define how much you wish to add and confirm. If left on the maximum only the amount needed to fill the jetpack will be removed.


Designation: Airlocks


Airlocks are the primary means of players entering and exiting stations and ships. They allow you to pressurize/depressurize when entering and exiting the lock so as to conserve valuable oxygen. Most modules do not have an airlock preinstalled, which means sperate modules which work entirely as Airlocks need to be attached.

Designation: Elevators


Elevators are used in various ships and stations as transport between levels. Elevators are buggy. It is recommended you do not jump in them or place items into them.

Designation: Main Engine Panel


The Main Engine Maintenance Panel is found at the aft exterior of the MULE. This is where components for the main engine can be swapped if need be. Due to engines not really being functional this is not really needed at the moment.

Designation: Cargo Hold

Components
For all components their current state is color coded:
  • Green - In a good State
  • Yellow - In a acceptable State
  • Red - In a bad State
Depending what state the component is in it will affect how effective the relative system will be. For example if the Catalyst in the Reactor is at 10% the Reactors Max Power Output will be a lot lower.

Designation: Air Processing Controller

Air Processing Controllers are degradable components in Hellion. Air Processing Controllers are used only in the Air Filter systems. They affect the O2 consumption and powerup time of the Air Filter.


Designation: Air Filter Unit

Air Filter Units are degradable components in Hellion. Air Filter Units are used in only one ship system, that is in the Life Support node. It affects the max air filtering of the room.


Designation: CO2 Filter

CO2 filters are degradable components in Hellion. CO2 Filters do exactly what their name suggests: filter CO2 from the station's air using a semi-permeable membrane dipped in lithium hydroxide which breaks down the CO2 into lithium carbonate and oxygen. CO2 filters are installed in the Air Filter Life Support subsystem. They affect the Air filtering quality of the Air Filter.


Designation: Servo Motor

Servo motors are degradable components in Hellion. Servo motors are used in a variety of ship and station systems such as the Air Generator, one of the two Life Support subsystems. They affect the deployment time of solar panales, max air output of air generators and max air filtering of air filters.


Designation: Pressure Regulator

Pressure Regultors are degradable components in Hellion. Pressure Regulators are used in only one ship system, that is in the Life Support node. It affects the max air output of the room.


Designation: Resource Injector

Resource Injectors are degradable components in Hellion. Resource Injectors are used in a variety of ship and station systems such as the power and air generators, the main engine and all RCS systems. They affect the Fuel Consumption for power and air generators and the main engine and they affect the thrust sensitivity of RCS systems.


Designation: Containment Field Generator

Containment Field Generators are degradable components in Hellion. Containment Field Generators are used only for the Fusion Reactor. They affect the power output of the reactor.


Designation: Catalyzer

Catalyzers are degradable components in Hellion. Catalyzers are used only for the Fusion Reactor. They affect the max power output of the reactor.


Designation: EM Field Controller

EM Field Controllers are degradable components in Hellion. EM Field Controllers are used only for the Fusion Reactor. They affect the power time of the reactor.


Designation: Fuse

to be completed


Designation: Singularity Cell Detonator

Singularity Cell Detonators are so far not degradable components in Hellion. Singularity Cell Detonators are used only for the FTL drive. They affect the power up time of the FTL drive.


Designation: Warp Cell

Warp Cells are degradable components in Hellion. Warp Cells are used only for the FTL drive. They are like fuel cells, they will slowly run empty the more jumps you do. Once depleted jumps are no longer possible.


Designation: Plasma Accelerator

Plasma Accelerators are so far not degradable components in Hellion. Plasma Accelerators are used only for the Main engine. They affect the engine accelerator of the Main engine.


Designation: High Energy Laser

High Energy Lasers are so far not degradable components in Hellion. High Energy Lasers are used only for the Main engine. They affect the engine accelerator curve of the Main engine.
Resources
Resource
Icon
Description
Oxygen
Most valuable Resource in the game
Refined from Ice, Dry Ice and Heavy Ice
Nitrogen
Can be used as RCS-Propellant
Also used by the Air Generator to mix it with Oxygen to get breathable air.
Nitro
Can be used as RCS-Propellant for Jetpacks
Refined from Nitrate Minerals
Deuterium
Fusion Reactor Fuel
Refined from Ice and Heavy Ice
Hydrogen
Propellant for Main Engine
Refined from Ice
Dry Ice
Can be refined into Oxygen
1 Dry Ice for 0.7 Oxygen
Ice
Can be refined into Oxygen, Hydrogen and Deuterium
1 Ice for 0.3 Oxygen, 0.6 Hydrogen, 0.01 Deuterium
Heavy Ice
Can be refined into Oxygen, Hydrogen and Deuterium
1 Heavy Ice for 0.3 Oxygen, 0.6 Hydrogen, 0.1 Deuterium
Nitrate Mineral
Can be refined into Nitro and Nitrogen
1 Nitrate Mineral for 0.4 Nitro, 0.5 Nitrogen
First Steps
After starting in your Cryopod the first thing you should do is get an overview of your surroundings, this is your new home! To the right you have a nice window with blinds that can be shut using the button to the right of it, and a comfy bed to the left. Once you leave this room, you will find another area, with a desk, and a suit tip: open up the helmet immediatly to prevent any waste of oxygen. Once you leave this new compartment you will end up in the main body of your outpost, only to find that there is no gravity! You will have to make your way forward to the massive red button, this will enable gravity. Make sure you are in an upright position when doing so, because otherwise you might faceplant and hurt yourself. Once you can move around freely you should head over to the Power Interface on the far left of the Outpost and turn on both the Solar Panels and the Capacitor. Shortly after the light should switch on. Next to the cabinet is the Life Support interface, you want to switch on both the Oxygen Generator and the Air Filter. Both should now be on Standby, they will only go online and consume Oxygen / Nitrogen when needed. You are now ready to disembark your Lifeboat. Head to the exit and make sure the door is closed behind you. Dont forget to close your helmet, move to the far right of the exit and hold on by holding 'SHIFT'. Now open the Emergency Overide and you should be moved forward a little bit if you were holding on, or shot out into space if you werent. Activate your Jetpack by pressing 'J' and have a look around, there should be a Airlock Module, a derelict and a MULE around. If you cant see these, press 'X' to bring up your short range radar, and use the up or down arrow keys to select one of the objects. At the bottom of the screen you can see a little navigation aid that will show and arrow to where the selected object is, it also points up and down for guidance. Now head over to the Airlock Module, this will be your primary means of getting in and out of your station without having to use up Oxygen to refill the vented air.
Make sure when heading there to keep your speed down (below 5 m/s) otherwise you will impact the surface and loose health or even die. You can see both your directional speed on the bottom left, and your lateral speed on the bottom right. Once at the airlock, hold on again using 'SHIFT' (this becomes your favorite thing over time as it can also help you stabilize when floating about in space) And look for the docking access port (a flashing square on the top) and interact, you should now be viewing things from the airlock. Press 'R' to swap between the two ports, and use the arrow keys to select which object and which dock at the object. In this case We want to dock to the Outpost, its up to you which port you want to dock with. Check the Docking section for a in detail description on how to dock properly. After having docked, exit the interface using 'TAB' and head on inside. At the airlock there will be a console on the left, which you can interact with, where you first want to depressurize the room, and then open the outer door once the noise stops. Then inside on the same door to the left will be the same interface, there close the outer door and repressurize. Once the pressure reaches approx. 0.5 you can open your helmet as it becomes safe to breath. Once the pressure is equalized open the inner door and head on inside.
Congratulations! You have expanded your outpost!
Inside the Airlock Module you will find another cabinet with, if you are lucky an EVA suit, or pieces of it, and maybe a gun and some ammunition. If you head back to the main area of the outpost you can dock your jetpack to the cargo interface, and when interacting you should see that in the tab 'SLOT 01' there are now two elements, Oxygen and Nitro, drag and drop oxygen and nitro from the Outpost cargo to your jetpack, so from the left to the right. Re-equip the Jetpack.
Next we want to explore the derelict and see if there is anything interested hidden inside, approach it carefully just as the airlock, turn on your flashlight if you are having any difficulty to see around (L) and have a look around. There should be one or two things to find, (I'm not saying where, explore away! :D) Now we will go to the MULE to begin venturing the Hellion system!
Leave the Outpost via the airlock, again by first making sure the airlock is pressurized, go inside, close the inside door, depressurize, dont forget to close your helmet at about 0.5 and then open the outer door. After you reach your ship you will find the Airlock at the top, also flashing, enter here following the same procedure as before. Once inside and the inner door open beneath you, make sure you are in line with the ladder when decending, as if you are not, you will faceplant onto the ground and take some damage. Once inside, have a look around, explore, be proud that youve made it this far! There is a elevator next to the airlock that leads down to the cargo bay which has drills, batteries, spare parts, and the cargo interface. You can also use the cargo bay as a airlock, however you need to close the door to the elevator manually first, and to open the cargo bay you need to use the override next to the pressure interface. You can lock the Airlock and door to the cockpit from the inside by pushing a little red button which is next to the open/close switch at the airlock, or on the door at the cockpit. When heading to the cockpit, after passing the door, next to the ladder there should be a small interface. On this interface you can choose who has permissions on your ship, and also give your ship a fancy name of your own! (Instead of the random letters and numbers)
Next step FTL jumps! Head to the FTL section for a explanation on how to do this.
Docking
To be completed
Faster Than Light
Preparing the FTL drive

FIrst of all you should head to the Power Supply Interface at the rear of your ship and activate both Solar Panels, the Fusion Reactor and the Capacitor. Now head back to the cockpit and activate the FTL drive by looking at the far most right button on the console which says 'FTL' and pressing 'F'. If you now look the the left you should see green lights next to FTL (Faster Than Light drive), CAP (Capacitor) and LIFE (Life support systems). This means all those system are ready, ENG (Engine) is not needed for FTL jumps).


Now you need to calculate the path to your destination, start by pressing the NAV button, the second from the left, this will open up the Navigation Interface. In the top left you have a button called Scan which you can click to Scan your surroundings for Derelicts, Modules or even other MULEs. Asteroids and Planets are already known objects.

You can also create your own orbit if you dont desire to jump to anything specific (maybe to move your lifeboat to a new position for building a base) First you need to right click on a planet / moon and "create custom orbit". There you can specify the coordinates by click and holding on the green coordinates at the bottom and then sliding up or down to adjust.

You can now select your destination, right click, and select Travel Using: Warp Drive.

FTL drive callibration

In the bottom left corner you can see the charge of the Capacitor in orange, and the amount of energy the jump will consume in red. The red area only represents the actualy jump, the energy of the capacitor will still be decreasing during allighnment, so you may run out of power if your Fusion Reactor cant carry the load, and the allignment takes too long.
Just above that are the Fuel Cells and their current state, this is where you can select how many Cells to use, for short travels only one is needed. For longer travels more than one may be needed. The amount you select also has an influence on warp time. The red area marked in a Cell shows how much the manouvre will degrade the Cell.
In the center at the bottom you can see the parameters of the Orbits, and the status check of you Manouver. It could be saying one of the following:
  • Acceleration too low - The proposed time of arrival is too fast, it is necessary to increase the time of arrival.
  • Acceleration too high - The proposed time of arrival is too slow, it is necessary to decrease the time of arrival.
  • Insufficient fuel in fuel cells - The fuel cells selected do not have enough to support the jump, either select more cells, or this jump is not possible and a shorter jump to find new cells is advised.
  • FLT Ofline - The FTL drive has not been turned on.
  • Ready - All good to go!

At the bottom right corner you have the time settings, the top being the start of the maneuver, and the bottom being the arrival time. These times get changed like the coordinates for a new orbit, left click and hold, and then slide up or down. The arrival time should be longer than the start time. The start time should be how long you think you will take to allign the ship (more on this later) into position, the minimum is 30 seconds. When setting the arrival time you need to pay attention to the notifications at the bottom in the center as described above.
FInally when all is done you need to press initialize.

Aligning the jump

You can leave the Navigation panel with 'TAB' !IT IS IMPORTANT THAT NO MORE MANEUVERS (FORWARD, BACKWARD, LEFT OR RIGHT) GET CARRIED OUT BEYOND THIS POINT AS THEY WILL LEAD TO CANCELLATION OF THE JUMP!
Now when controling the ship you see a countdown at the center of you HUD this is the time to align you ship for the jump. You should also see a small red 'M' which leads you to a bigger M in a diamond shape.


Just by using the mouse and 'shift' to stabilize, align your ship with the M until it turn green. This means you are ready to execute the maneuver.
The final step is to wait until the timer reaches below 5 seconds, the M will turn yellow and you need to then press 'J' to commence the jump.
Congratulations! You have made your first jump, sit back, relax, leave the cockpit if you wish!


It is reccomended that during a jump you do not touch the controls. Make sure that once you arrive, you turn off the FTL drive again as it consumes massive amounts of energy! And if you feel you need to conserve deuterium deactivate the Reactor as well.

Known causes for jump being cancelled
  • You moved using WASD during the allignment phase
  • Your capacitor ran out of charge during the allignment phase
  • Know any others? Please share!
Loot Distribution
Loot distribution has been split into five different zones. The "Starting zone", "Civilian zone", "Industrial zone", "Military zone" and "Special zone" Below I will cover what to expect in these zones.


In the Starting zone, as you can imagine, is going to be the area will all new players spawn, making it easy for you to find your friends when playing with other people, (no more flying accross half the system to find someone...) However, as this is the starting area, only low tier loot can be found.

The Civilian zones used to be residential areas, in the early stages of Hellion's colonization these areas held large civilian populations. However one day, something happened, we still do not know what this was, but it has turned these areas into baren wastelands. You will be able to find upgrades for your living quarters, you will also be able to find some much needed spare parts! The most common modules to be found here are crew quarters and corridors etc.

Hellion's infrastructure was once located, in the what is now knows as, Industrial zone. This is the place to go if you need new mining equipment or some backup or new EVA suits. This is also the go to place if you are looking for a cargo module, or need to refine some of your mined materials.

The Military zones used to house the staging locations for the troops of Hellion. As the military clearly failed at keeping Hellion from falling apart, I dont think they mind if you come along and scavenge some of their supplies. Weapons and ammo are fairly common in these areas, however supplies and resources fairly low. So if you want to stock up on military ordinance, or need some spare ammunition, this is the place to go! But be wary, as other people here will be freshly armed just as you, and may not have the nicest intensions...

Last but not least there are the Special zones, these basically follow the same pattern as the other four zones mentioned above, however there are a few key differences. These are the only places where you can hope to find high tier equipment! However these areas are also the most dangerous places in Hellion, as they are home of the "Doomed outposts" which contain the best items in game! However also have some bad surprises in store for you!

Below is an image of the zone split up for the planet Bethyr and its three moons.

Modules
Designation: Crew Quarters Module
Nav-Code = CQM-AC

Altcorp crew quarters offer more comfort then your regular cryopod rooms offering decorations and even a basketball hoop for recreation.

Designation: Outpost
Nav-Code = OUTPOST

Starter Modules provide the basic survival systems for new players. They come with two Cryo Pods that can be used to re-spawn from and invite other players into their station.

Designation: Life Support Module
Nav-Code = LSM-AC:HE3

Full life support module features four Cryo Pods and a complete life support system that can easily maintain acceptable conditions for a large number of linked modules. This version however is not self-sufficient and will require a power supply unit in order to operate.

Designation: Power Supply Module
Nav-Code = PSM-AC:HE1

Power supply module is essentially a large fusion reactor. It can generate a vast amount of power using hydrogen and helium isotopes as fuel. If you plan to build yourself a large station, you should probably start looking for one right away.

Designation: Cargo Bay Module
Nav-Code = CBM-AC:HE1

Cargo-bay module features a massive storage space, an airlock and a built in refinery system that allows you to process raw resources into usable ones, most notably fuel for engines and reactors. It can also be used as a hangar for small vessel and comes with a number of docking ports that can be used to expand its functionality via external upgrade modules.

Examination of the Cargo Bay's exterior suggests that it may be possible to dock multiple Cargo Bays side-by-side to create a very large enclosed space.

Designation: Command Module
Nav-Code = CM-AC:HE3

The Command module is the nerve center of any large station. It is by no means essential but provides a central control point for the entire station allowing you to remotely change various parameters. It is also equipped with a powerful sensor array that can track any approaching objects. The module itself is split into two decks where the upper section contains the command and communications centers and the lower section serves as a junction with four docking ports.

Designation: Corridor Module
'I' Corridor Nav-Code = CIM-AC:HE1
'T' Corridor (Junction) Nav-Code = CTM-AC:HE1
'S' Corridor (Vertical, Zero-G) Nav-Code = CSM-AC:HE1
Angled Corridor (Right) Nav-Code = CRM-AC:HE1
Angled Corridor (Left) Nav-Code = CLM-AC:HE1

Corridor and intersection modules are used as junctions between various station sections. Such as vertical, horizontal, L shaped and T Shape. Some large modules like cargo or power supply are bulky enough that fitting them into the existing station layout would be impossible without a correct corridor section. By using them in a smart way it is possible to create choke points that allow easier station defense in case of boarders.

Designation: Airlock Module
Nav-Code = AM-AC:HE1

Airlock modules serve as exit and entry points, and they allow ships to be safely docked to a space station. Players can pressurize and depressurize an airlock in order to save atmosphere and to avoid rapid decompression when existing a ship or station.

Designation: Dockable Container Module
Nav-Code = IC-AC:HE2

Storage unit that allows you to store materials 5000 unrefined, 500 refined. It has a docking release lever on the outside. Might be for the bigger TAMARA ship shown in an early trailer, as a cargo hauling option.
Features
This is a list of all features Zero Gravity has published that are being worked on or are completed. For the official list, visit this link[www.playhellion.com]

Space based on real physics
Realistic scale solar system
Completed
Newtonian Physics
Completed
Orbital mechanics
Completed
Seamless transitions
Completed
Persistent universe
Completed
Immersive sound
Realistic sound propagation
Completed
Space survival
Vacuum and decompression
Completed
Temperature
Work in progress
Radiation
Work in progress
Salvaging
Parts
Completed
Resources
Completed
Station modules
Completed
Ships
Work in progress
Resource gathering
Asteroid EVA mining
Completed
Refining
Completed
Asteroid Ship mining
Work in progress
Gas giant harvesting
Work in progress
Detailed crafting system
Parts
Work in progress
Weapons
Work in progress
Equipment
Work in progress
Piloting
Piloting and Navigation
Completed
Scanning
Completed
Different propulsion systems
Completed
EVA
Realistic zero gravity movement
Completed
Modular ships, stations and gear
Base building
Completed
Ship modification
Work in progress
Base and ship customization
Work in progress
Equipment
Work in progress
Complex ship to ship combat
Ship to ship combat
Work in progress
Subsystem targeting and destruction
Work in progress
Damage propagation
Work in progress
Damage control mechanics
Work in progress
Electronic warfare
Work in progress
Complex maintenance
Complex resource management
Completed
Stations
Completed
Ships
Completed
Equipment
Work in progress
PvP
Close quarters combat
Completed
Boarding
Completed
Hacking and security
Work in progress
Realistic wound mechanics
Work in progress
Suite damage and degradation
Work in progress
Unrestricted multiplayer interaction
Free multiplayer interaction
Completed
Multi-crew ships
Multi-crew ships
Completed
Realistic communications
Voice chat
Work in progress
Radio mechanics
Work in progress
FTL communications
Work in progress
Known Bugs and Glitches
Random Fact: Did you know that the reason for bugs being called that way, is because the very first bug ever to occur was due to an actual bug getting stuck/squished in a touring machine.

A full list of currently reported bugs can be found here[www.playhellion.com].
Funny Glitch Stories
This section is for funny glitches that have happened in game, if you have a story and want to share it here, just message me or put it in the comments section below :D

  • I was playing with someone, who was at that point going through the airlock at the top of the MULE. I was watching from inside, when suddenly I heard a knocking sound from below in the cargo bay. After this had scared the s**t out of me, I decided to get a gun and aim at the elevator as I hear it activate, only to find my friend coming up... He had glitched through the ship into the cargo hold xD
  • I was inside the airlock of the MULE, I depressurized, however then, the outer door diddnt open, neither through the console, or the override. I then tried to repressurize, also diddnt work. I then tried to open the inner doors, also diddnt work. So I came to the realization, I just got trapped in a decompressed airlock...
39 Comments
Beta 🚫 Geuze 🚫 11 Jul, 2020 @ 3:31pm 
Danke für die Mühe und die Arbeit.

:)
GTink911 25 Jun, 2020 @ 7:42pm 
I'm going to basically be making a copy paste of this with updated info, so I'll for sure include a link to yours :)
Severaice  [author] 25 Jun, 2020 @ 6:20pm 
Go for it :D I should have updated this long ago, but when I started looking into it again and found out development had stopped I was too disappointed haha. Would be cool if you could mention me in your guide but up to you :P
GTink911 24 Jun, 2020 @ 10:32pm 
Hi, I am planning on making an updated version of this guide, is that fine with you?
Nine 30 Jun, 2019 @ 9:26am 
I don't get why you do not show how to navigate? the game doesnt give you any info on it. i am playing single player and cannot lock on to the first outpost and therefor cannot warp there. outside of the navigation screen it does not show up on the target list. inside the navigation screen there is no way to add the station to the target list. am i missing something? i really want to play the game but i just keep running into a wall.
Beta 🚫 Geuze 🚫 7 Aug, 2018 @ 8:49am 
Moin Moin,
da wo ich her komme sind die Briten zwar nicht weit weg, doch verstehen musste ich sie zum Glück nie. :)

Sacht ma, gibt´s euren Guide auch auf Hoch- oder Norddeutsch? :P Das wäre super....

Und denn noch mal zwei Fragen an euch Profis.
1. Ist der Singleplayer schon spielbar?
2. (Ich hab das Spiel ewig in der Wunschliste gehabt und wo es raus kam nur angetestet. Wir kleben sonst zur viert in Empyrion fest)
Ist Hellion mitllerwile auch für "Gelegenheitsspieler" etwas zugänglicher?

LG Geuze
InvolvedSpark 27 Jan, 2018 @ 7:18pm 
Might want to add the welder to the tools section, and that it is refilled with hydrogen. Would certainly help out new players. It took me a while to figure out hydrogen is used in it.
Severaice  [author] 28 Oct, 2017 @ 3:10pm 
Ja im laufe der woche, hab am dienstag Job interview :|
for other people in english ^^ =
"Update for 0.2.5? Since a lot has changed"
"Yeah, some point in the week, got a Job interview on tuesday :|"
Zorz 27 Oct, 2017 @ 6:44am 
update für 0.2.5 geplant? hat sich ja einiges geändert ;)
Severaice  [author] 24 Oct, 2017 @ 6:15am 
@hlgl2 Thank you :D I do need to get this a bit up to speed tho :/
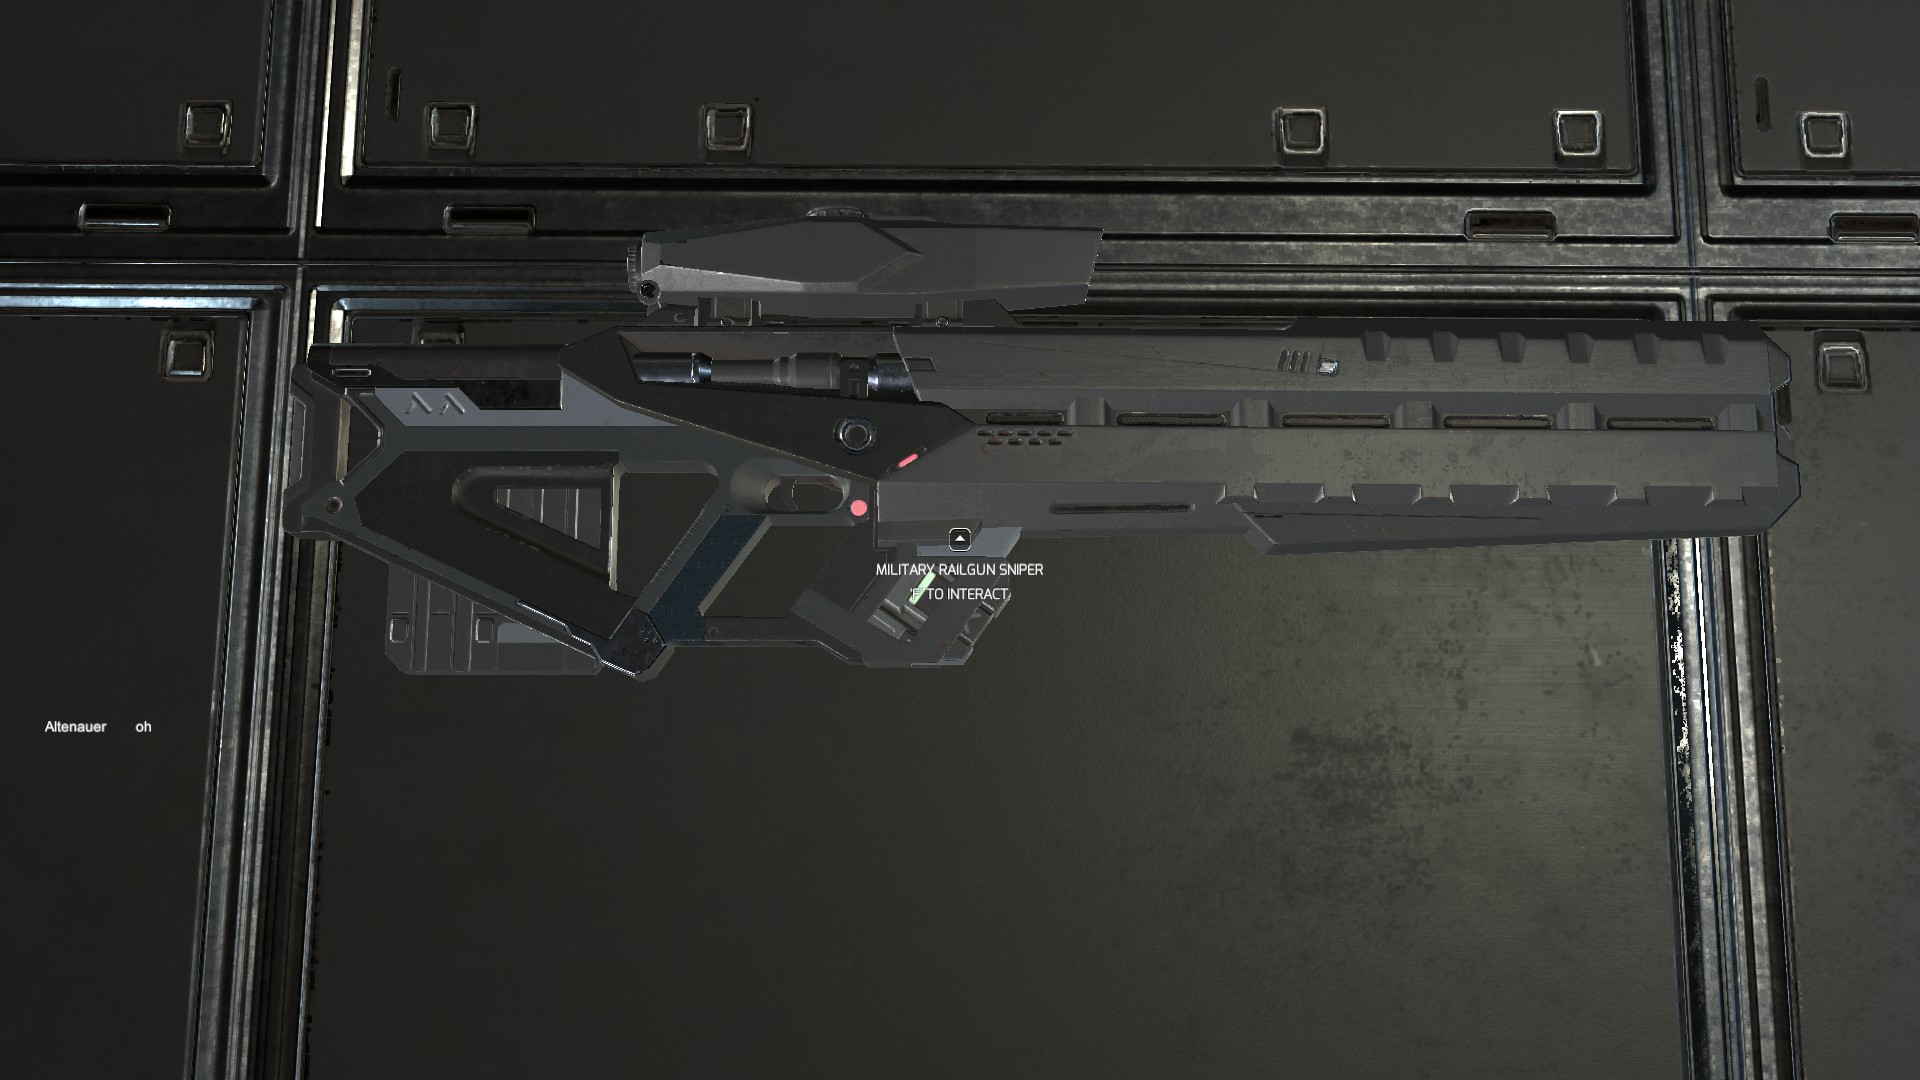
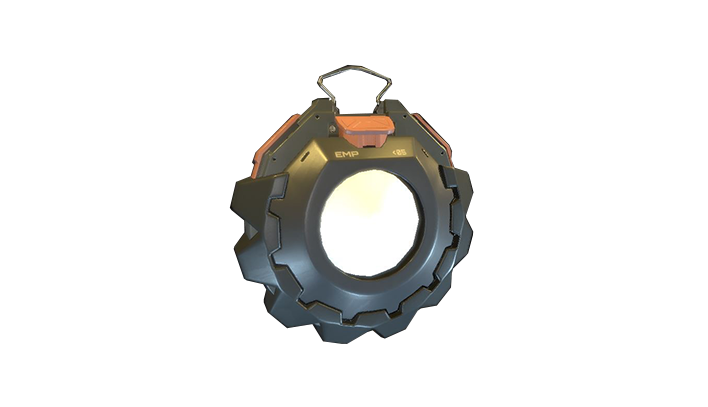
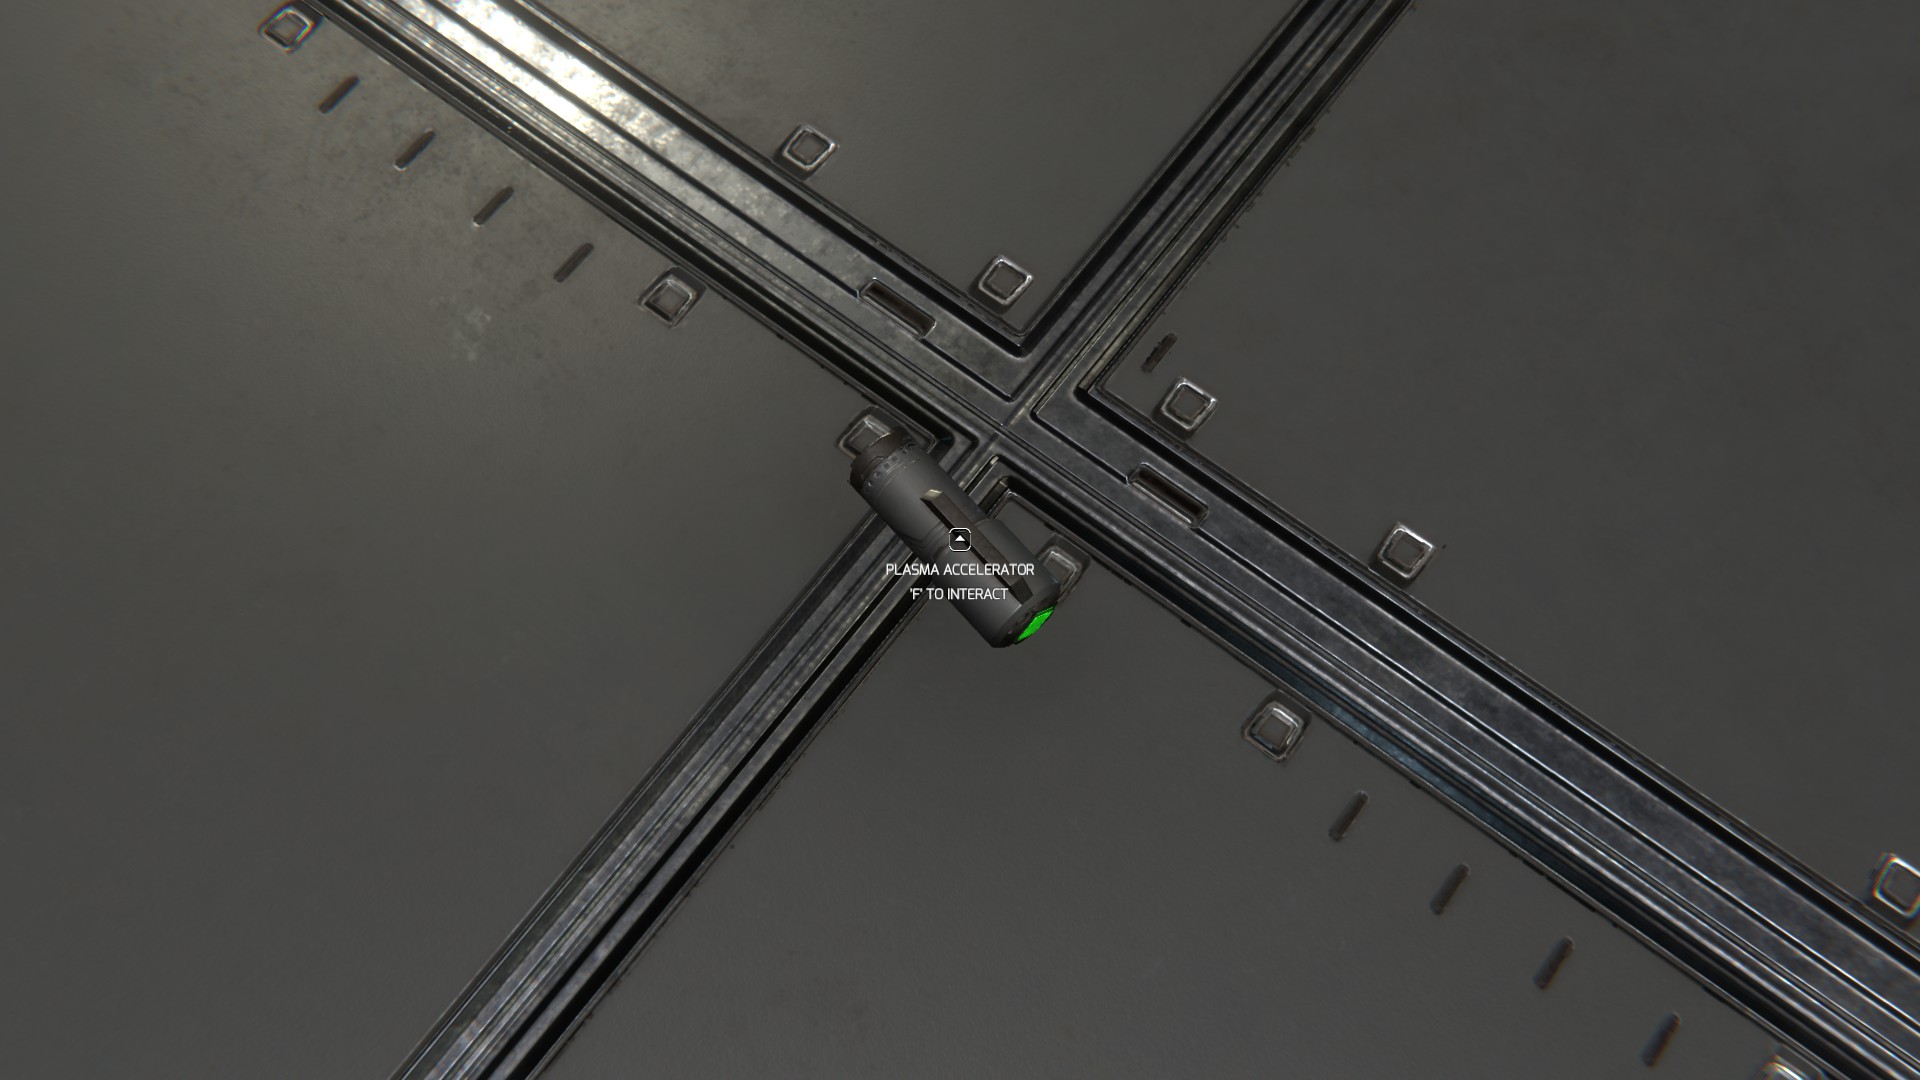
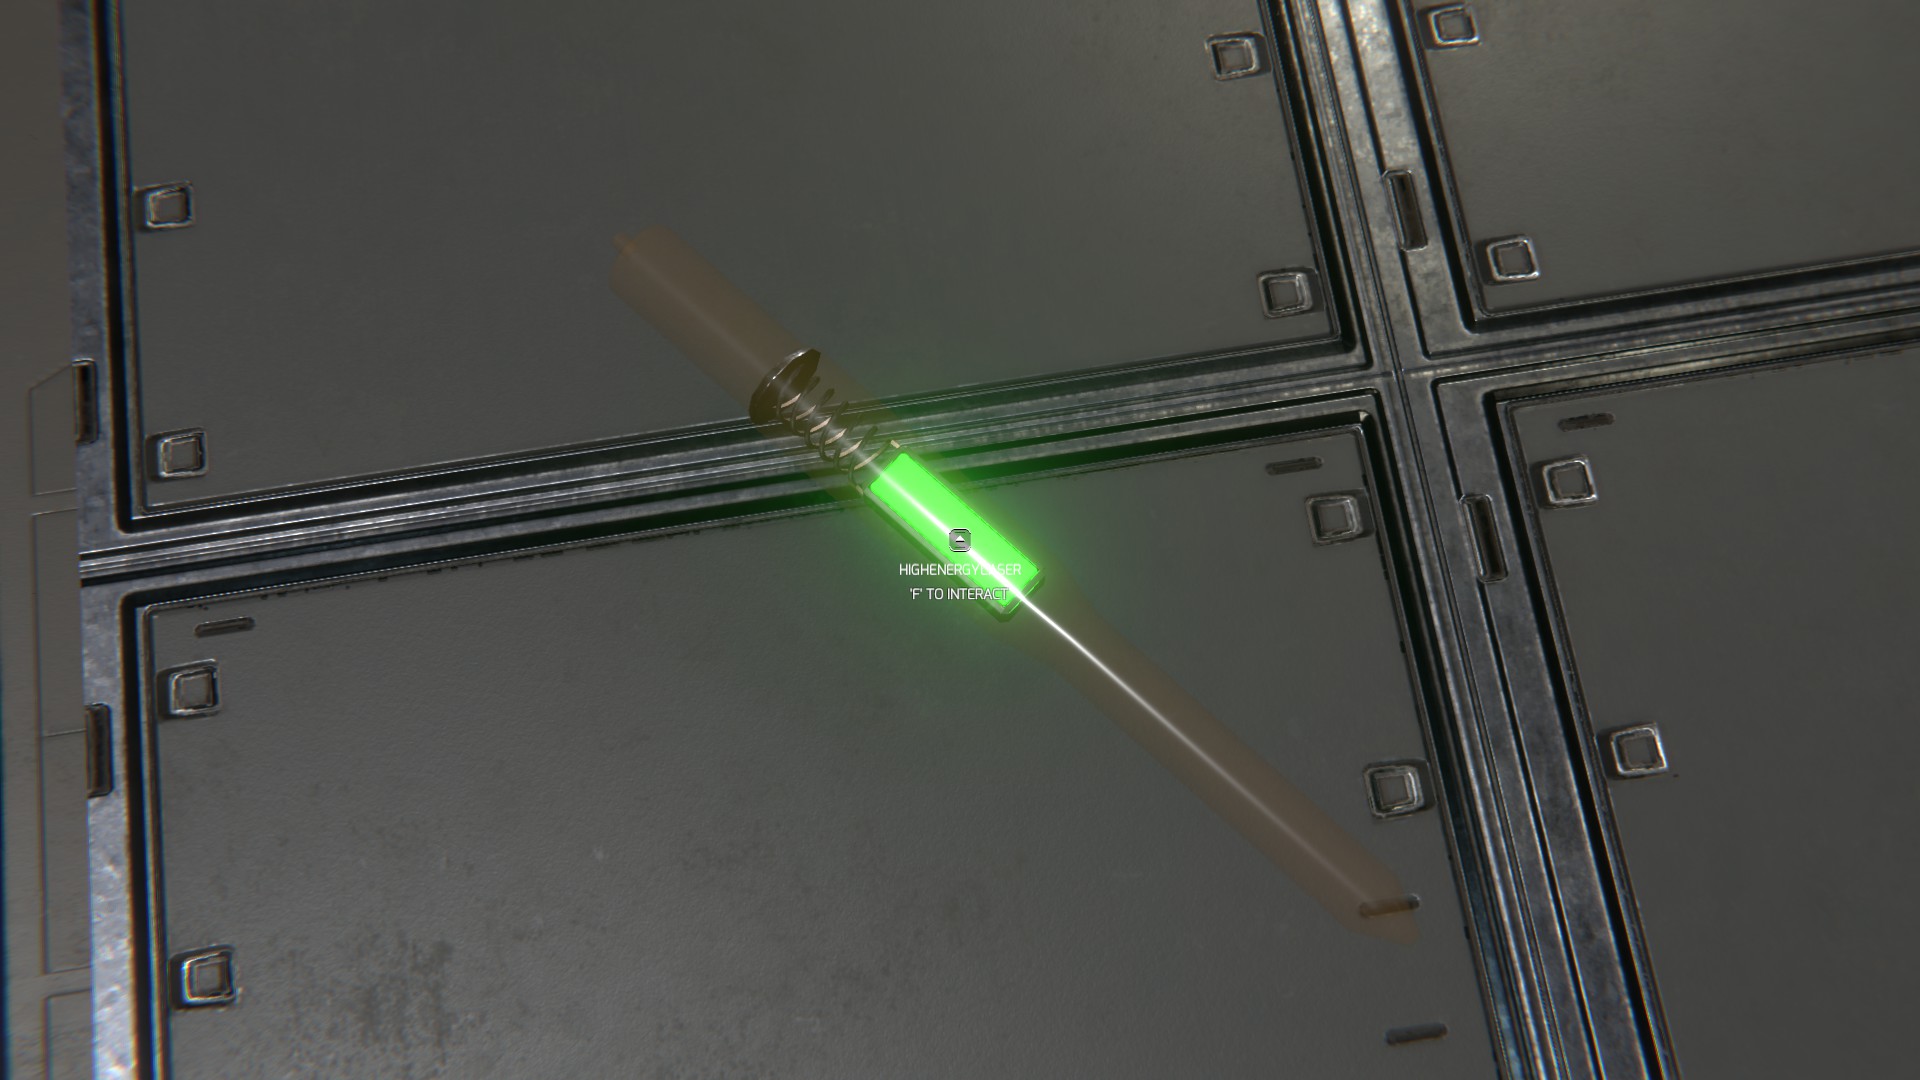
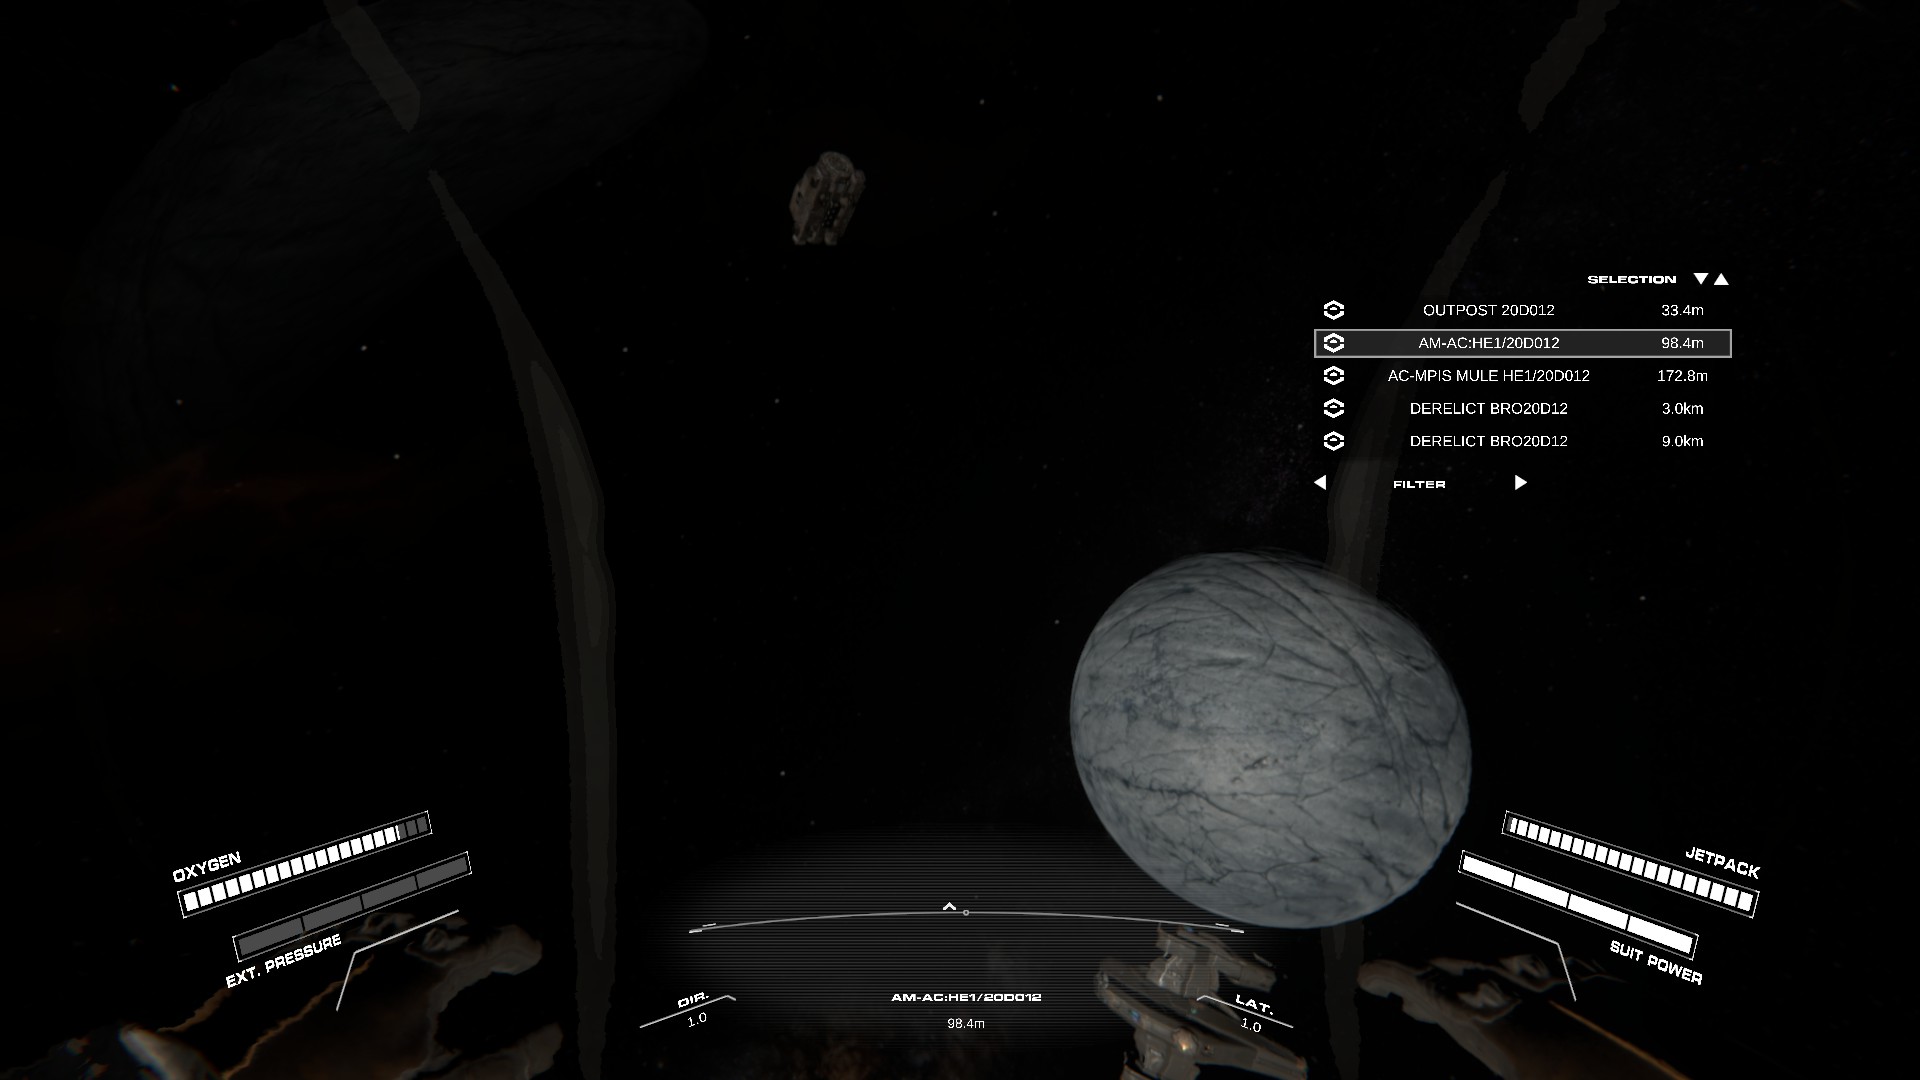
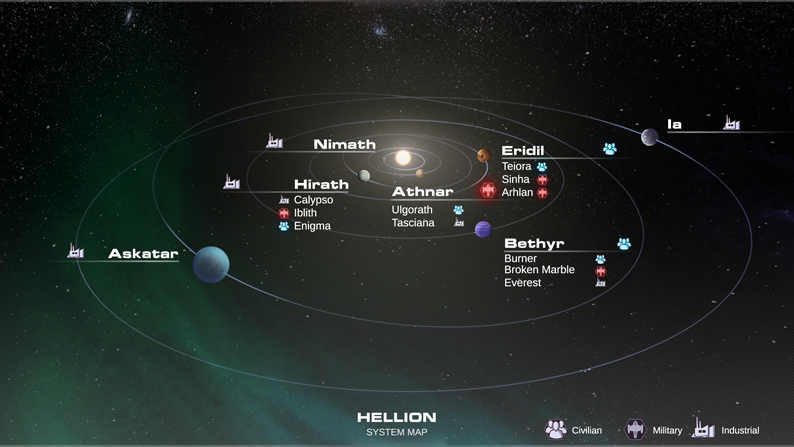
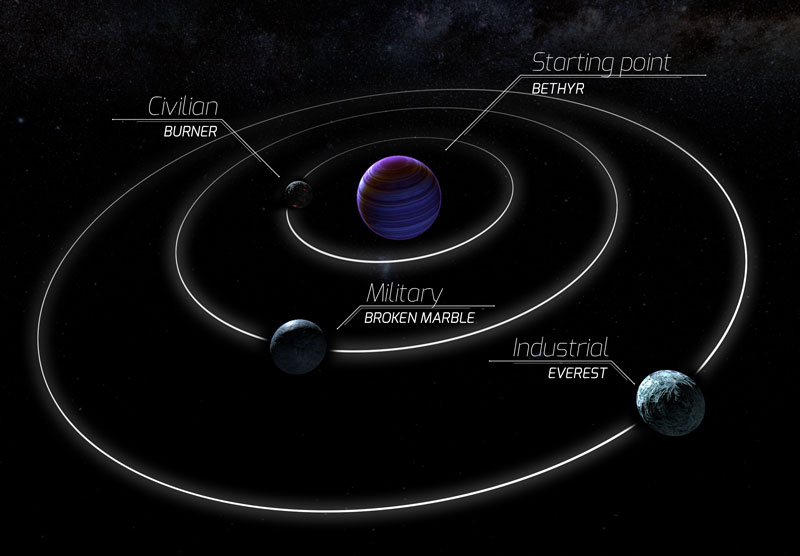
@Lunar a bit late my response, but you usualy have to FTL to the module you want to collect. And certain things spawn in different areas. Check out the Loot Distribution section!