Killing Floor 2

Killing Floor 2

25 ratings
Objective mode walkthrough
By Fumo Bnnuy N Friends
A simple guide to win objective mode in beta. Step by step process on what to do and what to avoid. This is atm beta 1 so they may change things by beta 2 and full release.

edit: Seems they didn't change many things in terms of the the order of the objectives. Though they did move around some weapons perk skills and slight gameplay changes so i'll update the guide and add the new nuked objective to the guide soon.
   
Award
Favorite
Favorited
Unfavorite
New Objective types and Perk setup
With objective mode theres new objectives which are really just some rehash of old ones before the beta update but also new ones. It's very simple once you learn how each works and what perks do and don't work:

-Escort (drone)=simple. escort a drone to X area and weld or repair it along the way. It's basically the santa's workshop sled defense but the path is not so set in stone.

-Operate and control=SYG (stand your ground) but you gotta push a button. Again the new version of santa's workshop's pull the lever

-Hold the zone=literally SYG but a different name. Same concept only this time you won't lose dosh for not being in the zone. It just won't move the timer foward. Same as operate and control just choose the best perk you feel most comfortable with SYG on normal survival.

-Exterminate=either kill the boss or kill specific zeds. Only 1 wave has them atm and it's the all crawler wave on zed landing

-Transport=pick up X items and bring them back to X location (exception of steamland all parts go back to the drone). Although the gears sometimes spawn randomly based on where you are, they usually spawn only within or near 3 areas. If they spawn elsewhere and you or i find it i'll add it to a possible area it spawns in the guide later.

-Weld and Repair=same as weld and repair on santa's workshop and airship.


what perks work for what:
-weld and repair any so long as you know how to kite
-transport=any but speed > all
-exterminate=any but ammo may become a factor in some cases
-hold the area=any perk will do. Whatever you feel comfortable with using for a SYG objective normally


-escort=specifially this one is where people get ♥♥♥♥♥♥ the most on. Only 4 perks i know of work well and of that only 3 can actually solo very well depending on the lvl they start at for solo play:

-firebug=most recommended because of the ability to create a literal firewall and dealing with trash zeds the best. Best ammo unit to zed killing potential aside from zerker and support but they're more situational and can't really kill zeds fast AND many at 1 time unless under certain conditions

-demo (all R)=highly underused and underrated. All R demo clears trash just as well if not better than firebug, AND incaps or stumbles medium and big zeds. Sadly ammo may become an issue but if zeds start swarming the drone it clears them extremely fast and well. Nukes work but they'll only poison panick/have the potnetial to poison panick and the zeds will stop the drone

-zerker (tank all L with switching smash for massacre)=best to hold the area behind the drone but can do foward. With zerker rage it'll push the zeds back or foward if in front of the drone. Most usefulness is helping kite or tank big zeds away from the drone.
-medic (poison panic)=trash cleaner but can poison panic medium and above zeds away. Though again same problem with the nuke demos.

Also for weld and repair, the trader pod weld/repair in zed landing and outpost i wouldn't recommend supports (especailly solo). SG5000 sucks for killing en mass an endless stream of trash zeds. Speed and being able to rush from 1 trader pod to another > welding potency. It doesn't take too much to weld them either (1 person welding + about 3 extra seconds or 2 people welding is enough).

i'll go more into detail in each for each section / map


perks to avoid and perks to use:
-firebug=perfered especially for solo due to trash killing and big zed capabilities as well as DoT and AoE damage, low ammo consumption per zed killed, and mass zed killing capabilities
-demo (all R)=2nd for same as firebug but added bonus of immeidately killing zeds around the drone
-zerker=tanking, kiting zeds away from the drone, and overall just unilmited ammo
-medic=staple. Solo not so much but multiplayer yeah you may or rather NEED one

-commando, support, and survivalist (depending) can work as supportive perks. Support especially for welding objectives outside of welding trader pods (SG5000 sucks against early hoardes of trash zeds) and extra ammo. Commando with zed time extensions makes zed time perk skills more useful and uncloaks stalkers as well as being useful on outpost and maybe steam fortress (atm you only get KFP in zed landing so not very useful in the boss wave).

-sharpshooter, GS, and swat i'd say avoid because of high costs, high maintenance costs, and they're mostly pick perks (at least GS and sharp are). High zed hoardes of mostly trash zeds mean you'll either run out of ammo or be more easily cornered. They can also make it more difficult to do objectives (they're good / okay for zed killing not so much objective).
Weapons to consider and perk skills to consider
Just a small sub-section i'd though i'd include to post the weapons (even on the perk weapons that don't really fit for the perks themselves for objective mode). Not set in stone and more a consideration than outright choosing them as a must have perk skill or weapon:


Perk weapons

-any zerker weapon excluding the nailgun and pulverizer (hemo is 10X better atm because of healing and poison panic). Bone crusher works best for tanking while the battle axe and eviscerator for clearing zed hoardes

-Mag fed support weapons (for trash clearing), avoid single shot reload because of time to reload and zeds can appear from behind cooridoors easily

-HX-25 for clearing trash hoardes and nukes if you have them unlocked

-avoid swat weapons unless it's the p90 or tommy gun for large mags

-crossbow ironically works for stunning big zeds and mediums like edars

-firebug flamethrower, CnB, and MWG to kill trash and incap or push medium and big zeds away. Kills EDARs relatively easily

-helios for the same reason as firebug weapons above but added bonus of small penetration buff

-HM 501 med AR for grenade AoE damage and healing/buffing allies along the way

-m79, m32, and rpg all help clear a zone of trash zeds while significantly damaging mediums or big zeds, as well as incapacitating them if you use R perk skill traits. Better to use the frag rounds to have a larger blast radius (if you know or can easily counter sirens before they scream which if you have frag rounds you can at least stumble them so they cannot scream and then finish em off or someone else kill them)

-freezethrower more for holding zeds in a line instead of killing them. Reminder that zeds have a fixed # that can be in the map at any one time before they stop spawning more and then only spawn when you kill 1. Freezeing medium and big zeds like scrakes makes it more easier to kite and control the flow of zeds

-m16 but only on commando for fast grenade AoE clearings

-GS the only weapon that comes to mind are the AF2011's and that's more for versatility and kiting big zeds away from objectives. 500's work if you pick line em up for penetration bonuses. Aside from that avoid them for the most part since it's still part of the pick perks (along with most swat and sharpshooter weapons).

-Killerwatt charged beam works for clearing lines of zeds. If you can get it before the escort wave(s), it makes the challenge stupidly easy.


Perk skills

-zerker rage actually is very beneficial in objective because it not only heals you but keeps zeds away from the objective. On transporter, escort (drone), and pretty much all objectives outside of exterminate (boss wave) it helps keep the zeds back relatively easily

-extended mag perk skills on any perk work very well. Less time reloading and more pew pew pew=less zeds cluttering the way

-frag rounds and make things go boom both work to help clear zeds in or around an objective area. Trash die instantly, mediums can get knocked down or killed in a 2nd shot, and big zeds take significant damage or can get knocked down depending on the other perk skills used.

-shock tropper and mad bomber are better for objective mode. Again the point is not kill zeds anymore. It's killing zeds (endless waves until the objective finishes) and doing the objective. Since trash are a greater threat than big zeds in objective mode, clearing more of them makes the match much easier

-massacre over smash for zerker is the same reason to take vampire over butcher. More trash zeds mean you have more access to health sources and more easier to kill them.

-heatwave is a must for firebug along with zed sharpnel for more AoE damage and stunning zeds

-zed splosion or zed sharpnel for survivalist/firebug help dealing with zeds much more easier and safer. Since they're in hoardes anyway in higher waves, having the perk skills help inc. the % chance a zed explodes and the explosion reaches and stuns or kills more zeds.

-cripple and battering ram. Should you go swat battering ram helps push zeds far away now with the reworks. Pushing zeds behind the escort even further back while incapping them or clearing and incapping zeds in a narrow hallway going foward does wounders. Objective first killing zeds 2nd (unless it's the exterminate objectives).

-Ballistic shock and ranger help more on sharp than killing perk skills. Logic behind it is that zeds spawn infintely till the objective is finished. Delaying medium and big zeds even for 3-6 seconds more means they won't spawn any new zeds and makes takedowns easier (especially if you're on the move alot on transport or escort).
Zed landing objective Part 1
Probably the easiest to do starting off first.


wave 1=repair and weld the broken trader pods.
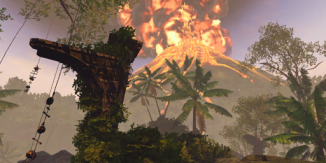
to do this simply repair and weld the broken trader pods. May be random but usually they follow a set path most of the times. 1st is the one on the beach by the crashed plane. 2nd up is the trader pod in the cave near the extraction point where the flares are setup. 3rd is the one where the cave is outside of it (the cave where the drone tech is setup/the camp fire). 4th and last is the trader pod facing the volcano (the only remaining one left).

wave 2=exterminate all crawler wave
To do this one simply change to firebug or zerker. Other perks work too but ammo may become an issue as well reloading because they spawn frequently and close by. If you wanna conserve ammo go as a speedy perk, kite them into a crowd, and chuck a grenade at them. The best spot to holdout on is either:
-top of the rocky ridge where you can jump down from near the extraction zone with the flares
-cave if you weld the door (but it may mess with your other strategies for the later waves unless you are a support or have a support if multiplayer).
-small ledge near the crashed plane (when you spawn look left and that small ridge).

Wave 3=escort the drone
The drone will take a little bit to come out and will be at half health. Best to repair it and continue.
For this wave on suicidal or HoE they will spawn qps. Best to have a zerker tank them away. focus more on defending the drone and making sure no zeds get too close. If anything have 1 person whose the best at dealing with them lead them away from the drone or behind the group so you can kill them without losing sight of the drone or stopping it.
If solo chuck a couple of (if damage grenades no emp cyro or flashbangs) grenades at the path where it's going 1 every 3 seconds to kill the zeds that will surround it and quickly kill the qps. Once they are dead they won't spawn anymore just regular zeds.
The path it will follow is from the beach, past the rocks, through the cave, up the path with the stream of water and into the cave with the drone equipment/campfire. You can weld the door before the wave starts to make it easier though no zeds spawn behind it. They will all spawn in the cave opening going to the trader pod.

Wave 4=transport the horzine touch pads
The pads will be randomly scattered and spawn depending on where you are when they activate. They will always be furthest away from you unless you're in a team then it'll be random. They usually spawn in 3 locations:
-underneath the ledge that's near where the extraction point is with the flares
-at the bottom of the stairs near the 2nd door (there's only 2 one is the one by the cave so it's the 2nd one)
-If memory serves me right the last one should be close to the extraction point with the flares (may have to double check on thate one).

Atm theres a glitch where you can heal and switch back to your original weapon and original speed. I'm sure they'll fix this soon by beta 2 hopefully. If so then you'll go slower. Best bet is to have a zerker or big zed killer to hold it since they already walk at normal speed. DO NOT GET A

TRASH KILLER PERK TO HOLD IT.

Trash zeds will be a greater threat than big zeds. Should be zeds show up you can switch to your weapon but you'll drop the item. You can actually throw the touchpad as you would a weapon with backspace. A viable tactic, bit slower, but you'll never be unarmed. You can also throw a grenade and you won't drop the item.


Zed Landing objective Part 2
cont.

Wave 5=Hold the zone escort drone (hey that rhymes).
Simple task. SYG and wait until the data finishes downloading. You only need the required amount of people for this one for the timer to continue the countdown (solo=1, multiplayer 2 players=1 person, 3-4 players=2 people, and 5-6 players=3 players). Not much but just hold the area and make sure zeds stay out of it until the timer goes down.

You can weld the door (if broken and a support have someone repair it. Best to have 3 people in the center (big zed killers and medics) while the rest outside (zerkers and trash zed killers).

If you have or are a zerker you may wanna face the entrance of the cave opening leading to the trader pod. Most zeds will spawn there. Zeds rarely if not few spawn by the small creek area and behind the doors (once welded you can pretty much hold the doors till the wave ends or just before the timer ends). One area to watch out for is the small hole. Crawlers typically spawn from it and can impede the timer process.


Wave 6=Escort (drone) 2nd part to the extraction zone
The drone will go from that area, past the doors, down the stairs, towards the extraction point. Pre match setup you may wanna weld and if a demo trap the doors near the stairs (if you have a support repair them if needed). IF you are solo and not a support but didn't use them best weld the bottom stairs door an wait to weld the ones near the cave (if you didn't weld them prior).

Big zeds spawn this wave (scrakes and full fleshpounds or qps varies based on RNG and difficulty). Same tactics apply and big zeds usually do not spawn again once killed. Dispatch them quickly but the main focus should be making sure the trash zeds or any zeds for that matter stay away from the drone. Even being near wills top it. Fan out in groups of 3 in front of and behind the drone.

1st wave of zeds will spawn at the cave entrance and some from the creek path. Zeds will mostly spawn behind you and won't spawn in front till the drone gets closer to the stairs. It is then that you should get closer (if the welded door is still welded push left if not have 1 person go right and 2 left towards the extraction zone). It'll then go around rather than the area between the extraction zone and trader pod.


Wave 7=operate and control
Simple SYG with pressing the flare button (think of it as the lever). Just need 3 people in the zone rest spread out. best setup is like the cave but have 2 trash perk zeds 1 inbetween the flares and trader pod path, 1 on the path near the water puddle, and 1 towards the stairs leading to the beach and the small area on the right facing the stairs (makes it so zeds don't spawn too too close). Just have 1 person near the button at all times and press it immeidately once it activates.


Wave 8=exterminate (KFP)
atm only kfp keeps on spawning. Best have the weapons that work well against it (including MW damage weapons, eviscerator or tanking SS/BC/battleaxe on zerker, etc.). Kill it. Once dead You'll automatically get into the chopper after about 10 seconds and finish the match. ATM there is a glitch where if he gets too close to the drone he'll start attacking near that area. Use that to your advantage too if you want.


Outpost objective Part 1
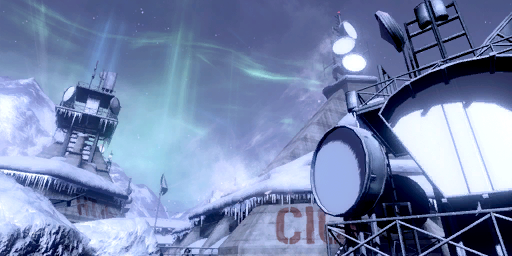
2nd easiest map to do. paths highly favor CQC (close quater combat) and welding a ton of doors.


Wave 1=Weld and Repair the trader pods
Same as the previous section just weld 4 of the 6 trader pods. 1st trader pod is either the one going up the snow slope on the southeast end of the map (North would be if you were by the helipad and you were facing north it would be to your right), or the middle trader pod. 2nd pod would be either the middle trade pod or the one at the bottom from the middle area going north (near the truck). 3rd would be either the pod near the gun range or the pod near the command center. Last pod will be the one missing (command center or the gun range because they're near the 2nd wave objective). The pod on the far West side of the map (indoors with the garage and truck) will almost never need to be repaired/welded.

edit: Sometimes the trader pod in the gun range doesn't get repaired either. Experienced this recently. It seems that it really is RNG but 2 of the 6 pods won't be welded (ironically you can still use it even if it's broken, you just won't be able to see it glow neon blue like the others).


Wave 2=Operate and Control, overload the servers
Next wave will happen in the area adjacent to the gun range or at the bottom of the command center. Simple SYG and press the button. 2 areas will be the open range facing the TV's/computer monitors. 2nd will be the hallway leading to the gun range. SYG rules apply as before. Best to have 1 trash zed perk towards the end of the hallway near the gun range (to have make zeds spawn further) and 2 towards the open range area (1 at the top of the first 1st small stair steps and 1 in the TV monitor area). If low number of players the gun range hallway takes priority over the open ranged area.


Wave 3=Escort the drone
You will have to open the gate to start the wave. The door/gate will be the one near the stack of boxes/crates where the server overload wave was (in front of the TV monitor pole facing west). The drone will go up the stairs to the Left side up the next flight of stairs, make a Right turn, towards the metal screening room at the end of the command center, towards the west down the hallway towards the drone equipment.

Best pre-wave setup is to weld the door that exits to the outside towards the center of the map (west doors up the 1st flight of stairs). The other door(s) you may wanna consider welding are the doors near command center on the south side on top, the doors at the bottom of the stairs if you were at the center of the map the doors in front of the trader pod at the center, and the doors that lead to the cafeteria. Do note that if you don't have a support to weld them you may wanna not weld them and leave them for the escort back as it'll be more difficult to do without them.

Setup as previously. 3 in front 3 in back. Fan out when going up the stairs (1 person in the area facing the helipad and 2 ahead while 3 stay behind). If not enough players top takes priority leading to the metal security screenings and behind the drone. zeds will spawn around the bottom and the command center (near the big H horzine logo where the ammo box spawns on the broken raillings). Halfway through zeds will spawn from below and coming from the helipad area.

Once the drone reaches the metal screening area best to weld the door immediately and continue foward (nothing will spawn in the metal screen area). If welded the door at the middle area then zeds will be blocked. If not they'll spawn from the middle area of the map and go up the stairs. Few zeds will spawn from the cafeteria until the drone reaches the hallway so you should be fine (maybe 1 or 2 but most will spawn coming from the metal screen direction or the bottom of the stairs).

After it should be easy to defend the area since it's a 2 way hallway. Zeds will either spawn coming up from the stairs near the drone equipment room or behind from the hallway where the drone went through.


Wave 4=Transport the Touch pads
3 areas they usually spawn:
-Garage at the bottom of the stairs where the red cabinet with the tools are
-near the gun range area
-Forgot the last location but i have faint memories near the TV monitor room area/command center area. I'll look into it later.
Edit:No wait i remember now. It'a the center doors that i recommended you weld for the drone escort wave (the center of the map, the doors that lead up the stairs on the west side (if north is facing the area hallway and the center map trader pod would be on the right).


Outpost Objective Part 2
cont.

Wave 5=Escort the drone back towards the command center (area with the large H horzine logo in orange i believe)
Pre wave setups: weld or if possible repair then weld:
-double doors in the drone equipment area (it's from the stairs path the drone took to get there).
-Double doors on the left facing the cafeteria hallway (or north the hallway between the cafeteria and the drone area).
-Double doors that lead from the cafeteria to the path the drone originally took from the metal screening room to the drone area

The drone will go through the hallway through the cafeteria, towards the outdoors to the center of the map but around the pillar through the double doors that go towards the command center.
4 front 2 back because zeds will spawn a ♥♥♥♥ ton in front and sides. or front takes priority no matter how many behind (if 2 only have 1 person in front and 1 in the middle/near the drone to cover the front and back when necesary).

zeds will spawn from the hallway cafeteria and the side coming either up the snow stairs or from above the roofop. Once inside the cafeteria zeds will spawn from the hallway coming from the original drone path, behind, and the outside (basically all directions). Best to weld the doors as the drone passes to focus on the side doors (if not welded the hallway doors) or the outside doorway. Once the drone reaches the outside towards the center have 2 behind the drone and weld the door it comes out of (from the cafeteria). Move foward and cover the area with the snow slope and doorway towards the command center (they'll try to stop you from going into the command center).


Wave 6=Operate and control destroy the terminal
SYG and hold the area. Press the button. Zeds will mostly spawn from the outside where the drone came from. At about halfway through the zeds will start spawning from the room with the security metal screenings. Pre-wave setup is to weld the metal screening hallway and the double doors leading to the outside.


Wave 7=exterminate Patriarch
ATM mostly get Patriarch for this objective in all the times i've played (like with zed landing objective and KFP). Best to have a commando/switch to one if not already in a team setting. A demo or get c4 to uncloak/dedonate if he gets too far. Eviscerator zerker. Hemogoblin medic, MWG or helios all L firebug.

Pre wave setup (optional but useful)=repair and weld the doors in the screen room, the bottom door leading to the outside (patty usually spawns in the center but may spawn from the bottom outside door), the 2 doors in the hallway from the gunrange both leading to the outside, the double doors that lead from the middle of the map up towards the drone path when going towards the equipment room, the cafeteria double doors, and once patty gets into the command center weld the doors that the drone came from the cafeteria towards the command center.

Kite him around the command center (easily do-able). He should die with little to no problem especially if you stick some c4 to him (more the merrier).


Wave 8=Hold the Zone extraction helipad
SYG but at the helipad. Very easy to do. Just have 4 people or even 5 people focus on the hallway leading into the double metal screening room (or inside to literally the rest of the map), and 1 person minimum looking up from the metal ledges that zeds can drop down onto you. Just hold the area till the chopper shows up and you should easily win the match.

Steam Fortress Objective Part 1
*no image from stock images available yet*

Steam fortress is the one map people seem to have trouble with. It's just too new and people haven't exactly found the spawn locations of ammo and zeds yet or the paths /locations to take/hold. Luckily I paid enough attention to get the jist of it all.

This objective map actually takes 10 waves instead of 7 (long instead of medium waves). Why idk but maybe it's because steam fortress was focused more on but no evidence to back it up.


Wave 1=Escort the drone
Possible the hardest map to do atm because you flat out start with escorting the drone. It's also a fairly length path from the start to the area. From start to the area up the stairs, zeds will usually spawn from the back and the top of the broken railings as well as the hallway where the transport the gears mission will be (right side room facing the stairs).
When going up the stairs zeds will immediately spawn from the doors at the top of the stairs. Weld the door ASAP before the drone reaches the top to focus on the top and bottom zeds more. The drone will go through the elevator (not through the broken railings). When it gets close zeds will start spawning from the other room/around the elevator. Push foward. Afterwards zeds will mostly only spawn from behind so the drone can easily reach the destination with little to no hassle.


Wave 2=Weld and Repair the bottom area
What the title says. Repairs maybe RNG but most of the times i find that it's usually, in order:
1. the fuse box closest to the entrance
2. the fuse box on the left side facing from the spawn entrance (♥♥♥♥ what am i saying if you spawn to make things easier north would be going towards the rocket door and south would be going towards the spawn where you first started). the west side near the elevator
3. the fuse box near the trader pod at the bottom loading dock area
4. the fuse box missing near the elevator/crate room

For steam fortress weld and repair i do recommend support because it takes an absurdly long time to weld. Normally 2 full welds + about 30% extra. With a support it should be cut by at least half that.


Wave 3=transport the gears to the area near the spawn area
Gear locations vary but usually:
1st. bottom area where you repaired the 1st fuse box
2nd. either the top area near the globe that's near the rocket door entrance or the steam boiler you'll have to defend later
3rd right above the bottom trader pod near the 3rd fuse box. Up the stairs where theres 3 cargo crates and a spinning gear turbine


Wave 4=Operate and control Activate the command console
Remember the area where the drone goes that afterwards the zeds only spawn from behind. That room. SYG and just hold the area. Zeds spawn from the small hole on the west side facing the console or north, the east side, and behind you from above on that small area on the east side cargo crate.
Steam Fortress Objective Part 2
cont.

Wave 5=Escort the drone towards the spawn point
Drone will go from the rocket door towards the spawn location around the east side. Basically down the flight of stairs towards the water wheel area where you'll repair the boxes in the upcoming waves, all the way towards the spawn point.
3 in front 3 back but going down the stairs best to have 4 or majority in front because zeds will spawn more from the bottom or sides of the bottom of the stairs. Nearing the spawn point you wanna do the opposite and have the majority of players towards the back or near the drone since they'll spawn on the sides too (btw i forgot the name of the drone is Rover for Steam Fortress).


Wave 6=Transport gears towards the boiler (west side near the globe that's near the rocket door entrance
gear locations:
1st. bottom trader near the 3rd fuse box
2nd. hallway with the broken door and weldable door. the first set of spiral stairs escorting the drone to the spawn point
3rd. Near the water wheel on the east side of the spawn point where you will weld the fuse boxes in a later wave


Wave 7=Hold the Zone boiler area
SYG rules. Zeds will spawn from the stairs and the east side with crawlers from the small hole near the gear transport location. Zeds will first spawn from the east side then the bottom and finally the small hole near the gear transport location.


Wave 8=Weld and Repair 2nd set of fuse boxes
1st. Water wheel on the east side of the spawn point area
2nd. middle fuse box in the same location
3rd. Fuse box where the Operate and control area will be. Where the drone goes (way back to spawn point) facing the rocket the command console area.


Wave 9=Operate and Control rocket pad area
SYG rules. Zeds will mostly spawn from west area adjascent to the rocket room door and the broken railings in the center of the console command. They'll spawn there 1st then 2nd the area on the east side coming up the spiral staircase or from the small hallway with the broken door and welded door. Rarely spawn from below the small staircase but will sometimes occasionally spawn a husk or scrake so be wary every now and then


Wave 10=Exterminate boss (any boss)
From the console command area on the rocket go towards the door near the area where the escort drone first goes to and comes back from. Go inside the launch pad towards the rocket door. Buy whatever inside the trader pod and fight the boss. It's open season and any boss can spawn (not specific ones). Most noteable (but mostly RNG on my part) is KFP and patty, 2nd hanz, and rarely spawns abom.

Nuked Objective: Part 1
-coming soon-
Nuked Objective: Part 2
-TBA-
Closing remarks
Welp that's about it. At least for Beta 1. Hopefully they don't change it TOO much. Objective mode is actually not too difficult (even at lower difficulties). I wouldn't entirely be opposed to the idea of adding more ammo boxes for the escort drone waves but aside from that everything else is do-able with competence, patience, and good teamwork if in a group.

Good luck and have fun.


Special thanks to Aya (Shame)imaru, [ST] Immortal Nub (mostly negative reinenforcement :P), and

It'd be criminal if i didn't thank pathfinder (used his video and other YT's as a guide for steam fortress but mostly his since his latest vid had no commentary). I sorta knew the layout already but forgot some key issues (some gear spawns and the order of waves happen from wave 6+).
22 Comments
Fumo Bnnuy N Friends  [author] 11 May, 2020 @ 7:49pm 
i'm so tempted to cont the guide but that would mean redownloading it and my computer can't handle it sadly
BlackRedDead 2 Nov, 2019 @ 10:35pm 
overall i wish there would be more motivation to play "hold zone" - but sadly the rewards are not worth the hassle yet! - hell, they are even not a nice bonus as what the hell should i do with 200 dosh at most? - a mere less than 50 if you're bad luck! - as those zones are pretty imba, sometimes even impossible to hold even with a full team of competent players - as just to large and spawnpoints right inside it! (shafts are impossible to defend the zone when they drop right inside it!)
BlackRedDead 2 Nov, 2019 @ 10:29pm 
haven't played nuke objective yet, but always found it strange to walk around unharmed in nuclear dust - so i kinda like the idea that i have to reduce my exposure time - depends on dmg taken ofc! - i think running around with full health shouldn't kill me if i take a shortcut trough the open, but do indeed harm me to an extend where i really have to care about not staying outside because even with the healer i would die if staying outside! - especially the drawback when encountering and facing zeds in the outside! (also this map is just to easy to camp outside and kill zeds even at their spawns and paths inside the level! - running around in a circle at later waves there is not much reason to go inside or in the basement unless you're encountering zeds ahead of your path that you can't outmaneuver!)
Fumo Bnnuy N Friends  [author] 2 Nov, 2019 @ 10:16pm 
that and the 2nd i believe wave where you gotta weld in the basement.
Fumo Bnnuy N Friends  [author] 2 Nov, 2019 @ 10:16pm 
i really should update the nuke objective mode b/c the entire outside being the floor is lava type of poison is bullshit and i died a couple of times trying on HoE and even suicidal.
Fumo Bnnuy N Friends  [author] 2 Nov, 2019 @ 10:15pm 
yeah the crawler wave isn't that hard but tbh it helps people who casually play the game. Again this helps to prep and learn as well because if you fuck up on objective mode (especially steam fortress) you lose a lot of time and effort). This is very true on HoE as i almost won HoE solo for zed landing but the 3rd to last wave where yo have to escort the drone to the drop zone i fucked up and the drone broke down. I was pretty much a sitting duck as either i could run or try to repair the drone but zeds closed in and chipped at my ammo.

Also the guide is accessible through the steam interface making it easier to look up what's next and on single player pause and then continue the game.
BlackRedDead 2 Nov, 2019 @ 9:15pm 
and what i personally experienced was - but like in every game(mode) i played where it tasks the player more than just point&shoot! - ppl that, despite it being announced and displayed, don't get what to do - resulting in ppl headlessly running around and even let me and the drone killed! - that is the second highest issue with this mode's fail with randoms, because you sadly still encounter ppl where you can just ask how they - if they have any - managed to finish their degree?!
i mean those ppl doesn't help a guide tough! - you can even tell them what to do and they just reply "stfu noob" or garbage like that! - scarce that you get a full team of such real noobs but it happens! - sadly especially on HoE with randoms xP (there should be some sort of lock, that you need to be invited into it under a certain level!)
BlackRedDead 2 Nov, 2019 @ 9:08pm 
@Fytch depends on the difficulty, players who want to beat HoE eighter learn all of this themselfes trough several losses or simply read a guide and prepare themselfes and concentrate on the actual gameplay! ;-)
BlackRedDead 2 Nov, 2019 @ 9:06pm 
so i personally never experienced a team that got overwhelmed by the crawlerwave - i admit it's tougher than it sounds and you can indeed easaly be killed if you underestimate their numberstrengh - but a single grenade of any class is enough to dimish those numbers close to emergency (tough, beware to kill yourself with it!) - and while headshots are kinda challanging to score at crawlers it is also a high chance that a "aimed bodyshot" scores a headshot, as the whole target is smaller while the headsize remains and is at another position - so you actually don't need to aim for the head as you might hit it anyway and can just concentrate on counting your shots! ;-)
BlackRedDead 2 Nov, 2019 @ 9:06pm 
huh? - Crawler Wave is the easyest i know - tough i often play firebug, demo or medic - or at least have one of those in the team when i play another class - but the only classes wich might have serious issues are the sniper and maybe unexperienced gunslinger, support or even commando (protip: tapfire!) - also having a berserker at the team to deal with masses without ammo consumption helps great and is allways a good addition to the team! (decapaciting scrakes later comes in handy very well^^)