Left 4 Dead 2

Left 4 Dead 2

73 ratings
Select Your Skins [SYS] (Users Guide)
By Ellie
This Guide explains to L4D2 players how to use the Select Your Skins [SYS] features.
   
Award
Favorite
Favorited
Unfavorite
Summary
The Select Your Skins (SYS) is the future of the infamous RNG.
It is a module created for L4D2, that will let you randomize the textures of compatible mods, or, for certain mods, to let you choose and lock the skin you want, forever (until you change it again).

The base mod comes in two parts. You only really need the first one (the CORE), but you can subscribe to the SYS HUD Mod so you can better see what you're doing.

https://steamhost.cn/steamcommunity_com/sharedfiles/filedetails/?id=2325990437 https://steamhost.cn/steamcommunity_com/sharedfiles/filedetails/?id=2325994272
Before jumping into that quick user guide, there are a few things you need to know :
  • 🚫 The system to lock and select a skin (SYS) is not compatible with the use of the Steam Controller or with special graphs like the budget panel.
  • ⚠️ The system works with the usage of Slots. Each mod has a dedicated slot, and if you have two mods that use the same slot, they will change together when you try to change their skins. Therefore, try to not have two mods active that use the same slot.
  • The system works only for SYS compatible mods. Old RNG mods, unless updated, do not work with this system.
  • Certain SYS Compatible mods will only allow you to randomize the skins again will not let you choose your skin This is up to the Modder's choice.

Table of Contents
This Guide is divided into three parts:
  • ⚙️ INSTALLATION (How to install the mod)
  • 📄 USER MANUAL (How to use the mod)
  • 🔧 SLOT CHANGE (How to modify a mod to change its slot)
⚙️ INSTALLATION
The first (and maybe only) thing you need to do is to subscribe to this mod.

https://steamhost.cn/steamcommunity_com/sharedfiles/filedetails/?id=2325990437
You can also subscribe to the HUD Mod that you can find here.

https://steamhost.cn/steamcommunity_com/sharedfiles/filedetails/?id=2325994272
Note that this HUD mod is not compatible with the Global Radar. If you want to use both SYS and the Global Radar, you will need a special combined HUD mod:
https://steamhost.cn/steamcommunity_com/sharedfiles/filedetails/?id=2325995062

WHAT YOU SHOULD SEE
When you subscribe to the CODE Mod, wait for it to load (when the little spinner icon 4 disappears besides the Add-Ons tab in the main menu).

Then go in Options > Keyboard/Mouse > Edit Keys/Buttons and look for this.


If you see this, the Mod is fully installed and you can jump to the 📄 User Manual.
If you do not see this, you will need to manually install something. Keep reading this Guide and try all the alternative installation methods in order.
Alternative Method ➀
This method only works the SYS Core Mod is conflicting with an addon.
Note that even if it says it conflicts, it's not a problem at all and will not crash your game. The conflicts are often due to Vocalizer mods that also want to change the Keyboard/Mouse menu.

Note that if you use a Vocalizer, only ion's Vocalizer is fully compatible with SYS (even if it says it conflicts), because I actually copied ion's keybinds, knowing that a lot of people use this mod.

Alternatively, you can use the VOX Vocalizer + SYS bundle by subscribing to this addon instead of the SYS Core Mod (unsubscribe from the SYS Core mod if you use that one):
https://steamhost.cn/steamcommunity_com/sharedfiles/filedetails/?edit=true&id=2389473654
Now, here are the steps you need to follow in order to use the Alternative Method ➀:

STEP 1
Go to {LINK REMOVED} and manually download the SYS Core Mod.
You'll end up with a .zip file that contains a .vpk file.

STEP 2
Put that .vpk file in Program Files\Steam\SteamLibrary\steamapps\common\Left 4 Dead 2\left4dead2\addons.

STEP 3
Restart L4D2 and now, the SYS Options should appear in the Edit Keys/Buttons section.
If it doesn't work, try to unsubscribe from the SYS Core Mod and from all of the Vocalizer mods. Then, reinstall your Vocalizer, start L4D2, wait for the addons to load, exit L4D2, subscribe to the SYS Core Mod, then start L4D2 once again
Alternative Method ➁
This other alternative method works only if you have no Vocalizer mod active. The goal is to manually add the options by modifying a L4D2 file you have on your computer.

STEP 1
Go to Program Files (x86)\Steam\SteamLibrary\steamapps\common\Left 4 Dead 2\left4dead2\scripts and open the kb_act.lst file with Notepad (or any text editor).

STEP 2
At the end on that kb_act.lst file, add this big block of text (copy & paste it), then save the kb_act.lst file and start L4D2. You should now see the SYS options under edit keys/buttons.
"blank" "==========================" "blank" "SELECT YOUR SKINS (SYS)" "blank" "==========================" "incrementvar cl_buy_favorite_quiet 0 1 1;sc_enable 0;sc_enable2 0;" "Switch between SYS/RNG" "incrementvar cl_buy_favorite_nowarn 0 1000000000 1" "Reroll RNG" "incrementvar budget_background_alpha 0 1000000000 1;" "Slot 1 (Zoey)" "incrementvar budget_bargraph_background_alpha 0 1000000000 1;" "Slot 2 (Zoey Extras)" "incrementvar budget_panel_height 0 1000000000 1;" "Slot 3 (Rochelle)" "incrementvar budget_panel_width 0 1000000000 1;" "Slot 4 (Rochelle Extras)" "incrementvar budget_panel_x 0 1000000000 1;" "Slot 5 (Bill)" "incrementvar budget_panel_y 0 1000000000 1;" "Slot 6 (Francis)" "incrementvar budget_show_history 0 1000000000 1;" "Slot 7 (Louis)" "incrementvar budget_show_peaks 0 1000000000 1;" "Slot 8 (Coach)" "incrementvar hud_classautokill 0 1000000000 1;" "Slot 9 (Nick)" "incrementvar sc_pitch_sensitivity 0 1000000000 1;" "Slot 10 (Ellis)" "incrementvar sc_pitch_sensitivity2 0 1000000000 1;" "Slot 11 (Survivors Extras 1)" "incrementvar sc_yaw_sensitivity 0 1000000000 1;" "Slot 12 (Survivors Extras 2)" "incrementvar sc_yaw_sensitivity2 0 1000000000 1;" "Slot 13" "incrementvar sc_mouse_sensitivity 0 1000000000 1;" "Slot 14" "incrementvar sc_mouse_sensitivity2 0 1000000000 1;" "Slot 15" "incrementvar sc_debug_sets 0 1000000000 1;" "Slot 16" "incrementvar npc_height_adjust 0 1000000000 1;" "Slot 17" "incrementvar overview_alpha 0 1000000000 1;" "Slot 18" "incrementvar overview_health 0 1000000000 1;" "Slot 19" "incrementvar overview_locked 0 1000000000 1;" "Slot 20" "incrementvar overview_names 0 1000000000 1;" "Slot 21" "incrementvar overview_tracks 0 1000000000 1;" "Slot 22" "incrementvar texture_budget_background_alpha 0 1000000000 1;" "Slot 23" "incrementvar vprof_verbose 0 1000000000 1;" "Slot 24" "incrementvar texture_budget_panel_height 0 1000000000 1;" "Slot 25" "incrementvar texture_budget_panel_width 0 1000000000 1;" "Slot 26" "incrementvar texture_budget_panel_x 0 1000000000 1;" "Slot 27" "incrementvar texture_budget_panel_y 0 1000000000 1;" "Slot 28" "incrementvar vprof_graphwidth 0 1000000000 1;" "Slot 29" "incrementvar vprof_graphheight 0 1000000000 1;" "Slot 30" "blank" "==========================" "incrementvar budget_background_alpha 0 1000000000 .01001;" "Slot 1 Max Priority (Zoey)" "incrementvar budget_bargraph_background_alpha 0 1000000000 .01001;" "Slot 2 Max Priority (Zoey Extras)" "incrementvar budget_panel_height 0 1000000000 .01001;" "Slot 3 Max Priority (Rochelle)" "incrementvar budget_panel_width 0 1000000000 .01001;" "Slot 4 Max Priority (Rochelle Extras)" "incrementvar budget_panel_x 0 1000000000 .01001;" "Slot 5 Max Priority (Bill)" "incrementvar budget_panel_y 0 1000000000 .01001;" "Slot 6 Max Priority (Francis)" "incrementvar budget_show_history 0 1000000000 .01001;" "Slot 7 Max Priority (Louis)" "incrementvar budget_show_peaks 0 1000000000 .01001;" "Slot 8 Max Priority (Coach)" "incrementvar hud_classautokill 0 1000000000 .01001;" "Slot 9 Max Priority (Nick)" "incrementvar sc_pitch_sensitivity 0 1000000000 .01001;" "Slot 10 Max Priority (Ellis)" "incrementvar sc_pitch_sensitivity2 0 1000000000 .01001;" "Slot 11 Max Priority (Survivors Extras 1)" "incrementvar sc_yaw_sensitivity 0 1000000000 .01001;" "Slot 12 Max Priority (Survivors Extras 2)" "incrementvar sc_yaw_sensitivity2 0 1000000000 .01001;" "Slot 13 Max Priority" "incrementvar sc_mouse_sensitivity 0 1000000000 .01001;" "Slot 14 Max Priority" "incrementvar sc_mouse_sensitivity2 0 1000000000 .01001;" "Slot 15 Max Priority" "incrementvar sc_debug_sets 0 1000000000 .01001;" "Slot 16 Max Priority" "incrementvar npc_height_adjust 0 1000000000 .01001;" "Slot 17 Max Priority" "incrementvar overview_alpha 0 1000000000 .01001;" "Slot 18 Max Priority" "incrementvar overview_health 0 1000000000 .01001;" "Slot 19 Max Priority" "incrementvar overview_locked 0 1000000000 .01001;" "Slot 20 Max Priority" "incrementvar overview_names 0 1000000000 .01001;" "Slot 21 Max Priority" "incrementvar overview_tracks 0 1000000000 .01001;" "Slot 22 Max Priority" "incrementvar texture_budget_background_alpha 0 1000000000 .01001;" "Slot 23 Max Priority" "incrementvar vprof_verbose 0 1000000000 .01001;" "Slot 24 Max Priority" "incrementvar texture_budget_panel_height 0 1000000000 .01001;" "Slot 25 Max Priority" "incrementvar texture_budget_panel_width 0 1000000000 .01001;" "Slot 26 Max Priority" "incrementvar texture_budget_panel_x 0 1000000000 .01001;" "Slot 27 Max Priority" "incrementvar texture_budget_panel_y 0 1000000000 .01001;" "Slot 28 Max Priority" "incrementvar vprof_graphwidth 0 1000000000 .01001;" "Slot 29 Max Priority" "incrementvar vprof_graphheight 0 1000000000 .01001;" "Slot 30 Max Priority" "blank" "==========================" "cl_buy_favorite_quiet 0;cl_buy_favorite_nowarn 0;budget_background_alpha 128;budget_bargraph_background_alpha 128;budget_panel_height 384;budget_panel_width 512;budget_panel_x 0;budget_panel_y 50;budget_show_history 1;budget_show_peaks 1;" "Full Reset SYS 1/3" "sc_pitch_sensitivity .9;sc_pitch_sensitivity2 .9;sc_yaw_sensitivity 1;sc_yaw_sensitivity2 1;sc_mouse_sensitivity 0.1;sc_mouse_sensitivity2 0.1;sc_debug_sets 0;npc_height_adjust 1; overview_alpha 1; overview_health 1;overview_locked 1;overview_names 1;" "Full Reset SYS 2/3" "texture_budget_background_alpha 128;texture_budget_panel_height 284;texture_budget_panel_width 512;texture_budget_panel_x 0;texture_budget_panel_y 450;vprof_graphheight 256;vprof_graphwidth 512;vprof_verbose 1;hud_classautokill 1;overview_tracks 1;" "Full Reset SYS 3/3"
Alternative Method ➂
This method is the worst and is not a real method. If you cannot get the SYS Options to show up in Edit Keys/Buttons, you can still manually bind the keys instead of using the Edit Keys/Buttons. This will teach you how to manually edit these keys.

STEP 1
Open the Developers Console.
If you do not know how to do that, download this mod that will add a button in the menu for it:
https://steamhost.cn/steamcommunity_com/sharedfiles/filedetails/?id=214945910
STEP 2
Let's take the button to randomize everything as an example.
In the developers console, write this and change the # to the key of the keyboard you want for this button. Then press on ENTER on your Keyboard to confirm.
bind # "joystick 0;incrementvar cl_buy_favorite_nowarn 0 1000000000 1"
For example, if you want the button to randomize everything again to be on the J Key of your keyboard, write this then press ENTER.
bind J "joystick 0;incrementvar cl_buy_favorite_nowarn 0 1000000000 1"
Note that if you want to use SPECIAL keys (like Keys from the NUMPAD or other such keys), you can look at the [Appendix] at the very end of that Guide for all the Keycodes.

If you did everything correct you should see what you just typed with a ] just before, like this:


STEP 3
Did you like that ? Because you'll need to do STEP 2 over and over again for all the controls you want to use. Note that you actually only really need the 2 main keys, and then the keys for the slots you are currently using.
Hereafter, you will find all the bind to manually bind the controls :

Switch between SYS/RNG
bind # "joystick 0;incrementvar cl_buy_favorite_quiet 0 1 1"

Reroll RNG
bind # "incrementvar cl_buy_favorite_nowarn 0 1000000000 1"

Slot 1 (Zoey)
bind # "incrementvar budget_background_alpha 0 1000000000 1;"

Slot 1 Max Priority (Zoey)
bind # "incrementvar budget_background_alpha 0 1000000000 .01001;"

Slot 2 (Zoey Extras)
bind # "incrementvar budget_bargraph_background_alpha 0 1000000000 1;"

Slot 2 Max Priority (Zoey Extras
bind # "incrementvar budget_bargraph_background_alpha 0 1000000000 .01001;"

Slot 3 (Rochelle)
bind # "incrementvar budget_panel_height 0 1000000000 1;"

Slot 3 Max Priority (Rochelle)
bind # "incrementvar budget_panel_height 0 1000000000 .01001;"

Slot 4 (Rochelle Extras)
bind # "incrementvar budget_panel_width 0 1000000000 1;"

Slot 4 Max Priority (Rochelle Extras
bind # "incrementvar budget_panel_width 0 1000000000 .01001;"

Slot 5 (Bill)
bind # "incrementvar budget_panel_x 0 1000000000 1;"

Slot 5 Max Priority (Bill)
bind # "incrementvar budget_panel_x 0 1000000000 .01001;"

Slot 6 (Francis)
bind # "incrementvar budget_panel_y 0 1000000000 1;"

Slot 6 Max Priority (Francis)
bind # "incrementvar budget_panel_y 0 1000000000 .01001;"

Slot 7 (Louis)
bind # "incrementvar budget_show_history 0 1000000000 1;"

Slot 7 Max Priority (Louis)
bind # "incrementvar budget_show_history 0 1000000000 .01001;"

Slot 8 (Coach)
bind # "incrementvar budget_show_peaks 0 1000000000 1;"

Slot 8 Max Priority (Coach)
bind # "incrementvar budget_show_peaks 0 1000000000 .01001;"

Slot 9 (Nick)
bind # "incrementvar hud_classautokill 0 1000000000 1;"

Slot 9 Max Priority (Nick)
bind # "incrementvar hud_classautokill 0 1000000000 .01001;"

Slot 10 (Ellis)
bind # "incrementvar sc_pitch_sensitivity 0 1000000000 1;"

Slot 10 Max Priority (Ellis)
bind # "incrementvar sc_pitch_sensitivity 0 1000000000 .01001;"

Slot 11 (Survivors Extras 1)
bind # "incrementvar sc_pitch_sensitivity2 0 1000000000 1;"

Slot 11 Max Priority (Survivors Extras 1)
bind # "incrementvar sc_pitch_sensitivity2 0 1000000000 .01001;"

Slot 12 (Survivors Extras 2)
bind # "incrementvar sc_yaw_sensitivity 0 1000000000 1;"

Slot 12 Max Priority (Survivors Extras 2)
bind # "incrementvar sc_yaw_sensitivity 0 1000000000 .01001;"

Slot 13
bind # "incrementvar sc_yaw_sensitivity2 0 1000000000 1;"

Slot 13 Max Priority
bind # "incrementvar sc_yaw_sensitivity2 0 1000000000 .01001;"

Slot 14
bind # "incrementvar sc_mouse_sensitivity 0 1000000000 1;"

Slot 14 Max Priority
bind # "incrementvar sc_mouse_sensitivity 0 1000000000 .01001;"

Slot 15
bind # "incrementvar sc_mouse_sensitivity2 0 1000000000 1;"

Slot 15 Max Priority
bind # "incrementvar sc_mouse_sensitivity2 0 1000000000 .01001;"

Slot 16
bind # "incrementvar sc_debug_sets 0 1000000000 1;"

Slot 16 Max Priority
bind # "incrementvar sc_debug_sets 0 1000000000 .01001;"

Slot 17
bind # "incrementvar npc_height_adjust 0 1000000000 1;"

Slot 17 Max Priority
bind # "incrementvar npc_height_adjust 0 1000000000 .01001;"

Slot 18
bind # "incrementvar overview_alpha 0 1000000000 1;"

Slot 18 Max Priority
bind # "incrementvar overview_alpha 0 1000000000 .01001;"

Slot 19
bind # "incrementvar overview_health 0 1000000000 1;"

Slot 19 Max Priority
bind # "incrementvar overview_health 0 1000000000 .01001;"

Slot 20
bind # "incrementvar overview_locked 0 1000000000 1;"

Slot 20 Max Priority
bind # "incrementvar overview_locked 0 1000000000 .01001;"

Slot 21
bind # "incrementvar overview_names 0 1000000000 1;"

Slot 21 Max Priority
bind # "incrementvar overview_names 0 1000000000 .01001;"

Slot 22
bind # "incrementvar overview_tracks 0 1000000000 1;"

Slot 22 Max Priority
bind # "incrementvar overview_tracks 0 1000000000 .01001;"

Slot 23
bind # "incrementvar texture_budget_background_alpha 0 1000000000 1;"

Slot 23 Max Priority
bind # "incrementvar texture_budget_background_alpha 0 1000000000 .01001;"

Slot 24
bind # "incrementvar vprof_verbose 0 1000000000 1;"

Slot 24 Max Priority
bind # "incrementvar vprof_verbose 0 1000000000 .01001;"

Slot 25
bind # "incrementvar texture_budget_panel_height 0 0 1000000000 1;"

Slot 25 Max Priority
bind # "incrementvar texture_budget_panel_height 0 0 1000000000 .01001;"

Slot 26
bind # "incrementvar texture_budget_panel_width 0 1000000000 1;"

Slot 26 Max Priority
bind # "incrementvar texture_budget_panel_width 0 1000000000 .01001;"

Slot 27
bind # "incrementvar texture_budget_panel_x 0 1000000000 1;"

Slot 27 Max Priority
bind # "incrementvar texture_budget_panel_x 0 1000000000 .01001;"

Slot 28
bind # "incrementvar texture_budget_panel_y 0 1000000000 1;"

Slot 28 Max Priority
bind # "incrementvar texture_budget_panel_y 0 1000000000 .01001;"

Slot 29
bind # "incrementvar vprof_graphwidth 0 1000000000 1;"

Slot 29 Max Priority
bind # "incrementvar vprof_graphwidth 0 1000000000 .01001;"

Slot 30
bind # "incrementvar vprof_graphheight 0 1000000000 1;"

Slot 30 Max Priority
bind # "incrementvar vprof_graphheight 0 1000000000 .01001;"
📄 USER MANUAL
This section is the User Manual. It aims to teach the user (also known as 'you') how to use the SYS (Select Your Skins) features.

This section assumes that you downloaded the optional HUD Mod to see what you're doing. Even if you can use the SYS features without the HUD Mod, it is recommended, at least at the beginning, to subscribe to it to have a feedback on what you're doing.

This section is divided into four parts:
  1. Switching between SYS and RNG.
  2. Rerolling RNG (Rerandomize everything).
  3. Selecting a skin using SYS.
  4. Locking a skin using SYS.
➊ Switch between SYS/RNG
The first MAIN Key at your disposal is the Key to Switch between SYS/RNG.
It's the first one you can assign in the options.


If you use the HUD Mod, when you press this key, you'll see the icon of what you just activated appear on the screen then disappear and fade out, like in the picture below.


It is now time to explain what these two modes, RNG and SYS, do:

RNG Mode
RNG Mode is the randomization mode. When you're in this mode, every addon you subscribed to will get a random texture or a random model depending on what the modder chose.

In this mode only, you can use the "Reroll RNG" key (see section ➋).

If you switch to this mode, the skin you might have selected (see section ➌) will disappear and be replaced by a random one, unless you locked it with max priority (see section ➍).

Therefore, to summarize, in RNG Mode, the textures will be randomized unless...
  • ... the mod is not SYS compatible (old RNG mods).
  • ... you have locked a skin with max priority to prevent it from changing in RNG mode.
  • ... the modder chose to deactivate the randomization (RNG) and only allow SYS*.
* this might be the case to offer non-canon skins that only the user and not the game can select, such as hair color variants, that the user can change and select in SYS mode, but that will now show in the randomization pool

SYS Mode
SYS Mode is the skin selection mode. When you're in this mode, the skin / texture will in any case be the one you previously selected. To see how to select skins, please go to section ➌.

Note that the selected skins are kept in the game memory even after you leave L4D2. They will stay between maps, between campaigns, forever. If you use a SYS mod that allows for color change, it will even remember the color if you switch between mods.


➋ Reroll the RNG (Rerandomization)
The second MAIN Key at your disposal is the Key to Reroll the RNG.


This key can mainly be used in RNG Mode (see section ➊ to know how to switch from RNG to SYS). Its usage is very simple.

REROLL RNG
When you press on Reroll the RNG in RNG Mode, every skin of every item and character will be randomized again. You do not like what you're having in your hand, or that picture you see on a vending machine ? Just hit Reroll the RNG key and eveything will change again.

Note that all skins that are locked (see section ➍) are not randomized, since they do not change in RNG Mode. Also note that incompatible mods (that use the old RNG system) are not randomized.


❸ Select Your Skins (SYS)
The main feature of the SYS technology is to be able to select your skins, so they are kept in the game's memory. You probably saw that in the menu, there are a lot of Slots (from 0 to 30).

Slots 0 to 12 are assigned to survivors, but slots 13 to 30 can be used by anything. This is up to the modders choice. Therefore, to actually change the skin, you need to do three things:
  1. Identify what Slot your addon is using.
  2. Assign the correct Slot to one of your Keyboard Key
  3. Enter SYS Mode (see ❶) and press on the Key you assigned
Here's a practical example: I downloaded a SYS Compatible Pills Mod. If you go to the addon page, it says that it uses the Slot 17. Therefore, I downloaded the mod, and assigned my J Key to the Slot 17.


Then, I need to make sure I am in SYS Mode, otherwise I will not be able to change the skin. So I press on the Switch between SYS/RNG until I see the SYS logo come up (with the HUD Addon):


Then, I can press on J, the key that I just assigned, to change the things as I like.
Note that if you use the SYS HUD Mod, an icon will appear in the top-right corner to tell you what Slot you have just modified.


When you're happy with your skin, just stop pressing the Key to change it (you can even remove the Key Bind so that you do not have a risk to change your skin by mistake).


❗️ Note that at this point, you skin will still change (be randomized) if you switch back to RNG Mode. To truly lock your skin forever and prevent any change, please to go the next section (➍).
➍ Lock Your Skins
By default, the skins you choose in SYS Mode will still be randomized if you switch back to RNG Mode. To prevent that, you can force maximum priority for the skin you selected in SYS Mode.
⚠️Note that even when a skin is "locked" (has maximal priority), it can still be changed with the key for its Slot (even in RNG Mode). The only true way to make sure a skin will forever not change is therefore to select it in SYS Mode, to give it maximum priority, and then to unassign / remove the keyboard key to change it, so there's no risk of changing it by mistake.
The SYS technology is also able to lock your skins in place, so they will not change anymore.

This is done by using the "Max Priority" Keybinds that you can see below all others in the Edit Keys/Buttons menu in the options.

Once again, you only need to do 3 things:
  1. Identify what Slot your addon is using (you did that already in ➌)
  2. Assign the correct Max Priority Key to one of your Keyboard Keys
  3. Press on the Max Priority Key you just assigned.
For example, if I still have my add-on for the Pain Pills (Soda) that uses the Slot 17, I should first select the skin I want using what's explained in the section ➌, then I must do the following:

First, since my add-on uses the Slot 17, I need to assign the Slot 17 Max Priority button to a key. I chose the K key at random. I will not need it for very long anyway.


Then, I press on the K key and it locks the skin by giving it maximum priority. Note that if you use the SYS HUD Mod, you see a little red lock on the top right corner, to let you know the Slot 17 now has maximum priority.


Note that now, even if I enter RNG Mode, the skin of the Pain Pills stays the same.


At this point, you can safelty unassign the key you used to lock the skin. If you do not want the skin to change ever again, you can even unassign the Slot key you use to scroll between skins.


Note that the key to lock the skin (give it maximum priority) works even if you are in RNG Mode. If you hit that key while in RNG Mode, the corresponding item will therefore enter SYS Mode even if you're in RNG Mode, and you can then change its skin even if you are in RNG Mode
🔧 SLOT CHANGE
This section is more complex and tells you how, as an user, you can edit an add-on to change the slot it is using.

You might find yourself in a situation where two add-ons you like actually use the same slot.
If there's still the possibility to change them together until they both match what you like, which can be a bit tedious, you can also edit the add-on to change its slot.

If you are experienced and already know what a VMT file is, you do not need to read this section any further. Decompile the mod, open all VMT files, look for a line like this at top of every VMT...
$slotUsed "15"
... and replace the slot of all VMTs by whatever slot you want the mod to use.

If you are not experienced and do not know (yet) what a VMT file is, keep on reading.
⊙ Install the (de)compiler
STEP 1
In your Steam Library, open the "Games" Dropdown menu at the top and tick the TOOLS checkbox.


STEP 2
Install Left 4 Dead 2 Authoring Tools.


STEP 3
Go to Program Files\Steam\SteamLibrary\steamapps\common\Left 4 Dead 2\bin and look for a thing called vpk.exe. Make a shortcut to that vpk.exe (right click on it and select "create shortcut") and put it on your Desktop (the shortcut, not the vpk.exe itself).

⊙ Decompile and edit the mod
STEP 4
Go to this website: {LINK REMOVED} and manually download the mod you want to edit the slot of. In the .zip file, you'll find a .vpk file.

STEP 5
Drag and drop this .vpk file on the vpk.exe shortcut you created on your desktop.
Note that your .vpk file will not have that purple box icon you can see in the picture below.


STEP 6
Open the folder that just appeared on your desktop. And go to the materials folder. Keep opening the subfolders until you find .vmt files.


STEP 7
One by one, open all the .vmt files with Notepad or a similar text editor.


STEP 8
At the beginning of at least one .vmt file, you will see this line, but the 17 can be any other number:
$slotUsed "17"
Change the 17 (or the number you have) into the (new) slot this mod should use, then save, and repeat this for all the .vmt that have this $slotUsed line (it is always at the beginning).

⊙ Recompile the mod
STEP 8
Go back to your Desktop and delete the .vpk file that should still be here (not the vpk.exe shortcut but the mod file you downloaded from that website earlier)

STEP 9
Drag and drop the folder that have the .vmt files you just modified on the vpk.exe shortcut.
This will create a new .vpk file on your Desktop whose name will be the same as the name of the folder. This .vpk file is your modified mod.


STEP 10
Put that .vpk file (still the .vpk file and not the vpk.exe shortcut) in this folder: Program Files\Steam\SteamLibrary\steamapps\common\Left 4 Dead 2\left4dead2\addons

STEP 11
Unsubscribe from the original mod if you're still subscribed to it on the Workshop.
🎆 Congratulations ! You just modified the Slot the addon is using ! Enjoy ! 🎇
🖥️ HUD MERGE
It is also possible to make the SYS HUD compatible with any HUD, if you use a custom HUD.
To do this, you please look at the 🔧 SLOT CHANGE section, but instead of doing ⊙ Decompile and edit the mod (Steps 4 to 8), do these steps instead.
📌 The HUD file that the SYS HUD mod is using should be compatible with almost any HUD, mainly NEUNGUI, SCHISM, or SLIMHUD, because the file it uses is rarely used by HUD mods.

STEP 4
Go to this website : {LINK REMOVED} and manually download the HUD mod you are using. In the .zip file, you'll find a .vpk file.

STEP 5
Drag and drop this .vpk file on the vpk.exe shortcut you created on your desktop.
Note that your .vpk file will not have that purple box icon you can see in the picture below.


STEP 6
Open the folder that just appeared on your desktop.
Then go to resource\ui\hud and open the ItemPickup.res file with Notepad.


STEP 7
In that ItemPickup.res file, you will see that the file begins by this
"Resource/UI/HUD/ItemPickup.res" {
Now, just UNDER this, copy and paste THAT:
sys_rng { "ControlName" "ImagePanel" "fieldName" "sys_rng" "xpos" "180" "ypos" "-40" "zpos" "120" "wide" "512" "tall" "512" "pinCorner" "0" "visible" "1" "enabled" "1" "centerwrap" "1" "image" "sys/sysrng" "scaleImage" "1" "autoResize" "1" } sys_slots { "ControlName" "ImagePanel" "fieldName" "sys_slots" "xpos" "800" "ypos" "10" "zpos" "120" "wide" "64" "tall" "64" "pinCorner" "0" "visible" "1" "enabled" "1" "centerwrap" "1" "image" "sys/slots" "scaleImage" "1" "autoResize" "1" }


STEP 8
Save that ItemPickup.res file and carry on with steps 9+ of 🔧 SLOT CHANGE.

[Appendix] List of all Key Codes
This is the list of all possible Key Codes if you want to manually bind the controls:
TAB ENTER ESCAPE SPACE ! # $ BACKSPACE & ' ( ) * + , - . / 0 1 2 3 4 5 6 7 8 9 : ; < = > ? @ A B C D E F G H I J K L M N O P Q R S T U V W X Y Z [ \ ] ^ _ ` a b c d e f g h i j k l m n o p q r s t u v w x y z { | } ~ BACKSPACE UPARROW DOWNARROW LEFTARROW RIGHTARROW ALT CTRL SHIFT F1 F2 F3 F4 F5 F6 F7 F8 F9 F10 F11 F12 INS DEL PGDN PGUP HOME END KP_HOME KP_UPARROW KP_PGUP KP_LEFTARROW KP_5 KP_RIGHTARROW KP_END KP_DOWNARROW KP_PGDN KP_ENTER KP_INS KP_DEL KP_SLASH KP_MINUS KP_PLUS CAPSLOCK JOY1 JOY2 JOY3 JOY4 AUX1 AUX2 AUX3 AUX4 AUX5 AUX6 AUX7 AUX8 AUX9 AUX10 AUX11 AUX12 AUX13 AUX14 AUX15 AUX16 AUX17 AUX18 AUX19 AUX20 AUX21 AUX22 AUX23 AUX24 AUX25 AUX26 AUX27 AUX28 AUX29 AUX30 AUX31 AUX32 MWHEELDOWN MWHEELUP MOUSE1 MOUSE2 MOUSE3 MOUSE4 MOUSE5 PAUSE
20 Comments
Raz 19 Aug, 2021 @ 3:42am 
does it work with the Colt M4A1 Weapon With RNG mags?
Barclay Edgarias 15 Aug, 2021 @ 11:20pm 
For the command line, what's the command to bind a key for the menu. I couldn't find that at all in this guide
Yalbor 30 Dec, 2020 @ 9:01am 
Perfect! I did just as you said and now it works properly as it should. Thanks a lot for your help :)
Ellie  [author] 29 Dec, 2020 @ 11:46am 
@♋Ąlѷλr the Dark Angel♋ : Oh, I see, it's a special HUD with extra textures.
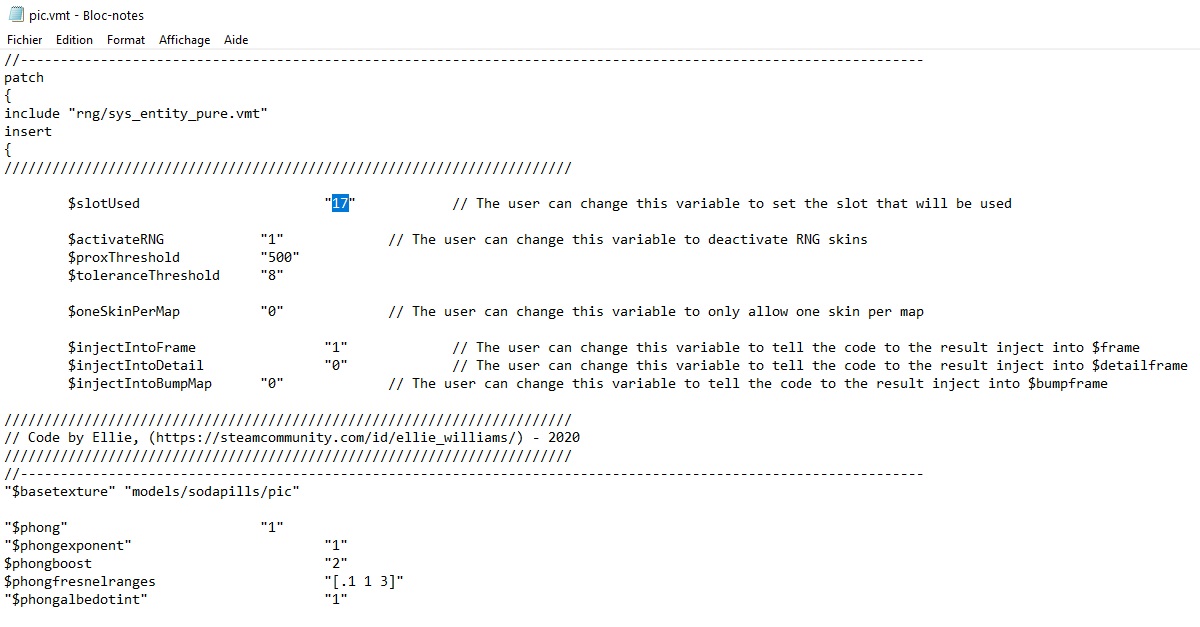
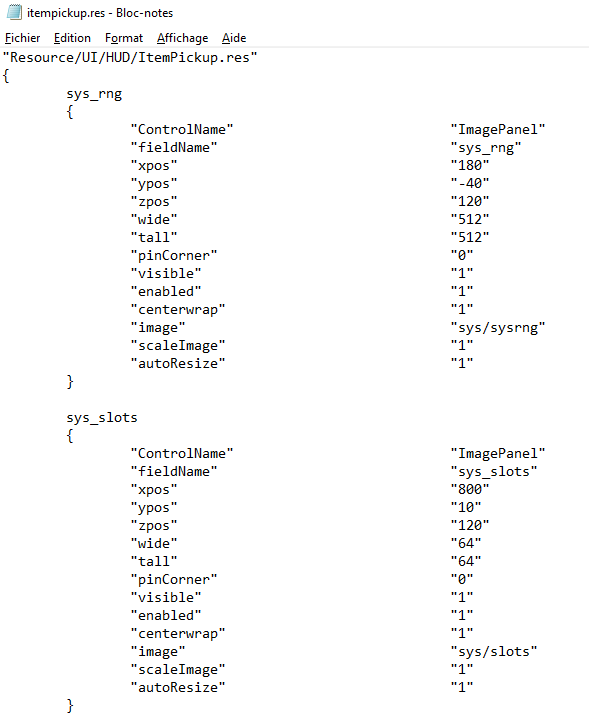
What you need to make to do is to include all the files that are in both mods.
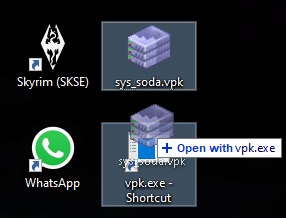
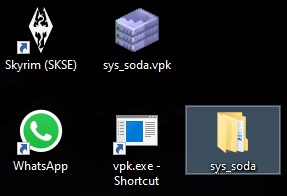
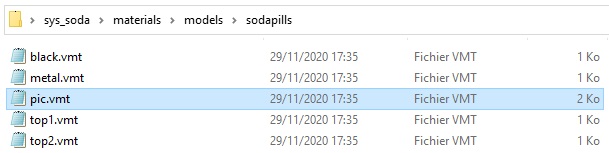
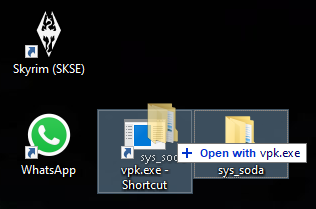
So, download the SYS HUD mod itself with {LINK REMOVED}, do Steps 1 and following to decompile the SYS HUD mod, and copy the whole "materials" folder that's in the SYS HUD mod into your modified HUD mod before you do steps 9+ to recompile.

In short, the exact cause of this error is that you're lacking the files that are in the SYS HUD mod.
You can probably also try to solve the issue JUST by subscribing to the SYS Mod too, atop of your modified mod.

You can add me as a friend if you have any further problems.
Yalbor 29 Dec, 2020 @ 9:24am 
Sorry, I meant in the upper right corner.
Yalbor 29 Dec, 2020 @ 9:23am 
Hello. I'm having a little problem with the HUD merging. I did everything exactly as you said in this guide, however, when I start the game there is a giant missing texture square in the center of the screen and another smaller one in the upper left corner of the screen. Am I doing something wrong?
BTW I'm trying to merge this hud: https://steamhost.cn/steamcommunity_com/sharedfiles/filedetails/?id=2240132561&searchtext=HUD+Vanilla
Ellie  [author] 20 Dec, 2020 @ 11:48am 
@Johnny Bravo: Alternative Method ➀ , read the bubble at the end
Gay Vegeta 20 Dec, 2020 @ 11:22am 
Actually im wrong, Im just using the the select your skin and the ions voalizaer
Gay Vegeta 20 Dec, 2020 @ 11:20am 
Mkay im def gonna try that thank you so much