Chained Echoes

Chained Echoes

249 ratings
In-Depth Character Guide
By ElCid
Breakdown of each playable character, with strengths, weaknesses and build suggestions. Contains spoilers since it reveals characters you can recruit.
9
3
15
2
2
2
2
2
   
Award
Favorite
Favorited
Unfavorite
Introduction and Disclaimer
I'll be updating this guide once the DLC launches.

This is meant to be a guideline based on my own personal experience with this game. Nothing written here is set on stone. This game has a lot of experimentation and possibilities with "builds", so go nuts!

Since stat growth is fixed based on the amount of skills you buy, I've reached the proper numbers by maxing out every single character and stripping them of all equipment, passives and Class Emblems to get the raw amount of each stat, in order to make a proper list of who has the highest / lowest stats.

I hope this guide finds you well and help in any way! Thanks in advance!

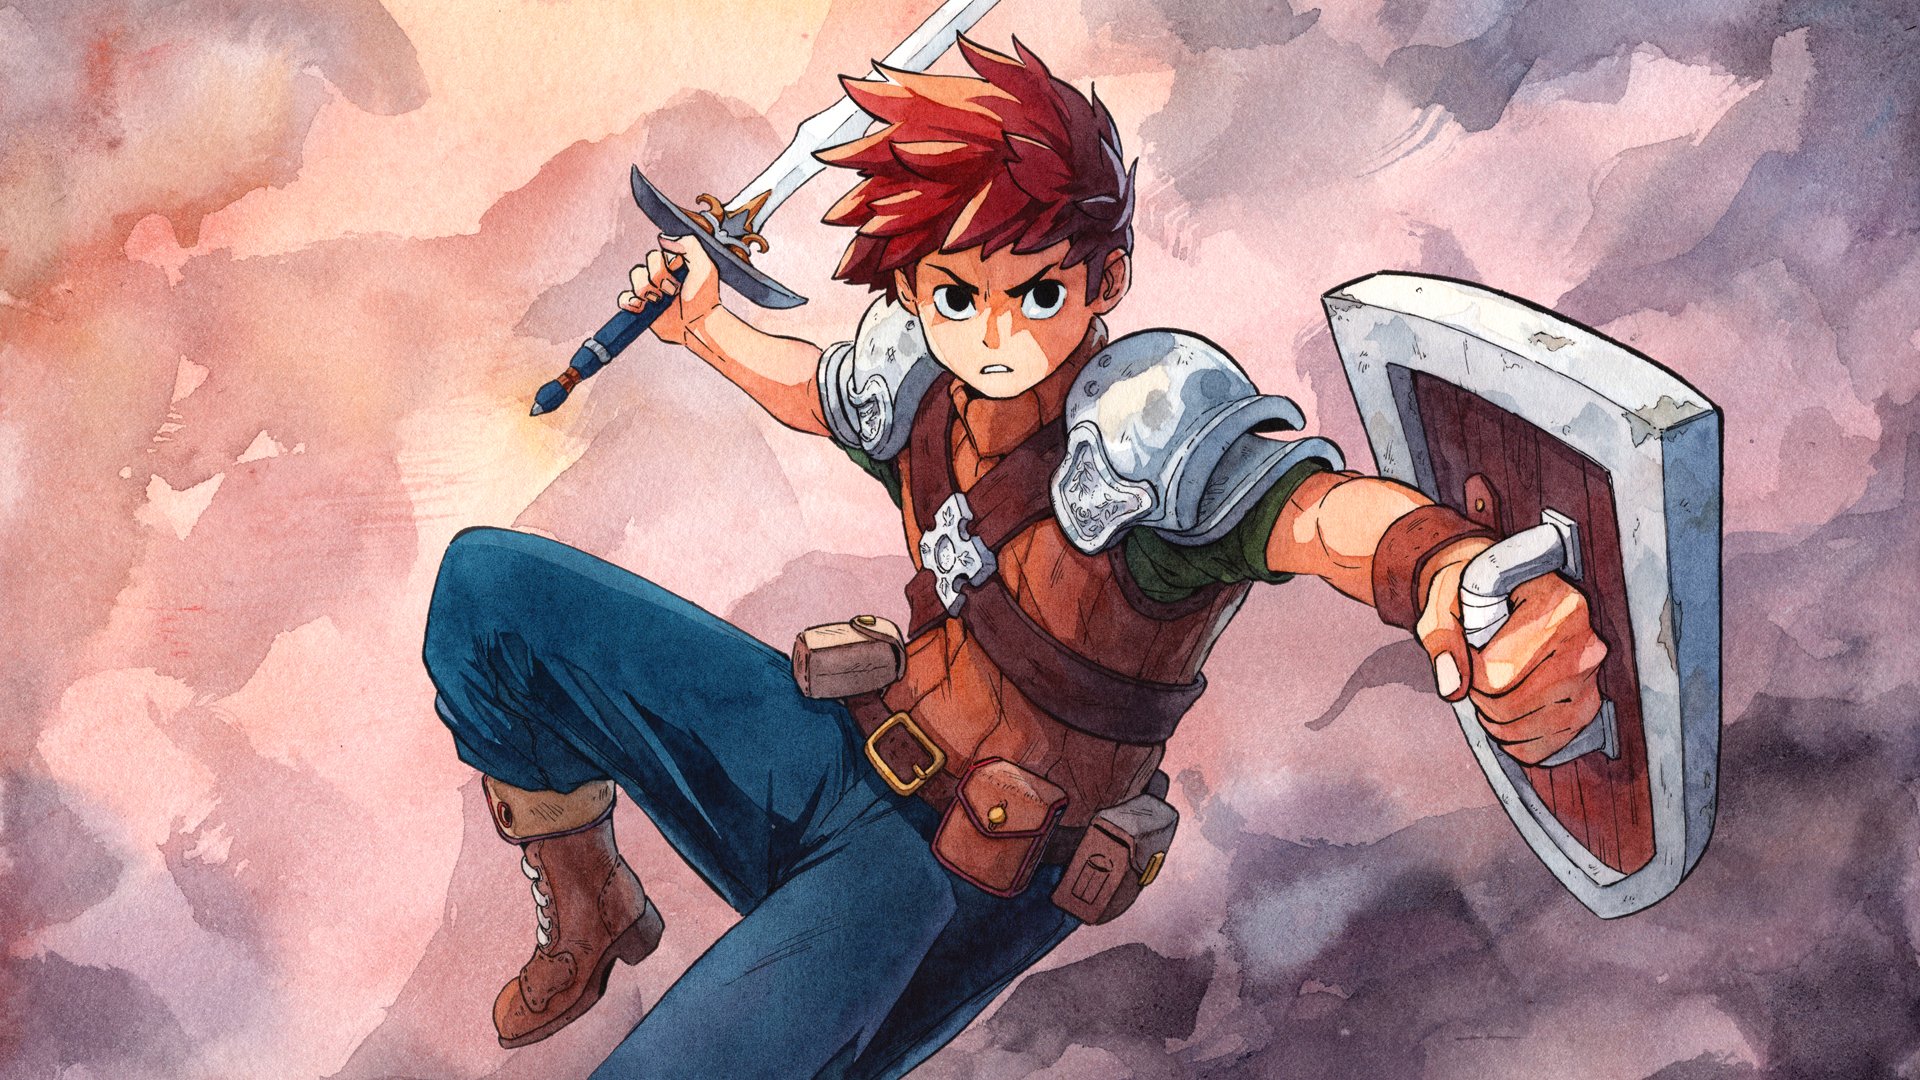
Art by the amazing Marcel Mosqi, who made the official Chained Echoes Steam trading cards!
General Tips
Plan your setups
Combat in Chained Echoes, especially in the late-game, is all about setups. Your characters will unlock plenty of buffs and debuffs and it is key to lay those down to empower your team while simultaneously crippling the enemy.

For instance, Sienna alone has four very important buffs she should have active nearly all the time, while Glenn should always make sure the enemy has Break debuffs on. With certain setups, you can see some really big numbers (for instance, I was been able to crit +18k with Lenne during the final boss) so it's important to have your team cover everything.

Fleeing is okay
If you realize you're about to get stomped, flee the battle. Fleeing is instant and has no drawbacks nor penalties, except for losing stolen items and possible drops from downed enemies. It's also perfectly fine to tweak the difficulty settings. No shame in that!

Don't bother with Crystals (until later)
The Crystal mechanic you unlock at the blacksmith anvil is a bit obnoxious of a system (because of RNG and how the combining works) yet very cool way to make your characters REALLY powerful, allowing you stack passives to reinforce their strengths or circumvent weaknesses. For instance, stacking CRIT Damage Up crystals on Sienna can make her dish out some really insane damage, while adding debuff crystals (i.e. Poison, Blind) on characters with multi-hit moves can make inflicting those easier (since chance is per hit).

However, I strongly recommend waiting to tamper with this system before you reach the endgame, or at least until you unlock the Sky Armors and is free to roam the world. It's really not worth farming crystals in the early game, and this title is already relatively easy enough; you can clear the vast majority of the content without ever using the crystal system.

In the endgame you'll be able to recruit a certain NPC to the hideout that allows you to "filter" crystal categories, allowing you to obtain specific types all the time, making farming significantly easier; but still is a huge hassle if you're hunting for a very specific crystal (I spent hours and hours trying to fully max Break Extender for Glenn).

If you want more details on the Crystal crafting, I recommend checking Xenocite's guide:
https://steamhost.cn/steamcommunity_com/sharedfiles/filedetails/?id=2915330259

Agility is everything
Agility (AGI) is the single most important attribute in the game, hence why Sienna is so busted since she has the highest of all characters. Improving your AGI in any way (passive skills, buffs, crystals) is key to get as many turns as possible before the enemy.

Drunken Master (a skill from the Monk Class Emblem) is a party-wide AGI-increasing ability, which you should have learned with one or more characters and equipped at all times, and use it as soon the fight starts.

Additionally, crippling your enemy's AGI with Robb's Leg Shot (and also Kylian's Leg Aim) is essential in any boss fight to further enable more turns for you and less for the enemy.

Teambuilding Tips
One of the biggest challenges of Chained Echoes is knowing how proper build your party. You can have up 6 characters, 3 active and 3 on the reserve, and swap between party members. Characters are linked with each other and will only swap with each other (i.e. Victor linked with Sienna means you can only swap between the two).

My personal advice for team building is:
  • Have a balanced active team: a beefy character to serve as the "tank", two damage dealers and a support.
  • Victor is pretty much mandatory in the team to drop his buffs as soon as possible. He can either be used in the active team, or alternatively, you can have him in the reserve, and link him to a fast character (or someone equipped with Swift Sandals) to swap as soon the first starts (since Victor is one of the slowest in the game).
  • Link characters that can cover each other's weaknesses. For instance, Sienna can be linked to Ba'Thraz for moments where you need heavy area-of-effect damage or in case she is blinded.

I usually roll with the following team setup, in the endgame. This is just an example.
  • Glenn <-> Amalia: solid and beefy frontline with plenty of damage, with Glenn being very self-sufficient with his HP Drain. Then in case things go south and you're hit with a nasty spike damage from the enemy, quickly swap to Amalia, top the team with Heal All, and then back to Glenn.
  • Sienna <-> Ba'Thraz: heavy single target damage through Sienna, and Ba'Thraz as the backup in case Sienna runs out of TP or the fight requires heavy area-of-effect damage.
  • Mikah <-> Victor: being one of the fastest in the game, Mikah is a good pair with Victor so he can buff the party as soon as possible. Mikah herself has really potent damage output and can provide plenty of buffs to supplement the rest of the party, which actually stack with some of Victor's.
  • Tomke <-> Lenne: Spinach Power right off the bat with Tomke to grant Aura/Shield to the party, and swap him to Lenne so she can use her Coat skills and enable the rest of the party.
Glenn, The Fighter

As the main character, Glenn is the most balanced character in the cast, with a decent array of offensive and defensive abilities, making him a mixed fighter of sorts. He can work as a budget tank since he has access to a taunt (Decoy) and Defense Stance (increases defense at the expense of decreasing attack), but works formidably well as a damage dealer.

At heart, Glenn is the game's "Breaker", as he has access to abilities that can decrease enemy offensive and/or defensive stats, which can turn the tide of battles. His Ultra Move, Power Armor Salvo, and his All Break ability both apply all detrimental debuffs except for lowering agility; the Ultra Move is notable as it hits all enemies.

Strengths
  • Fits the typical fighter archetype: versatile at pretty much everything.
  • Boasts high offensive and defensive stats.
  • Third highest HP.
  • Second highest ATK.
  • Third highest DEF, tied with Raphael.
  • Third highest AGI, tied with Tomke.
  • Can be played as hybrid tank / damage dealer.
  • Has access to powerful Break abilities to cripple enemy stats.
  • Has one of the most useful Ultra Moves in the game.
  • Amazing self-sustain in the endgame thanks to HP Drain combined with his already high attack.

Weaknesses
  • Not very reliable as a dedicated tank since he has no innate abilities to increase Hate other than Decoy.
  • Mostly single-target damage aside from his Ultra Move and Whirlwind Slash (which is obtained much later in the game). Certain abilities from Class Emblems can remedy this.
  • Has the fourth lowest TP, meaning he'll starve really fast when using abilities in quick succession.


Baseline
  • Armor Break / Arms Break / All Break: Glenn's bread and butter is his stat debuff abilities, which makes him a must for boss fights. Once you get All Break, you can forgo the other two.
  • Cross Slash: his most reliable damaging ability. Hits like a truck, and has direct synergy with HP Drain, which can make him nearly unkillable.
  • Lend Energy: incredibly useful to help fuel your main damage dealers and supports. Even though Glenn tends to burn through skills very fast himself, there still plenty of value in this ability.
  • Whirlwind Slash: pretty decent area-of-effect ability with a pretty cool animation, and when combined with HP Drain means he can top his healthbar easily while fighting multiple opponents.
  • HP Drain: deal damage, recover health. Simple as that. The beauty of this passive is that it works with multi-hit moves and also area-of-effect, meaning you'll gain HP per hit and/or enemy hit. This even works with his Ultra Move.

Class Abilities
  • Ether Sucker: from Vampire. Useful on all characters, period.
  • Drunken Master: from Monk. Works fine equipped on any character, but since Glenn tends to have free ability slots in the endgame, it's a pretty decent filler ability.
  • Power Swing: from Warrior. Useful for normal battles against multiple opponents. Keep this on him until you unlock Whirlwind Slash later in the game.
  • Blindman's Buff: from the Gambler. Can be useful in certain fights with multiple targets, but its reliance on RNG makes it less desirable. Still a pretty decent filler skill. Can fully heal Glenn if you get at least 3 hits when combined with HP Drain.
  • HP Sacrifice: from Vampire. A passive skill where you lose 5% of your HP but deal 5% more damage (up to 15% when maxed). Combining this with HP drain means you'll never be a disadvantage, and the extra +15% damage is juicy.

Crystals
  • Break Extender: you'll absolutely want this on Glenn, maxed, since it guarantees 100% of extending any existing Break debuff for 3 additional turns. The beauty of this is that it works with area-of-effect skills, such as Whirlwind Slash, allowing you to extend it on multiple enemies. With this crystal you pretty much only need to use All Break once in the entire fight as long Glenn continues to attack.
  • ATK Up: Glenn already hits pretty hard, so further increasing his ATK is a no-brainer.
  • Dry Strike: this is a filler crystal that can be useful for a certain combo involving Lenne and Victor that will be discussed later in their sections.


Early Game
Glenn starts with a solid kit: Cross Slash and Armor Break being the bulk of his character through the entire game. Oil Slash is quite useful with Lenne's Fire Thrust for some extra damage.

Focus your points on getting Lend Energy as soon as possible, while spreading points on stat bonuses (HP, ATK and DEF) and getting passives such as HP Up and ATK Up. I recommend giving him the Warrior Class Emblem as soon as you get it. He is one of the best characters for it.

Mid Game
Glenn (and Kylian, until he leaves the party) will be your frontline fighters for quite a while until you get Egyl. While Glenn can be built into a tank of sorts since he's the first character to get a taunt in the form of Decoy, I'd advise against it. The taunt system as a whole is not very reliable even for the dedicated tanks (Egyl and Raphael) who have ways to increase Hate, so I'd skip on making Glenn one. Picking Decoy is decent, however, in order to (attempt) keep enemy attention away from your more frail characters.

Once Egyl enters the party, you can focus on maximizing Glenn's offensive capabilities and utility. I recommend getting Restrain and Counter Attack as soon as you can. The Stance abilities are useful; I usually roll with Attack Stance to maximize his damage.

At this point you can swap the Warrior Class Emblem for the Monk to give him tons of HP and AGI, if you want. He can be kept as a Warrior through the whole game, however, since the stat bonuses are pretty good for him.

End Game
Glenn truly becomes an unkillable powerhouse in the endgame. Get All Break first and foremost, followed by HP Drain, Shield Ally, and Whirlwind Slash. With Cross Slash + HP Drain he can top his health in boss fights without any issues, making him incredibly self-sufficient.

Focus on giving Glenn all the ATK Up passives he can, and he'll be hitting hard, healing himself hard, counter attacking hard, all while taking damage for his allies and healing back anyway. This pretty much makes him the best tank in the game without actually tanking and taunting.

For accessories, Reaction Armlet (30% of counter attack chance) can be stacked with the Counter Attack passive for whopping 80% counter attack chance. Otherwise, Bracelet of Power (+20% ATK) works just fine. Alternatively, you can give him Knight's Honor (which gives the Warcry passive, increasing Hate at the start of the fight) so he can soft-tank.
Lenne, The Elementalist

Despite her weapon of choice, Lenne is a pure magic-based attacker, boasting among the highest MAG stat in the game, on top of very high TP (meaning she can spam skills at will). Lenne is all about exploiting the enemies' elemental weaknesses, as she is able to inflict damage of all elements except for Light and Dark (initially).

Lenne has fantastic synergy with Victor in the endgame, having a potent combo in the form of her Coat skills plus his Efreet's Song or A Sylph's Tale, which allows for the entire team to hit for weakness damage all the time. Add any Strike skills into the mix (Oil, Heavy, etc.) and you'll be dealing even more damage.

On top of that, Lenne can break in the ten thousand (!!!) of damage with the right setups, namely Third Eye and Elemental Pact. Add other buffs from other party members into the mix and she'll nuke anything.

I like to call Lenne a "Magic Dragoon" since she fits a bit of the archetype of the Dragoon Job from the Final Fantasy series (she even has Jump skills) while having her own spin with magic damage.

Strengths
  • Magic Attacker focused on exploiting elemental weaknesses.
  • Has one of the highest damage-output potential in the entire game, alongside Sienna and Ba'Thraz.
  • Second highest MAG, tied with Ba'Thraz.
  • Second highest TP.
  • Has both single-target and area-of-effect skills.
  • Has access to the Coat skills, that can imbue the whole party with elemental damage.
  • One of the few characters who can remove enemy's buffs (Cleanse).

Weaknesses
  • Some of the lowest defensive stats (HP, DEF and MND) in the cast.
  • Below average AGI means she needs buffs to get more turns.


Baseline
  • Cleanse: on demand enemy buff removal. Lenne starts with Cleanse, and should keep it equipped for the whole game. Not many enemies can buff themselves, but when they do, Lenne can easily get rid of them.
  • Third Eye: one of the sources of Lenne's nuke, increasing her next attack by +125% damage (up to 150% when maxed). It's double-edged sword as her DEF and MND are reduced by 25% (which is detrimental considering her already low defensive stats) but the extra damage compensates it. She can one shot most enemies in the game with this when exploiting elemental weaknesses.
  • Water / Fire / Wind Coat: enables the party to deal elemental damage, which can be exploited with Victor's aforementioned elemental songs.
  • Heaven's Tear: arguably Lenne's most potent skill, as it'll always deal damage based on the enemy's current elemental weakness. Equip this and you can forgo her Water / Fire / Wind Thrusts. Sadly there is no area-of-effect version of this skill.
  • Elemental Pact: Consumes all TP and the next 3 magical attacks deal +100% damage (up to 150% when maxed). This might sound counter-intuitive, but with TP Regen and by simply using a item or Glenn's Lend Energy she can be back on her feet. Combine this with Third Eye for some really crazy damage.
  • TP Sacrifice: lose 10 TP but deals 5% more damage (when maxed you lose 5 TP and deal 15% more damage). This passive synergizes absurdly well with Lenne as her TP pool is already among the highest in the game.

Class Abilities
  • Firestorm / Earthstream Spirit: from Summoner. Synergizes extremely well with her kit since the damage scales with MAG. This ability can be equipped on pretty much any character as it has no set duration and adds extra damage on every turn.

Crystals
  • MAG Up: stack those and Lenne will be hitting even harder. No-brainer choice. There is actually a diminishing return when stacking these stat up crystals, though.
  • CRIT Up: with the Magic Poleyns accessory Lenne's Magic Abilities can crit, so raising her crit chance is really useful.
  • HP / DEF / MDN Up: considering Lenne's low defensive stats, trying to circumvent with crystals is a good idea, though I prefer maximizing her MAG so she can just kill things faster.
  • Specialist: Lenne will pretty much always be hitting for weakness damage, so having this allows for more Ultra Moves per boss battle.
  • HP Drain: very straightforward. Hit enemy, get HP. The amount seems to scale with damage done, so the harder you hit, the more you heal. Useful on pretty much all characters.


Early Game
Lenne starts with all her Thrust abilities available (though not all learned by default), plus Cleanse, which is pretty solid. Focus your points on bonus MAG to enable her damage from the start, and also on HP and DEF since she's lacking in that department.

Mid Game
On tier 2 she gains access to her Jump abilities, which are good for normal battles. But more importantly, she can learn Third Eye, which should be your top priority. Other than that, focus on the usual: more MAG, HP and DEF.

On tier 3 she'll gain access to the Coat skills. I usually stick with Fire Coat so I can combo with Victor's Efreet's Song and Glenn's Oil Strike for some really nasty damage potential.

By this time you should have access to Shaman and/or Summoner Class Emblems. Either one works on Lenne. I like giving her the Shaman Emblem first so she can learn MAG Up, then Summoner for the Firestorm / Earthstream Spirits, then give her back Shaman since it has higher MAG bonuses.

End Game
On the final tier Lenne finally gains access to her most potent ability: Heaven's Tear. Once you get this you can get rid of all the other Thrust skills, freeing slots for other abilities. She also gains access to Elemental Pact and TP Sacrifice, which further enable her damage.

Once you unlock the Advanced Class Emblems, give her Pyromancer to maximize her MAG bonuses.

For accessories, the best one for Lenne is Magic Poleyns, which allows Magic Attacks to crit. While Lenne's crit chance is nowhere as high as Sienna's, she still has the second highest crit chance (tied with Victor and Magnolia).
Robb, The Archer

Robb is a very underrated character. Most people say he's bad (in a way, he kinda is), but he actually brings a lot to the table in the form of many his status effects abilities. He has the very rare Leg Shot, which reduces enemy's AGI, arguably one of the most important debuffs in the game; other than him, only Kylian has it through his Leg Sweep (and since he leaves the party later, that makes Robb's far more valuable).

Outside of Crystals and certain Class abilities, Robb is the only character that can directly inflict Poison and Toxic, on top of his very useful Pandemic skill which spreads those status effects to all enemies.

On top of that, Robb also has Trap abilities where he places it on one of his allies, and if said ally is attacked by the enemy, it triggers the trap, dealing damage or inflicting status effects. There is even an exclusive accessory to him, called Leaf Hood, which gives a chance for the trap to not disappear after triggering.

Robb's Ultra Move, Nature's Springwell, is very useful in boss fights where enemies inflict various debuffs, as it not only removes debuffs from the entire party, it raises their resistance while also removing the enemies' own resistances.

Strengths
  • Can cripple enemies with a variety of status effects.
  • Traps are very useful when used in tandem with a tank.
  • Ultra Move is loaded with utility.
  • Can deal very high damage with Charging.
  • Has skills to cure status effects.
  • One of the few characters with Increase Drops passive.

Weaknesses
  • Mediocre to poor stats across the board.
  • Very low damage outside of Charging.
  • His niche as can be filled by other characters by using status effect Crystals and multi-hit attacks.


Baseline
  • Leg Shot: AGI is the most important stat in the game, and crippling your enemy's means less turns for them. This should always be the very first skill Robb uses.
  • Explosive / Ailment Trap: this former can deal surprisingly high damage when maxed (multiplier of 3x) while the latter can inflict up to 3 random debuffs that cannot be resisted. Very handy!
  • Poison / Toxic Shot: while both are damage-over-time effects, they actually stack! So having both Poison Shot and Toxic Shot is very useful, especially with Pandemic.
  • Herbal Medicine / Naturopathy not many enemies can inflict debuffs, but it's useful to on demand cleanses.
  • Nature's Mirror: this is potentially one of the most powerful buffs in the entire game, granting stat buff whose potency increases the more debuffs enemies have. The only issues is that it can only be used once per battle, and the stat picked is random. Great to use after Glenn's Ultra Move against multiple enemies.
  • Soul Parasite: reduces the enemy's resistance to all elements. The beauty of this skill is that it stacks with other resistance down debuffs (such as the ones from Victor). Great for enabling Lenne's damage.

Class Abilities
  • Suspicious Darts: from Gambler. When maxed this skill has 100% chance of inflicting Poison, Paralyze, Blind or Silence on ALL enemies. This skill works on any character, but it's a great filler skill on Robb and frees more slots for him.

Crystals
  • AGI Up: ideally you want Robb to drop all his detrimental debuffs and swap him for someone else, so having high AGI is key.
  • Status Extender: at max level, all the Extender Crystals have a 100% chance. Sleep / Paralyze Extender are amazing on Robb, for instance.
  • HP Drain: very straightforward. Hit enemy, get HP. The amount seems to scale with damage done, so the harder you hit, the more you heal. Useful on pretty much all characters.


Early Game
Robb starts with a solid kit, with Poison Shot and Pandemic being available right off the bat (though not learned by default). Get AGI Up so he can act faster, and spend points on defensive stats. Use spare points for Explosive Trap.

Mid Game
On tier 2 he gains access to Paralyze Shot and Charging, the latter vastly improving his damage output and performance. On tier 3 get Toxic Shot and Leg Shot as soon as possible, all while focusing on improving his HP and AGI. Increased Drops is also a must for farming materials and loot.

You shouldn't have enough Class Emblems for all available characters, but if you really want Robb equipped with one, Monk (for more AGI and HP) or Warrior (for more balanced stats).

End Game
On the final tier get Soul Parasite and Nature's Mirror, and focus on his stats. Sleep Powder is really good too, especially if you have the Sleep Extender Crystal. By now you should have the Advanced Class Emblems unlocked, so I strongly recommend having him learn Suspicious Darts from the Gambler.

For accessories, if you use his Traps often, then Leaf Hood is a must. Otherwise, he works fine with anything. Accessories that increase AGI are valuable to give him faster turns.
Victor, The Bard

Victor is the first support you get, and I dare to say he is all you need. His kit is loaded with unmatched utility. He can buff, he can heal, he can debuff, he can deal magic damage, he can lower resistances. He's possibly the most useful character in battle and you'll never want to fight without him.

He's mostly valuable for his Valor Minuet and Healing Hymn, which grant TP and HP regen, respectively, and should be the very first buffs to cast at the start of any battle. Additionally, he can pretty much top any character with Healing Hymn if equipped with the Holy Symbol accessory (all healing increased by 50%).

His Ultra Move, Cosmos Orchestra, is incredibly useful as it restores a lot of TP for the whole party, on top of granting TP and HP regen.

Strengths
  • Fits the typical bard archetype: lots and lots utility.
  • Has some of the most useful buffs and debuffs in the game.
  • The definitive support, fitting in any team composition.
  • Third highest MND.
  • Fourth highest TP.
  • Very useful Ultra Move.

Weaknesses
  • All his other stats except for MND and TP are mediocre to low.
  • Lowest AGI in the game, tied with Magnolia.


Baseline
  • Valor Minuet: one of Victor most important buffs. TP Regen is a must for long fights, and your most potent fighters (Glenn, Sienna, Lenne) will often burn down their TP fast.
  • Healing Hymn: incredibly useful to keep everyone in mint condition through the whole battle. If Victor stacks a lot of MND and has the Holy Symbol equipped, a single tick can pretty much fully heal any character.
  • Heroic Ode: this is his best buff, pretty much increasing bonuses to all stats, and will completely replace his Poetic March and Requiem later in the game.
  • Shield Mazurka: great emergency shield for incoming hard-hitting moves.
  • Efreet's Song / A Sylph's Tale: as aforementioned, Victor has a really powerful combo with Lenne by using either of these abilities and having her use the corresponding Coat ability, to allow the entire party to hit for weakness damage.

Class Abilities
  • Heal All: from Cleric. Victor has no innate area-of-effect direct healing spell, so this is a must.
  • Awaken Spirit: from Cleric. Resurrection spells are always useful in clutch moments, and Victor also has no innate reviving ability.
  • Drunken Master: from Monk. Works fine equipped on any character, and since Victor has a pretty low AGI already, this works wonders on him; ideally, this should be equipped on a faster character so Victor can drop his other, more important buffs.
  • Firestorm / Earthstream Spirit: from Summoner. Allows Victor to put some offensive pressure while he's busy handling buffs and healing the party. This ability can be equipped on pretty much any character as it has no set duration and adds extra damage on every turn.

Crystals
  • MND Up: the most important stat for healers as it affects the potency of healing spells, so stack that on him!
  • AGI Up: helps remedy Victor's low AGI.
  • CRIT Up: if you plan on equipping Victor with the Healing Belt, this is a must.


Early Game
Victor starts strong with Valor Minuet and Poetic March, which will carry you through most of the early game content. Focus on improving his HP, MND and DEF.

The Cleric is the very first Class Emblem you'll unlock. Equip it on Victor and never look back. It's the best one for him, by far.

Mid Game
On tier 2, get Healing Hymn, Shield Mazurka and Requiem. Tier 3 is pretty underwhelming in the active ability category (Bee Sting is interesting though), but it has the very valuable TP Cost Down passive. Use the spare points on his stats afterwards.

End Game
Once you reach the final tier, get Heroic Ode right off the bat, and you can forgo Poetic March and Requiem. Then get either Efreet's Song or A Sylph's Tale and improve the rest of his stats.

For accessories, as aforementioned, Holy Symbol is great on him, increasing healing effects by 50%. Alternatively, Healing Belt (heals can crit) is really good, though I personally prefer to keep that on Amalia.
Sienna, The Ronin

Sienna is arguably one of the most powerful characters in the cast, if not the most. Her damage output and speed are second to none, and she can even solo the secret super boss, with proper setup. She can reach whopping +80% critical chance with a combination of equipment, passives and crystals, not counting in-battle buffs, meaning she'll ALWAYS crit. With her superior speed she can have many turns before the enemies and allies alike.

She has access to Pilfer, which allows to steal items from enemies. While the Bandit Class Emblem also has a stealing ability (Easy Robbery), Sienna's Pilfer is vastly superior as at rank 3 it has 100% chance, as opposed to Easy Robbery's 60% chance.

Sienna has a unique mechanic where certain abilities have a chance to proc her Petal Storm buff, which allows her to use said ability (if equipped). This is quite potent in the early game until she learns Dragonfang, with a damage multiplier of x3.4, one of the highest in the game tied with her own Iaijutsu.

She can actually be built into a dodge / counter tank, which can be useful in fights where bosses use mostly physical attacks.

Strengths
  • Fits a mix of Samurai / Thief archetype: lots of speed and high damage, and ability to steal from enemies.
  • Has one of the highest damage-output potential in the entire game, alongside Lenne and Ba'Thraz.
  • Boasts high offensive and defensive stats.
  • Highest AGI and CRIT in the game.
  • Her stealing is guaranteed at max rank.
  • Has plenty ways to increase her AGI and dodge rate.
  • Powerful Ultra Move that increases her crit chance.

Weaknesses
  • Has the third lowest TP, tied with Robb. Given that Sienna takes a lot of turns due to her high AGI, she can quickly burn her skills.
  • She is so fast that the Overdrive gauge will rise a lot if there are no skills types available to Sienna for lowering it.
  • Nearly all her buffs except of Nukitsuke are selfish, only applied to her.
  • Petal Storm's proc is too RNG based to be relied on.


Baseline
  • Petal Storm: very potent skill, especially in the early game, solidifying Sienna as a nuke character right off the bat. The drawback is that it can only be used once Sienna gets a proc of the Petal Storm buff when using certain abilities. Becomes less useful in the endgame since Dragonfang is superior once Sienna hits higher AGI.
  • Yoko Giri: useful through pretty much the whole game, as area-of-effect is always good for normal battles. The chance of triggering Petal Storm is increased per enemy hit.
  • Pilfer: while there are no exclusive items obtained through stealing (mostly loot and materials), it's nevertheless a useful ability to have equipped pretty much at all times.
  • X-Slash: until the player gets Mikah, X-Slash is the only source for Bleed damage. This stacks with other damage-over-time effects (Poison and Toxic).
  • Blade Reflection: an emergency panic ability to inflict Blind on all enemies. Sadly it can only be used once per battle.
  • Nukitsuke: one of Sienna's most important abilities, granting +15% CRIT for the whole party. While additional ranks don't increase the effect, they increase the number of turns for the buff.
  • Quickstep: possibly Sienna's most important self-buff. It increases her AGI by 35% until being hit (whopping +75% on max rank). This makes her a speed-demon, and she can circumvent the drawback with...
  • Shadow Step: gives Sienna two dodge charges to avoid physical attacks, useful to keep her Quickstep active at all times. And in addition, she can also use...
  • Calm Water: increases her chance to dodge, and it scales with her AGI, meaning it has direct synergy with Quickstep. Truly formidable!
  • Dragonfang: this ability is the culmination of Sienna's potential. She can deal up to 5 hits, and the chance increases with her AGI. So with Quickstep + Drunken Master she can guarantee 5 hits all the time.

Class Abilities
  • Ether Sucker: from Vampire. Sienna has one of the lowest TP and burns skills fast, so this is especially valuable on her.
  • HP Sacrifice: from Vampire. A passive skill where you lose 5% of your HP but deal 5% more damage (up to 15% when maxed).
  • Search: from Chemist. Obtains a random item. Since Sienna is really fast this is good to spam on non-dangerous fights when trying to farm items and save money.

Crystals
  • CRIT Damage Up: with her whopping 80% crit, she can hit even harder!
  • AGI Up: more AGI means more turns, more damage, higher dodge chance and more hits on Dragonfang.
  • ATK Up: to hit even harder!
  • HP Drain: very straightforward. Hit enemy, get HP. The amount seems to scale with damage done, so the harder you hit, the more you heal. Useful on pretty much all characters.


Early Game
Sienna starts strong, with Petal Storm being a priority to learn. Focus on improving her AGI, CRIT and TP.

Mid Game
On tier 2 Sienna already hits her first powerspike. Get Nukitsuke as soon as possible, and continue to focus on her AGI. Getting Increased Rare Drops is also very useful for material farming.

On tier 3, you're pretty much set for the rest of the game. Get Shadowstep and Dragonfang and Sienna will start doing big numbers.

For Class Emblems, either Warrior, Bandit or Monk are good picks for her for now.

End Game
All that is left in the final tier is getting Quickstep and Calm Water and Sienna becomes a monster. Max her stats after that and you're set.

As for Class Emblems, Gambler is the best for her because of the extra CRIT chance.

For accessories, Life Thread (+15% CRIT) is pretty much mandatory for her. Otherwise give her anything that increases her AGI.
Ba'Thraz, The Spellfighter

Ba'Thraz is, in a similar way to Lenne, a magic-based attacker, though being a mixed fighter of sorts. His unique mechanic is the "Weapon Summon" system, where his magic and physical abilities will grant him a stack, up to 3 (up to 6 later in the game), and he can consume these stacks on certain abilities, to either deal neutral magic damage or recover HP or TP.

Unlike Lenne, Ba'Thraz deals damage with Light and Dark elements, as well physical. He has his own methods for nuking, though potentially more dangerous (for himself), giving him a true definition of a glass cannon. With Berserker, Heaven or Hell and other party buffs, he can even outdamage Lenne with his Ultra Move.

Because of the way Ba'Thraz's kit functions, it's not worth using other offensive spells from the Class Emblems since they won't contribute for his weapon stacking.

Strengths
  • Magic Attacker focused on building stacks and release them for more damage or added utility.
  • Has one of the highest damage-output potential in the entire game, alongside Lenne and Sienna.
  • Second highest MAG, tied with Lenne.
  • Highest TP, tied with Amalia.
  • Has both single-target and area-of-effect skills.
  • True definition of a glass cannon.
  • One of the few characters who can remove enemy's buffs (Dispel).
  • Shines in either quick normal battles or extended boss fights.
  • His Ultra Move is potentially the most damaging attack in the game, as one of the few that deal multiple hits.

Weaknesses
  • Below average defensive stats, on top of using robes, makes him very frail.
  • Fourth lowest ATK means his physical abilities are not worth using.
  • Loses all his weapon stacks if he dies.
  • Competes with Lenne for class emblems and accessories.


Baseline
  • Summoned Attack: the core of Ba'Thraz's kit, allowing him to deal very high burst damage based on the number of weapons stacks he gets from using other abilities.
  • Light Claymore / Sword: bread and butter of his kit, alongside the Dark-based skills.
  • Dark Spear / Scythe: bread and butter of his kit, alongside the Light-based skills.
  • Berserker: unlike Lenne's Third Eye, Berserker lasts for several turns. It's a true double-edged sword as Ba'Thraz both deals and takes x1.5 increased damage. Because of that, having means to mitigate damage or a tank is valuable to keep him safe. Ideally you'll want to pop Berserker right before using Summoned Attack.
  • Summoned Ether / Heal: this turns Ba'Thraz into a potent situational support, allowing him to replenish TP or HP by consuming his weapon stacks.
  • Heaven or Hell: with proper setup, combining multiple buffs, on top of Berserker and this one, allows Ba'Thraz to deal the most damage in the game in a single turn with his Ultra Move. In addition, he can actually survive after three turns if he's at full health while equipped with Silver Lining.
  • Dispel: on demand enemy buff removal. You'll usually have Lenne with her own Cleanse, since Ba'Thraz needs all his slots for offensive spells and buffs. Not many enemies can buff themselves, but when they do, Ba'Thraz can easily get rid of them.
  • Silver Lining: a passive that allows surviving lethal attacks when at full HP. This is a great way to circumvent the use of Berserker.
  • Summon Effects+: a passive increases the number of stacks of summoned weapons, 1 per level (up to 3 additional weapons summoned, totallizing 6).

Class Abilities
  • Firestorm / Earthstream Spirit: from Summoner. Synergizes extremely well with his kit since the damage scales with MAG. This ability can be equipped on pretty much any character as it has no set duration and adds extra damage on every turn.

Crystals
  • MAG Up: stack those and Ba'Thraz will be hitting even harder. No-brainer choice. There is actually a diminishing return when stacking these stat up crystals, though.
  • HP Drain: very straightforward. Hit enemy, get HP. The amount seems to scale with damage done, so the harder you hit, the more you heal. Useful on pretty much all characters.


Mid Game
By the time you recruit Ba'Thraz you'll have access to tier 2 already. Don't even bother with his physical skills since he has a very low ATK. Focus on getting Berserker, Light Sword and Dark Scythe. Dump the rest of the points on MAG, HP and DEF.

As for Class Emblems, Shaman or Summoner work the best.

End Game
On the final tier, get Heaven or Hell and Summoned Effects+ right off the bat, and dump the rest of the points on improving stats.

Once you unlock the Advanced Class Emblems, you can equip him with Pyromancer to maximize his MAG bonuses (he will be competing with Lenne for that, though).

For accessories, the best one for Ba'Thraz is Magic Poleyns, which allows Magic Attacks to crit. Again, he'll be competing with Lenne for that.
Amalia, The Healer

Amalia is the fully dedicated healer of the game. While lacking the buff potential of Victor, she compensates by having a wide array of healing spells, including mass resurrection. On top of that, she has an innate "minion" (similar to Shaman's Spirits) in the form of her dog, Cres, which will deal damage each turn, while also being able to heal the party too with certain skills.

Her Ultra Move, Howl of Healing, fully restores the party's HP on top of resurrecting any dead party member, being a great emergency button.

Strengths
  • Fits the typical healer / medic archetype: primarily healing spells.
  • Highest MND.
  • Highest TP, tied with Ba'Thraz.
  • Average MAG.
  • Can mass resurrect with both her Raise All as well her Ultra Move, Howl of Healing.

Weaknesses
  • All her other stats except for MND, TP and MAG are among the lowest in the game.
  • Low HP and DEF makes her incredibly frail.
  • Very limited offensive capabilities.
  • Unable to use Summoner's Spirits because of Cres counting as a minion and being active 100% of the time.


Baseline
  • Heal / Heal All: pretty straightforward, single target and area-of-effect heals.
  • Raise / Raise All: single target and area-of-effect resurrection.
  • Revival: grants Reraise, instantly reviving a character if they die. Very useful for Ba'Thraz's Heaven or Hell.
  • Concentration: recovers 80 TP to self. Amalia already has the highest TP in the game and will rarely run out of steam, but this is useful nevertheless.
  • Shield / Aura: gives the whole party physical and magical resistance, respectively.
  • Cres Command: switches Cres between healing and attack mode. Cres' damage scales of Amalia's own ATK, so it's not the greatest; keeping him in healing mode is more useful overall.
  • Cres Transform: empowers Cres depending on which mode he is in.
  • Silver Lining: Amalia is a very frail character, so having an emergency survival ability is very useful.

Class Abilities
  • Drunken Master: from Monk. Works fine equipped on any character, and it's a pretty decent filler ability.

Crystals
  • MND Up: the most important stat for healers as it affects the potency of healing spells, so stack that on her!
  • AGI Up: helps remedy Amalia's low AGI.
  • CRIT Up: if you plan on equipping Amalia with the Healing Belt, this is a must.


Mid Game
By the time you recruit Amalia you'll have access to tier 2 already (maybe even tier 3, I honestly can't remember). Don't even bother with any offensive physical skills since she the lowest ATK in the cast. Focus on getting Shield, Aura and TP Cost Down. Dump the rest of the points on MIND, HP and DEF.

If you plan on using Amalia instead of Victor as your main support (I wouldn't), you can give her the Cleric Class Emblem. Otherwise, Mage Warrior is not bad as it raises all her stats (which is good considering she is lacking on nearly everything).

End Game
Once you reach the final tier, get Raise All, Revival and Silver Lining and improve the rest of his stats. If you do want her to have some kind of direct offensive power, just give her a Class Emblem Spell, since her physical abilities are not worth.

For accessories, Holy Symbol is great for her, increasing healing effects by 50% (I do prefer this on Victor, though). Alternatively, Healing Belt (heals can crit) is really good, but you'll have to improve her CRIT a bit with crystals, skills or in-battle abilities.
Egyl, The Fortress

Egyl is the first dedicated tank you'll get. He focus mostly on mitigating physical damage, but works fine as a main tank for any content, given his high defensive stats, especially HP. Unlike Glenn's Decoy, his Attention! affects all enemies, making aggro control more reliable. On top of that, Egyl has plenty of self healing abilities, making him incredibly resilient and self sustainable.

Given Egyl's low AGI, he can be put in the reserve and linked to a faster character and swapped at the start of the battle to taunt enemies.

Strengths
  • Fits the typical tank archetype: very sturdy and hard to take down.
  • Highest HP and DEF.
  • Average ATK.
  • Has plenty of abilities and passives to increase Hate generation.
  • Ultra Move makes party immune to physical damage.
  • Amazing self-sustain and survivability.

Weaknesses
  • Has the lowest MND, making him a poor tank for fights versus magical users.
  • Second lowest TP and AGI.
  • Very poor personal damage.


Baseline
  • Attention!: area-of-effect taunt. Combine it with certain passives (such as Warcry) to make enemies focus on him right off the bat, since he has low AGI.
  • Load Gunspear: make his Hate generation more reliable. Very useful when combined with Whirlwind Spear.
  • Cover / Shield All: makes Egyl take damage for his allies instead. Can be combined with the Shield Ally passive for increased effect.
  • Whirlwind Spear: excellent area-of-effect ability to keep enemies focused on Egyl, especially if the passive Kiai (increases Hate generation) is equipped. Spam it after using Attention!.
  • Iron Will: one of Egyl's best abilities, and it actually makes his lower AGI play in his favor. It makes him survive ANY attack with 1 HP until his next turn. Essentially immortal.
  • First Aid: FULLY heals Egyl. I can't stress enough how good this is when combined with Iron Will.
  • Comrades' Help: increases all healing done to Egyl, no matter the source.

Class Abilities
  • Ether Sucker: from Vampire. Useful on all characters, period. Since Egyl has the lowest TP, it's especially useful on him.
  • Drunken Master: from Monk. Works fine equipped on any character, and since Egyl is painfully slow, it's a pretty decent filler ability.

Crystals
  • SOS HP / DEF Up: this works pretty well with Iron Will as it'll guarantee a proc while ensuring he survives.
  • HP / DEF Up: not much to say. Just reinforce his strengths.
  • HP Drain: very straightforward. Hit enemy, get HP. The amount seems to scale with damage done, so the harder you hit, the more you heal. Useful on pretty much all characters.


Mid Game
By the time you recruit Egyl you'll have access to tier 2 already (maybe even tier 3, I honestly can't remember). Focus on getting all the Hate increasing skills and focus the rest on his HP and DEF.

If you want to give him a Class Emblem, Chemist is pretty good as it's an all-round with bonuses to defensive stats.

End Game
Egyl becomes truly unkillable in the endgame once you unlock Iron Will and Comrades' Help. After getting Kiai, Heroic Tank and War Cry, focus on improving his stats, as usual.

For accessories, Knight's Honor (gives Warcry) can be stacked Warcry itself, if you have equipped. Otherwise, anything that increases his HP or DEF works fine. Alternatively, Heavenly Ring (reduces TP cost by 20%) is great to help remedy his low TP.
Tomke, The Gourmand

Tomke is the first optional character you can recruit, and you absolutely should. He is essentially a Blue Mage from the Final Fantasy series, able to learn skills by literally eating his enemies (think Quina Quen from Final Fantasy IX). Tomke might look like a joke character, but he is loaded with utility. He is easily one of the best characters in the game, despite his somewhat goofy appearance.

He has surprisingly balanced stats across the board (even more than Glenn himself), meaning he can fill any role needed (tank, healer, physical attacker, magic attacker). I personally like to use him as a jack-of-all-trades, with a bit of everything.

Tomke starts with only one skill, Uncanny Encounter, which can only be used against enemies he can learn skills from. The game is nice enough to show a "Canned" box when you fight an enemy, so you'll know that said enemy can be eaten. I recommend you check Jedo's guide, where he shows which enemies can be canned and where to find them. Youtuber PrimeraEspada91 also made a three part video with a walkthrough showing how to get each skill (Part 1, Part 2, Part 3).

There is an exclusive accessory for Tomke called Can Machine, which allows him to eat enemies below 50% HP (as opposed to 25% / 30% / 40% from Uncanny Encounter).

Strengths
  • Typical Blue Mage from Final Fantasy, learning skills from enemies.
  • Very balanced and above average stats.
  • Abilities learned from enemies offer plenty of damage and utility.
  • Flexibility makes him fit in any party setup.
  • Has access to all the Killer passives (bonus damage against specific enemy types).

Weaknesses
  • Uncanny Encounter can only be used once enemies are below certain HP thresholds. It also can only be used on enemies that you can learn skills from, and only once; this means you can't use Uncanny Encounter to kill normal enemies faster.
  • Very weak until learning more useful and powerful skills.
  • Doesn't have any passive skills that really stands out.


Canned
  • Spinach Power: arguably his best skill. Casts Shield AND Aura on the entire party. I usually have him cast this right at the start and swap him for Victor.
  • Sailor's Song: his second best skill. Raises Ultra Bar by 30% (up tp 50% when maxed). Can only be used once per battle.
  • Sharing is Caring: grants a random amount of TP to the ally. Very RNG based. You'll either get next to nothing or fully restore the ally's TP.
  • Broken Accordion: has one of the highest damage multipliers in the game (x4, up to 4.4 when maxed); damage scales the lower Tomke's HP is. Great when used in tandem with Silver Lining.
  • Sacrifice: kills Tomke for reviving the whole party. It's a situational panic button in case things go south.

Class Abilities
  • Ether Sucker: from Vampire. Useful on all characters, period. Tomke will rarely run out of TP, though.
  • Drunken Master: from Monk. Works fine equipped on any character as a pretty decent filler ability.
  • Heal All: from Cleric. This allows Tomke to fulfill a niche of emergency healer since has a pretty high MND.
  • Magic Smash / Physical Wonder: from Mage Warrior. Since Tomke has pretty balanced and above average ATK and MAG, these skills can actually hit pretty hard when used by him.

Crystals
  • HP / DEF / MND Up: Tomke has pretty decent defensive stats, so pumping more just further reinforces it.
  • Status Extender: not much to say. Just to make him keep enemies debuffed.
  • HP Drain: very straightforward. Hit enemy, get HP. The amount seems to scale with damage done, so the harder you hit, the more you heal. Useful on pretty much all characters.

Focus on Tomke's stats and always save enough points to learn his skills as you get enemies canned. Given his balanced stats, there is no priority, just focus on whatever you want him to be.

As for Class Emblems, anything works for him; I mostly keep him with Bandit for more AGI, or Chemist for more balanced stats across the board.

Until you learn all his skills, his best accessory is the aforementioned Can Machine. Once you can all enemies, you can swap to something that fits the playstyle you're aiming for him. I personally have him with the Swift Sandals (75% of chance to act first) so he can drop Spinach Power as soon as possible.
Mikah, The Martial Artist

Mikah is the second optional character you can get; she can only be recruited if you got Tomke beforehand. She is a "combo" oriented character, as her skills enables the damage of other skills, where you need to use one skill to empower another in succession. This can result in some really crazy damage spike consistently.

Strengths
  • Fits the typical monk archetype: high damage and speed but poor defensive stats.
  • Insanely high damage output potential.
  • Highest ATK.
  • Second highest AGI.
  • Powerful abilties that get empowered as others are used.

Weaknesses
  • Very glass cannon, with some of the lowest stats in the game outside of ATK and AGI.
  • Lowest TP.
  • Second lowest DEF, tied with Magnolia.
  • Her combo system makes her gameplay too one dimensional, lacking flexibility.


Baseline
  • Tiger Punch / Rush: her to-go single target combo. Tiger Punch grants the Tiger Combo buff, empowering Tiger Rush. Using an empowered Tiger Rush grants the Full Bloom buff.
  • Falling / Rising Dragon: her to-go area-of-effect combo. Falling Dragon grants the Dragon Combo buff, empowering Rising Dragon. Using an empowered Rising Dragon grants the Full Bloom buff.
  • Final Blossom: very potent area-of-effect attack when used with the Full Bloom buff.
  • Spinning Kick: a stacking single-target attack that reach up to x4.5 damage multiplier when used in succession.
  • Charging Revenge: deals 120% more damage on the next turn (140% when maxed). Similar to Lenne's Third Eye, with a slightly lower damage bonus but without decreasing DEF and MND.
  • Double Steps: increases the AGI of the entire party by 30% (up to 40% when maxed). The beauty of this ability is that its effects stack with the AGI buff from Monk's Drunken Master! EDIT: as of patch 1.2 these buffs no longer stack. :(

Class Abilities
  • Ether Sucker: from Vampire. Useful on all characters, period.
  • HP Sacrifice: from Vampire. A passive skill where you lose 5% of your HP but deal 5% more damage (up to 15% when maxed). Combining this with HP drain means you'll never be a disadvantage, and the extra +15% damage is juicy.

Crystals
  • ATK Up: Glenn already hits pretty hard, so further increasing his ATK is a no-brainer.
  • HP Drain: very straightforward. Hit enemy, get HP. The amount seems to scale with damage done, so the harder you hit, the more you heal. Useful on pretty much all characters.


Mid Game
By the time you recruit Mikah you'll have access to tier 2 already. Equip her with Charging Revenge and never look back. Work on getting her combo skills as well investing on her AGI, HP and ATK passives.

As for Class Emblems, either Warrior or Bandit work really good on her.

End Game
Get Double Steps, Spinning Kick and Final Blossom as soon as possible, as well Counter Attack, and dump the rest on her stats.

As for accessories, Bracelet of Power (+20% ATK) or Winged Cape (+15 AGI) works just fine.
Magnolia, The Mystic

Magnolia is the third optional character you can recruit. She is a pure magic-based attacker, boasting the highest MAG stat in the game, on top of very high TP. Her arsenal covers all the elements, meaning she is suited to deal with any situation.

Her mechanic lies in her card system, where whenever she cast a spell, the card drawn can be between 1 and 10, empowering the spell with various effects (increasing damage or making it hit multiple enemies, for example). On top of that, Magnolia can transform into her Fairy Queen form once per battle, where any spells cast are 8 or above card effect.

Strengths
  • Magic Attacker with a wide array of spells that cover every element.
  • Highest MAG.
  • Third highest TP.
  • Skills can be empowered depending on the card number when cast.
  • Can deal absurdly high damage with Falfalaran + Wild Card + Blind Draw.

Weaknesses
  • Other than MAG, all her other stats are between mediocre and low.
  • Lowest AGI, tied with Victor (but somehow she feels even slower).
  • Damage output is very RNG dependent, making it unreliable.
  • Lenne is better than her in every aspect.


Baseline
  • Elemental Spells: Magnolia has the best elemental attack coverage as she has a spell of each element.
  • Lunatic Joker: deals neutral magic damage. Useful when the enemy has no elemental weakness. But ideally you should be using Victor to lower resistances anyway. Still useful when grinding on Easy since you can just spam it without requiring to setup.
  • Eclipse Ace: pretty much the same as Lenne's Heaven's Tear, dealing damage based on the enemy's current elemental weakness. It has a lower potency of her normal elemental skills, though.
  • Fireworks: consumes the Ultra Bar to deal REALLY high damage. Pretty interesting skill and can hit very hard with proper buffs.
  • Blind Draw: increases a random stat to the party by 30% (up to 40% when maxed). The only problem with this skill is its RNG, which can result in the player not getting the desire stat.
  • Wild Card: makes her next card-based skill to deal double damage and cannot fail. Can be combined with the next skill for some insane damage.
  • Falfalaran: this is Magnolia's most important skill, as it vastly improves her damage output by making her roll only 8 or above on her cards. Pack it with Wild Card, Blind Draw and other buffs from the rest of the party and she can deal one of the highest damage in the game. The only drawback is that this skill can only be used once per battle.

Class Abilities
  • Firestorm / Earthstream Spirit: from Summoner. Synergizes extremely well with her kit since the damage scales with MAG. This ability can be equipped on pretty much any character as it has no set duration and adds extra damage on every turn.

Crystals
  • MAG Up: stack those and Magnolia will be hitting even harder. No-brainer choice. There is actually a diminishing return when stacking these stat up crystals, though.
  • HP / DEF / MDN Up: considering Magnolia's low defensive stats, trying to circumvent with crystals is a good idea, though I prefer maximizing her MAG so she can just kill things faster.
  • HP Drain: very straightforward. Hit enemy, get HP. The amount seems to scale with damage done, so the harder you hit, the more you heal. Useful on pretty much all characters.

Magnolia joins much later, with all tiers available. So just pick those aforementioned spells and dump the rest on her passives.

As for the Class Emblems, Pyromancer is the best, followed by Shaman and Summoner. She'll be competing with Lenne and Ba'Thraz for those.

For accessories, Magic Poleyns is the best, but I prefer it on Lenne. Otherwise, Bracelet of Magic is good just to further increase her MAG.
Raphael, The Inquisitor

Raphael is the final character you can recruit, and the fourth optional. While Egyl is a physical tank, Raphael is a magic tank, having many abilities to mitigate magic damage. He has less Hate generation than Egyl, but compensates it with party utility and more damage.

Strengths
  • Fits the typical Paladin archetype: sturdy and with support-oriented skills.
  • Second highest HP and DEF.
  • Third highest ATK.
  • Third highest DEF, tied with Glenn.
  • Second highest MND, which makes him useful as a secondary healer.
  • Ultra Move makes party immune to magical damage.

Weaknesses
  • Not very effective on fights where enemies don't use magic.
  • Only has one taunt skill.


Baseline
  • Flash: area-of-effect taunt. Combine it with certain passives (such as Warcry) to make enemies focus on him right off the bat.
  • Holy / Devilish Spirit: very similar to the Summoner's Spirits. The Holy spirit replenishes TP to a random character on Raphael's turn, while the Devilish Spirit will deal damage (based on Raphael's ATK).
  • High Cross: gives 100% taunt for 1 turn. Useful when everyone is low on health.
  • Exorcise: negates all magic damage until Raphael's next turn. Given he has below average AGI this actually plays in his favor.
  • Soul Eater: taking damage gives allies TP. Very useful overall. Should be one of the first abilities to cast after Flash.
  • HP Drain: deal damage, recover health. Simple as that. The beauty of this passive is that it works with multi-hit moves and also area-of-effect, meaning you'll gain HP per hit and/or enemy hit. This even works with Ultra Moves.

Class Abilities
  • Ether Sucker: from Vampire. Useful on all characters, period.
  • Heal All: from Cleric. Given Raphael's very high MND, he works surprisingly well as a healer, further reinforcing his paladin-inspired archetype.

Crystals
  • HP / DEF / MND Up: not much to say. Just reinforce his strengths.


Raphael joins pretty much at the endgame, with all tiers available. So just pick those aforementioned spells and dump the rest on his defensive passives.

As for the Class Emblems, either Warrior or Monk works just fine. Rune Knight is also a good pick if you plan on making Raphael a healer of sorts.

For accessory Bracelet of Wisdom is good just to further increase his MND.
Special Thanks
  • To Matthias Linda, for creating this amazing game filled with passion. I can't wait to see what else he has in the works, whether it's a DLC for this game or a whole new project.
  • A couple of Steam users who gave me feedback to correct a couple of errors in the guide: Kenpachi, Weasel, Jo, Sou1Ace, Laszlo.
40 Comments
ElCid  [author] 5 Jun @ 8:58pm 
@The Progenitor
Thanks for the heads up! Fixed it.
The Progenitor 5 Jun @ 7:56pm 
Just to let you know, Raphael's class ability section mistakenly refers to him as Egyl.

"Since Egyl has the lowest TP, it's especially useful on him."
ElCid  [author] 1 Jun @ 1:05pm 
@Mr.Rudi
Interesting. I wonder if the latest patch ended up bugging it somehow.
Mr.Rudi 1 Jun @ 12:12am 
egyl iron will does the same effect as silver lining, so after being used he can only survive one atack that would kill him, not until his next turn. i thougt the same as the description says so, but i tried to do the archivement of fighting on foot earth worms and survive 5 turns, but egyl would die to every second hit of the worm with iron will on. unless my game is bugged, thats how it works currently
Mr.Rudi 31 May @ 11:57pm 
drunken master and double steps max out at 25% agi not 40
ElCid  [author] 28 Oct, 2024 @ 5:58pm 
@spacejunker

Thank you for the heads up! I do care, but frankly I'm not sure there is much I can do. Unfortunately plagiarism of Steam guides is pretty common, and I don't think there is anything that can be done, legally speaking.
spacejunker 28 Oct, 2024 @ 4:48pm 
Just a heads up, but a website called Medium plagiarized this guide almost word for word. They changed like a few subtitles for some sections and called it a day. Not sure if you care, but just wanted to mention it.
\w/ 18 Feb, 2024 @ 2:44pm 
Also, I am not high enough level yet but the action plan you have laid out seems very slow. Use a bunch of actions to set up you damage attack. Apparently evading an attack still removes a stack of Quickstep. Just too many conditionals in her kit in my opinion.
\w/ 18 Feb, 2024 @ 2:41pm 
I am GS14 right now and I have found Sienna to be not very good except for Pilfer. Her damage is unreliable. Put the highest rank +% to steal two items on her.
Endarire 21 Nov, 2023 @ 2:44pm 
Having reached Act 3 on Hard, I learned that AGI, offense, and preventing the enemy from acting or guaranteeing it misses - when combined - make for a fairly easy time.

Hours of grinding were also involved to max everything on everyone.