Killing Floor 2

Killing Floor 2

77 ratings
Tamari's KF2 Survival Handbook - Medic Mentality
By Tamari
An insight into some of the ways a Field Medic can help his/her team be successful, from simple tips/tricks to more complex strategies. This guide aims to show how the Field Medic can be a determining factor in the outcome of any game.
   
Award
Favorite
Favorited
Unfavorite
Introduction
Topic:
Medic Mentality

Category:
Logistics

Prerequisite Guides:
https://steamhost.cn/steamcommunity_com/sharedfiles/filedetails/?id=1619420165
https://steamhost.cn/steamcommunity_com/sharedfiles/filedetails/?id=1632622273
https://steamhost.cn/steamcommunity_com/sharedfiles/filedetails/?id=1666770249
https://steamhost.cn/steamcommunity_com/sharedfiles/filedetails/?id=1650828185
For player skill levels:
Any

View the entire Handbook here:
https://steamhost.cn/steamcommunity_com/sharedfiles/filedetails/?id=1633641281
Welcome to Tamari's KF2 Survival Handbook - a consolidated resource for tips, tricks, and tactics for Killing Floor 2 that aims to help you become a better player and learn a bit more about the game while you're at it.


This guide is focused on: Medic Mentality

The Field Medic has a central role in KF2 as the backbone of any squad, keeping teammates healthy and out of danger. In fact, good Medics can actually control the pace and flow of the game, by enabling their teammates to take battles on their own terms as well as play more aggressively. Aside from healing though, there are many things a Field Medic can do to be effective. This guide aims to delve into those tactics and also offer an insight into what I believe makes an effective healer. I will also discuss each of the specific Field Medic weapons, offering my opinion(s) on their strengths and weaknesses as well as how you can use them as effectively as possible.


Read on!


Some Disclaimers
Before I get into the thick of it, I want to address a few things in advance that I know people will either comment about or ask me about personally. I feel that I shouldn't have to write in a section like this, but I figured I would address it anyway, so here goes.

Please note that some of the information in this guide is out of date and does not include the changes brought about in the recent updates to the game. I will be updating everything eventually.

First
Everything you are about to read is my personal opinion, based on my experience playing the game for just about 2500 hours. I've now been playing the game going on 7500 hours now, and though most of my opinions have not changed, my level of experience has. Eventually, I would like to update this guide to reflect that growth.

Even with all that playtime, I am by no means an authority on the best way to play the game, nor am I attempting to be. I just want to help as many people improve their gameplay as I can. The topics you will read about in the upcoming sections are based around the things that I have noticed to work the best in my personal experience with the game.

Second
I generally appreciate any feedback people are willing to give me. I learn new things from players all the time. If there's something you notice that I lapsed over that you would like to share, please do so.
It is extremely helpful and helps to make these guides better and more informative for everyone!

But please, there's no need to flame the guide (or me) in the comments because it doesn't match up with your personal preferences. If you come forward with genuine and constructive advice on how to make the guide better, I promise I will listen to you and most likely incorporate your advice somehow.
If all you're going to do is complain about how the guide sucks, then maybe you should just find another guide to read, or perhaps write your own (?).

And lastly..
This is a long guide. In fact, all of these "Mentality" guides will be.
If all you're looking for is a TL;DR and expecting a quick, sweet, "this is what you should do" guide, I don't think you're going to enjoy reading this.

My primary aim when I write these is to be as encompassing as possible.
I don't feel like it benefits anyone to say "this is the best skill setup to use" unless I explain why. This usually involves explaining every facet of most concepts, which is why the length can get long.

I don't write anything that doesn't need to be in the guide, so I hope you give it a chance and read through until the end. Each bit of information is deliberate and I really have tried to make this as direct and straight to the point as possible.

Thanks for understanding.
Anyway, lets finally get into it.


Weapons
Let's begin by discussing each of the available Perk Weapons for the Field Medic, including my opinions on their strengths, weaknesses, and suggested uses.

Please note that these listings are out of date and does not include the changes brought about in the recent updates to the game. I will be updating them eventually.

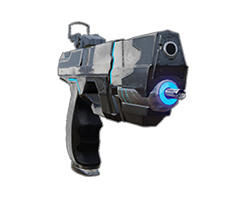
HMTech-101 Pistol

Tier: 1
Base Weight: 1 kg
Cost: 200 Dosh
Total upgrade cost: 3300 Dosh

Every Medic's starting weapon, quintessential to almost every possible loadout. Great for healing 1-2 players with relative ease, however struggles to hold its own on later waves and should be paired with other Medic Weapons as soon as possible.

Upgrades improve this weapon's Syringe Recharge Rate, which allows you to shoot darts faster. In general though, it isn't worth it to upgrade the 101 past Tier 2, as subsequent upgrades begin to add weight to the weapon, limiting your loadout capabilities. You should only upgrade this weapon once to get the faster Syringe Recharge Rate, and save your weight for your other weapons.

This gun weighs a meager 1 kg, so there's really no excuse to ever not have one. The two darts it allows you to fire can make all the difference!

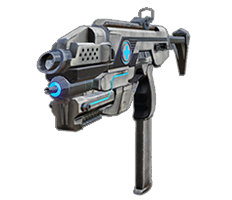
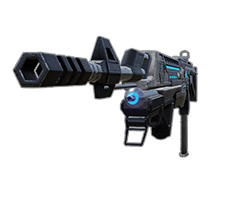
HMTech-201 SMG

Tier: 2
Base Weight: 3 kg
Cost: 650 Dosh
Total upgrade cost: 2800 Dosh

A beefed up version of the 101, firing in full-automatic. Still lacking a bit in power however. This weapon works great alongside the 101 during earlier waves, as it gives you a few extra Healing Darts. Depending on the difficulty and skill of the players in your game, it's sometimes possible to skip buying this weapon altogether in favor of the higher Tier weapons.

As with the 101, upgrading this gun increases its Syringe Recharge Rate slightly, but it is usually not worth it to upgrade this weapon. Instead, you should seek to replace the 201 as early as possible with a higher Tier Medic Weapon.

HRG Healthrower

Tier: 3
Base Weight: 7 kg
Cost: 1000 Dosh
Total upgrade cost: 2200 Dosh

The Healthrower is the everyman's (or woman's) prime choice for group healing and buffing, being capable of deploying targeted streams Healing Gas on demand. With this weapon, it is possible to keep players buffed almost indefinitely, by firing a small stream of Healing Gas every few seconds at them.

This makes it great for Kiting scenarios, where group healing and buffing is of the utmost importance.

Aside from all of that, the Healthrower is also great at dealing with Small/trash Zeds like Clots and Crawlers, and also has the hidden benefit of revealing cloaked units such as Stalkers. During a kite, this weapon can be used to Panic Zeds, incapacitating them momentarily and allowing you and your team to slip past.

As with all other weapons that utilize Healing Gas, you'll have to keep in mind that this weapon only heals players while they stand in the gas. Because of this, you have to keep a focused stream of gas on players who you want to heal. Another notable downfall to this weapon is it's limited range, only really allowing you to take advantage of its benefits in close quarters.

Still, the Healthrower can fire up to 2 Healing Darts before needing to recharge, allowing you to retain some of your long range healing utility. Like all other Medic Weapons that fire Healing Darts, this weapon can also have its Syringe Recharge Rate improved through Upgrades.

HMTech-301 Shotgun

Tier: 3
Base Weight: 6 kg
Cost: 1100 Dosh
Total upgrade cost: 2200 Dosh

One of the better Medic Weapons, combining a decent amount of stopping power with the retained ability to heal teammates with Healing Darts. This is one of the cornerstones of any Medic loadout and should absolutely be used to replace the 201 as soon as possible, should you have it in your inventory.

Headshots from this weapon can decapitate most small Zeds in one round, and it even has surprising power versus Albino Zeds like the Gorefiend.

In terms of healing capability, the 301 is about as effective as the 201 SMG, but the extra stopping power this weapon offers makes it a better choice overall.

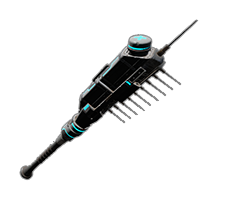
Hemogoblin

Tier: 3
Base Weight: 8 kg
Cost: 1100 Dosh
Total upgrade cost: 2200 Dosh

The Hemogoblin is one of the more unconventional Medic Weapons.

It's primary use is debuffing Zeds, by applying an Affliction known as Bleed.
Bleeding Zeds move 30% slower, attack 25% slower, and deal 30% less damage. This makes it really useful versus Large Zeds in particular.

The Hemogoblin, like most other Medic Weapons, retains the ability to shoot Healing Darts at your teammates. The main issue with this weapon though is its lackluster ability to deal damage. It has had its damage buffed in recent patches, but overall, its usefulness is generally eclipsed by the other Medic weapons and off-perk weapons, such as the HMTech-301 Shotgun.

Still, it can potentially be useful in some cases, such as during the Boss wave.


Weapons (cont.)
Hemoclobber

Tier: 3
Base Weight: 4 kg
Cost: 1200 Dosh
Total upgrade cost: 2200 Dosh

The Hemoclobber is the ideal Medic / Berserker crossover weapon, combining the benefits of melee-combat with the ability to heal teammates. Much like the Berserker's Pulverizer, the Hemoclobber has an alternate fire function which deploys Healing Gas in a small area on successful contact with a Zed.

One of the most obvious drawbacks to this weapon is that it has a short range. You must be in the immediate vicinity of your teammates to heal them. It's also pretty hard to hit teammates depending on factors like ping, perk, and what Zeds are or are not in the way.

Still, the Hemoclobber's alternate fire is pretty good, being capable of dispatching most small and even a few medium Zeds with ease. This is a decent weapon to take into the front line during the earlier waves, but ultimately should be replaced by one of the higher Tier weapons, like the HMTech-401 Assault Rifle.

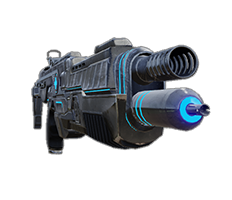
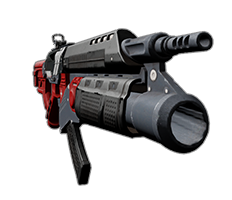
HMTech-401 Assault Rifle

Tier: 4
Base Weight: 7 kg
Cost: 1500 Dosh
Total upgrade cost: 1500 Dosh

The penultimate upgrade in the line of Medic Weapons.

The 401 is absolutely unparalleled in terms of raw single-target healing, being capable of shooting up to 3 Healing Darts in quick succession before needing to recharge. At higher Medic levels, the amount of healing this weapon can put out is ridiculous, due to the Medic's increased Syringe Recharge Rate. It is also the best Medic Weapon at buffing teammates, since Darts are mostly free, and this weapon can shoot a lot of them in quick succession.

This gun has surprising damage too, being capable of decapitating most small Zeds in one round, killing Crawlers and Stalkers in one shot, and decapitating Albino Zeds like the Gorefiend in just a few rounds. Its 40-round magazine and high rate of fire also allow a competent Combat Medic to really assist their team on the front line.

The primary downfall of this weapon is its massive recoil. Out of all the Medic Weapons, the 401 has some of the worst muzzle jump, making it hard to hit targets at range. The Commando has a way to counteract this through passive perk skills, but unfortunately the Field Medic does not.

One way a Medic can account for this though is by tap firing, which is firing in quick, successive 1-round "bursts". This works because the first few bullets in a burst always go directly to the center of the screen.

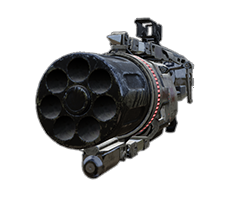
HMTech-501 Grenade Rifle

Tier: 5
Base Weight: 8 kg
Cost: 2000 Dosh
Total upgrade cost: N/A

The last in the line of the HMTech weapons, the 501 offers the Medic up to 10 extra Medic Grenades, making it one of the most useful weapons you can carry in your loadout. It is capable of deploying Healing Gas at pretty surprising distances, much further than standard thrown Medic Grenades. The bullet damage this weapon offers is pretty surprising too.

The 501 is one of the most useful weapons for group healing and buffing, and is especially useful during kiting and Last Man Standing scenarios, due to its ability to zone out Zeds. Still, it cannot fire any Healing Darts, and thus is pretty expensive to use for single-target healing. To counterbalance this, you should bring another Medic Weapon, preferably the HMTech-401 Assault Rifle.

Since this weapon has a Base Tier of 5, it cannot be upgraded any further.


Off-perk Weapons
Now let's showcase a few of the most common Off-perk Weapon choices for the Field Medic that you can use to aid your team. Note that these aren't the only choices, nor are they necessarily the best. These are just the most common ones I've seen people using and/or that I personally use myself.

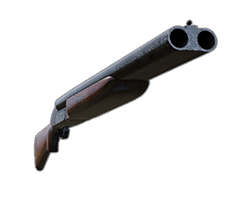
Double-barreled Boomstick

Tier: 2
Base Weight: 5 kg
Cost: 750 Dosh
Total upgrade cost: 2800 Dosh

The Double-barreled Boomstick is one of the most useful off-perk Medic weapons, granting the wielder the capability to dish out massive amounts of damage in short bursts.

The Boomstick has the amazing capability for Recoil Force Boosting, which allows the user to soar through the air. This enables plenty of things, like quicker movement, evasive capability, the ability to Goomba Stomp Zeds, control Large Zeds and Bosses, reduce fall damage, and even help initiate fights against Large Zeds.

One other core functionality of the Boomstick is its high Stumble Power, especially on the alternate fire. This allows the Medic to use it to keep Zeds away from themselves and the team, and create openings.

On top of all this, the Boomstick is very lightweight, meaning you won't have to give up too many Medic Weapons to carry it! Definitely worth a try!

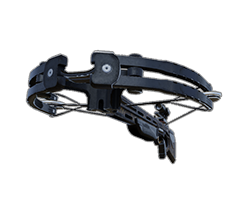
Crossbow

Tier: 2
Base Weight: 6 kg
Cost: 650 Dosh
Total upgrade cost: 2800 Dosh

The Crossbow is typically a weapon used by the Sharpshooter, but the Field Medic can put it to great use as well. This weapon is especially good at fighting Large Zeds, due to its high Stun Power, which allows one to incapacitate most Zeds after a few shots.

For this reason, it's a brilliant off-perk choice for helping your team initiate fights against Large Zeds, as your teammates can pile on damage after the Stun.

It's lightweight too, and doesn't limit your inventory space too much. Bonus!

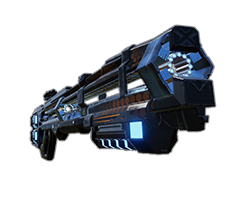
Rail Gun

Tier: 4
Base Weight: 10 kg
Cost: 1500 Dosh
Total upgrade cost: 1500 Dosh

The Rail Gun is a good off-perk choice for the Field Medic for many of the same reasons the Crossbow is. It has the capability to Stun Large Zeds, giving your teammates an opportunity to attack. More importantly though, it just deals a lot of damage, which allows you to contribute a bit more offensively.

The major downside to this weapon is it's weight. The Rail Gun weighs a whopping 10 kg, so if you decide to use it, you won't be able to carry as many Medic Weapons, which in turn limits your healing capabilities a decent amount.

Freezethrower

Tier: 3
Base Weight: 7 kg
Cost: 1100 Dosh
Total upgrade cost: 2200 Dosh

The Freezethrower is another excellent off-perk choice for the Field Medic, due to it's ability to Freeze Zeds in their tracks. This makes it a great initiator against Large Zeds, since your teammates will have plenty of free reign to open fire on the frozen Zed. In general, the Freezethrower allows for very clean and efficient takedowns of Large Zeds, without relying too much on good aim like the Crossbow. This weapon even works well on Hell on Earth difficulty.

It's also pretty lightweight like the Double-barreled Boomstick, meaning you won't have to give up too many Medic Weapons to carry it.

The one major downfall to this weapon is it's low damage. Because of this, it's primarily used as a support tool at best. For the most part, you'll have to rely on your teammates to use it with maximum effectiveness.


As a final note, if you are curious about any of the upgraded capabilities of the weapons I've discussed up until now, check out the Appendix I wrote on Upgrades here:
https://steamhost.cn/steamcommunity_com/sharedfiles/filedetails/?id=1665112317
This guide will give you raw statistics about the performance of each gun at each Upgrade Level.
You can view information such as each weapon's damage for each of its attacks, and in the case of the Medic Weapons, exactly how fast the Syringe recharges at each level as well.


Loadouts
So, now that we've covered the Weapons in great detail, you most likely have an important follow-up question:

"Which weapons are the best to use together?"

Good question, my friend.
It's hard to give an appropriate and conclusive answer to that. But if I had to, I would suggest that the choice is yours.

Truthfully, there are too many factors that play into what makes a weapon useful, from a player's aim, awareness, and reaction time, to what Zeds are currently on the field and even the perks the rest of your teammates are playing as. You simply can't judge a weapon based on its Tier alone in an overwhelming majority of cases.

In the previous two subsections, my primary goal was to give you the general pros and cons of each gun and even then, the comments you read were just my opinion. There may be better ways to use some of the weapons that I personally think aren't very useful, or there may not be. Who knows.

Anyway, part of the fun in KF2 is experimenting and trying out new things, so I'm going to leave it up to all of you readers to make your own judgement calls on what weapons you think work well together. There are plenty of weapons that don't work well together, but again, that's pretty relative to each individual player.

My personal suggestion is to read the comments I left above about each gun's strengths and assess the current state of the game you're playing in to make your decision.

For example, if you notice that most of your team is comprised of slower moving perks, or if you constantly find that your team is being surrounded and overrun, you might want to bring the HMTech-501 Grenade Rifle or the HRG Healthrower. The extra Healing Gas may just allow you to keep everyone (and yourself) topped off (and buffed) a bit more easily. The gas will also help keep the area relatively clear, giving your teammates a bit more room to operate.

Or another example. If your team is more split up, you might decide you need to use the HMTech-401 Assault Rifle, since Healing Darts are much better at long range than Healing Gas. If you're really having trouble keeping up with healing, you might decide to bring the 101, 301, and 401 all together. You might prefer these weapons as well if you find that you want to buff teammates more often, since Healing Gas is a pretty expensive way to do it normally.

Or you might decide you want to help more in combat, so you decide to take the HMTech-301 Shotgun for the extra stopping power..

Anyway, I can go on. These are just a few examples really..
At the end of the day, if all you really like to use is the Hemoclobber and it works well for your team, then go for it. Use whatever you find to be the most fun and effective for your specific playstyle.

What I will do for you though is tell you the loadouts that I personally use when I play Medic for specific situations. I assume that most people play similarly already, but who knows, perhaps you will be enticed to try them out for yourself if you haven't already:


Tamari's Suggested Loadouts
1.


This is pretty much my go-to loadout. I use this exclusively in Survival, especially when playing on Hell on Earth difficulty, or on Endless Mode in the later waves.

With the 101, 301, and 401, you should never have a shortage of Healing Darts, which can allow you to help your team recover from almost any damage (at nearly any range). Buffs are pretty important on HoE in general, and Healing Darts are the most cost-effective way to apply them, which this kit is far from short on.

This loadout also makes you a jack-of-all-trades in terms of Combat Proficiency. The 301 has decent stopping power versus some of the medium Zeds, like Gorefiends and Bloats, and can even be helpful against Large Zeds. It also completely destroys most smaller Zeds in one to two shots, and sometimes can kill even more Zeds through collateral damage due to it's penetration.

The 401 is a great trash cleaner-upper, dispatching Crawlers, Stalkers, Clots, Cysts, Slashers, and Gorefasts with ease.

The best part about this loadout is that no matter which weapon you're using, you can always heal your teammates, since each one can fire Healing Darts. With other loadouts, sometimes the time you spend swapping weapons can be just long enough that a teammate can die if they're already close to death.

2.


This is my all-time favorite loadout in terms of pure fun factor.
I use this the most on Endless Mode in particular.

With the 101 and 401, you should have a plentiful supply of Healing Darts to keep teammates alive and well. But where this loadout really shines is the Double-barreled Boomstick. Even as an off-perk weapon, the Boomstick has amazing stopping power, making it great for attacking Large Zeds like Scrakes. With this gun, you can easily take them out all on your own if you know what you're doing. It's also just good for bullying most Zeds out of your way.

The Boomstick provides so much utility, allowing you to Goomba Stomp, prevent/reduce fall damage, and so much more. Plus it's just fun to jump around everywhere.

You can also completely shut down bosses with Goomba Stomps if you know how to time them properly, which is always a hilarious sight to see for most players.

3.


This is in my opinion, the most balanced loadout in terms of healing capability.

The 401 is the best Medic Weapon in the game in terms of Healing Darts, allowing you to shoot up to 3 before having to recharge. This more than takes care of your single-target healing needs.
The 501 lets you blanket areas in Healing Gas, not only providing group healing, but zoning out Zeds as well. This makes it really good for Endless in particular, or whenever your team has to kite.

So with this setup, you have the best of both worlds as far as healing goes: single-target and AoE (group healing).
The rifles themselves also do a decent amount of damage, and are great for cleaning up most small to medium Zeds with little problems.

The only thing this loadout struggles with is pure stopping power. If you get a Scrake or Fleshpound in your face, it's going to be pretty hard to take it down unless your team helps you.

4.


This loadout is quite the opposite of the first, centering almost completely on using Healing Gas to heal your team. This is the loadout you would pick if you find that your team is constantly surrounded and taking damage, or if you want to buff them all easier.

This is a fantastic loadout for kiting especially, as the Gas you can deploy will be great for group healing and buffing your entire team. By firing quick bursts of Gas at repeated intervals, it is possible to keep your entire team buffed indefinitely. You can also use the poison inflicted by the weapon to clear yourself and your team of small Zeds like Crawlers and Clots.

The one major downfall to this loadout is its short healing range. Though the 501 can deploy gas from afar, it still requires teammates to stand in the cloud to be healed. Fortunately, the Healthrower still retains the ability to fire Healing Darts if you happen to need them, but it is still not as effective at longer range compared to weapons like the HMTech-401 Assault Rifle.

Anyway, those are just a few of the weapon sets that I like to use when I play Field Medic. Find what works best for you, and experiment a little!


Skills
Similarly to what I wrote about Loadouts, I don't really have a good answer as to which Perk Skills you should use in any given situation. It's basically up to you.

In general though, I think the most effective way to play Field Medic is to use the left-hand side of the skill tree pretty much exclusively, as these are the skills that actually help you heal yourself and your team.

The right-half of the tree houses more combat-oriented skills, which are actually pretty good in Solo Play. But in Multiplayer, if all you're going to do is use the right-side skills, then why not just play a perk more suited for dealing damage? You will still be more effective at healing as a Medic than any other perk, regardless of what skill setup you use, but the Field Medic perk is simply not designed for dealing damage. You aren't going to be taking out Fleshpounds left and right even if you use all the right-side skills, so it's not worth it to sacrifice the healing power for damage in pretty much every scenario.

Just my opinion..

Still, I actually mix in the right-side skills sometimes when I play. On earlier waves, it can actually help to use skills like Battle Surgeon to give yourself a bit of extra damage for example.

Another reason why the left half of the tree is so useful is due to the Buffs they grant you. Adrenaline Shot, Focus Injection, and Coagulant Booster are so quintessential for healing on higher difficulties that they should almost never be traded off. All of these skills allow your teammates (and yourself) to evade and/or soak up damage, which keeps them alive and makes everyone's life easier.

Even in the inevitable case that players get themselves in bad situations (it happens all the time), the left side skills still have you covered. In my opinion, you will have much more success saving a teammate using Coagulant Booster, than trying to make up for it with Battle Surgeon. This is usually because if a teammate is about to die, chances are pretty high that they won't be able to dodge the damage you are attempting to save them from anyway. The best thing you could do for them in that case is hopefully give them enough resistance to survive the next hit while you heal them up.

Or consider the case in which a teammate is running away from a Fleshpound. Do you heal them and give them stacks of Adrenaline Shot, or do you try to shoot at the Fleshpound yourself and hope that the extra ammunition from Combatant Doctor can help you finish the job? Typically, it's pretty hard to kill Fleshpounds as a Medic no matter what skill setup you use, so I would say that the more worthy choice is Adrenaline Shot, since you probably won't be able to kill the Fleshpound in time anyway before your teammate takes damage.

At the end of the day, it's up to you to decide what skill setup you want to use. All skills can potentially be useful in a specific capacity, and I very much despise the idea of a "meta", so use what you feel works best for you and your team.

The above comments are just opinions I've formed based on my personal experience with the game. I just thought I would share them, for whatever it's worth.


Preventative Medicine
One way to be an efficient healer is to prevent teammates from taking damage altogether.

This potentially saves them from needing to be healed in the first place, which makes your job a lot easier in most instances since you will be able to focus your healing on players who need it the most.

An efficient Medic can protect their teammates from taking damage in a variety of ways, primarily through:
  • Bash Cancelling
  • Goomba Stomping
  • Bodyblocking
  • Healing Gas

Let's dive into each these separately.


Bash Cancelling
If you've read my previous guides or have a lot of experience with KF2, you may already know what a Bash Cancel is.
For those who don't though, I highly recommend reading about it in Section 1.2: Universal Defensive Tactics. You can find a link to that here:
https://steamhost.cn/steamcommunity_com/sharedfiles/filedetails/?id=1632622273
In a nutshell, Bash Cancelling involves using the Melee Bash (V) to protect oneself from taking damage, by stopping a Zed's attack.

As a Field Medic, one can utilize Bash Cancelling much in the same way they would use it to protect themself, but to protect teammates instead.

Consider the following situation:
A pack of Fleshpounds have just appeared in front of your squad, and the team Sharpshooter is attempting to shoot them down. Meanwhile, a Scrake has managed to sneak up behind your Sharpshooter and is preparing to attack. Sharpshooters are very vulnerable to flank attacks, especially when they are looking down the sights.

If you bash the Scrake before he can hit the Sharpshooter, you not only save them from taking damage, but you buy him/her some extra time as well. This can allow them to line up their shot and make the necessary takedown, or simply move away and find a safer position to snipe from.

If the Scrake is not bashed, a variety of things can go wrong. The Sharpshooter could either miss their shot completely, or place it incorrectly, which could potentially lead to a teammate dying. The Sharpshooter themself could also die, which also negatively impacts your team.

Here's an in-game example of what I mean by this:
https://youtu.be/TQrnmIOc4xY

This is just one example, but this extends into many other situations as well. Consider the case where a Siren flanks your squad. The Siren's scream not only ignores armor, but disarms explosives as well. On Hell on Earth difficulty, just a couple of Sirens alone can completely eradicate an entire squad in seconds. A Bash Cancel is capable of stopping the Siren's scream, which can give your team some breathing room.

Since Medics usually don't directly participate in combat, they have more time to look for threats like these, and thus should always be on the lookout so that they can either deal with them or notify their teammates.


Goomba Stomping
Much like Bash Cancelling, Goomba Stomping can also be used to protect teammates.
I also wrote about this in Section 1.2. So if you are unsure what this is, refer to the link above.

Goomba Stomps are an extremely reliable way of incapacitating any Zed or Boss, and an incapacitated Zed can deal no damage to your squadmates!
Plus, you give your squadmates additional time to deal with the Zed(s) and land crucial shots to weakpoints and critical zones. A win-win situation for everyone.

Goomba Stomps are typically useful against Large Zeds, but can be used against any Zed to great effect really. They also come in handy during Kiting scenarios, where Zeds can potentially be in the way, preventing your team from progressing without sustaining serious damage.

Compared to Bash Cancelling though, Goomba Stomping ends up being a bit harder to pull off in practice since you need to be above Zeds to incap them (unless you're dealing with Crawlers). You can remedy this by carrying a Double-barreled Boomstick, allowing you to Recoil Force Boost onto the Zed's head and knock them over. Otherwise, look for a set of stairs or map props such as cars and railings to get a bit of extra height.

I wrote a lot about Recoil Force Boosting in Section 1.4: Advanced Movement. You can read all about it here:
https://steamhost.cn/steamcommunity_com/sharedfiles/filedetails/?id=1666770249
The potential benefits to Goomba Stomping incoming Zeds are very much the same as with Bash Cancelling.

Here's how this looks in-game:
https://youtu.be/r7Fz3gvxClI


Bodyblocking
Another thing you can do to stop teammates from taking damage is Bodyblocking incoming Zeds. This simply means standing in front of the Zed and blocking it so that you take the damage instead of your teammate(s).

This works because Field Medics are extremely resistant to damage, due to their increased Movement Speed, Armor, Syringe Recharge Speed, and Syringe Potency. These core attributes of the perk make it one of the best for sustaining high amounts of damage, with quick recovery.

This can be extremely important, especially during Kiting scenarios where certain teammates are either lagging behind the squad or are close to death. A crucial Bodyblock can mean the difference between the game ending or not. Plus, you can Bodyblock to de-rage Fleshpounds and Quarter Pounds, giving your team yet even more breathing room.

Here's how this looks in-game:
https://youtu.be/oxn3XL4vGzw

You don't have to just block Fleshpound hits. For example, if you notice that a Husk has snuck up behind your team and is about to shoot at them, you could soak up the rocket!

Note
An important thing to note is that sometimes, Zeds will not attack you, even when you stand directly in their way. This happens a lot with Fleshpounds especially, who tend to ignore everything except their chosen target after enraging. You should always be ready to heal your teammate or attack the Zed should this occur.

You can also reduce damage taken through Knife Parrying, a tactic I discussed in detail in Section 1.2: Universal Defensive Tactics. You can find a full write-up on it here:
https://steamhost.cn/steamcommunity_com/sharedfiles/filedetails/?id=1632622273
Using the Knife to block attacks can really save a lot of health and armor in the long run. Use it!

Note that a Field Medic can further improve their survivability through the left-hand side of the skill tree, as those skills amplify healing abilities.


Healing Gas
The last way you can be effective at shielding your team from damage is through Healing Gas. Healing Gas is applied from the following sources:
  • Medic Grenades
  • Airborne Agent
  • The Hemoclobber

Healing Gas has the special property that it heals teammates while simultaneously damaging enemies. In addition to damaging enemies, gas has the hidden benefit of revealing cloaked units, such as Stalkers. This can be helpful to your team!

This makes it extremely useful as an area denial tool, being capable of zoning out and outright killing most smaller Zeds. Even if the gas doesn't kill them, the Poison damage it inflicts is capable of causing Poison Panic, rendering the Zeds unable to attack for a short time.

Because of this, you should deploy Healing Gas in areas where teammates are under heavy attack in order to keep them clear.

If we revisit our earlier example with the Sharpshooter, a clever Field Medic could drop a Medic Grenade onto the Sharpshooter, covering him in gas and preventing approaching Zeds from attacking him while he snipes.

Here's how this looks in-game:
https://youtu.be/P1r0HUYC3Js


Combative Medicine
As a Medic, you don't have to relegate yourself to only protecting teammates and healing them.
Let's discuss how the Field Medic can directly help the team in combat as well.


Recon
Field Medics double as efficient Scouts or Spotters due to their increased speed, which allows them to navigate the battlefield quickly. An efficient Medic can use this to their advantage to spot key threats, such as an incoming Large Zed, and report it to their team. Early callouts are key to holding your ground as a squad, especially on higher difficulties.

A Large Zed (or several), left unchecked, will eventually push your team out of position, potentially forcing a Kite or even causing some of your teammates to die.

This works the best when the Medic is positioned such that they can survey as much of the battlefield as possible, for example on high ground. This could be standing on top of a car, standing on a raised platform, or just being a bit up-hill from your teammates.


Aggro Management
A term popularized in MMORPGs, holding Aggro refers to holding an enemy's attention. Holding aggro on a Zed means it is actively pursuing and attempting to attack you.

This "piggybacks" off of the previous section in a way, since Zeds that are attacking you instead of your teammates cannot damage your teammates at all (usually anyway).
What this really does is allow your teammates to damage the Zed with relative safety. By ensuring that Zeds are attacking you instead of your teammates, you can double as an efficient Tank.

To get Zeds to focus on you, you can usually walk up to them and wait for them to turn around. Just be careful with Large Zeds as you can take a lot of damage doing this.

Being near Zeds after your teammates run out of line of sight (LOS) is another way to get them to focus on you. I wrote all about this in Section 1.1: AI Pathing. Here's a link if you want to read more about it:
https://steamhost.cn/steamcommunity_com/sharedfiles/filedetails/?id=1619420165
And here is an example video showcasing the above concepts:
https://youtu.be/_TQJNqlrrY0

One thing you should keep in mind is that sometimes it actually benefits your teammates more if the aggro is directly on them.
Consider the case in which a Sharpshooter is attempting to snipe a Fleshpound that has just appeared in front of your squad. Most of the time, it's harder to hit targets that are moving perpendicularly (at a sideways angle) to you or away from you with their back turned. This is because typically, the Zed's weakpoint is the head, and in either of these cases, the head is harder to target.

Try to observe your teammates. If it looks like they are about to engage a Zed, it might be best to let them fight it, rather than intervening, so that they can line up shots easier. This is situational, and depends on your squad's composition and how confident your teammates are. Some players have no issues aiming at targets moving erratically, while others do.

Where holding Aggro can really come in handy though is managing multiple Large Zeds.

Consider the case where your squad is engaging a tight pack of Scrakes on Hell on Earth difficulty. On HoE, Scrakes have a Rage Threshold of 90%, meaning that they become angry after losing just 10% of their maximum health.

A lot of times, players become eager in these situations and tend to open fire on the entire group, causing them all to become enraged. Once this happens, chaos ensues and usually someone will die. Even if they aren't doing it intentionally, sometimes additional Scrakes/Fleshpounds will be enraged through collateral damage. This happens a lot for example with Supports and Demolitionists, whose projectiles/bullets either deal splash damage or have increased penetration.

In these scenarios, it can be beneficial to peel some of the Zeds away from the main pack, and thereby away from the collateral. Since you move quickly as a Medic, you will have no problem kiting them around, and you can still heal your teammates in the meantime.


Large Zeds
You can also help your team initiate fights against Large Zeds, using weapons like the Crossbow, Freezethrower, and Double-barreled Boomstick.

The Crossbow has a chance to Stun Zeds, momentarily disabling them.
The Freezethrower allows you to Freeze the Zed, which is effectively a Stun.
The Double-barreled Boomstick has a high Stumble Power, which can help stagger Large Zeds and keep them away from your team. It can also be used to Goomba Stomp the Large Zed, knocking it to the ground.

Note that the Crossbow is pretty unreliable against Fleshpounds, and should not really be used to attempt to Stun them. It still does a good bit of damage however.

All of these give your teammates a relatively safe way to fight Large Zeds. Just keep in mind though that knocking Zeds over can make it harder for some of your teammates to hit them.

If you aren't sure what I mean by Stun or Freeze, I wrote all about them in Section 3.1: Afflictions. You can read about it here:
https://steamhost.cn/steamcommunity_com/sharedfiles/filedetails/?id=1650828185
Here's what this looks like in-game:
https://youtu.be/NZBPMDN_Wmo


Cropdusting
Another creative way to utilize Healing Gas is through Airborne Agent. This skill causes you to deploy a small cloud of gas each time Zed Time is either activated or extended. The gas emanates from the Medic for 8 seconds following activation.

During this time, it's possible to run up to smaller Zeds and gas them, which usually nets a few kills. This is known as Cropdusting, and it's a virtually free way to get some easy kills and clear up some space for your team.

Here's how this looks in-game:
https://youtu.be/1HwWxF0N1Yg

This tactic works great against smaller Zeds like Clots, Crawlers, and especially Stalkers, since the gas will reveal them even while they're invisible.


Waging War
If all else fails, you can take on the Zeds yourself to help your team.

Be mindful when doing this, because it can be hard to multi-task between fighting and keeping the team alive. If there is another Medic on your team, or someone carrying an off-perk Medic Weapon, it can make combat participation a bit less risky.

Realistically, there's no reason why a Medic can't fight alongside their team. In fact, they should whenever possible (albeit carefully).
Try to help fight during periods of downtime, or when your team is healthy and doing well. Not only will it end the wave quicker, but it can relieve a bit of pressure on your teammates.

Like in the previous section, one of the best tools you have at your disposal for fighting Zeds is Healing Gas, as it is a fantastic (and efficient) area-denial tool. Throwing down a Medic Grenade in a doorway creates a "deathwall", killing most small Zeds attempting to pass through it. This works great against Stalkers in particular.

Basically, gas can reduce the number of entry points your teammates have to worry about. It can also give your squad a breather so that they can complete time-critical actions such as reloading. This is especially helpful on higher difficulties and on late-wave Endless.

The HMTech-501 Grenade Rifle opens up a lot of possibilities for this, since it can fire grenades much farther than you can throw them. You can also bounce grenades off of walls, ceilings and even map props to block high-up entry points and even heal teammates who are out of line of sight (LOS).

Here's an in-game example:
https://youtu.be/bWLI7K7KtYE


Self-preserving Medicine
This section pertains to the actions a Field Medic can take to keep themselves out of harm's way. After all, a dead Medic can do no healing, and an efficient Medic should only take damage when ultimately necessary (such as blocking attacks for his/her team).


A Quick Note
Do note that in addition to what you're about to read, pretty much all of the concepts described in Preventative Medicine can be employed to protect oneself as well, such as Bash Cancelling and Goomba Stomping. If you're unsure what I mean by that, refer to that section above.


Positioning
Careful positioning is an important part of staying alive as any perk, but it is a lot more important for the Field Medic since they are such a vital part of the team.

In general, the best place for a Medic to be is somewhere where he/she can see the entire squad. This is usually on high ground, such as a platform or at the top of a flight of stairs, however you can also stand on top of map props like vehicles and fences to give yourself a bit of extra height.

Futhermore, you should also try to be surrounded by your teammates, so that incoming threats have to go through them before reaching you. Your primary goal, above all else, should be to keep yourself and your team alive. If you come under attack while you are near your teammates, they can help you fight off the Zeds, saving precious health and possibly even preventing death.

Another important positioning tip revolves around blocking Zed spawns. As it turns out, Zeds cannot (usually) spawn in direct line of sight (LOS) of a player. This means that if you stand in a doorway or an adjacent room, Zeds cannot spawn there and attack your team.

By blocking specific spawns, you can not only control entry points into the area your team is defending, but give yourself less Zeds to worry about as well.

Lasty, you need to know when it's time to bail out.
If you see that the squad is beginning to be overrun, try to move near an exit.
This allows you to make a (relatively) safe escape. If it turns out that your team needs to kite, this will also allow you to help lead the kite. This is something I will discuss a lot more in depth later on in this guide.

You aren't going to be able to save everyone, so sometimes it actually can help more to save yourself so that you don't die as well (which would negatively impact the rest of your team). If you feel like you can jump in and save them, then do it, but don't forget to consider your own safety as well.


Escaping From Zeds
Sometimes it is inevitable that you will become trapped, which almost always leads to death.
This typically happens when you are trying to save teammates from taking damage, for example through Bodyblocking.

Many times, smaller Zeds like Crawlers and Gorefasts will surround you, which can spell certain death, especially on Hell on Earth difficulty. In these situations, you can simply fire or throw a Medic Grenade at your feet, which should clear your path, by either killing or Panicking the Zeds.

However, other times you will become trapped by Large Zeds, which is the main thing I want to focus on. For the most part, you're pretty much dead if this happens, but there are a few things you can do to attempt to get yourself out of these kinds of situations.


Tactic 1: Damage Force Boosting
In Section 1.4: Advanced Movement, I talked about Damage Force Boosting, which is essentially converting received damage into movement. Here's a link to that if you'd like to read about it:
https://steamhost.cn/steamcommunity_com/sharedfiles/filedetails/?id=1666770249
Its primary use is getting away from Zeds and avoiding follow up damage, which is especially useful against Fleshpounds. However, you can also use this trick to get out of a corner or out of a group of Large Zeds you might be stuck between.

When you're stuck, try repeatedly jumping. If one of the Large Zed's attacks connects with you while you're in midair, you will sometimes be launched upward, above the Zeds. This can allow you to break free, and even Goomba Stomp some of the Zeds in the process, which allows you a cleaner getaway. Try it, it can save your life!

Here's how this looks in-game:
https://youtu.be/l6K98htUXBQ


Tactic 2: Recoil Force Boosting
You can also utilize the Double-barreled Boomstick to perform a Recoil Force Boost, allowing you to propel yourself over the blocking Large Zeds and get to safety. This was also covered in depth in Section 1.4, so refer to the link above if you are unsure what I mean by this.

Using the Double-barreled Boomstick can allow you to get a bit more height than using Damage Force Boosting, which can help you get past some of the taller Zeds and Bosses like the Abomination or King Fleshpound.

While we're talking about the Boomstick, I should also mention that another thing you can do is use the Boomstick's alternate fire to Stumble Zeds out of your way. Sometimes this can create an opening just wide enough for you to slip through and make your escape. Try it!

Here's how this looks in-game:
https://youtu.be/ftjGbD1sW2o


The obvious drawback to each of these tactics is that you need significant vertical clearance.
If you're in a small room or underneath an object, you will likely be unable to get away and will most likely die unless you or your teammates can kill the surrounding Zed(s) in time.


Last Man Standing Scenarios
When you're the Last Man Standing, try to save Medic Grenades so that you can use them to keep yourself clear. If you're specced into the left-hand side of the skill tree, you can use your grenades to buff yourself.

For example, when fighting the Patriarch, you can use Healing Gas to apply stacks of Adrenaline Shot onto yourself, giving you extra Movement Speed to avoid rockets and minigun fire. In the case of Hans Volter, you can avoid his grenade attacks. You can also use the speed to avoid melee attacks from either of these Bosses, which are especially deadly on Hell on Earth difficulty. These are just a couple of examples..

Otherwise, everything else I mentioned in previous sections applies. Use Bash Cancelling to avoid taking damage from attacks, specifically from Large Zeds. If you have a Double-barreled Boomstick (a brilliant off-perk weapon choice for any Medic), use it to Recoil Force Boost and/or Goomba Stomp Zeds. You can specifically stomp enraged Fleshpounds so that you have a bit more time to damage them before they hit you. Remember to use raised surfaces, such as staircases, to stomp Zeds as well, as it can allow you to get past them and avoid becoming trapped!

If you've got a Large Zed or Boss on your tail, you can utilize Cornerhugging and/or Looping to give yourself some breathing room. These are two tactics I discussed in significant detail in Section 1.1: AI Pathing.

Here's a link if you'd like to read more:
https://steamhost.cn/steamcommunity_com/sharedfiles/filedetails/?id=1619420165
Also try to avoid confined spaces, such as small hallways and chambers, as it is easier to become trapped in these areas.

Another thing you should do is save fallen teammates' weapons. Most people don't know that dropped weapons have a 5 minute despawn timer, after which the weapon will completely disappear. If you can, pick up a teammate's weapon and drop it at the Trader, or at least back onto the ground. This will reset the despawn timer, allowing your teammate to retrieve their gun after they respawn.


Healing Priority
This section pertains to the priority of healing teammates, or in other words, who you should try to focus your healing on in a given situation.

Before we get into the thick of it, you should understand that there is no absolute answer as to who you should heal at any given point in time. So many factors play into any specific situation, from the composition of one's team to the game length, difficulty, and/or mode, that it is impossible to really give a "one-size-fits-all" answer as to who you should heal.

Even in some of the situations I will explain below, it might be possible that there is a more pressing matter to attend to. Take what I write with a grain of salt and use your own discretion when you're playing.

Anyway here are a few common situations where your team can usually benefit more from focused healing.


Extinguishing Flames
Did you know that your healing can put out burning players?

To be a bit more specific, healing a burning player via any means reduces the remaining time they burn AND the burning damage they take (per each remaining tick) by 50%.

For example, suppose that a player is on fire and will burn for 6 seconds total, taking 10 damage every second. Healing this player would cause them to only burn for 3 seconds total, taking only 5 damage every second, instead of 10. So overall, the player takes 15 damage total, instead of 60.

In terms of damage, healing a burning player causes them to take only 25% of the remaining damage.

So.. you should try to heal burning players immediately, as you can save them a lot of health and armor, especially on higher difficulties. Medic Grenades work great for this, as you can put multiple teammates out at once with the gas.

Here's an example video showing all of this in action:
https://youtu.be/Ehm84fIF5Ck
Notice how much faster the fire goes out in the second part of the clip!

Note
Multiple darts or Healing Gas ticks WILL stack this "halving" effect, putting out the flame quicker. Also remember that all forms of healing can apply the effect, which includes the Medical Syringe. You can also put out your own fire with the Syringe as well!

To extend on the previous example, if you had waited for one second before healing the burning player, only the remaining 5 seconds would be split in half. This means that for the first second that you waited, the player still took the full damage from the flames.

In this example, the difference wouldn't really be too noticeable, but it can be pretty significant in the long run.


Specific Perks
In general, you should aim to more readily heal players who are playing slower-moving perks, for example Support and Sharpshooter (with specific skill setups).

This is simply because these perks have a harder time staying away from danger, due to their reduced mobility. In Kiting situations, these perks will struggle to keep up, and therefore struggle to avoid taking damage. Some perks, like Sharpshooter and Demolitionist, also struggle at dealing with point blank threats, due to slower reload times and, sometimes in the Demolitionist's case, a minimum detonation range for projectiles. These things also cause these perks to take more damage on average.

Understanding the general strengths and weaknesses of each perk can help you judge who will need more healing in most situations.
For example, during a fast-paced Endless wave such as Poundemonium, it's much more likely that the Demolitionist player will need healing than the Gunslinger player. On waves with lots of fast enemies (or on higher difficulties), perks with slower weapons, longer reloads, and less splash capability (like the Sharpshooter) will likely take more damage.
The list goes on..

It can help a lot if you're using the left-hand side of the skill tree, as these skills give you valuable buffs like Adrenaline Shot, which increases a player's Movement Speed, giving them a bit more breathing room.

Still, you should use your discretion here.

If you see someone that is at 1 HP, you should obviously heal them regardless of what perk they are playing. It's just that, in my experience, the slower-moving perks tend to take more damage.

You also have to consider that individual player skill, including positioning, aim, and sometimes luck, plays a role in how much damage someone takes.


Ultimatums
In some situations, you will have no choice but to choose a specific individual or group to focus your healing on. A lot of times in these situations, you will have to choose who lives and who dies, as you will not be able to keep all parties alive.

These kinds of situations typically occur when the squad is split up. This could be as a result of the team's position being overrun, or from teammates simply being in different places at different times.

So who do you heal in this situation?

The answer to this is pretty broad honestly, and it mostly comes down to your discretion. Here's a "checklist" that I would use to assess a situation like this (not to be considered in any specific order):
  • Is the player another Field Medic?
  • What level is/are the player(s) Perk(s)?
  • Is the player a top scorer (ie, are they carrying)?
  • Are there more players in one group than the other?
  • Does the player's perk offer a core functionality that the team desperately needs (e.g. killing Large Zeds)?
.. etc

When a situation like this comes up, you'll have to make an on-the-spot judgement call based on who you think would be of the most benefit to save.

If one of the players/groups is/includes another Field Medic, this is usually a good candidate, as saving other healers will allow them to contribute to your team's health.

If one of the players/groups is/includes a skilled player, or a player that you've seen has consistently "carried", or outperformed the rest of your squad consistently, this can also make a good candidate. Saving this person from death will likely increase the odds that your squad will make it to the next wave. The definition of "outperformed" is pretty relative, but most people can tell a good player from a bad one, so I shouldn't really have to do too much explaining here.

At times, pure numbers must also be taken into consideration. If you let the group with four players die, that's four less players you have for the remainder of the wave. Is the firepower they can offer absolutely necessary to your team beating the wave? In most cases, the answer is yes, and so you should heavily consider opting to save a larger group of players than a smaller one.

If one of the players/groups is/includes a perk whose functionality is quintessential to the squad's survival, you should heavily consider prioritizing them. For example, this could be your team's only Sharpshooter, or a Demolitionist, both of whom have great effectiveness versus Large Zeds. If you're playing on Endless Mode and get a special wave like Poundemonium, these kinds of perks can prove even more valuable.

These really are just a few things you should think about when determining who to save/heal/prioritize. Obviously, it would be great to keep everyone on the team alive at all times, but KF2 is a pretty hectic game, and things can spiral out of control in moments. Even if you play perfectly, players can still sometimes put themselves in precarious situations that demand extra attention, something that's not necessarily your fault as a Field Medic.

As I've said several times by now, you must use your discretion when deciding who is more important to heal on your team.


Utilizing Buffs
This section pertains to the efficient use of Buffs.

Buffs are any positive / stat-increasing effect that can be applied to players. Field Medics have a variety of them, all of which are harnessed through the left-hand side of their skill tree. These skills are designed to amplify a Medic's healing abilities and are more team-oriented in general.

The three buffs a Field Medic can apply to their teammates are:


Buffs are extremely helpful. As an example, consider the Damage Resistance Buff applied by Coagulant Booster.
On Hell on Earth difficulty, Fleshpounds can do upwards of 60 damage to players. With full stacks of Coagulant Booster, the 30% damage resistance can cut this value down to 42!

Note that other resistance attributes may make this reduction even higher.

That's really significant in the long run!


Buffs via Healing Gas
When you heal teammates with your Healing Darts, you will apply these buffs automatically, but did you know that Healing Gas can apply them as well? In fact, Healing Gas heals teammates in ticks, which are short repeated intervals, and each of these ticks applies a stack of the buff. This makes it possible to be fully buffed after just a few moments of standing in the gas.
Useful!

Here's an in-game example of this:
https://youtu.be/eootf8aVtQ0
Notice how stacking multiple clouds of gas applies the buffs faster!

With Healing Gas, it is also possible to buff multiple teammates at once, allowing you to get more value out of your skills in situations where group healing is necessary.


Buffs via Healing Darts
If you're using Healing Darts to heal your teammates, don't be afraid to shoot several darts when healing them, rather than just one, as each dart will apply a stack of your buffs. You should do this even if the healing would cause overheal, meaning that the additional darts don't actually apply any healing due to the player topping out at 100% health. The player will still get the buffs!

Of course, if you see that multiple teammates are hurt, you might want to spread out the darts.. but keep in mind that Field Medics have an increased Syringe Recharge Rate, allowing them to shoot Healing Darts at faster intervals. Even in situations where multiple teammates are injured, you can usually get away with spamming Healing Darts at each one just fine.

Don't forget that you can also use Healing Gas with the darts and buff them even faster (and probably easier too)!

Lastly, don't forget that all Medic Weapons have separate ammo pools for their Healing Darts. If you find yourself running out of darts a lot, consider bringing a second (or third) Medic Weapon.

Here's an example video showing what I mean:
https://youtu.be/OgJ81rUTNmE
Take note of the speed difference in each clip. You really only need one dart in this case, but shooting multiple makes players move significantly faster!


Buffs at Maximum Health
To a surprising amount of players (especially newer ones), it is little known that Field Medics can also apply buffs to teammates who are already at full health.

This is done the same way you would normally buff teammates, by either shooting them with Healing Darts, or deploying Healing Gas.

Keep in mind though that when attempting to do this with Healing Darts, you will need to manually aim, as Medic Weapons will not lock onto uninjured players.

Now, let's discuss a few specific scenarios where buffing teammates can be helpful:


Scenario I: Getting to the Trader
The speed granted from Adrenaline Shot can help your squad get to the Trader faster.
This will not only let them buy their gear quicker, but allow them to get back into position before the wave begins as well.

Typically, a majority of the Trader period is spent just travelling to the pod, which leaves little to no time for the return trip. If your teammates have recently died, this will be made even worse, as they will first have to gather their gear before going to the pod. If your teammates are playing slower perks, like Demolitionist or Support, this will be made even more worse.

When your teammates are unable to get into position before the next wave begins, it can sometimes cause chaotic situations, especially late in Survival Mode when Large Zeds spawn more readily at the beginning of the wave, or in Endless Mode when getting special waves like Poundemonium. If your teammates were unable to make it to the Trader at all, due to spending time collecting their gear or simply being slow, the chances of this kind of a situation occurring are even more likely.

Try to boost squadmates whenever possible, especially if you notice that someone has died and is attempting to collect their dropped weapon(s) or if your squad is comprised of mostly slower-moving perks.

Here's an in-game example:
https://youtu.be/Qh1nKwV_5wI

This isn't really related to Buffs, but try to take and drop dead teammates' weapons at the Trader to avoid them having to waste time tracking them down! This can save a lot of time and money!


Scenario II: Fighting Large Zeds
The additional damage offered by Focus Injection can help your squadmates take down Large Zeds.

For example, you could shoot Healing Darts at a Sharpshooter who you see is attempting to snipe a Fleshpound. The extra damage can potentially reduce the amount of ammo needed to take down the FP, possibly even resulting in a one-shot kill. Useful!

If you see your squad tightly grouped together near a pack of Large Zeds, you could also deploy gas to pre-buff everyone. The additional damage might allow them to hold their ground. Even if they can't kill the Large Zeds in time, the Resistance you offer to them will allow them a smoother escape.


Scenario III: Escaping from Zeds and Bosses
The speed granted from Adrenaline Shot can help your teammates get away from Zeds and escape the killzone of Zed attacks.

For example, you could buff a teammate who you see is about to be hit by a Fleshpound, or hit by the Patriarch's rockets, or blown up by Hans' grenades. The list goes on..

The small bit of speed you can offer to your teammates in these situations can help them save precious health and armor, which may mean the difference between victory and defeat. Even if your teammates are fully healed, try to shoot them with Healing Darts or drop Healing Gas for them to make them more agile.

Don't worry about wasting grenades during boss fights. On most maps, all ammo spawns are active during the Boss wave, giving you a plentiful supply of grenades. Just make sure you don't steal ammo from your teammates and leave yourself at least one or two grenades for emergency situations.

In the case of gas, you'll also harm enemy Zeds, possibly sending them into a Panic, which can further help your team get to safety.


Scenario IV: Kiting
During Kiting scenarios, the extra speed offered by Adrenaline Shot can be used to help slower perks like Supports or Demolitionists catch up with the squad. More commonly, the additional speed can be used help teammates who may be close to death or may become trapped.

I will discuss this in a lot more detail in the next section.


Those are just a few scenarios. The list goes on really.
The main point that I'm trying to make here is that buffs can be used to great effect not just in the reactive sense, but in the proactive sense as well.


Kiting
The Field Medic plays a vital role in any situation involving Kiting.
Kiting refers to the act of engaging enemies while simultaneously moving away from them, much like how a kite is pulled by a string from a distance.

Some examples of situations where Kiting typically occurs include:
  • While fighting a Boss
  • After a teammate (or several) has died
  • During Last Man Standing scenarios
  • When a Large Zed (or more) is/are enraged
  • When the squad's position is overrun
  • During Endless, when getting a special wave such as Boom or Poundemonium

When members of the squad die, a gap is left in the defensive wall that allows Zeds to slip past, usually resulting in the remainder of the squad being overrun and having to move to a new location. By this point, things are typically chaotic and unorganized, as players scramble to get to safety. Amidst the commotion, squadmates are much more likely to take damage and die, usually because they are forced to move past threats instead of dealing with them.

It is during these times that the Field Medic shines the most.


Leading the Kite
One of the best ways that a Field Medic can help his/her team during a kite is by leading the kite.

This involves:
  • Scouting incoming threats
  • Tanking damage
  • Protecting teammates from receiving damage
  • Keeping teammates buffed
  • Controlling entry points

Basically, you can think of the Medic in these situations as the shepherd of a flock of sheep.


Scouting Incoming Threats
As I previously explained, Medics double as great spotters, due to their increased Movement Speed.

During a kite, you should utilize your speed to always be ahead of your teammates so that you can warn them about threats or deal with them yourself. During a kite, players tend to follow whoever is at the front of the group, and since Medics move faster than most perks, they are a prime candidate to lead the kite. By being at the front of the kite, the Medic can more readily determine the safest route to take for the squad.

If it turns out that a Zed is in the way, you can resort to Bash Cancelling and Goomba Stomping to help your team get past. If you aren't sure what I mean by that, refer to the Preventative Medicine subsection above.

Another reason why it is good to be at the front of the kite is due to Zed spawning mechanics, which I described earlier. If you know your team will be entering an area soon, it helps to be in that area before they get there, since you will block Zeds from spawning there. As I will explain shortly, Zeds approaching the squad from the front can sometimes pose an issue for the squad during a kite, possibly resulting in some of your squadmates dying, or the kite failing completely.


Tanking Damage
It's in a Medic's best interest to soak up damage for the team during a kite.

The best way to do this is by Bodyblocking, which I described in detail in the Preventative Medicine subsection above. Bodyblocking allows you to (somewhat) reliably tank damage for teammates. This is especially helpful on higher difficulties, or during special Endless waves like Poundemonium.

With Fleshpounds and Quarter Pounds specifically, you will also de-rage them, which can relieve a lot of pressure on your team.

Remember to use the Knife to perform a Knife Parry whenever you're attempting to block a Large Zed's attack for your teammate(s). This will drastically reduce the amount of damage you take, and in some cases can even save your life. Just keep in mind that this is only effective against melee-based attacks.

If you can't directly soak up the damage, try to mitigate it as much as possible using Bash Cancelling. For example, you could stop a Husk that is using his flamethrower to burn your squad, or stop a Siren currently screaming, which can save squadmates from dying, especially on higher difficulties.


Keeping Teammates Buffed
Keeping your teammates buffed will also improve your odds of survival during a kiting scenario.
The most useful buff during a kite is undoubtedly Adrenaline Shot, as it increases a player's Movement Speed by 10% per stack, but Coagulant Booster and Focus Injection can come in handy too.

As I discussed in a previous section, you can still buff teammates even if they are at full health. Healing Gas works great for this, since you can buff multiple teammates at once with it, collectively increasing their stats. Gas can also be sometimes easier to use since Healing Darts will not auto-target players who are at maximum health. This can allow you to focus your aim on incoming Zeds or on players who may need immediate healing.


Controlling Entry Points
Speaking of Healing Gas, one of the most important things a Medic can do during a kiting scenario is controlling entry points.

Entry points are any doors or entrances that open up into the path you're currently kiting along. One of the primary causes of a failed kite is being overrun by Zeds that cut off / intercept the squad through these points. This usually happens due to the fact that most players are moving backward, firing at the Zeds already following the squad. This leaves the group extremely susceptible to attacks from Zeds that are coming from ahead of the squad. Due to Zed teleportation mechanics, the chances of this happening are higher than you might think.

By remembering that Healing Gas is a fantastic area-denial tool, you can deploy it in these entrances to stop most smaller Zeds from getting through.

Deploying gas is made a lot easier with the HMTech-501 Grenade Rifle, since it can deploy around 10 Medic Grenades with a full supply of ammo. This is in addition to the five Medic Grenades that come with the kit, giving around 15 total.

So if you know your group is approaching a blind corner or door, fire or throw a Medic Grenade ahead so that it covers the entrance in gas. Chances are high that you'll catch a few Zeds, which can potentially save your team from becoming trapped! Even if the Zeds don't die, gas will typically cause them to Panic, rendering them unable to attack for a short time.

Using Acidic Rounds can also allow a Field Medic to Panic Zeds with normal attacks, giving yet another method of incapacitating Zeds. Acidic Rounds can especially help against incoming Large Zeds in particular.

Also remember that you can simply be ahead of your squad standing in the doorway in order to block Zeds from spawning there. This is another great way to control entry points with virtually no cost.


Tamari's KF2 Servers


Tamari's KF2 is a KF2 community of over 800 Members that I operate alongside Forrest Mark X that aims to bring a modded experience to KF2 that enhances the game through quality-of-life features and changes, new gamemodes, and a chill and close-knit environment. We're a multi-continental KF2 community supporting the NA and EU regions, and now also Southeast Asia / Australia as well!

Our objective is primarily to introduce people to the Controlled Difficulty mod, but we have something fun for players of basically all skill levels and preferences.
We don't like drama and try our best to maintain a stress-free environment that feels more like a small gaming family than a group of friends playing games together.

These are not your typical modded servers. The mods in use aim to enhance the vanilla experience as opposed to drastically changing it. As such, you can expect to find features that remedy some of the more clunky aspects of vanilla KF2 gameplay as well as features that allow players to customize their experience(s). We also have lots of customized content that builds on the original game, such as 25 additional Prestige Levels (with unique badges), 187 custom Server Achievements, and custom gamemodes like Arms Race, True Endless, and ZED Wars.

Come hang out with us!
All types of players are welcome!
http://discord.gg/tamari
Conclusion
Art by littletino
Instagram: @rikavalentine39[www.instagram.com]

Show her some love!


I hope this guide has helped you to learn a few new things to give you that edge out on the Killing Floor. If you have any questions, leave a comment below! I will be updating this from time to time as more things are discovered.

Please give this guide a thumbs up if you liked it so others can see it, and so I know to make more!


Be sure check out the rest of the Handbook, where you can learn a bunch of other odds and ends about KF2 to help you improve your gameplay:
https://steamhost.cn/steamcommunity_com/sharedfiles/filedetails/?id=1633641281


Thanks for reading!
- Tamari


13 Comments
Tamari  [author] 30 Oct, 2019 @ 12:15am 
Updated the guide to include the new weapons!
Tamari  [author] 23 Jul, 2019 @ 9:35am 
Thanks for the suggestion. Updated the guide to reflect this!
Avenging Angel 23 Jul, 2019 @ 9:07am 
I feel like the fact that the freezethrower allows one to get clean 6hp large kills (especially fps) should be added in the weapons section. thats ultimately my reason for running it besides just helping out with random freezes.
Panda 13 Jul, 2019 @ 10:57am 
I hope after this guide I will see less battle medics, I never undertand people who took medic, but trying to make like a damage dealer...
Cap'n Saccade 9 Jul, 2019 @ 2:34am 
ps, my record is 0 kills and 1 assist with a medic - i accidentally put 2 darts into a fleshpound and caused 1 damage. For this I was awarded 2 vault dosh, despite 2k+ healing.

I dislike Airborne Agent, as it heals but does not buff or make use of symbiotic and also does not give the same bounty for kills - the other applies only toxic incap (2-5 seconds of time, same as shooting with darts) but will not "un-enrage" a fleshpound, despite causing no extra damage, as 100*0 (no toxic damage from acidic rounds) = 0.

It's the incap that is preferable to the airborned agent (unelss on Hoe and with a cohesive team, in which case - I would rather use the zed time to heal everyone with darts, although airborned can cut a path for people to escape by providing toxic damage tick and toxic incap.

These are more abstract concepts that are probably not suitable for this guide.
Cap'n Saccade 9 Jul, 2019 @ 2:29am 
TL;DR - excellent guide - first "player" guide I've ever read - idk why it was on the shift tab, but It really is very good and I agree with 95-99% of everything written here.

I suppose the main 1% I disagree with is the manga, but that's an age difference - my manga is 1970s-1980s, no webo :p

Very well done to both of you - all your guides are fantastic.
However, I am glad you have said "personal opinion only" as I run builds and specs that are not "normal", but survive - especially with my weird and often insulted gunslinger build (I've yet to make a medic gunslinger - as there are too many single pistols, and I'm at 15/15!).

To improve the guide, a cross perk section on how to medic without being a medic would be a great addition.

One of the golden rules of KF2 - don't heal yourself if you can help it!
Cap'n Saccade 9 Jul, 2019 @ 2:25am 
This is a very well structured and presented guide - well done.

I do not trust others to play medic, so it is (not through choice) often the class that I use. Or at least to take a medic weapon that is off-perk.

As you said - no reason to not have a med-pistol unless at 15/15...

Idk why this guide came up on the shift-tab menu today, but I'm glad it did, and I'm going to star and give it a thumbs up so that hopefully other players will read it (although, from my experience, most KF2 players don't often like to read more than 240 characters).
Cap'n Saccade 9 Jul, 2019 @ 2:25am 
I've met some terrible medics this event, and I am frankly fed up of playing medic all the time (that or - if I only care about winning, zerker, because I will win 6 player, wiped to solo game as zerker 9/10 times).

Good tactics and explanations - I hope that more players read guides like this (this is the first guide I've ever read on KF2, other than server setup and console stuff...), so that I can finally start trusting others to be medic...

Very impressive guide and I wish people would take the time to learn this stuff, if they are incapable of figuring out themselves, as those of us who've been here since early access have done... (It's a zed coop FPS... There's 2-3 wikis! what's so difficult?!)
dough boy 8 Jul, 2019 @ 12:43pm 
Excellent and informative guide, especially for a medic main! I follow many of the points myself, but I learned a few new things like the goomba stomp stuff. I have a bit of advice about healing grenades, if it wasn't mentioned already.
I see a lot of medics missing their grenades, so a good way to not miss is to learn to predict player movements. If they're running away from you, throw a heal grenade a bit in front of them. If they're coming towards you, throw it under yourself. If a scrake or fleshpound is about to hit them, they're going to fly back a few steps, so throw a heal grenade a bit farther behind them. When they get hit, they'll get sent right into the heal grenade. Basically, try not to throw directly at teammates. Predict where they will be in a few seconds, since there is a very short wait time until the heal grenade activates.
Coco 8 Jul, 2019 @ 11:06am 
I'm reading it and liking it so far. I just had a wtf reaction when I saw the Railgun tho XD